Create a WhatsApp channel in Chat App Message Service and complete onboarding, including WABA binding, phone verification, and message template configuration.
Preparations
1. Alibaba Cloud account
-
Register an Alibaba Cloud account and complete business identity verification.
-
Activate the service in the Chat App Message Service console.
2. Facebook account
-
Good standing: Your Facebook account is in good standing.
-
Identity consistency: Your Facebook account name must match your government-issued ID.
-
No violation history: No prior Meta policy violations on your account.
-
Email domain: If using a company email domain, it must have no Meta policy violations.
-
Facebook account registration: Register on the official website if needed.
-
Two-factor authentication: Enable two-factor authentication on your Facebook account to avoid verification code delivery issues.
3. Business information
Gather the following business information:
-
Business name and address: Must match your business license.
-
Official website: Must display your business name.
-
Business phone number: Used for BM verification. Must receive SMS or voice calls.
-
Bank statement or tax bill: Used for BM verification. Must include your business name and phone number.
-
Verification email: Email domain must match your website domain.
4. Phone number
-
Prepare a phone number for your WABA.
-
Ensure this number can receive verification codes via SMS or voice call.
Procedure
Step 1: Create a WhatsApp channel
-
Log on to the Chat App Message Service console.
-
On the Channel Management page, click Create Channel.
-
In the Create Channel dialog box, select WhatsApp for Channel Type and enter a Channel Name.
-
Click OK. The WhatsApp channel is created.
On the Channel Management page, click a Channel ID to open the channel's configuration page. Here, you can register and manage a WABA, create a WhatsApp message template, and send WhatsApp messages.
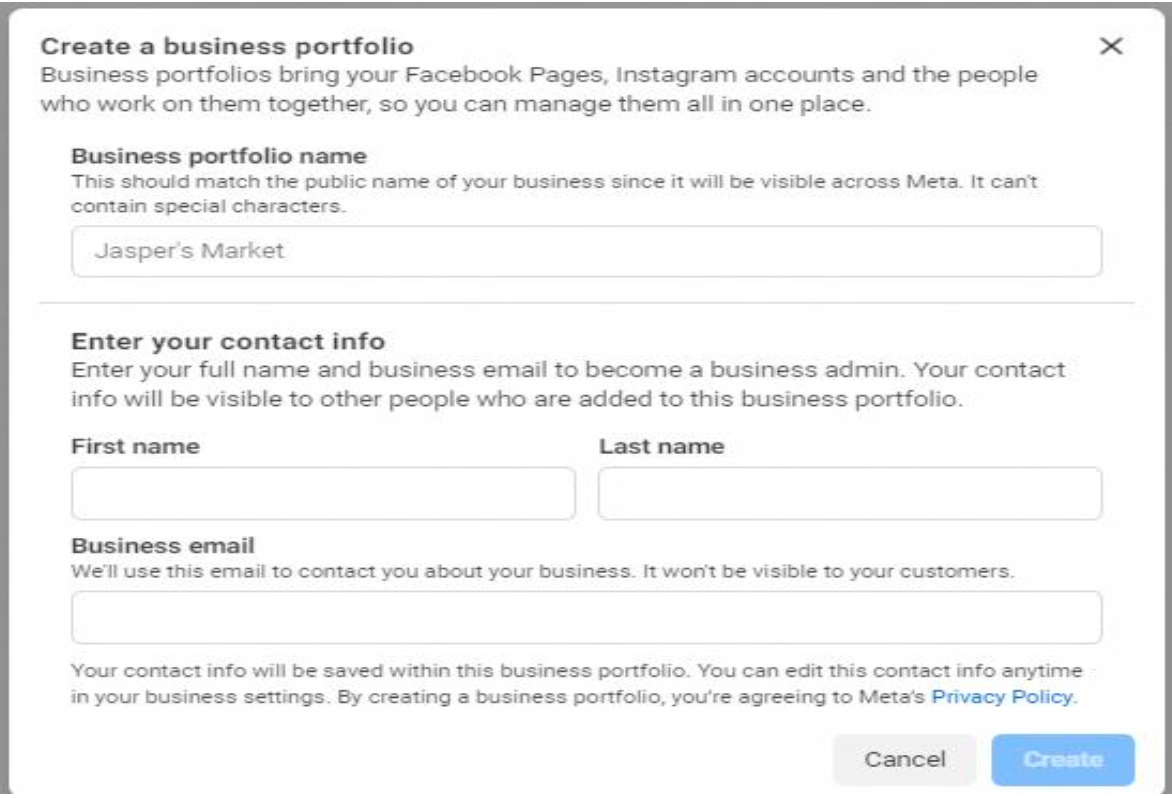
Step 2: Create a Business Manager (BM) account
After creating a WhatsApp channel, create a BM account using one of these methods:
Method 1: Create in the Chat App console (Recommended)
Register and bind a WABA
A WABA is the official business account required by Meta for sending commercial messages on the WhatsApp Business Platform. After Meta business verification, your WABA displays a verified badge that builds recipient trust.
To send WhatsApp messages, you must first register a WABA. Chat App Message Service uses Meta's Embedded Signup flow for registration.
-
The business information you submit during WABA registration must match your Alibaba Cloud account. Inconsistent information can cause registration failure or delay business verification.
-
The phone number must never have been registered on any WhatsApp product and must be able to receive verification codes.
-
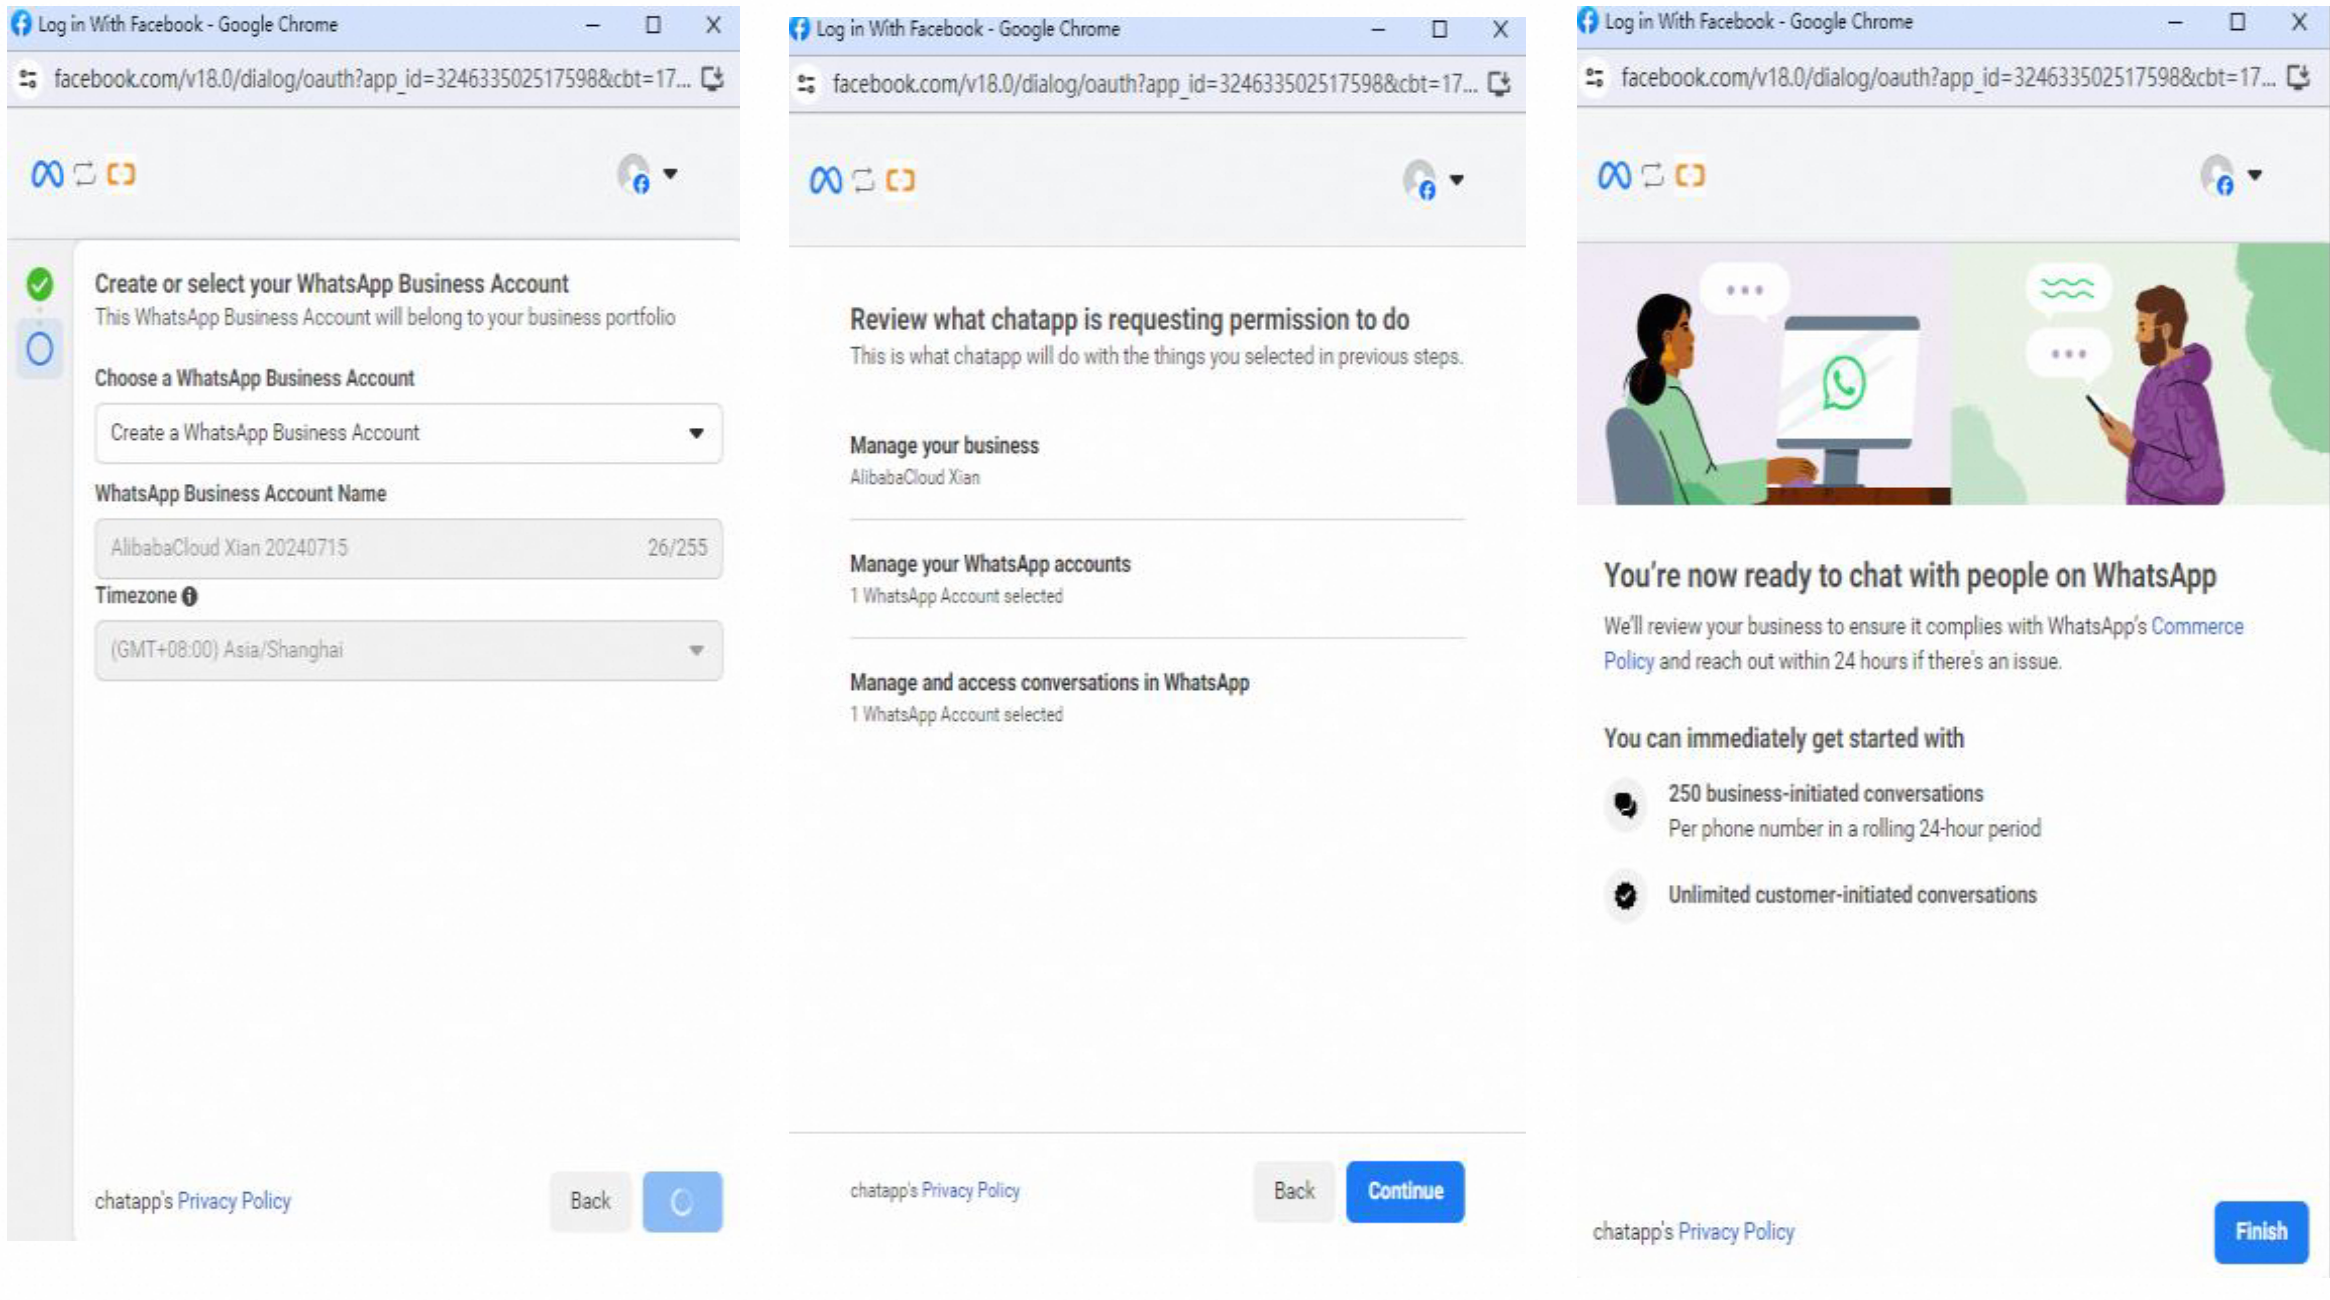
Register and bind a WABA:
Important-
Each channel can be bound to only one WABA. To manage multiple WABAs, create one channel per WABA.
-
A WABA that has not completed Meta business verification can register up to two phone numbers. After business verification, the limit increases to 20. To request a higher limit, contact technical support to apply for an increase from Meta.
Log on to the Chat App Message Service console.
-
In the left navigation pane, choose Channel Management. Select a WhatsApp channel and click Manage. Then, choose WABA Management > WABA Registration and Binding.
-
In the Meta Embedded Signup window that opens, sign in to Facebook:
Note-
If you are already signed in with the correct Facebook account, click Continue As [Your Name].
-
If you are not signed in or are using a different account, click Log Into Another Account.
-
If the page does not load, verify that your network can reach Facebook.
-
If your browser has an ad blocker installed, it might prevent the Facebook SDK from loading. Temporarily disable the ad blocker and reload the page.
-
-
Click Get started and complete the on-screen forms.
Important-
The following steps are for reference only. The actual screens are governed by Meta's Embedded Signup interface, which may change without notice.
-
If you are creating a new Meta Business Account or WhatsApp Business Account, Meta must approve it before the binding completes. After approval, the WABA is bound to your channel and its status changes to APPROVED. You can then go to Manage phone numbers to add, sync, and configure phone numbers.
-
Fill in your business information, including business name, business email, business website or page, and country/region. Click Next.
ImportantProvide complete and accurate business information. Inaccurate information can delay or block your Meta Verified badge and Official Business Account (OBA) application.
-
Create a WABA. Set the WhatsApp Business Account name and select a time zone. Click Next.
-
Review the permissions requested by Chat App Message Service. Click Next.
ImportantTo allow Alibaba Cloud Singapore to manage your WABA, you must grant both WABA access and billing management permissions. Without these permissions, the binding fails.
-
Wait for Meta to validate your information, then click Finish.
-
-
-
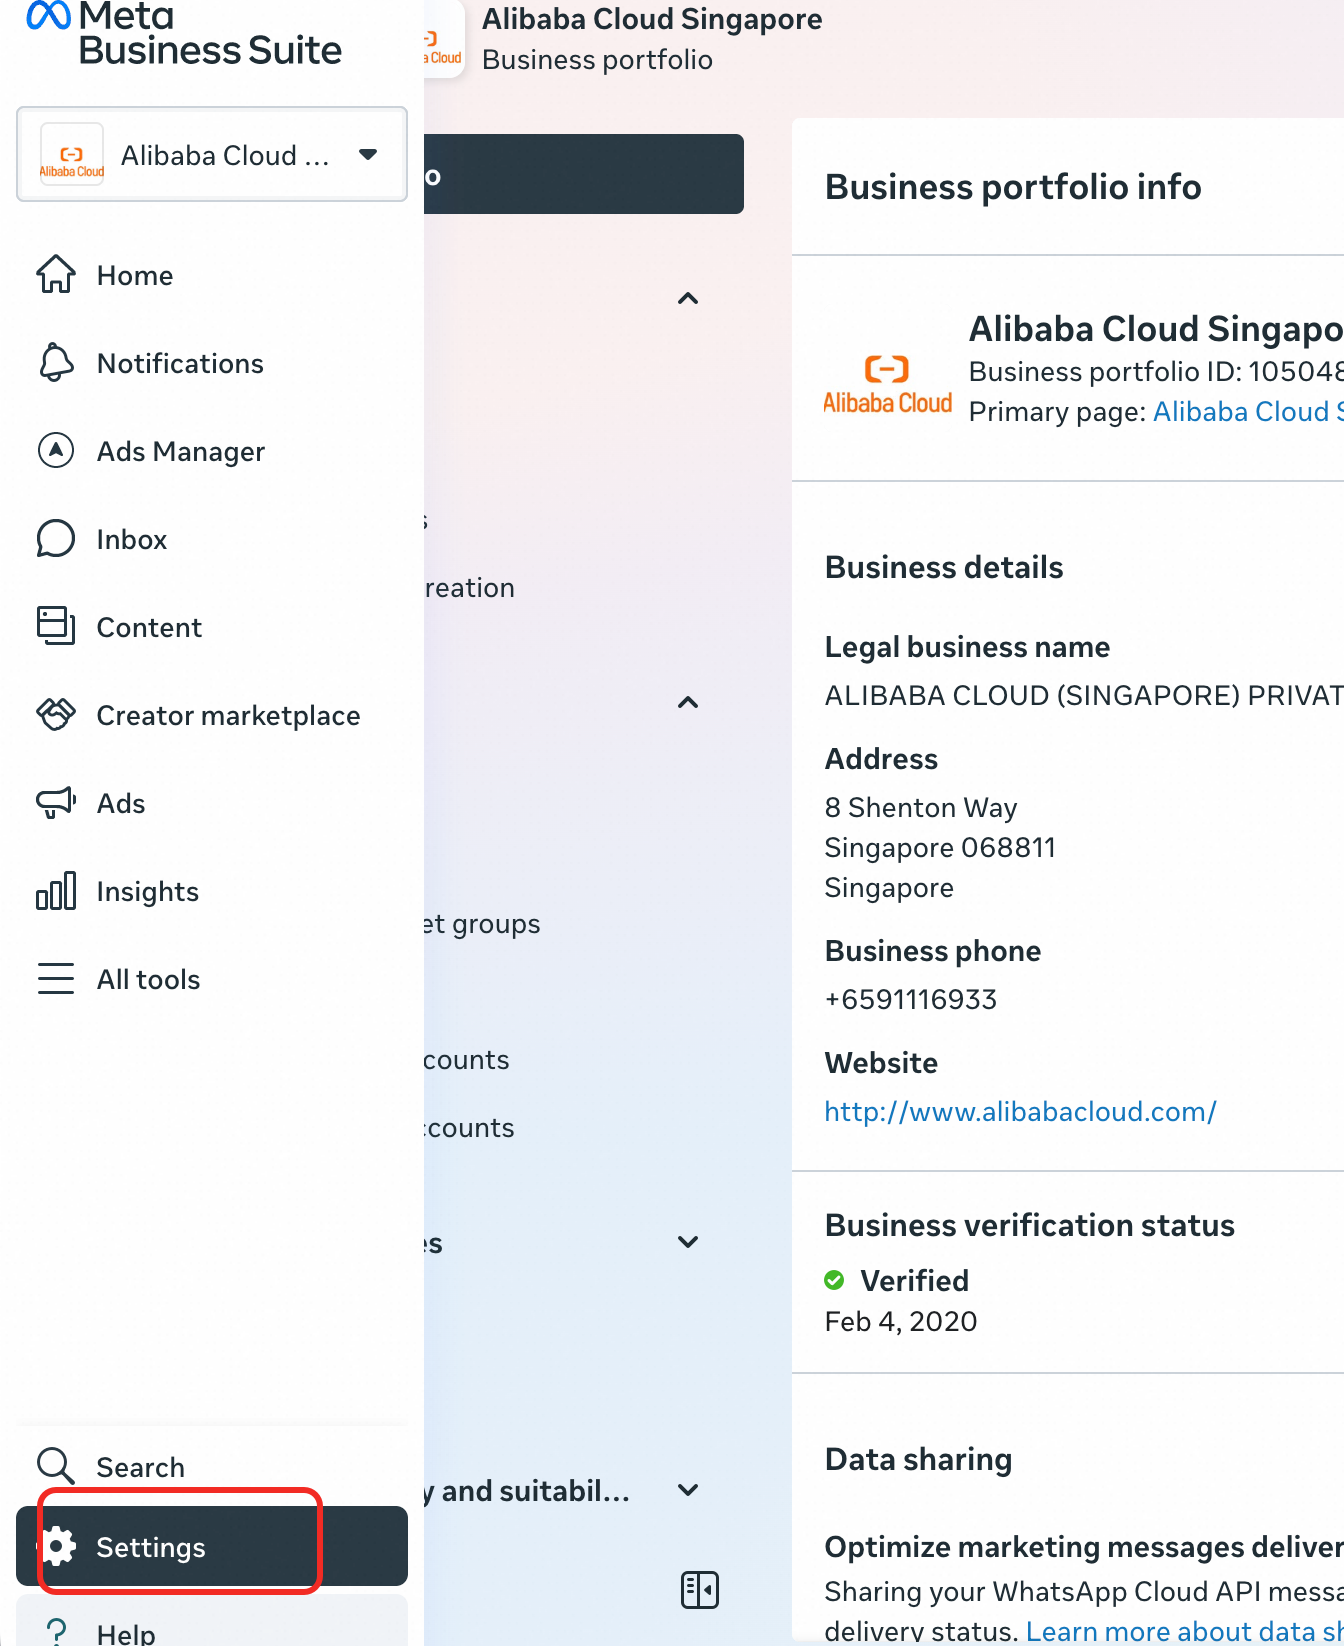
Verify your business: After registering your WABA, go to the Security Center in Meta Business Suite to complete business verification. For detailed instructions, see Verify your business in Meta Business Suite.
Method 2: Create on the Facebook website
-
Log in to your Facebook account.
-
Go to Meta Business Suite, enter your business name and website, and submit.
Step 3: Add and verify your phone number
1. Register a WABA
After creating your BM account, click Contiune to open the WABA registration page and complete the registration.
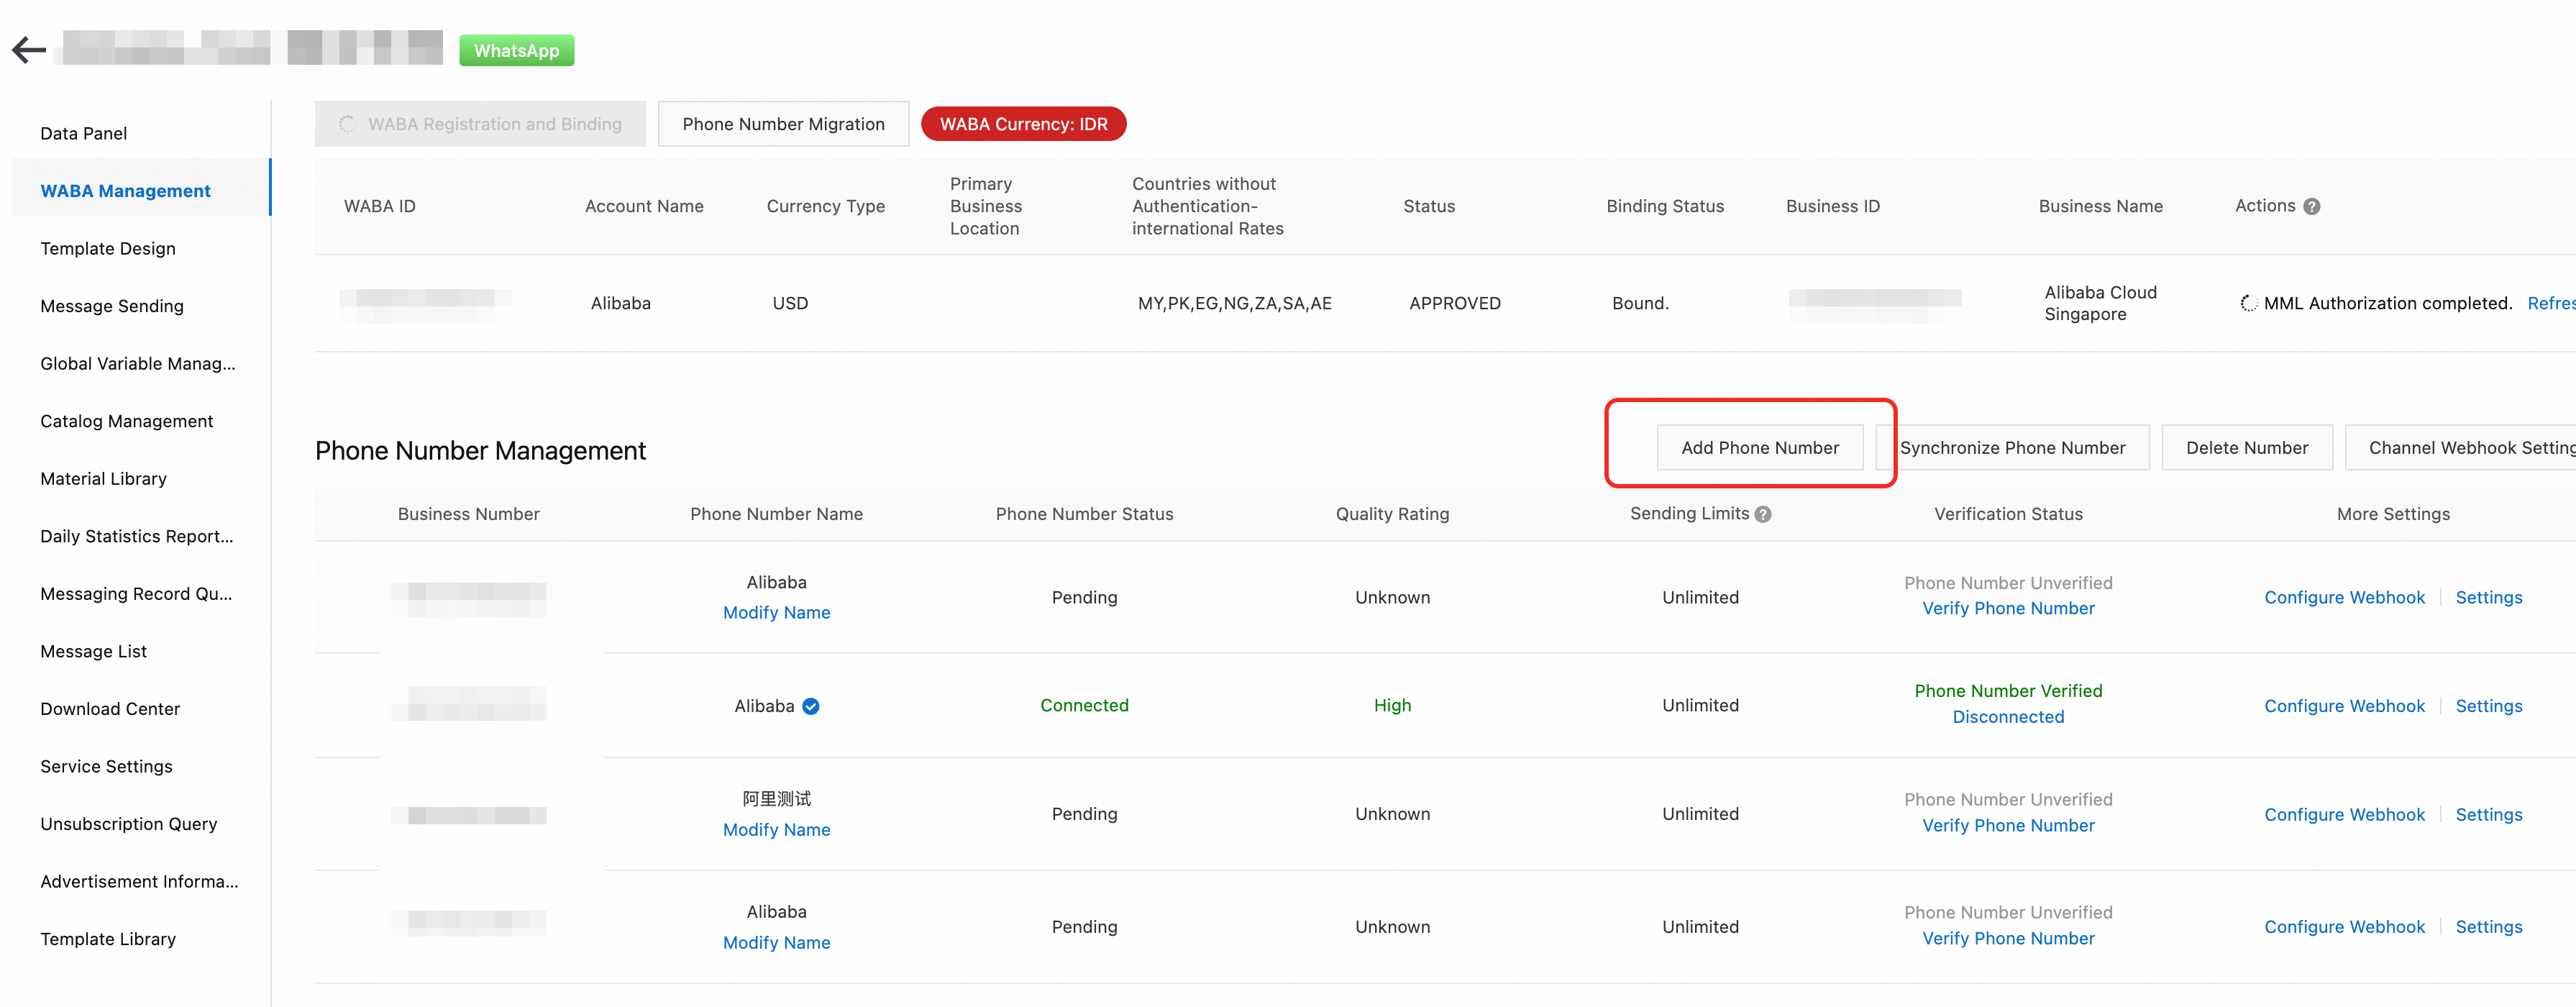
2. Add a phone number
-
Go to the Chat App Message Service console.
-
In the left navigation pane, click Channel Management, find your channel, then click Manage.
-
Choose WABA Management, then click Add Phone Number.
-
Fill in the Phone Number Type, Name, Country/Region, and Phone Number fields.
The name must be related to your brand. If you have multiple numbers, use distinct names. For example, if your brand is "ABC," your display names could be "ABC Plus" and "ABC Support."

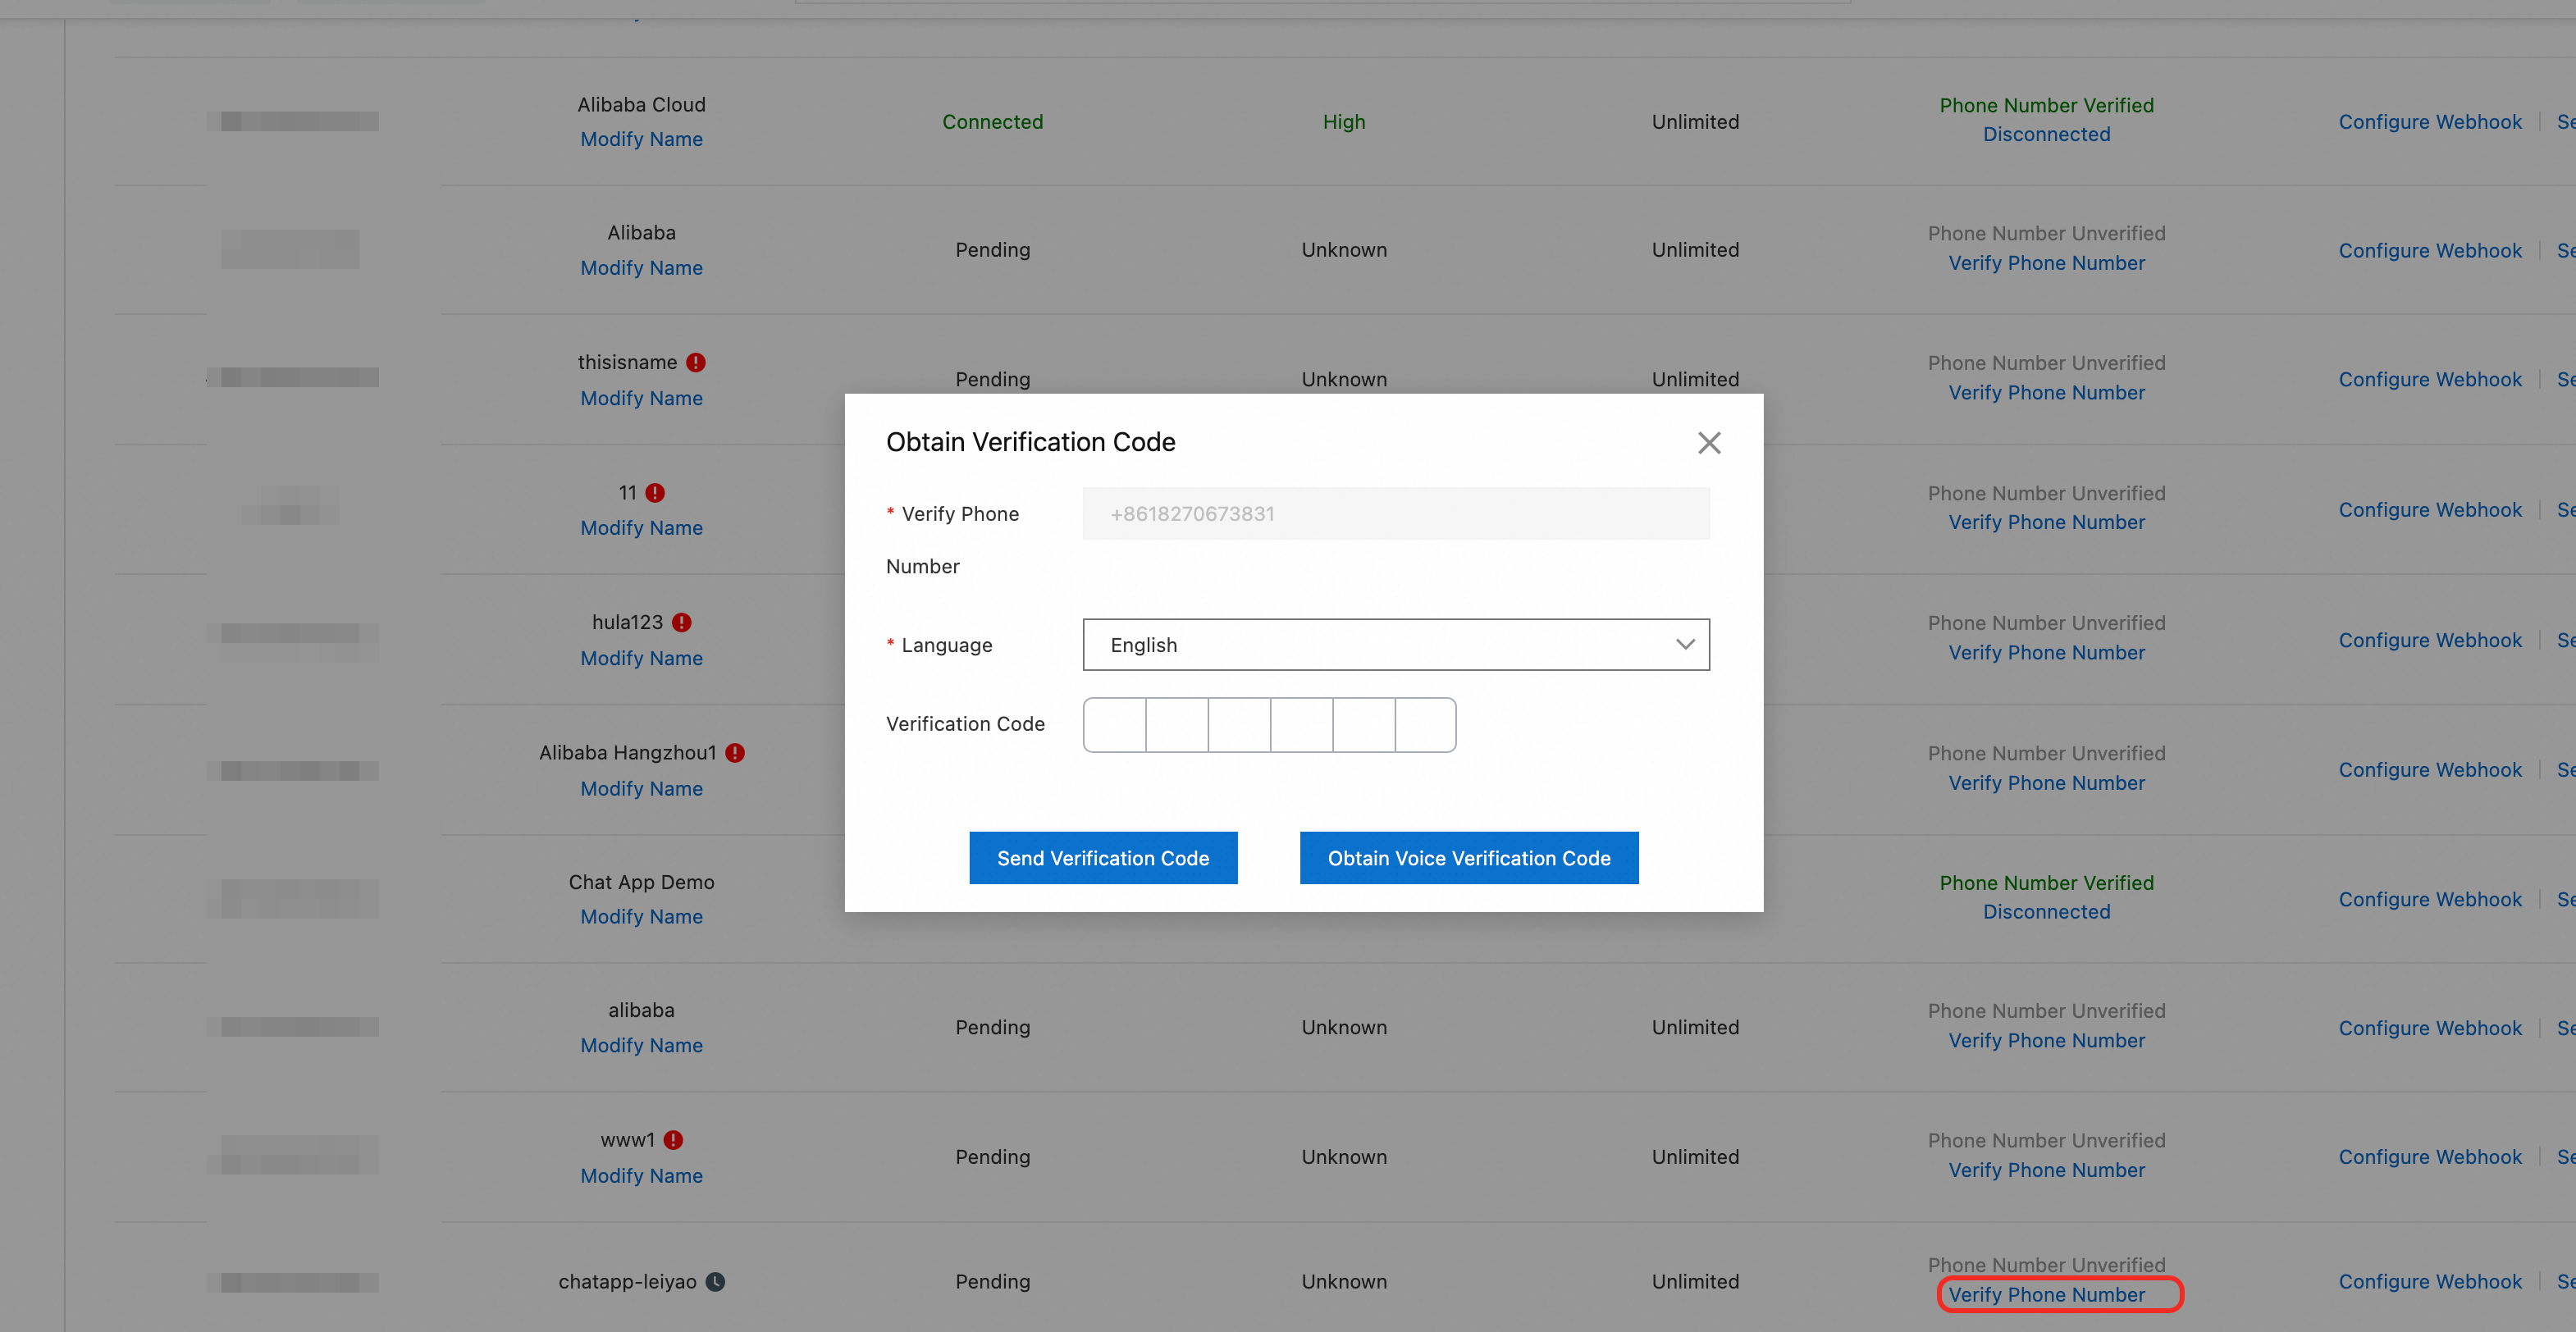
3. Activate the service and complete verification
Activate the service and receive a verification code to verify your phone number.
Step 4: Create a message template
Meta requires that the first business-to-customer message uses an approved template. Create templates that match your use cases.
-
For detailed instructions, see Template design.
-
You can only start sending messages after your templates are created and approved.
-
Contact your account manager if you have any questions.
Step 5: Complete business verification (recommended)
Business verification is optional but strongly recommended to prevent future account issues.
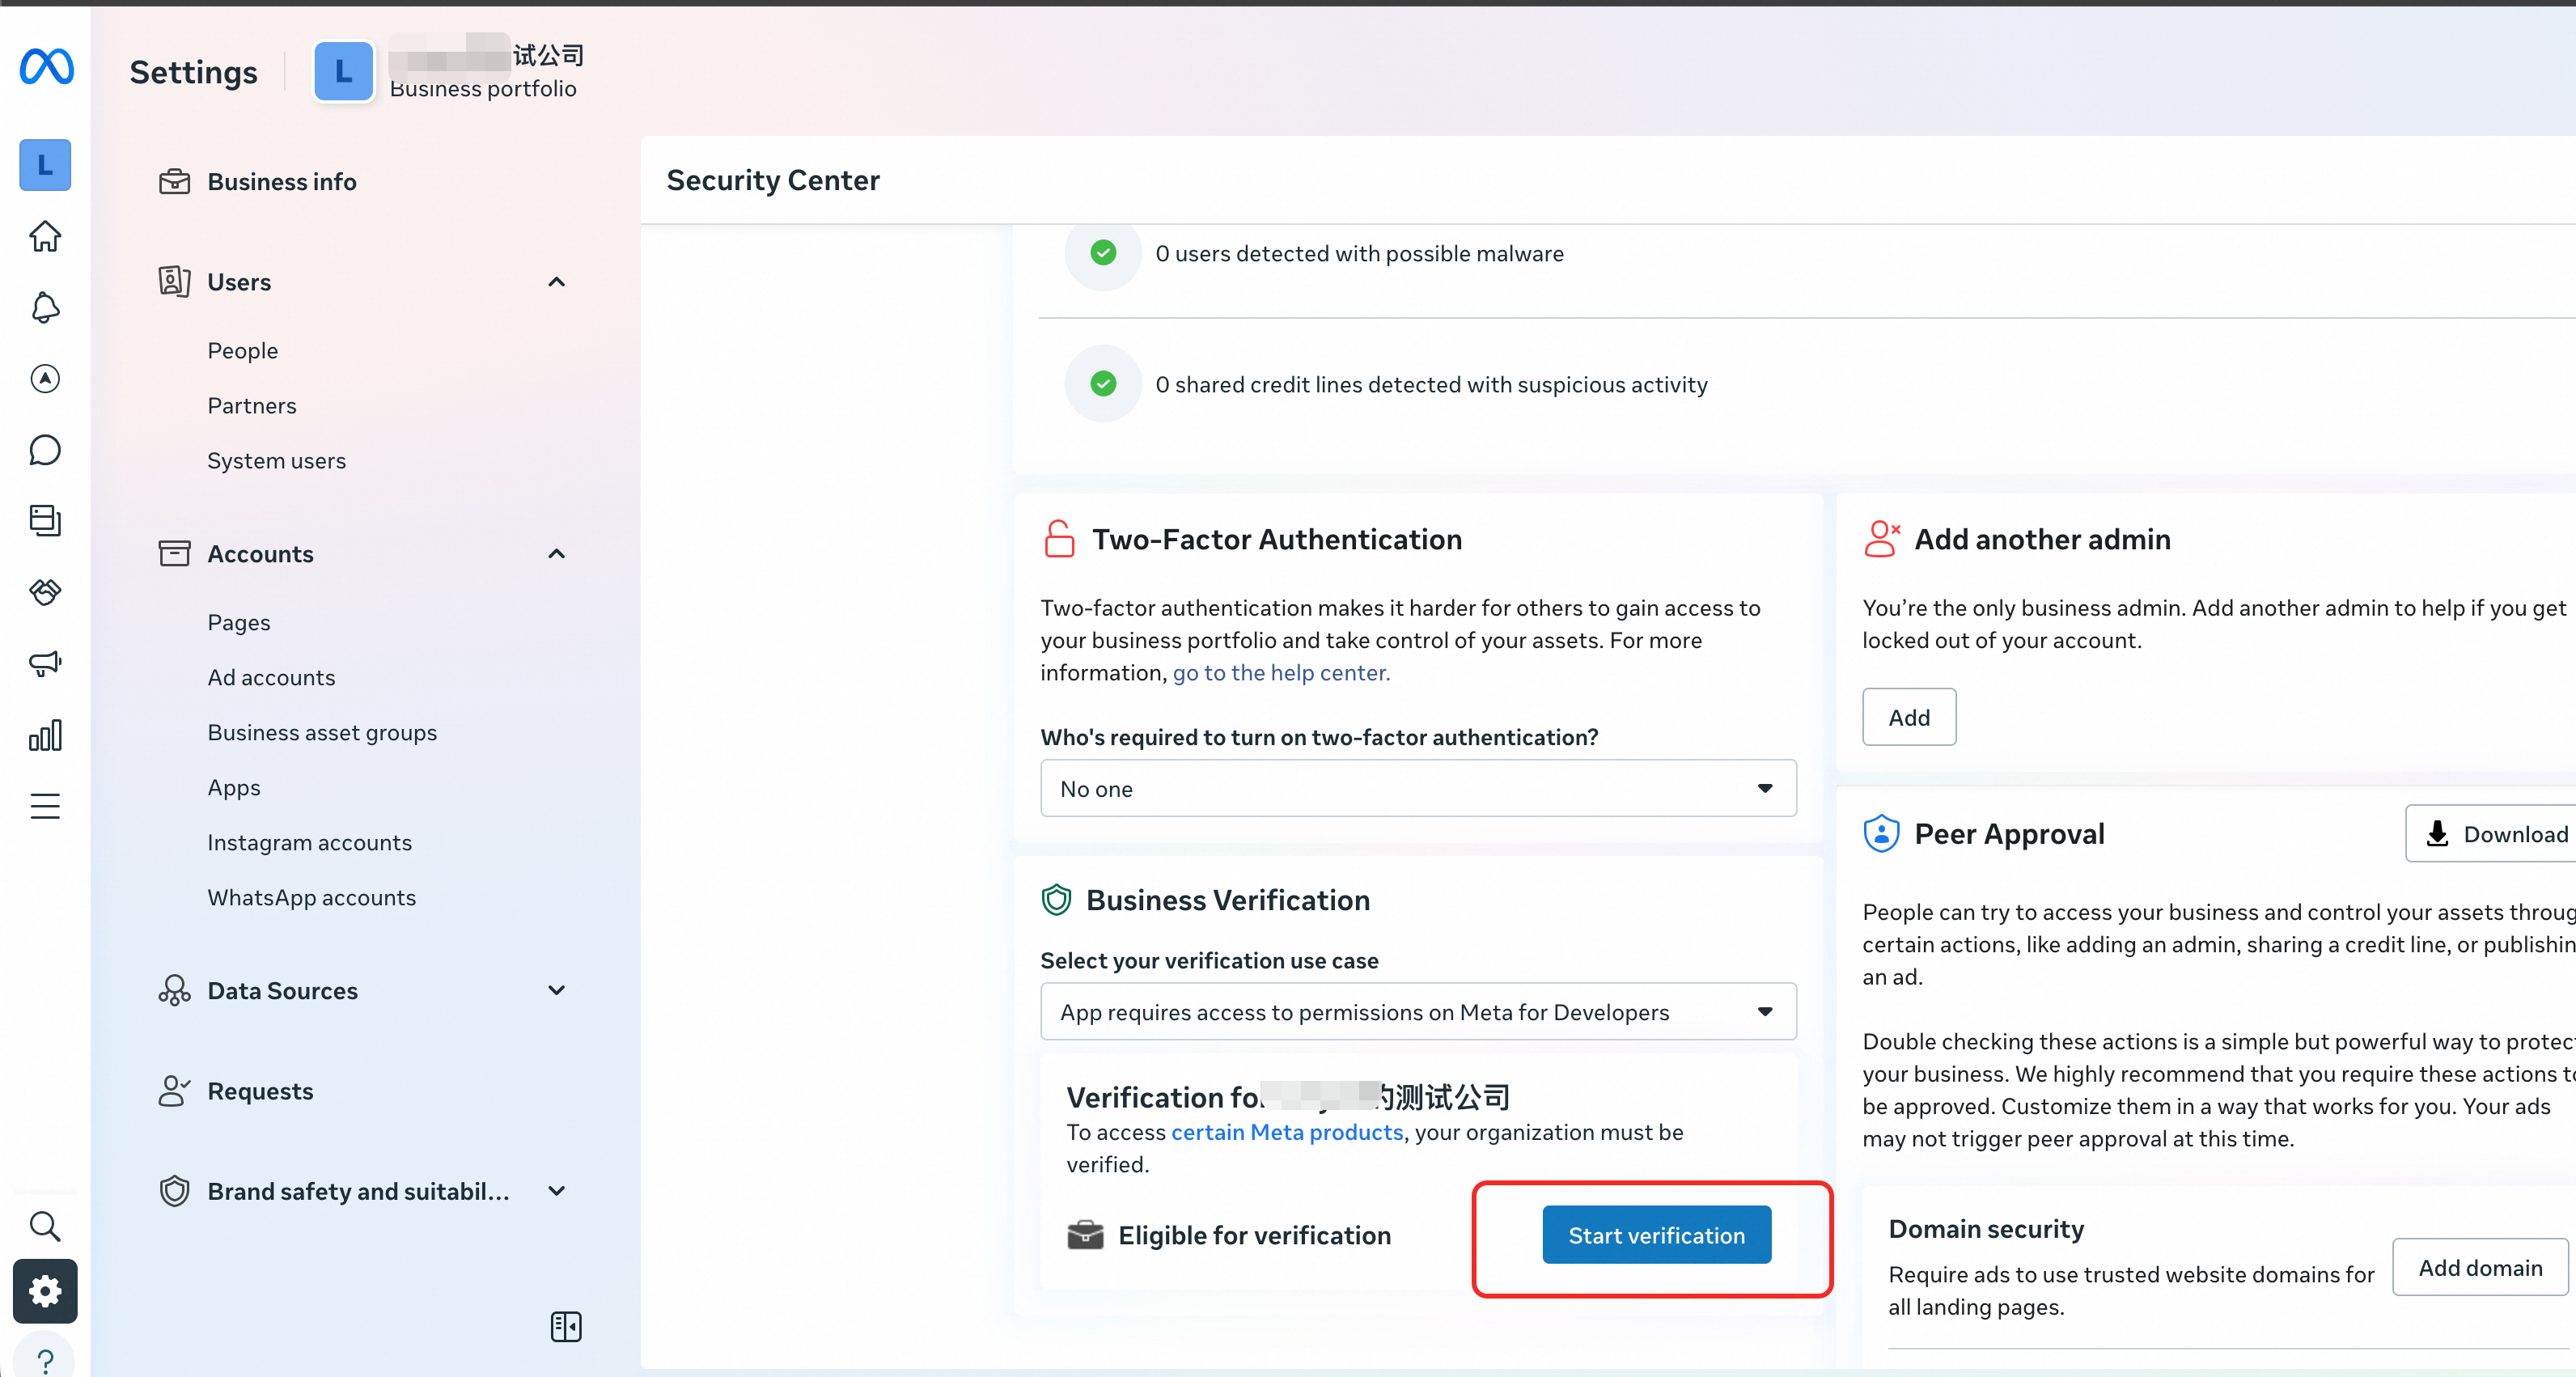
1. Start Meta business verification
-
Go to the Meta Business Verification page.
-
Click Settings.

-
In the left menu, click Security Center. On the right, find the business entity associated with your WABA and click Start verification.
2. Complete your BM information
-
Business name: Must match the name on your business license.
-
Business address: Must match the address on your business license.
-
Business phone number: Must match the phone number on your bank statement or tax bill.
3. Submit for verification
-
Submit your business license.
-
Submit a bank statement or tax bill. The document must include your business phone number.
-
Email verification: Receive a code via email to verify your domain.
-
Phone verification: Verify your phone number and its association with your company by receiving a verification code via SMS or a voice call.
Review time:
-
Review typically takes 48 hours.
-
Monitor messages from Meta.
-
If review exceeds 48 hours, contact your account manager.
Step 6: Apply for an OBA (Optional)
An Official Business Account (OBA) is optional but provides additional permissions, features, and brand credibility.
1. Review OBA application requirements
-
Your BM account has been verified.
-
Your display name has been approved.
2. Submit an application
-
Submit your request to your Alibaba Cloud account manager.
-
Provide at least 5 links to online articles or websites that feature and promote your brand.
FAQ
Why was my WABA banned, and how can I fix it?
Possible reasons:
-
Using a generic or unrelated name for your BM account or WABA that doesn't match your company or brand name.
-
Failing to complete business verification.
Solutions:
-
Ensure your BM account and WABA names are relevant to your business.
-
Complete business verification.
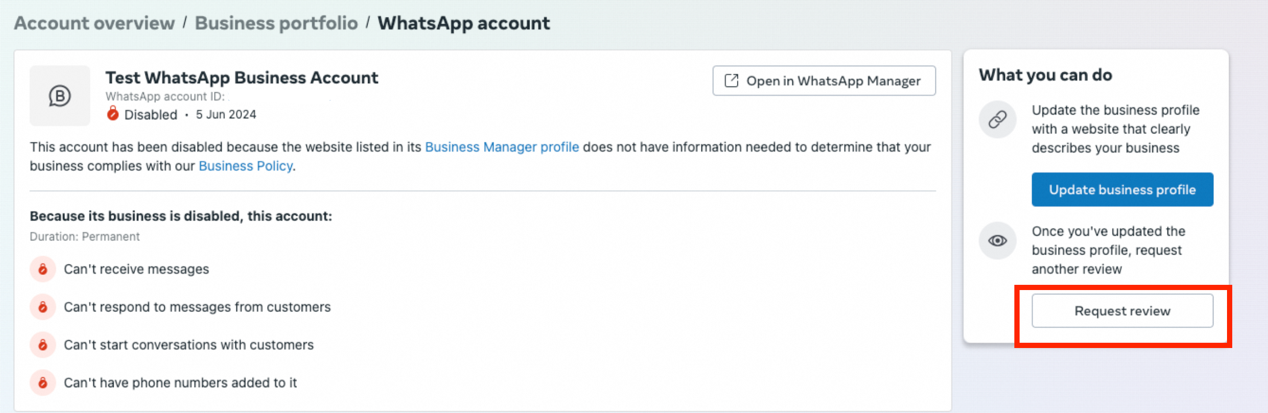
How do I resolve a website link flagged as invalid?
Issue: Meta flags a website URL as invalid.
Solution:
-
Request a review from the alert banner in Business Manager.
-
Provide a detailed description of your website and its relevance to your business.
-
If the issue persists, contact your account manager to open a support ticket with Meta.
How do I establish a valid link between my business and my website?
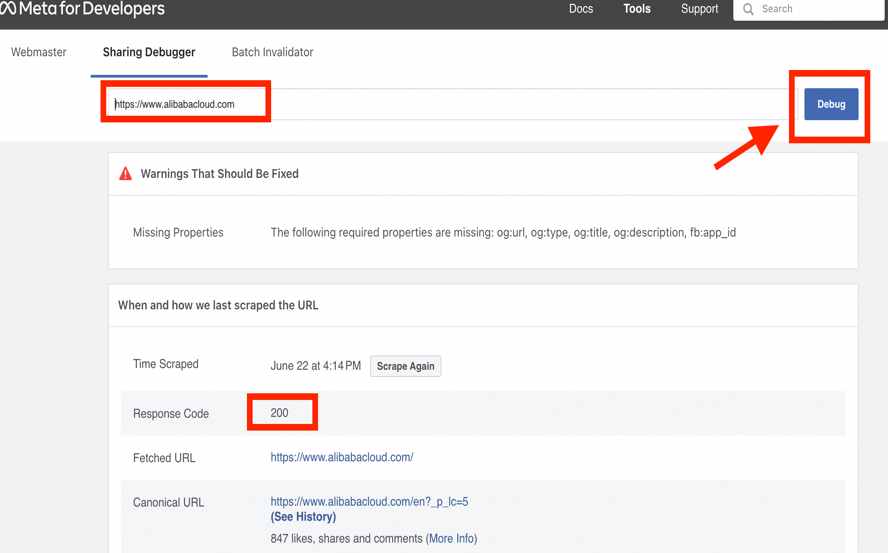
Your website must meet Meta's criteria for accessibility, content, and domain consistency.
-
Website accessibility
-
The website must be fully functional with no broken links.
-
It must be publicly accessible.
-
Use the Meta Sharing Debugger to check that it returns a 200 status code.
-
-
Website content
-
Your company's official brand logo must be displayed.
-
The products or services you offer must be clearly described.
-
-
Domain consistency
-
Your website domain must match your business email domain. For example, website
www.alibaba.comand emailbob@alibaba.com.
-
What should I do if I can't receive a verification code?
Verification code delivery issues are typically caused by Facebook 2FA settings or carrier-side blocking.
-
Facebook 2FA settings:
-
Configure 2FA correctly on your Facebook account to prevent code delivery issues.
-
-
Phone numbers in the Chinese mainland:
-
SMS delivery to Chinese mainland numbers can be unstable.
-
Check with your carrier if the message was blocked.
-
Enable international SMS.
-
Can I register a WABA without completing Meta business verification?
Yes, but with significant restrictions:
-
Phone number limit: You can add a maximum of two phone numbers.
-
Messaging limit: Your BM account can initiate conversations with up to 250 unique numbers per rolling 24-hour period. This limit is shared across all numbers in the BM.
-
Account risk: Higher risk of restriction or ban if users report your messages.
Complete business verification to unlock higher messaging limits and improve account stability.
Can I export numbers that failed during a bulk send?
No. Failed phone numbers from bulk sends cannot be exported.