After you use the VMware backup and disaster recovery feature to restore a VMware virtual machine (VM) as an Elastic Compute Service (ECS) instance, you may want to fail back the ECS instance to your on-premises VMware environment. To do this, create a custom image for the ECS instance and export it. Then, use the VMDK image file to create a new VM in your on-premises VMware environment. This document describes how to perform this operation.
Prerequisites
A VMware VM backup is restored as an Alibaba Cloud ECS instance. For more information, see Restore a VMware VM to an ECS instance.
ImportantThis feature applies only to failing back Linux ECS instances to on-premises VMware. For CentOS 7 systems, if the system fails to start after the failback, manually switch the disk controller to an IDE controller and then restart the system.
An Object Storage Service (OSS) bucket is created in the region where the custom image resides. The bucket is used to temporarily store the custom image before you download it to your local machine. For more information, see Create buckets.
Usage notes
Due to image copyright restrictions, you cannot export custom images created from Alibaba Cloud Marketplace images or images of the Windows Server operating system. For more information about the limits on exporting images, see Export a custom image.
The source ECS instance for the image export (the instance you are failing back to on-premises VMware) must be an instance that was backed up and restored using the VMware backup and disaster recovery feature of Cloud Backup. Otherwise, the VM created from the VMDK file in your on-premises VMware environment will fail to start.
Procedure
This procedure involves creating a custom image, exporting the image, and using the exported image to create a VM. The time required for these steps depends on the data volume of the disk. Estimate the required time in advance to ensure a smooth process.
Failback requires careful planning and thorough testing to ensure a smooth system migration and prevent data loss or service interruptions.
Create a custom image for the ECS instance. For more information, see Create a custom image from an instance.
Export the custom image to OSS. For more information, see Export a custom image.
If the exported image format does not meet your requirements, use the qemu-img tool to convert the image file format. For more information, see Convert image formats.
Create a new VM in VMware using the VMDK file.
Step 1: Create a custom image from an ECS instance and export it to an OSS Bucket
Log in to the ECS console.
In the navigation pane on the left, choose .
In the upper-left corner of the page, select a region and resource group.

Find the target instance. In the Actions column, choose
 > Disk and Image > Create Custom Image.
In the Create Custom Image dialog box, enter a name for the custom image, keep the default configurations for other parameters, and then click OK.
ImportantWhen you create a custom image, related snapshots are created by default. You are charged for retaining the image. For more information, see Snapshot billing.
You can export the image only after its status changes to Available.

In the left-side navigation pane, choose .
On the Custom Images tab, find the image that you want to export and click Export Image in the Actions column.
ImportantDownload the image file to your local machine from the OSS bucket.
Because the exported image file is stored in an OSS bucket, you are charged for OSS storage and download traffic. For more information about OSS billing, see Billing overview.
In the Export Image dialog box, read the notes and conditions, and then click Next. For more information about the limits, see Conditions for exporting custom images.
Specify the OSS bucket to store the image and a prefix for the image file name. Then, click Export.
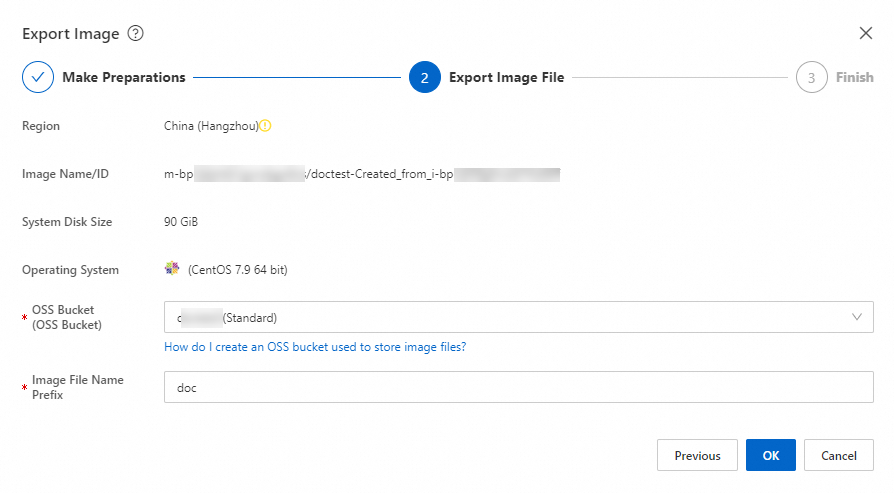 Important
Select an export format for the image. RAW, VHD, QCOW2, VDI, and VMDK are supported. In regions where you cannot set the image format, the image is exported in the RAW format by default. For more information about exporting custom images, see Export a custom image.
If you export the image in the RAW format, you must convert it to the VMDK format when you create the VM in VMware.
In the navigation pane on the left, click O&M And Monitoring
 , and select Task Management. On the Task Management page, view the progress of the image export task. You can cancel the image export task at any time.Note
The time required to export the image depends on the image file size and the current export task queue. Click Task Details to view the task progress.

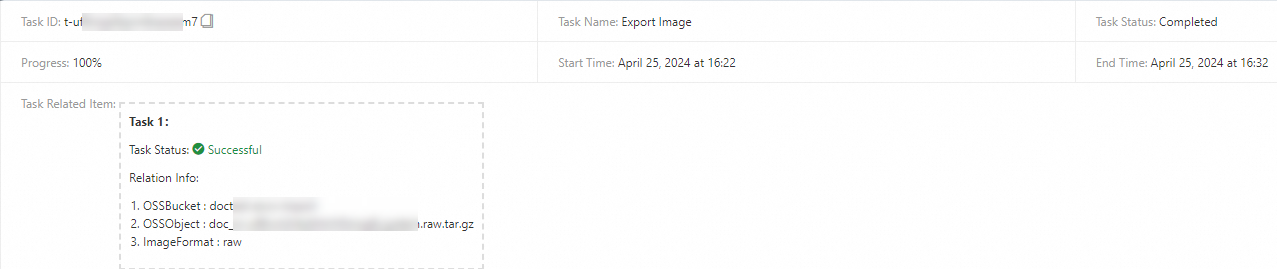
After the export task is complete, view the task details. The image is now saved in your specified OSS bucket.

Step 2: Export the image from the OSS bucket to your local machine
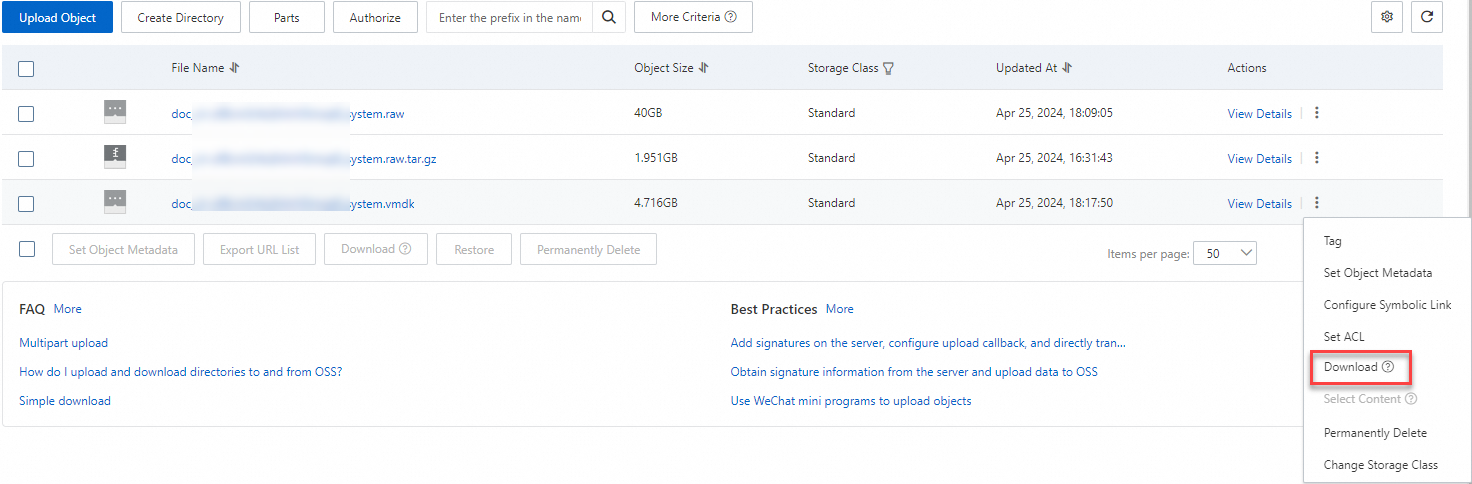
Download the image file from the OSS bucket to your local machine. For more information, see Download files.
If you selected RAW as the image format during export, the exported image file has the .raw.tar.gz file name extension. After decompression, the file name extension is .raw.
(Optional) Step 3: Convert a custom image from RAW to VMDK format
If the name of your exported custom image is doc_system.raw.tar.gz, use the following command to convert its format.
If the exported image format does not meet your requirements, you can use the qemu-img tool to convert the image file format. For more information, see Convert image formats.
Before you decompress the image file, make sure you have enough storage space to prevent decompression failure.
Decompress the
doc_system.raw.tar.gzfile to get thedoc_system.rawfile. The exported file isdoc_system.raw.tar -xvzf doc_system.raw.tar.gzConvert the custom image format to VMDK. For CentOS systems, you can run the
yum install qemu-imgcommand to install the qemu-img tool. The converted file is nameddoc_system.vmdk. After you run the command, wait for the conversion to complete. A new file nameddoc_system.vmdkis created in the directory.qemu-img convert -f raw -O vmdk doc_system.raw doc_system.vmdk
Step 4: Upload the VMDK file (image) to VMware
Log on to the vSphere Web Client.
In the Datacenter, find the target datastore.
Go to the details page of the target datastore, select Upload Files, and upload the image. Uploading a large file can take some time. Please wait for the upload to complete.
Step 5: Use the VMDK file (image) to create a new VM in VMware
Log on to the vSphere Client.
Right-click a data center, host, or resource pool, select New Virtual Machine, and then click Next.
In the New Virtual Machine wizard, select Create a new virtual machine as the creation type, and then click Next.
Enter a virtual machine name, select a location for the VM, and then click Next.
Select the target compute resource and click Next.
Select a storage location for the VM files and click Next.
Select the compatibility and click Next.
Select the guest OS family and guest OS version, and then click Next.
Customize the hardware, including the CPU, memory, network, and other hardware options.
Delete the default new hard disk and select the VMDK file that you uploaded as the new hard disk.
Click Add New Device and select Existing Hard Disk.
Browse to and select the VMDK file that you uploaded. Set Virtual Device Node for the new hard disk to IDE 0, and then click Next.
If you have multiple disk image files, upload the VMDK files one by one. Set the virtual device node to IDE 0 for each file.
On the Ready to complete page, review the configuration.
Click Finish to create the VM.
You have now failed back the ECS instance to your on-premises VMware environment. The username and password for the new VM are the same as those for the ECS instance. You can now proceed with testing and other tasks as planned.