This topic describes the initialization flow and key steps for the Enterprise Procurement Customer Relationship Management (CRM).
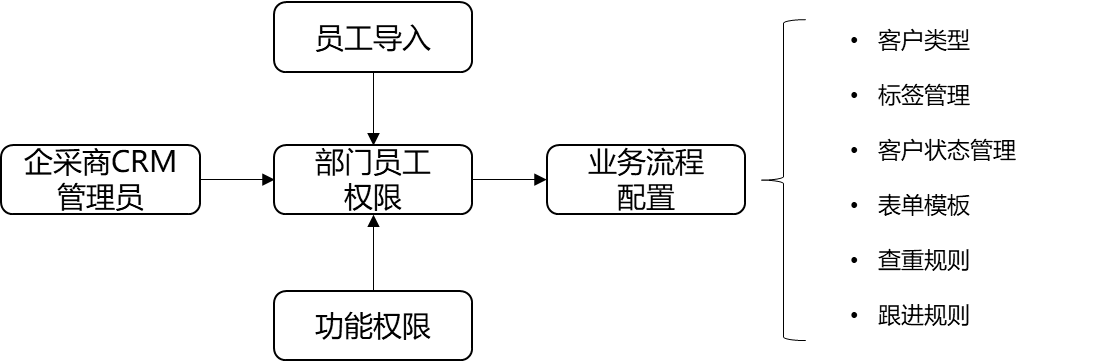
Initialization flow
Glossary
Employee/User: An employee of your organization. Each user corresponds to an account.
Role: The responsibilities of an employee based on their position in the organization. Roles are typically divided by job function, such as procurement, sales, or operations. Multiple users can be assigned to a single role. A single user can also have multiple roles.
Permission: The scope of features a user can access. Permissions are linked to roles. You manage user permissions by granting permissions to roles.
Management flow: An administrator grants permissions to a role. This defines the features and data scope available to that role. The administrator then assigns the role to a user account to complete the authorization.
Department and employee permission configuration
After you purchase the product, you can use your account to log on to the Enterprise Procurement Workbench. If you use an Alibaba Cloud account or a 1688 account, you can click the Alibaba Cloud/1688 account logon option at the bottom.
First, you can create your company's organizational structure and import employees based on your business scenarios. Then, you can set the roles and corresponding permissions for employees to achieve a more efficient configuration.
For more information about setting up organizational structures and importing employees, see the Employee Management document. For more information about configuring employee roles and permissions, see the Permission Management document.
Business flow configuration
Customer type
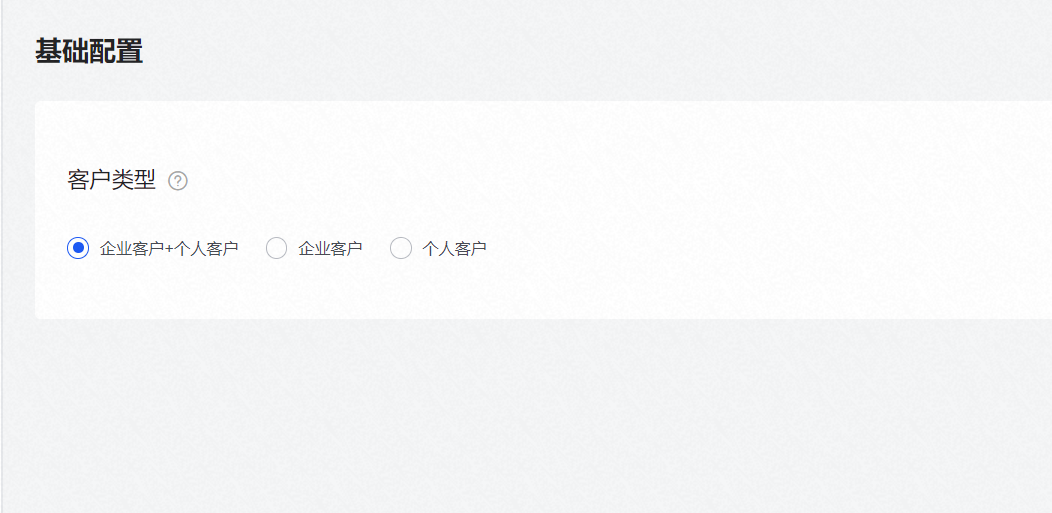
You can select your customer type based on your business needs. Note that the customer type you select affects your subsequent form settings. The system selects [Enterprise Customer + Individual Customer] by default.
Go to the Cloud Business Opportunity workbench. Choose [More] > [Business Flow Management] > [Customer Type] to go to the [Basic Configuration] page.
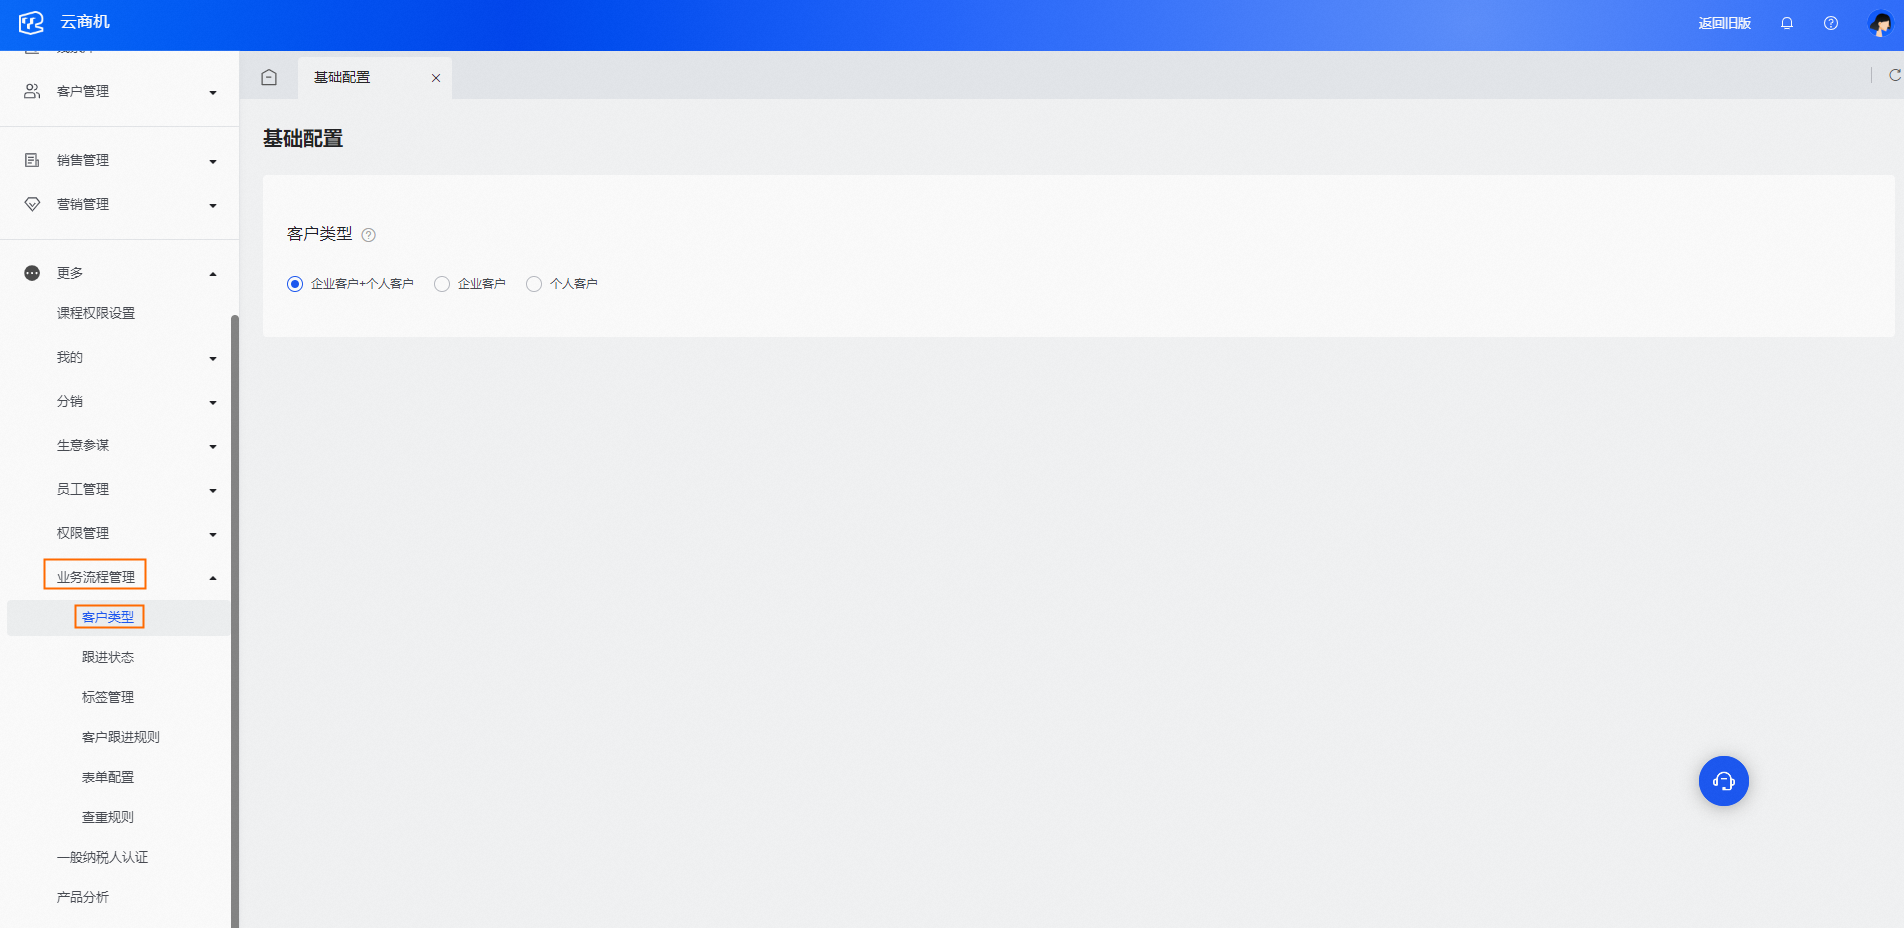
You can select a customer type as needed.
Follow-up status
Customer status management refers to the stages a customer is in during the sales follow-up process. Because business models vary, different organizations define customer statuses differently. The Cloud Business Opportunity workbench provides the following default statuses. The initial and final statuses cannot be deleted, but you can rename them.
[Configuration Item] Reversible: Specifies whether the process can return to the previous step. The default value is No.
The default template is as follows:
Initial status: To Be Followed Up
Status 1: Intent Confirmed
Status 2: Solution Quoted
Status 3: Quote Reviewed
Final status: Deal Won
Final status: Deal Lost
Go to the Cloud Business Opportunity Workbench. Choose [More] > [Business Flow Management] > [Follow-up Status] to go to the [Customer Status Management] page. Click [Edit] in the upper-right corner.
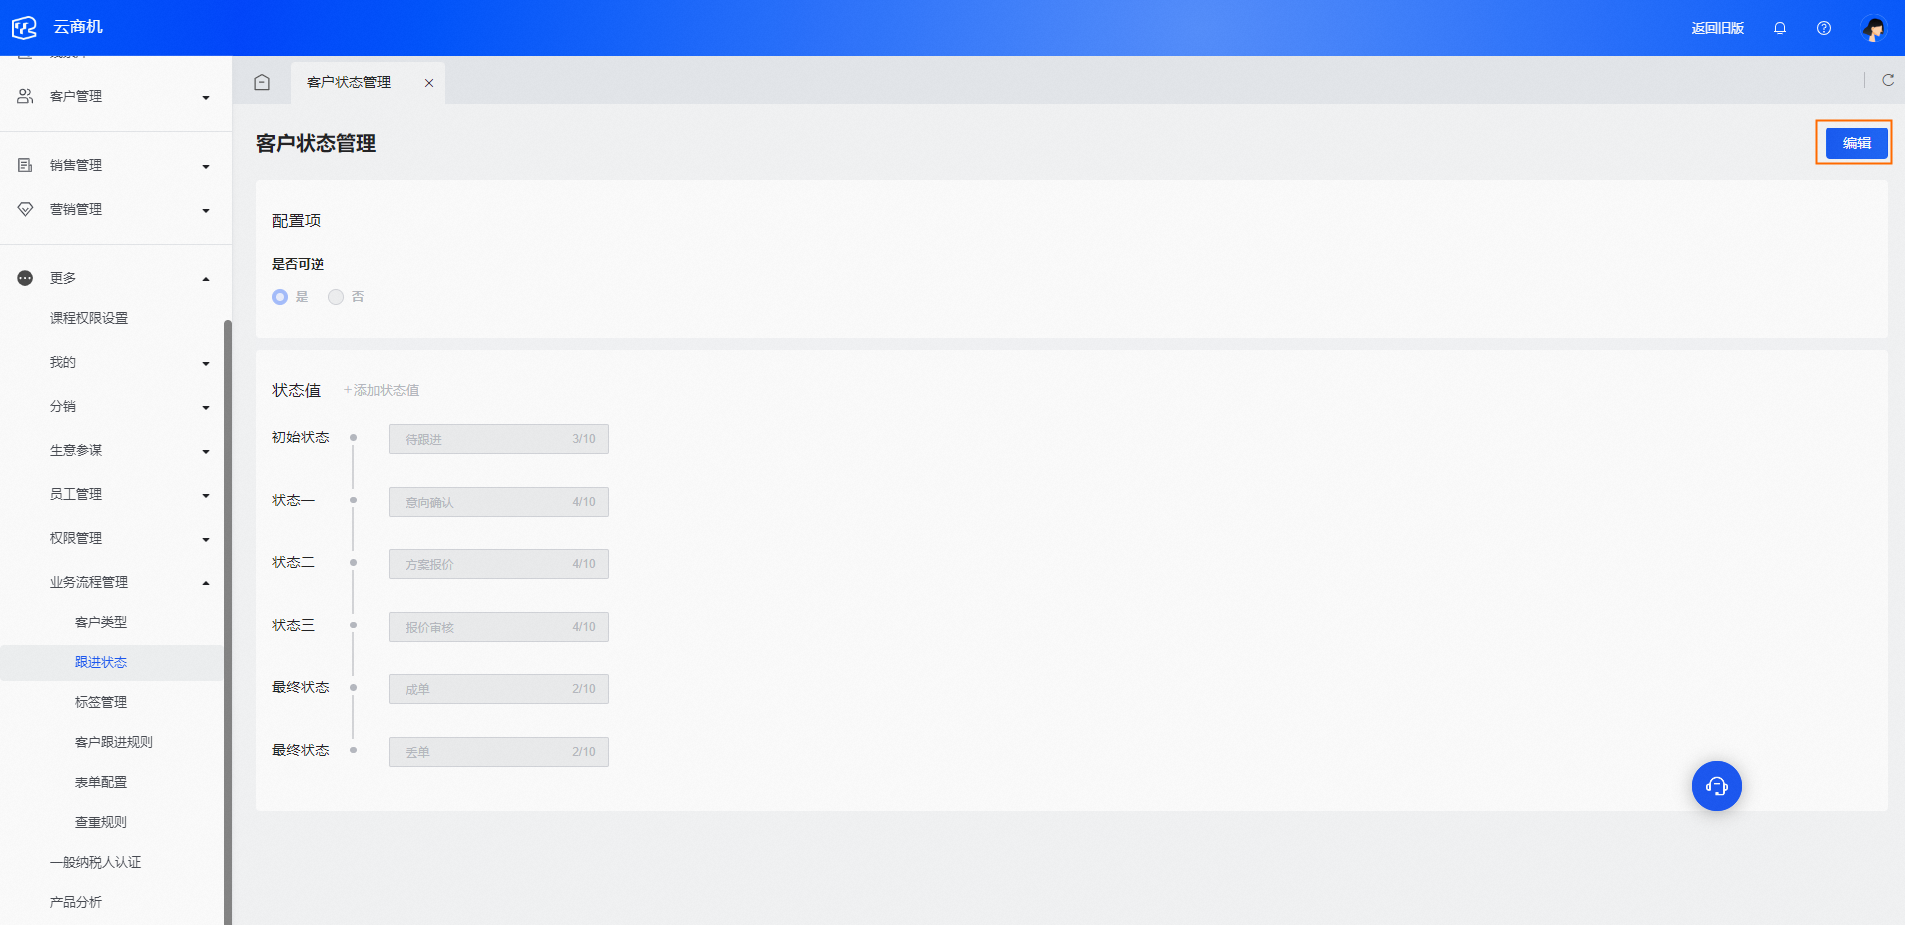
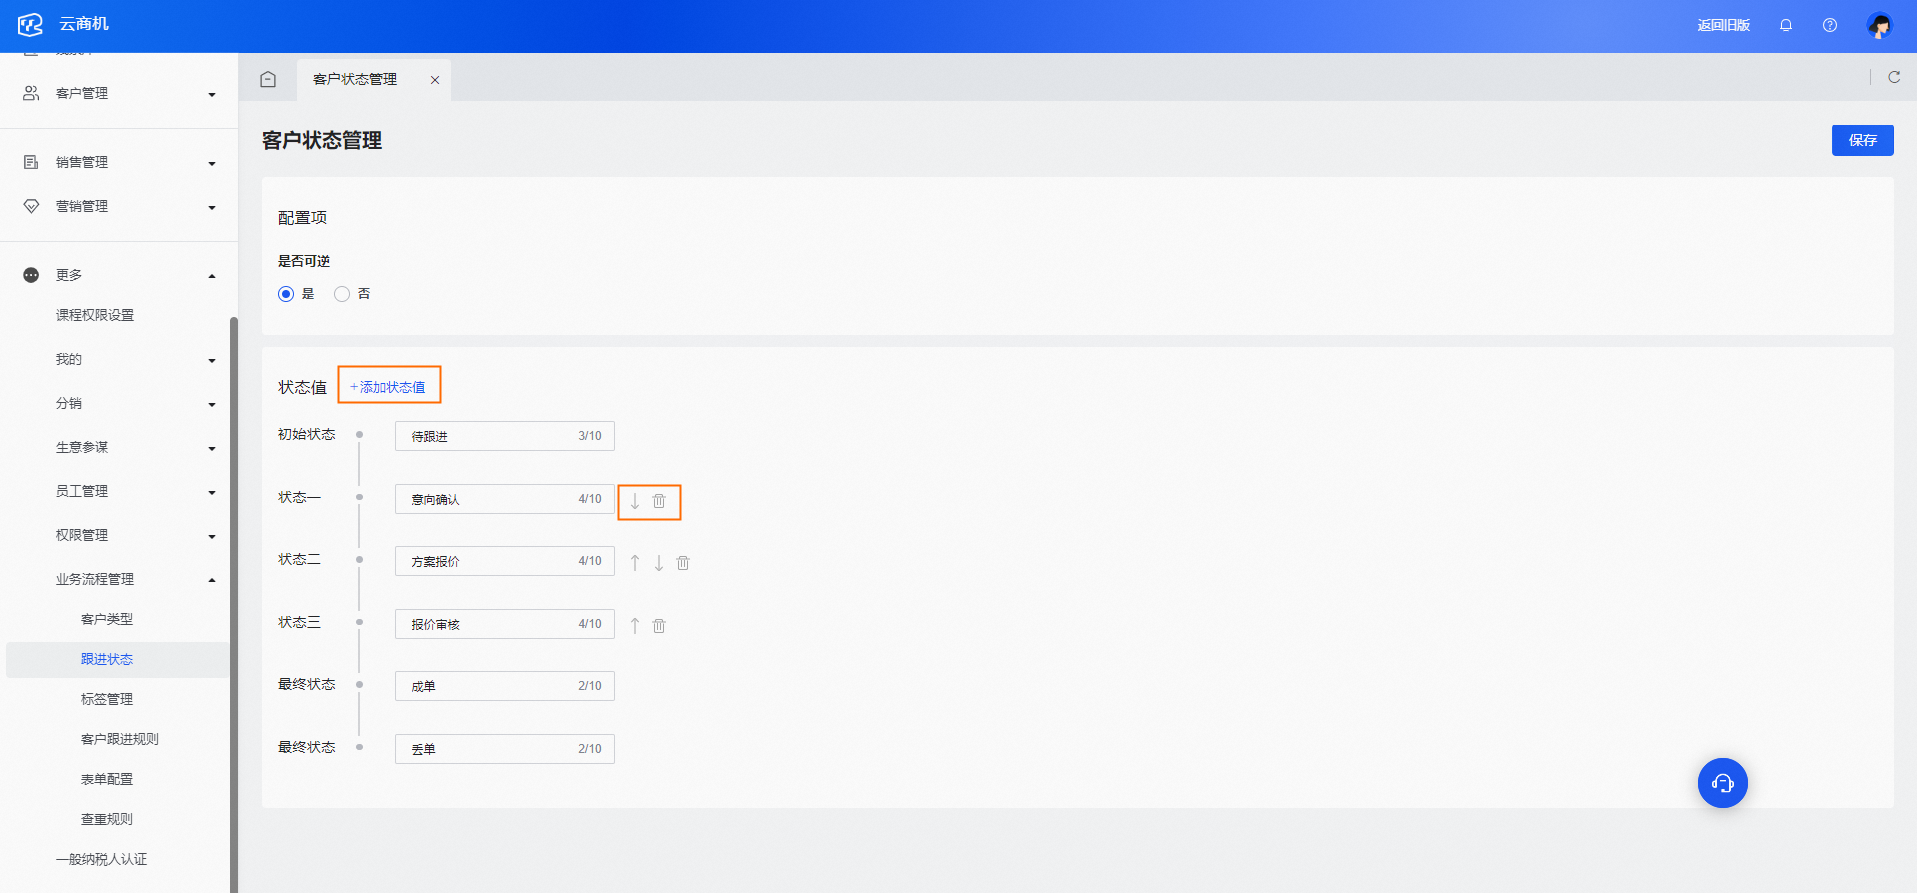
To add a status, click [Add Status Value]. You can also delete a status or adjust the order of statuses.
Tag management
Organizations classify customers into different levels, such as by industry or importance. The Enterprise Procurement CRM supports custom tags that you can apply to information templates.
Go to the Cloud Business Opportunity Workbench and choose [More] to go to the [Tag Management] page. Click [New Tag] in the upper-right corner, or click [Edit] in the upper-right corner of a tag to edit it.
The default tags provided by the Cloud Business Opportunity Workbench are shown in the following figure:
Customer follow-up rules
Create a rule
Go to the Cloud Business Opportunity Workbench. Click [More] > [Customer Follow-up Rules] > [New Rule]. You can then create rules for the effective scope, the maximum number of customers to follow up on, automatic release to the public pool, and claiming customers.
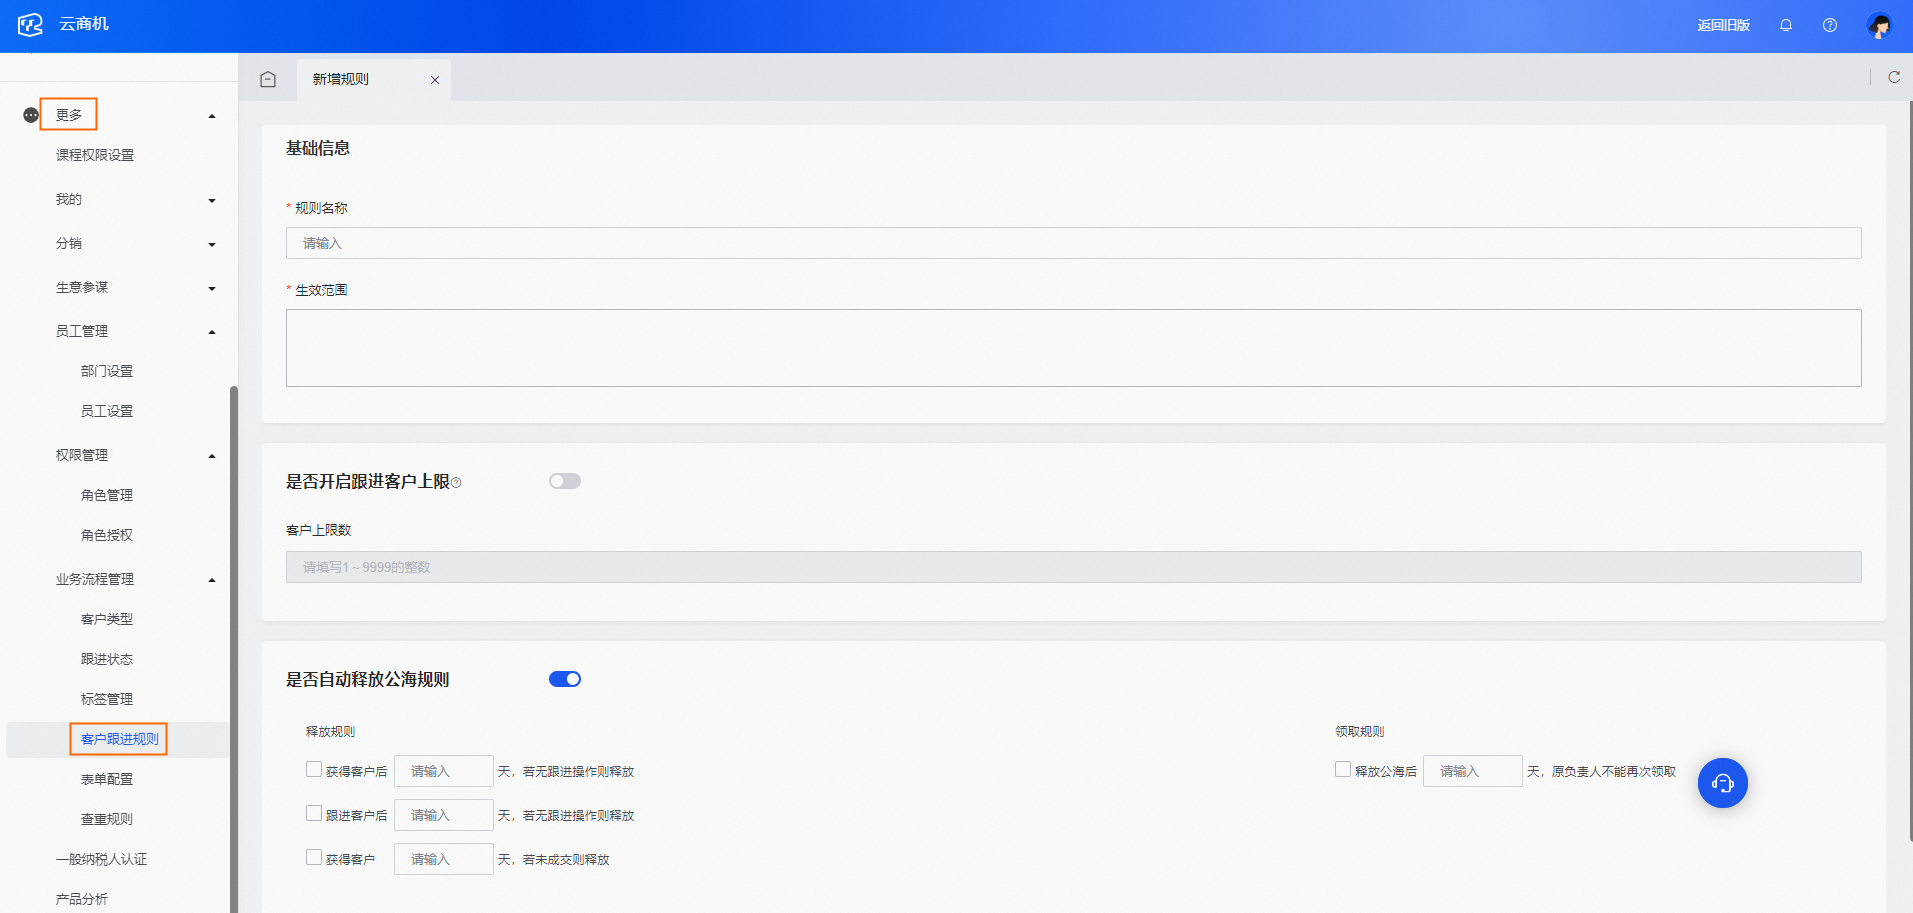
Rule Name: A brief summary of the rule.
Effective Scope: The range of employee accounts that must follow this rule. (If no accounts are available for selection, you must create an organization and accounts).
Customer Limit: The maximum number of customers that can be claimed from the public pool.
Public Pool Release Rule: If any release rule is triggered, customers who meet the rule's criteria are released to the public pool.
Edit a rule
To modify an existing rule, find the rule by its name and click [Edit].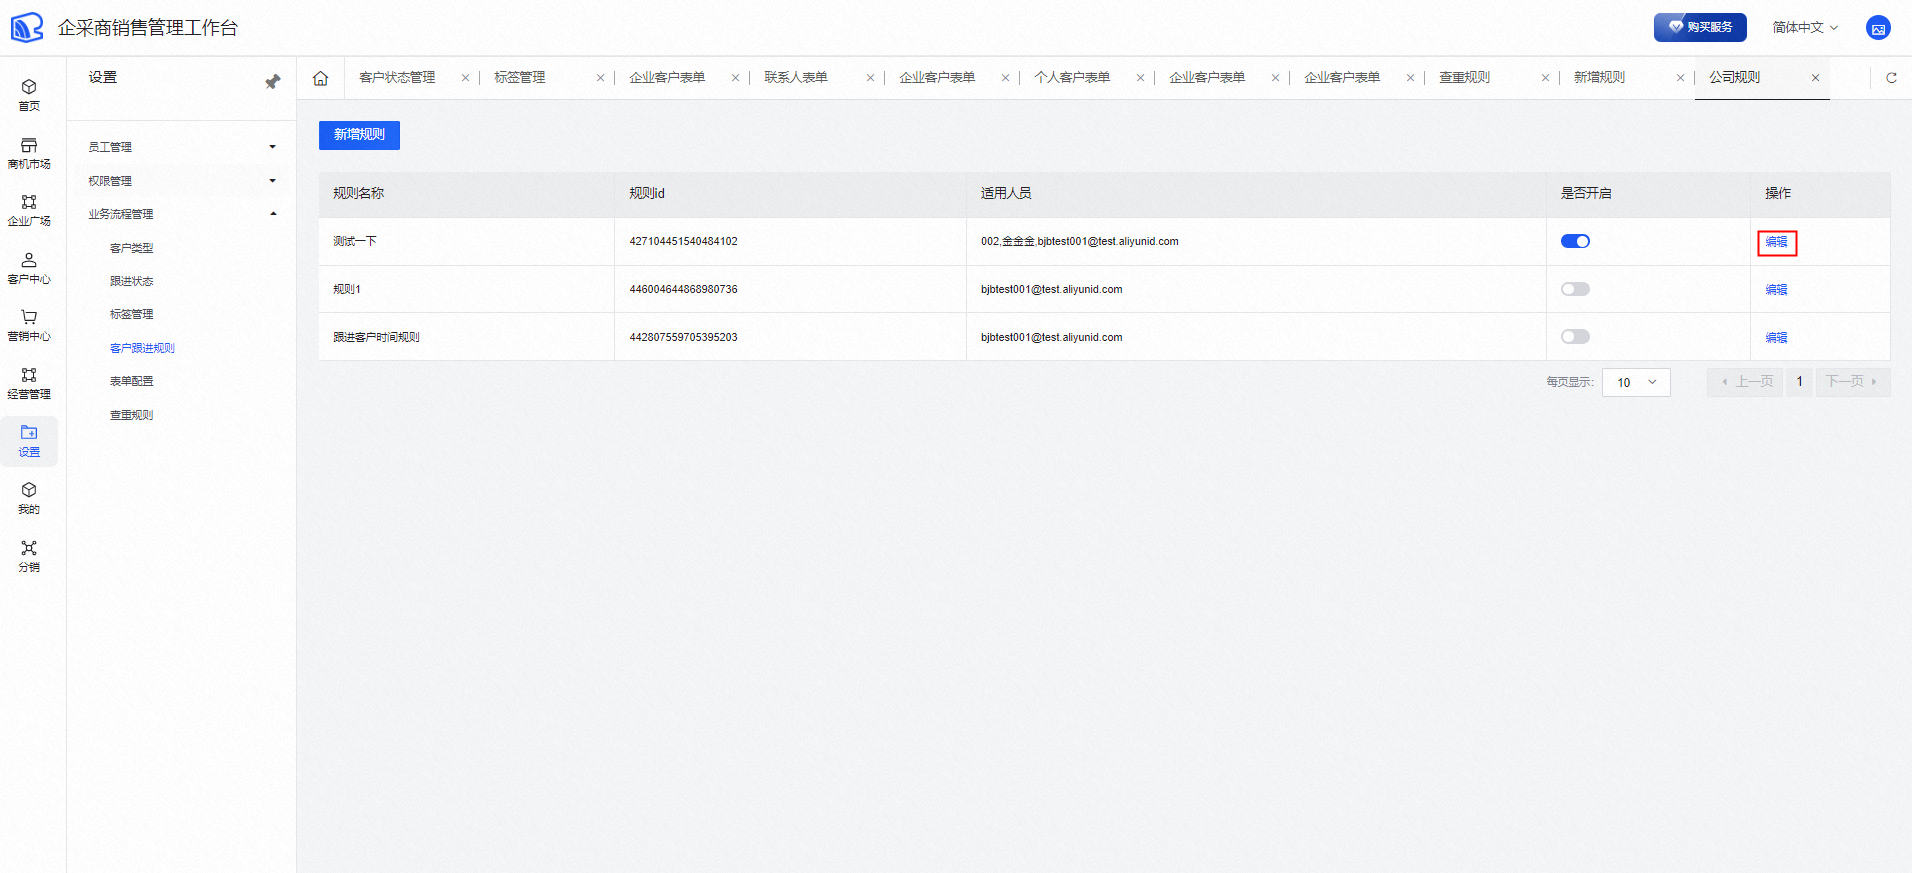
Form configuration
You can configure customer information templates and follow-up record templates. Sales representatives use the configured forms to follow up with customers.
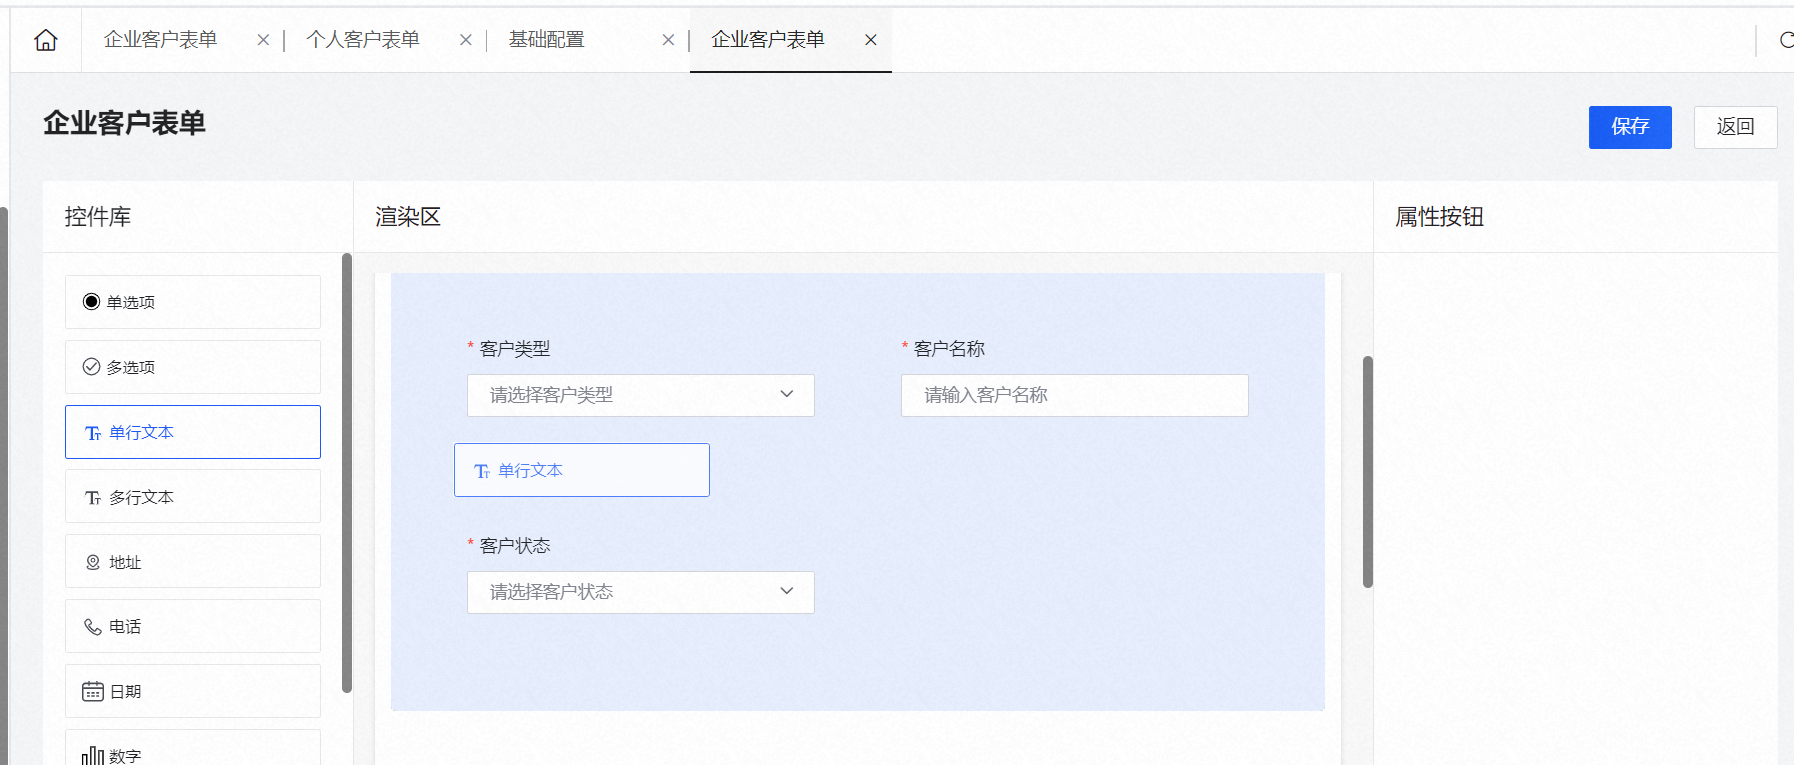
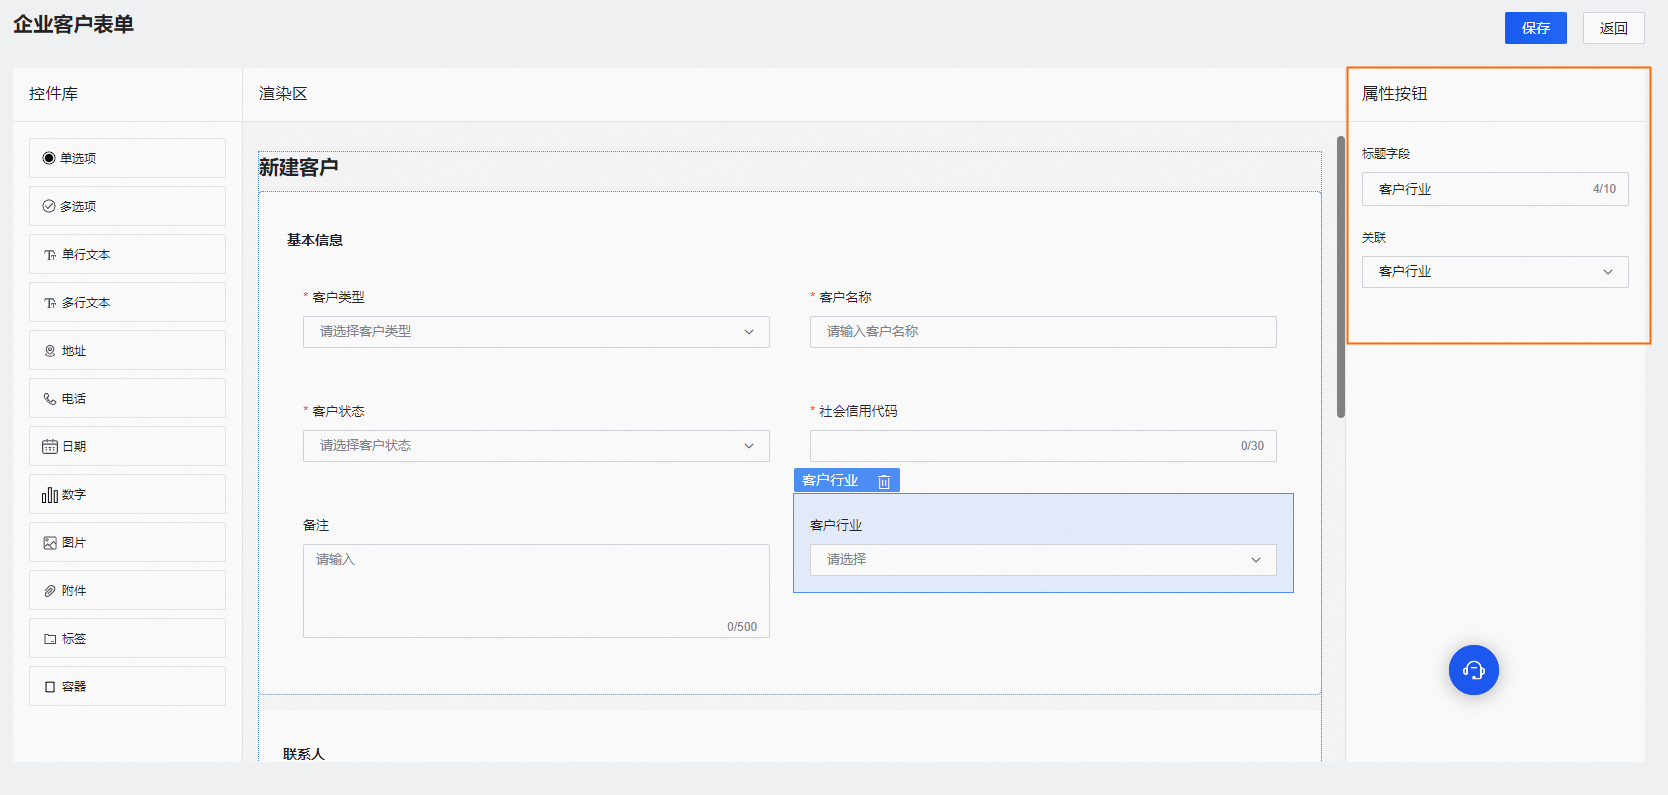
Control Library: The type of field, such as text input, drop-down list, or image upload.
Rendering Area: The form that sales representatives see. You can drag and edit controls in this area.
Properties Button: The additional requirements you want to set for a field, such as the title field or whether it is required.
Method:
In the control library on the left, you can select the required control.

In the rendering area on the right, you can set the properties for the control.
Customer information template
When an organization has multiple customer types, such as enterprise or individual, and adds new customers, specific information fields are required for each type. The Enterprise Procurement CRM provides pre-configured templates that you can modify on the corresponding page.
To use tags, you must first set them up in Tag Management. Then, you can directly select the tag content here.
Contact form
Go to the Cloud Business Opportunity Workbench. Choose [More] > [Business Flow Management] to go to the
Contact Name: Required
Contact Phone: Required
Email: Optional
WeChat: Optional
Department: Optional
Position: Optional
Address: Optional
Is Key Decision-Maker: Required
Enterprise customer form
Go to the Cloud Business Opportunity Workbench. Choose [More] > [Business Flow Management] to go to the
Customer Type: Individual/Enterprise, Required
Customer Name: Required
Unified Social Credit Identifier: Required
Customer Status: Required
Customer Industry: Optional
Contact Information: Includes all fields from the contact form described above.
Owner: Optional
Remarks: Optional
Individual customer form
Go to the Cloud Business Opportunity Workbench. Choose [Settings] > [Business Flow Management] to go to the
Customer Type: Individual/Enterprise, Required
Customer Name: Required
Customer Status: Required
Contact Information: Includes all fields from the contact form described above.
Owner: Optional
Remarks: Optional
Follow-up record template
The form template lets you set up different data fields to record customer information based on your business situation. You can add, delete, or modify business fields to match the application scenarios of different types of organizations.
The Enterprise Procurement CRM provides a default information template that you can adjust. The default fields are as follows:
Customer Name: Required
Contact: Required
Follow-up Method: Includes Phone, Email, In-person Visit, and Other. Required
Date: Required
Phone: Required
Address: Optional
Visit Record: Required
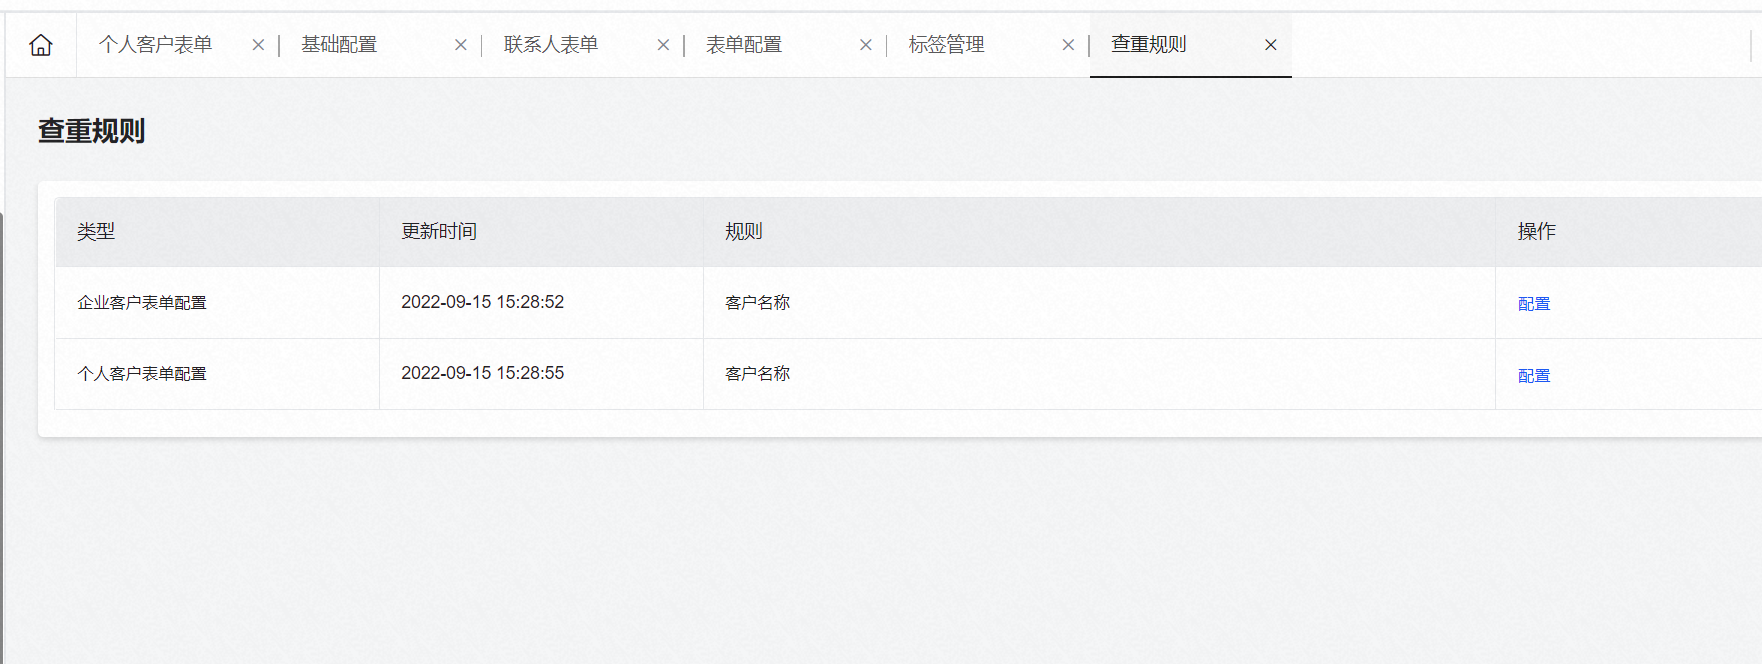
Duplicate check rules
To prevent multiple sales representatives from following up with the same customer simultaneously, the Enterprise Procurement CRM supports duplicate checking. You can also customize the rules for identifying a duplicate customer.
Enterprise Customer: Check for duplicates by customer name.
Individual Customer: Check for duplicates by customer name. You can also add the contact phone number as a criterion. In this case, a record is considered a duplicate only if both the customer name and contact phone number match.
Go to the Enterprise Procurement Workbench. Choose [More] > [Business Flow Management] > [Duplicate Check Rules]. You can click [Configure] on the right to configure the rules.