Add an OceanBase for MySQL data source
This topic describes how to add an OceanBase for MySQL data source in DataV and explains its configuration parameters. OceanBase features strong consistency, high availability (HA), high performance, online scalability, and low cost. It is also highly compatible with SQL standards and mainstream relational databases.
Add a data source over the Internet
Log on to the DataV console.
On the My Data tab, select Data Source Management and click Add Data.
From the Type list, select OceanBase for MySQL.
Select Public Network.
Enter the connection parameters for the OceanBase for MySQL data source.
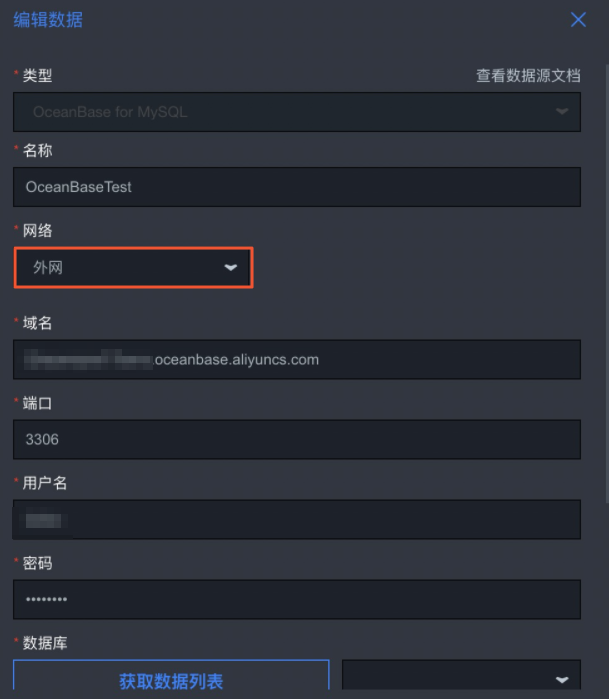
Parameter
Description
Name
The display name for the data source. You can enter any name.
Domain Name
The public endpoint to connect to the database.
ImportantThis is the domain name or IP address that the DataV server uses to access your database over the public network or the internal network of some Alibaba Cloud regions.
For example, if you use Alibaba Cloud OceanBase for MySQL over the public network, an example domain name is: xxxxxxxx.oceanbase.aliyuncs.com. On the Tenant Details page in the OceanBase console, you can click to request a public endpoint and configure the whitelist to add the public IP addresses of DataV. You can use the endpoint after it becomes active.
Port
The port that the database uses. The default port is 3306.
Username
The username to log on to the database.
Password
The password to log on to the database.
Database
The name of the database.
insecureAuth
Turn on this switch if you use an earlier version of MySQL.
After you enter the connection parameters, click OK to add the data source.
The new data source is displayed in the list of data sources.
Add a data source over a private network
Log on to the DataV console.
On the My Data tab, select Data Source Management and click Add Data.
From the Type list, select OceanBase for MySQL.
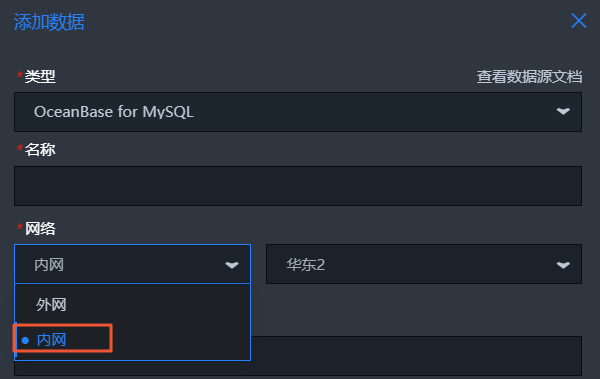
Select Private Network and the region of your OceanBase instance.
Enter the database connection parameters.
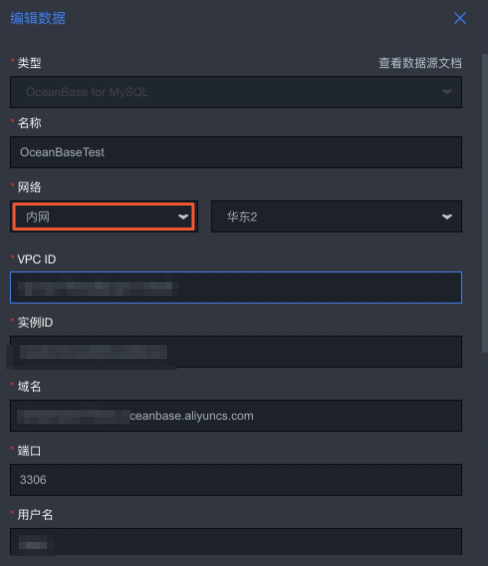
Parameter
Description
Name
The display name for the data source. You can enter any name.
VPC ID
The ID of the VPC where your OceanBase instance is located. To find this ID, go to the OceanBase console. On the Tenant Details page, find the ID in the agent address information in the topology diagram. For example, if you access the instance through the private endpoint of the primary endpoint, use the VPC ID of the primary endpoint. In the figure, this is `VPC Network: vpc-bp1******` on the primary endpoint card.
Instance ID
The ID of the database instance in the VPC. You can find this ID the same way you find the VPC ID. If you access the instance through the private endpoint of the primary endpoint, use that private endpoint for this parameter. In the figure, this is `t61j1******1c.cn-hangzhou.oceanbase.aliyuncs.com` on the primary endpoint card.
Domain Name
The private endpoint to connect to the database.
ImportantThis is the domain name or IP address that the DataV server uses to access your database over the public network or the internal network of some Alibaba Cloud regions.
For example, if you use Alibaba Cloud OceanBase for MySQL in a private network environment, an example domain name is
xxxxxxxx.oceanbase.aliyuncs.com. In the OceanBase console, go to the Tenant Details page and add the DataV VPC private IP address of the region where your instance is located to the whitelist. You can use the domain name after the private IP address takes effect.Port
The port that the database uses. The default port is 3306.
Username
The username to log on to the database.
Password
The password to log on to the database.
Database
The name of the database.
insecureAuth
Turn on this switch if you use an earlier version of MySQL.
After you enter the database connection parameters, the system automatically tests the connection to verify that the database is accessible.
After the connection test is successful, click OK to add the data source.
The new data source is displayed in the list of data sources.