Configure event interfaces
This topic describes how to configure event interfaces for a widget.
In the widget editor, click the  icon in the upper-right corner. On the Event Settings tab, you can configure the event operations.
Switch modes
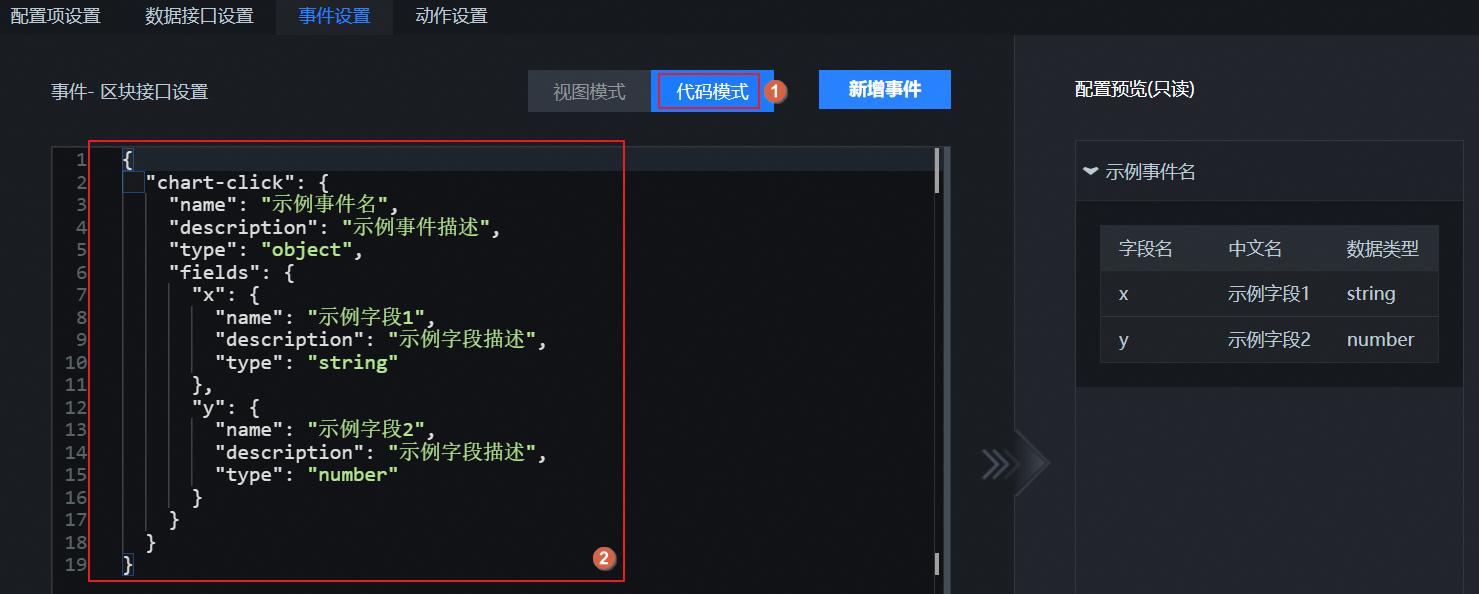
At the top of the dialog box, you can switch the event mode to View Mode or Code Mode.
Mode |
Description |
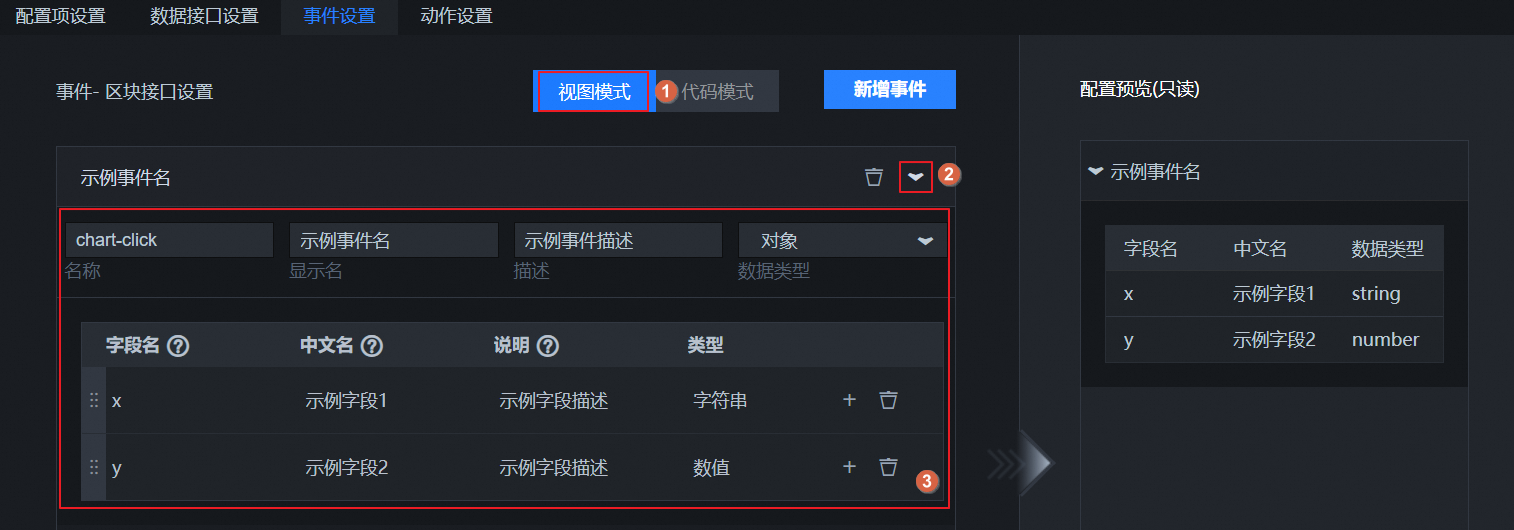
View Mode |
In View Mode, see the style of the sample event and customize its content based on the sample. You do not need to write code. Sample event style in View Mode |
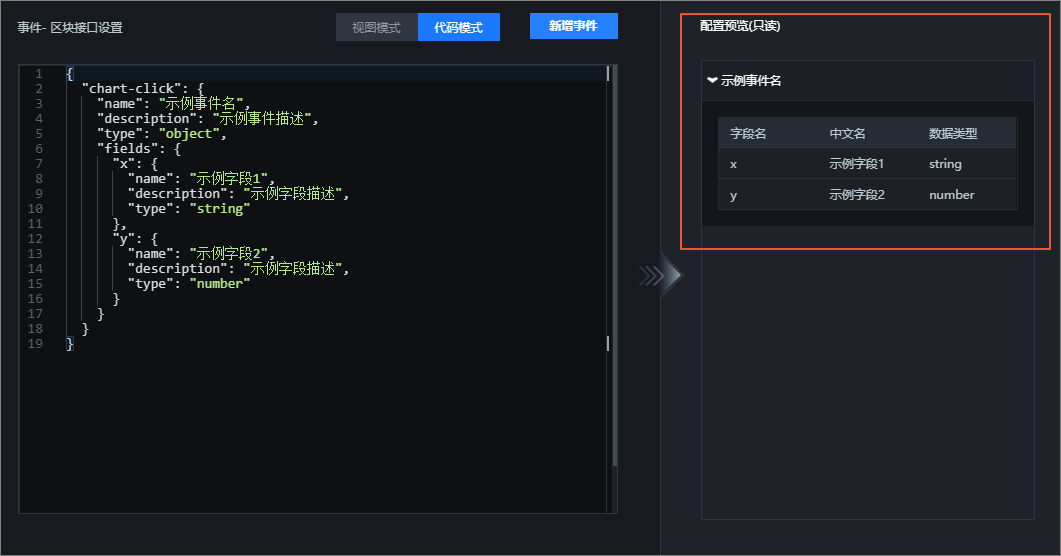
Code Mode |
In Code Mode, write custom code for your event based on the sample code. You can add or configure event content. Sample event style in Code Mode
Note
For more information about the code standards for event interfaces, see Widget developer package file overview. |
Configure an event interface
The Event Settings tab provides a sample event by default. You can customize the event content for each operation.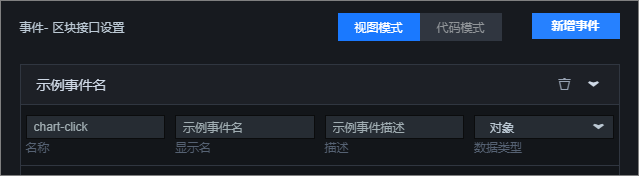
Operation |
Description |
Expand the event details list |
Click the |
Edit basic event information |
Each event contains multiple parameters. Customize the basic information parameters of the event.
|
Delete an event |
Click the |
Add an event |
On the Event Settings tab, click Add Event. A new event is added to the configuration area below.
Note
Add or edit multiple events for the widget interface as needed. |
 icon to the right of the sample event. This opens the list of detailed configurations for the event.
 icon to the right of the event to delete it.
Configure event fields
The event configuration panel includes two sample event fields by default. You can customize the event fields for each operation.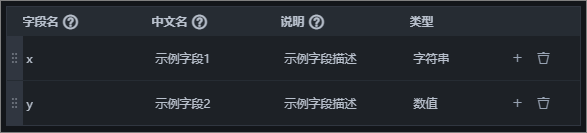
Operation |
Description |
Edit basic field information |
Each event field contains multiple parameters. Customize the parameters of the field.
|
Add a field |
Click the |
Adjust field position |
After you add multiple field rows, click the |
Delete a field |
Click the
Note
After you delete all fields from the list, click Add Field to add a new field row.
|
 icon to the right of a field row and select Add Sibling. A new field row is added.
 icon on the far left of a row. Drag the row to change its vertical position.
 icon to the right of the field row to delete the field.
View and use event interfaces in a visualization application
After you configure an event interface in the widget editor, you can view its details when you use the widget in the canvas editor.
In the block editor, preview the configured event interface and test its data interface. After the test is successful, publish the block. For more information, see Preview a block and Publish a block.

Switch to the Workbench page. Hover over a data dashboard and click Edit to open the canvas editor.
Click the Widget Library tab and select the Widgets module. You can see all published widgets in the widget list.
Click the widget that you want to use. The widget is added to the canvas editor.
Select the widget on the canvas. In the configuration panel on the right, select the Advanced tab. You can see all the configuration information for the widget's event interface.
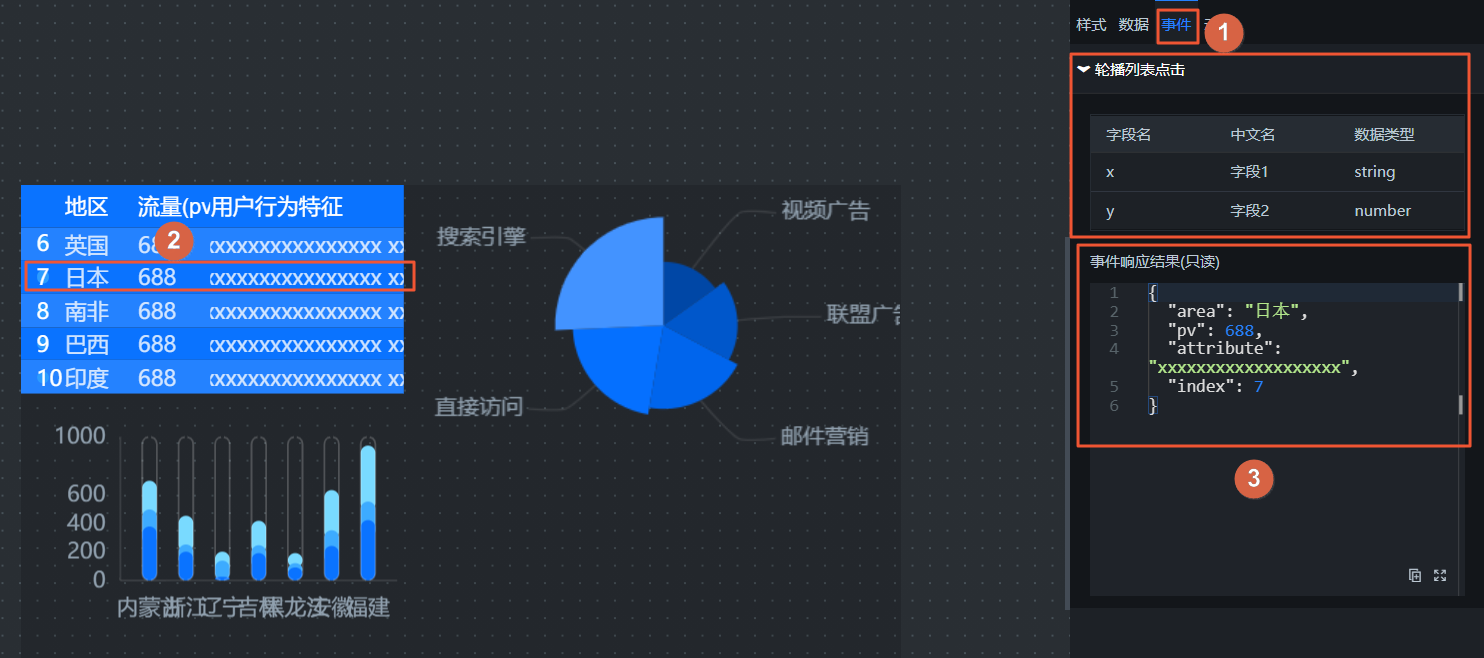
Preview event configurations in real time
On the Event Settings tab, the left side of the dialog box is for customizing event configurations and the right side is the real-time preview area. Any event parameters that you configure on the left are immediately displayed in the preview area, which makes it easy to view the event content.