Ground
The ground is the basemap layer in 3D City Builder. It supports L1 and L2 data precision levels. This topic uses the L2 precision level as an example to describe the style and data configurations for the ground layer, such as settings for shadows, environment map intensity coefficients, and face types. This topic also describes the configuration parameters for the ground layer.
In the layer list on the left side of the scene editor, click the Ground layer to open the configuration panel and configure the style and data for the Ground layer.
If Ground is not in the layer list, it means you have not added the Ground layer. See Add a Sub-widget to add the layer.
Style panel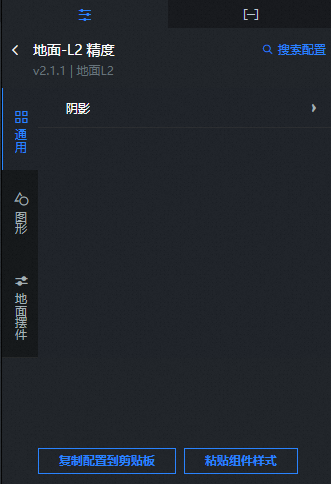
Parameter |
Description |
General |
Set general parameters for the ground. These parameters are available only when terrain data precision is set to L2. You can set the shadow style by turning the Emit Shadow switch on or off. |
Graphics |
Set the style of the ground graphic. You can select Bottom Face, Side Face, and Top Face.
Note
Maps support only images in PNG or JPG format. |
Map Decorations |
Configure the style of the map widget. This option is available only when L2 data precision is selected for the terrain. To the right of Model Mapping, click the
|
 or
or  icon to add or delete a model mapping. Click the
  or
or  icon to configure the arrangement of multiple model mappings. Click the
  icon to copy the currently selected model mapping and add a new one with the same configuration.
Data panel
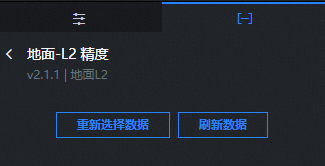
Reselect Data: In the data panel, click Reselect Data at the bottom. The Select Range dialog box opens. Select a new data range for the ground layer only. For more information, see the procedure for selecting a scene range in Create a scene using official basemap data.
Refresh Data: Refreshes the added data in the data panel.
Blueprint interaction
On the Scene Editor page, click the
icon to the right of Ground in the layer list.Click the
icon in the upper-left corner of the page.On the blueprint editor page, click the Ground layer in the import node bar. The configuration parameters for the ground layer's blueprint editor appear on the canvas, as shown in the following figure.
Events
Event
Description
When Data API Request Is Completed
This event is triggered after the data API returns a response and the filter processes it. The event also returns the processed data in JSON format. For a data sample, see the Data Response area on the Data tab in the component's configuration panel to the right of the canvas editor.
Rendering Completed
This event is triggered when the ground component finishes rendering. It also returns data of the object type. This setting is available only when the terrain data precision is L1.
Actions
Action
Description
Request Data API
Request server-side data again. Data from input data processing nodes or layer nodes is used as parameters. For example, if the API data source for the ground layer is
https://api.testand the data passed to the Request Data API action is{ id: '1'}, the final API request ishttps://api.test?id=1.Import Data API
Process data in the component's drawing format, import it into the component, and redraw. This action does not re-request server-side data. For a data sample, see the Data Response area on the Data tab in the component's configuration panel to the right of the canvas editor.
Show Component
Shows the component. No parameters are required.
Hide Component
Hides the component. No parameters are required.
 icon to the right of Ground in the layer list.
 icon in the upper-left corner of the page.