You can use the H5 container to perform the following operations.
Initialize the container
To use the Nebula container, you need to initialize it after the program starts up. In
To use the Nebula container, you must initialize it after the application starts. In the MyH5Application/MPaaS/Targets/MyH5Application/APMobileFramework/DTFrameworkInterface+MyH5Application.m file, call the following interface in the beforeDidFinishLaunchingWithOptions method of the DTFrameworkInterface Category to initialize the container.
For example:
- (void)application:(UIApplication *)application beforeDidFinishLaunchingWithOptions:(NSDictionary *)launchOptions
{
       // Initialize the container
        [MPNebulaAdapterInterface initNebula];

}
Open an online webpage in an application
After you initialize the container in the client code, you can call the interface provided by the Nebula container to open an online webpage.
For a video tutorial, see Tutorials.
In the
MyH5Application/Sources/DemoViewController.mfile, add code to create a button that calls an interface to open an online webpage when clicked.#import "DemoViewController.h" @interface DemoViewController () @end @implementation DemoViewController - (void)viewDidLoad { [super viewDidLoad]; // Do any additional setup after loading the view, typically from a nib. UIButton *button = [UIButton buttonWithType:UIButtonTypeCustom]; button.frame = CGRectMake(30, 150, [UIScreen mainScreen].bounds.size.width-60, 44); button.backgroundColor = [UIColor blueColor]; [button setTitle:@"Online URL" forState:UIControlStateNormal]; [button addTarget:self action:@selector(openOnline) forControlEvents:UIControlEventTouchUpInside]; [self.view addSubview:button]; } - (void)openOnline { [[MPNebulaAdapterInterface shareInstance] startH5ViewControllerWithParams:@{@"url":@"https://tech.antfin.com"}]; } @endClick the button to open the Ant Financial Technology homepage in the application. You have now learned how to open an online webpage in an application.
Call a native API from the frontend
When you develop a frontend page, you can use the bridge provided by the Nebula container to communicate with native code using a JavaScript API (JSAPI). This lets you retrieve information or data that is processed by the native code. The Nebula container includes built-in JSAPI capabilities. For more information, see this link. In the JavaScript (JS) file of your H5 page, you can call these capabilities directly using AlipayJSBridge.call. The following code provides an example:
AlipayJSBridge.call('alert', {
  title: 'Native Alert Dialog',
  message: 'This is a native Alert Dialog',
  button: 'OK'
}, function (e) {
  alert("The button was clicked.");
});You can go to the trial frontend page to test the feature of calling a native API from the frontend.
For a video tutorial, see Tutorials.
In the
MyH5Application/Sources/DemoViewController.mfile, add code to create a button named `button1`.UIButton *button1 = [UIButton buttonWithType:UIButtonTypeCustom]; button1.frame = CGRectOffset(button.frame, 0, 80); button1.backgroundColor = [UIColor blueColor]; [button1 setTitle:@"Call native from frontend" forState:UIControlStateNormal]; [button1 addTarget:self action:@selector(openJsApi) forControlEvents:UIControlEventTouchUpInside]; [self.view addSubview:button1];In the
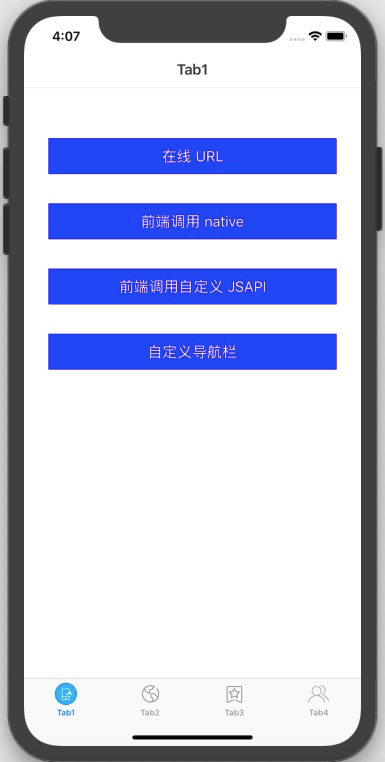
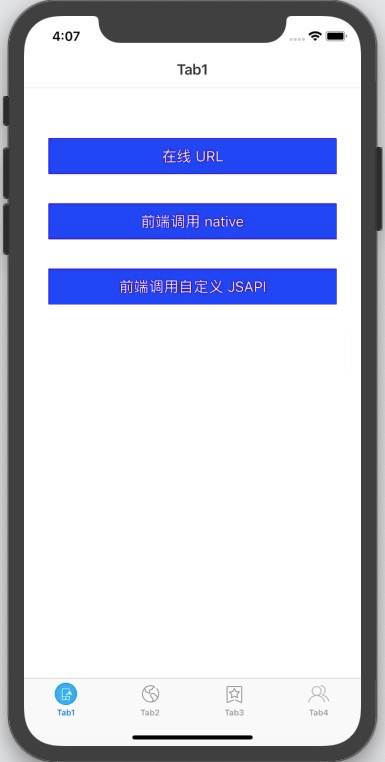
MyH5Application/Sources/DemoViewController.mfile, add the implementation code for `button1` as follows:- (void)openJsApi { [[MPNebulaAdapterInterface shareInstance] startH5ViewControllerWithParams:@{@"url":@"https://mcube-prod.oss-cn-hangzhou.aliyuncs.com/570DA89281533-default/80000000/1.0.XX.XX_all/nebula/fallback/h5_to_native.html"}]; }Compile the project and install the application on a mobile phone. After you open the application, the interface appears as shown in the following figure.
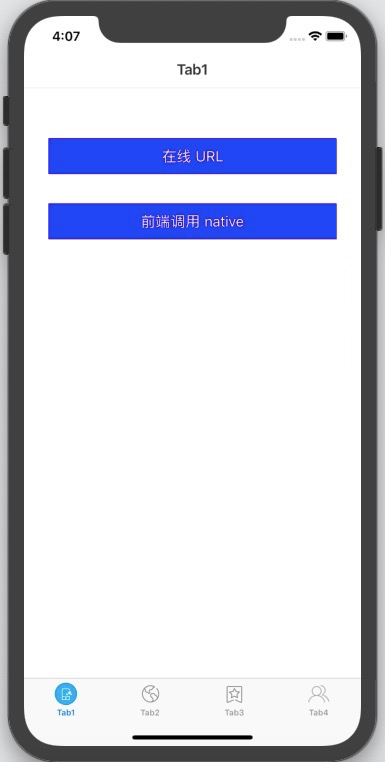
Click the button to open the frontend page. Click the Show Native Alert Dialog button. A native alert dialog appears with the title Native Alert Dialog and the message This is a native Alert Dialog. Click the OK button in the alert dialog. Another alert dialog appears with no title and the message The button was clicked. This indicates that the API call was successful. You have now learned how to call a native API from the frontend.
Call a custom JSAPI from the frontend
In addition to the built-in JSAPI capabilities of the Nebula container, you can also define custom JSAPIs.
For a video tutorial, see Tutorials.
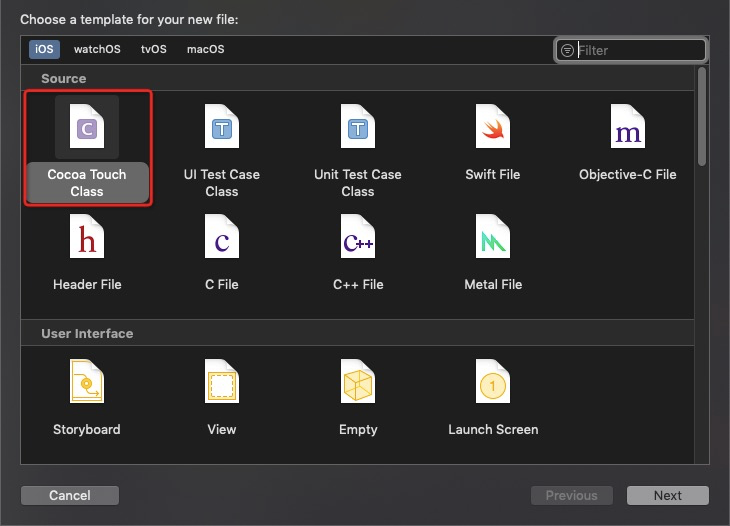
Create a JSAPI class.
Step 1. Follow the steps shown in the figure.

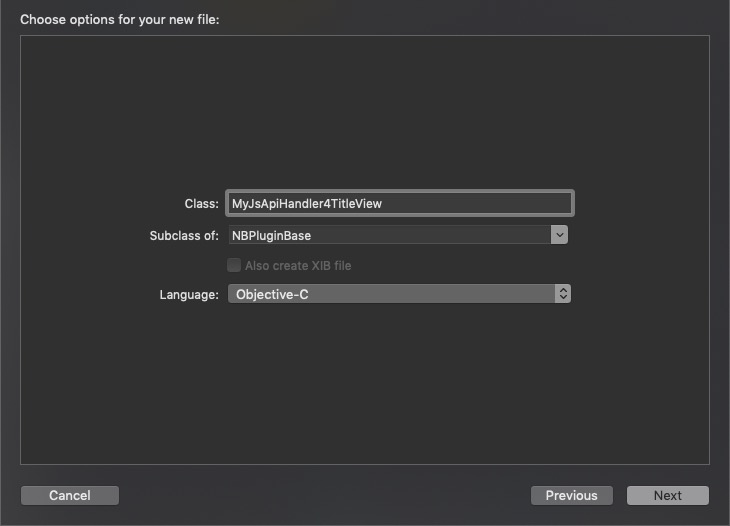
Step 2. Follow the steps shown in the figure.

Step 3. Follow the steps shown in the figure.
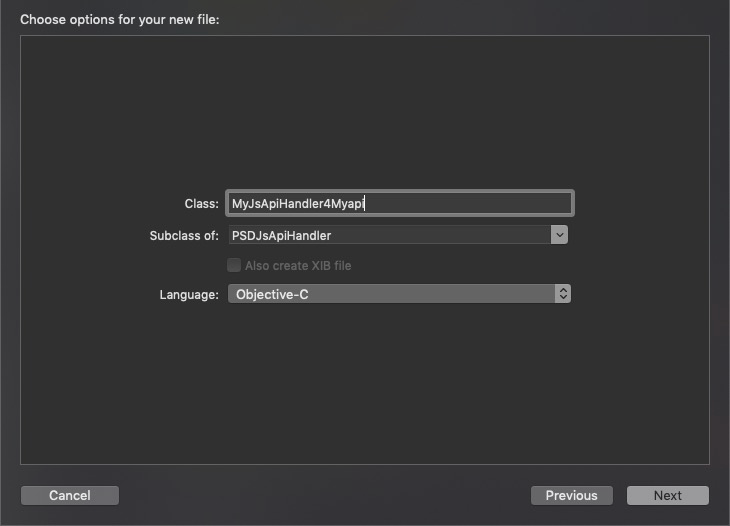
Step 4. Add the code.
 @implementation MyJsApiHandler4Myapi

 - (void)handler:(NSDictionary *)data context:(PSDContext *)context callback:(PSDJsApiResponseCallbackBlock)callback
 {
     [super handler:data context:context callback:callback];

     NSString *userId = @"admin";
     if ([userId length] > 0) {
         callback(@{@"success":@YES, @"userId":userId});
     } else {
         callback(@{@"success":@NO});
     }
 }

 @end
Inject your custom JSAPI into the Nebula container.
In the
MyH5Application/MyH5Application/Resourcesdirectory, create a new bundle.Follow the steps shown in the figure.
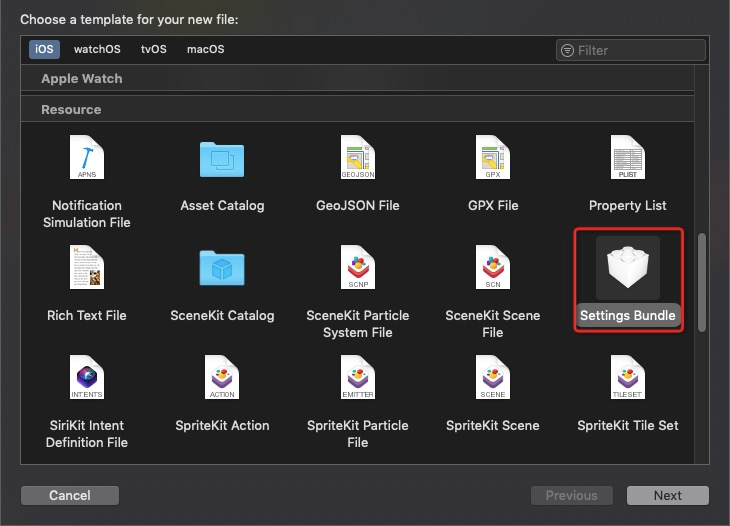
Rename the bundle to
CustomJsApi.bundleand clear its content.In the
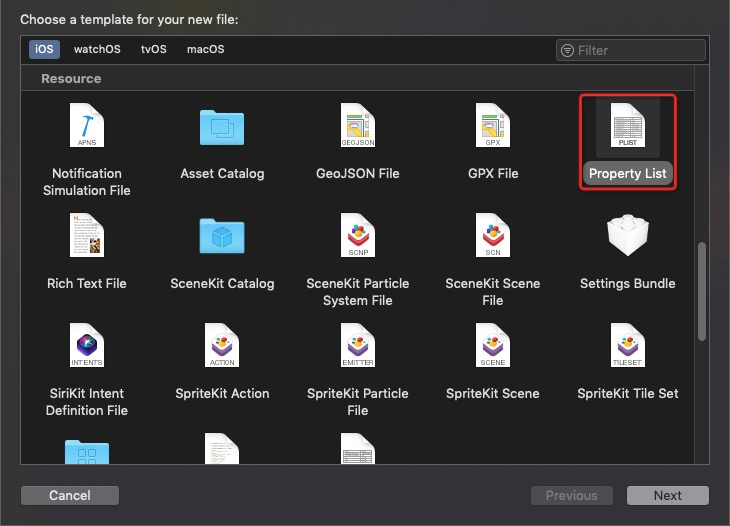
MyH5Application/MyH5Application/Resourcesdirectory, create a plist file and rename it toPoseidon-UserDefine-Extra-Config.plist. In the `JsApis` array of this file, register theJSAPIclass that you created in the previous step. The registered JSAPI is a dictionary. TheJSAPIkey specifies the name of the JSAPI interface to be called from the H5 page, which ismyapi. Thenamekey specifies the name of the class that you created, which isMyJsApiHandler4Myapi. Drag the plist file intoCustomJsApi.bundle.
Register the path of the custom JSAPI with the container. In the
MyH5Application/MPaaS/Targets/MyH5Application/APMobileFramework/DTFrameworkInterface+MyH5Application.mfile, use the following interface to initialize the container. This method injects the custom class into the container using the plist file. You must pass the custom path, which is anNSString, to the initialization method.- (void)application:(UIApplication *)application beforeDidFinishLaunchingWithOptions:(NSDictionary *)launchOptions { // [MPNebulaAdapterInterface initNebula]; NSString *pluginsJsapisPath = [[NSBundle mainBundle] pathForResource:[NSString stringWithFormat:@"CustomJsApi.bundle/Poseidon-UserDefine-Extra-Config.plist"] ofType:nil]; [MPNebulaAdapterInterface initNebulaWithCustomPresetApplistPath:@"" customPresetAppPackagePath:@""customPluginsJsapisPath:pluginsJsapisPath]; }In the
MyH5Application/Sources/DemoViewController.mfile, add code to create a new button named `button2`.UIButton *button2 = [UIButton buttonWithType:UIButtonTypeCustom]; button2.frame = CGRectOffset(button1.frame, 0, 80); button2.backgroundColor = [UIColor blueColor]; [button2 setTitle:@"Call custom JSAPI from frontend" forState:UIControlStateNormal]; [button2 addTarget:self action:@selector(openCusJsApi) forControlEvents:UIControlEventTouchUpInside]; [self.view addSubview:button2];In the
MyH5Application/Sources/DemoViewController.mfile, add code to defineopenCusJsApi. The implementation code is as follows:- (void)openCusJsApi { [[MPNebulaAdapterInterface shareInstance] startH5ViewControllerWithParams:@{@"url":@"https://mcube-prod.oss-cn-hangzhou.aliyuncs.com/570DA89281533-default/80000001/1.0.XX.XX_all/nebula/fallback/custom_jsapi.html"}]; }NoteYou can go to the trial frontend page to test the feature of calling a custom JSAPI. On this frontend page, you can call the custom JSAPI using the following method. The following code provides an example.
AlipayJSBridge.call('myapi', { param1: 'JsParam1', param2: 'JsParam2' }, function (result) { alert(JSON.stringify(result)); });Compile the project and install the application on a mobile phone. After you open the application, the interface appears as shown in the following figure.
Click the Call custom JSAPI from frontend button to open the frontend page. Then, click the Custom JSAPI button to open a new frontend page that also contains a Custom JSAPI button. Click this Custom JSAPI button. An alert dialog with no title appears. The content of the dialog shows the parameters that were passed from the frontend and processed by the custom API. You have now learned how to call a custom JSAPI.

Customize the TitleBar of an H5 page
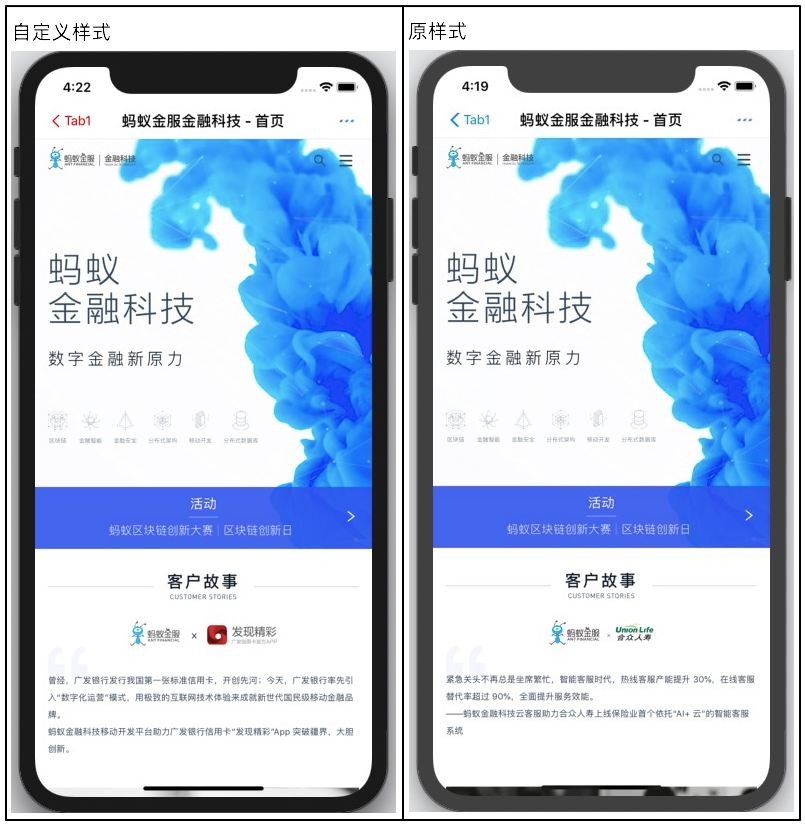
By default, the H5 page navigation bar has a white background, black text, and blue buttons. You can customize a plugin to modify the navigation bar style.
For a video tutorial, see Tutorials.
Create a plugin class.
Follow the steps shown in the figure.
Follow the steps shown in the figure.
Follow the steps shown in the figure.
Add the code.
- (void)pluginDidLoad { self.scope = kPSDScope_Scene; // -- Back area [self.target addEventListener:kNBEvent_Scene_NavigationItem_Left_Back_Create_Before withListener:self useCapture:NO]; [super pluginDidLoad]; } - (void)handleEvent:(PSDEvent *)event { [super handleEvent:event]; if ([kNBEvent_Scene_NavigationItem_Left_Back_Create_Before isEqualToString:event.eventType]) { // Modify the style based on the default back button NSArray *leftBarButtonItems = event.context.currentViewController.navigationItem.leftBarButtonItems; if ([leftBarButtonItems count] == 1) { if (leftBarButtonItems[0] && [leftBarButtonItems[0] isKindOfClass:[AUBarButtonItem class]]) { // Modify the color of the back arrow and text based on the default back button AUBarButtonItem *backItem = leftBarButtonItems[0]; backItem.backButtonColor = [UIColor redColor]; backItem.titleColor = [UIColor redColor]; } } [event preventDefault]; [event stopPropagation]; } } - (int)priority { return PSDPluginPriority_High; }
Inject your custom plugin into the Nebula container. Open the
Poseidon-UserDefine-Extra-Config.plistfile. In the `Plugins` array, register theMPJsApiHandler4TitleViewclass that you created in the previous step. The registered plugin is a dictionary. Thenamekey specifies the class name that you created,MyJsApiHandler4TitleView. Thescopekey indicates that the processing scope is the page (scene).Register the path of the custom plugin with the container. In the
MyH5Application/MPaaS/Targets/MyH5Application/APMobileFramework/DTFrameworkInterface+MyH5Application.mfile, use the following interface to initialize the container. This method injects the custom plugin class into the container using the plist file.NoteIf you completed the registration when you called the custom JSAPI in the previous section, you can skip this step.
 - (void)application:(UIApplication *)application beforeDidFinishLaunchingWithOptions:(NSDictionary *)launchOptions
 {
 //        [MPNebulaAdapterInterface initNebula];
     NSString *pluginsJsapisPath = [[NSBundle mainBundle] pathForResource:[NSString stringWithFormat:@"CustomJsApi.bundle/Poseidon-UserDefine-Extra-Config.plist"] ofType:nil];
     [MPNebulaAdapterInterface initNebulaWithCustomPresetApplistPath:@"" customPresetAppPackagePath:@""customPluginsJsapisPath:pluginsJsapisPath];

 }
In the
MyH5Application/Sources/DemoViewController.mfile, add code to create a new button named `button3`.UIButton *button3 = [UIButton buttonWithType:UIButtonTypeCustom]; button3.frame = CGRectOffset(button2.frame, 0, 80); button3.backgroundColor = [UIColor blueColor]; [button3 setTitle:@"Custom Navigation Bar" forState:UIControlStateNormal]; [button3 addTarget:self action:@selector(customNavigatorBar) forControlEvents:UIControlEventTouchUpInside]; [self.view addSubview:button3];In the
MyH5Application/Sources/DemoViewController.mfile, add code to definecustomNavigatorBar. The implementation code is as follows.- (void)customNavigatorBar { [[MPNebulaAdapterInterface shareInstance] startH5ViewControllerWithParams:@{@"url":@"https://tech.antfin.com"}]; }Compile the project and install the application on a mobile phone. After you open the application, the interface appears as shown in the following figure.
Click the Custom Navigation Bar button to open the Ant Financial Technology homepage. The style of the back button is now adjusted based on your customizations. You have now learned how to customize the navigation bar.