Create an application that displays a Toast message when a button is clicked, and generate a signed APK.
The process consists of four steps:
If you already have a signed native Android project, proceed to Create an application in the mPaaS console.
Prerequisites
Before creating a project, ensure that you have installed the mPaaS plugininstalled the mPaaS plugin.
Create a project
-
Open Android Studio. Click File > New > New Project.
-
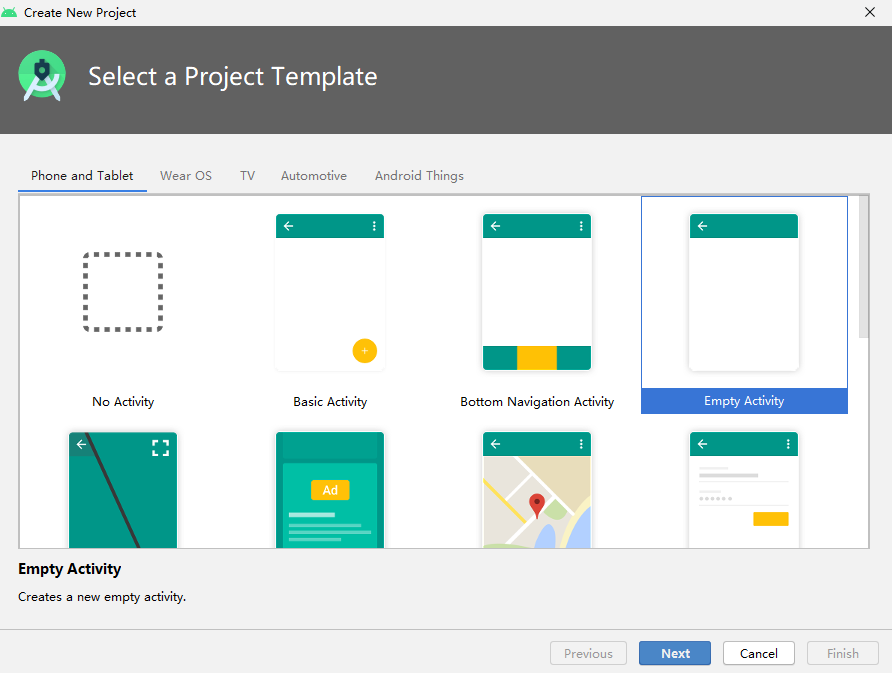
In the New Project window, select Empty Activity and click Next.
-
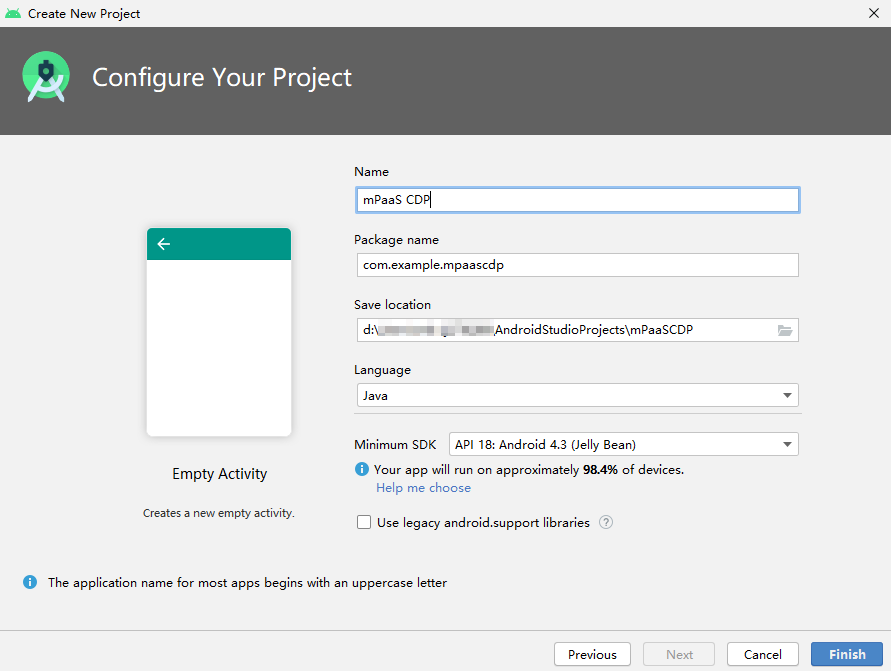
Set the Name, Package name, and Save location for the project. This tutorial uses mPaaS CDP as the project name and API 18: Android 4.3 (Jelly Bean) as the minimum SDK version.
-
Click Finish to create the project.
Write the code
-
Open the
activity_main.xmlfile and add a button to the layout.<Button android:id="@+id/button" android:layout_width="101dp" android:layout_height="50dp" android:layout_marginStart="142dp" android:layout_marginTop="153dp" android:layout_marginBottom="151dp" android:text="Button" app:layout_constraintStart_toStartOf="parent" app:layout_constraintTop_toTopOf="parent" />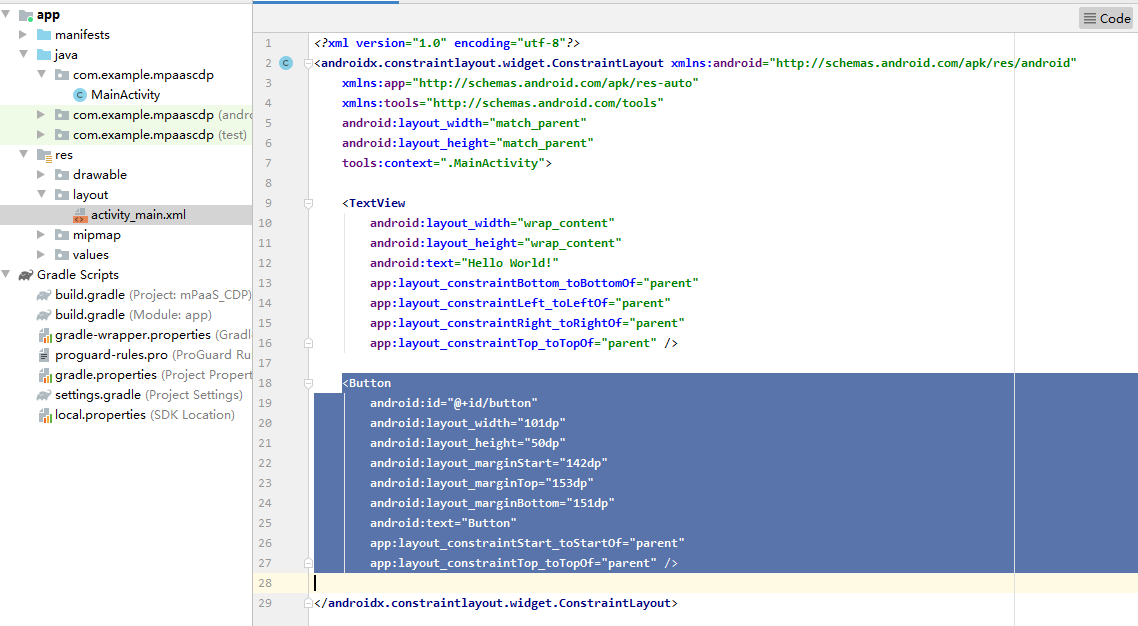
-
Open the
MainActivityclass and add a click event handler for the button.findViewById(R.id.button).setOnClickListener(new View.OnClickListener(){ @Override public void onClick(View v) { Toast.makeText(MainActivity.this, "Hello mPaaS!", Toast.LENGTH_SHORT).show(); } });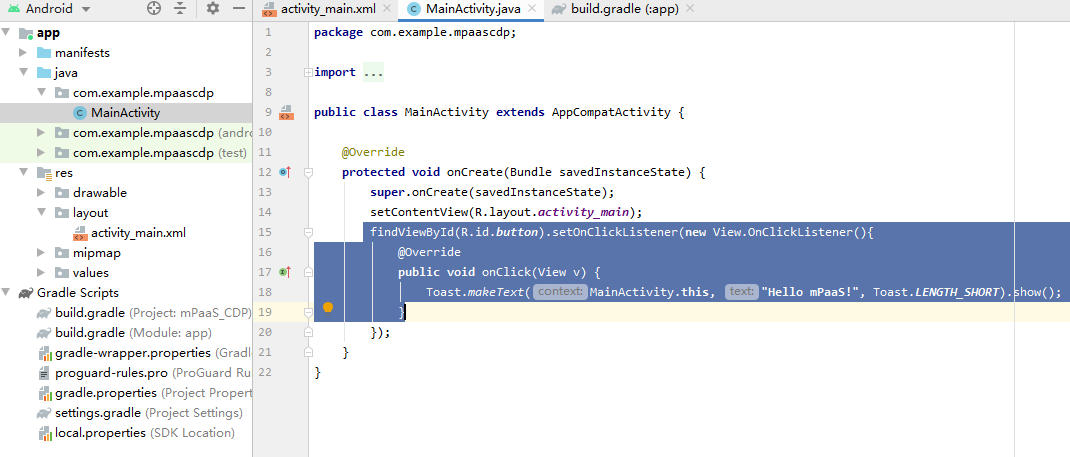
-
After the project compiles successfully, the code is ready.
Create a signature file and sign the project
A signed APK file is required to configure components in the mPaaS console.
To sign the project and generate the APK file:
-
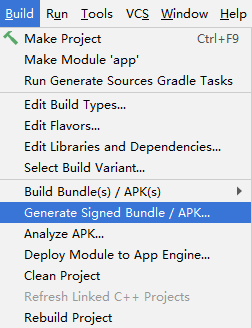
In Android Studio, click Build > Generate Signed Bundle / APK....
-
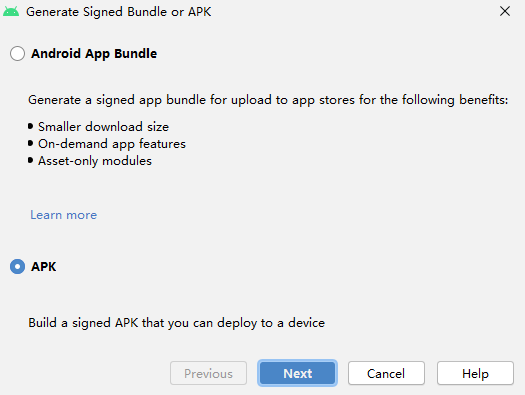
In the window that appears, select APK and click Next.

-
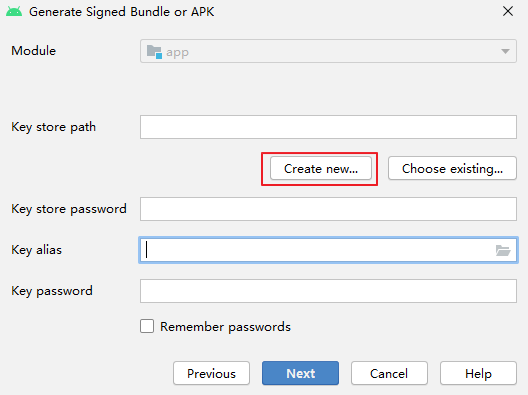
Click Create new.
-
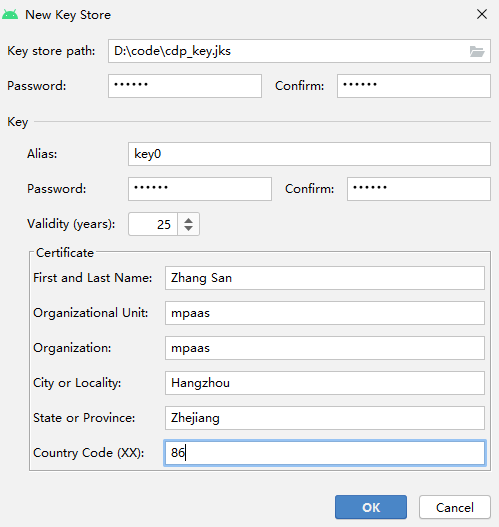
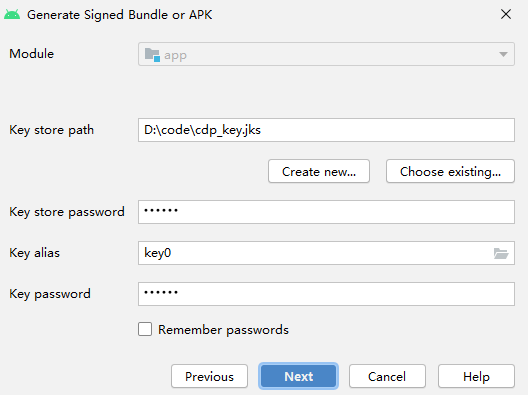
Enter the required information and click OK. The signature file is generated in the path that you specified for Key store path.
-
After the fields auto-fill, click Next to sign the project.
-
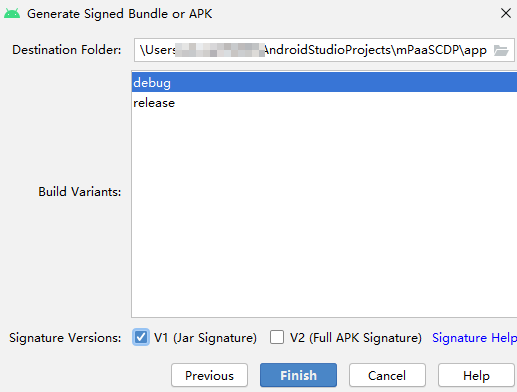
Select the desired Build Variant. You must select the V1 (Jar Signature) checkbox. You can also select the V2 (Full APK Signature) checkbox if needed.
-
Click Finish. After the build completes, the signed APK file is located in the
debugfolder (`~\mPaaSCDP\app\debug`). In this tutorial, the file is namedapp-debug.apk.
Install the application on a mobile phone
-
Connect your mobile phone to your computer and enable USB debugging mode on the phone.
-
In Android Studio, run the project to install the application on your phone.
-
Open the application on your phone. Click Button. A Toast message that says "Hello mPaaS!" appears at the bottom of the screen, confirming that the application works as expected.