QuickAudience supports custom task display for Marketing Automation (MA). This task management solution is deeply integrated with MA, providing multi-dimensional visualization dashboards and intelligent policy optimization. This feature helps businesses quickly configure marketing tasks, accurately execute marketing placements, and improve overall marketing efficiency and customer experience.
1. Scenarios
This feature solves the problem of rigid app content and low operational efficiency by enabling dynamic, personalized management of placements. You can configure multiple content sets for placements such as the primary feature grid, banner slots, and launch screens. You can target specific users with audience tags, such as gender, region, and behavior, or with custom rules for "new users" and "high-value users". This allows the same placement to show different content to different users. The system matches user profiles to content rules in real time. This reduces manual configuration effort. A data dashboard tracks impressions, clicks, and conversions to help you optimize your strategy. This greatly improves content relevance, user engagement, and conversion rates.
2. Instructions
2.1. Manage the material library
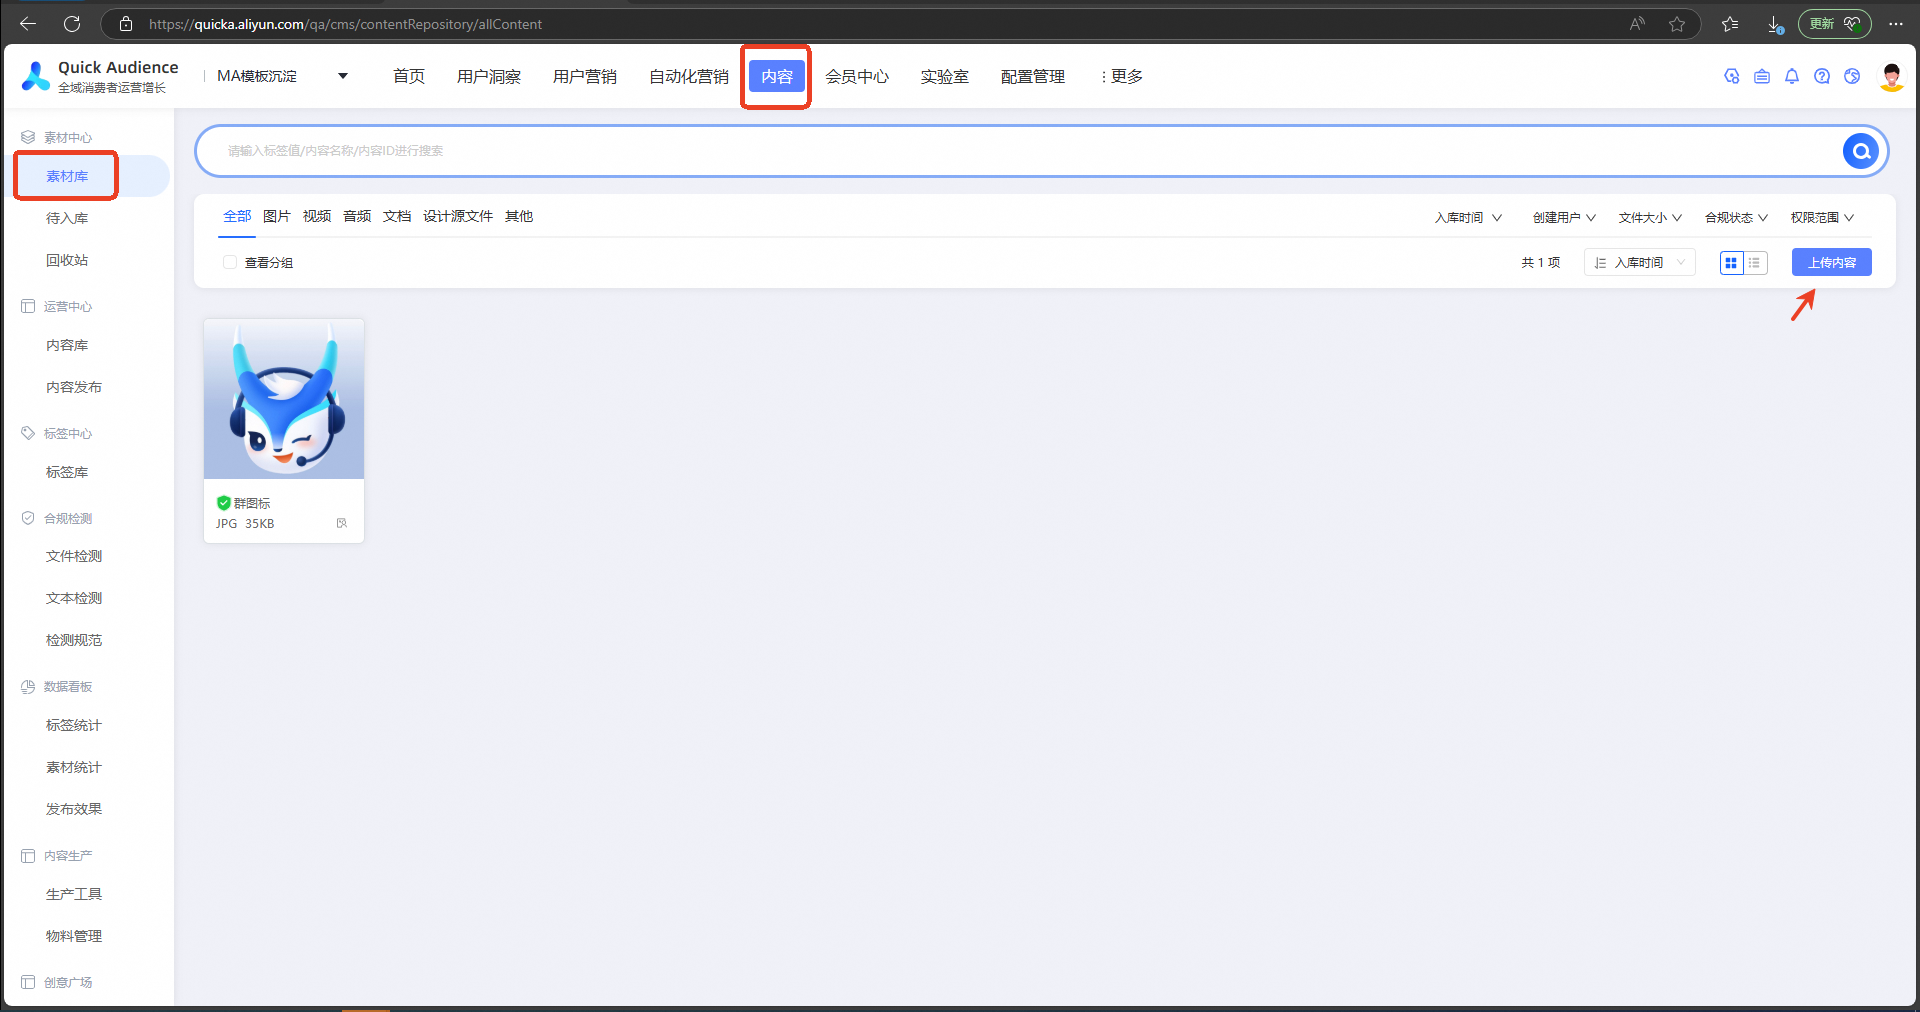
You must upload the content required for your marketing resource slots to the Material Library in advance. For more information, see Material Hub.
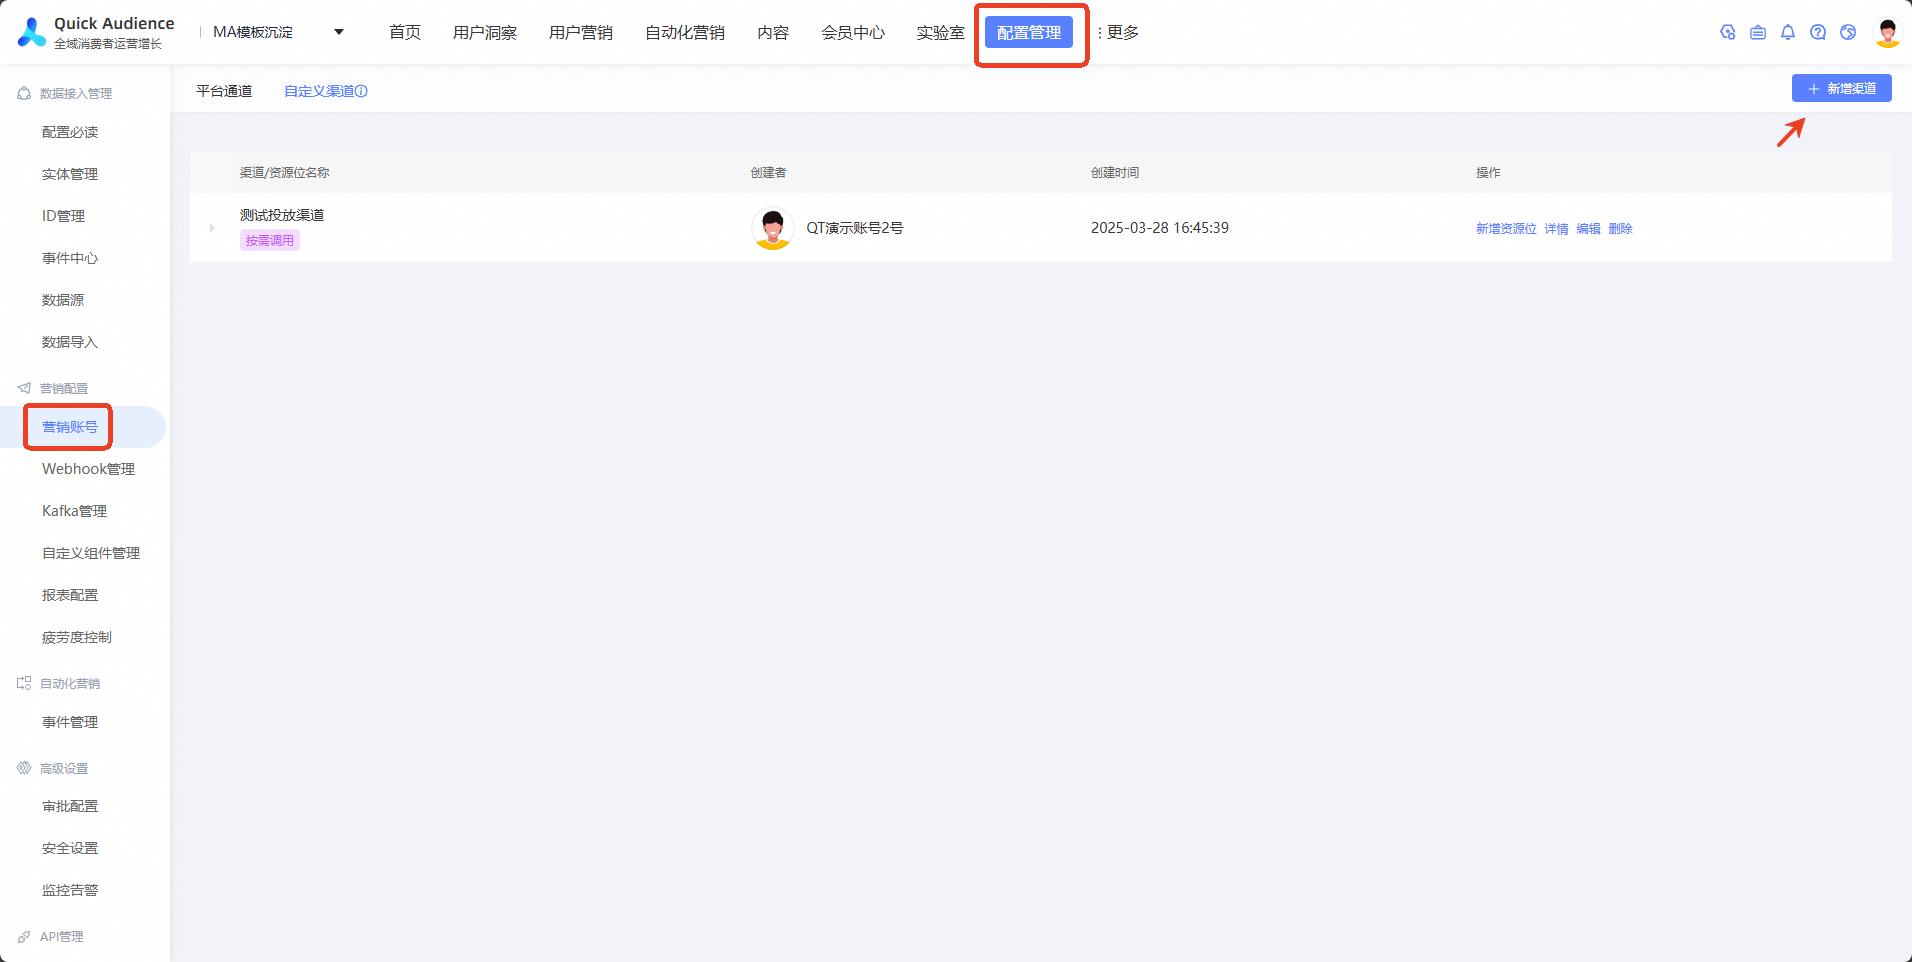
2.2. Create a custom channel
In QuickAudience, before you can publish custom content, you must first create a channel and a placement. Channels define the delivery method. Placements are defined by your business needs, such as a primary feature grid, a banner, or a recommendation slot. After you create a placement, you can select it when you publish content.
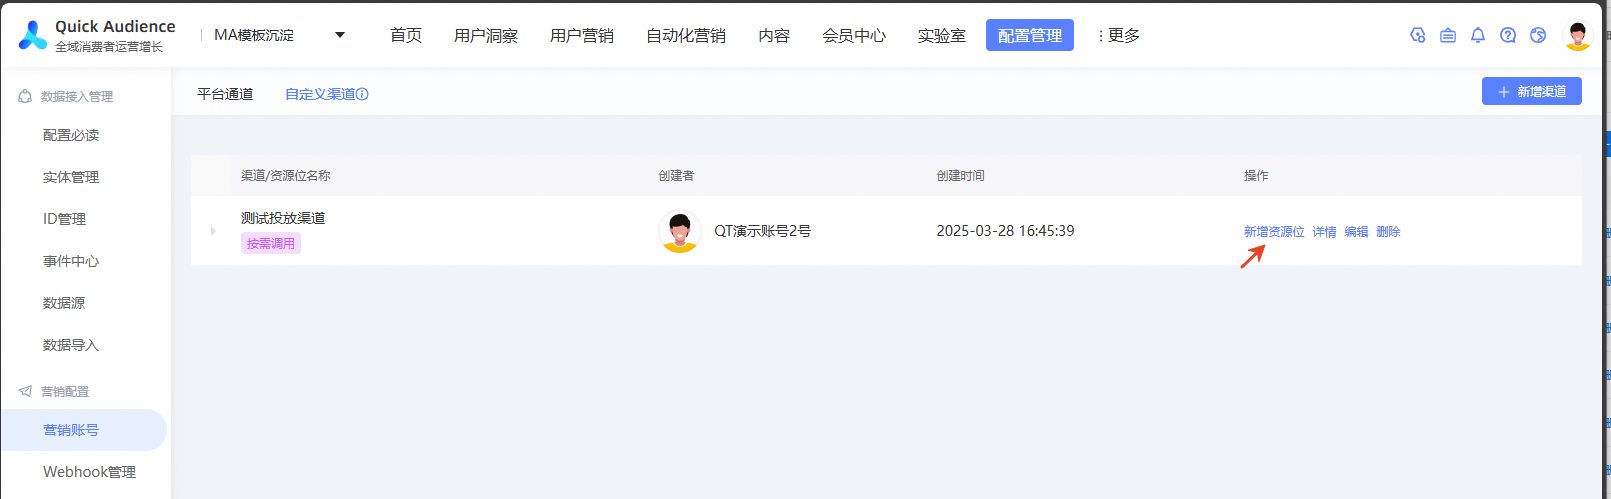
Go to Configuration Management > Marketing Account and click Add Channel.
In the dialog box, enter a channel name and select a push method.
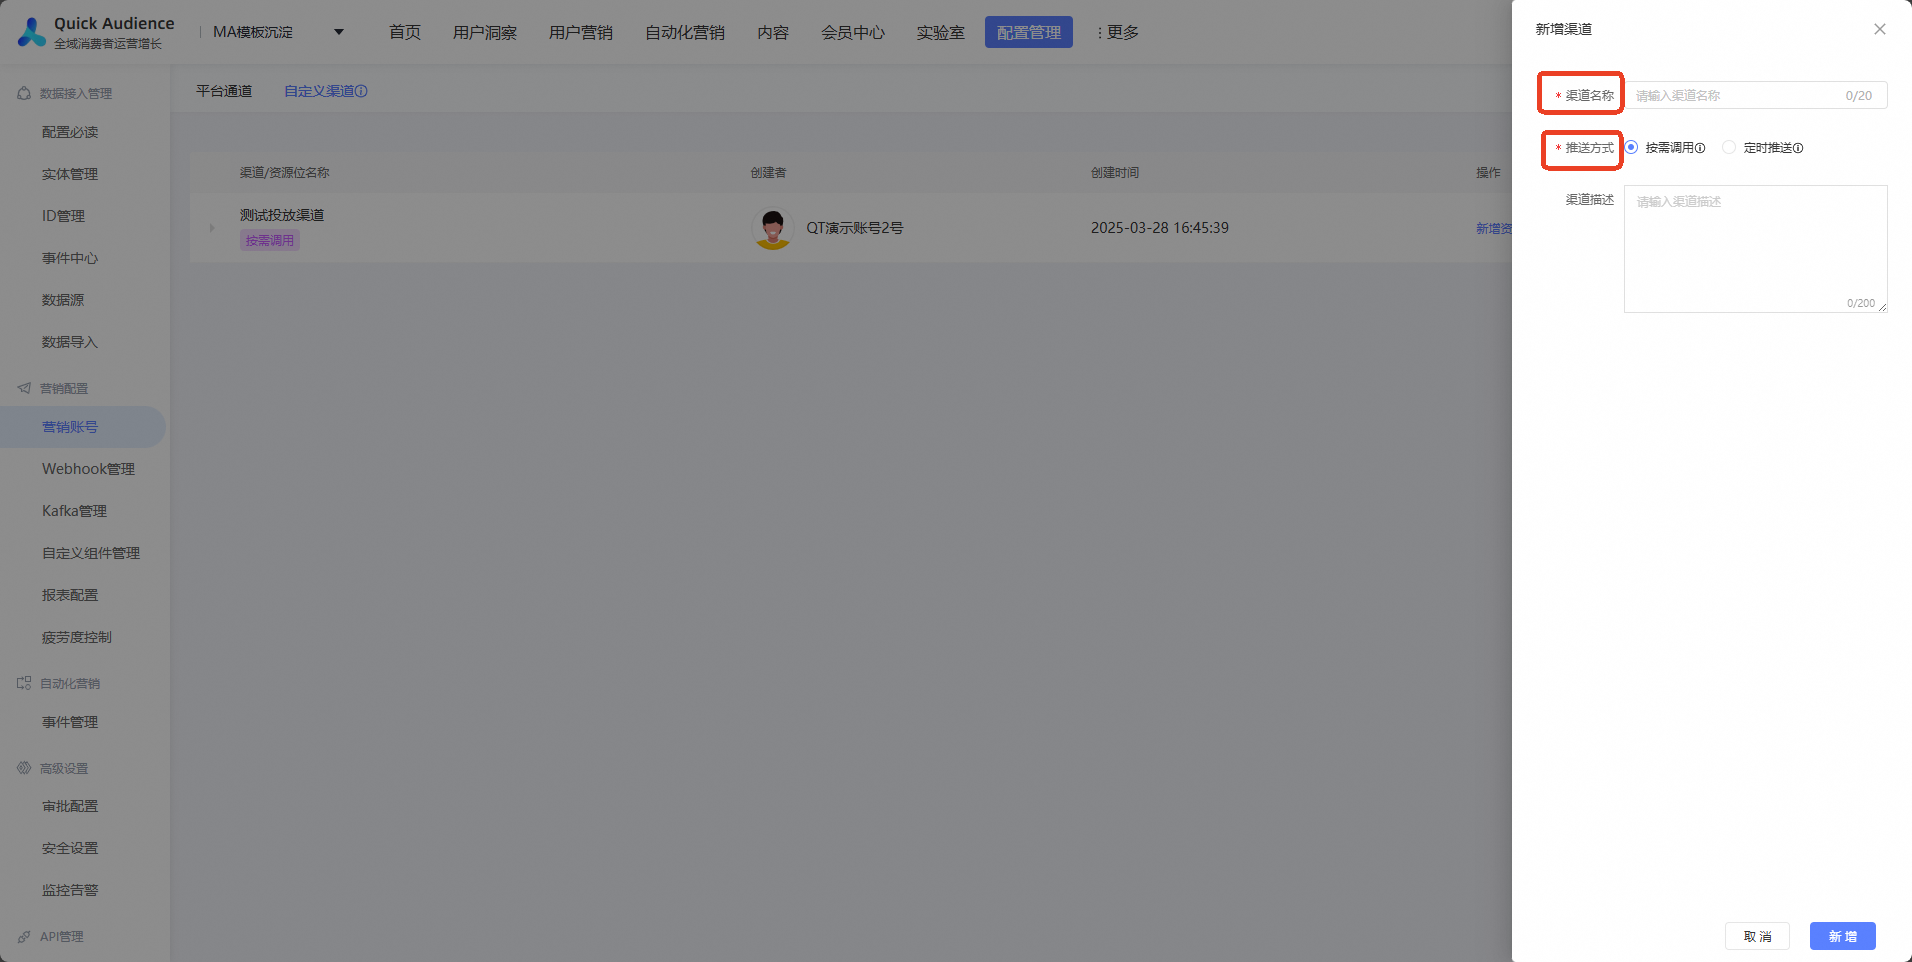

On-demand: Call the API at any time as needed. For more information, see the Call the Open API section below.
Scheduled push: Runs at a 30-minute polling interval. After a push is complete, a notification is sent to the specified webhook address. You can configure the polling interval in the deployment settings.
ImportantIf you select Scheduled push, you must enter a webhook address.
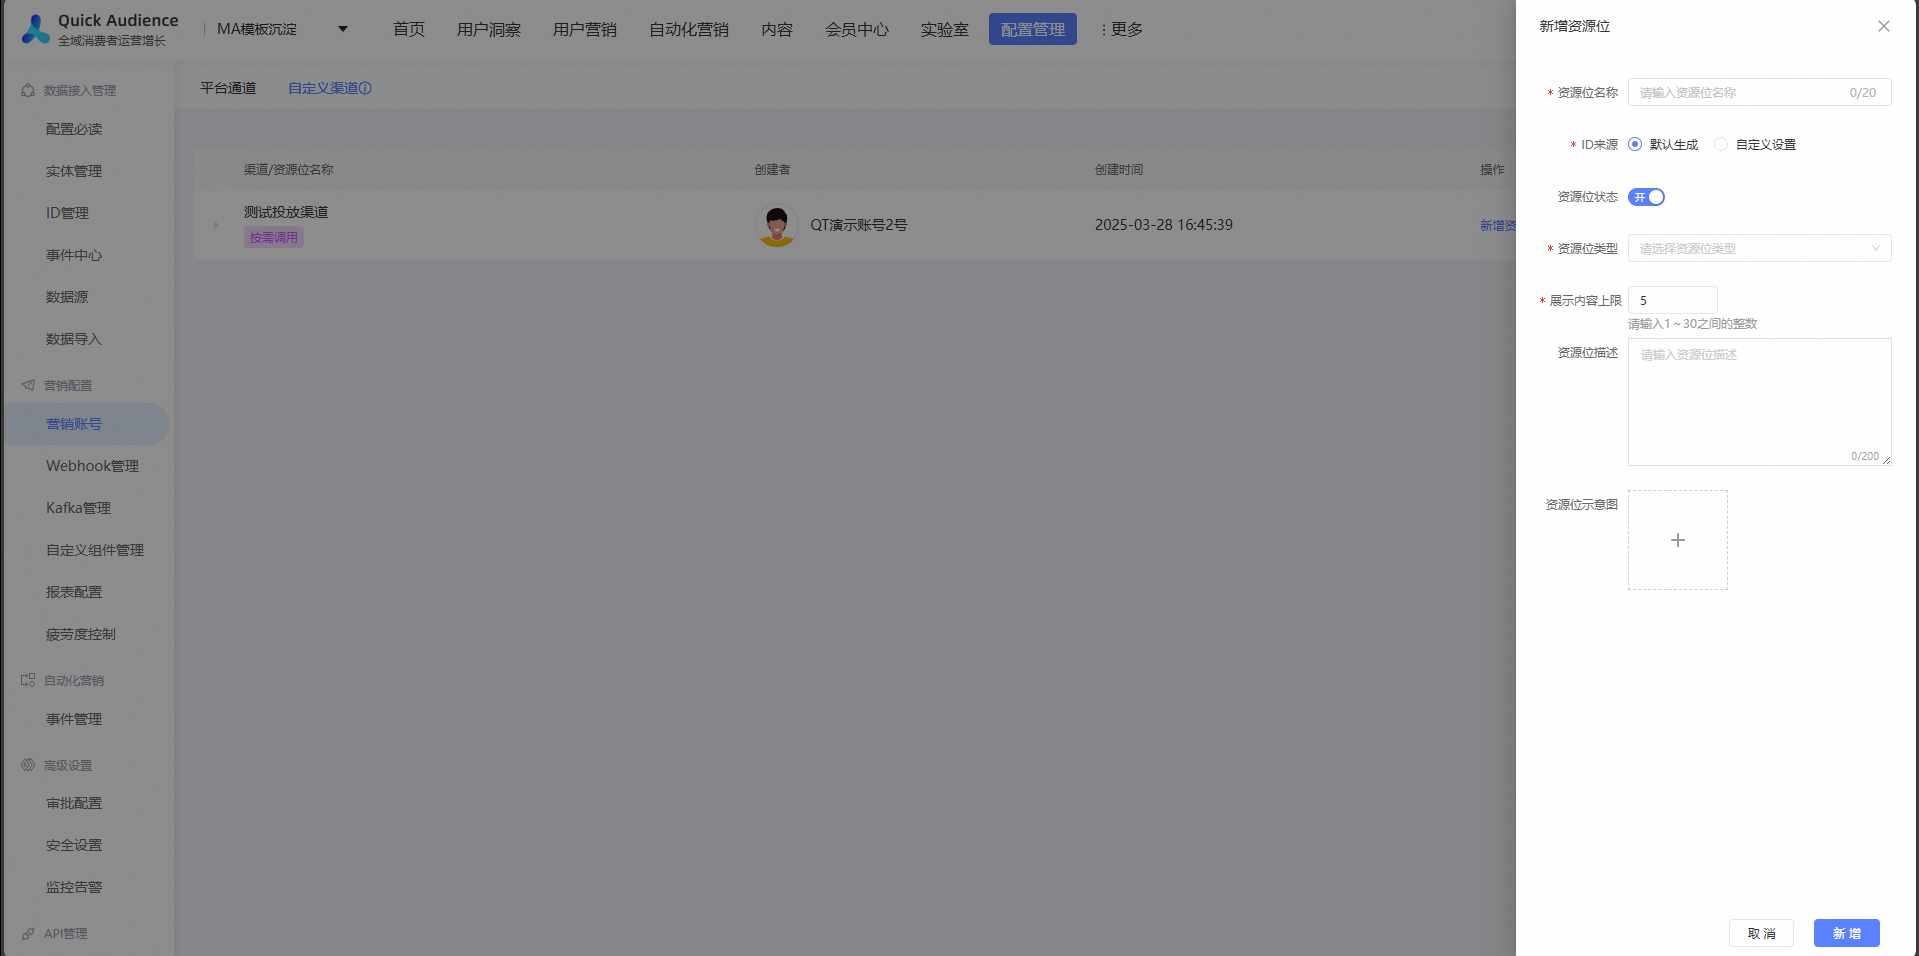
After you create the custom channel, click Add Placement.

ID Source: Select Default to have the QuickAudience system generate a random ID. Select Custom to enter your own ID.
ImportantThe placement ID is a required request parameter for the API operation.
Placement Status Switch: If this switch is disabled, the placement cannot be selected when you publish content. Existing tasks that use this placement, including recurring tasks, are not affected.
Resource Type: Select the type of content for the placement, such as Image, Text, Video, or Article.
The maximum number of content items to display must be an integer from 1 to 30.
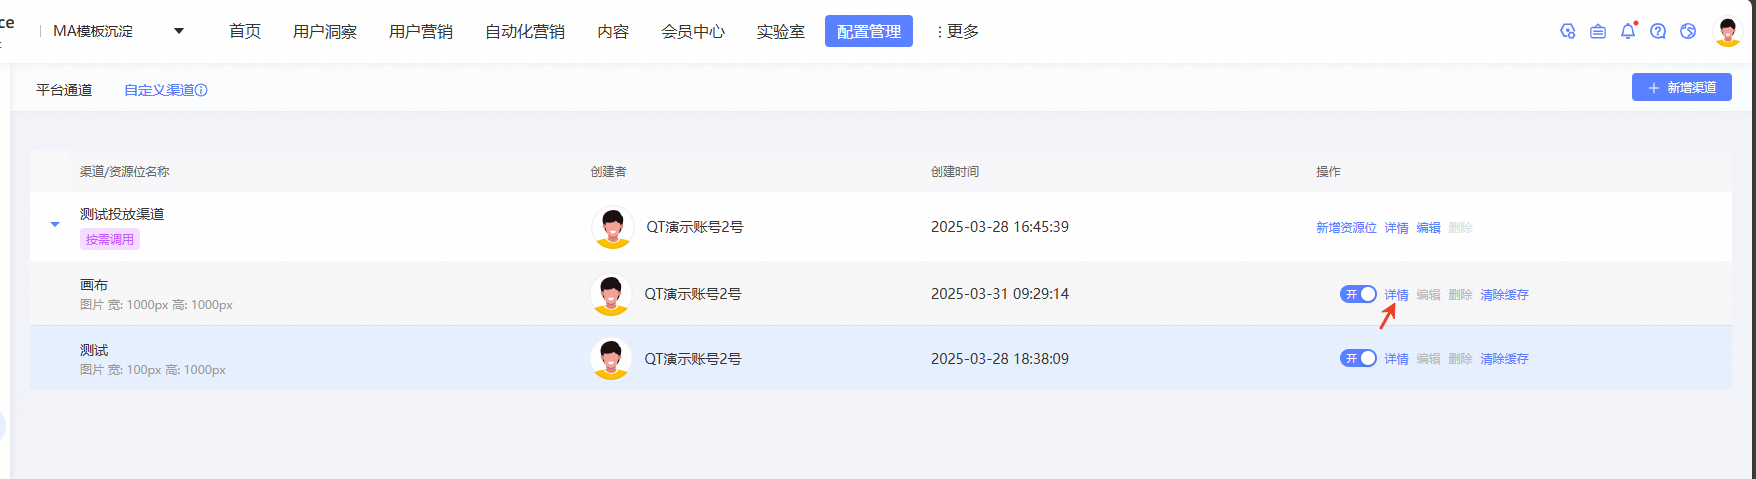
Placement Details
The placement details page shows information about the placement and a list of associated tasks. The task list includes the task name, delivery period, priority, publish type, task status, publish status, fatigue control plan, and creator. You can preview, unpublish, or manually push any task.
Preview: View task details.
Unpublish: After you unpublish a task, its content will no longer appear in the downstream placement. This action cannot be undone, so proceed with caution.
Manual Push: This operation is available only for the Scheduled push method and not for the On-demand method.

2.3. Create custom content
After you create the channel and placement, you can create a delivery task for a specific placement.
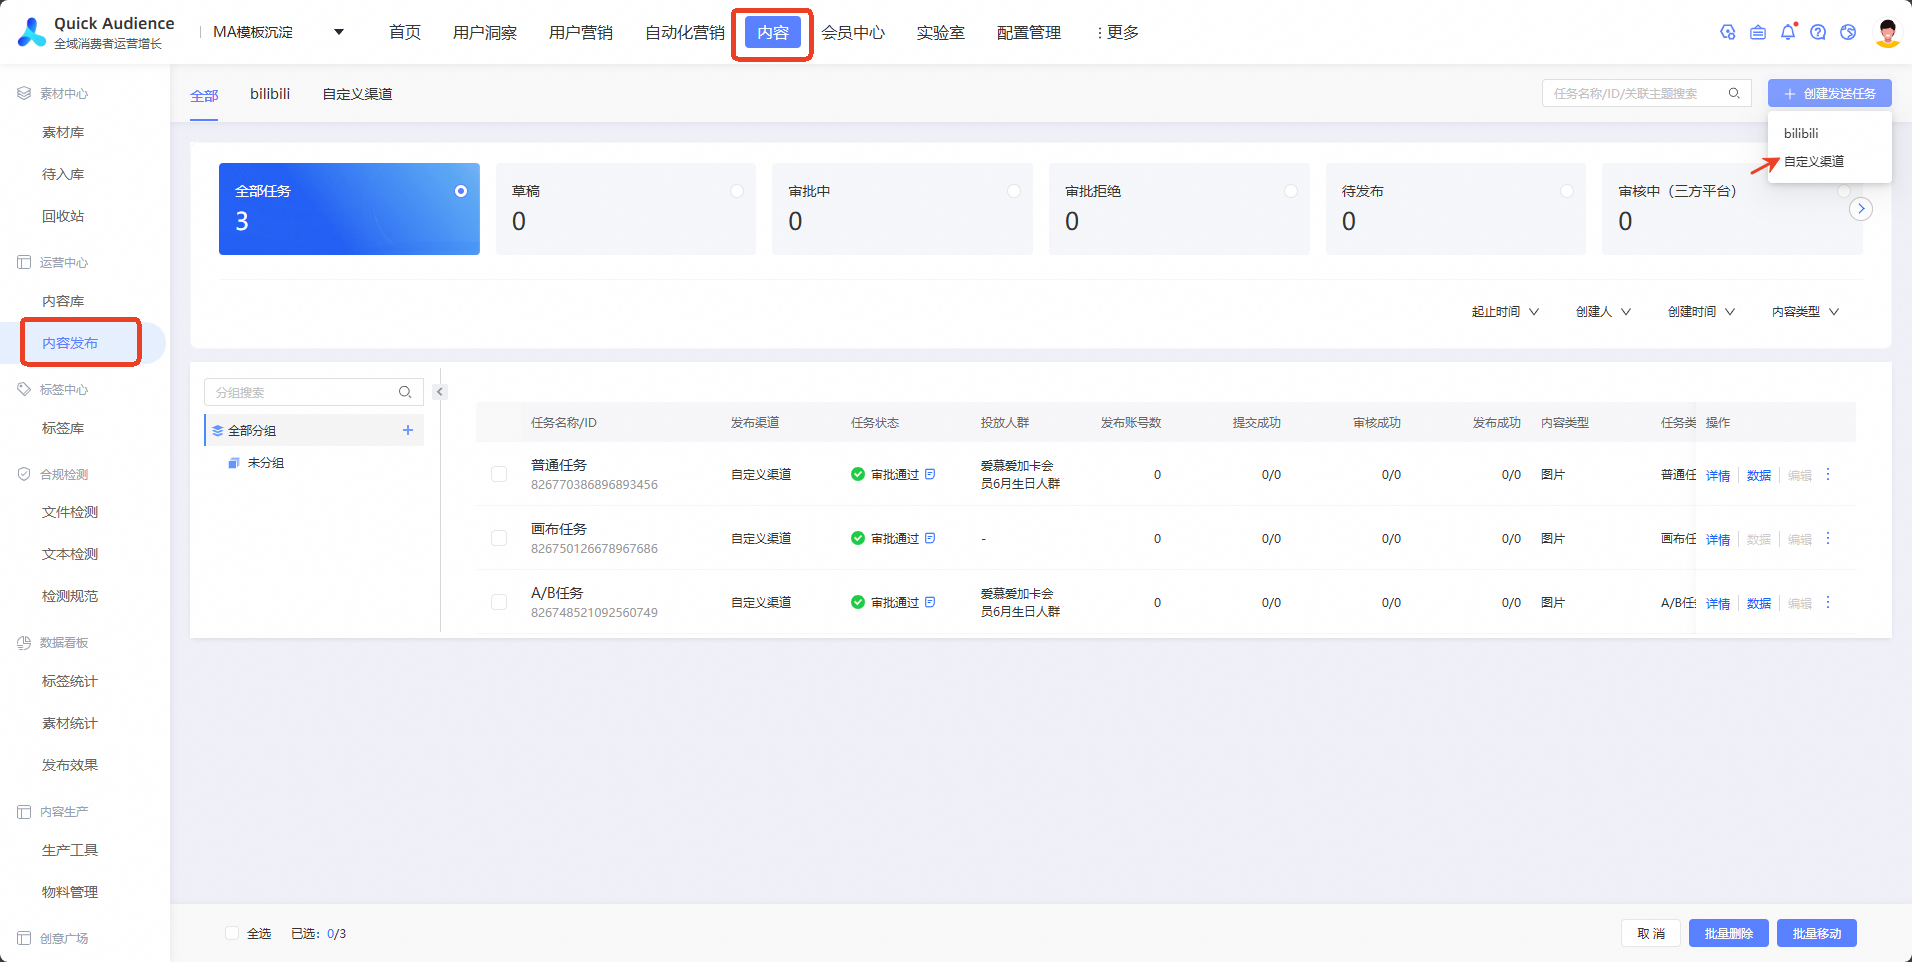
Task Type: Choose from Standard Task, A/B Task, or Canvas Task.
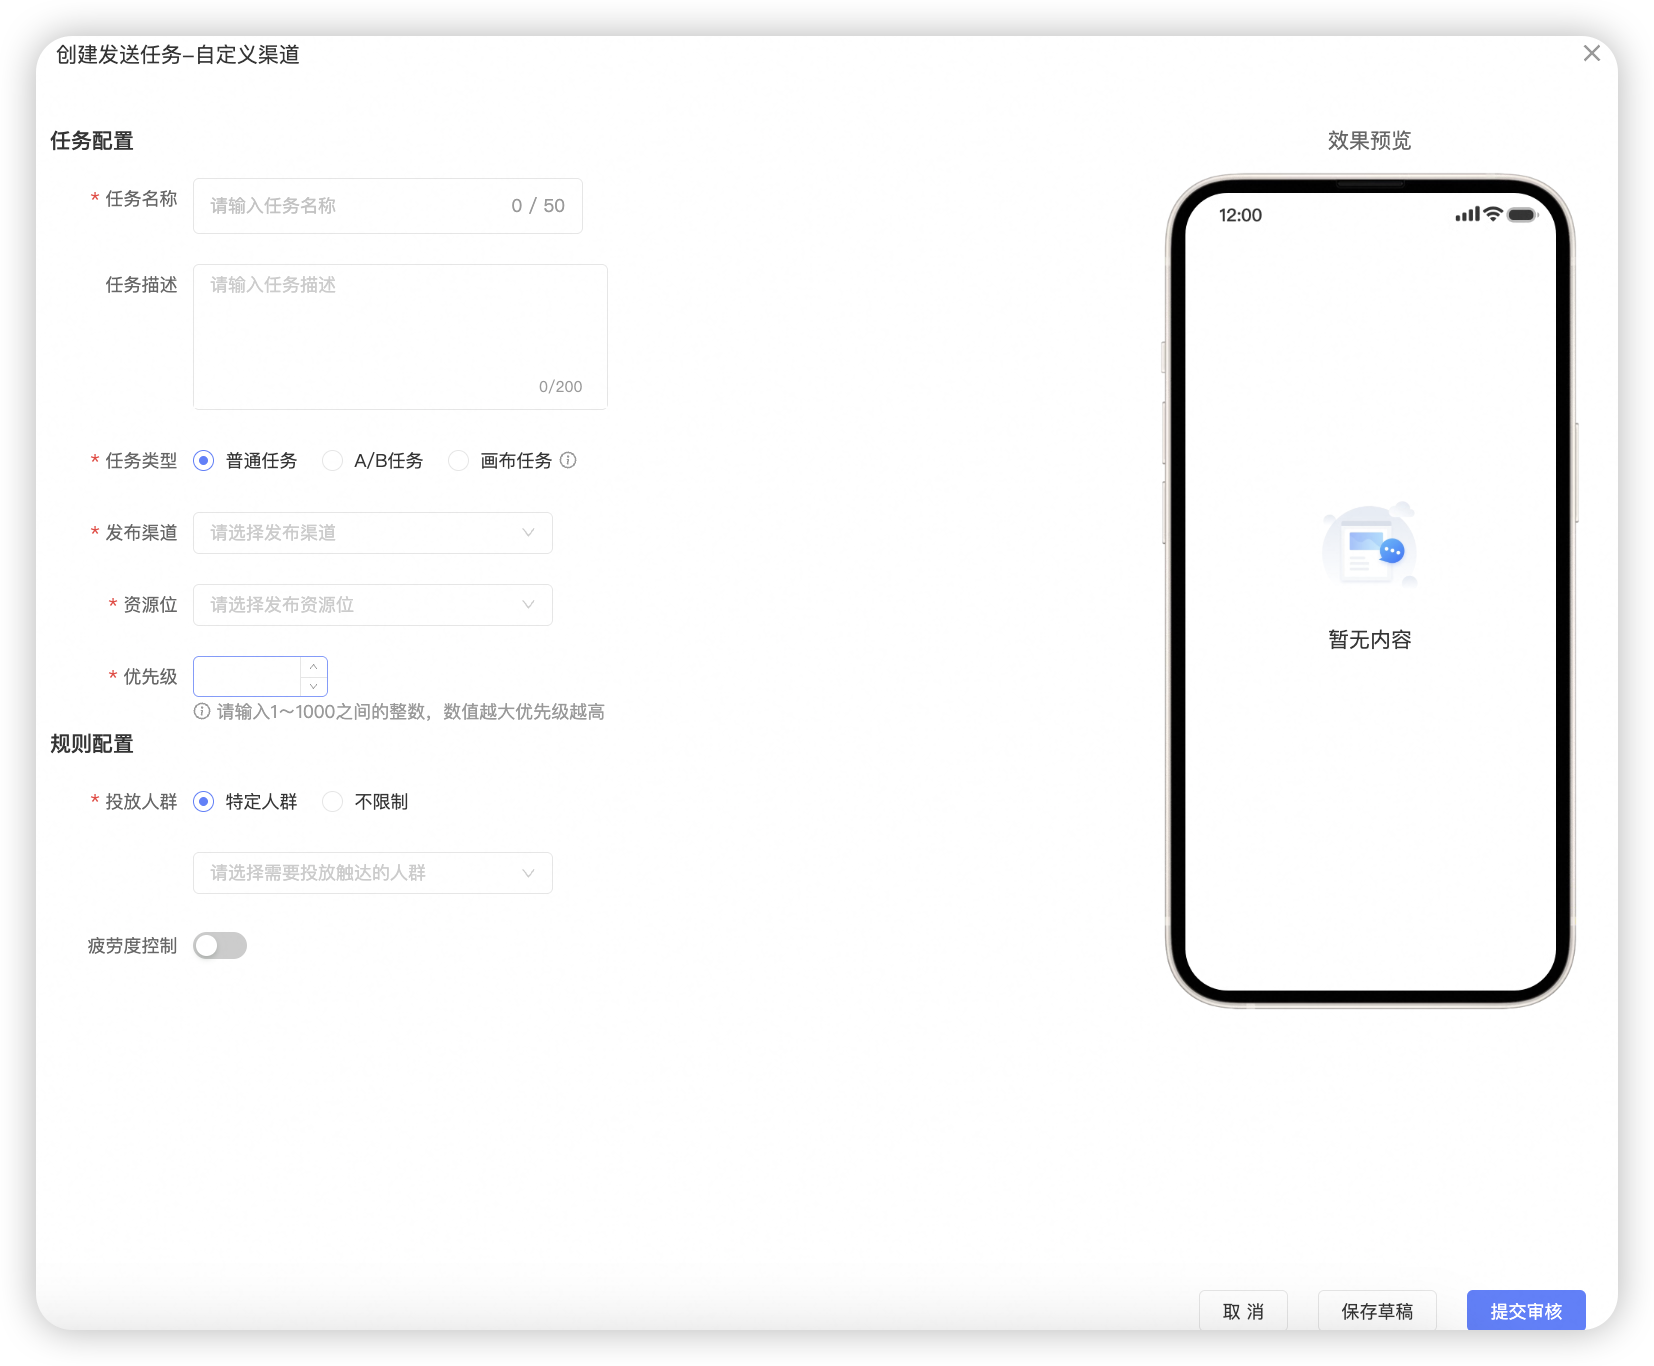
2.3.1. Create a standard task
Task Configuration
Publish Channel: Select the channel that contains the placement you want to manage.
Placement: Select the placement you want to manage.
Placement Details: Displays the placement ID, type, style, dimensions, and a summary of content already published to this placement. You can view these details to help you decide the priority of your new content relative to existing content.
Priority: Enter an integer from 1 to 1000. A higher number indicates a higher priority.
Delivery Period: Set the duration for the delivery. Options include Custom Time, One Year, Permanent, and Dynamic Period.
Content Configuration
Image/Video/Article Content: Upload the content you want to deliver to the placement.
Image/Video/Article Description: Enter a description for the image, video, or article.
Rule Configuration
Target Audience: Select the audience segment for this delivery and the audience ID as defined in your business system.
Fatigue Control: When enabled, you can set fatigue rules, such as hiding the content after it has been shown 5 times in 7 days.
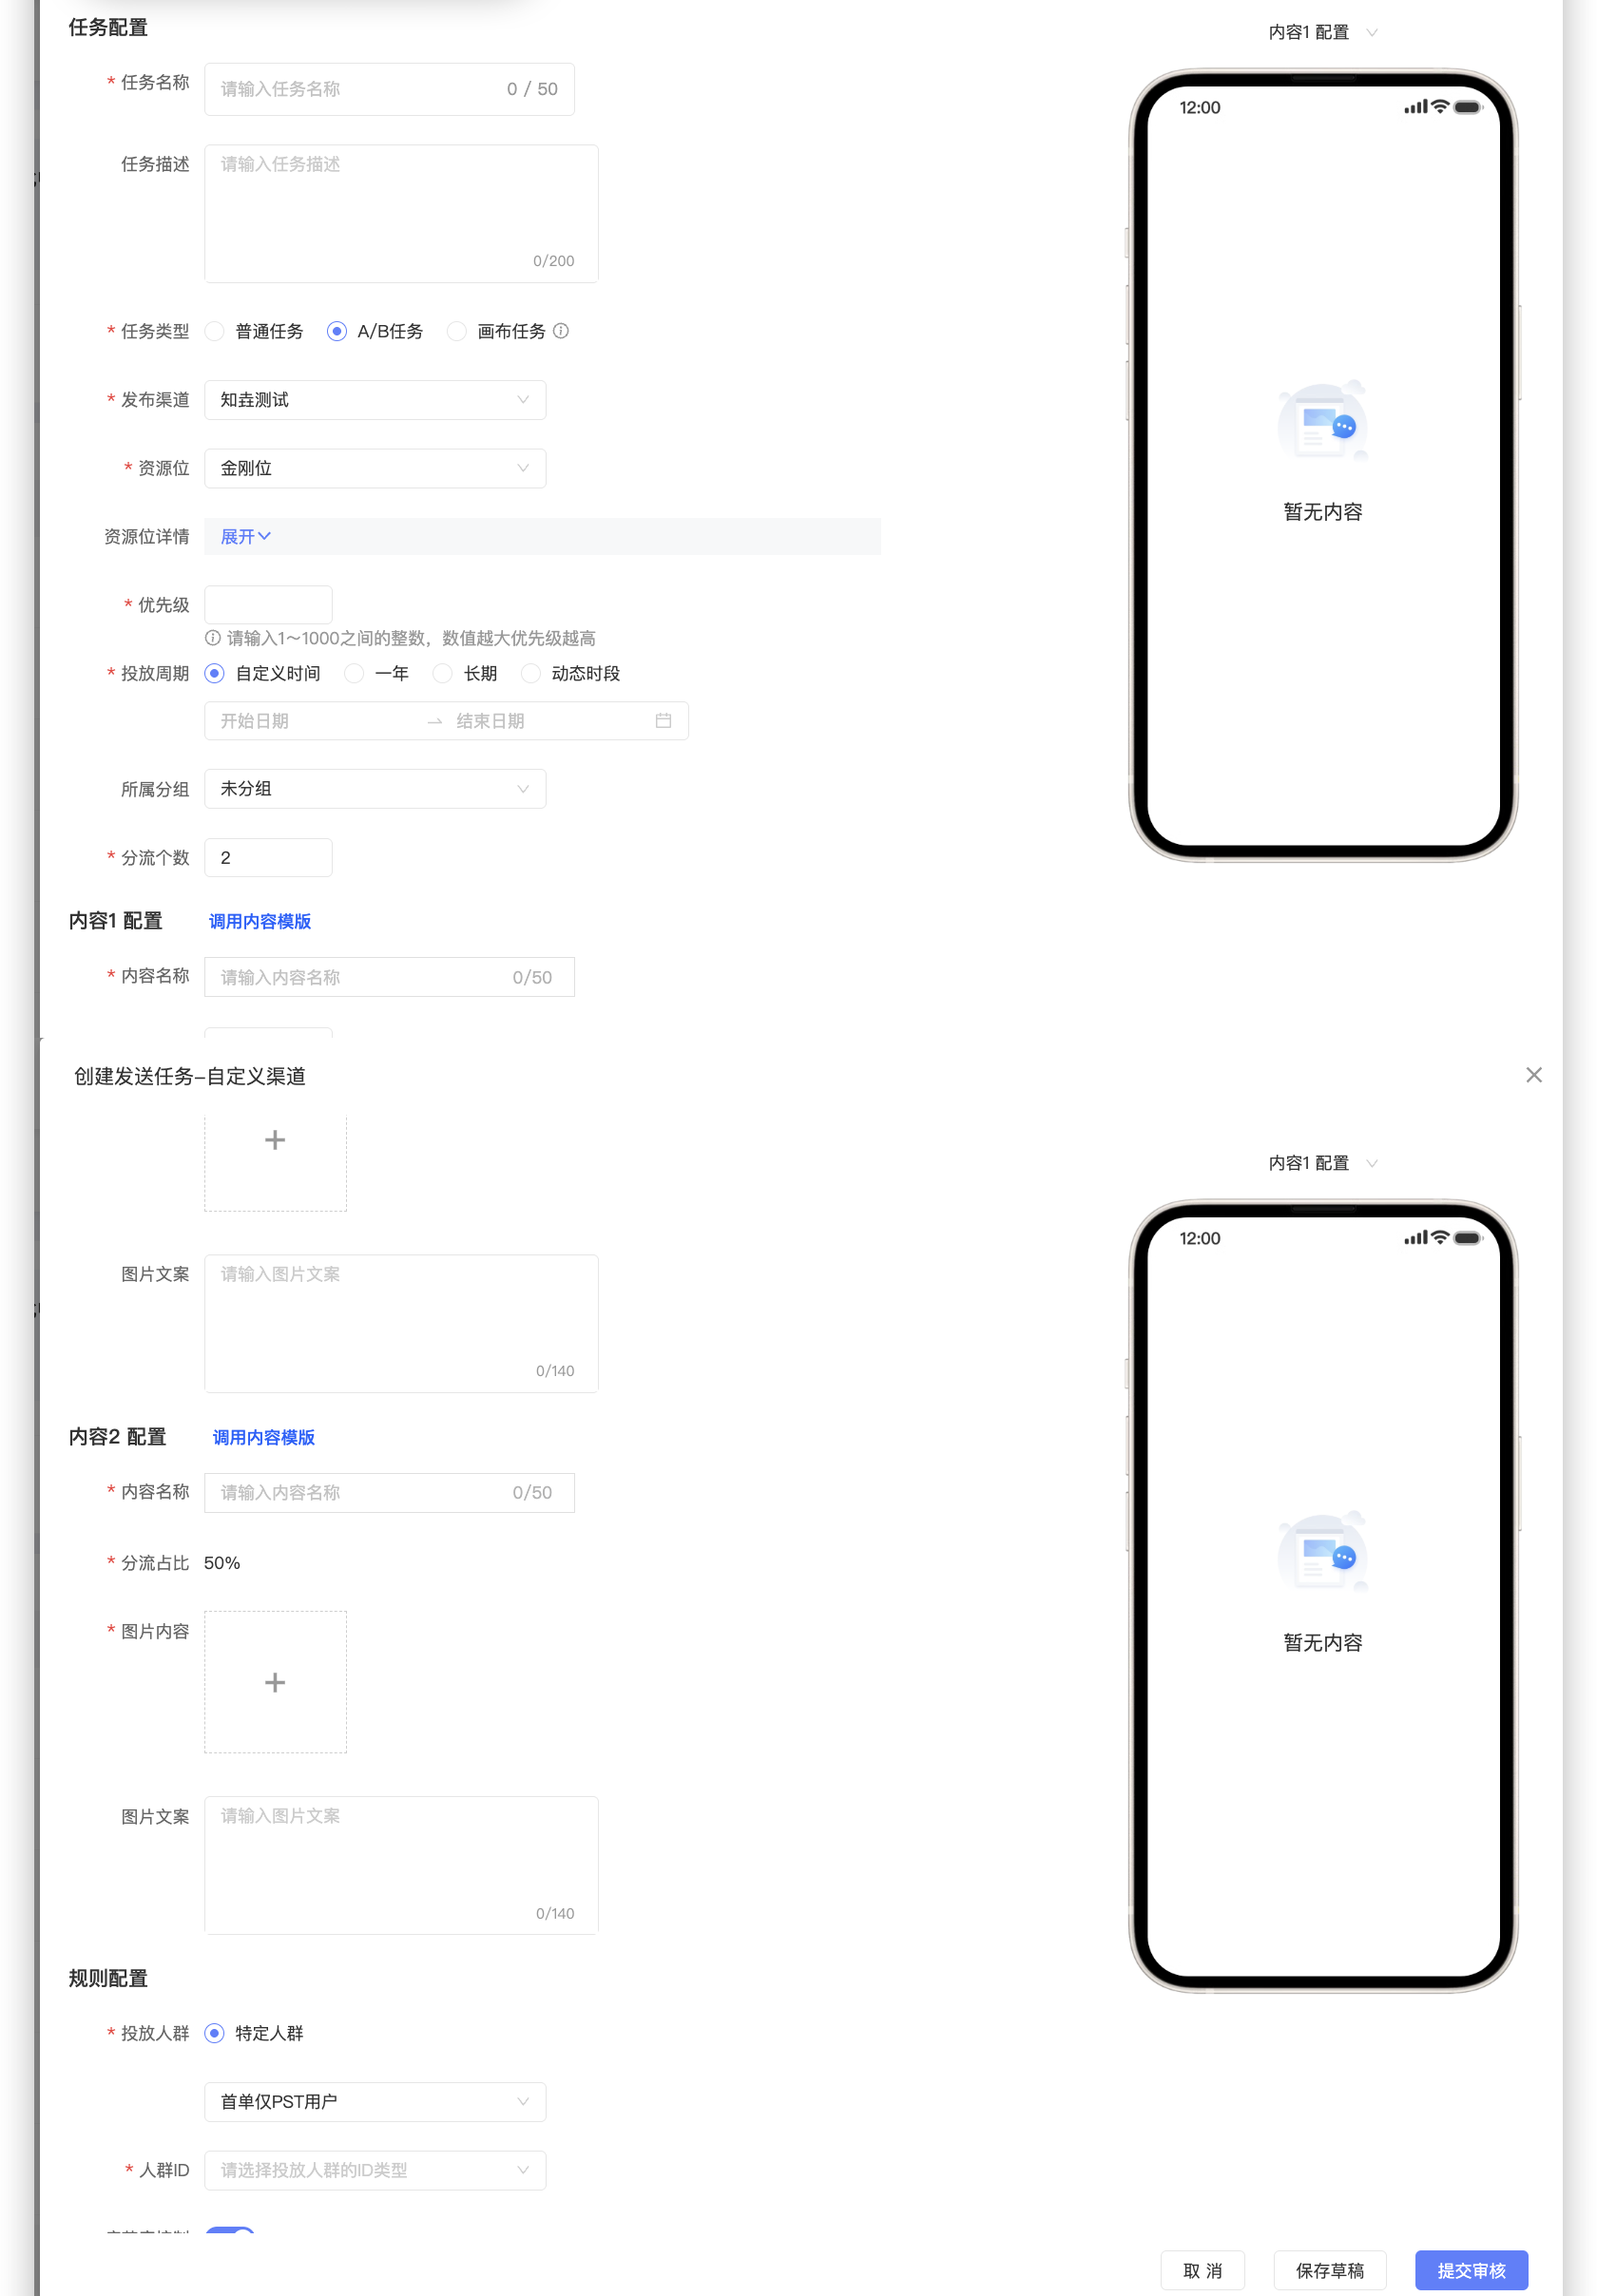
2.3.2. Create an A/B task
Task Configuration
Publish Channel: Select the channel that contains the placement you want to manage.
Placement: Select the placement you want to manage.
Placement Details: Displays the placement ID, type, style, dimensions, and a summary of content already published to this placement. You can view these details to help you decide the priority of your new content relative to existing content.
Priority: Enter an integer from 1 to 1000. A higher number indicates a higher priority.
Delivery Period: Set the duration for the delivery. Options include Custom Time, One Year, Permanent, and Dynamic Period.
Content 1 Configuration
Image/Video/Article Content: Upload the content you want to deliver to the placement.
Image/Video/Article Description: Enter a description for the image, video, or article.
Traffic Split: The percentage of the total audience that will be directed to Content 1.
Rule Configuration
Target Audience: Select the audience segment for this delivery and the audience ID as defined in your business system.
Fatigue Control: When enabled, you can set fatigue rules, such as hiding the content after it has been shown 5 times in 7 days.
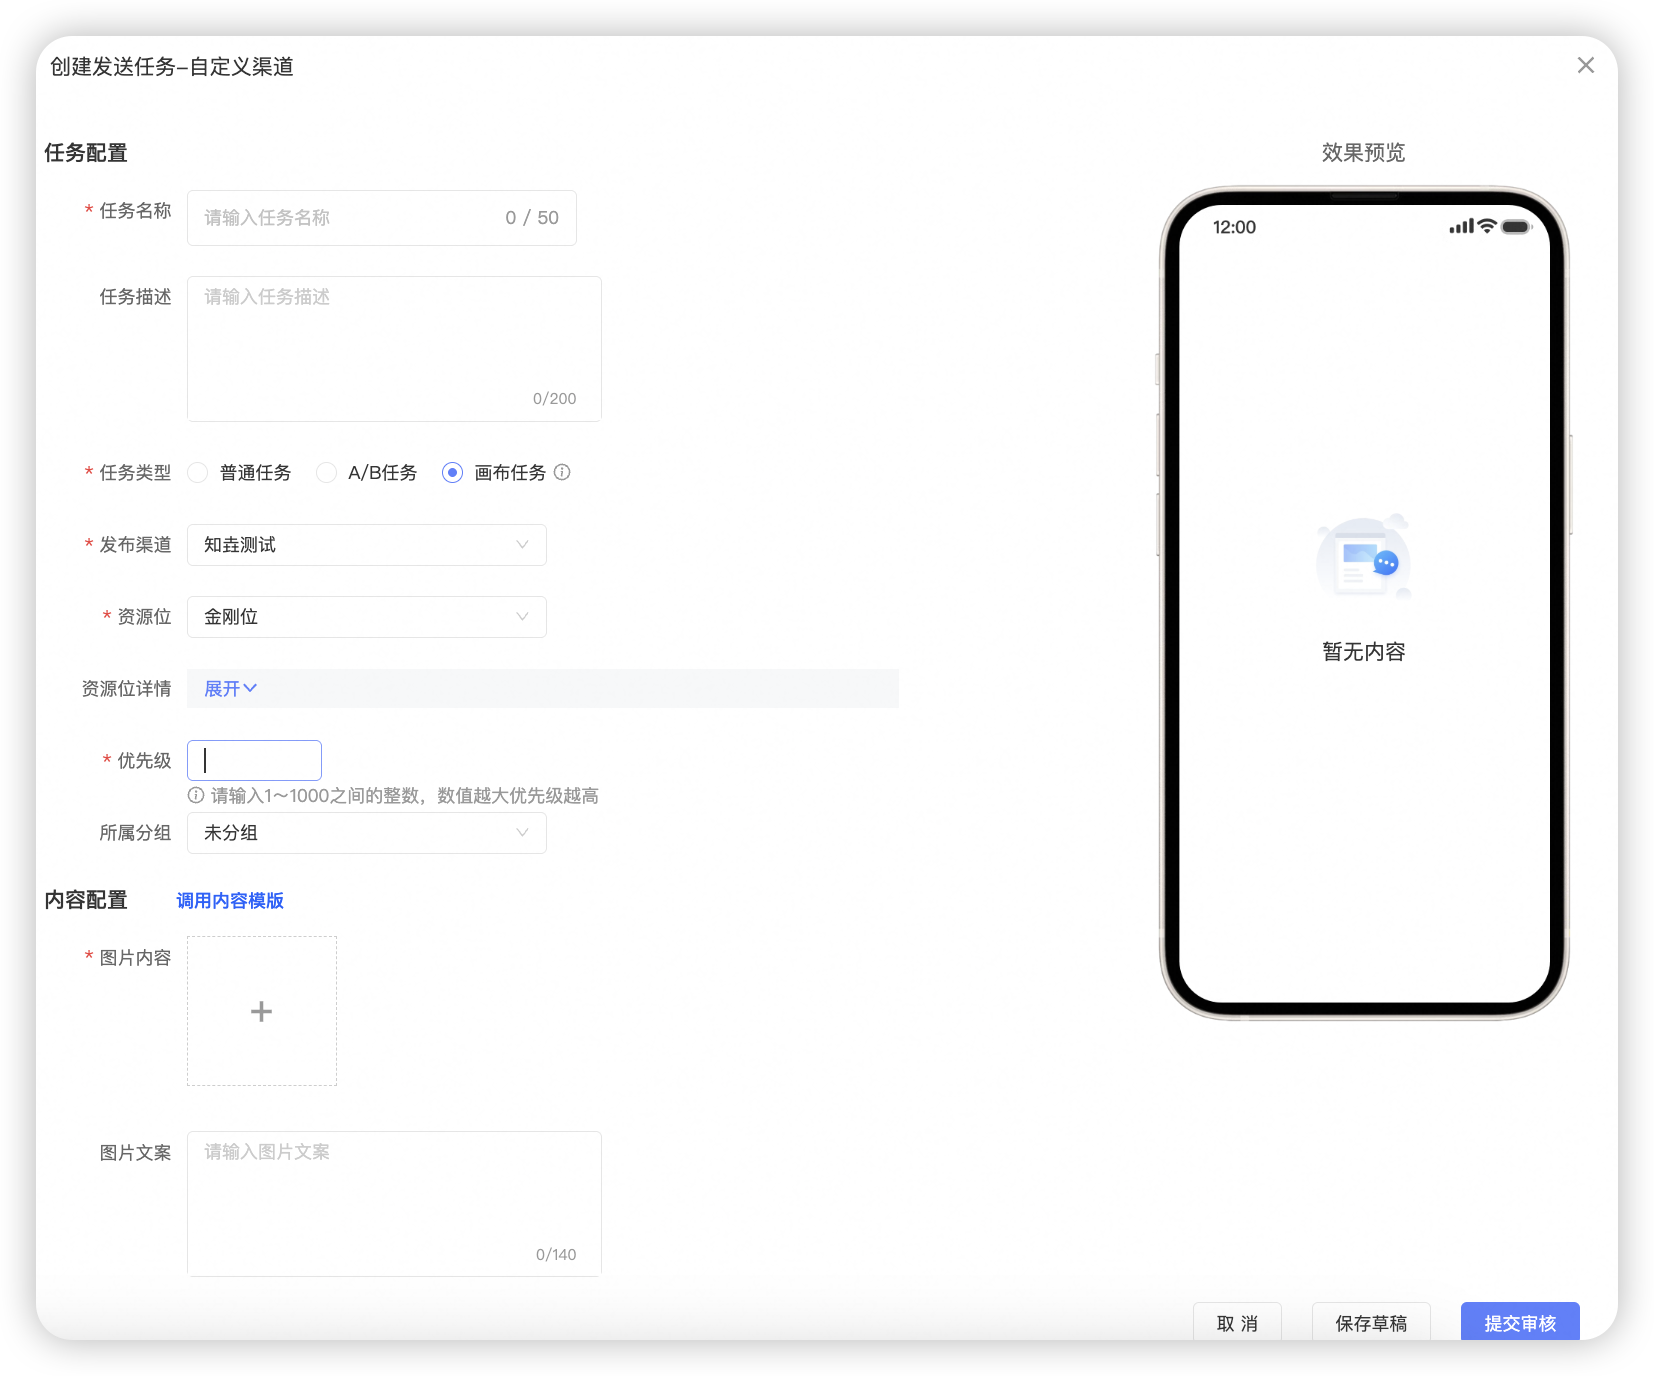
2.3.3. Create a canvas task
Unlike other tasks, canvas tasks do not require you to configure the delivery period, target audience, or fatigue control. These settings are configured within the specific MA task.
Task Configuration
Publish Channel: Select the channel that contains the placement you want to manage.
Placement: Select the placement you want to manage.
Placement Details: Displays the placement ID, type, style, dimensions, and a summary of content already published to this placement. You can view these details to help you decide the priority of your new content relative to existing content.
Priority: Enter an integer from 1 to 1000. A higher number indicates a higher priority.
Content Configuration
Image/Video/Article Content: Upload the content you want to deliver to the placement.
Image/Video/Article Description: Enter a description for the image, video, or article.
Rule Configuration
Push ID: The audience ID as defined in your business system.
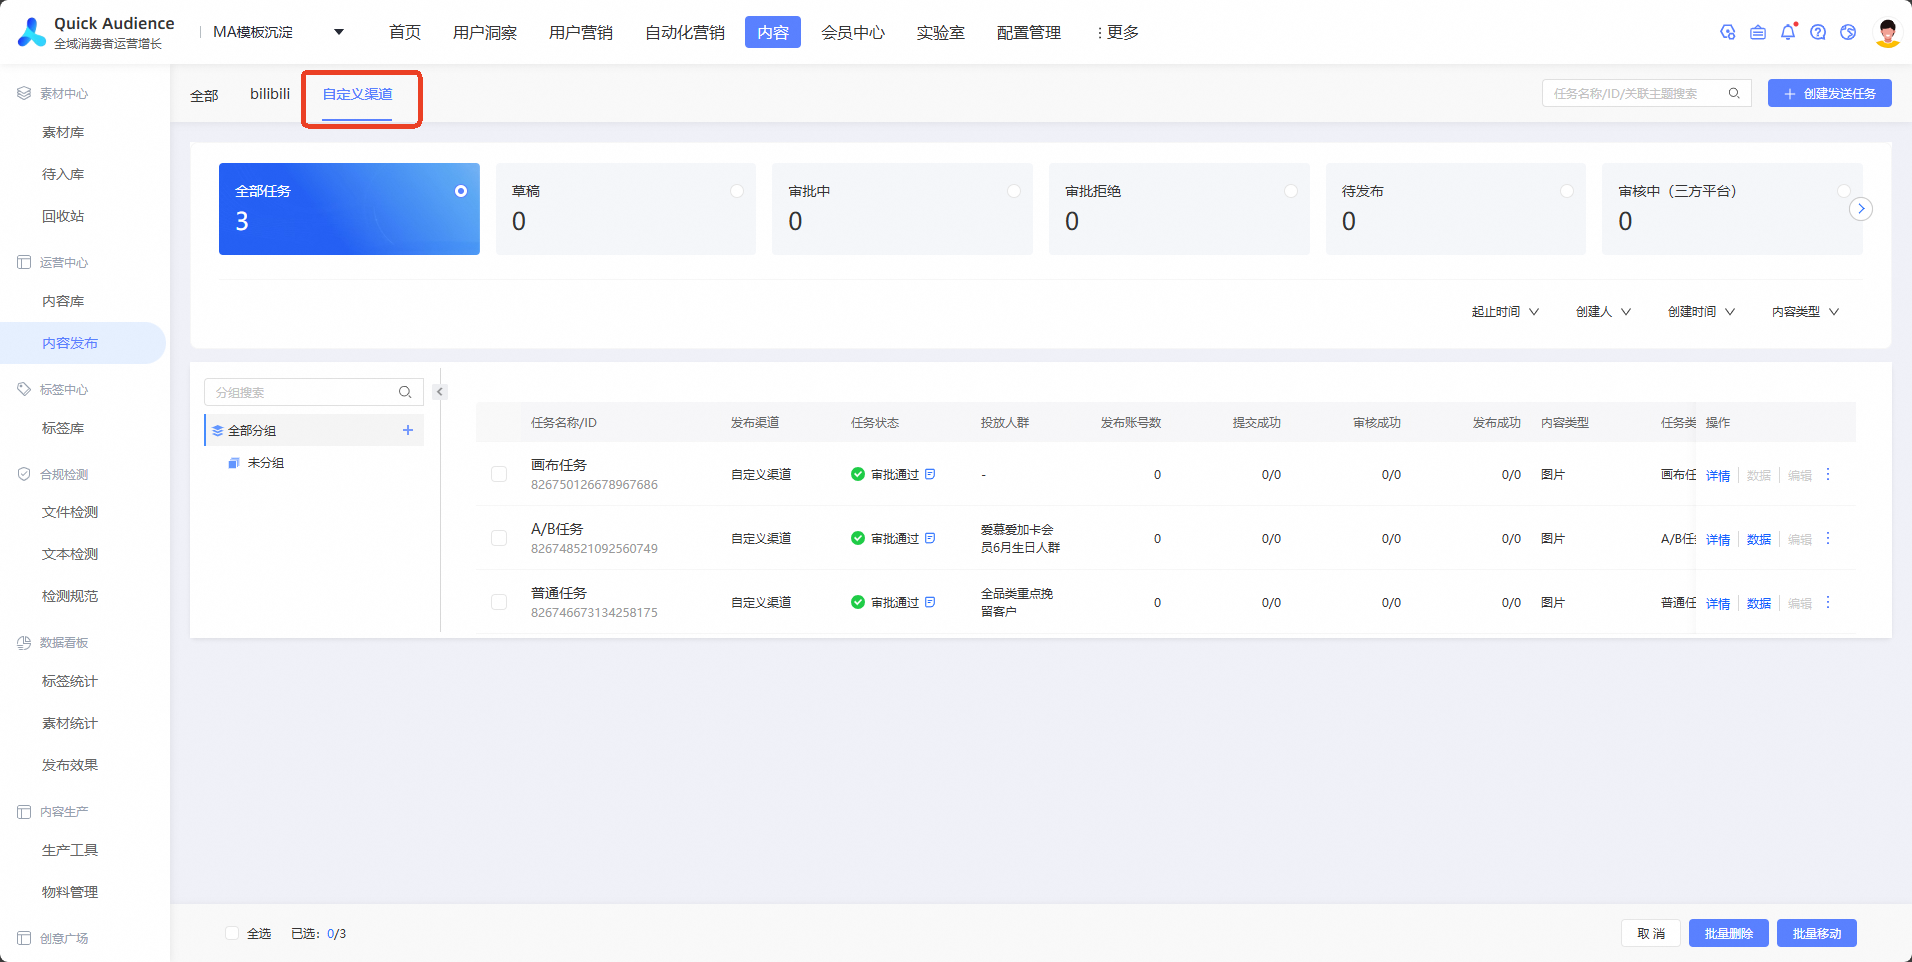
2.4. View task details
Go to Content > Custom Channel and select a task to view its details.
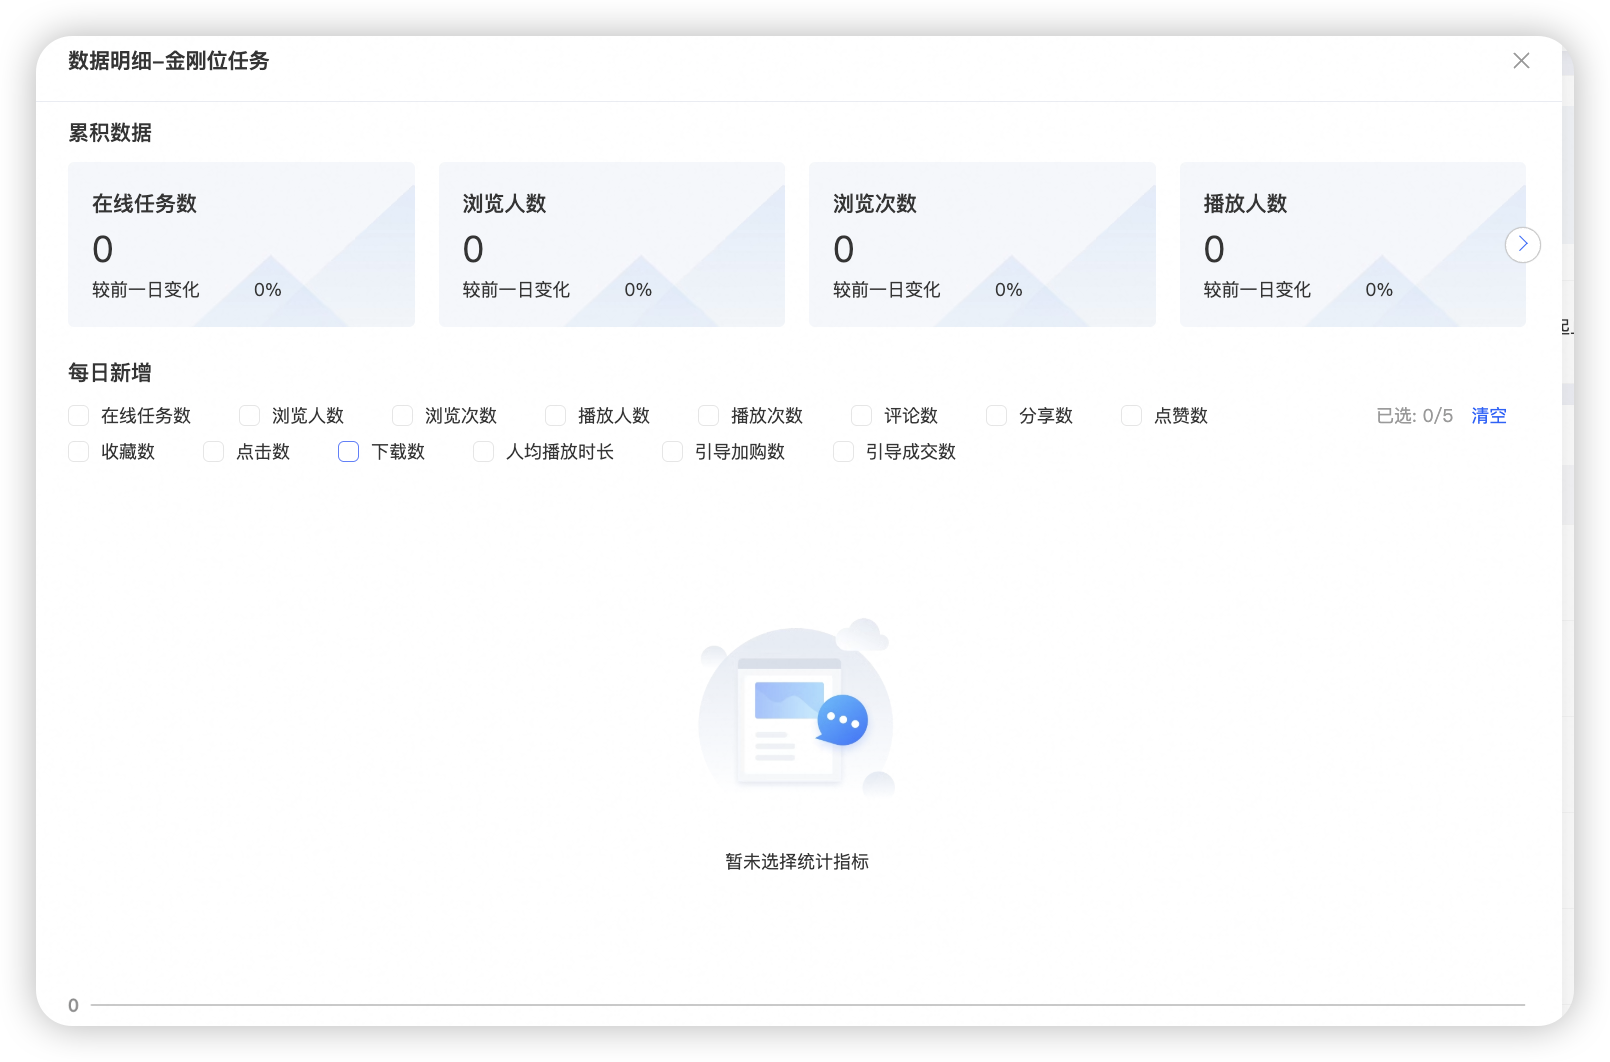
Task Data: After a task is delivered, select it to view detailed performance data.

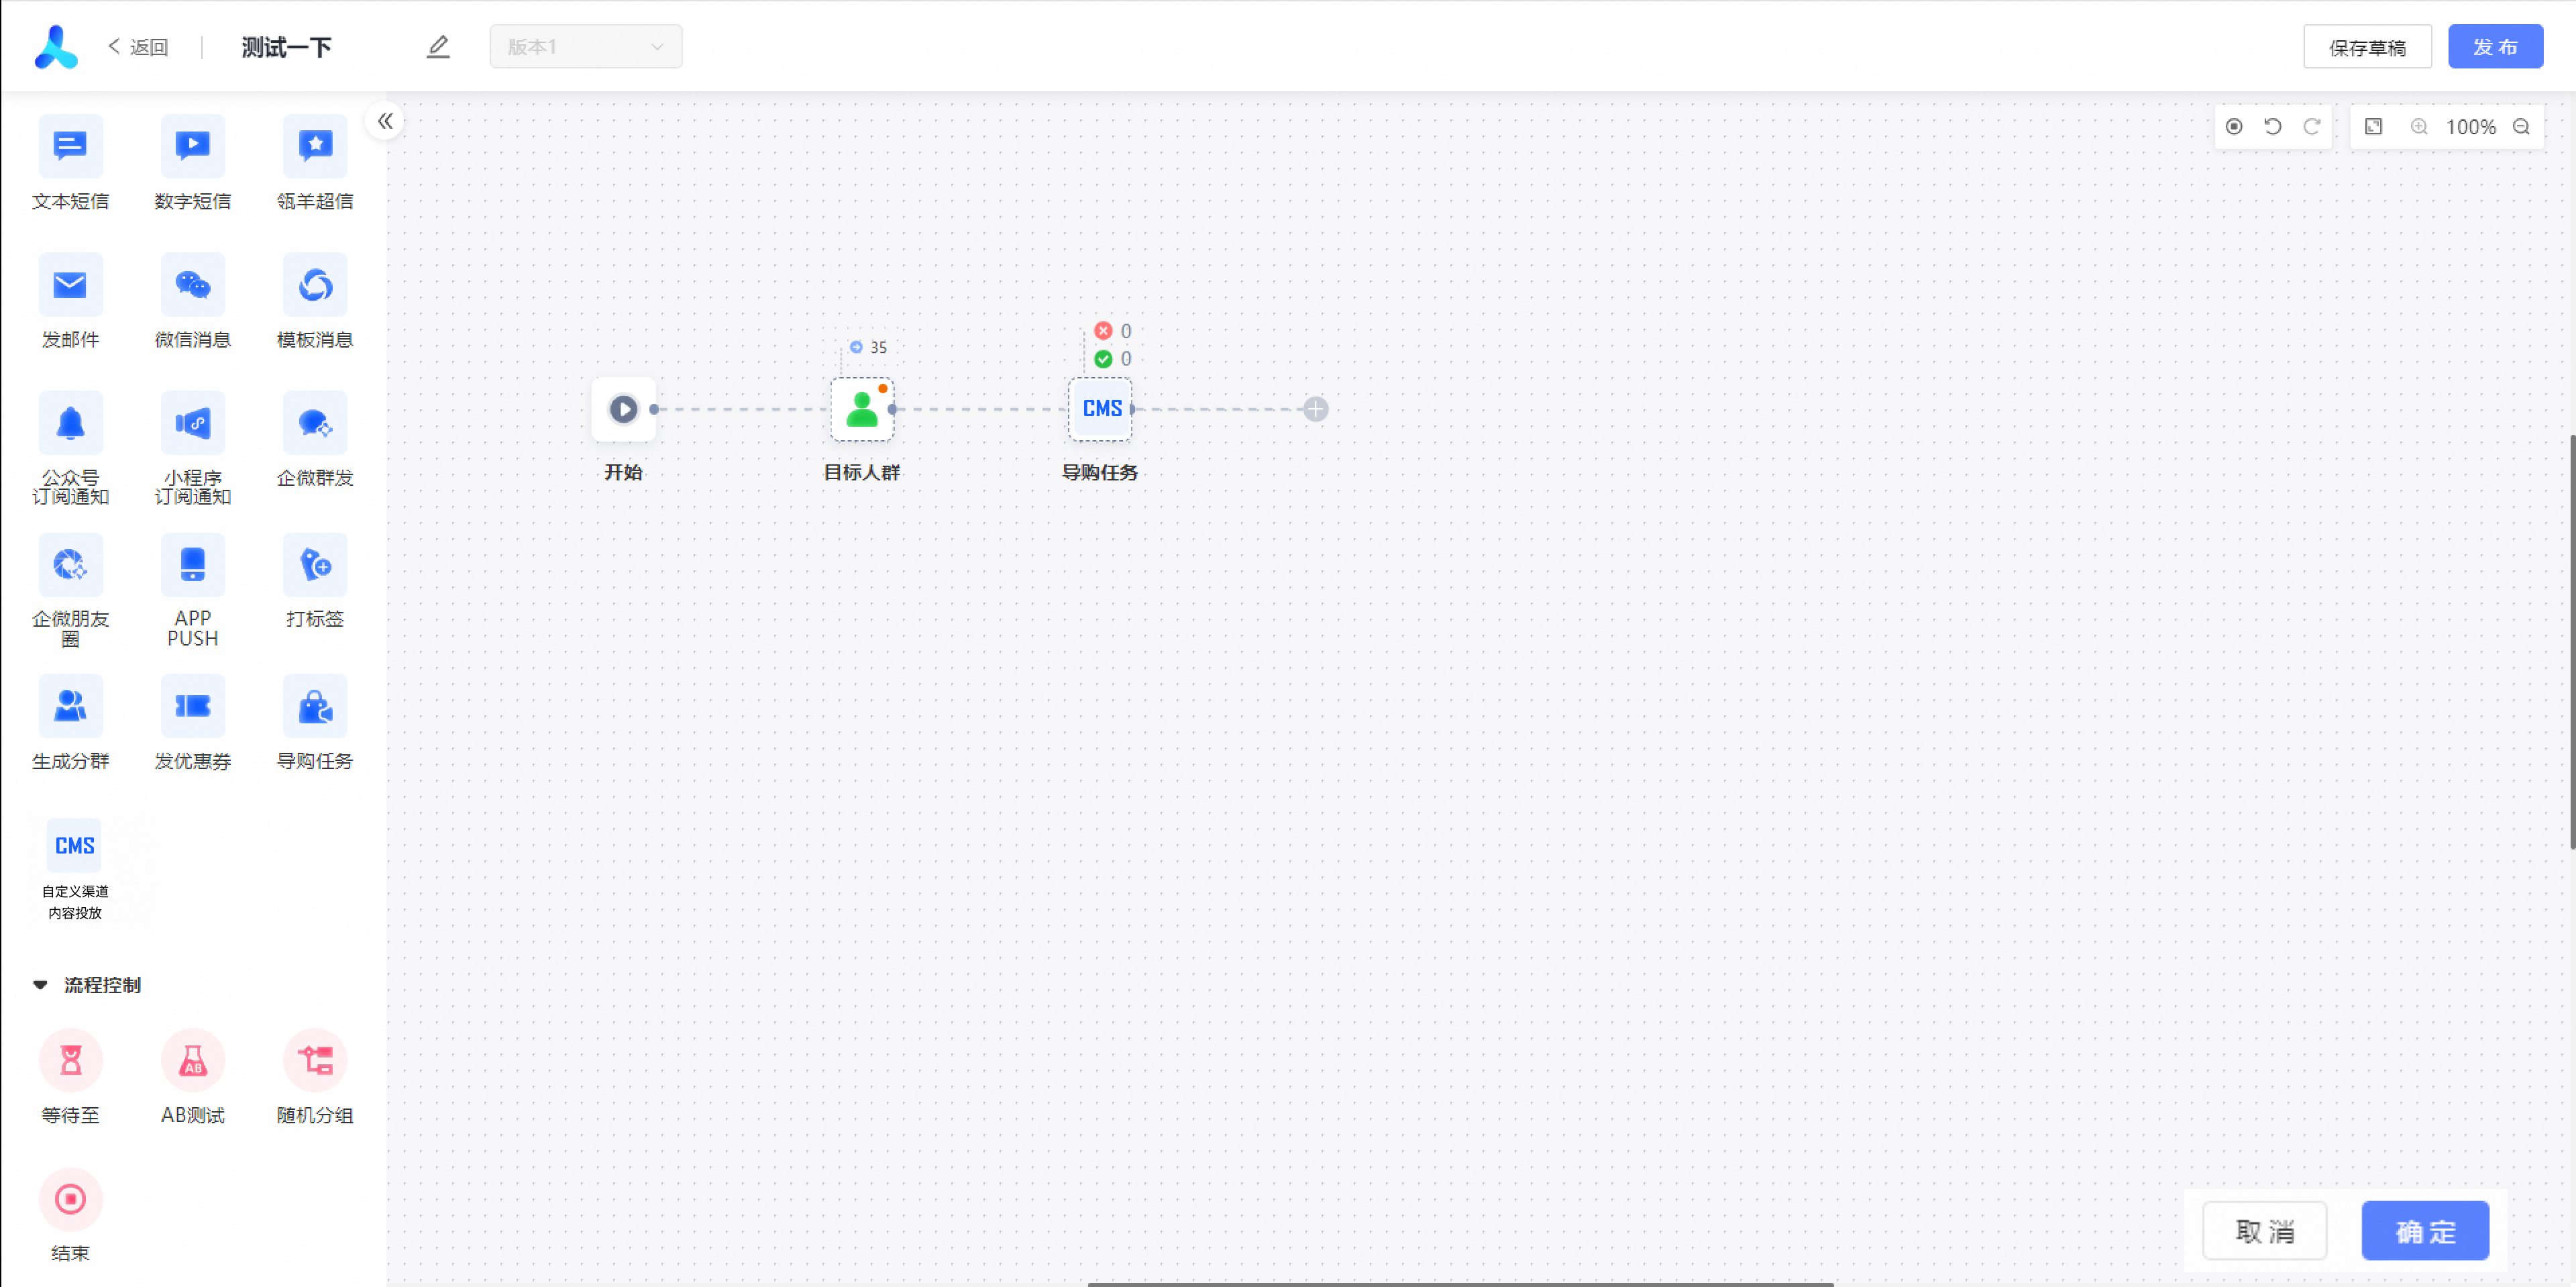
2.5. Configure a canvas task
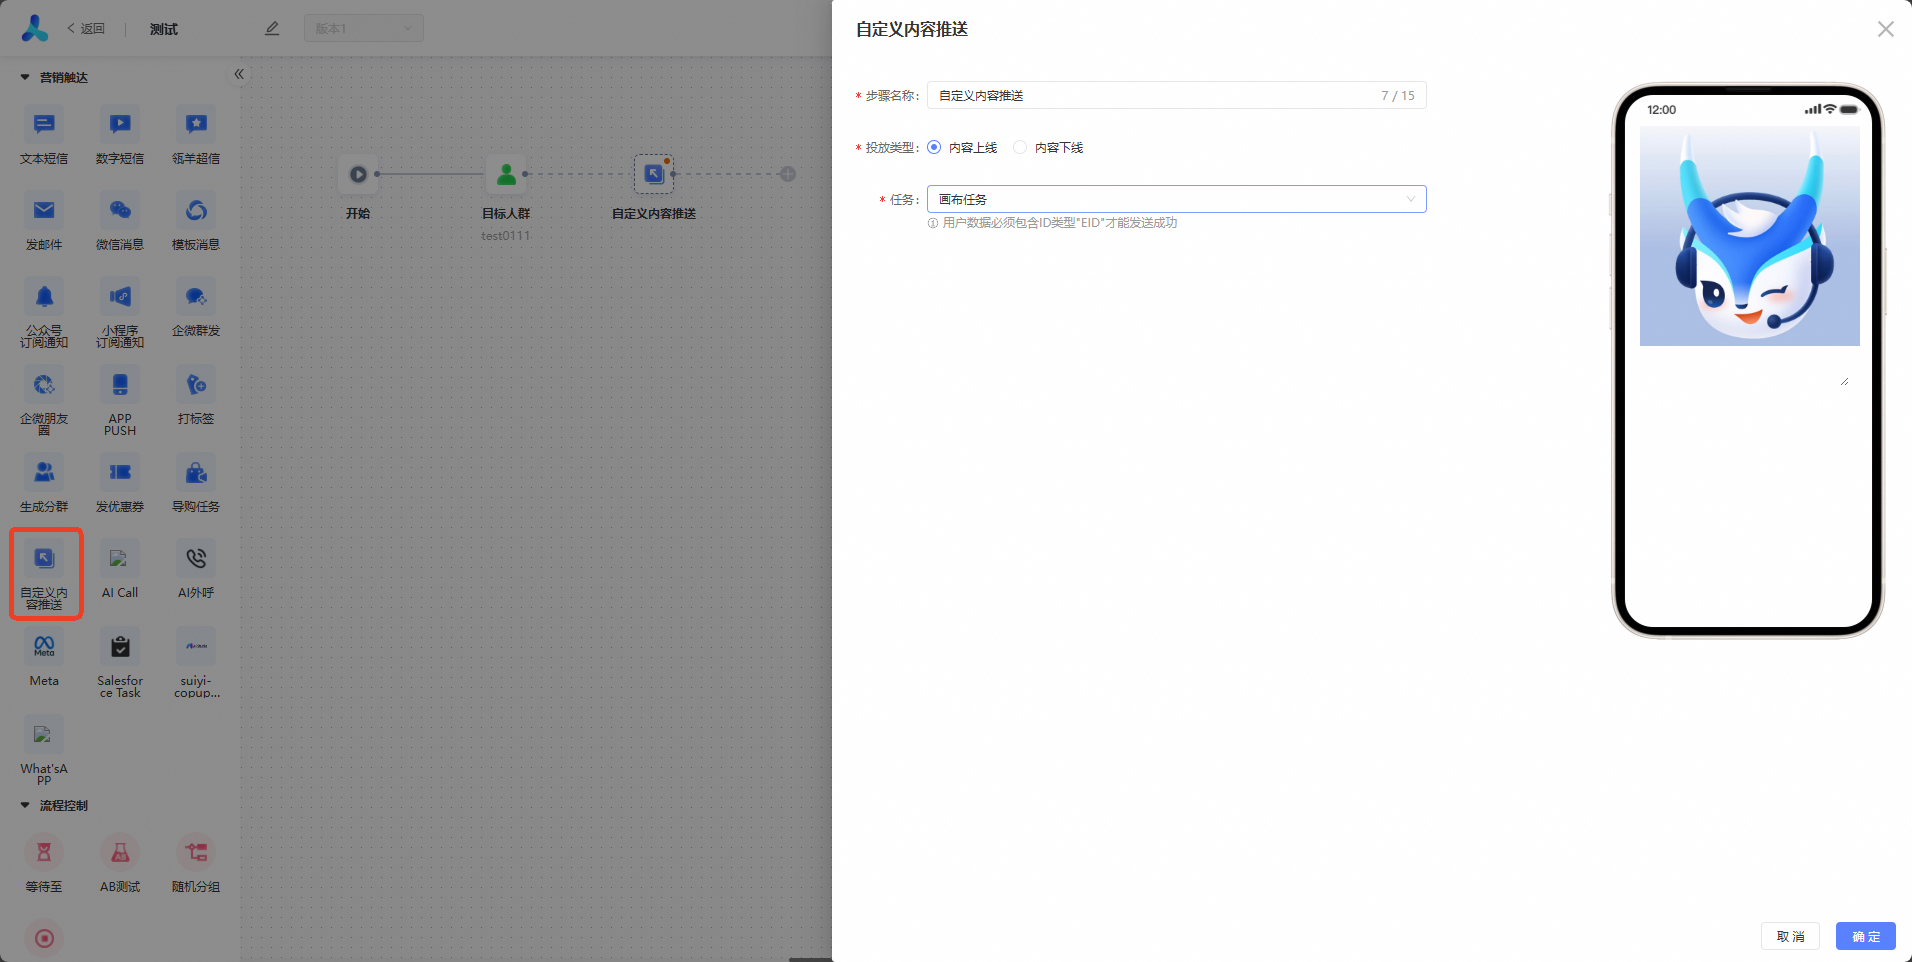
Go to Automated Marketing > New Marketing Campaign. After you add a trigger, you can add a custom content push component. In the component, set the delivery type (publish or unpublish content) and select a specific task. The task type must be a canvas task. Content recommendations are then sent to the audience filtered by the trigger you selected in the canvas.
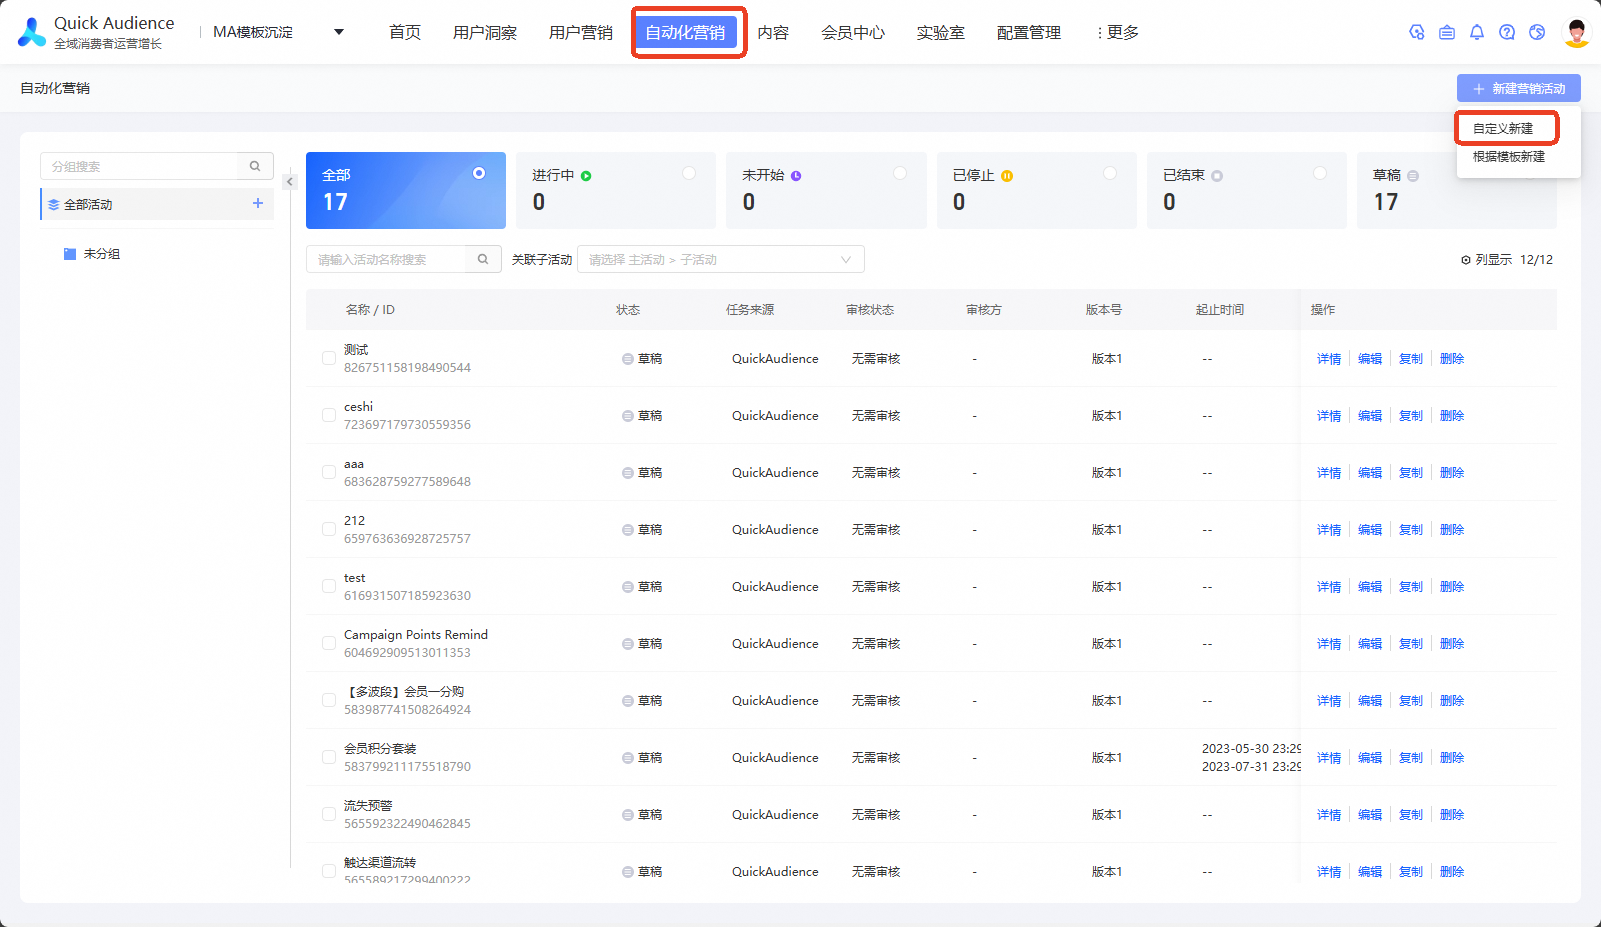
In Automated Marketing > New Marketing Campaign, select Custom to create a canvas task.
In the canvas, add a Custom Content Delivery component and select the canvas task you created.
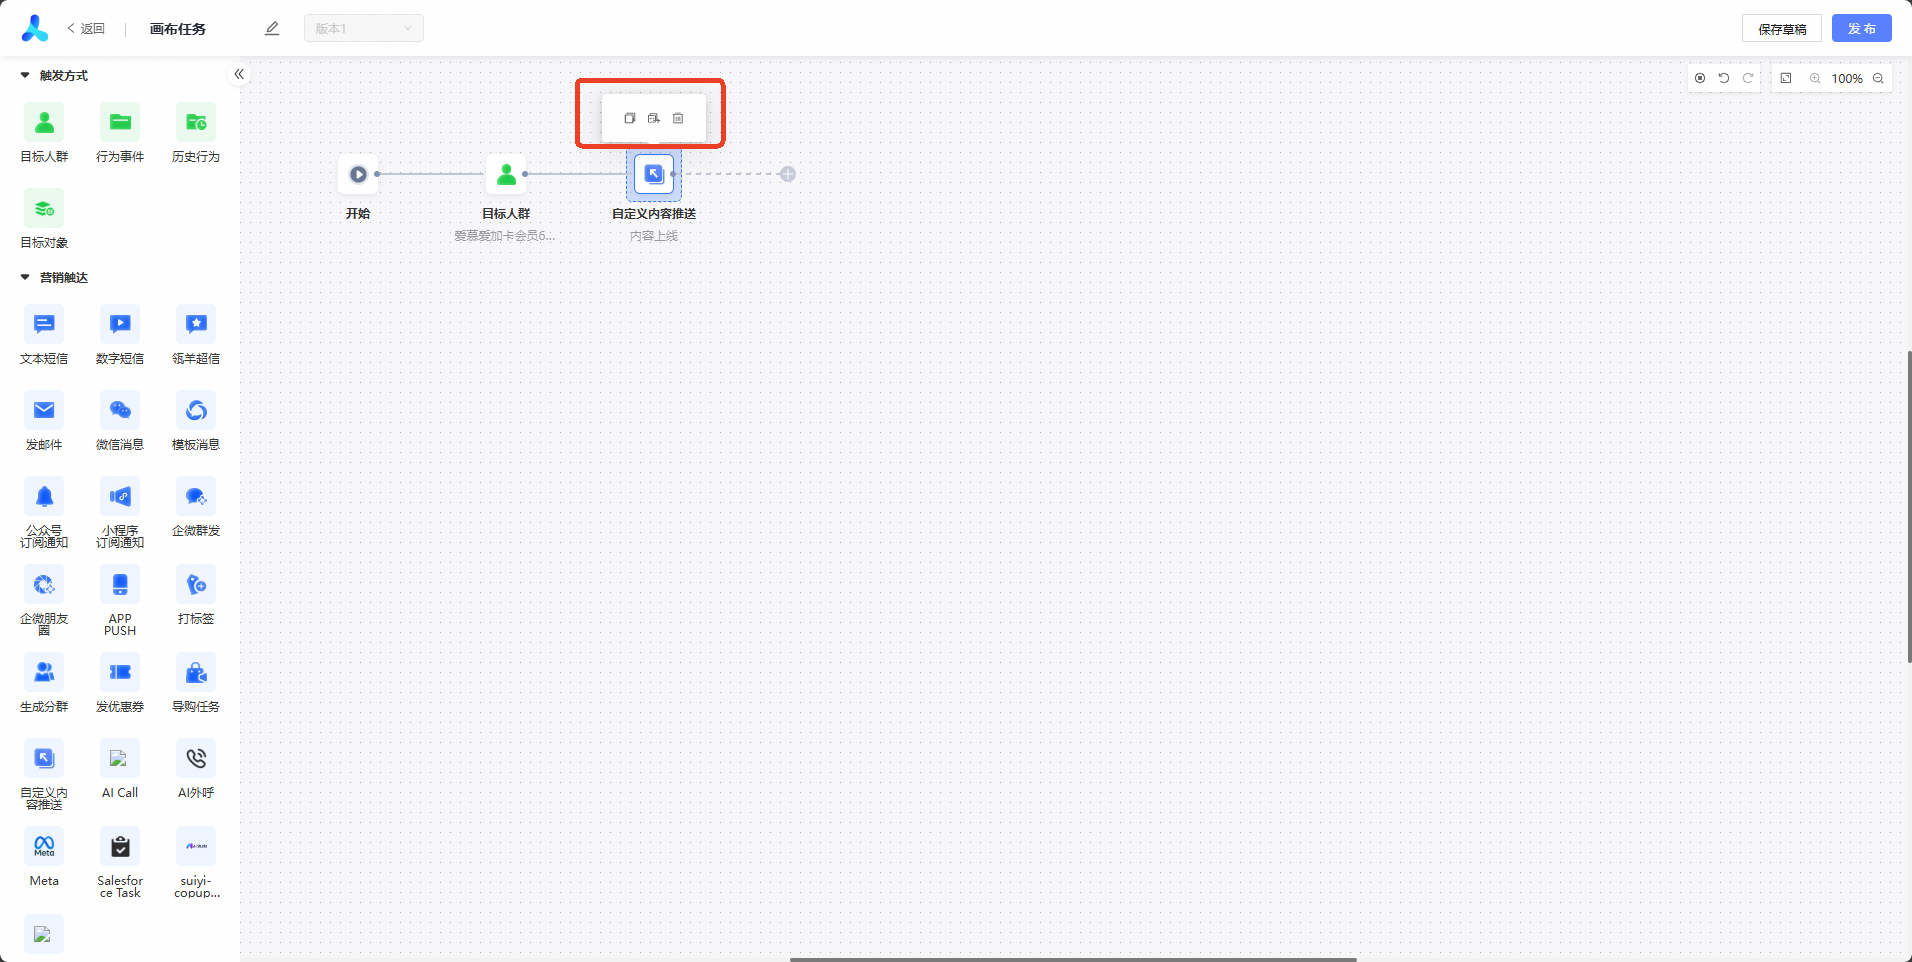
After you create a content delivery for a custom channel
Hover your mouse over the component to view options such as Copy, Copy Replication Task, and Delete Replication Task.
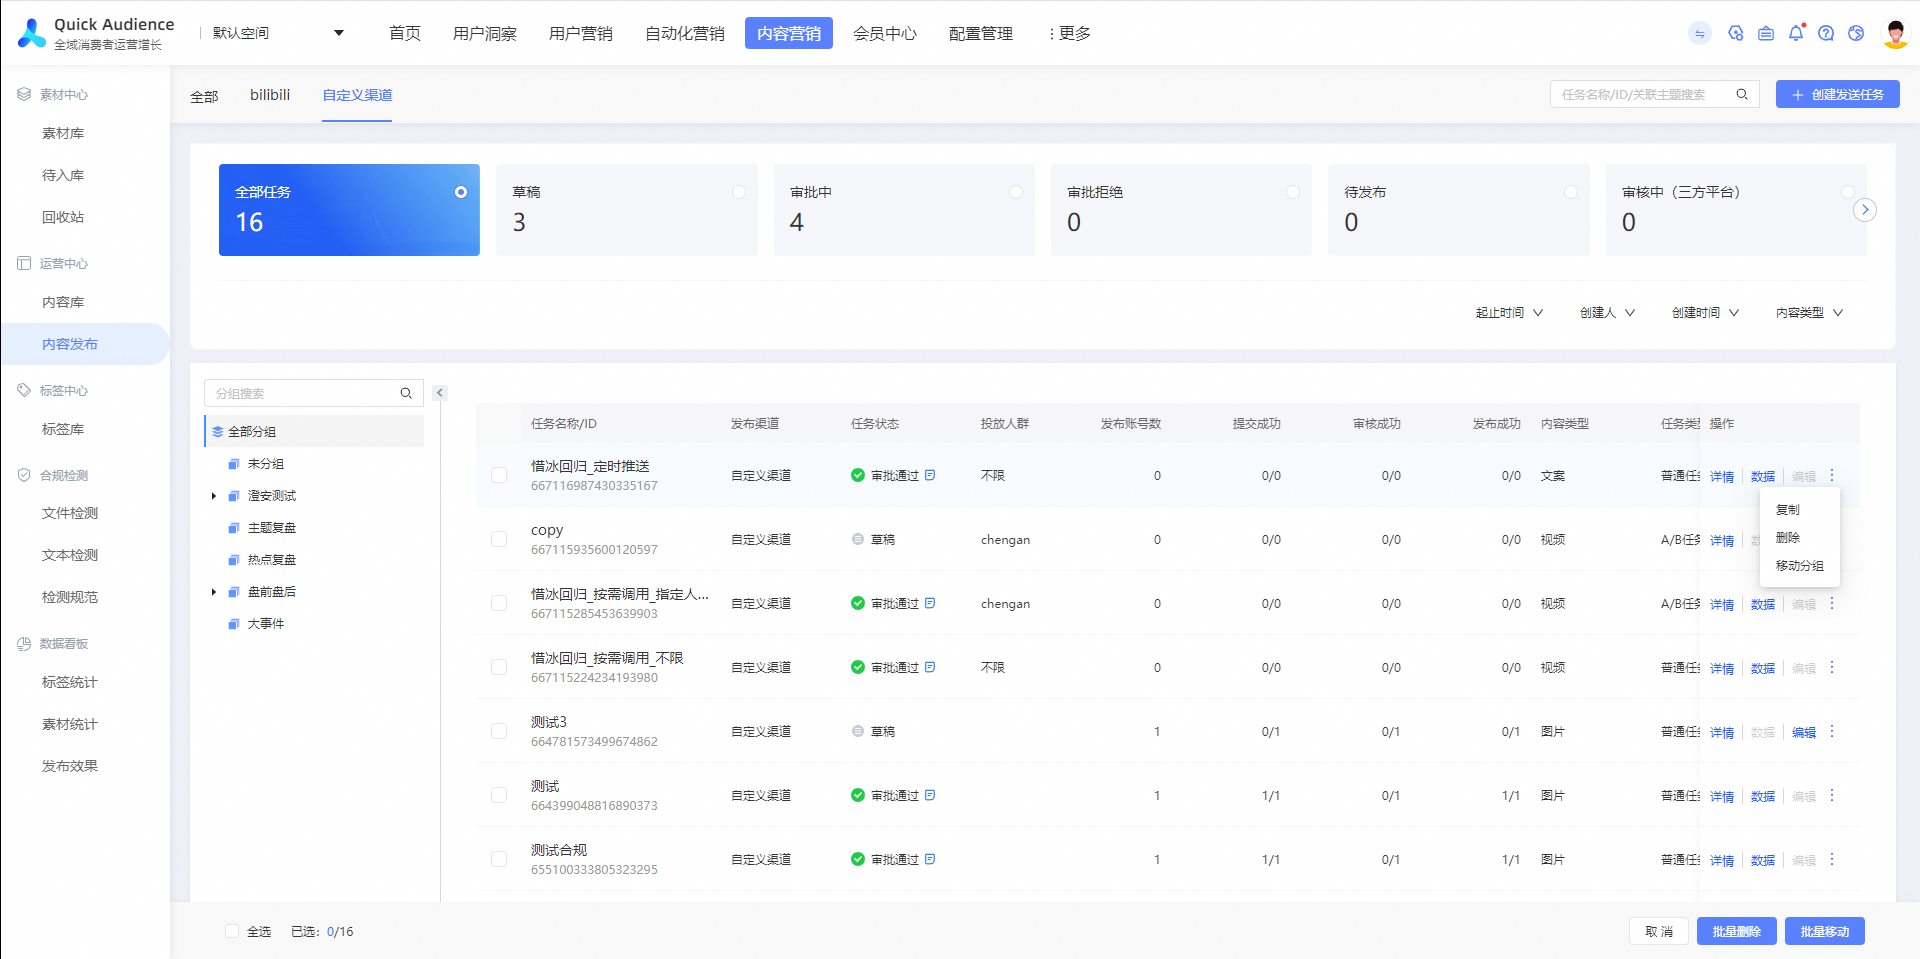
After the campaign is created, you can view the execution results on the Automated Marketing page.
Click Execution Records to view the push results for the canvas task.