Legacy Dynamic Environment Switching
Dynamic environment switching lets you change an application's environment on a mobile device without repackaging the client.
The dynamic environment switching feature is only available in Apsara Stack environments.
Dynamic environment switching is suitable for development scenarios that involve managing and frequently switching between multiple environments.
When you use dynamic environment switching, a new environment configuration file is written to the application. Therefore, you must request file storage permissions for your application.
Because updating the environment configuration modifies the Security Guard signature verification image yw_1222.jpg, the mPaaS security signature verification mechanism imposes two limitations on dynamic environment switching:
This feature is for development use only. Before you release your application, remove the corresponding configurations. Otherwise, the release package will throw a
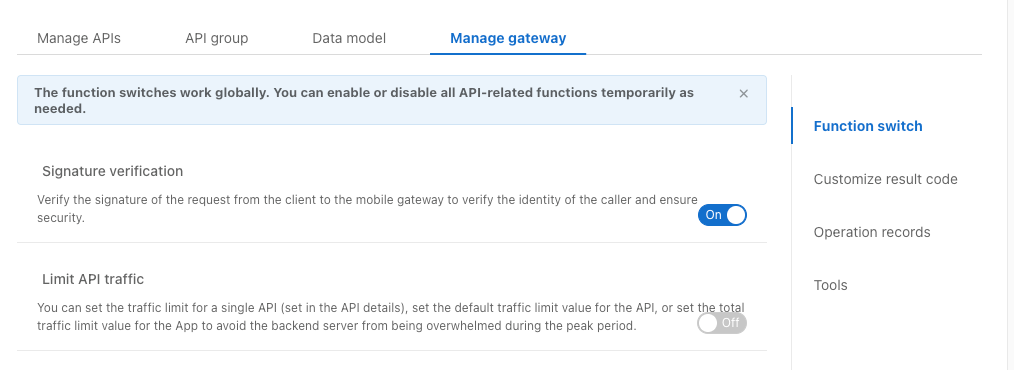
RuntimeException.You must disable the network request signature verification switch in the mPaaS console. Otherwise, requests will fail due to a mismatch in the signature verification image.
Add the dynamic environment switching SDK
Add the dependencies.
For the native AAR-based approach, add the following dependency to the
dependenciesblock in thebuild.gradlefile of your project's main module:dependencies { ··· implementation 'com.mpaas.mocksettings:mocksettings-build:10.1.60a.1575@aar' ··· }For the portal and bundle-based approach, add the following dependencies to the
dependenciesblock in thebuild.gradlefile of your portal project's main module:dependencies { ··· bundle 'com.mpaas.mocksettings:mocksettings-build:1.0.0.200421111458@jar' manifest 'com.mpaas.mocksettings:mocksettings-build:1.0.0.200421111458:AndroidManifest@xml' ··· }
Use the SDK.
In the native AAR-based approach, override the
getPackageManagermethod in the Application class to replacePackageManagerwithMockSettingsPackageManager.private MockSettingsPackageManager mockSettingsPackageManager; @Override public PackageManager getPackageManager() { if (mockSettingsPackageManager == null) { mockSettingsPackageManager = new MockSettingsPackageManager(this, super.getPackageManager()); } return mockSettingsPackageManager; }For the portal and bundle-based approach, modify the
applicationelement in theAndroidManifest.xmlfile of your portal project's main module as follows:<application android:name="com.alipay.mobile.quinox.MockSettingsLauncherApplication" ··· > ··· </application>
Add the following permission and ensure it is dynamically requested at runtime:
<uses-permission android:name="android.permission.READ_EXTERNAL_STORAGE" />Build a debug package or enable debugging in the
AndroidManifest.xmlfile:<application android:debuggable="true" ··· > ··· </application>
Switch environments
Scan the QR code to download the mPaaS Settings app.
 After installation, the mPaaS Settings app icon appears as follows:

Place the
configfile downloaded from the mPaaS console in your phone's SD card or internal storage.Add environments. Use the mPaaS Settings app to add the
configfile to the list.Open the mPaaS Settings app.
On the Environment List screen, tap Add environment configuration file at the bottom.
Locate the environment configuration file.

Add the configuration files for the production and test environments to the environment list.
Switch environments.
From the list, select an environment and tap Switch to set it as the current environment.
Then, launch the corresponding application. If test requests are sent successfully, the switch is successful.
When you switch to another environment and then restart the application, the system reports a 3000 error because the required
operationTypedoes not exist in the new environment. This is the expected behavior after a successful switch.