Configure Google Home platform integration
This document describes how to integrate your app with the Google Home platform and configure instruction mapping to ensure that instructions are executed correctly.
Google Home
Integrating with Google's third-party voice service involves two main parts:
1. Connect accounts by configuring settings in the Google console and the Link Living platform.
2. Configure instruction mapping to ensure that instructions are executed correctly.
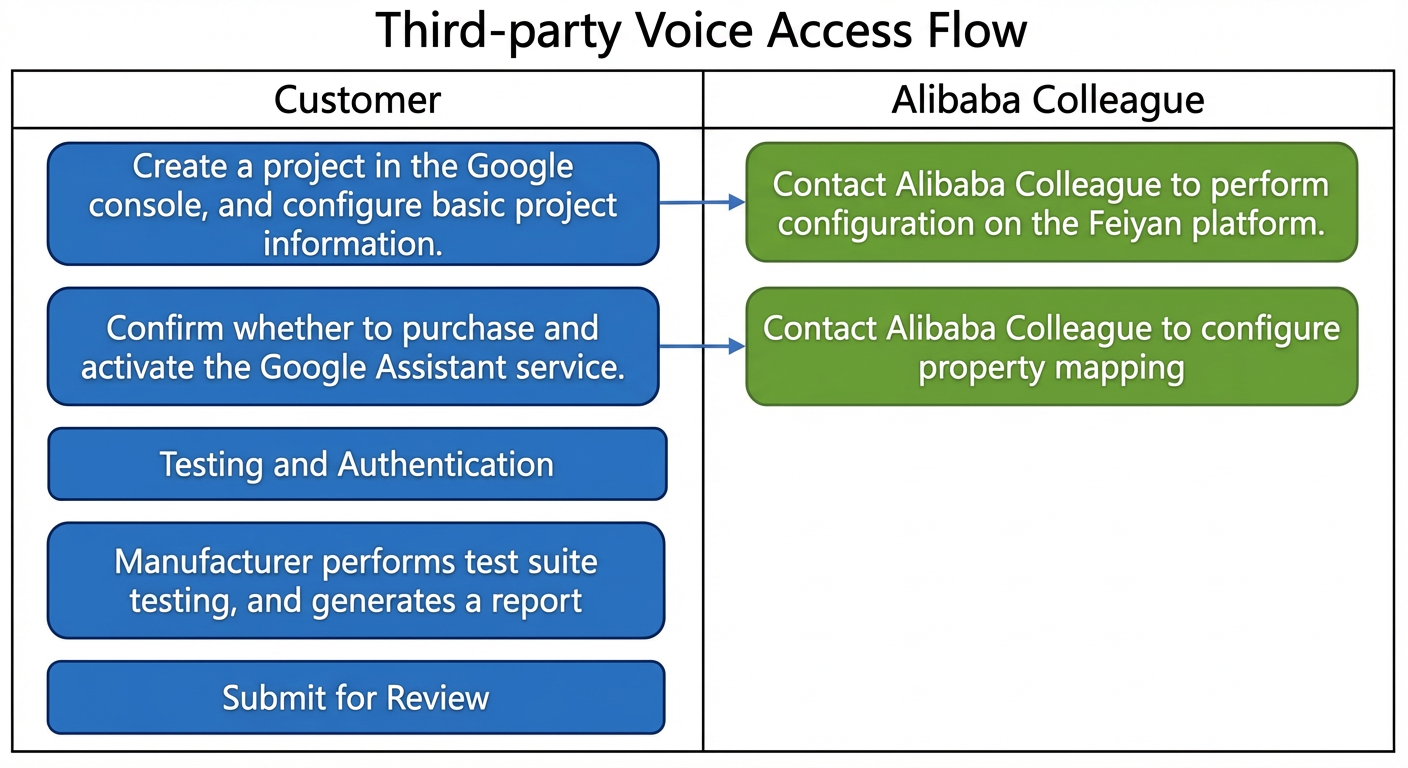
The following flowchart shows the configuration process for integrating with Google's third-party voice service. Follow this flowchart to complete the configuration. This document provides details for each step in the flowchart.
1. Prepare your account and resources
Google console account: https://console.actions.google.com/
Prerequisites for the console: You must purchase and enable the Google Assistant service. For more information, see Customize Google Assistant skills for your app.
The appKey obtained from the Feiyan console: android, ios.
App name in English: The English name of your app, such as Cloud Intelligent.
App icon URL: The URL of a vector image for your app's icon. If you cannot provide a URL, contact Alibaba Cloud support. The icon must be the same as the one used for Alexa.
Third-party account: The logon account and password for your app. During the testing phase, you must associate this account with Google Home. The account must have devices attached for testing.
2. Fill in the console information
1. Create a project
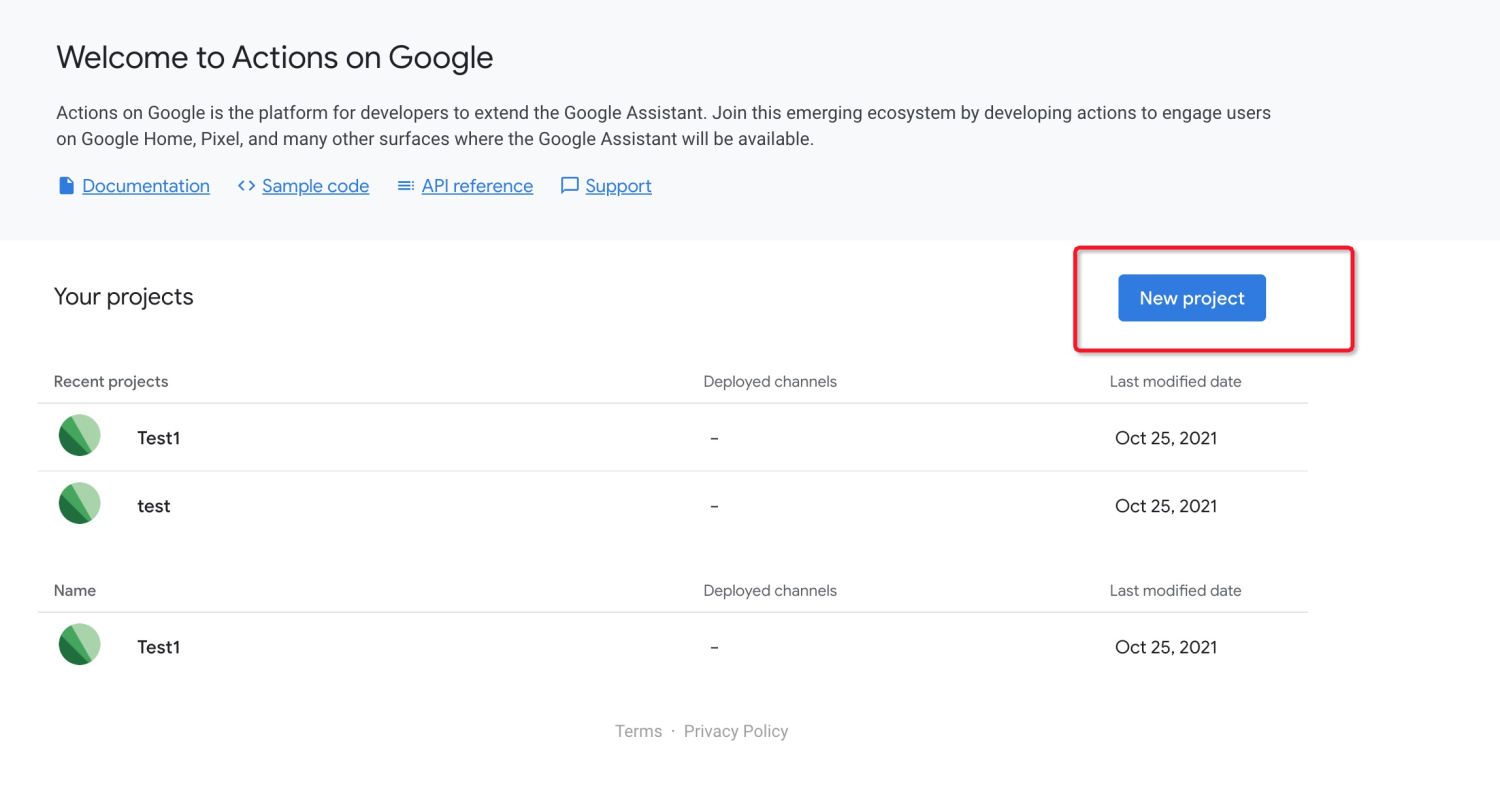
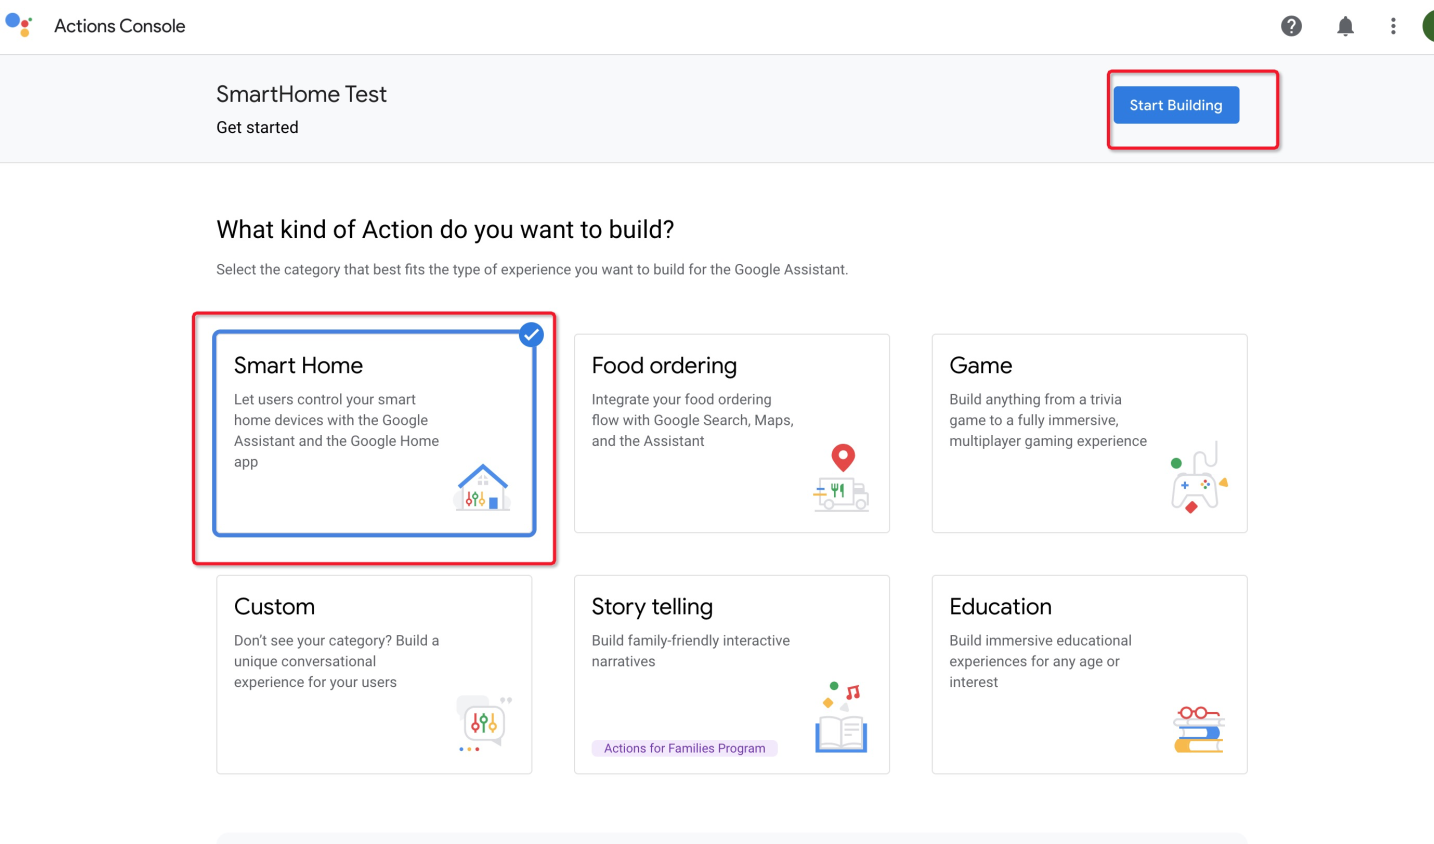
Click Start Building to create a project.
2. Fill in basic project information
Select the Develop tab:
(1) Invocation: Enter the project name, such as Cloud Intelligent.
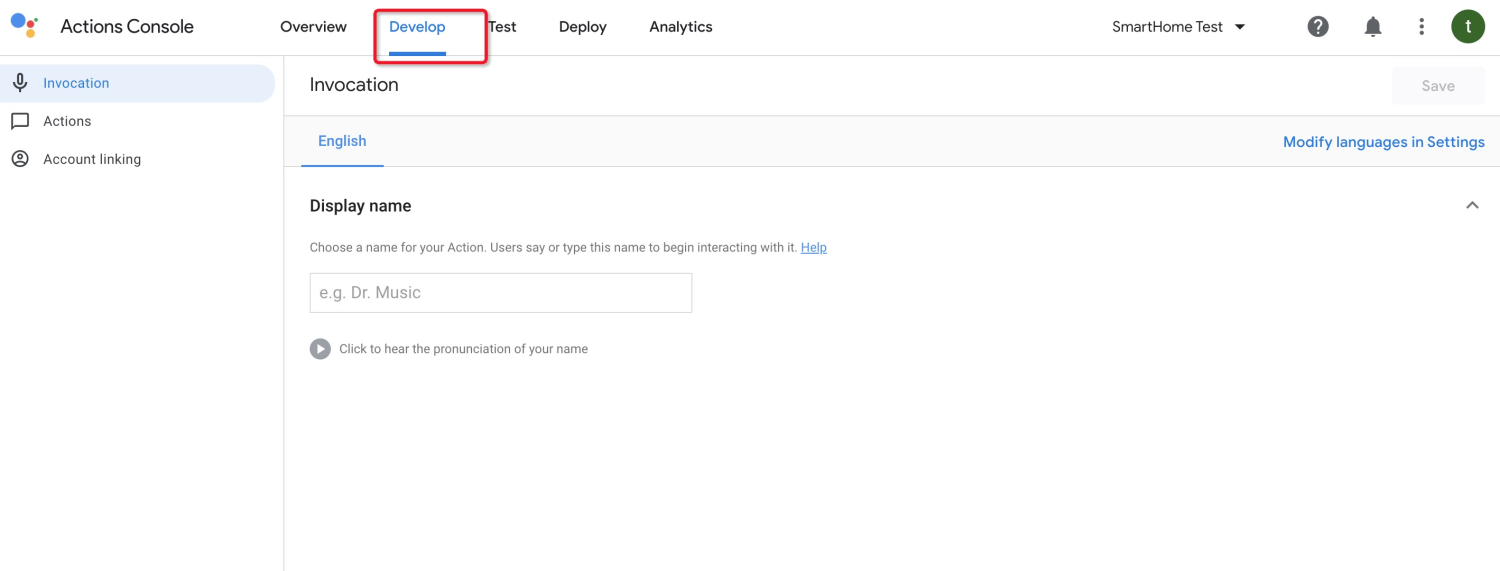
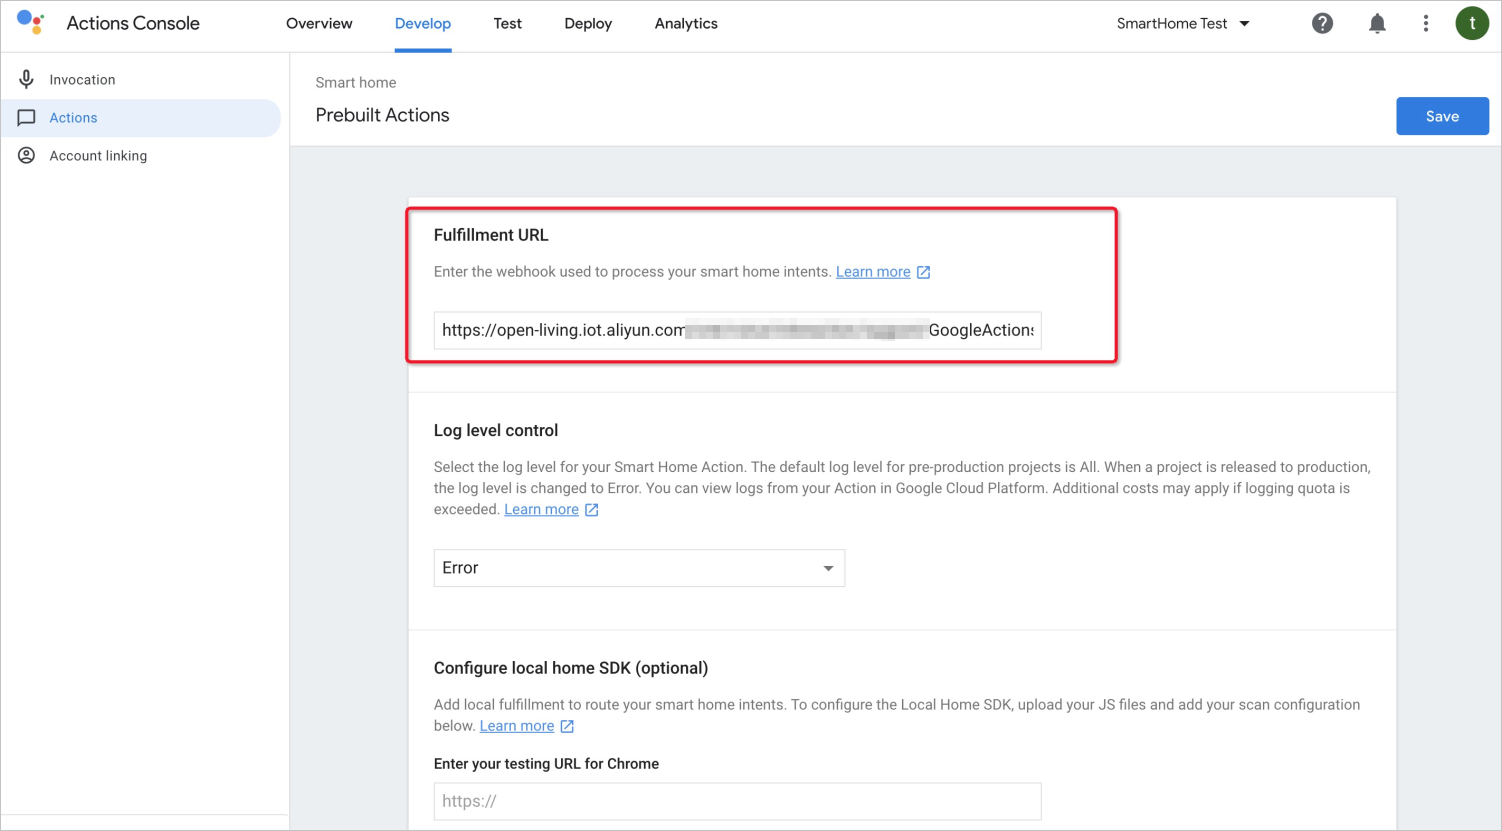
(2) Actions:
Set Fulfillment URL to https://open-living.iot.aliyun.com/one/voice/interaction/support/GoogleActions/v1.
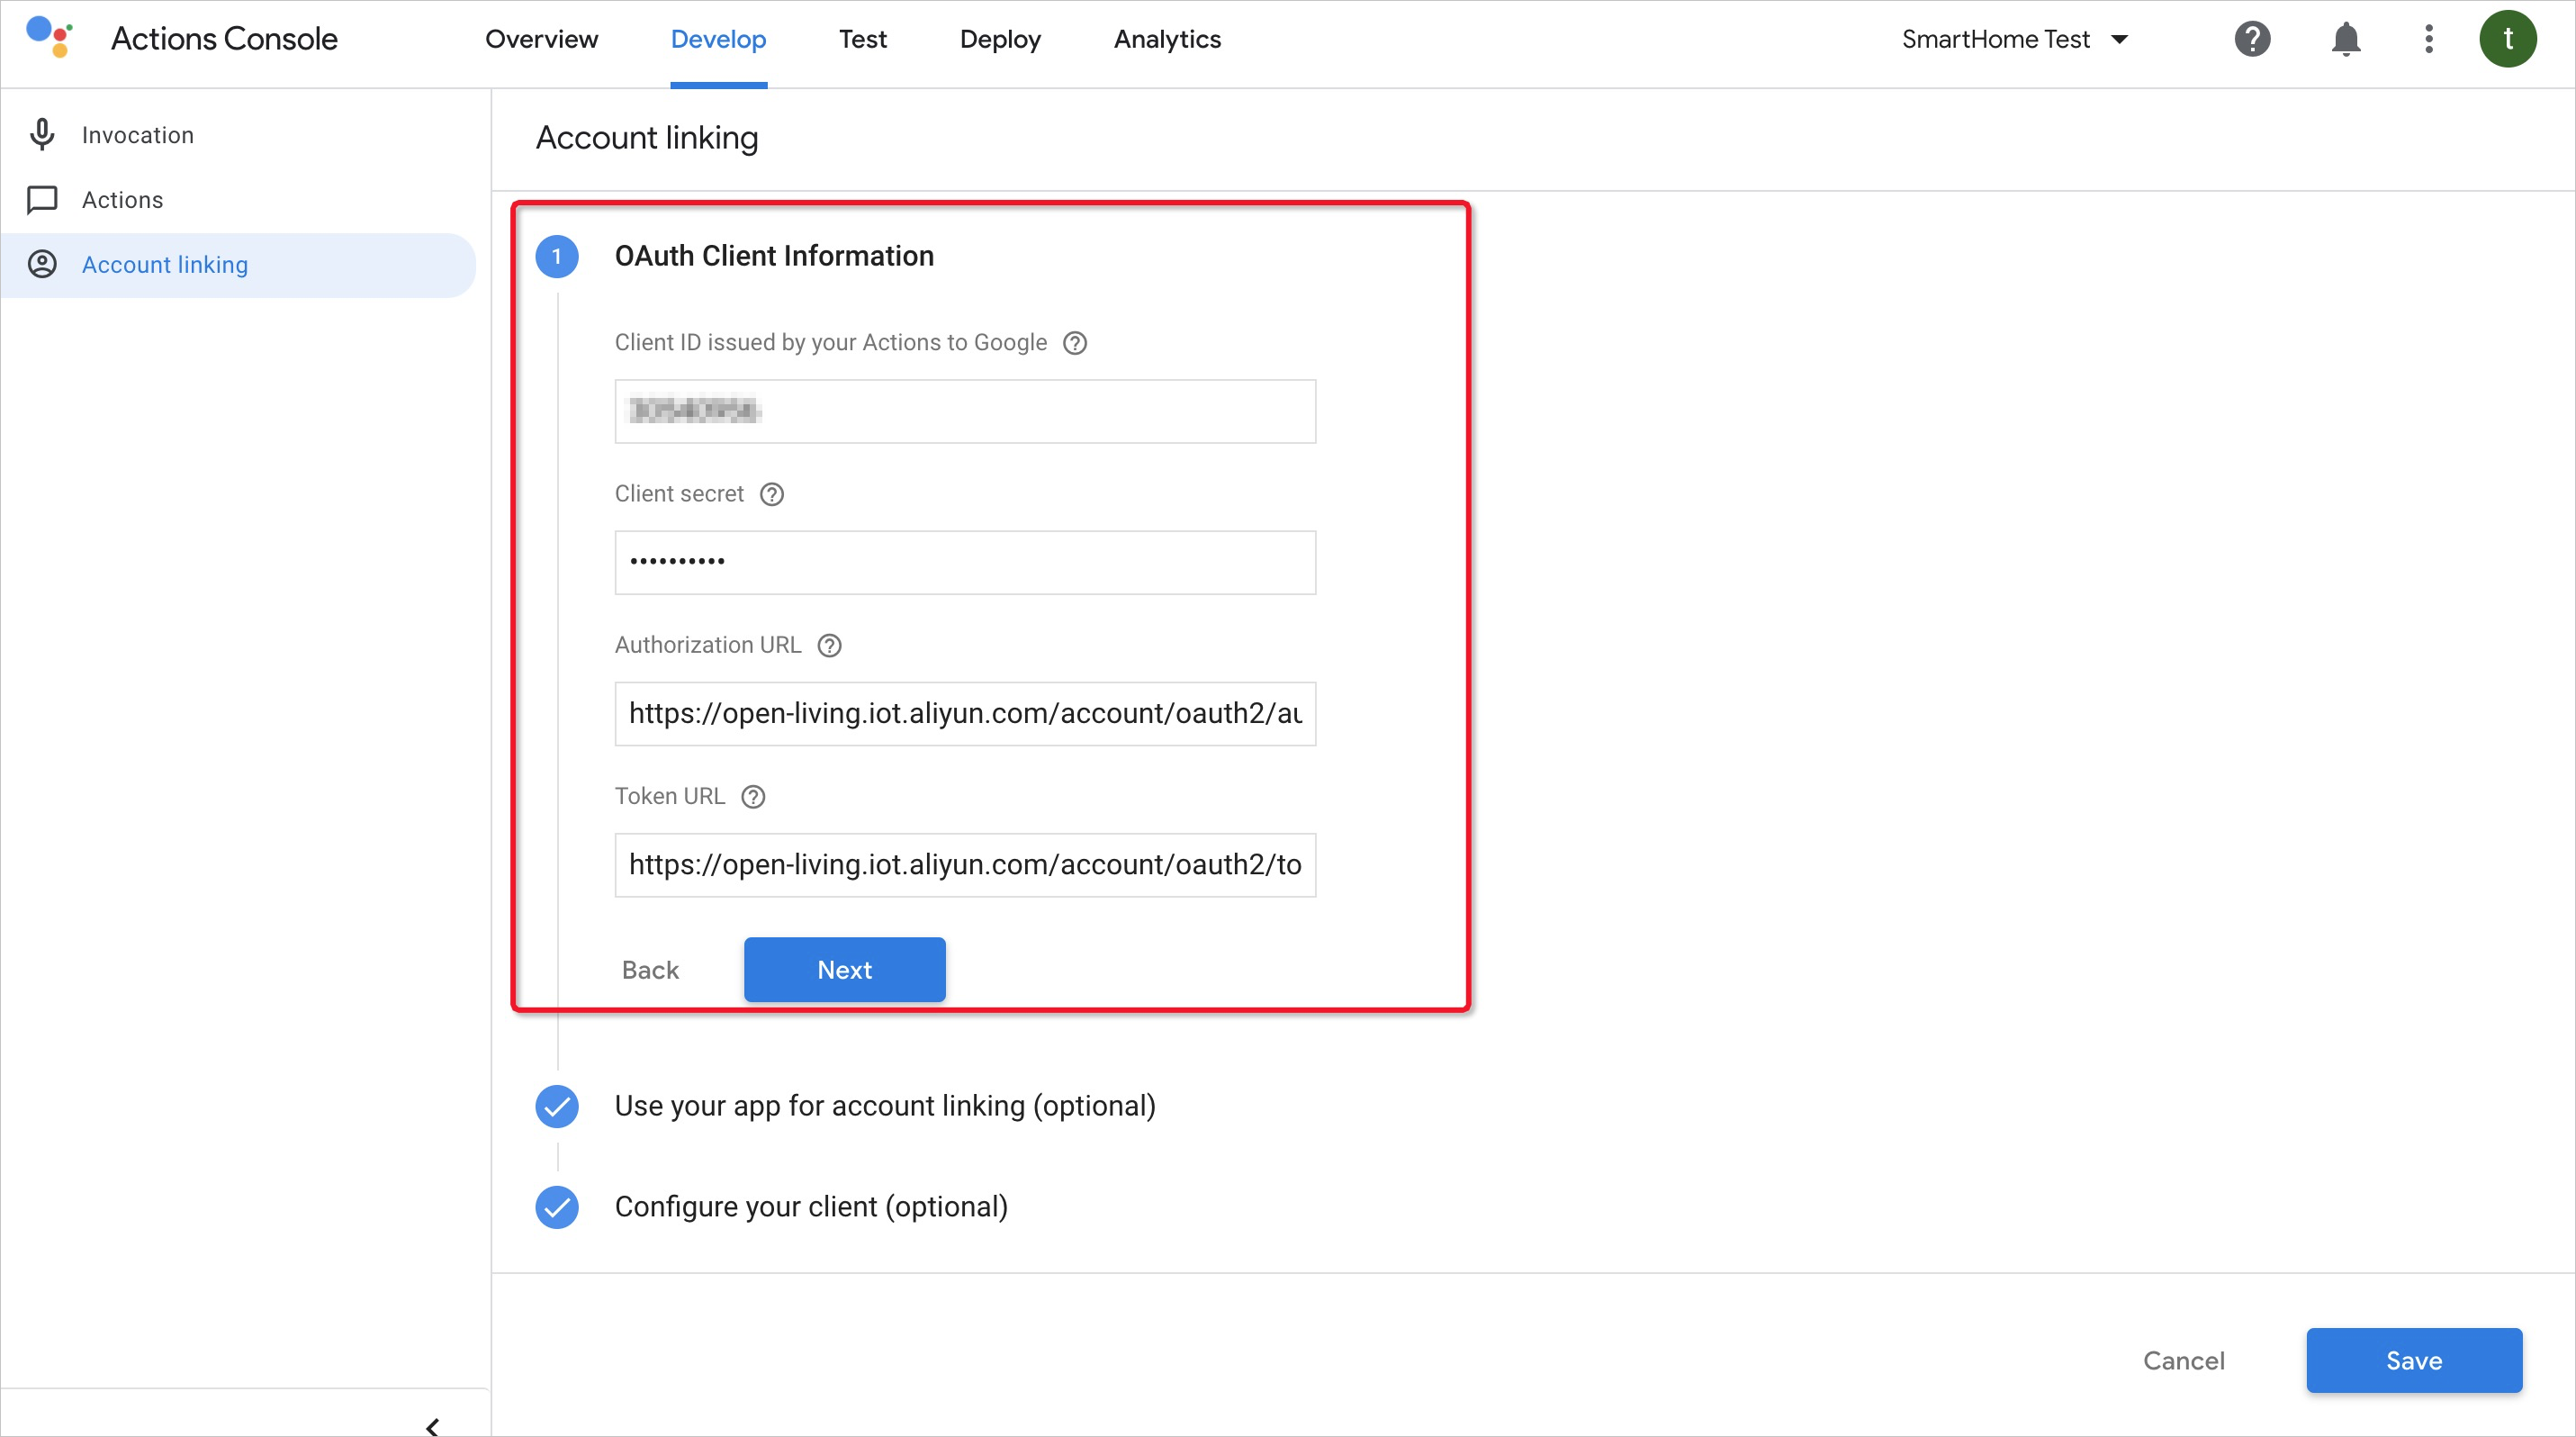
(3) Account linking: Enter the client ID, client secret, Authorization URL, and Token URL. These parameters are the same as those used for Alexa.
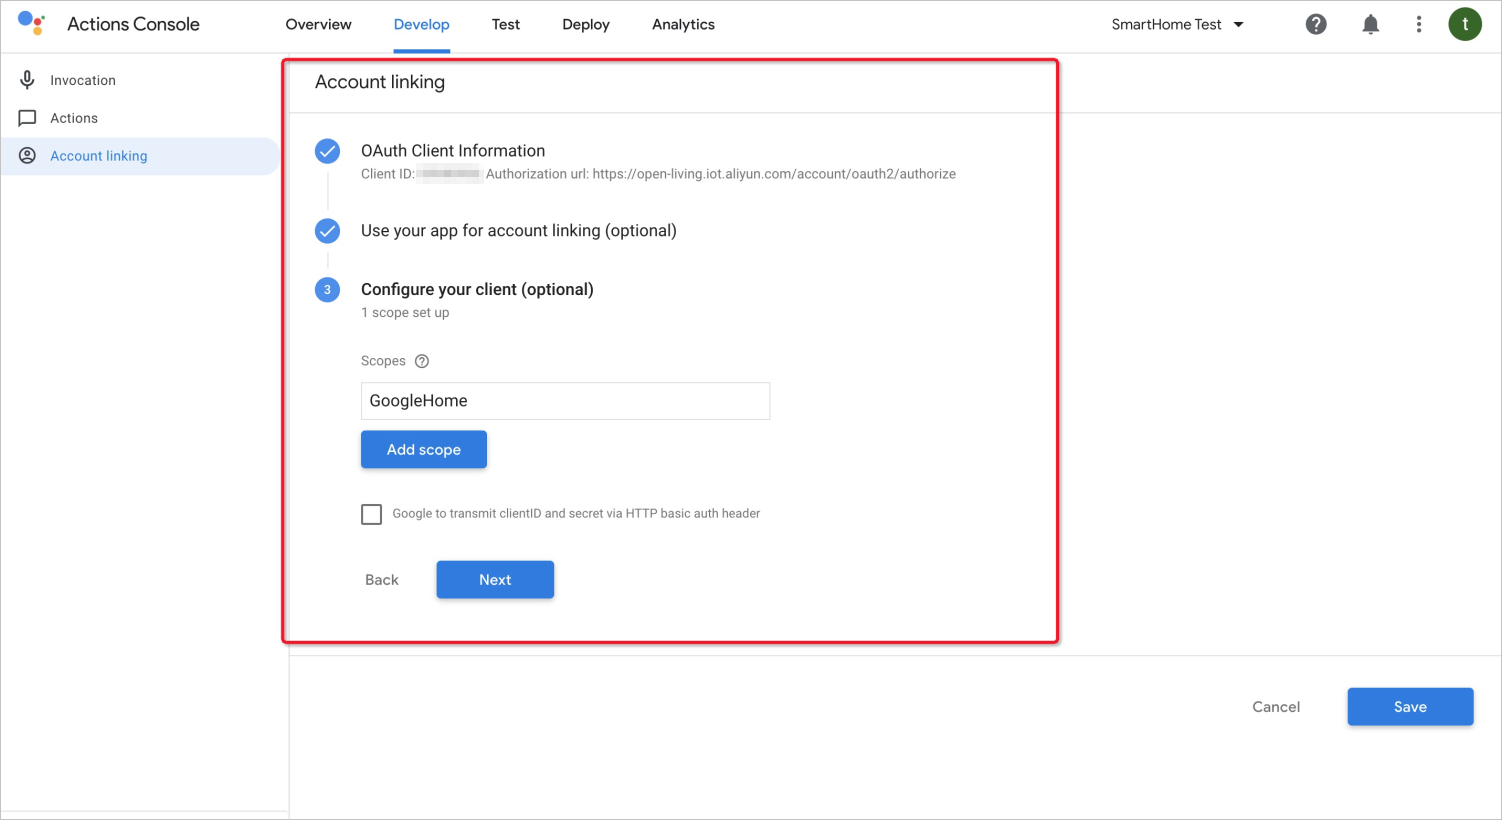
You can leave the Use your app for account linking (optional) field blank. Click Next.
In the Configure your client (optional) section, enter a custom scope in the Scopes field.
3. Feiyan Platform feature configuration (Contact Alibaba Cloud personnel to complete this configuration)
After you enter the parameters, contact Alibaba Cloud support to complete the feature configuration on the Link Living platform.
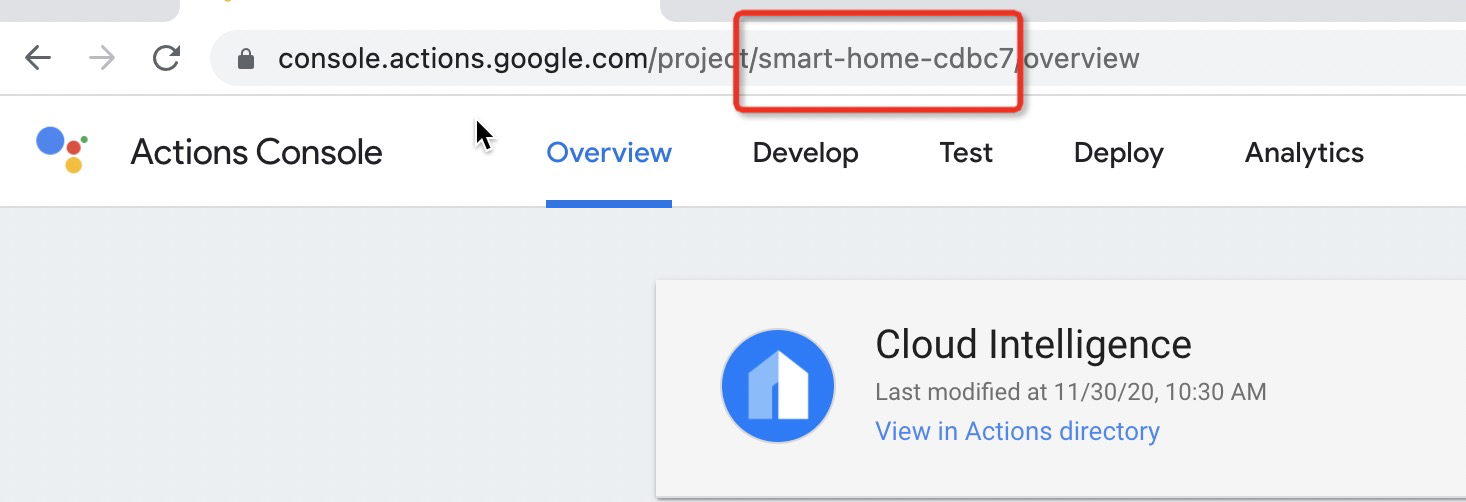
Provide the information from the 'Prepare your account and resources' section and the Google Action project name, such as smart-home-cdbc7, to Alibaba Cloud support. They will configure the account association webhook address.
1. Add the webhook address for Google account association
Contact Alibaba Cloud support to perform this configuration.
2. Add the aliyun-iot service account to the project's IAM permissions
Log on to https://console.cloud.google.com/iam-admin/iam?project=XXXX, where XXXX is your project name.
Add the Alibaba Cloud account homegraph@aliyun-iot.iam.gserviceaccount.com and grant it the Service Account Token Creator role.
3. Create a service account and submit it to Alibaba Cloud Link Living support for configuration
In the navigation pane on the left, click Service accounts. Create a service account with the Service Account Token Creator permission, such as xxxx@********.iam.gserviceaccount.com. Provide this service account to Link Living support for configuration.
4. Purchase and enable the Google Assistant service
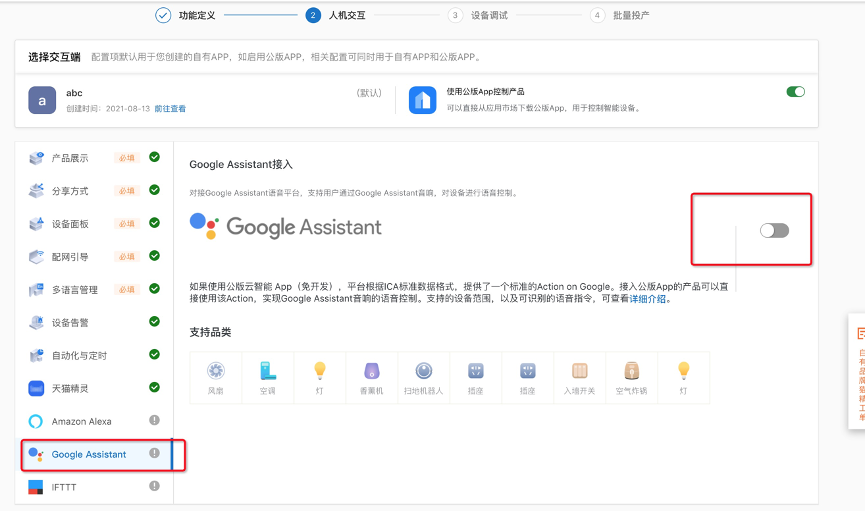
For more information, see Use a public app to control devices with a Google Home speaker. If you use the Cloud Intelligence App, click Use Public App to Control Products and enable the Google Assistant service. If you use your own branded app, you only need to enable the Google Assistant service.
5. Contact Alibaba Cloud support to configure property mapping
Contact Alibaba Cloud support to complete the property mapping configuration.
6. Test and verify
Log on to the Google Home app with your Google developer account. Click the plus sign (+) in the upper-left corner. Click Add devices and add Smart Home. Find the action that you created, add it, and authorize it with your branded app's account. This process retrieves the devices associated with your branded app's account so you can begin debugging. The procedure is as follows:
Prepare a device that is connected to the Link Living platform on the Alibaba Cloud International website (www.alibabacloud.com). Use your own branded app to attach the device.
Obtain a Google Home speaker. Download the Google Home or Google Assistant client and attach the speaker.
In the Google Home client, click Home control, and then add Smart Home under Add devices.
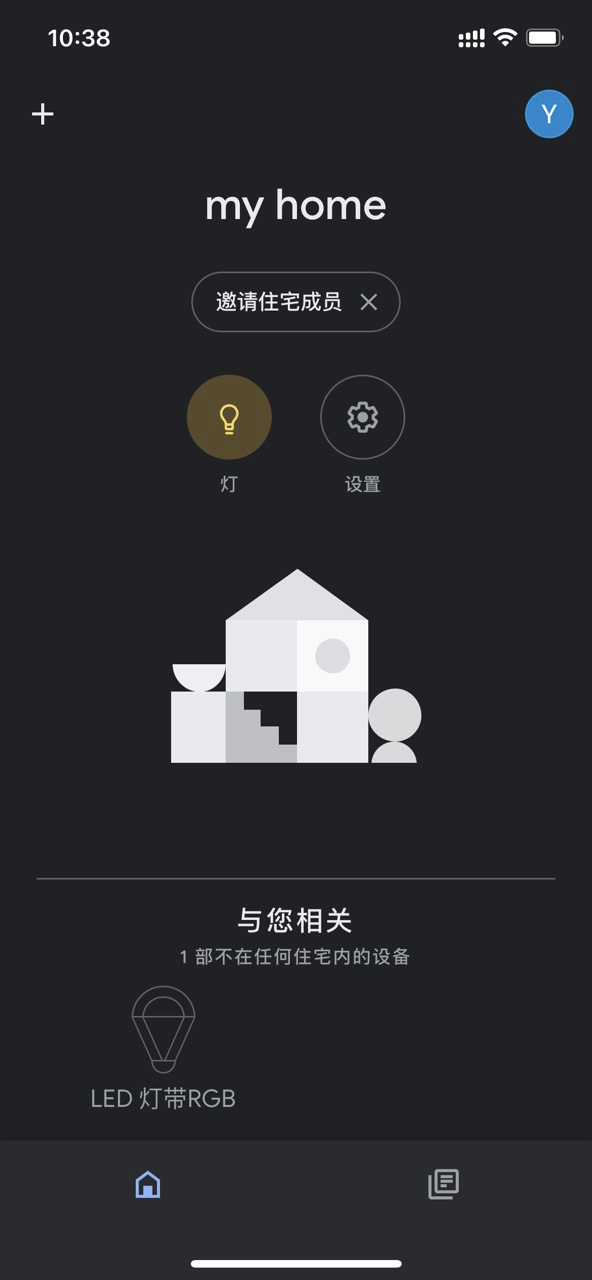
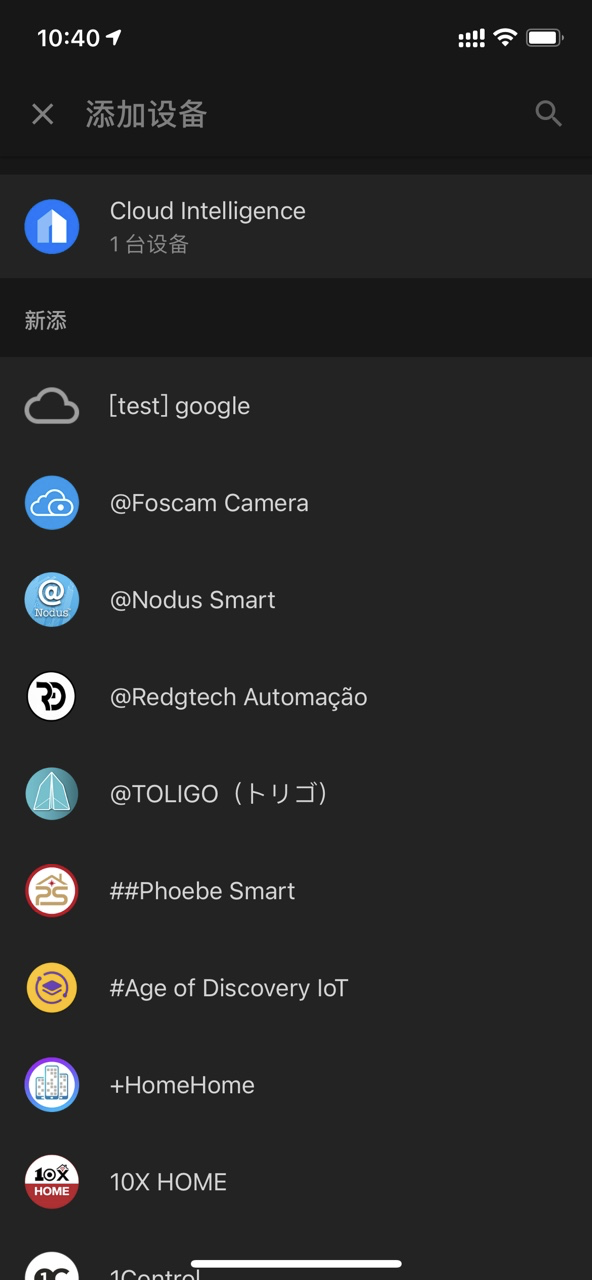
4. Enter the logon account and password for your branded app to add your smart devices. Note: If you change a device's nickname in your app, the speaker must rediscover the device. Otherwise, you cannot control it.
5. After you complete these steps, you can control your devices, such as My Light, with the following instructions:
"OK, Google, turn on/off my lights."
Dim smart lights: "OK, Google, dim my lights to fifty percent."
Change smart bulb colors: "OK, Google, turn my lights [color]."
Control August Smart Lock: "OK, Google, lock the front door."
Customize trigger phrases for IFTTT. For example: "OK, Google, let's get this party started."
7. Generate a Test Suite report (required for submission)
Log on to the Google Home app with your developer account. Attach it to your app account, and then sync the devices associated with your app account. Then, run the Test Suite.
URL: https://console.actions.google.com/project/smart-home-cdbc7/testsuite/
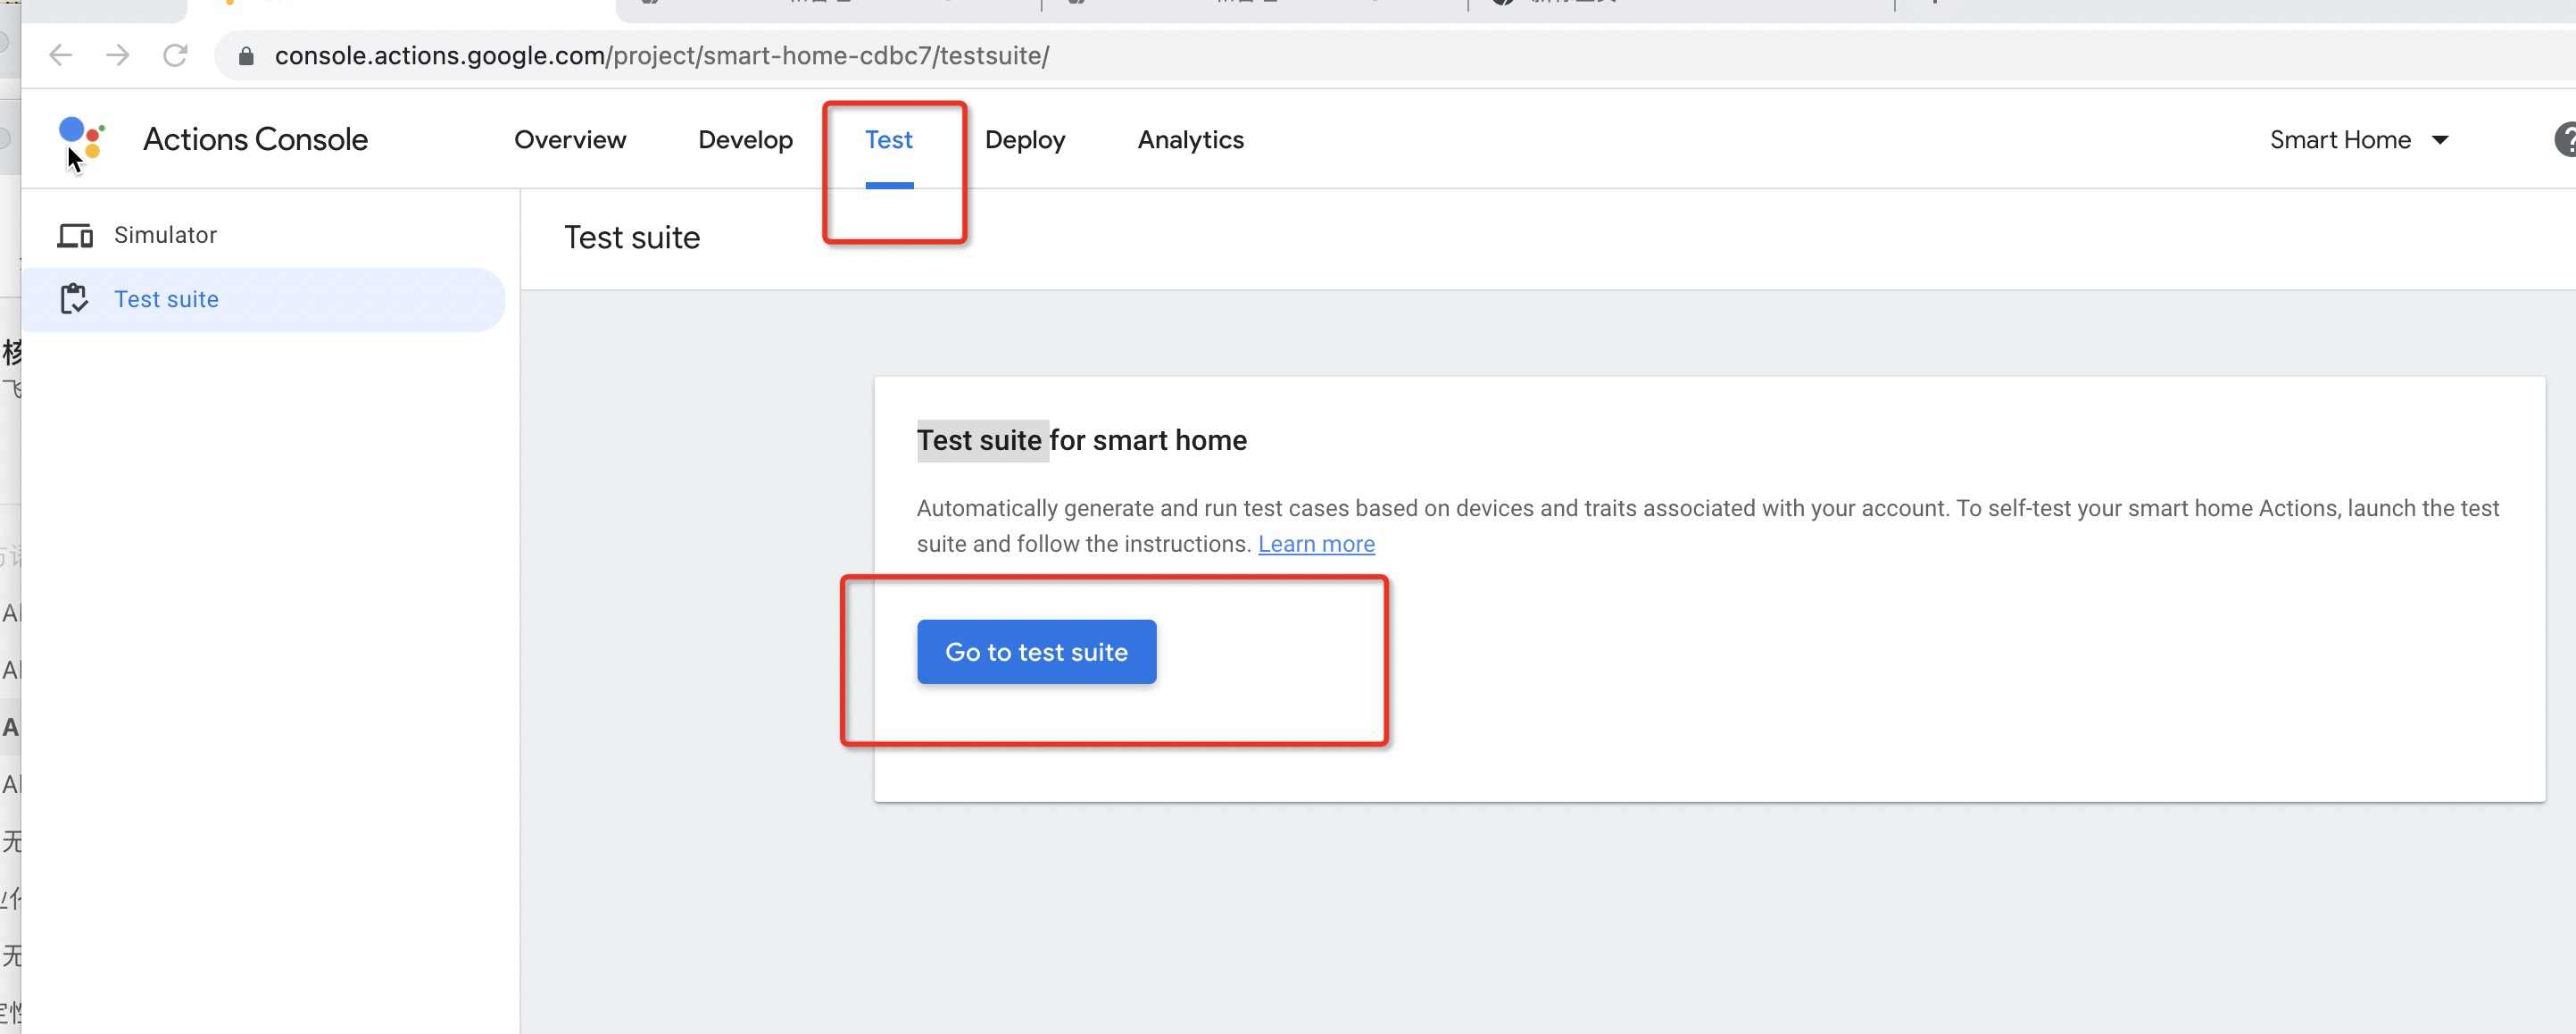
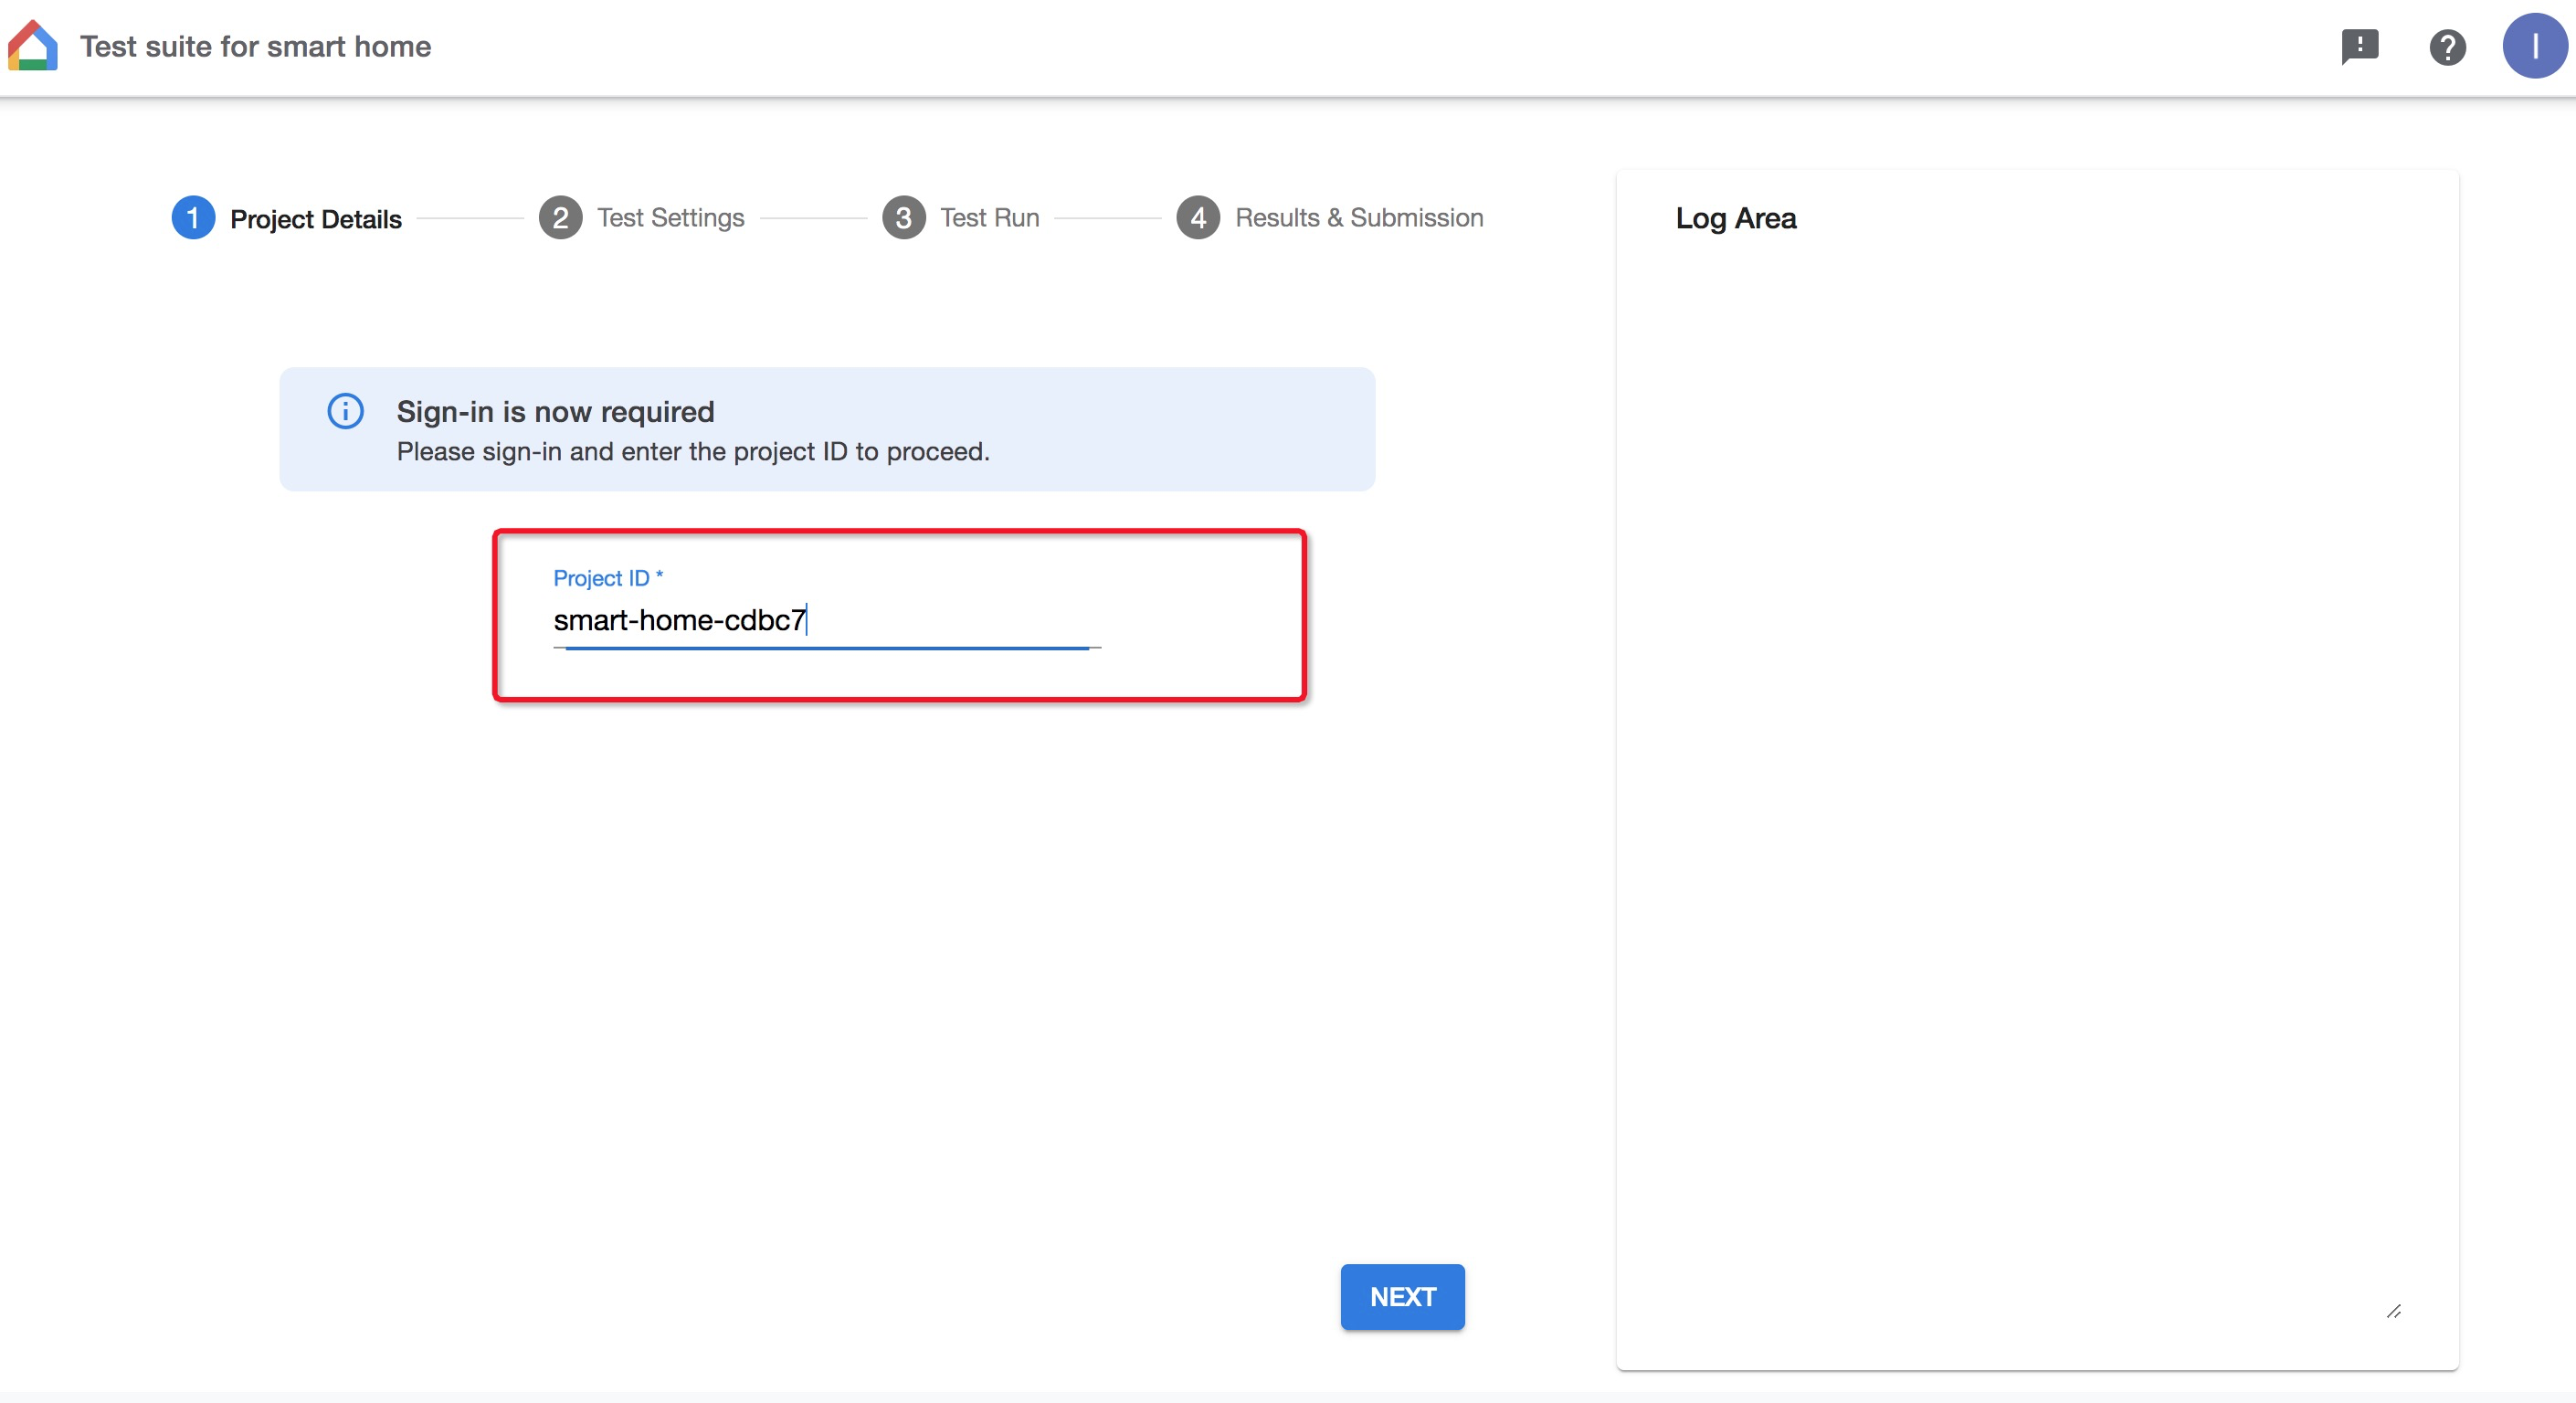
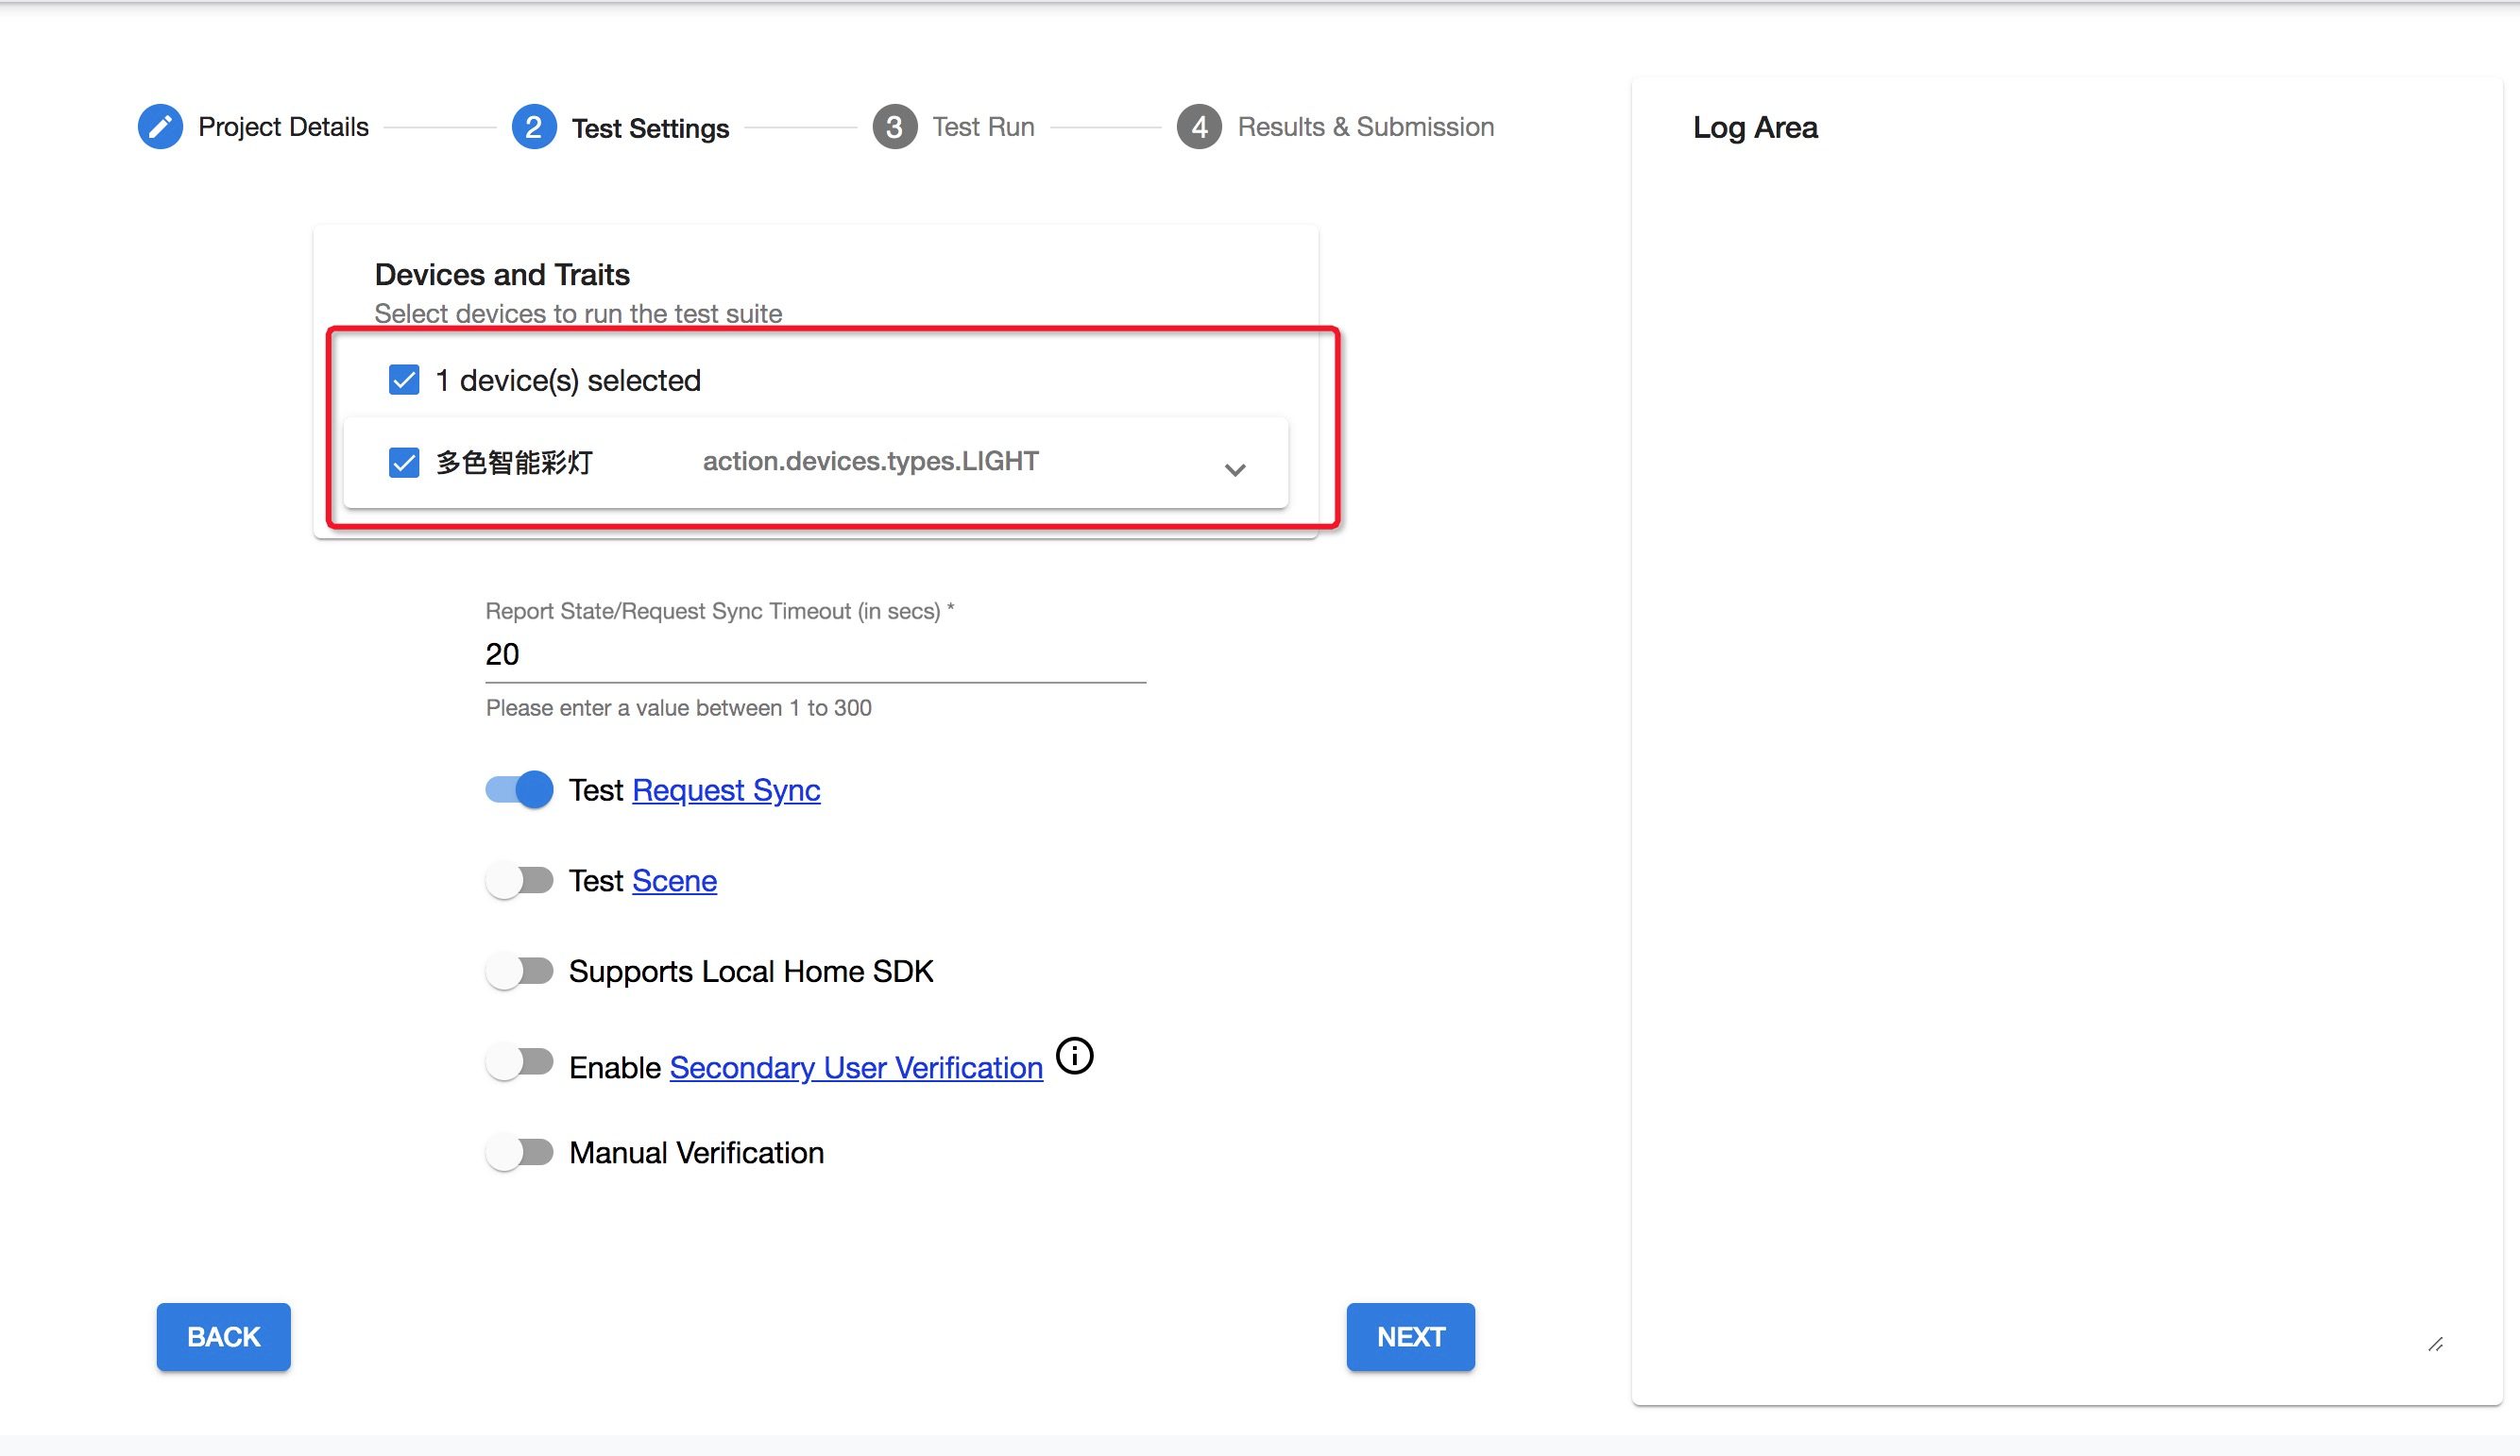
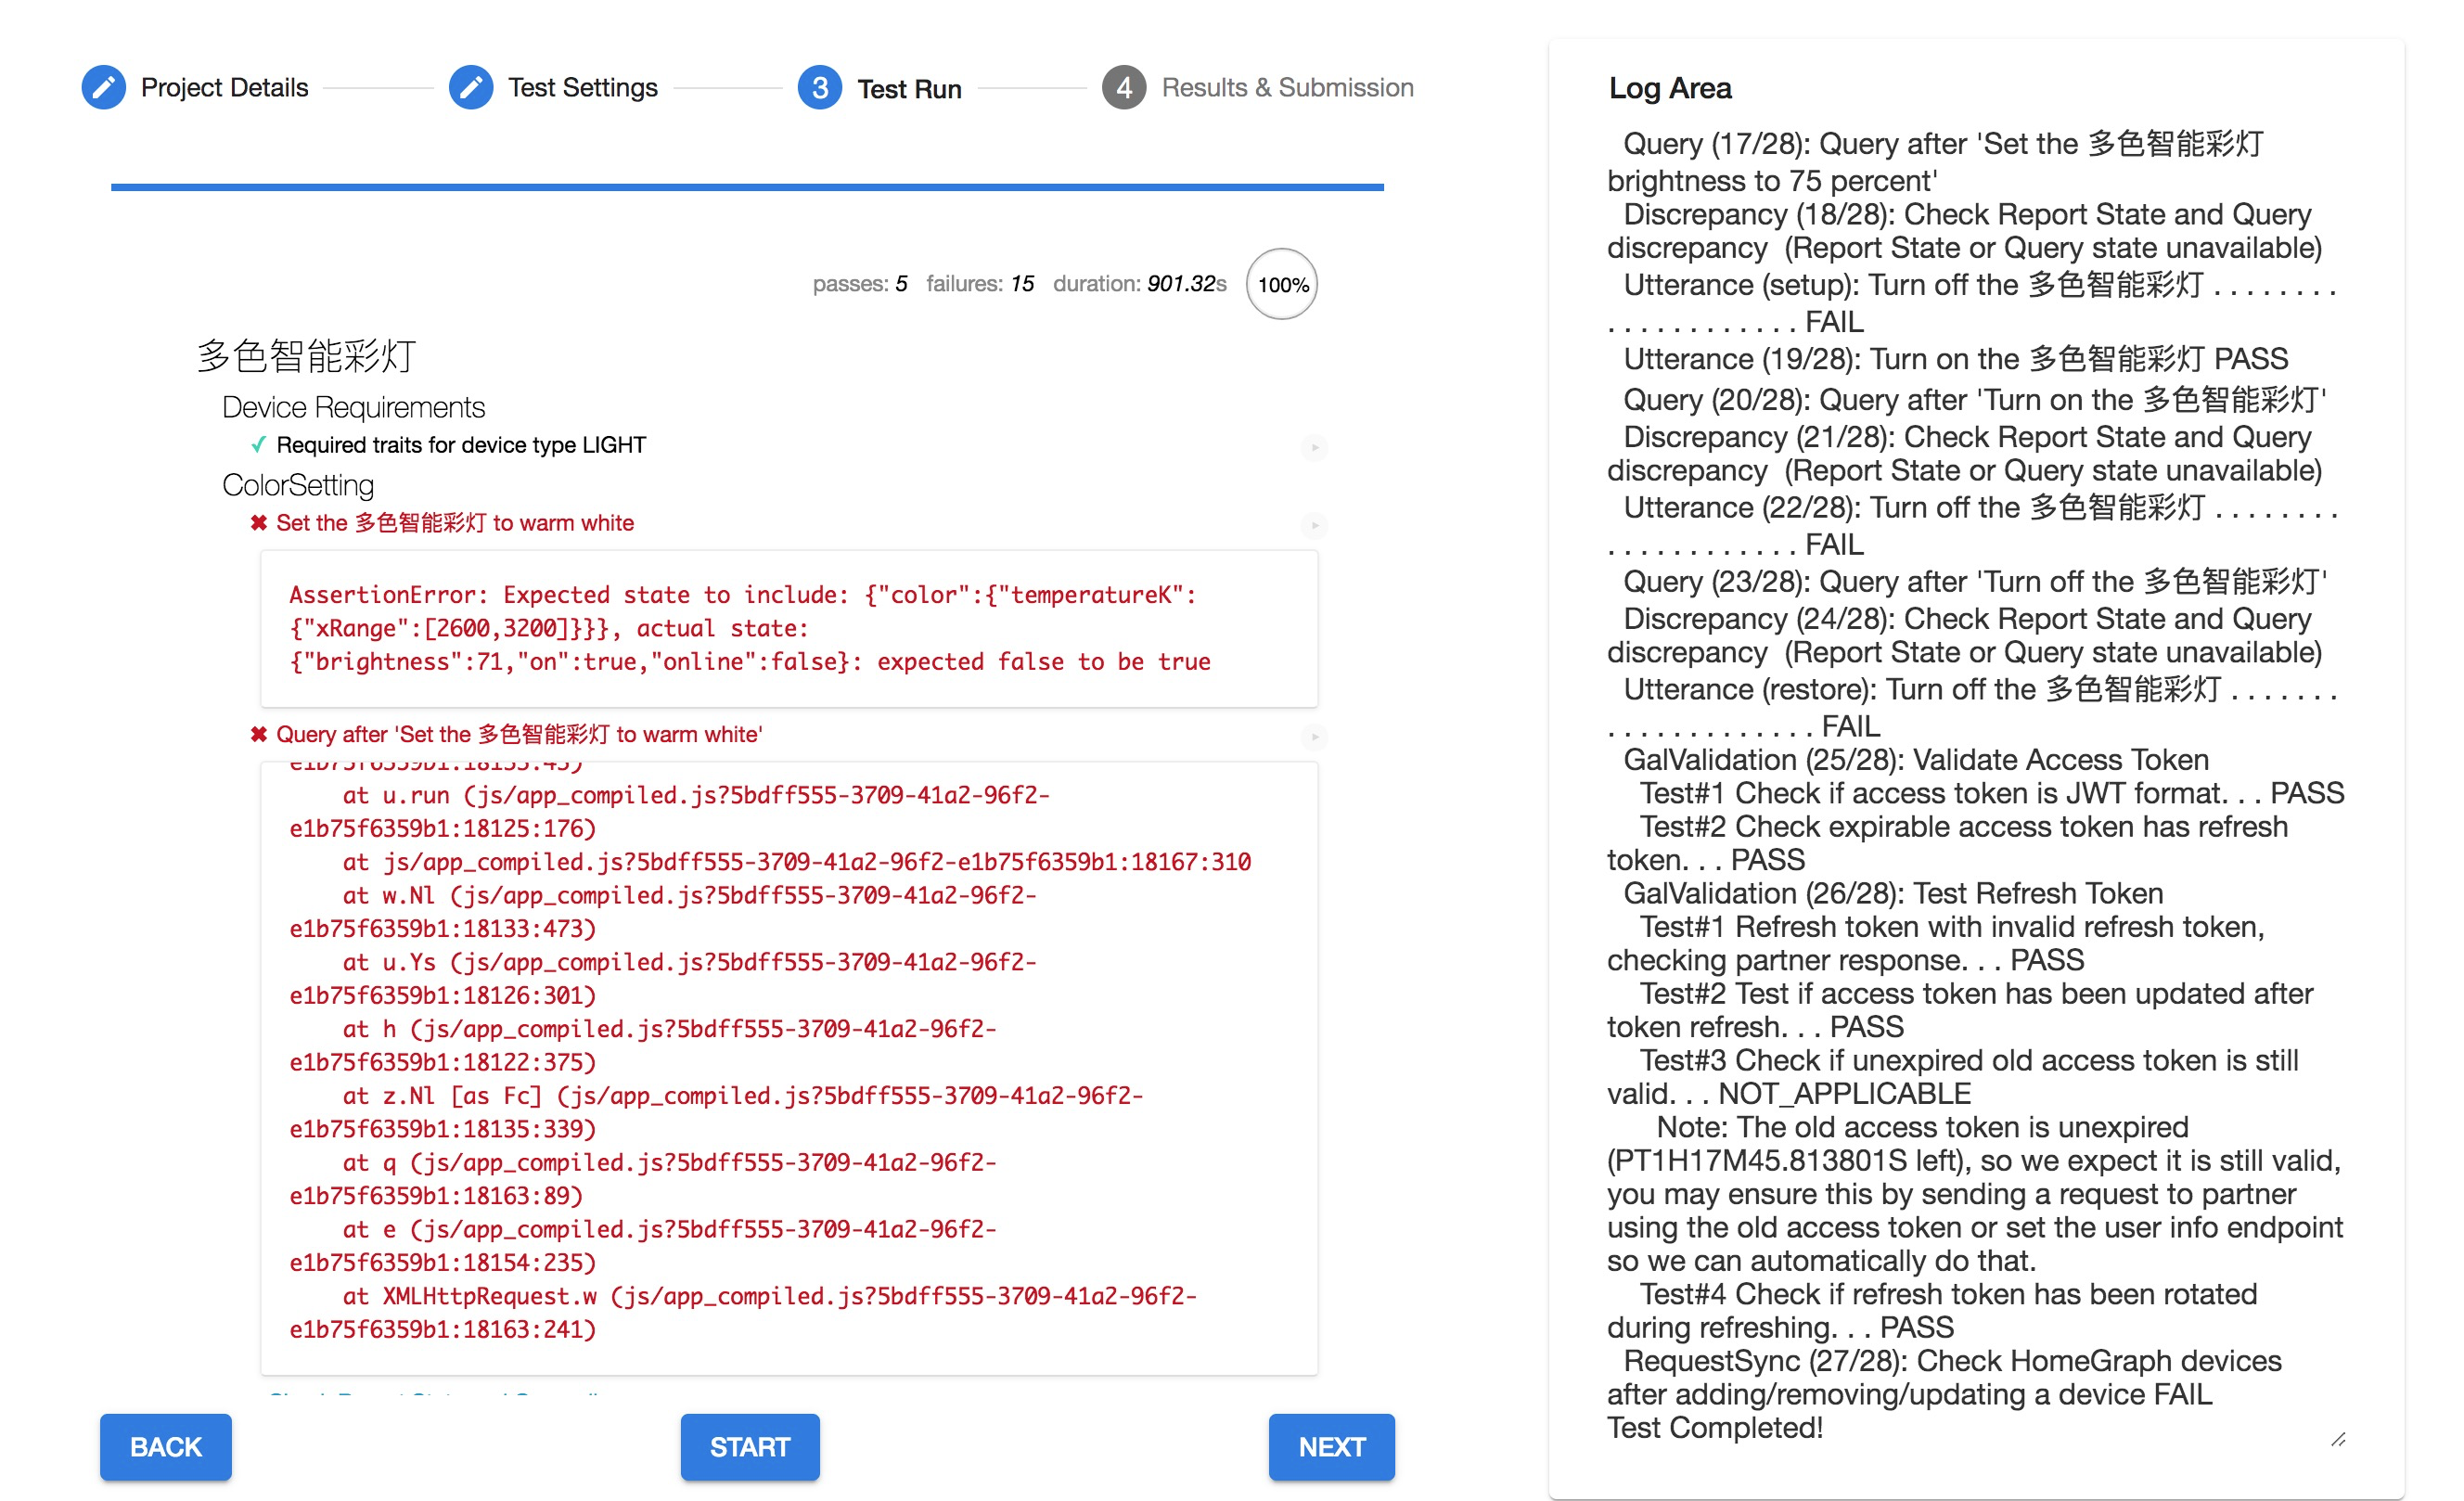
Select only the first option, Test Request Sync, and run the test. You must ensure that all test cases required by Google pass before you can generate the results file. The following figure shows an example where all test cases have passed:
If any test cases fail, check the logs and prompts to identify the cause. You must ensure that all test cases pass before you can generate the results report.
8. Submit for review
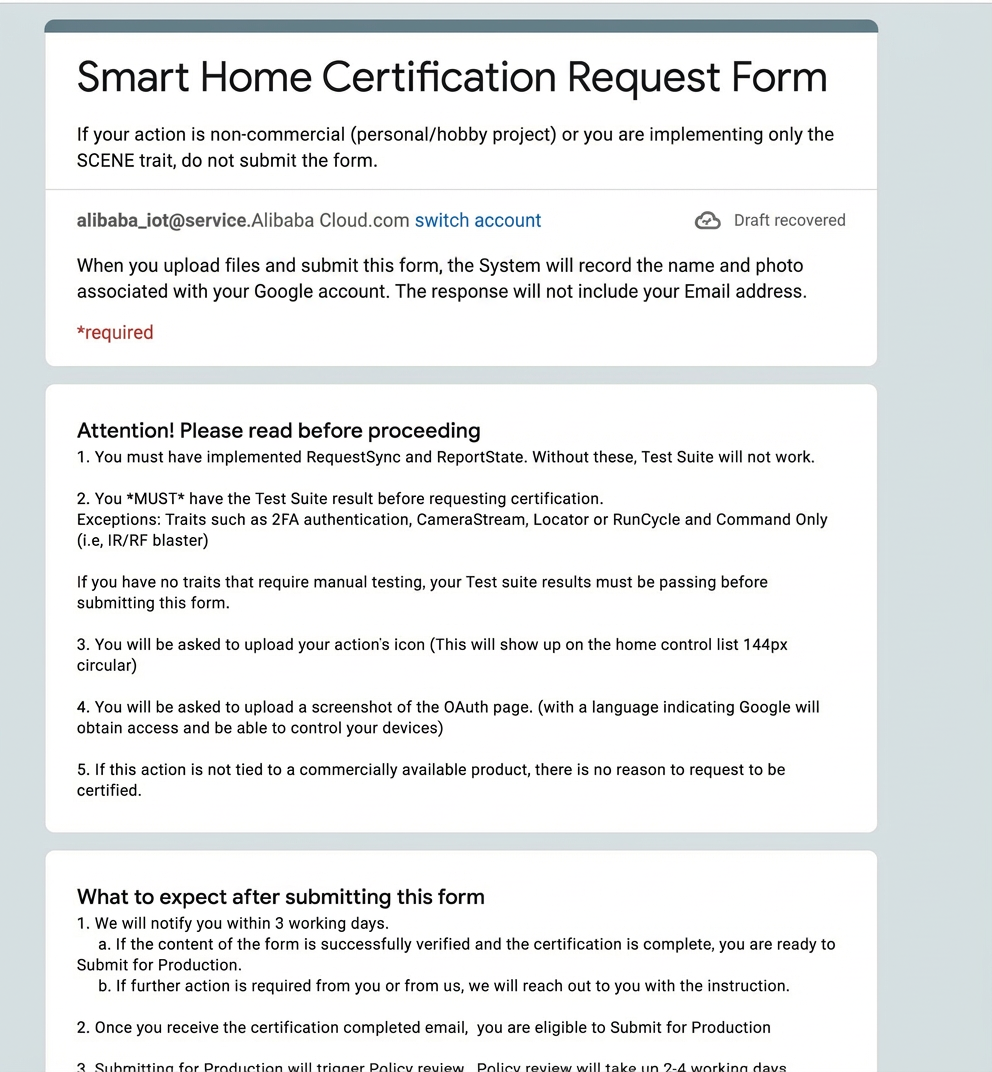
1. Fill out the form
Fill out and submit the form as required by Google. If there are any issues, Google will provide feedback so you can make corrections. You must upload the Test Suite report when you submit the form.
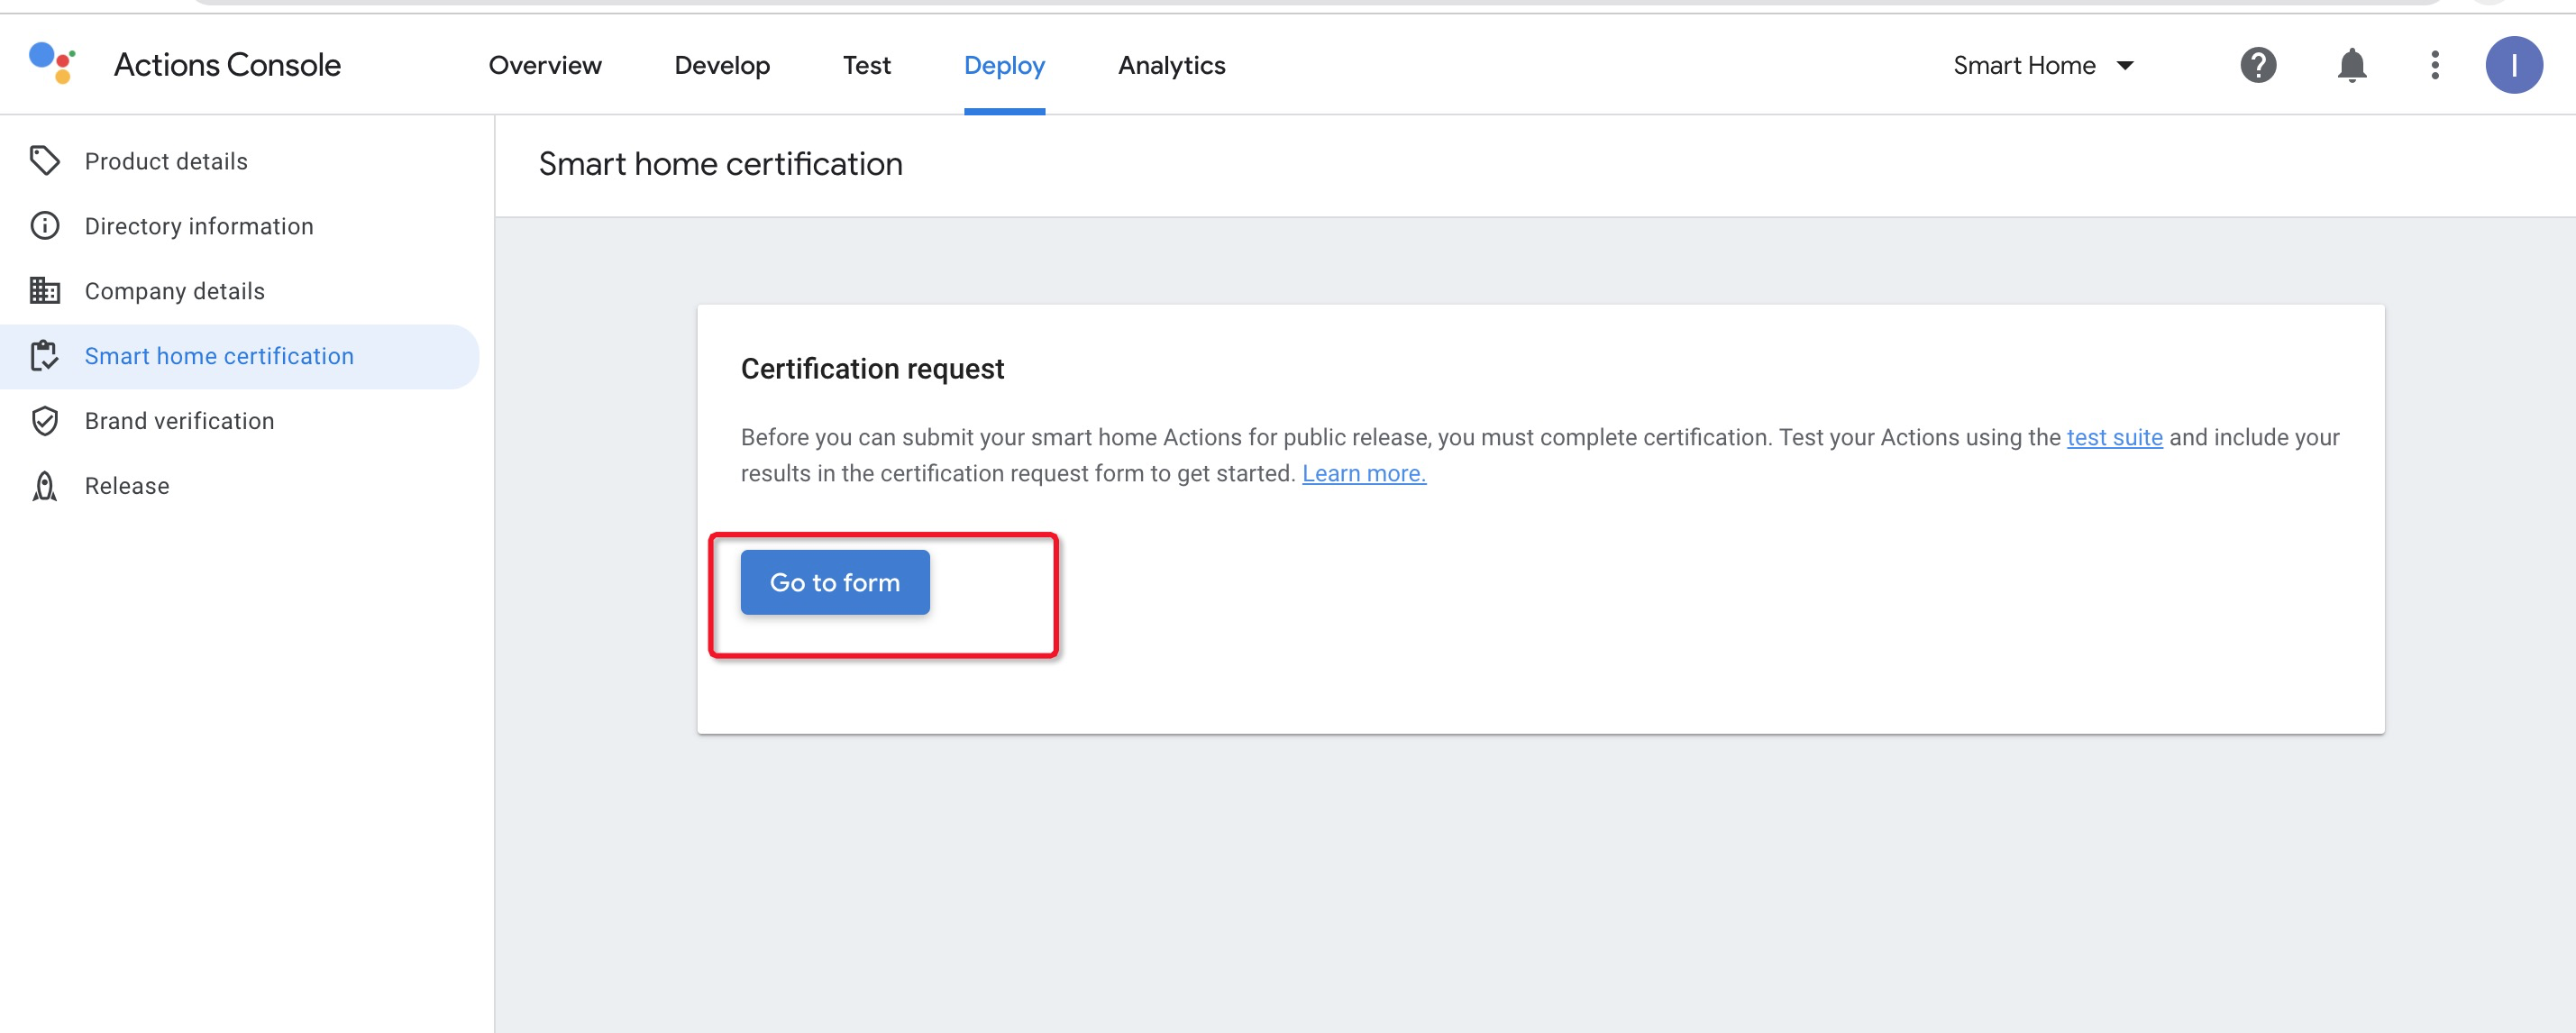
Fill out the 11-page form as required.
2. Publish and submit for review
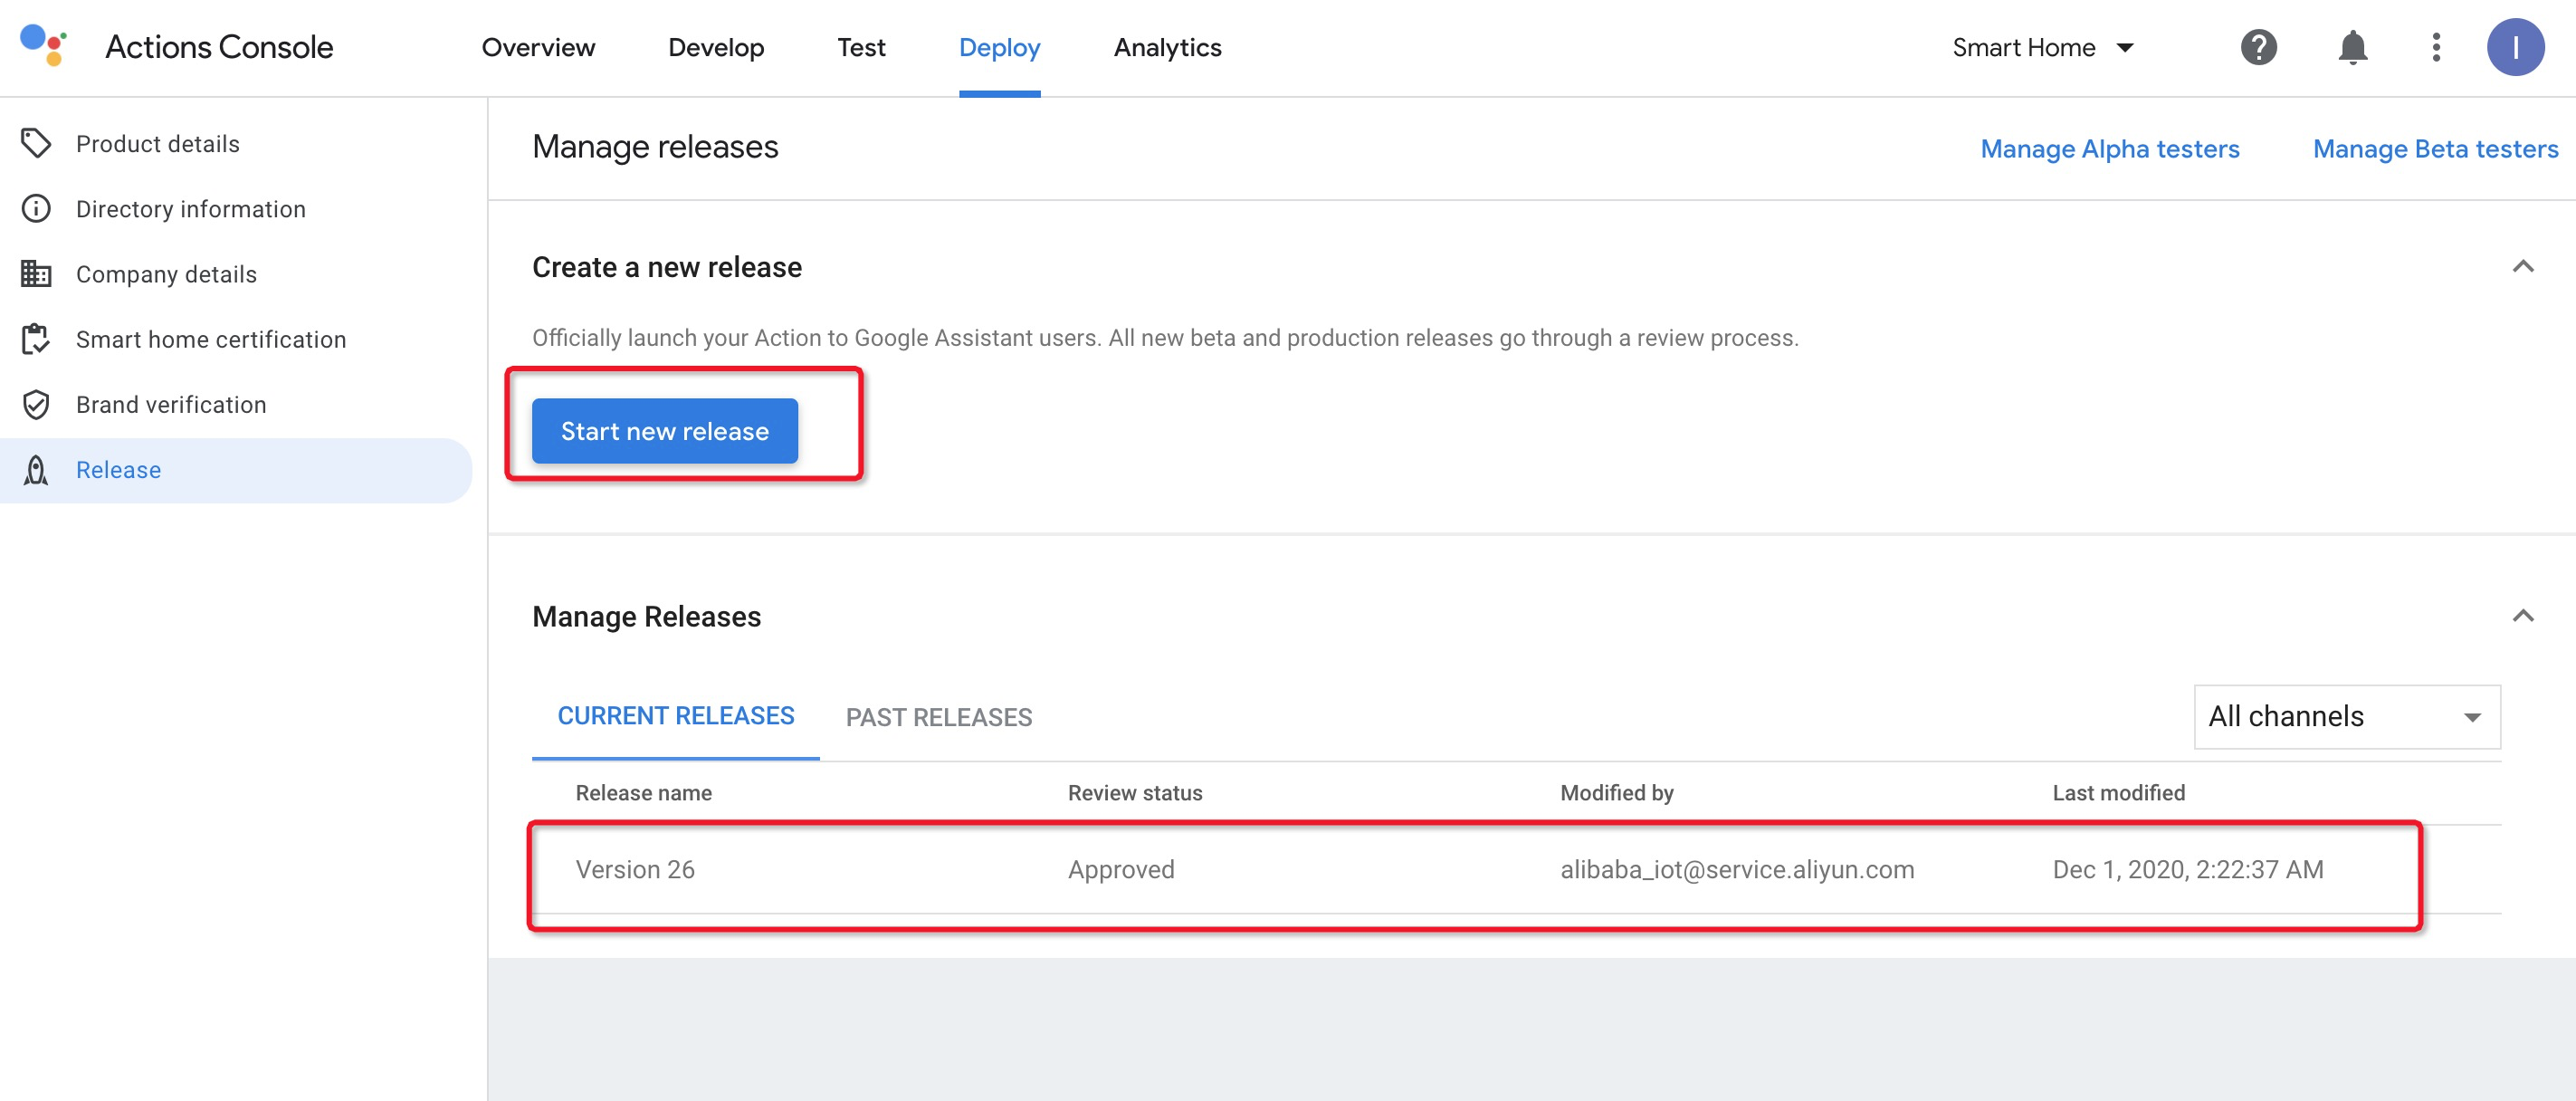
The review status is displayed on the page. If there are any issues, you will be notified by email to make the required changes.