Download and import synchronization object configurations
Data Transmission Service lets you download the configurations of synchronization objects for a data synchronization task. You can also import a CSV file to automatically configure and confirm these settings. This feature helps you save task configurations and quickly set up multiple tasks.
Download object configurations
After you create a data synchronization task, you can download its synchronization object configurations.
Log on to the OceanBase Management Console .
In the navigation pane on the left, click Data Transmission > Data Synchronization.
On the Data Synchronization page, click the name of the desired data synchronization task.

On the task details page, click the More icon (...) in the upper-right corner and select Download Object Configuration.
ImportantFor database-to-database data synchronization tasks, you can import objects only when you select Specify Objects.

Import object configurations
Data Transmission Service lets you import a CSV file to perform operations, such as setting row filter conditions, filtering columns, and setting sharding columns. You can download the object configurations from an existing task or a CSV template file, modify the file as needed, and then import it.
If you edit the file using Excel, save it as a comma-separated values (CSV) file before you import it.
The CSV file that you import for a data synchronization task must include the following columns: source database name, source table name, destination database name, destination table name, selected columns (separated by semicolons), column mapping, sharding columns (separated by semicolons), and row filter condition.
Log on to the OceanBase Management Console and purchase a data sync task.
For more information, see Purchase a data sync task.
On the Data Transmission > Data Synchronization page, find the desired data synchronization task and click Configure.

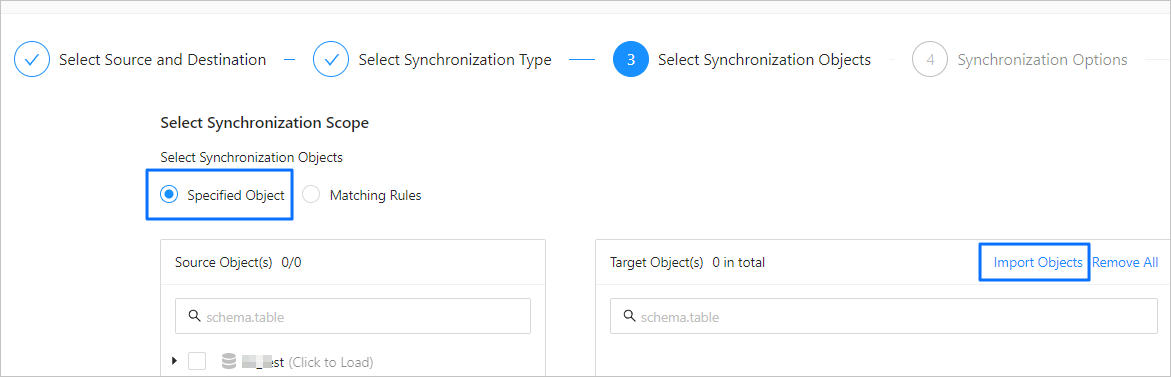
Configure the data synchronization task. On the Choose Synchronization Objects page, find the list to the right of Select Synchronization Scope and click Import Objects in the upper-right corner.
NoteFor database-to-database data synchronization tasks, you can import objects only when you select Specify Objects.
For more information about how to configure a data synchronization task, see the documentation for the relevant task type.
In the prompt that appears, click OK to open the Import Synchronization Objects dialog box.
At the bottom of the Import Synchronization Objects dialog box, click Import CSV File and select the local CSV file.
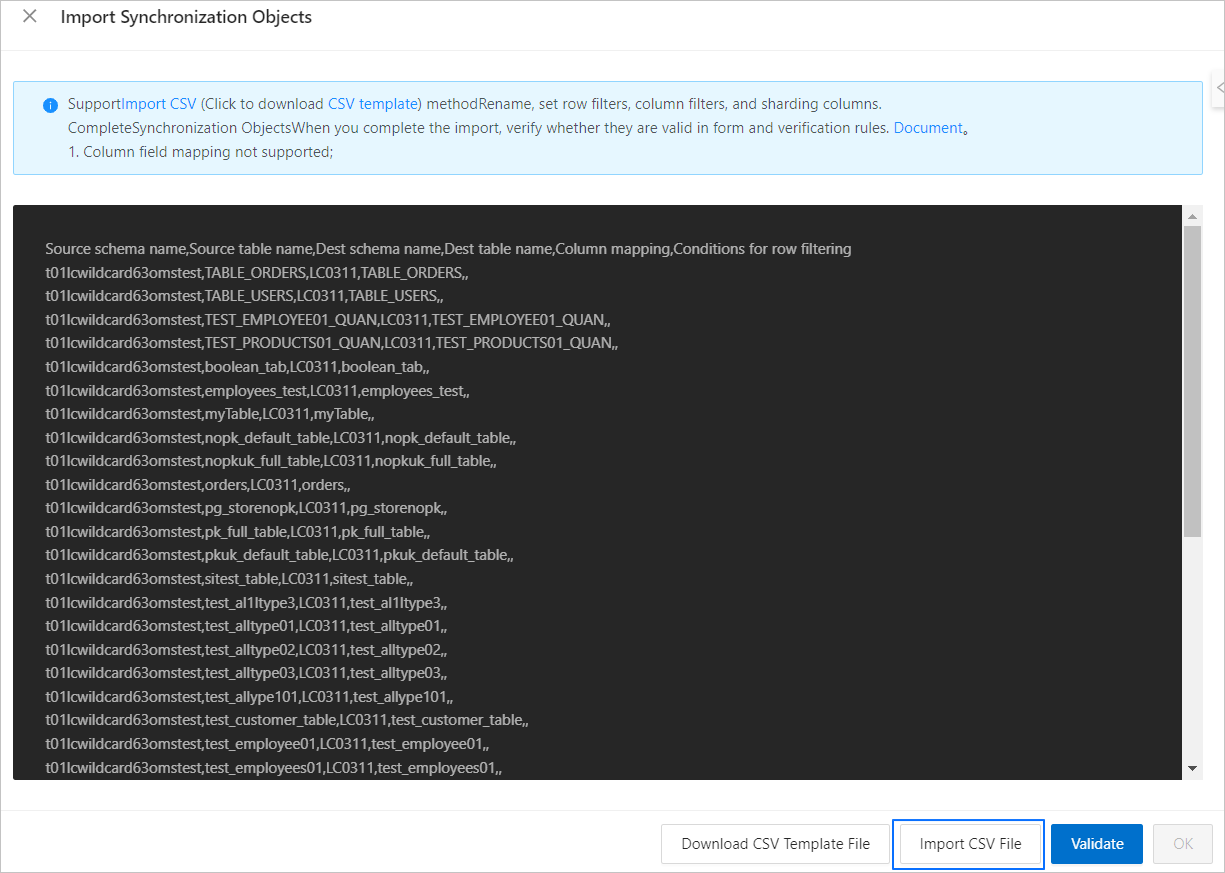
Alternatively, you can click Download CSV Template File at the bottom of the dialog box. After you download and modify the template as needed, click Import CSV File to import the synchronization objects.
The import object view displays the contents of the CSV file. You can edit the contents as needed.
NoteYou can generate the CSV file using an SQL script, editing it manually, or clicking Download Object Configuration on the task details page.
To implement database and table name mapping, enter destination database or table names that are different from the source names.
Click Validate to check whether the source objects exist and the row filter conditions are valid. If the validation is successful, the number of validated tables and views is displayed.
After the validation is successful, click OK to return to the Choose Synchronization Objects page.
Follow the prompts to complete the rest of the task configuration.