Operations Hub
The Operations Hub is a central location for storing and managing content templates for your space. It supports various formats, such as images, text, videos, articles, and copy.
Content template library
Create a content template
Navigate to Content Marketing > Your Space > Operations Hub > Content Library. In the upper-right corner, click Create Content to create a new content template.
Create an image and text content template
In the pop-up window, fill in the fields for the image and text content template. Fields marked with an asterisk (*) are required.
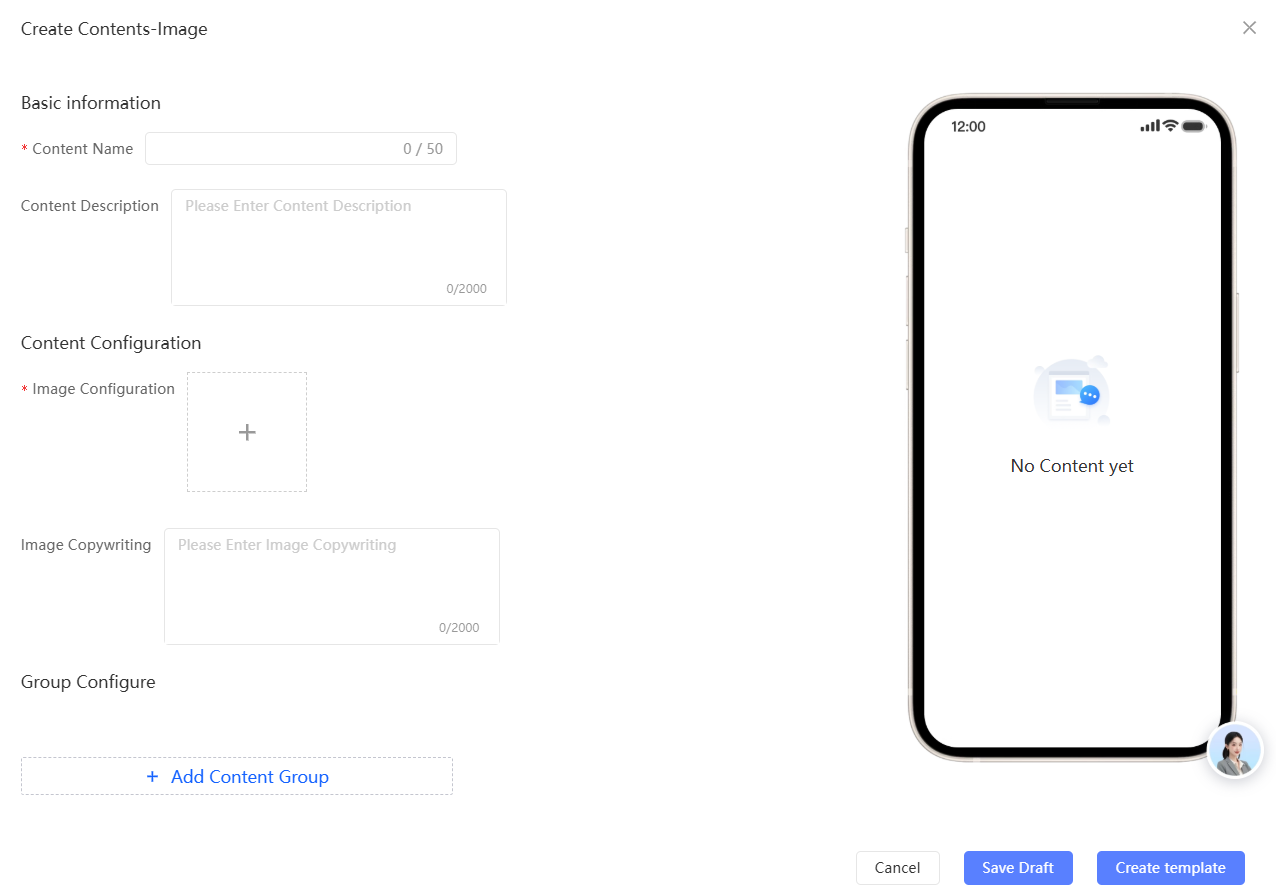
Procedure:
*Enter a content name. The name can be up to 50 characters long.
Enter a content description. The description can be up to 200 characters long.
Configure the content. *Configure images: Click the + icon, select images from the Material Library, and then click Confirm.
You can select up to nine images.
In the upper-right corner, you can filter materials by group and tag to quickly find images.
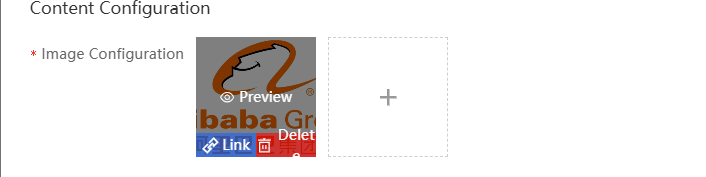
If you select the wrong image, move your mouse over the image to display the Delete button. Click Delete, and then select the correct image.
Set an image redirect link.
In the lower-left corner of the image, click Link. In the link address field, paste the URL of the destination page, and then click Confirm.
A link icon in the upper-right corner of the image indicates that a redirect link has been set.
Enter the image copy. The copy can be up to 140 characters long.
Configure group settings. For more information, see Content Grouping.
If you do not configure group settings, the content is placed in the Ungrouped group by default.
Click Add Content Group. In the pop-up window, select a group, and then click Confirm.
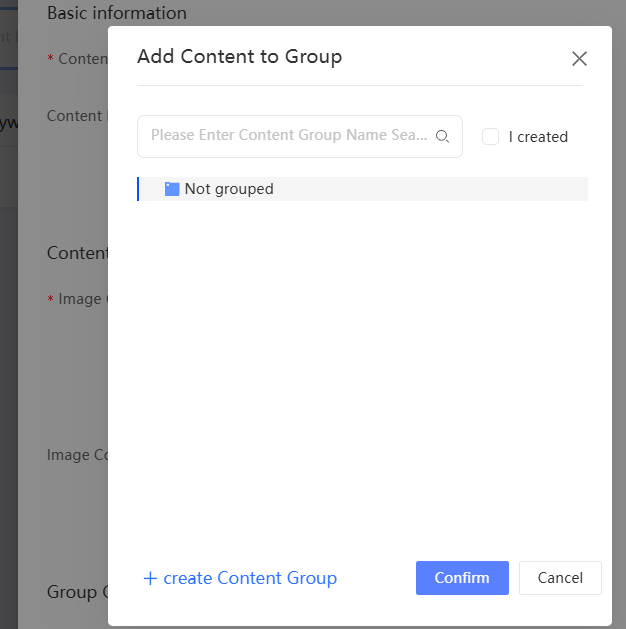
If you click Created by Me, the group list shows only the groups that you created.
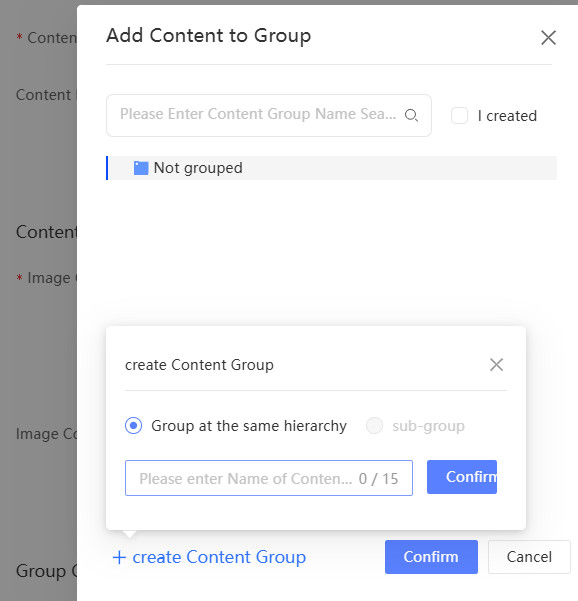
To create a new group, select an existing group and click New Content Group. In the pop-up window, select whether to create a sibling group or a child group, and then click Confirm. The new group is added to the group list.
*Configure manual tags. For more information, see Tag Management.
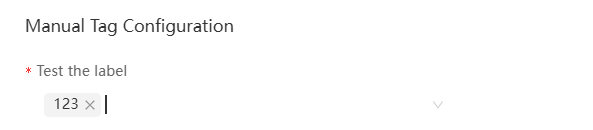
Tags marked with an asterisk  are displayed by default. These tags are required when adding content to the library. You must select at least one tag value for each required tag, as shown in the figure.
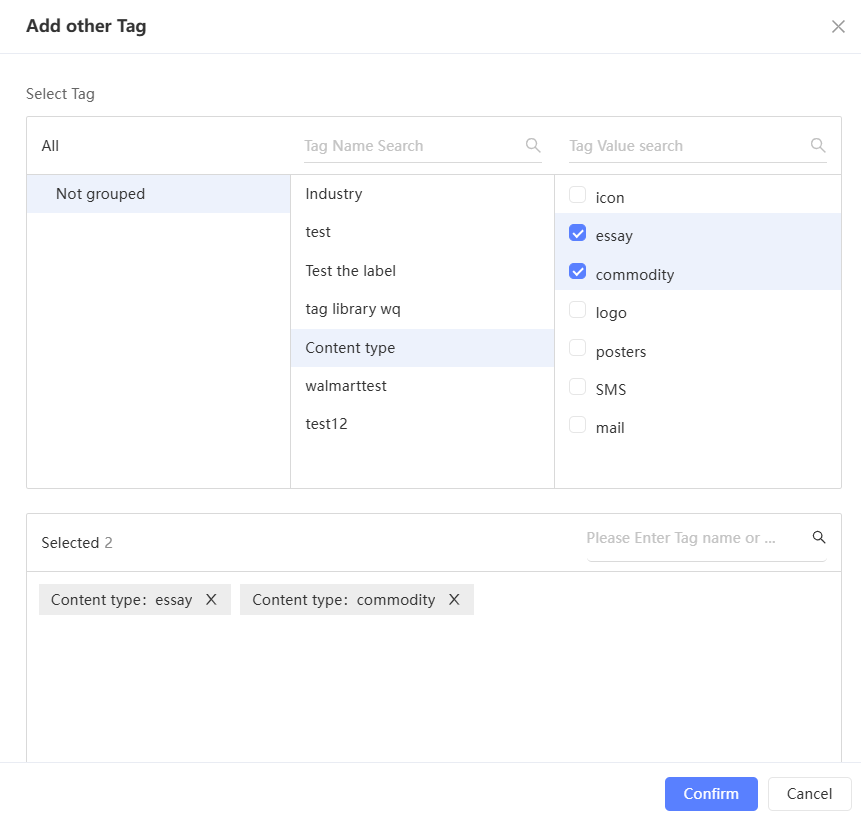
You can also configure optional tags. Click Add Other Tags. From all available tags, select a tag group, a tag, and a tag value in sequence, and then click Confirm.
Click Create Template, or click Save Draft to edit it later.

Create a video content template
In the pop-up window, fill in the fields for the video content template. Fields marked with an asterisk (*) are required.
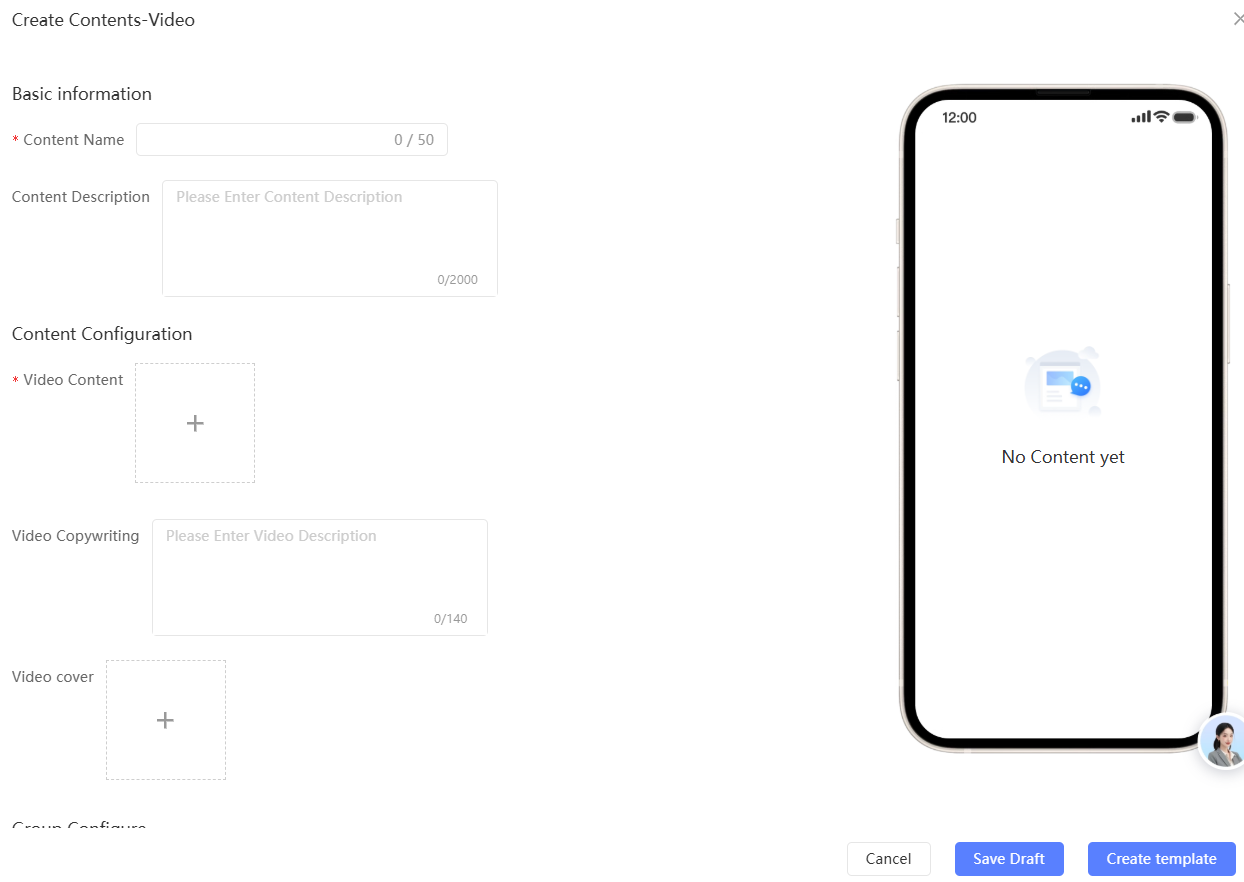
*Enter a content name. The name can be up to 50 characters long.
Enter a content description. The description can be up to 200 characters long.
Content configuration. *Video configuration: Click the + icon, select a video from the Material Library, and then click Confirm.
You can select only one video.
In the upper-right corner, you can filter materials by group and tag to quickly find videos.
If you select the wrong video, move your mouse over the video to display the delete button. Click Delete, and then select the correct video.
Enter the video copy. The copy can be up to 140 characters long.
Set the video thumbnail. Click the + icon. By default, a screenshot from the video is used as the thumbnail.
To use a custom thumbnail, select an image from the Material Library and click Confirm.
You can select only one thumbnail image.
In the upper-right corner, you can filter materials by group and tag to quickly find images.
Configure group settings. For more information, see Content Grouping.
If you do not configure group settings, the content is placed in the Ungrouped group by default.
Click Add Content Group. In the pop-up window, select a group, and then click Confirm.
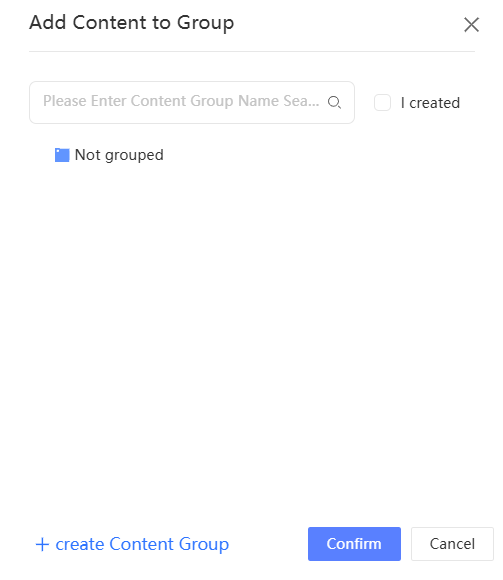
If you click Created by Me, the group list shows only the groups that you created.
To create a new group, select an existing group and click New Content Group. In the pop-up window, select whether to create a sibling group or a child group, and then click Confirm. The new group is added to the group list.

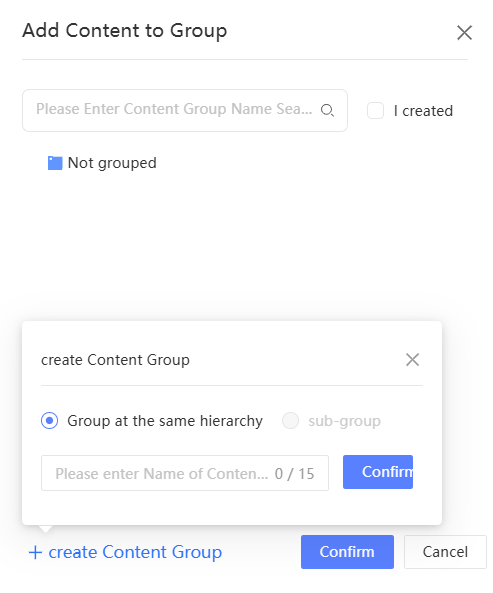
*Configure manual tags. For more information, see Tag Management.
Tags marked with an asterisk  are displayed by default. These tags are required when adding content to the library. You must select at least one tag value for each required tag, as shown in the figure.
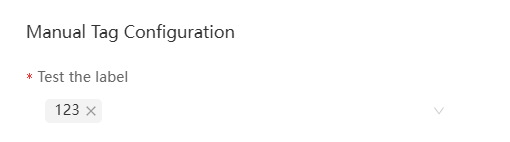
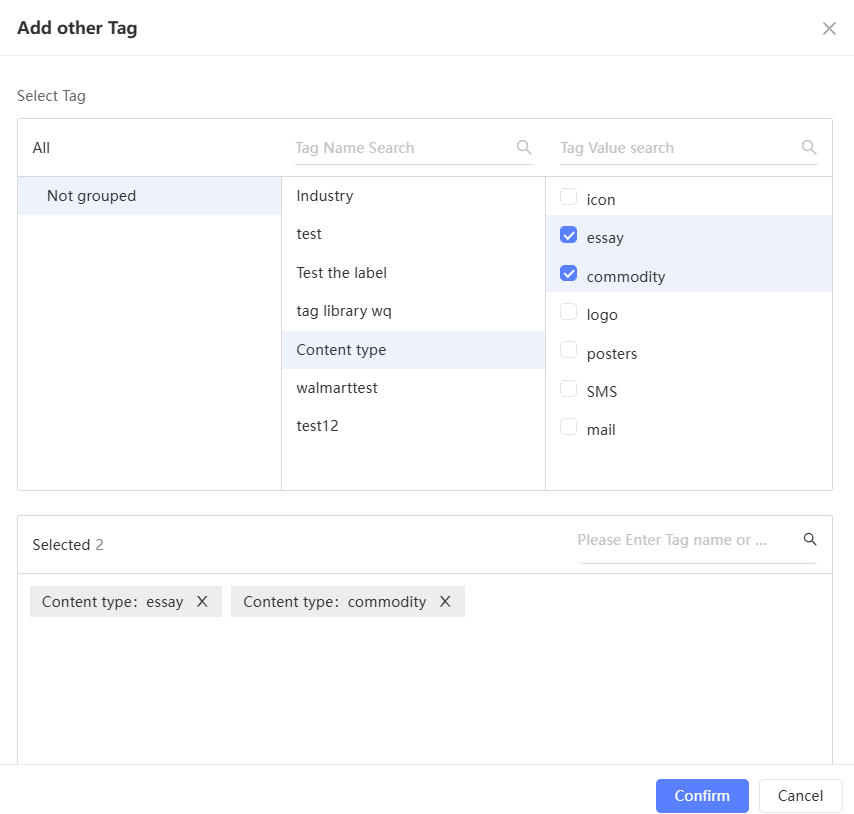
You can also configure optional tags. Click Add Other Tags. From all available tags, select a tag group, a tag, and a tag value in sequence, and then click Confirm.
Click Create Template, or click Save Draft to edit it later.

Create an article content template
In the pop-up window, fill in the fields for the article content template. Fields marked with an asterisk (*) are required.
Procedure:
*Enter a content name. The name can be up to 50 characters long.
Enter a content description. The description can be up to 200 characters long.
Content configuration. *Article body: Enter the body text of the article.
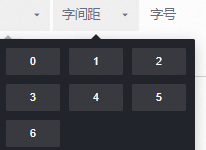
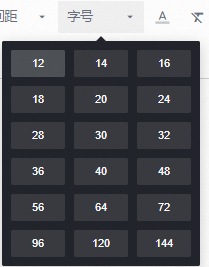
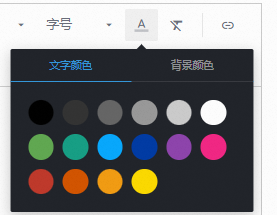
The body text supports formatting options, such as bold
, italic , underline , line height, letter spacing, font size, text color, and text background color.
 , italic
  , underline
  , line height, letter spacing, font size,
  text color, and text background color.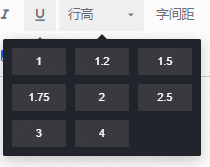
- You can add links to the article.
 You can add links to the article.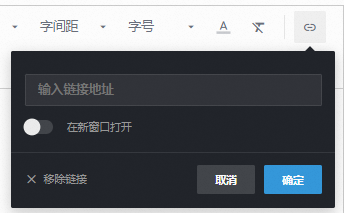
You can add images from the Material Library. In the upper-right corner, you can filter materials by group and tag to quickly find images.
Set the article thumbnail. Click the + icon, select an image from the Material Library, and then click Confirm.
You can select only one thumbnail image.
In the upper-right corner, you can filter materials by group and tag to quickly find images.
Configure group settings. For more information, see Content Grouping.
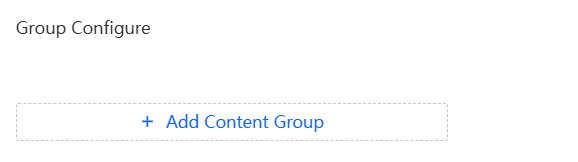
If you do not configure group settings, the content is placed in the Ungrouped group by default.
Click Add Content Group. In the pop-up window, select a group, and then click Confirm.
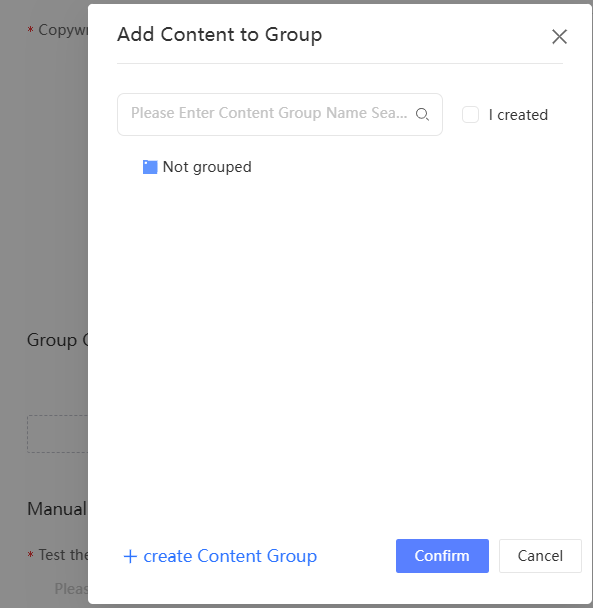
If you click Created by Me, the group list shows only the groups that you created.
To create a new group, select an existing group and click New Content Group. In the pop-up window, select whether to create a sibling group or a child group, and then click Confirm. The new group is added to the group list.
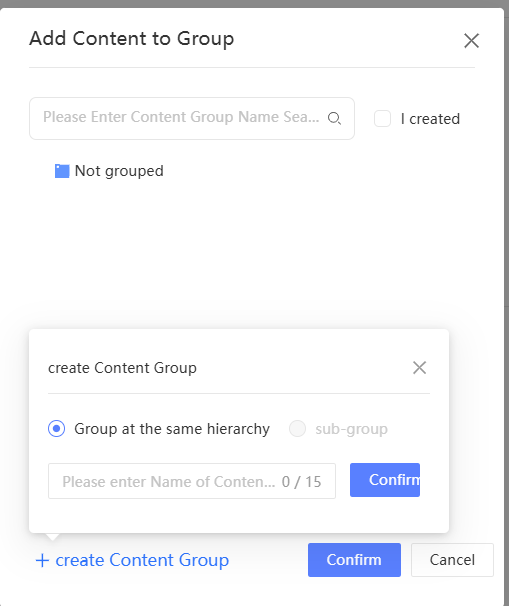
*Configure manual tags. For more information, see Tag Management.
Tags marked with an asterisk  are displayed by default. These tags are required when adding content to the library. You must select at least one tag value for each required tag, as shown in the figure.
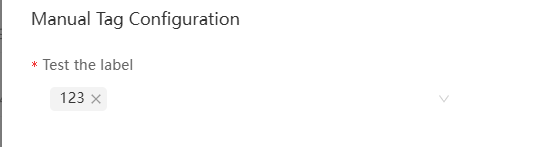
You can also configure optional tags. Click Add Other Tags. From all available tags, select a tag group, a tag, and a tag value in sequence, and then click Confirm.
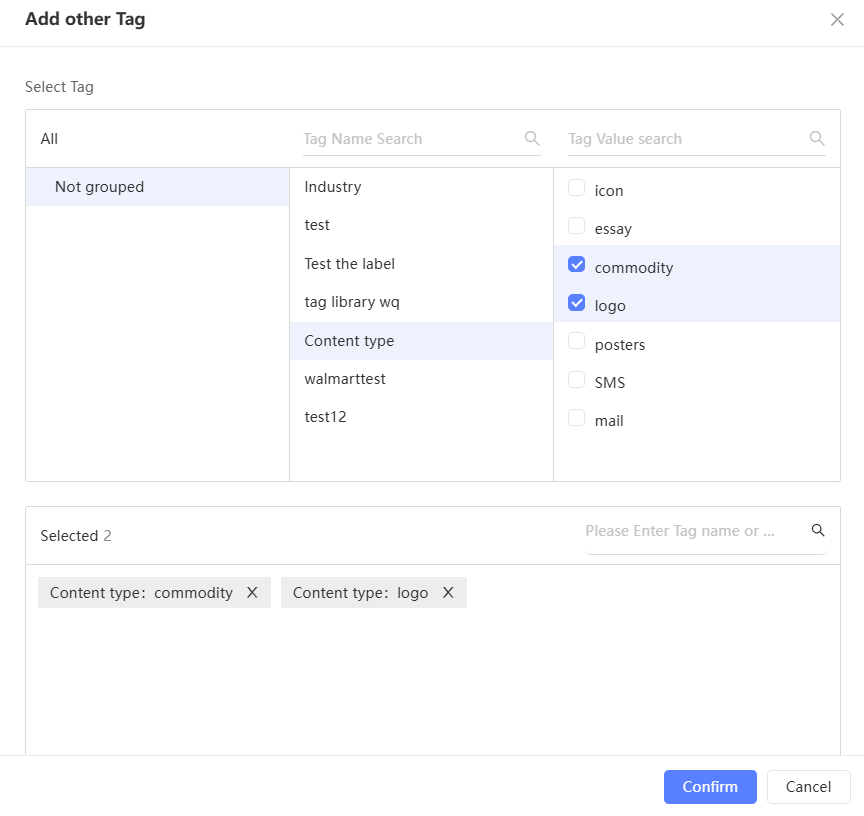
Click Create Template, or click Save Draft to edit it later.

Create a copy content template
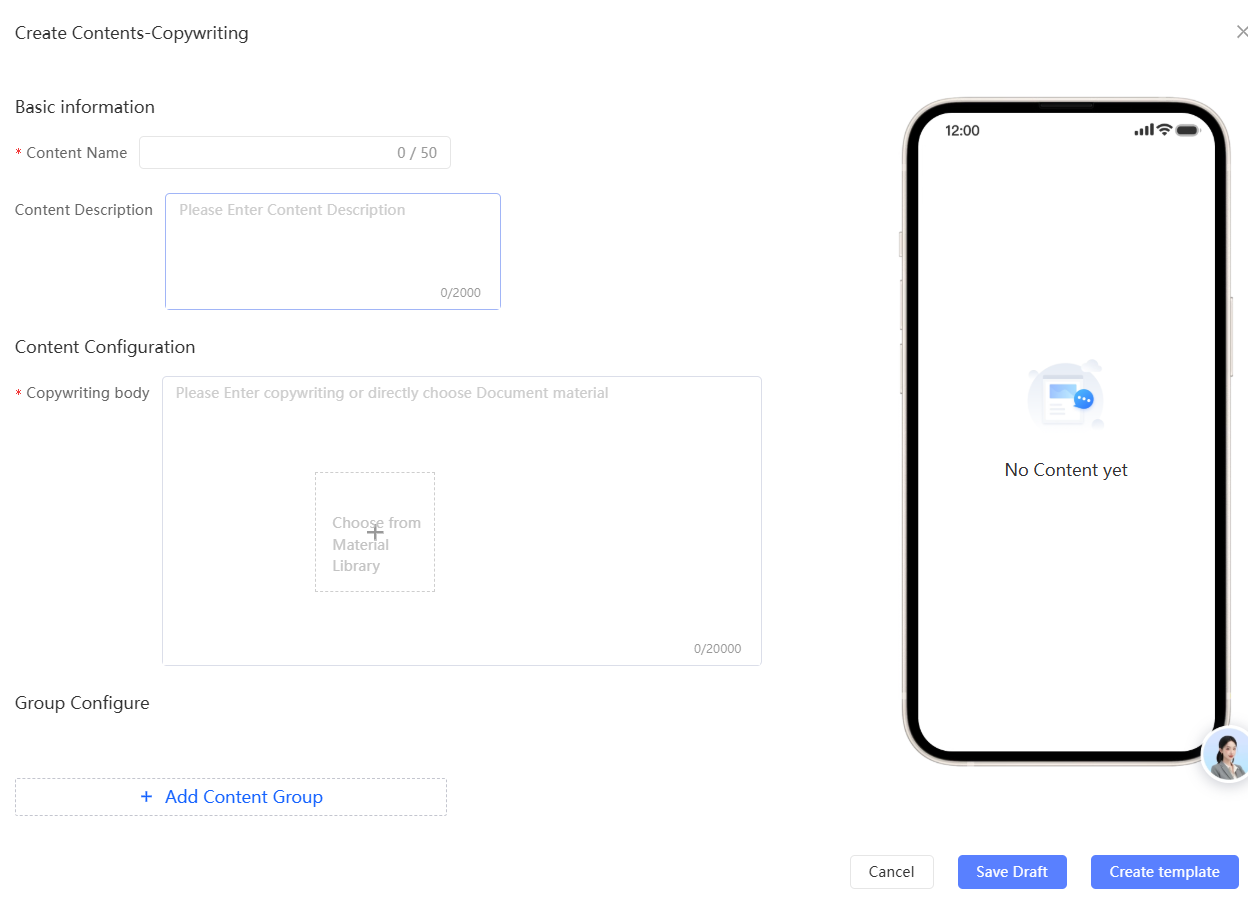
In the pop-up window, fill in the fields for the copy content template. Fields marked with an asterisk (*) are required.
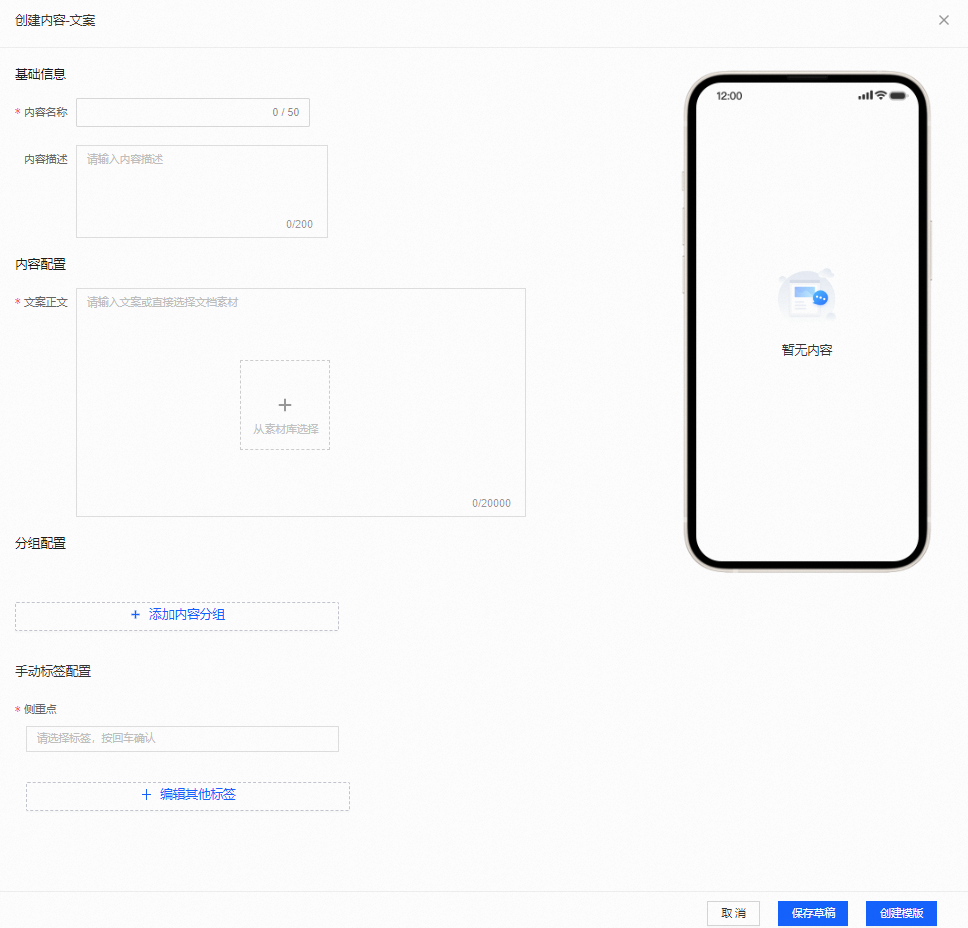
Procedure:
*Enter a content name. The name can be up to 50 characters long.
Enter a content description. The description can be up to 200 characters long.
Content configuration. *Copy body: You can enter the copy directly or select a document from the library.
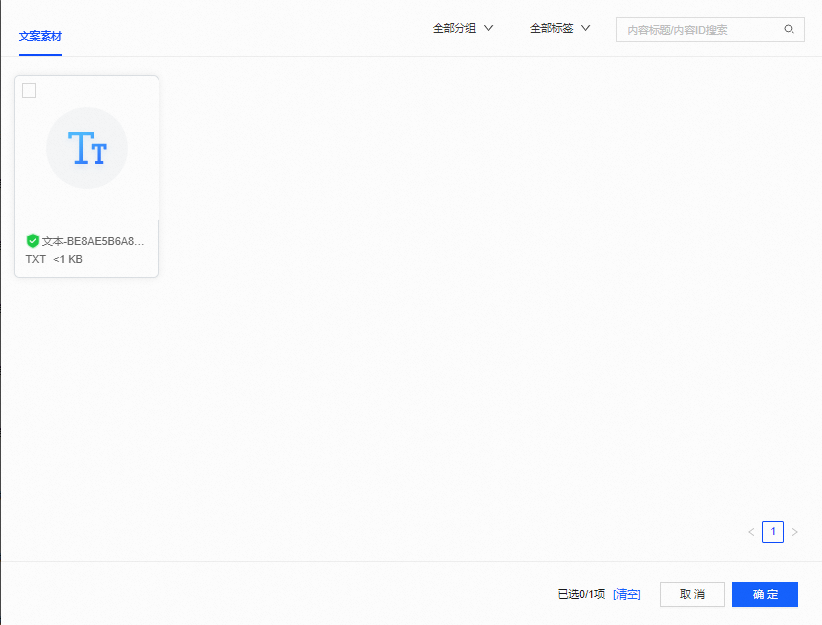
Click the + icon, select the copy material from the Material Library, and then click Confirm.
In the upper-right corner, you can filter materials by group and tag to quickly find copy materials.
Configure group settings. For more information, see Content Grouping.
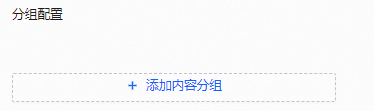
If you do not configure group settings, the content is placed in the Ungrouped group by default.
Click Add Content Group. In the pop-up window, select a group, and then click Confirm.
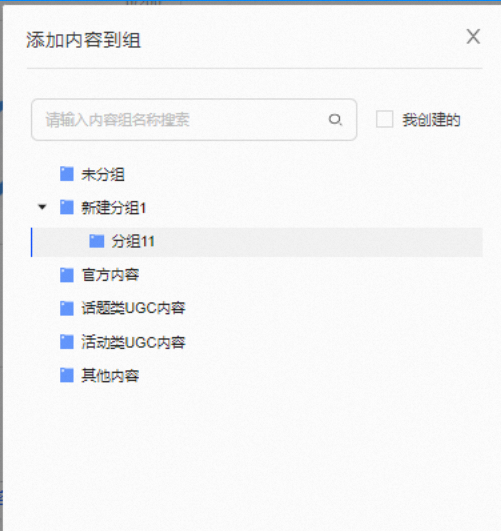
If you click Created by Me, the group list shows only the groups that you created.
To create a new group, select an existing group and click New Content Group. In the pop-up window, select whether to create a sibling group or a child group, and then click Confirm. The new group is added to the group list.
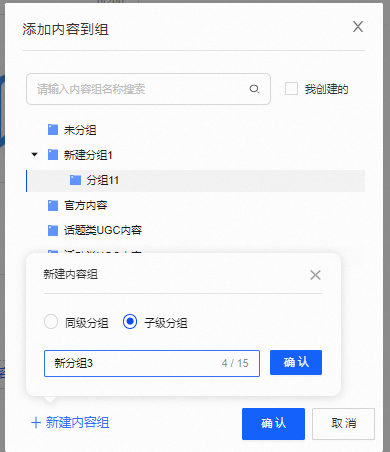
*Configure manual tags. For more information, see Tag Management.
Tags marked with an asterisk  are displayed by default. These tags are required when adding content to the library. You must select at least one tag value for each required tag, as shown in the figure.
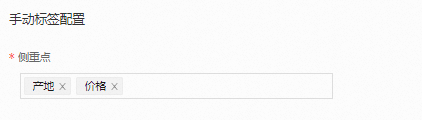
You can also configure optional tags. Click Add Other Tags. From all available tags, select a tag group, a tag, and a tag value in sequence, and then click Confirm.
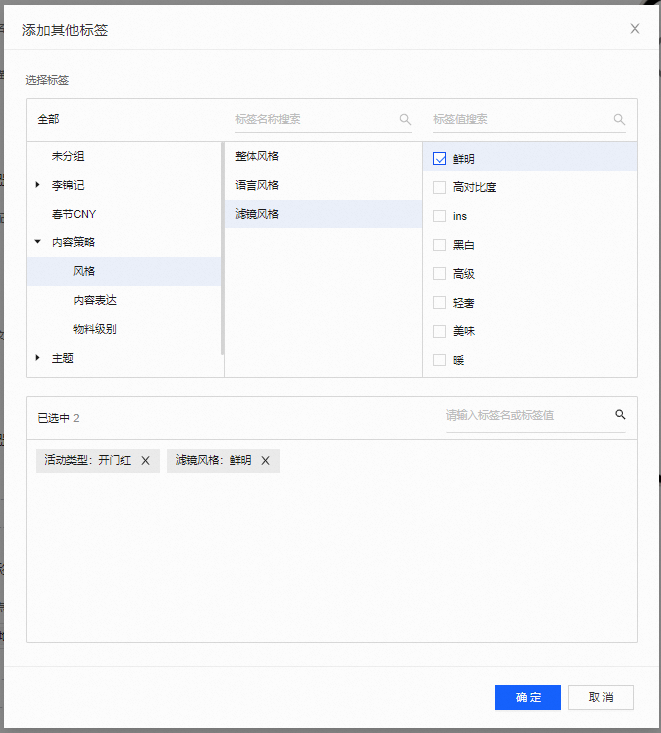
Click Create Template, or click Save Draft to edit it later.

View content templates
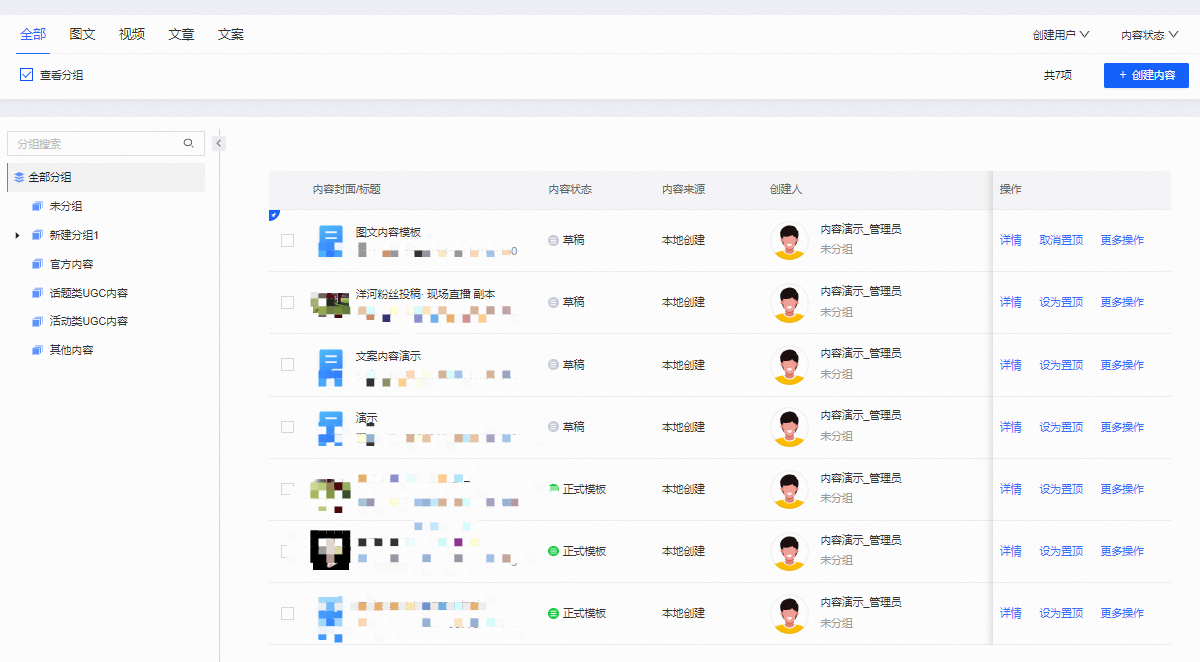
Navigate to Content Marketing > Your Space > Operations Hub > Content Library > All Content to open the content library. The content templates you have created are displayed on the Image, Video, Article, and Copy tabs.
The content list provides features such as search, group filtering, and content status filtering.

You can search for content by tag, name, or ID. After you enter a search term, click the Search icon to start the search.
You can filter by the following items:
The user group to which you belong.
Content status: Draft or Official Template.
Click View Groups. A group directory appears in the navigation pane on the left. Click a group name to display only the content in that group, as shown in the following figure. For more information about group operations, see Content Grouping.
View content template details
In the content list, click Details to open the details window.
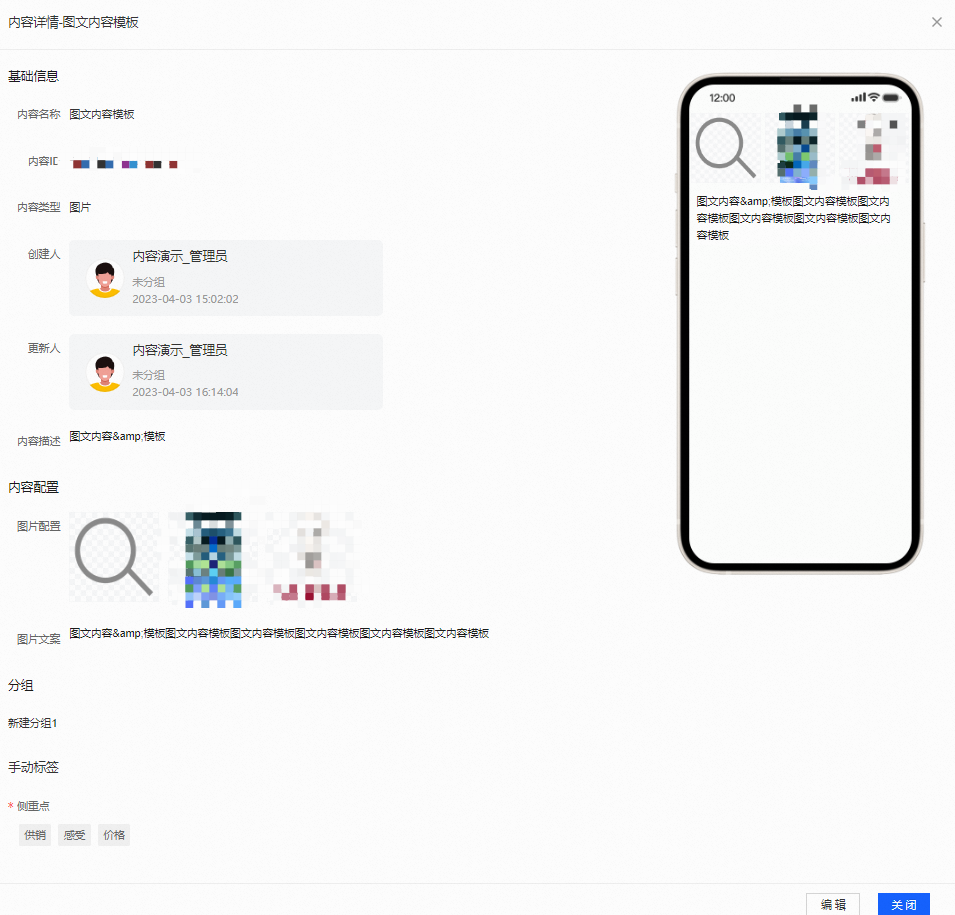
Different information tabs are displayed based on your permissions:
Details tab: Contains content details, group information, and manual tags.
You can click Edit to re-edit the content template.
Pin a content template
Procedure:
In the content list, click Pin. The content template is pinned to the top of the list, and a pinned icon appears in its upper-left corner.
In the content list, click Unpin to unpin the template.
Copy a content template
Procedure:
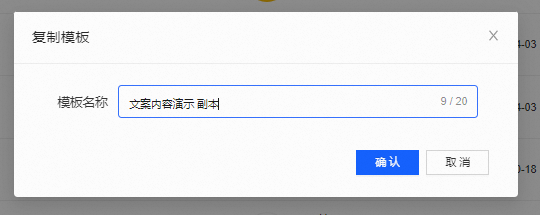
In the content list, click More, and then click Copy.
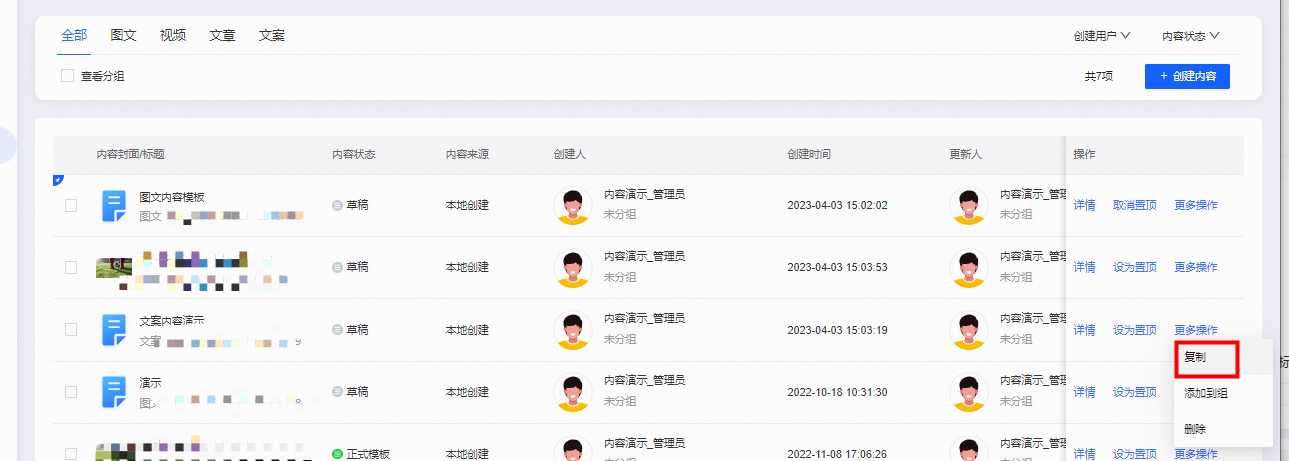
Enter a new template name and click Confirm.
Change the group of a content template
Procedure:
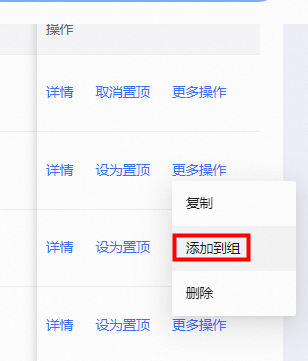
In the content list, click More, click Add to Group, select a group, and then click Confirm.
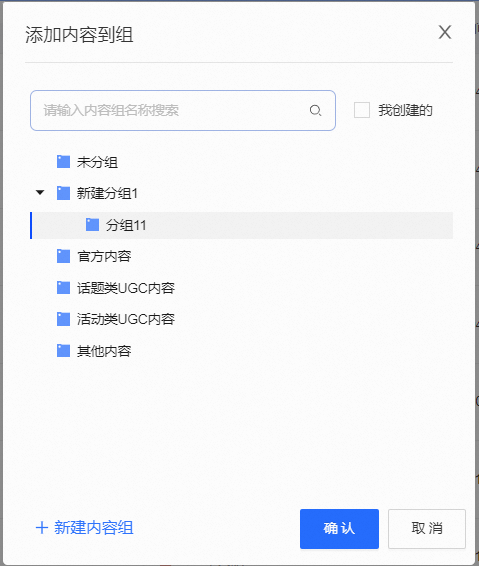
If you click Created by Me, the group list shows only the groups that you created.
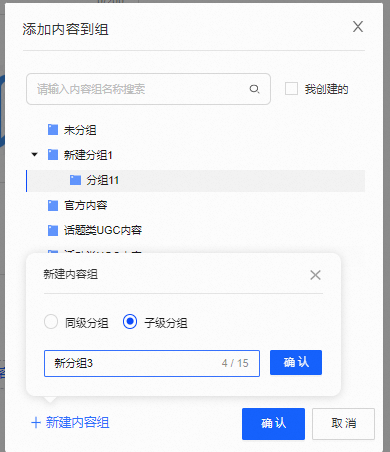
To create a new group, select an existing group and click New Content Group. In the pop-up window, select whether to create a sibling group or a child group, and then click Confirm. The new group is added to the group list.
Delete a content template
Procedure:
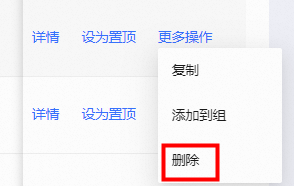
In the content list, click More, click Delete, and then confirm the deletion.
Content publishing
Create a sending task
Navigate to Content Marketing > Your Space > Content Publishing, and click Create Sending Task.
Bilibili task
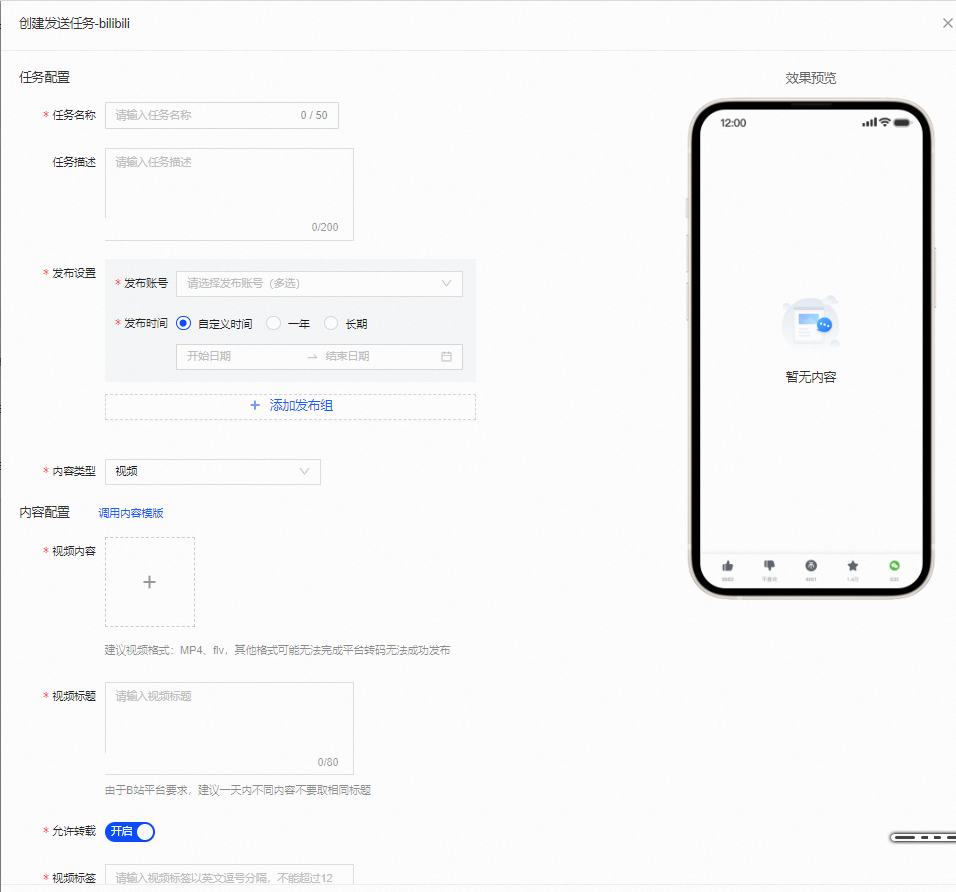
Select the Bilibili channel to create a sending task. In the pop-up window, configure the task. Fields marked with an asterisk (*) are required.
Procedure:
*Enter a task name. The name can be up to 50 characters long.
Enter a task description. The description can be up to 200 characters long.
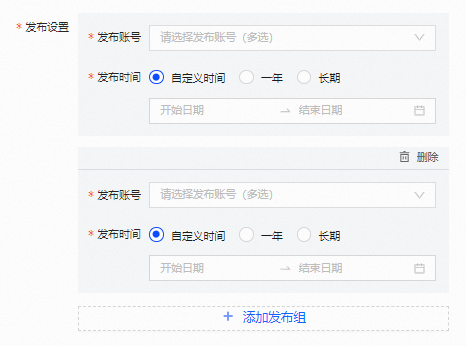
*Publishing settings
*Select one or more publishing accounts.
*Select a publishing time: One Year, Long-term, or Custom.
Click + Add Publishing Group to add another group. You must also configure the publishing account and publishing time for the new group.
*Select a content type: Video or Article.
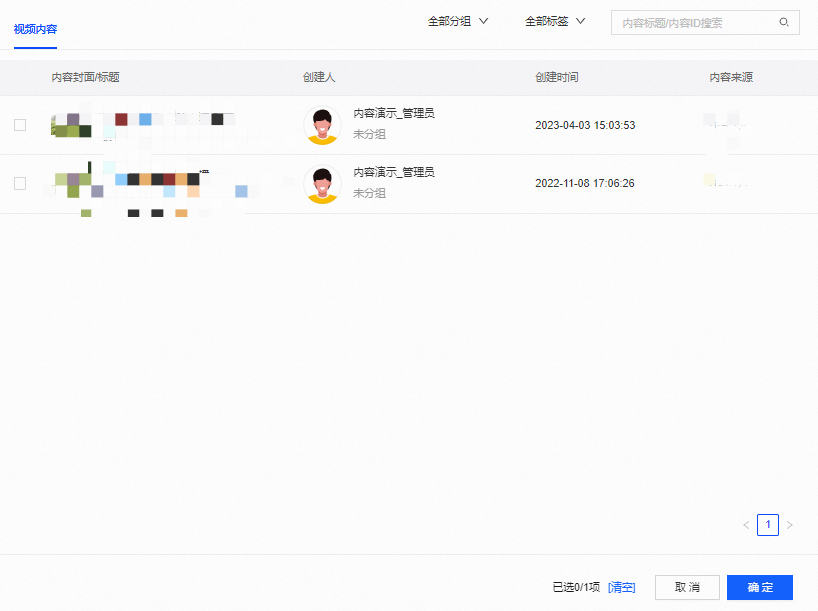
Click Call Content Template. You can select a template from the content library and click Confirm. Some configuration fields are then automatically populated.

*Content configuration
For video content, perform the following steps:
*Click the + icon to select a video from the Material Library.
*Enter a video title. The title can be up to 80 characters long.
*Specify whether to allow reprinting. Turn on the switch to allow it.
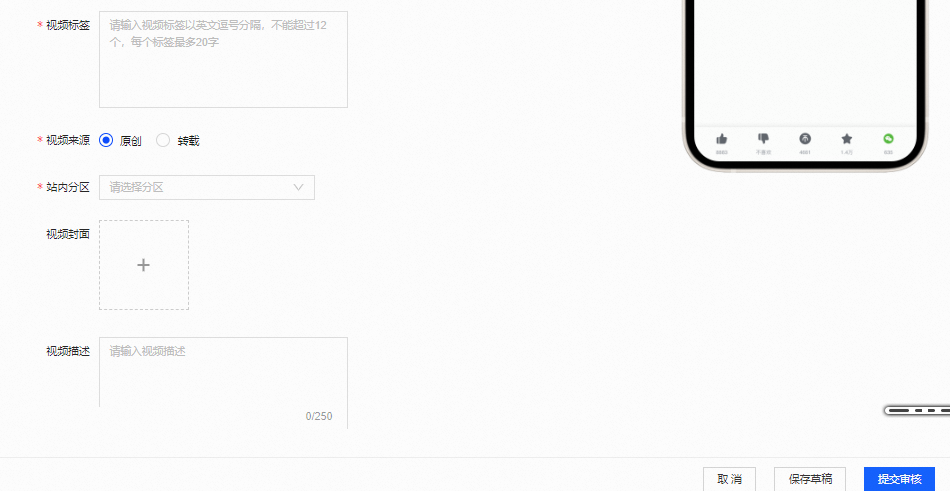
*Set video tags: Separate tags with commas (,). You can add up to 12 tags, and each tag can be up to 20 characters long.
*Video source: Select Original or Reprinted.
*Select an on-site partition.
Add a video thumbnail. Click the + icon. By default, a screenshot from the video is used as the thumbnail. You can also select an image from the Material Library to use as a custom thumbnail.
Enter a video description. The description can be up to 250 characters long.
For article content, perform the following steps:
*Article title: Up to 40 characters.
*Enter the article body: Text formatting options are supported, such as bold
, italic , underline , line height, letter spacing, font size, text color, and text background color. You can add links to the article content. You can also add images from the Material Library.*Enter an article summary.
*Select article tags: Enter article tags separated by commas (,). You can add up to 12 tags, and each tag can be up to 20 characters long.
*Select an article category.
*Manuscript template: You can select the platform's default thumbnail.
*Article source: Click Original or Reprinted.
 , italic
  , underline
  , line height, letter spacing, font size,
  text color, and text background color. You can add links
  to the article content. You can also add images
  from the Material Library.
Click Submit for Approval, or click Save Draft to edit it later.
Custom channel task
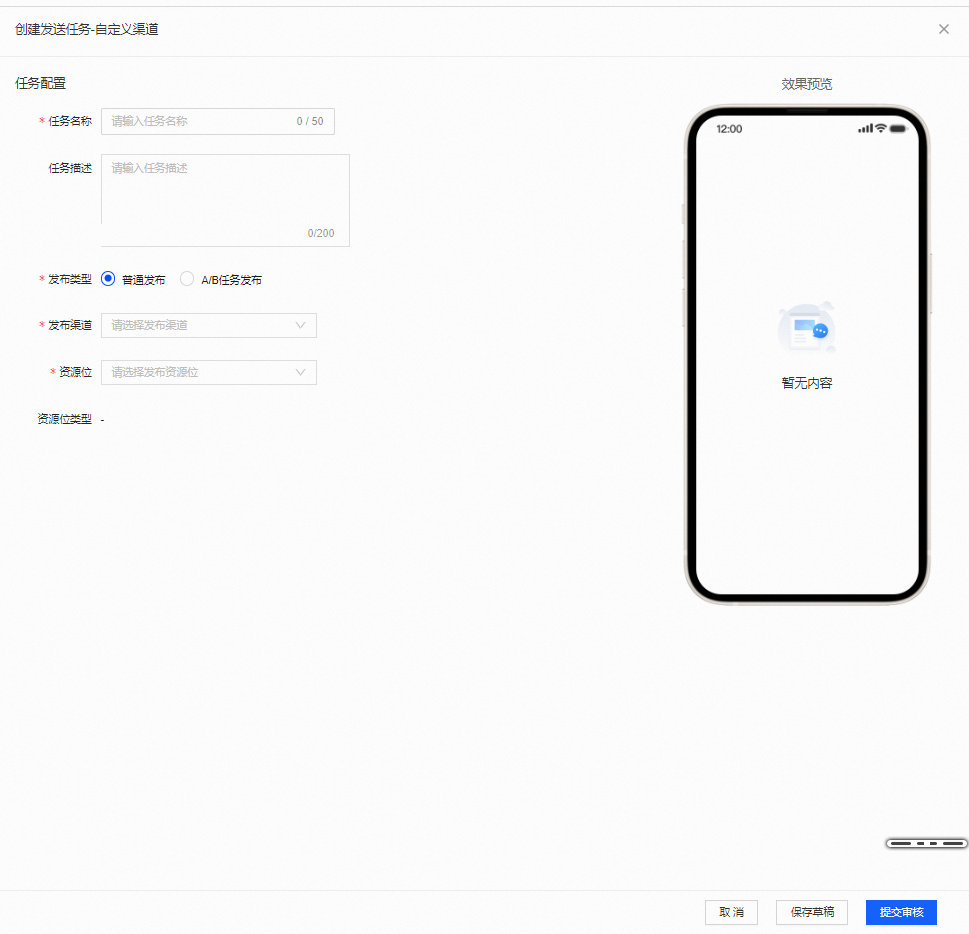
Select a custom channel to create a sending task. In the pop-up window, configure the task. Fields marked with an asterisk (*) are required.
Procedure:
*Enter a task name. The name can be up to 50 characters long.
Enter a task description. The description can be up to 200 characters long.
*Select a publishing type.
Normal Publishing
A/B publishing
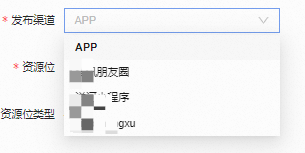
*Select a publishing channel.
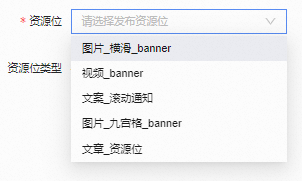
*Select a resource slot.
Click Submit for Approval, or click Save Draft to edit it later.
View the task list
Navigate to Content Marketing > Your Space > Content Publishing to open the content publishing details page. As shown in the following figure, tasks are categorized and displayed on the Douyin, Xiaohongshu, Bilibili, Kuaishou, WeChat Official Account, and Other tabs.
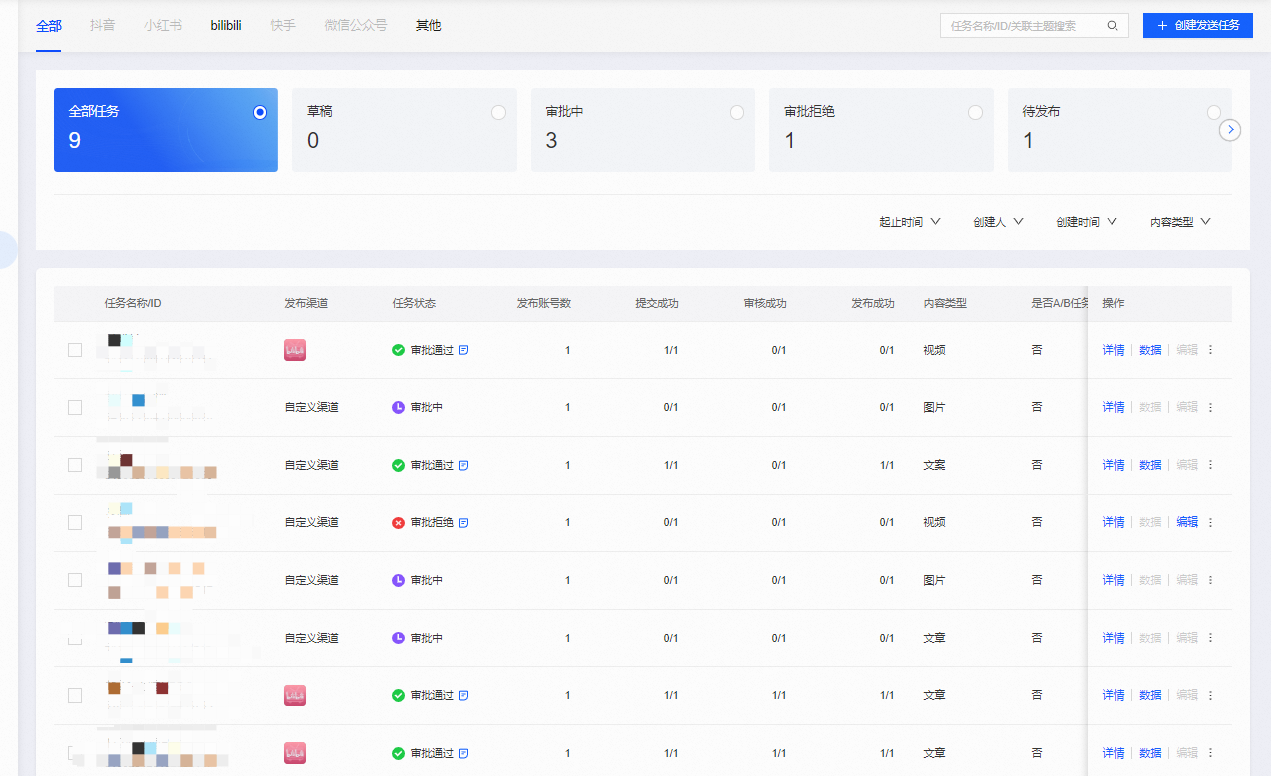
Search and filter features are available above the content list:
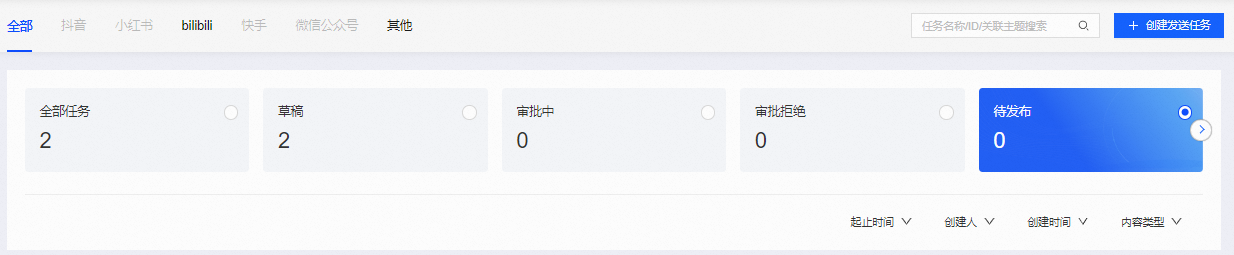
You can search by task name, task ID, or associated subject. After you enter a search term, press Enter or click the
Search icon.You can filter by the following items:
Task status: Draft, In Approval, Approval Denied, To Be Published, Published, A/B Test, or Downloaded.
Start and end time.
Task creator.
Task creation time.
Content type: Video, Article, Image, or Copy.
You can view the task status. Click
to view the approval process.
 Search icon.
 to view the approval process.
View task details
In the task list, click Details to open the details window. The information tabs are on the left, and a preview is on the right.
Different details tabs are displayed based on your permissions. The tabs contain information such as task name, task ID, task status, task description, publishing type, publishing channel, resource slot, publishing status, resource slot type, style, size, publishing time, creator, updater, and content configuration.
For tasks with a status of In Approval or Approval Denied, you can click
> Edit, make changes, and then submit the task for approval again.Tasks with a status of Approval Passed cannot be edited.
 > Edit, make changes, and then submit the task for approval again.
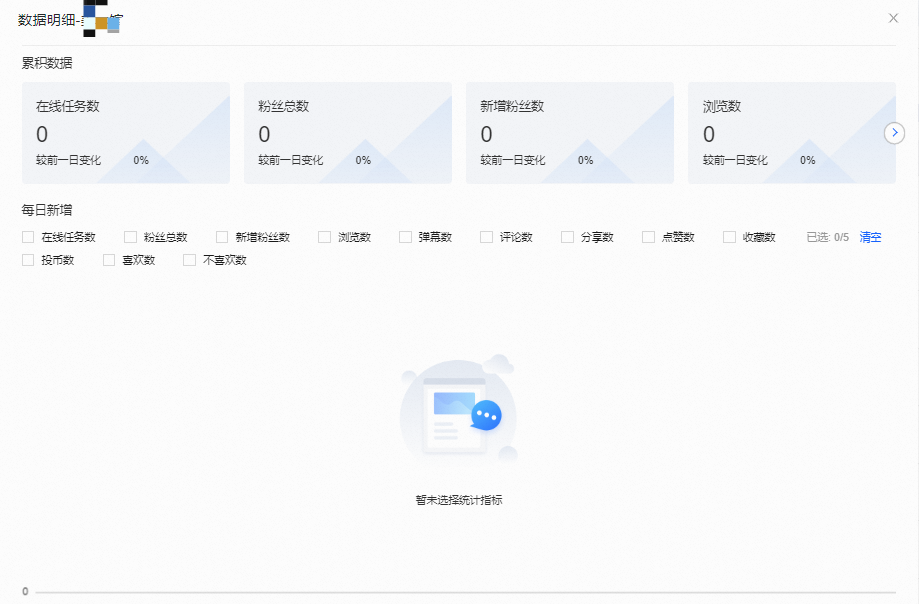
View task data
In the task list, click  > Data to view the data for tasks that have passed approval.
Edit a task
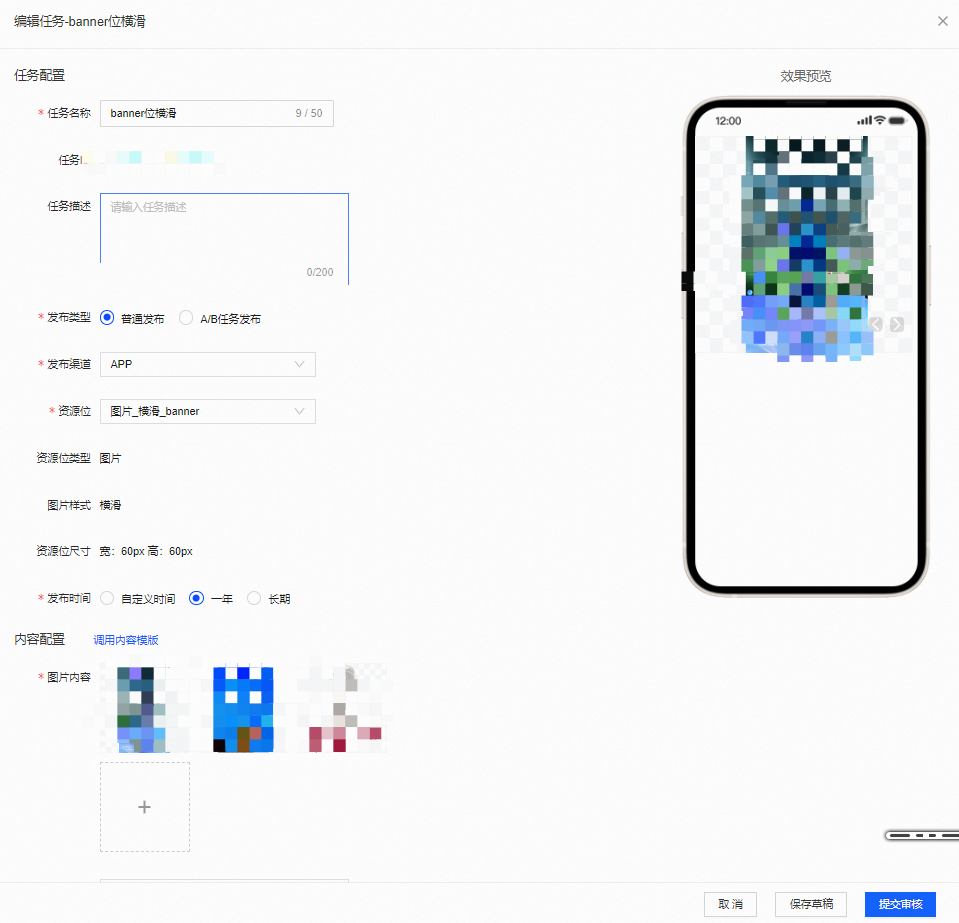
In the task list, click Edit to open the edit window. The task details are on the left, and a preview is on the right.
You can modify tasks with a status of Draft, In Approval, or Approval Denied, and then click Submit for Approval.
Delete a task
To select tasks, click the checkbox  to the left of each task in the list. In the lower-right corner, click Batch Delete, and then click Confirm.
You can select multiple tasks to delete them in a batch.
In the lower-left corner, click Select All to select all tasks on the current page for batch deletion.