ESA provides two DNS setup methods, CNAME and NS. You can switch between them based on your business scenarios by changing an existing CNAME setup to an NS setup, or by changing an NS setup to a CNAME setup, which allows for flexible configuration.
Use cases
ESA supports two DNS setup methods: CNAME and NS. For more information, see DNS setup.
NS to CNAME conversion: If you do not want to delegate DNS resolution to the ESA proxy, switch to the CNAME access mode.
Convert from CNAME to NS: If you want to enhance DNS security and simplify future CNAME configurations, switch to the NS setup.
Convert from NS to CNAME
This section explains how to convert your website's DNS setup from NS to CNAME.
For a website added to ESA with an NS setup, you cannot convert the DNS setup to a CNAME setup if the service location is Global or Chinese Mainland and the Proxy Status of a DNS record is DNS only. To convert the DNS setup, see What do I do if I cannot convert an NS setup to a CNAME setup?.
Step 1: Migrate DNS records and convert setup
To avoid service disruption, migrate your existing DNS records to your new DNS service provider before you start the conversion.
In the ESA console, select Websites, and in the Website column, click the target website.
In the left navigation pane, choose .
In the Convert to CNAME Setup section, click Convert.
Click Download All Records and CNAMEs, and configure the DNS records with your DNS service provider based on the downloaded file.
After you confirm that the DNS record migration is complete, click I Have Migrated DNS Records and Confirm to Convert.
Step 2: Verify the result
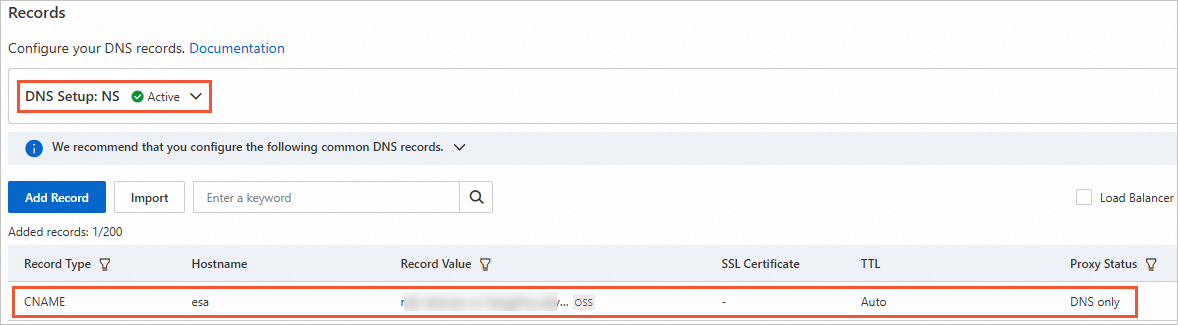
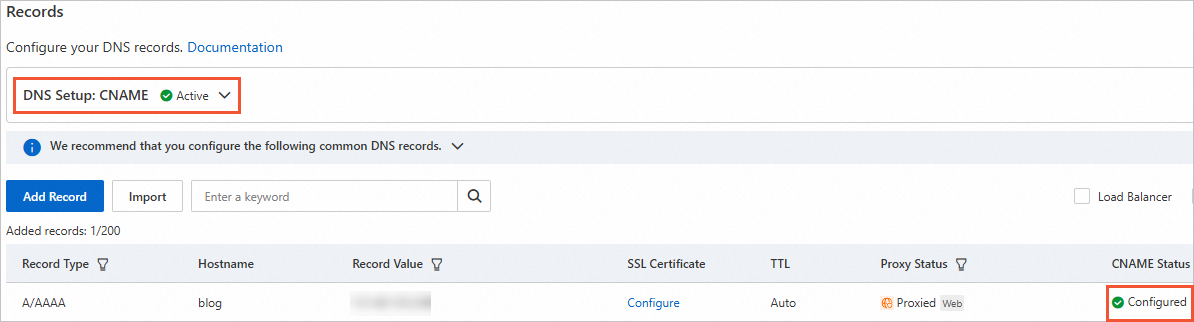
After the conversion operation is complete, you can view the conversion result in the Records feature of DNS.
In the ESA console, select Websites, and in the Website column, click the target website.
In the left navigation pane, choose .
On the Records page, the current DNS setup is CNAME, and the CNAME Status is Configured. This indicates that the DNS setup was successfully switched.
Convert from CNAME to NS
This section explains how to convert your website's DNS setup from CNAME to NS.
Step 1: Configure DNS records
Before you perform the conversion, you must configure the DNS records from your original DNS service provider in ESA to prevent your DNS records from being lost after the conversion.
Export or copy the DNS records from your current DNS service provider.
In the ESA console, select Websites, and in the Website column, click the target website.
In the left navigation pane, choose .
Add the DNS records that you obtained from your original DNS service provider to ESA. For more information, see Add DNS records.
Step 2: Convert the setup
After you configure DNS records in ESA, you can change the DNS setup.
In the ESA console, select Websites, and in the Website column, click the target website.
In the left navigation pane, choose .
In the Convert to NS Setup section, click Convert.

After you add all DNS records from the original DNS service provider to ESA, click I Have Configured DNS Records and Confirm to Convert.
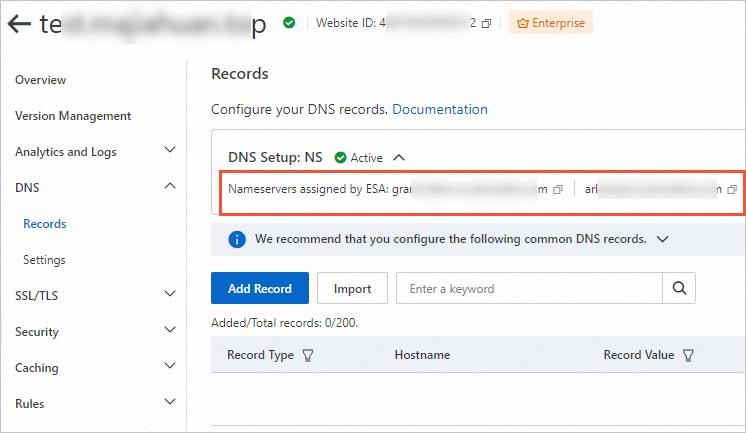
After the DNS setup is successfully switched, you need to replace your service provider's nameservers with the ESA nameservers. You can find the NS addresses that ESA assigns to you on the DNS records page.
Step 3: Verify the result
After the conversion operation is complete, you can view the conversion result in the Records feature of DNS.
In the ESA console, select Websites, and in the Website column, click the target website.
In the left navigation pane, choose .
The DNS setup conversion is successful when the DNS setup on the Records page is NS and the newly added DNS records are in the record list.