Distributor product selection
This topic explains how to select products in the Distribution and Supply Workbench.
The Add to Warehouse and Remove from Warehouse features are available only to allowlisted users. Distributors who onboard on or after January 1, 2025 are automatically allowlisted. If your account is not allowlisted, you can ignore the warehousing status.
In addition to using the console, you can also manage products in the warehouse by using an API. For more information, see Scenario 2: Synchronize and return products by using search APIs in Product API best practices.
After a channel provider makes products available to you, they are synchronized to your product pool. You can then select products by adding them to the warehouse. The system uses different product message sending strategies for products based on their warehousing status. If your account is not allowlisted for this feature, you can ignore this information. For more information, see Scenario 2: Synchronize and return products by using search APIs in Product API best practices.
Log on to the Distributor Workbench. In the left-side navigation pane, choose . In the list of active stores, find the store where you want to select products and click Enter Store Operations to open the Distribution and Supply Workbench.
In the left-side navigation pane, choose to open the Product Management page.
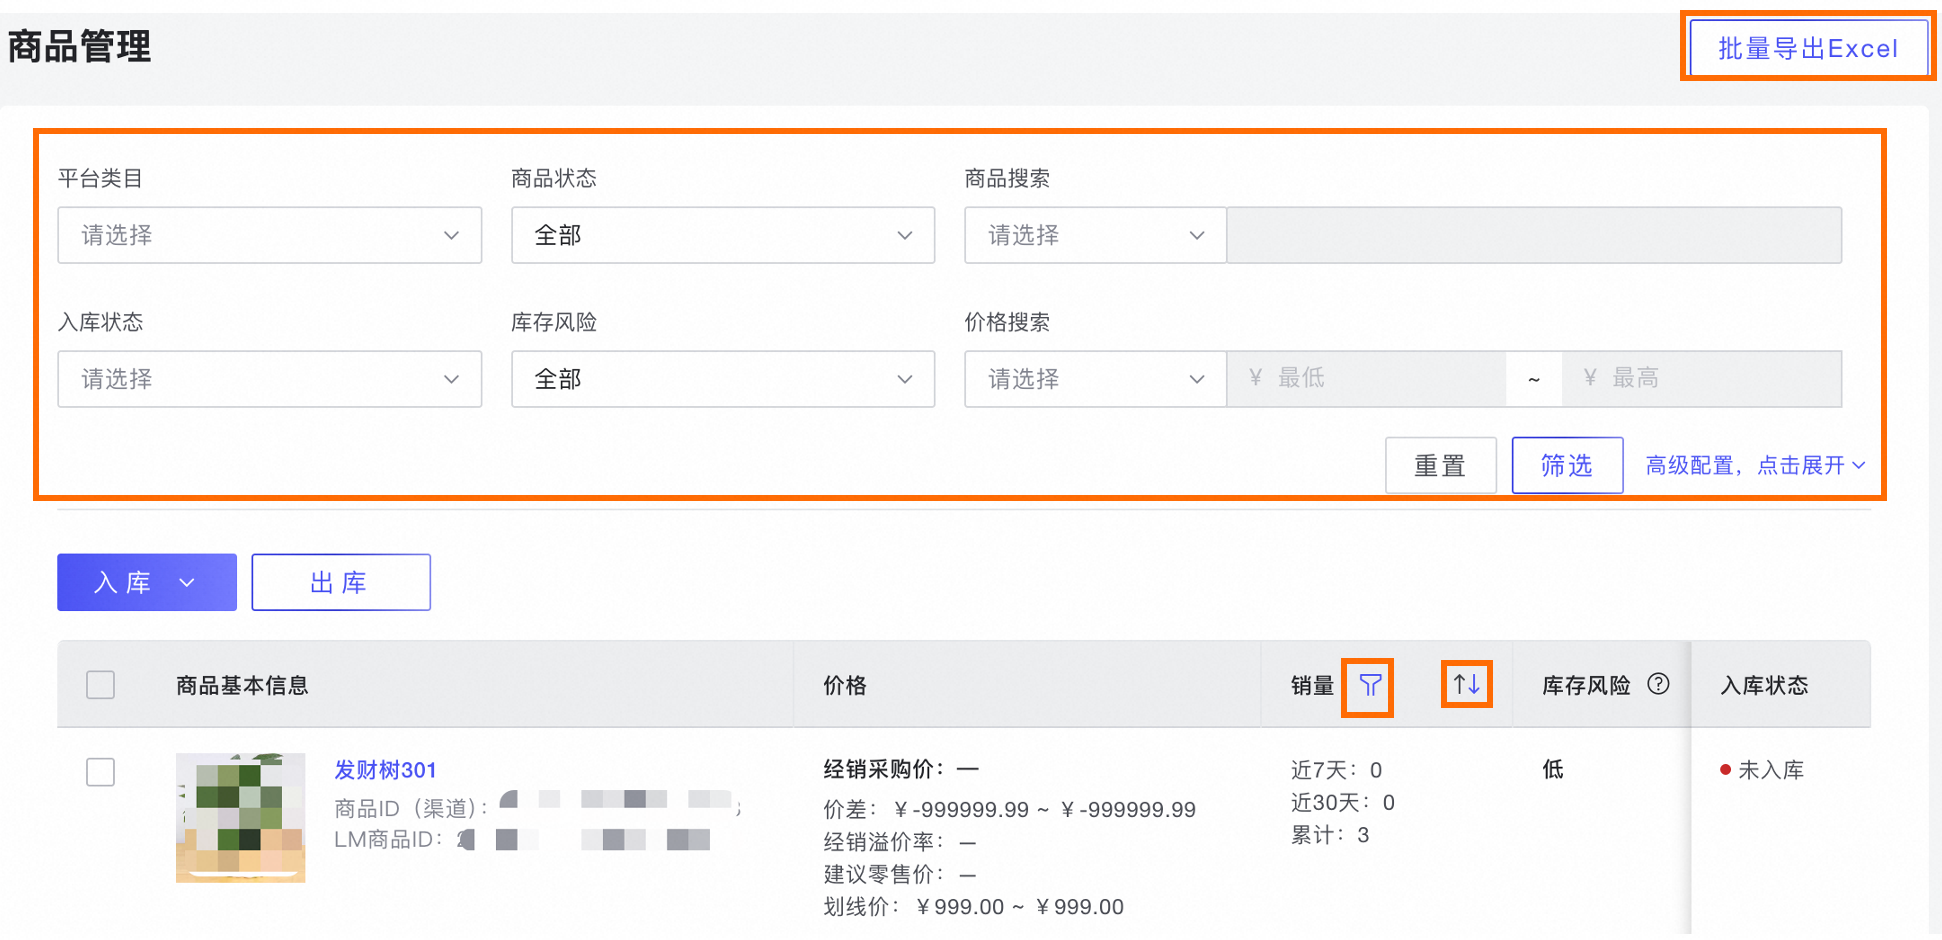
Launch time: The time when a channel provider makes a product available to a distributor.
Filter products: Filter products by criteria such as platform category and product status.
Export product information in bulk: Click Export Excel to export the information of the filtered products. To export all products, clear the filters first. You can view and download the exported file from the page.
Sort by sales: Click
 to select a sales metric to sort by, and click
  to set the sort order (ascending or descending).
Add products to the warehouse
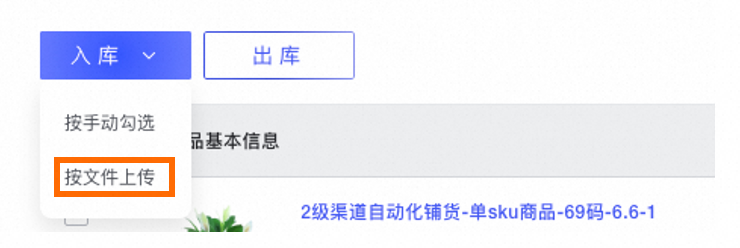
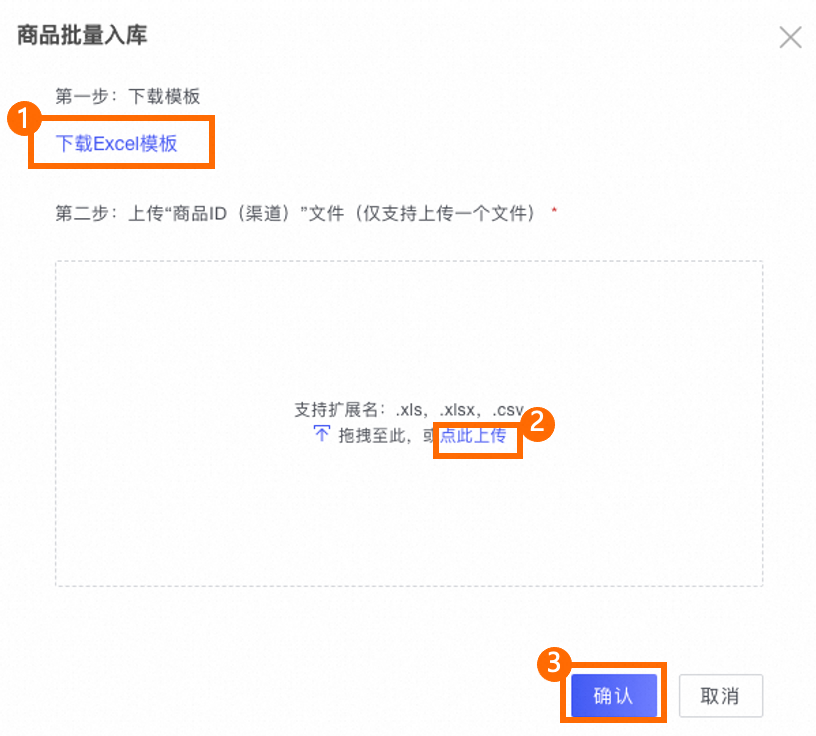
You can add products to the warehouse either manually or by uploading a file. Manual selection is suitable for adding a small number of products. The following procedure describes how to add products by uploading a file.
Step | Description |
1 | Click . |
2 | Click Download Excel Template. In the downloaded file, enter the channel product IDs of the products to add. Then, click Click to upload, upload the Excel file, and click Confirm. Note
|
Remove products from the warehouse
Step | Description |
1 | Click |
2 | Click Download Excel Template. In the downloaded file, enter the channel product IDs of the products to remove. Then, click Click to upload, upload the Excel file, and click Confirm. Note
|
 .
.Download Hub
Product export records
In the menu on the left, click to open the Product Export Records page.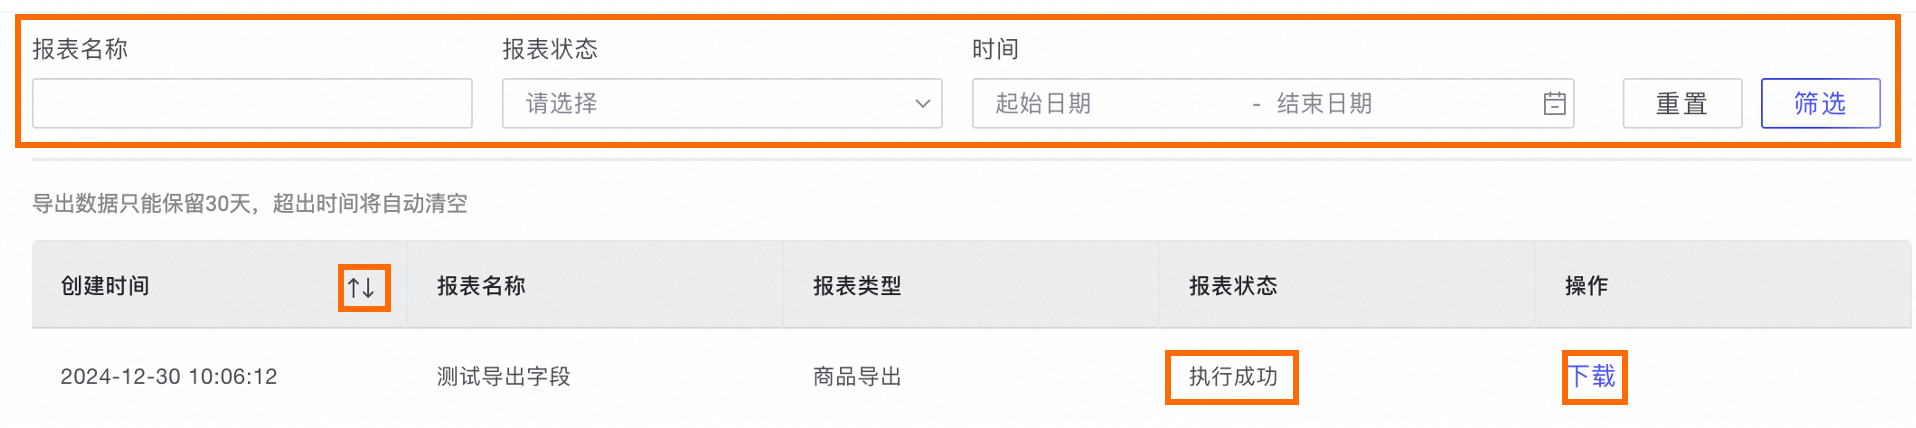
Filter reports: Specify the criteria and click Filter.
Download report: Click Download to save the report to your local computer. You cannot download a report if its Report status is Running. Wait for the status to change to Succeeded.
Sort reports: Click
 to sort download tasks by creation time in ascending or descending order.
 to sort download tasks by creation time in ascending or descending order.
Filter reports: Specify the criteria and click Filter.
Download report: Click Download to save the report to your local computer. You cannot download a report if its Report status is Running. Wait for the status to change to Succeeded.