Centralized procurement
This topic describes how to create a centralized procurement order in the Distributor Console.
This feature is temporarily unavailable. Use standard APIs for your procurement business. For more information, see the official LinkedMall documentation.
Create a centralized procurement store
Log on to the Distributor Console. Go to and click New Store. In Store Configuration, set the sales model to Distribution - Centralized Procurement. For other configurations and activation steps, see Distribution store activation guide.
After the store becomes active, click Select Channel Service. In the pop-up window, select a partner channel service and click OK.
If you cannot confirm the channel service, contact the channel provider or a LinkedMall operations specialist. After you select a channel service, you cannot change or reselect it. You must create a new store to select a different one.
After you select a channel service, you can contact the channel provider for review and product distribution.
Create a procurement order
Ensure your withholding Alipay account has a sufficient balance before you create a procurement order. This prevents order failures.
The system does not support secondary payments. If a procurement order is in the Pending Payment state due to an insufficient balance, you must top up the balance and place the order again.
Click Go to Store Operations to open the Distributor Supply Console.
In the navigation pane on the left, choose . On the Batch Procurement Orders page, click Create Batch Procurement Order.
Create a procurement order as follows:
Ordinal Number |
Description |
1 |
Enter a Name and Task Description for the procurement order. Keep the default values for other settings. Click Next. |
2 |
Follow the on-screen instructions. First, download the Excel template. Then, fill in the order information for each item in the template. When you are finished, upload the file and click Next.
Note
In the Excel file, field names marked in red and the Channel User ID are required. Other fields are optional. Carefully check the product ID and recipient information.
|
3 |
Click Generate Procurement Order. |
4 |
The system redirects you to the Batch Procurement Orders page. Find the procurement order that is pending execution and click Start Execution. The procurement task starts and enters the When the status updates to
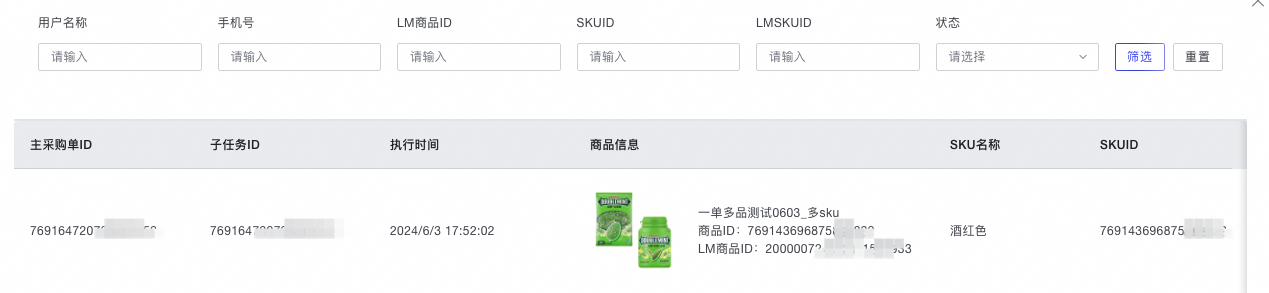
Click View Details in the preceding figure to go to the subtask list for the procurement order. You can view the execution results of the subtasks. Each subtask corresponds to one order, which is one row of order data in the Excel file.
Note
If a subtask fails, first check whether the data entered in the Excel file, such as the product ID, is correct. If the data is correct, copy the subtask ID and submit a ticket in the DingTalk service group. |
5 |
Confirm receipt:
|
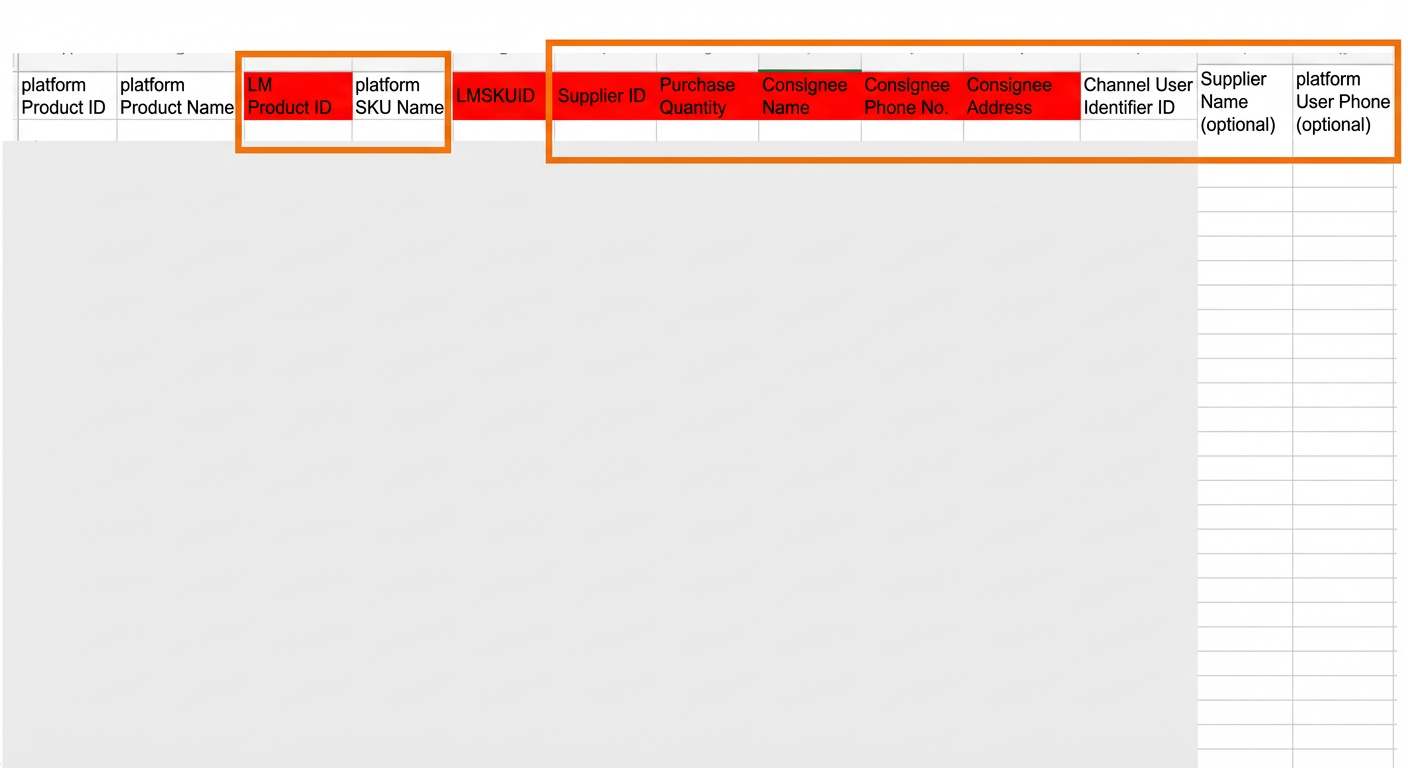 Field descriptions:
 (Executing) state. Wait for the task to complete. You can refresh the page to view status updates.
 (Completed), the procurement task is finished.