Complex table fill-in includes Cell Fill-in, Table Fill-in, and Dataset Fill-in. Create and manage Dataset Fill-in to edit dataset fields directly in a spreadsheet.
Example
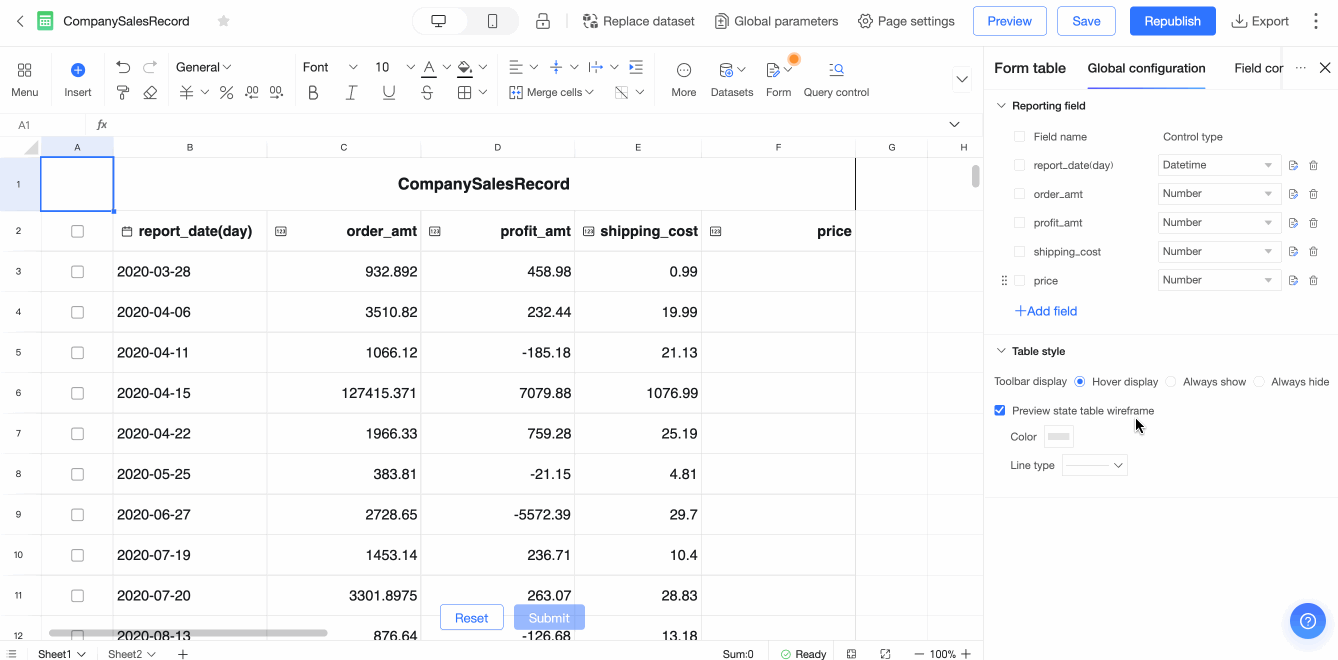
In the following insurance data entry table, fields such as Occupation Category, Gender, Time, Insurance Type 1 Name, Premium, Annual Achievement Rate, and Policy Count are loaded from a dataset. By combining dataset tables with fill-in controls, you can quickly edit specific fields such as Premium, Annual Achievement Rate, and Policy Count.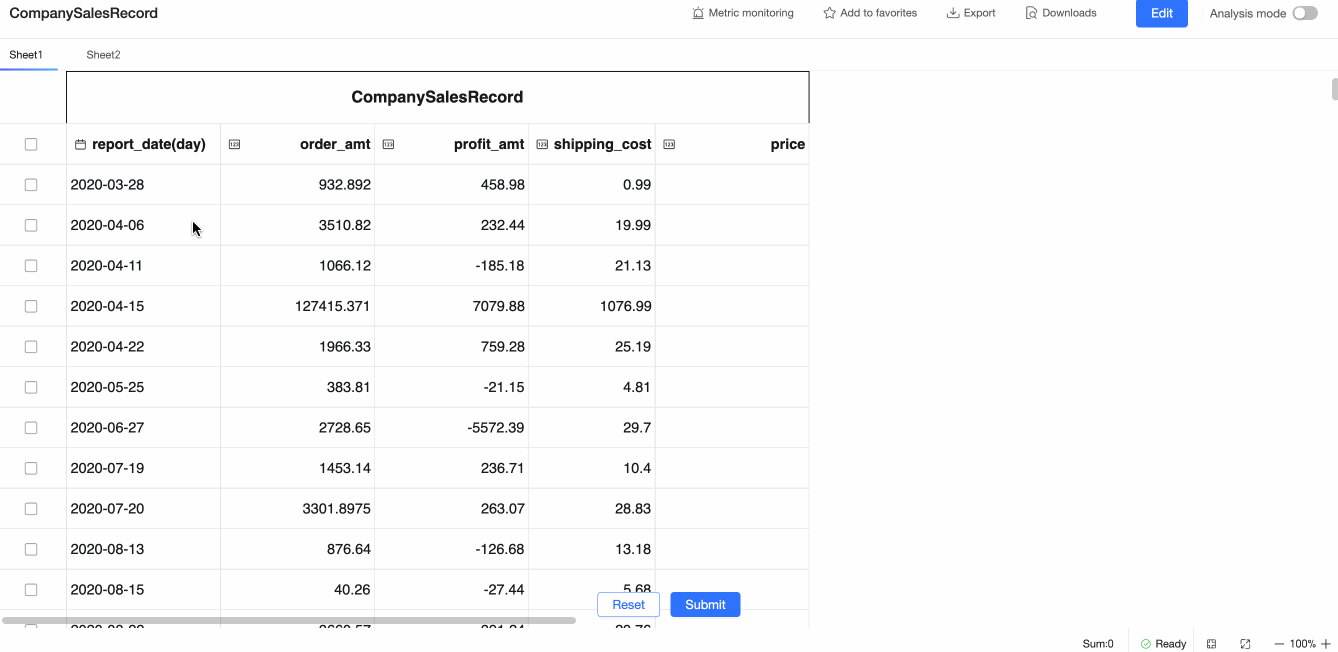
Dataset fill-in
Convert a dataset table in your spreadsheet into a fillable table to add, delete, or modify data in the underlying table.
Create a Dataset fill-in
-
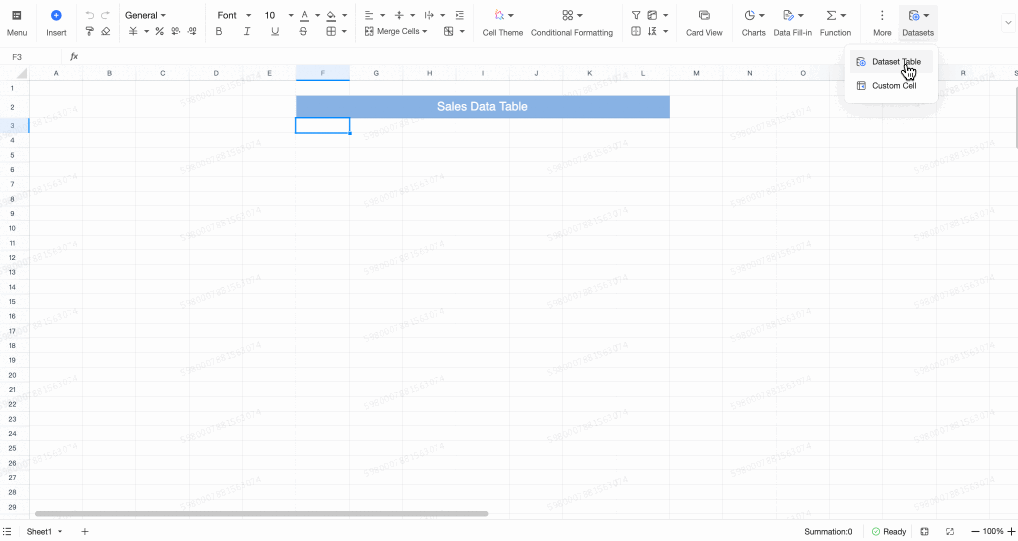
Open a dataset table from your spreadsheet list, or go to the spreadsheet page and click Dataset in the upper-right corner to create a new dataset table and configure its data fields.
-
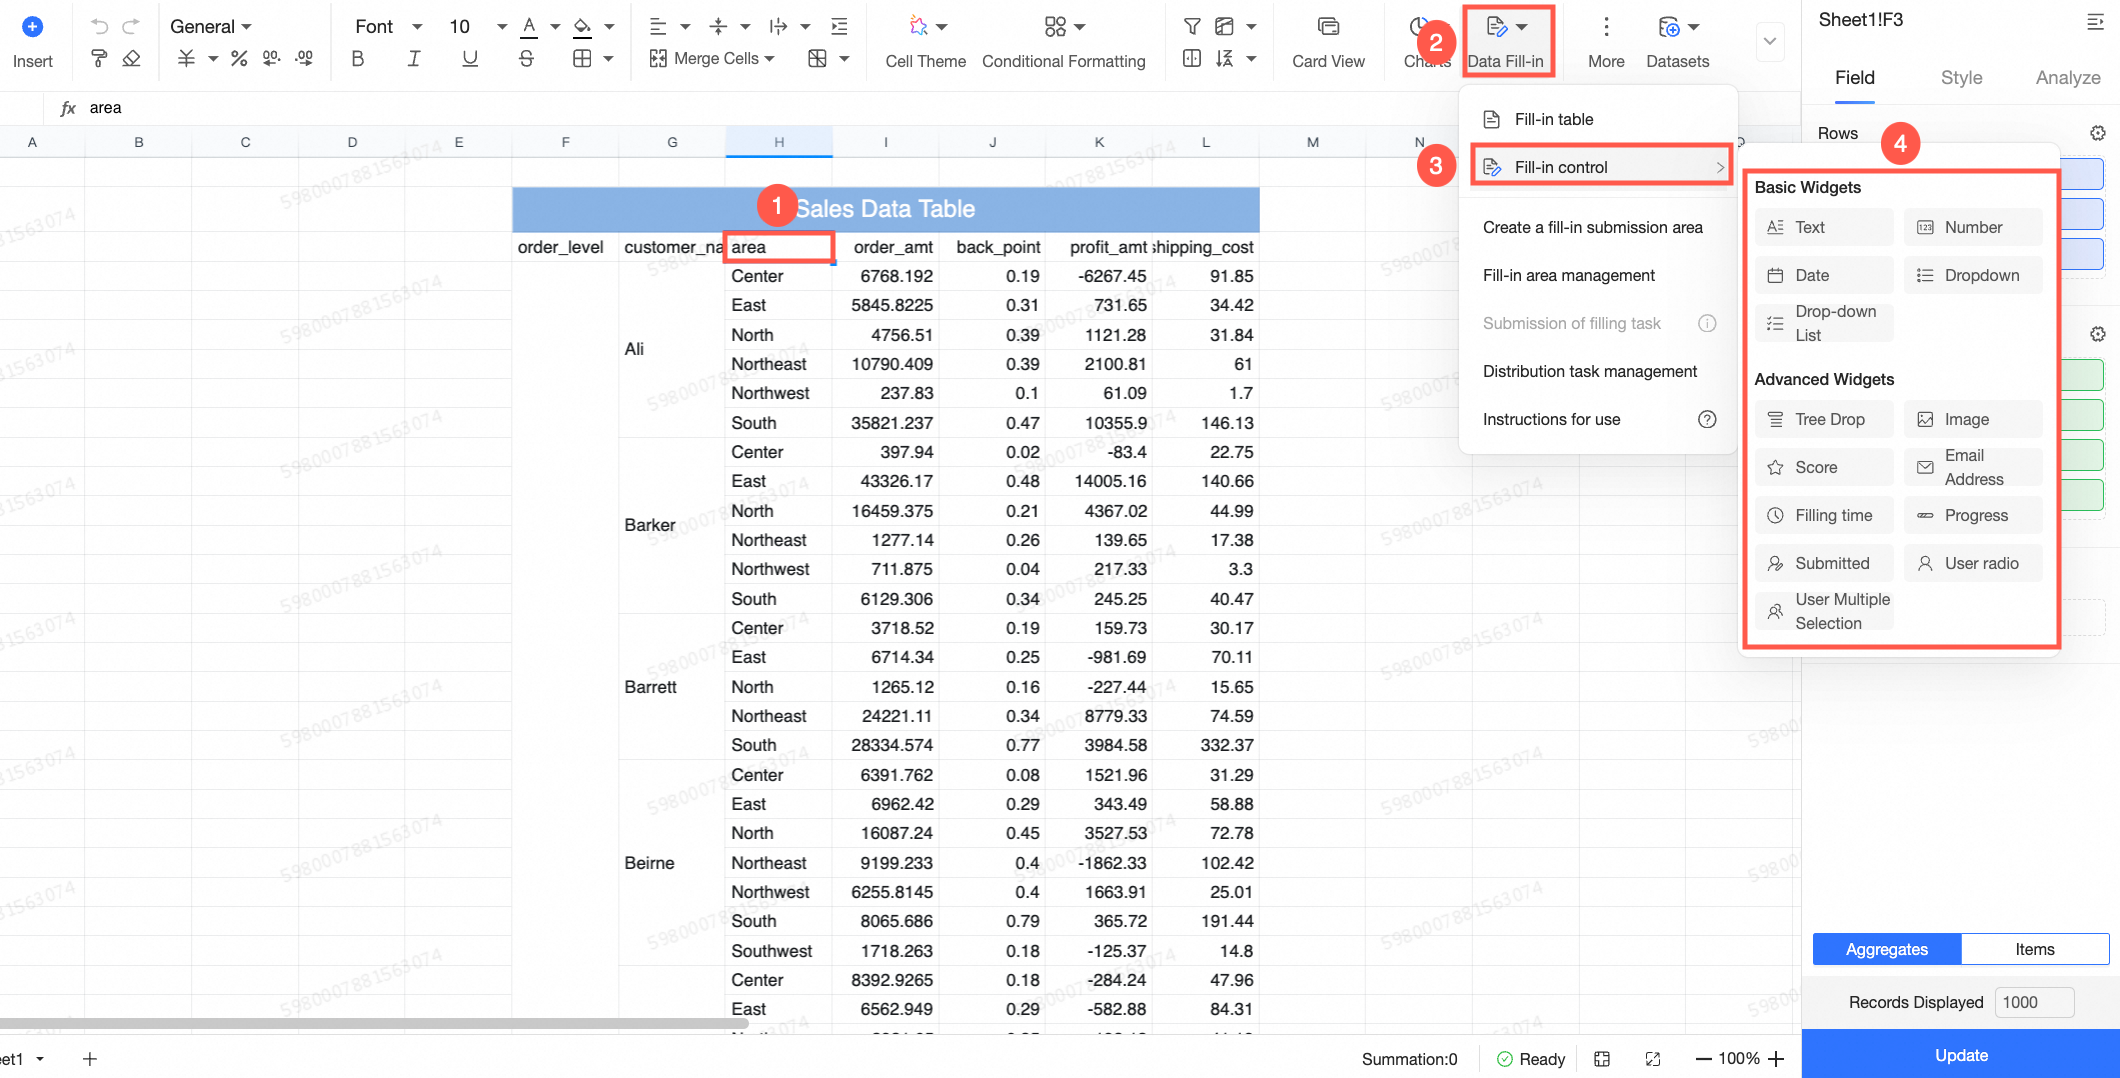
When you hover over a dataset table, click Data Fill-in, then select Fill-in Control, or select Insert Fill-in Control from the upper-left corner to convert the selected field into a fill-in control.
-
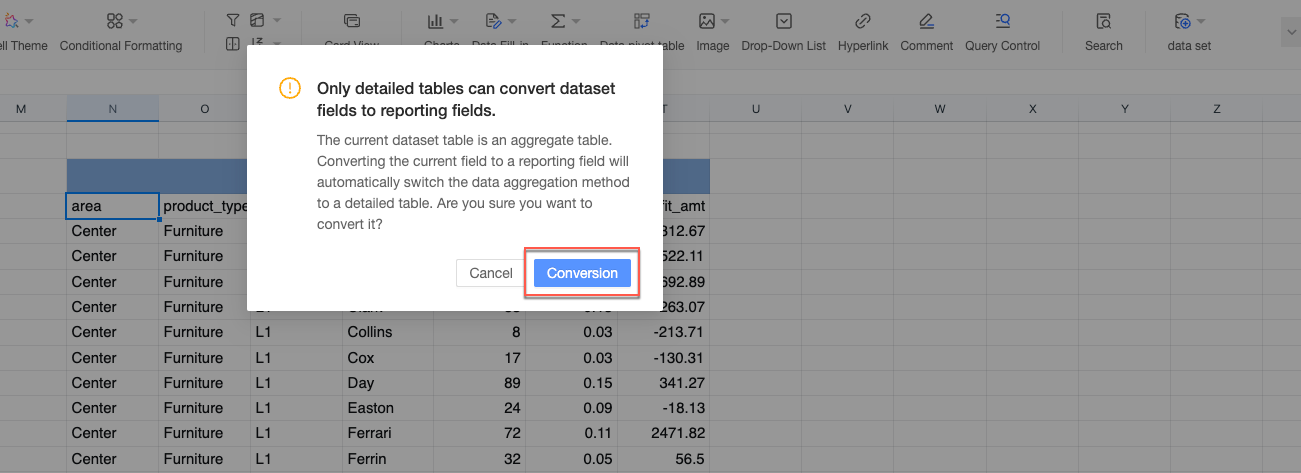
If your table is a details table, it converts directly. If it is an aggregate table, you must first convert it to a details table to enable the fill-in feature. You can convert it with a single click in the prompt that appears, or switch the table type at the bottom of the dataset table's field configuration page.
Field configuration
-
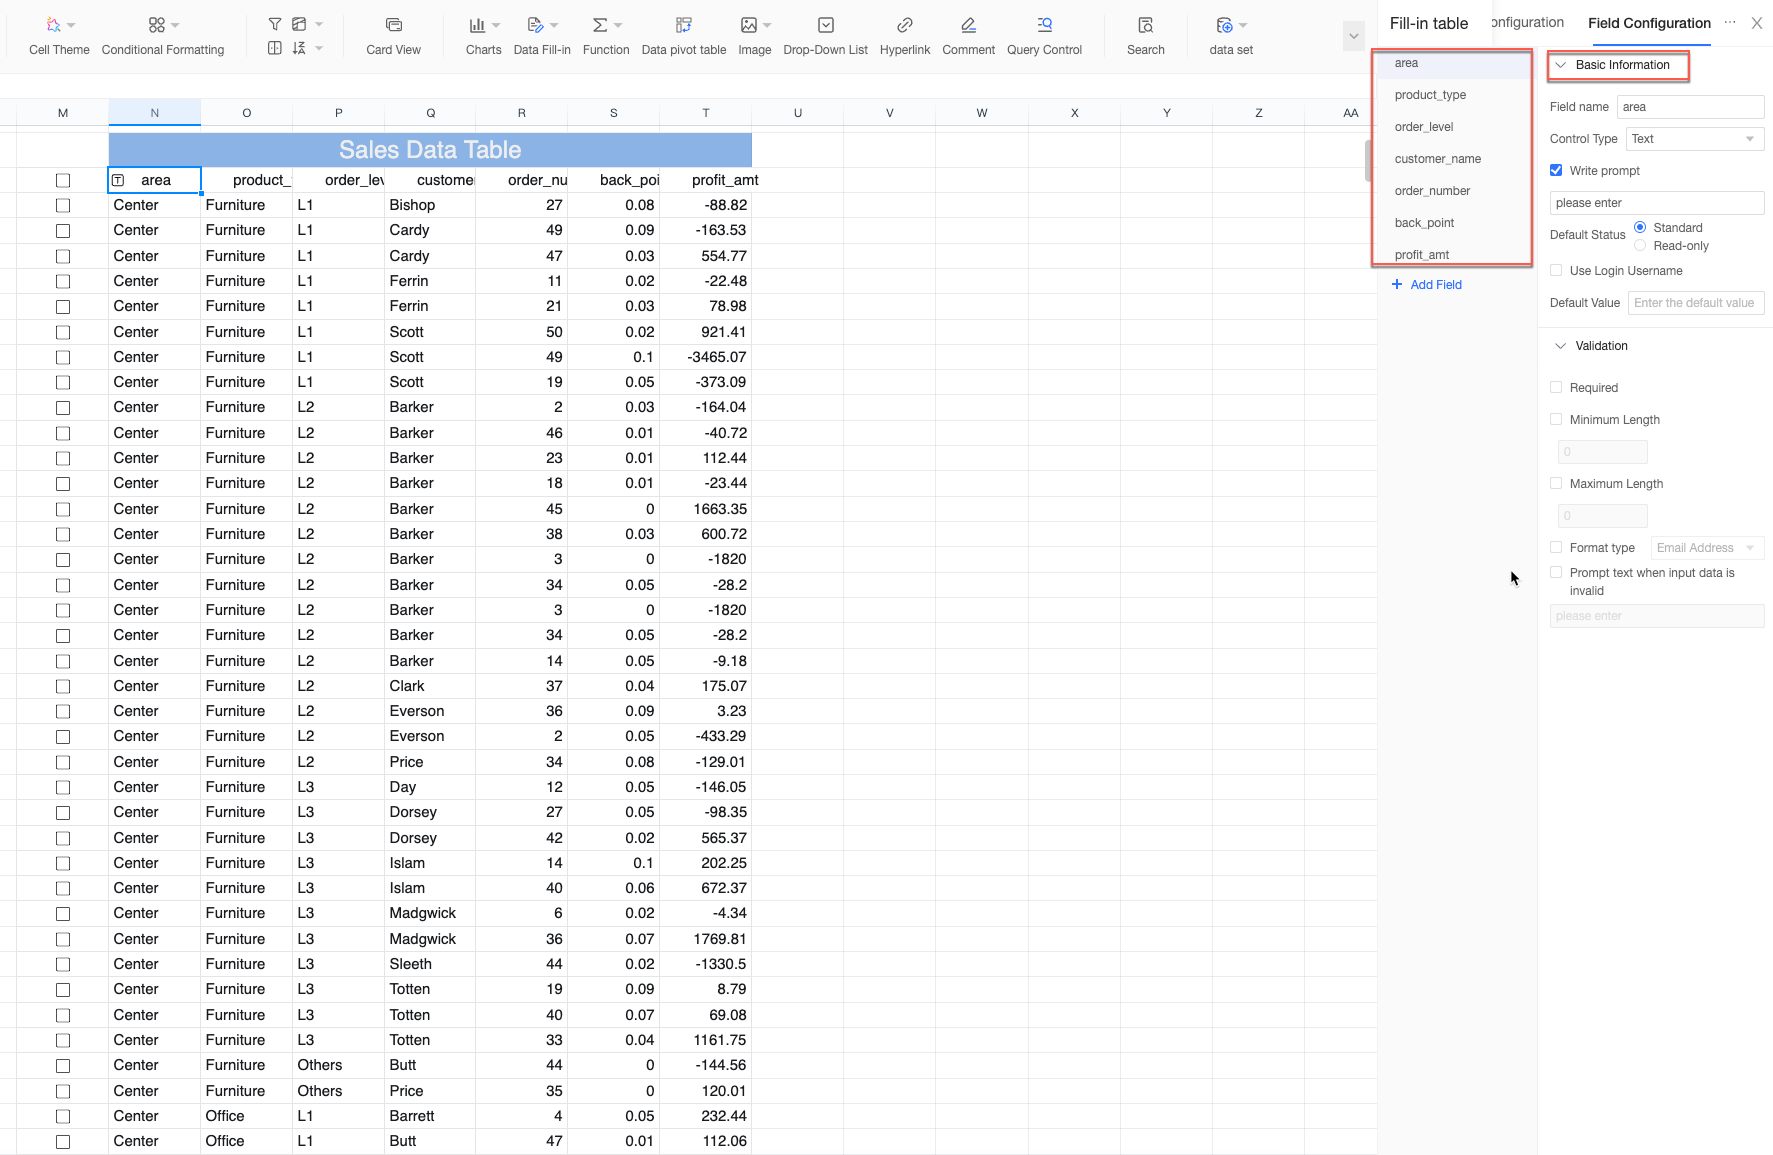
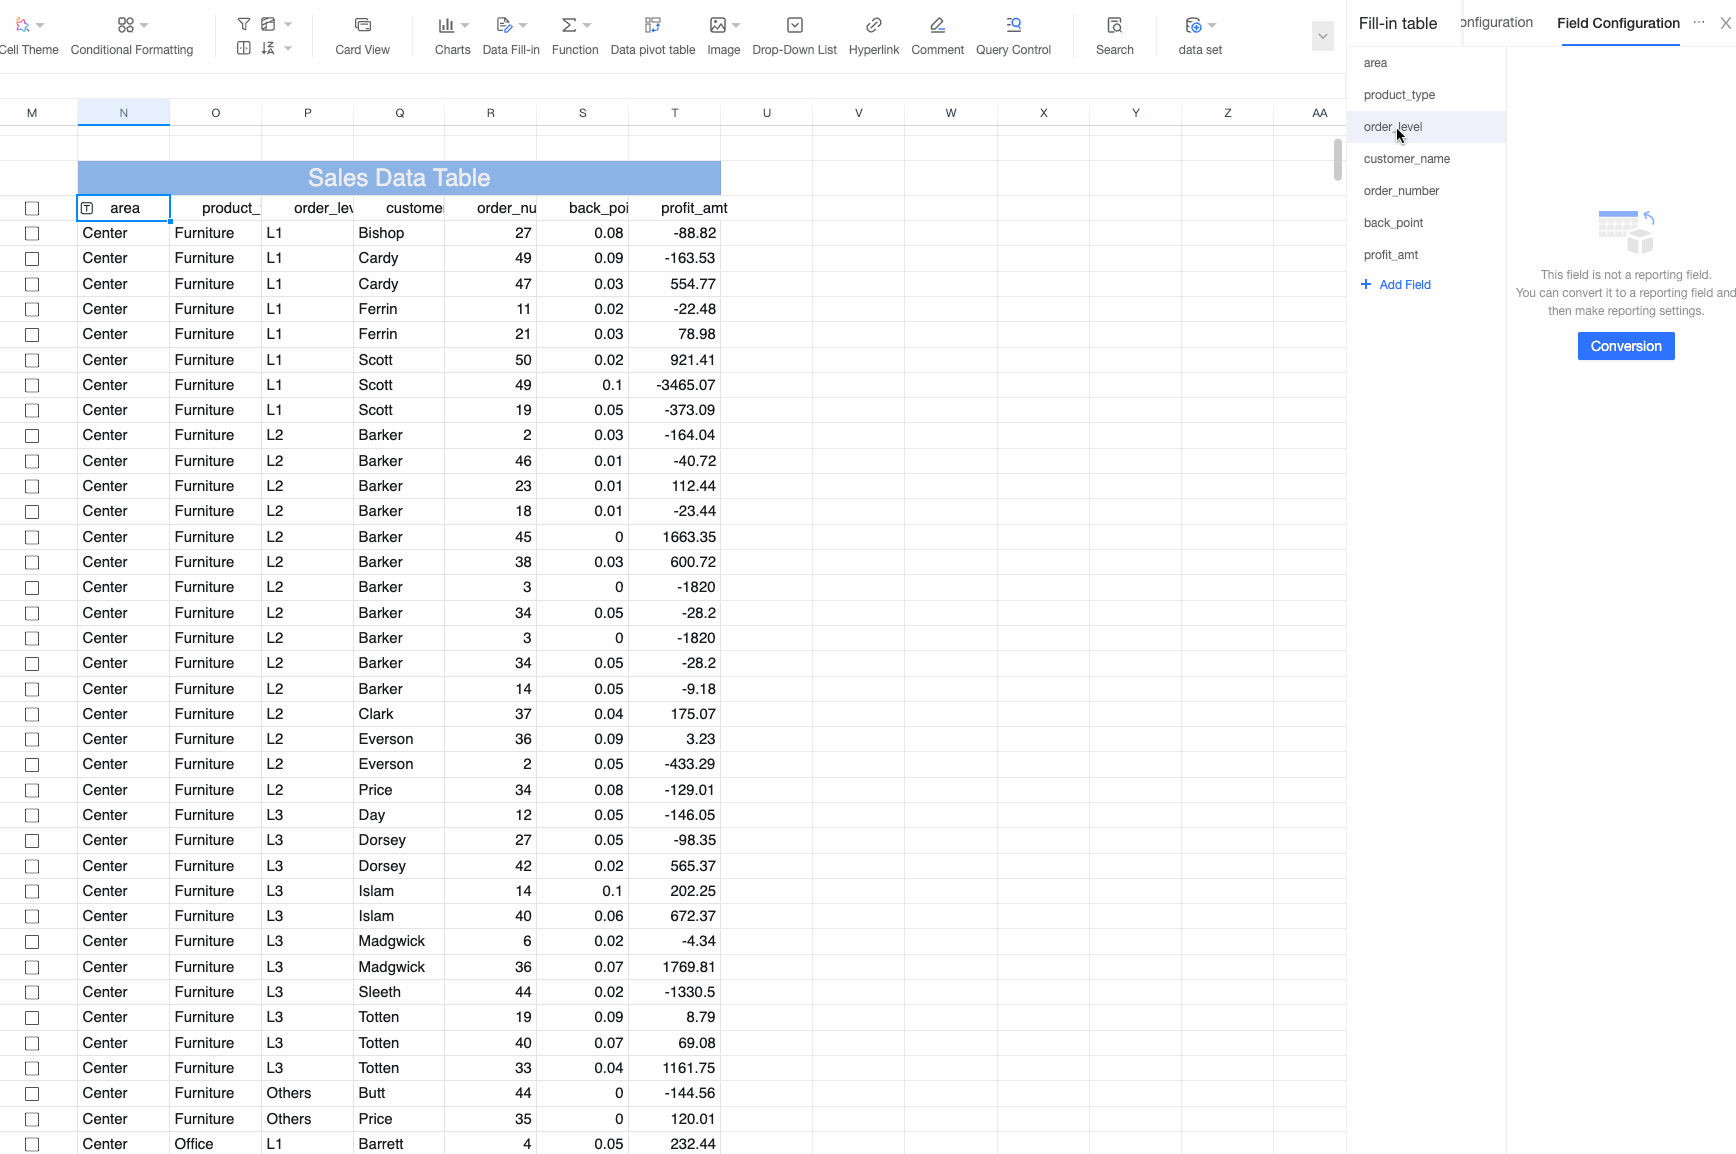
After the table is converted to a details table, the field configuration panel opens. All fields from the dataset appear on the left.
-
Switch between fields. If a field has not been converted to a fill-in control, you can convert it with one click.
 Note
NoteConversion rules: Numeric fields are converted to number controls, date fields to date controls, and text, geographic, and other fields to drop-down controls by default.
-
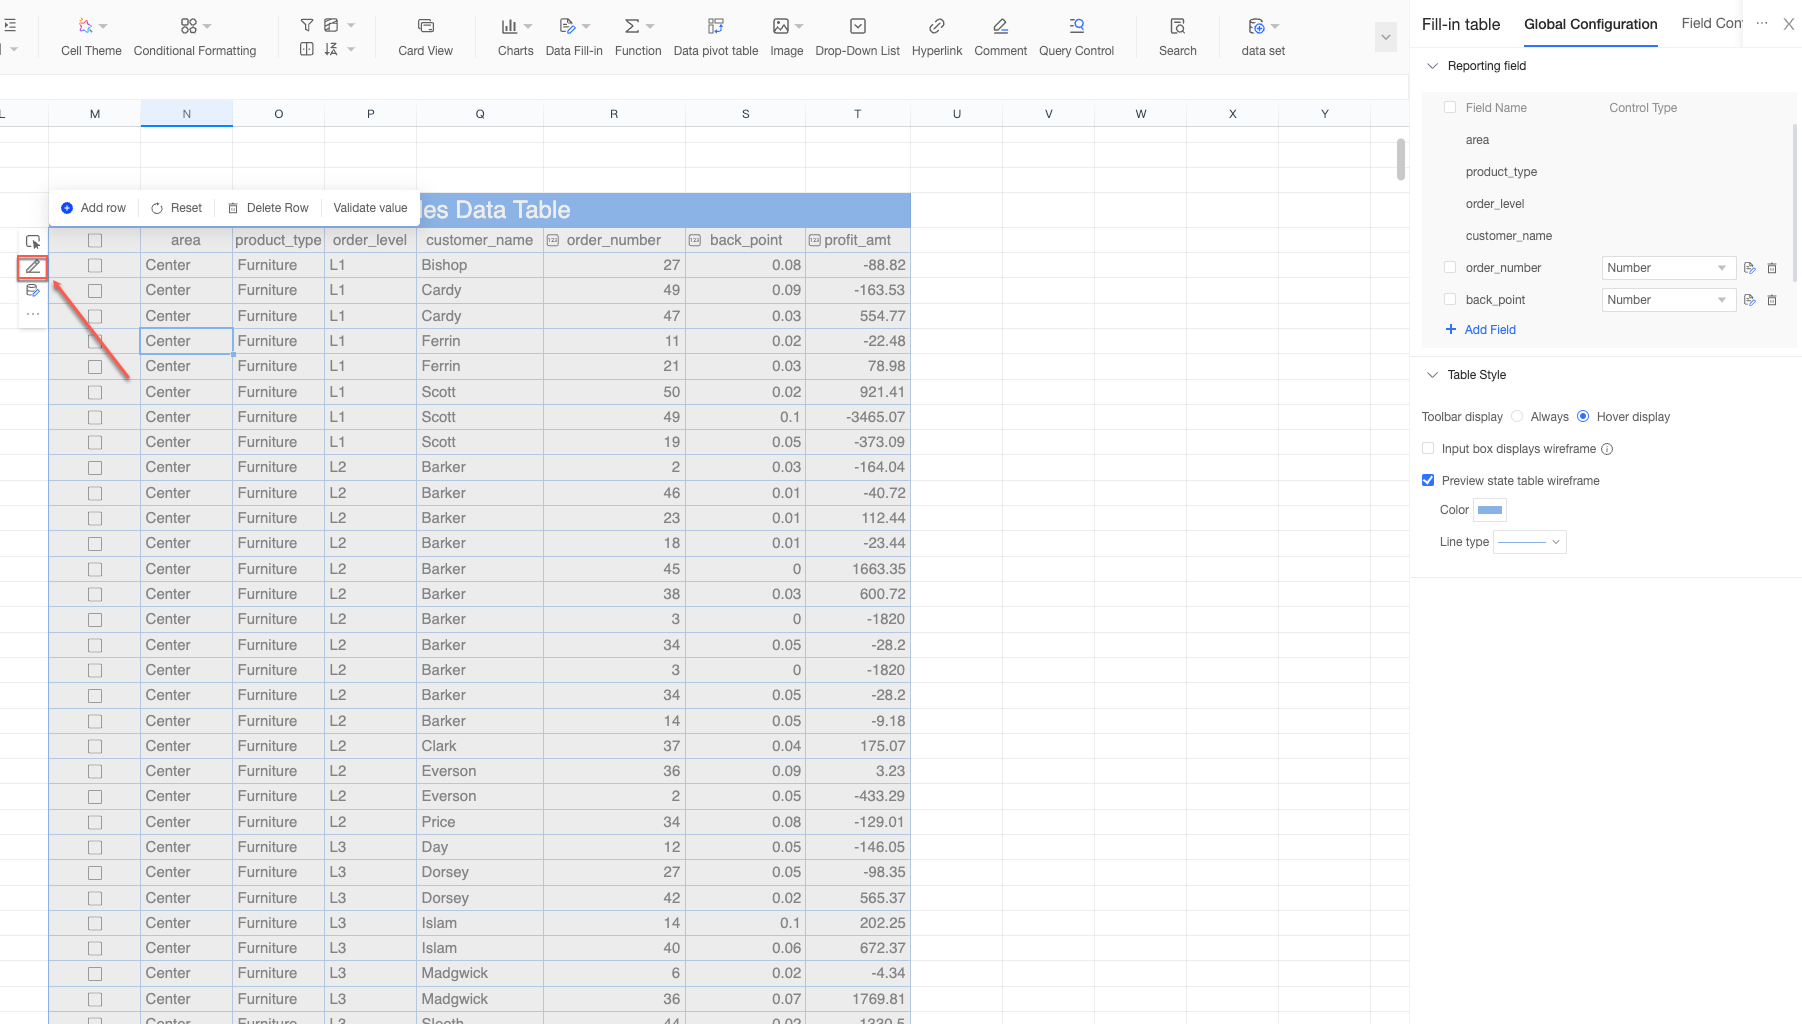
Click the
icon to the right of a fill-in field to revert it to a standard, non-fillable field. -
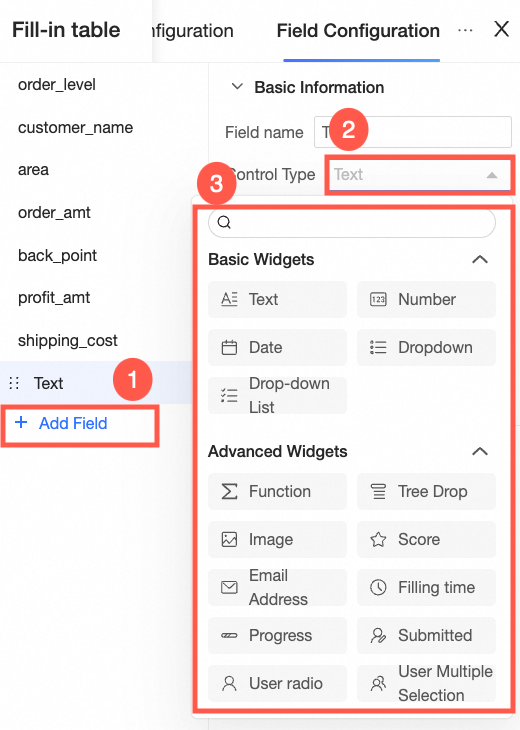
Click Add Field to add a new fill-in field. Map the new field to a field in the underlying table to save its data. For more information, see Set up the submission area. A new fill-in field can also be a function-based field, similar to those in a Table Fill-in.
-
Configure the parameters for each field. The configuration options are mostly the same as in a regular table. For more information, see Fill-in Controls.

Global settings
Click the Global Settings tab on the left side of the field configuration panel.
-
Fill-in fields
-
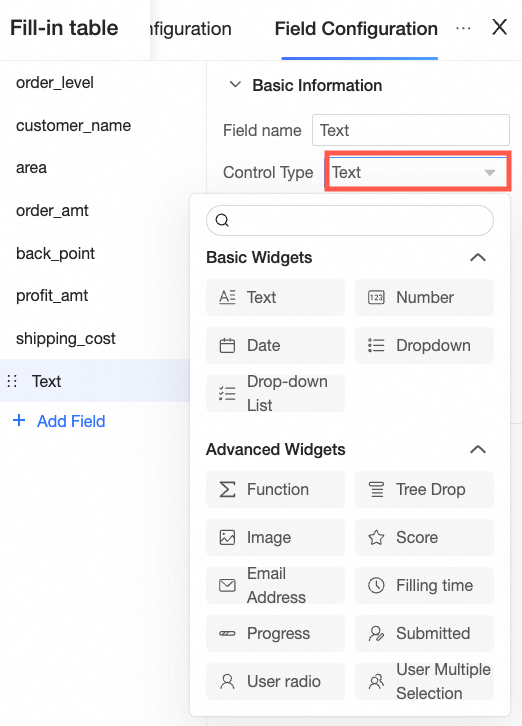
Click Add Field to add a new fill-in field and change its control type.
-
Click the
icon to drag and reorder fields, click the icon to open the field's configuration page, and click the icon to delete a field.
-
-
Table style
-
Set Toolbar Display to Always Show or Show on Hover. The toolbar provides actions such as Add Row, Reset (clears all data), Delete Row, and Validate Values.
-
-
Select Show wireframe for input boxes to display a wireframe around cells during data entry.
-
Select Show table wireframe in preview state to customize the color and line style of the table wireframe.
-
After you return to the dataset panel, you can click the
icon to re-enter the fill-in table configuration panel.

Next steps
-
After you create the Dataset Fill-in, configure the submission area to map the entered data to the underlying table. For more information, see Set up the submission area.