This topic is a quick start guide to data preparation.
Overview
Data preparation (lightweight ETL) allows you to perform operations such as data transformation, aggregation, joining, and union on data from a source table or dataset. The processed data is then output to a destination. This feature helps business users who are unfamiliar with SQL prepare data for BI visualizations with minimal effort.
Workflow
The typical process begins with connecting to a database in the data source module. Developers then use source tables or datasets as inputs for data modeling in the dataset module to perform in-depth data analysis and visualization. However, data often requires processing, such as union or aggregation, before it can be modeled. Quick BI introduces the data preparation module to address this need. It uses a lightweight ETL process to transform the data and writes it to a new source table or dataset, making it ready for modeling and analysis.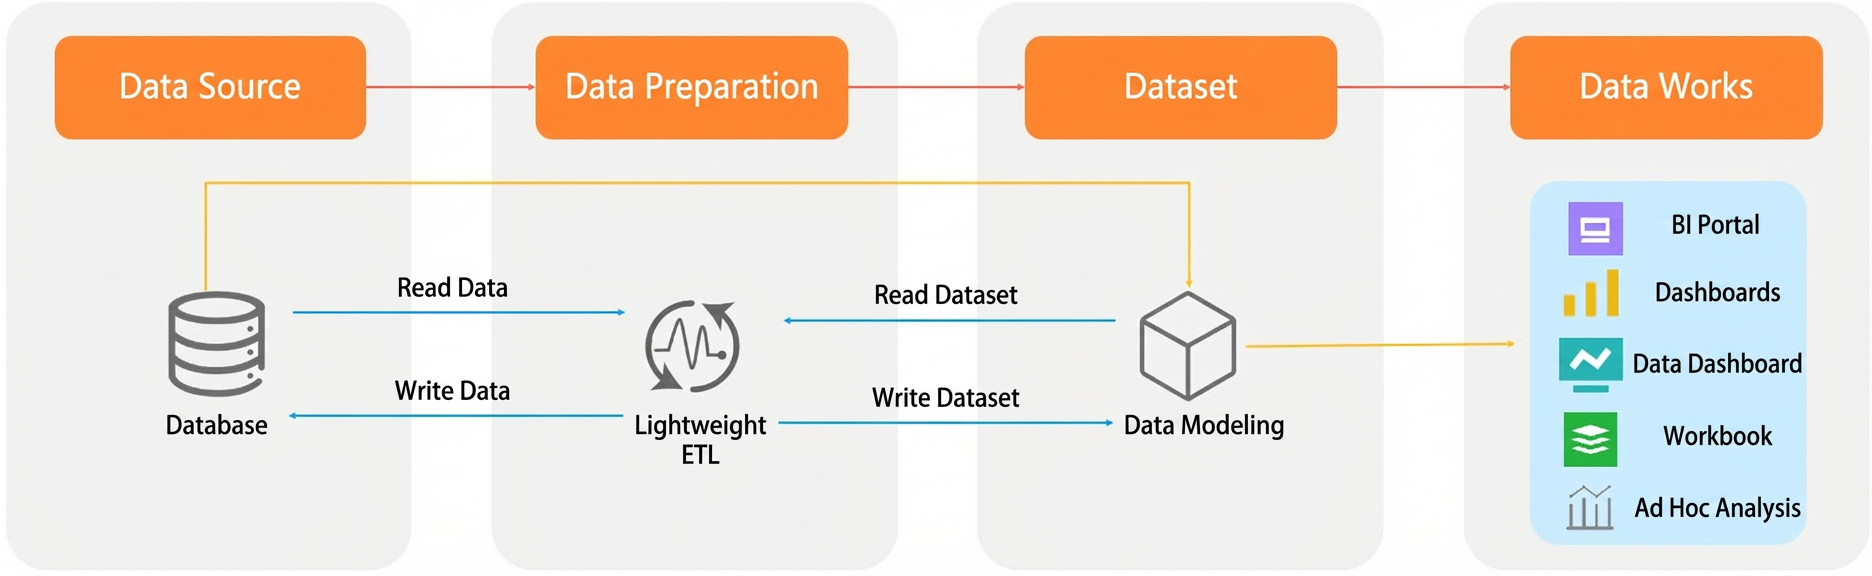
You can follow these steps to get started:
Limitations
Only developer accounts can use the lightweight ETL feature.
You must have read and write permissions on the destination database. For a list of data sources that support the data preparation feature, see Data Source Feature List.
Using ETL requires the following permissions for the relevant datasets or data sources:
Input node:
Dataset: You must have permission to use the dataset.
Source table: You must have permission to use the data source.
Output node:
Dataset: You must have permission to create or edit datasets.
Source table: You must have permission to use the data source.
The lightweight ETL feature is available only in Professional Edition workspaces.
Users with a Professional Edition subscription can publish up to 10 ETL tasks.
Trial users, including those on a Professional Edition trial or Advanced Edition users trialing the ETL module, can publish up to 3 tasks.
All fields in a node are displayed. You can select up to 200 fields.
An ETL input node supports a maximum of 10 million rows.
Entry points
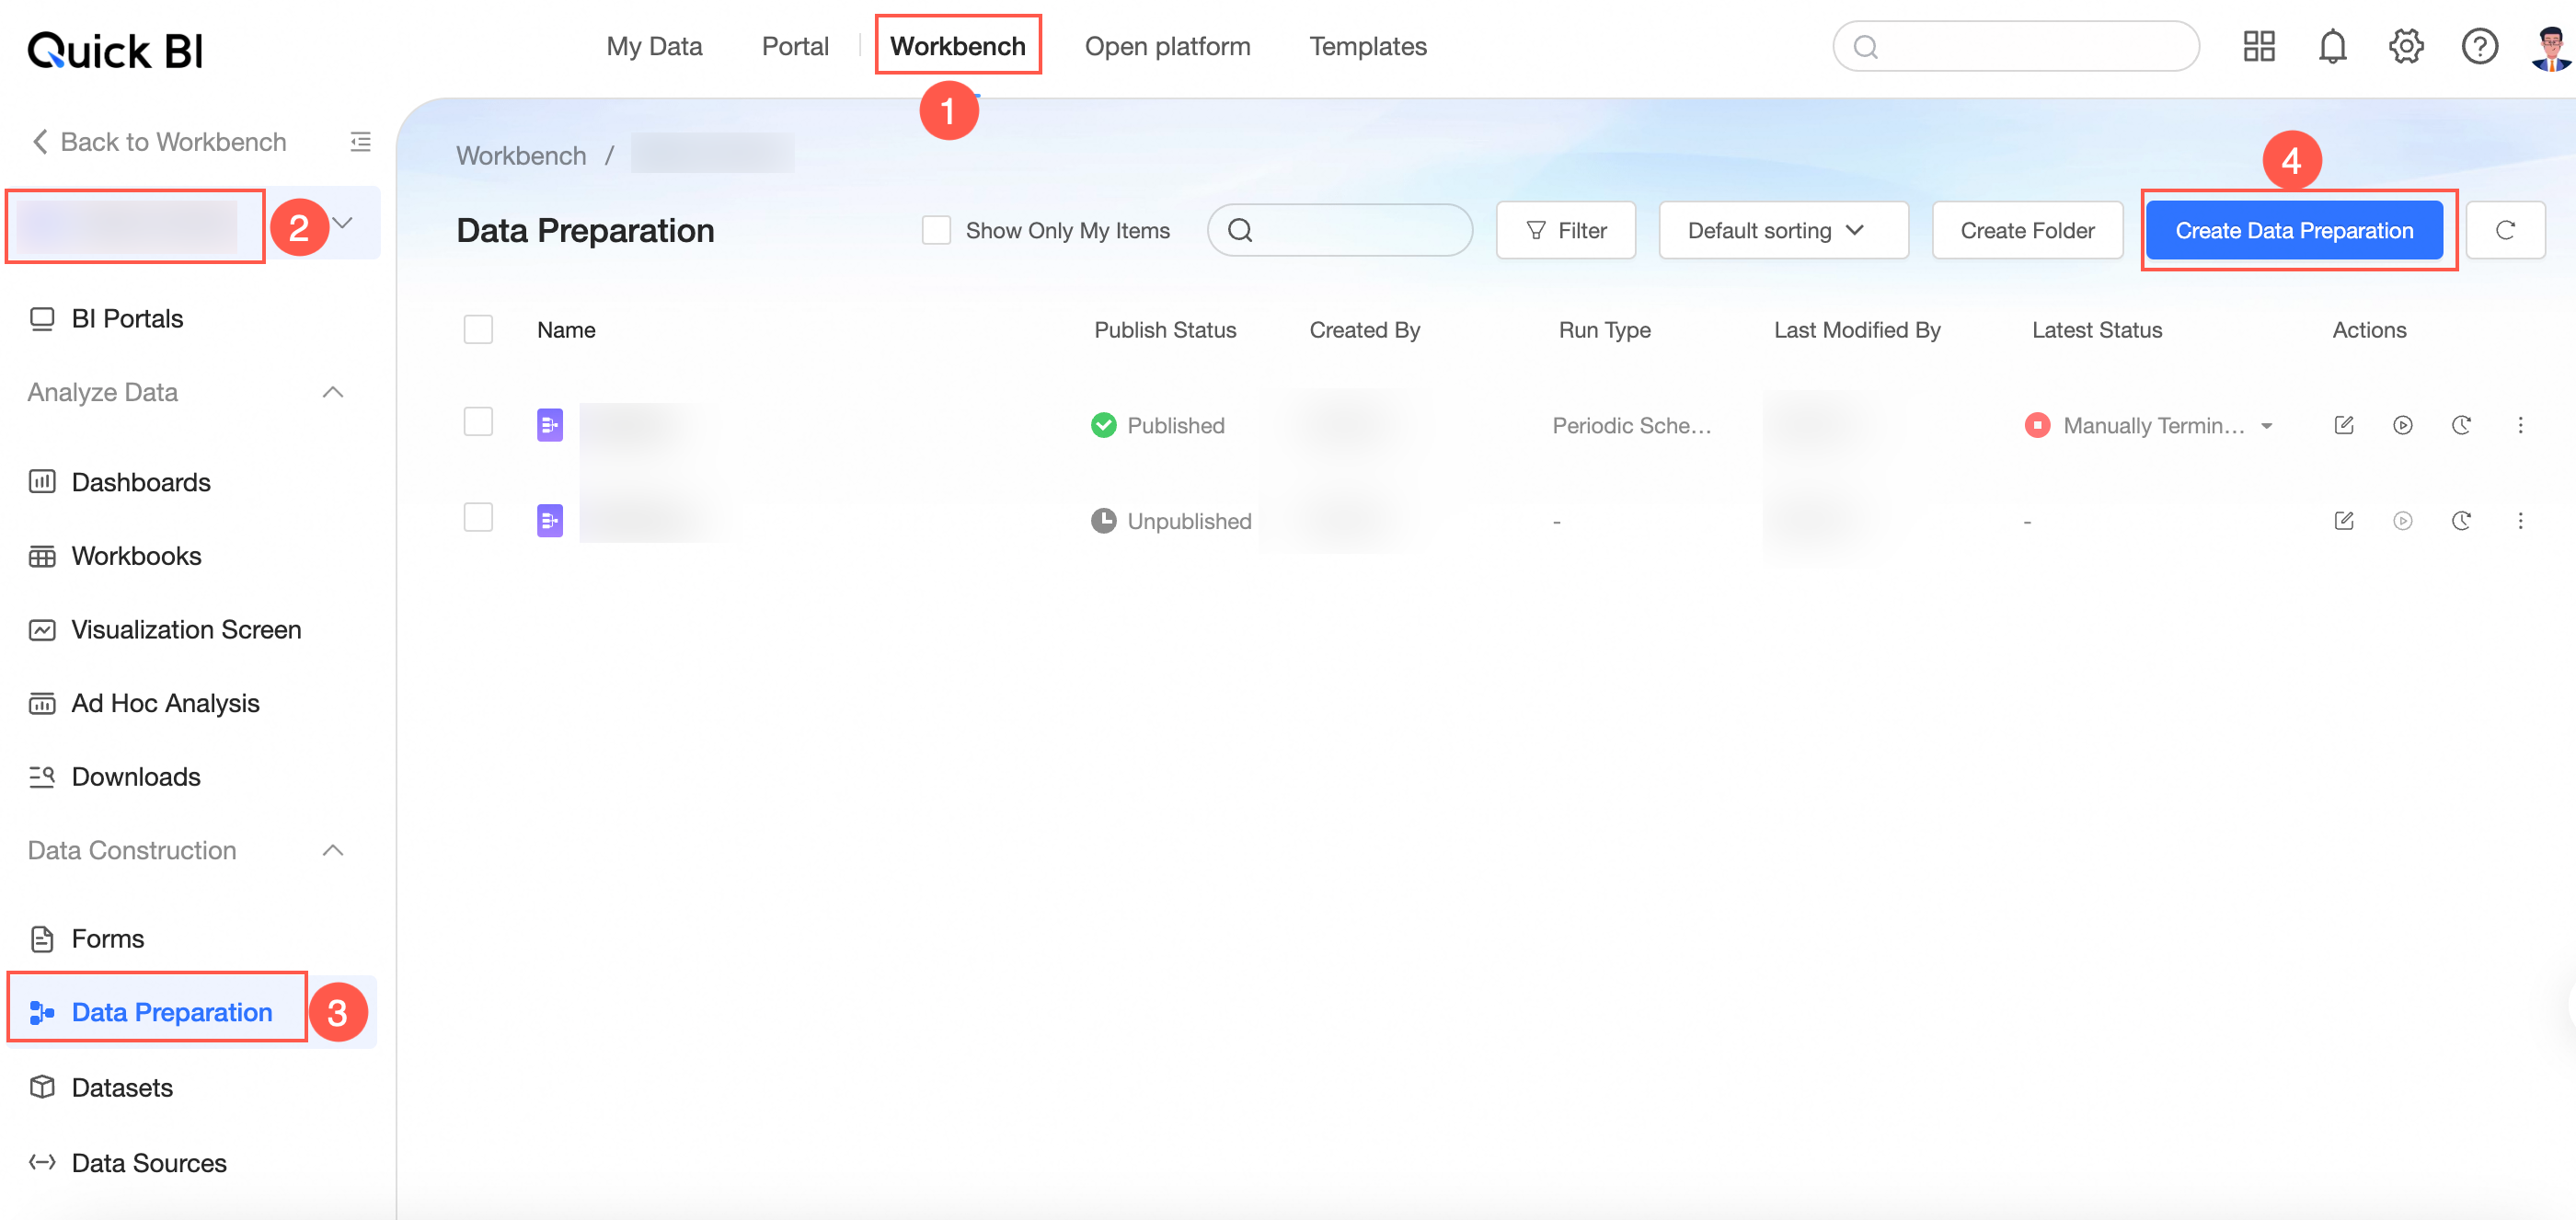
Log on to the Quick BI console.
On the Quick BI home page, create a new data preparation in one of the following ways:
Method 1: Go to the workbench, select a workspace, click Data Preparation, and then click Create Data Preparation.
Method 2: Go to the workbench, select a workspace, and click the
 icon next to Data Preparation.
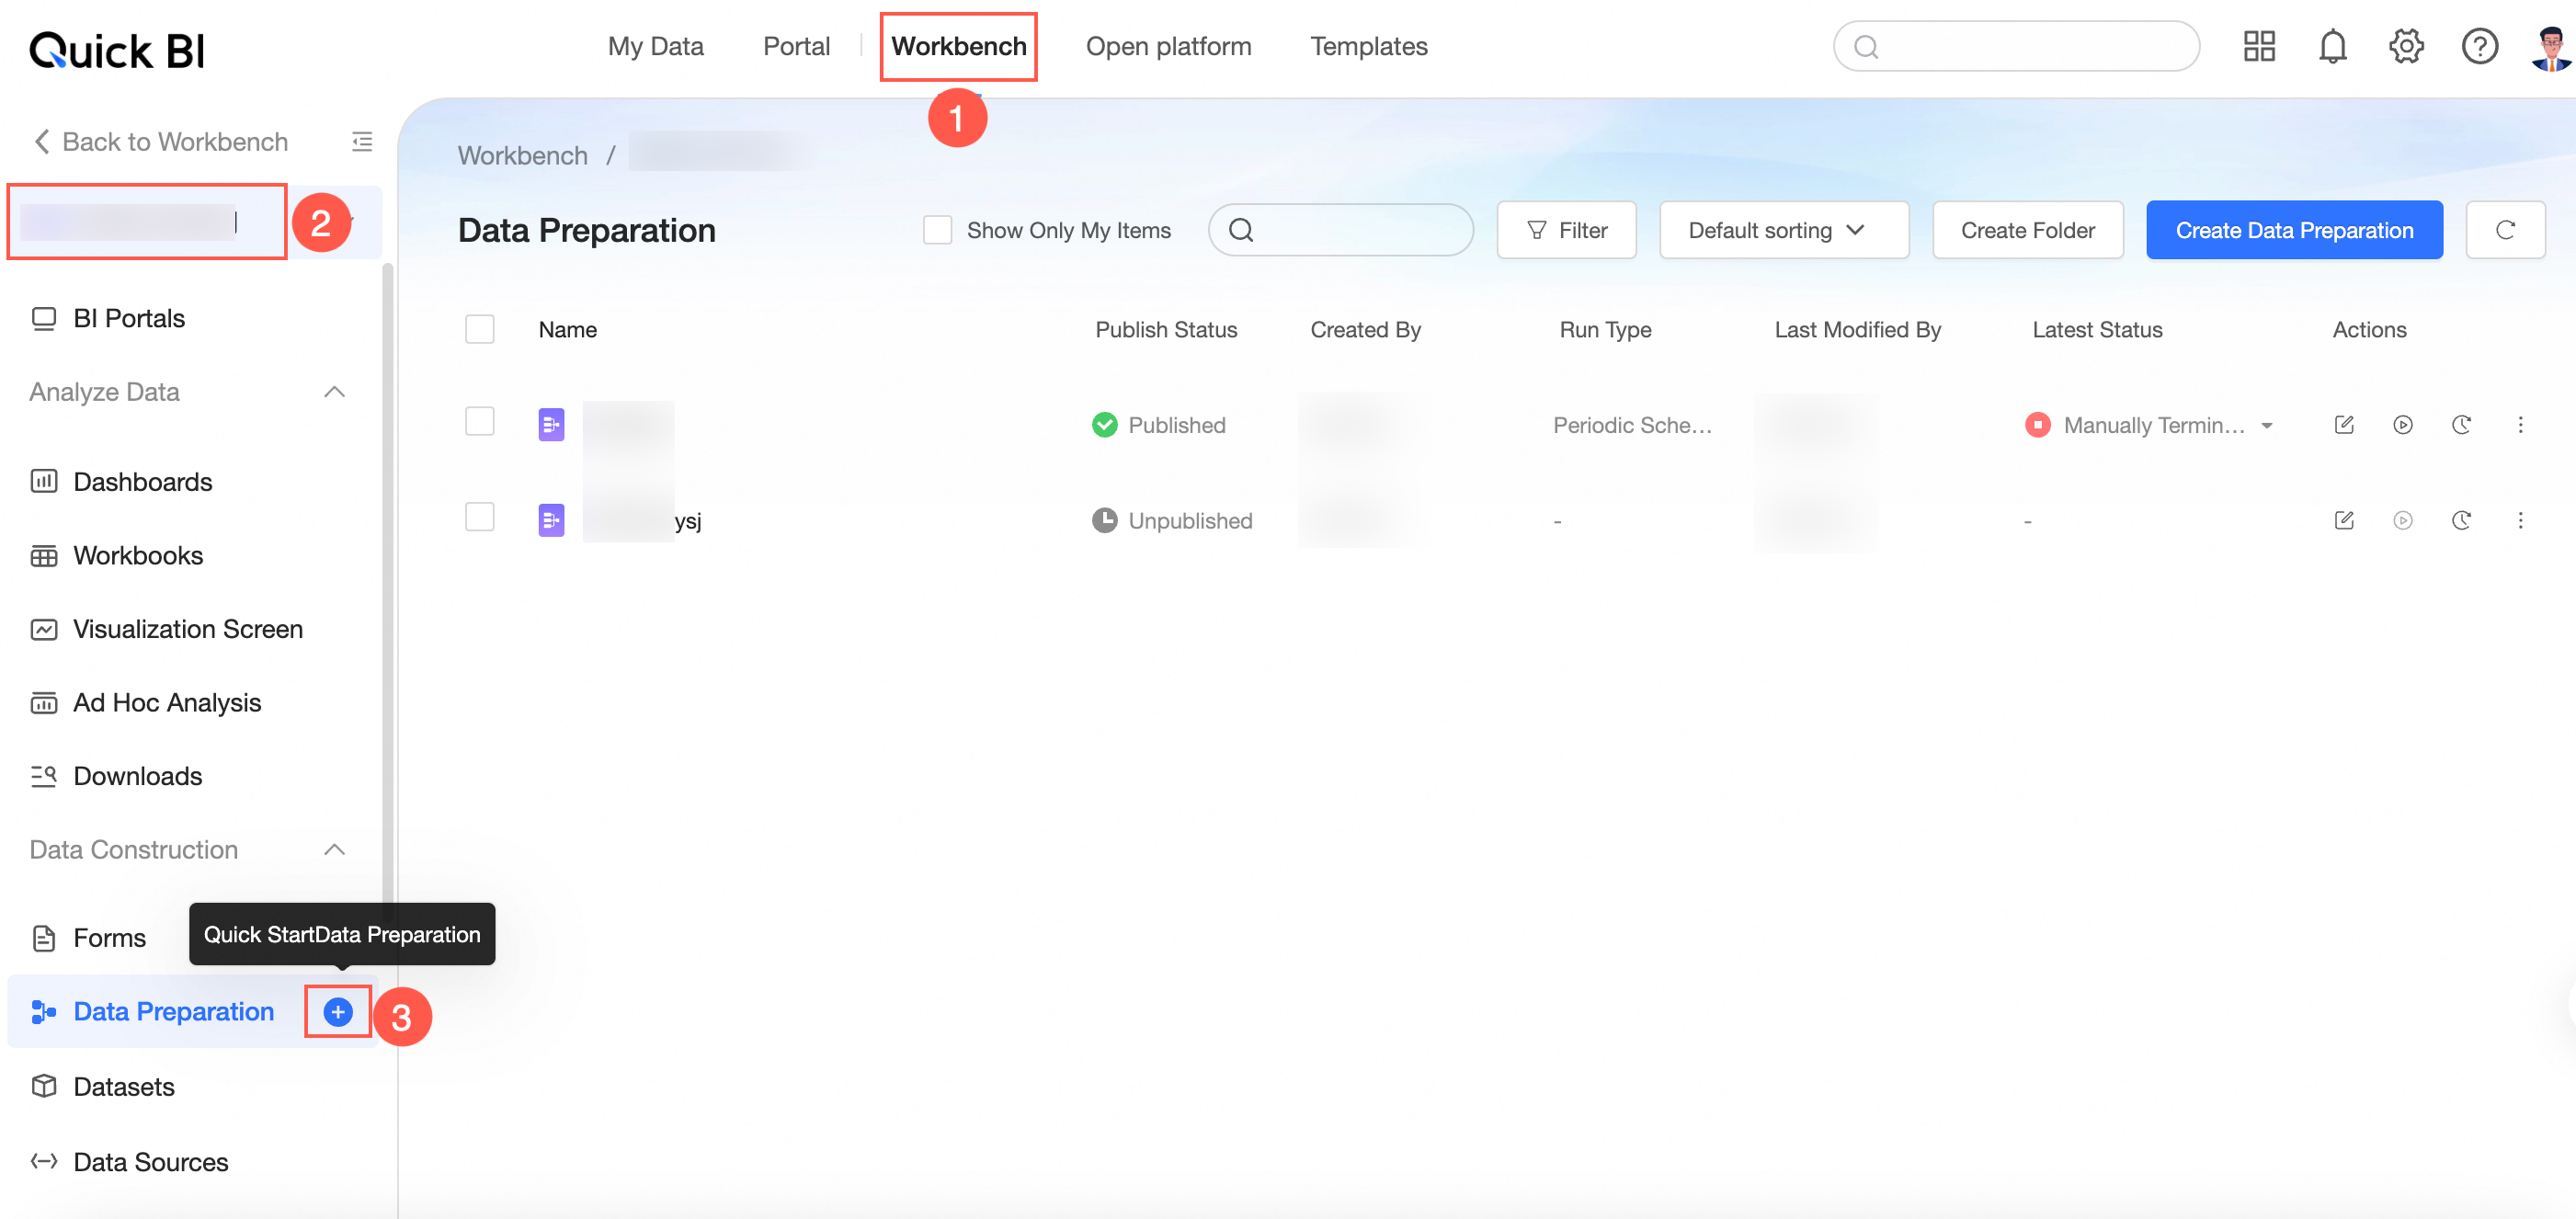
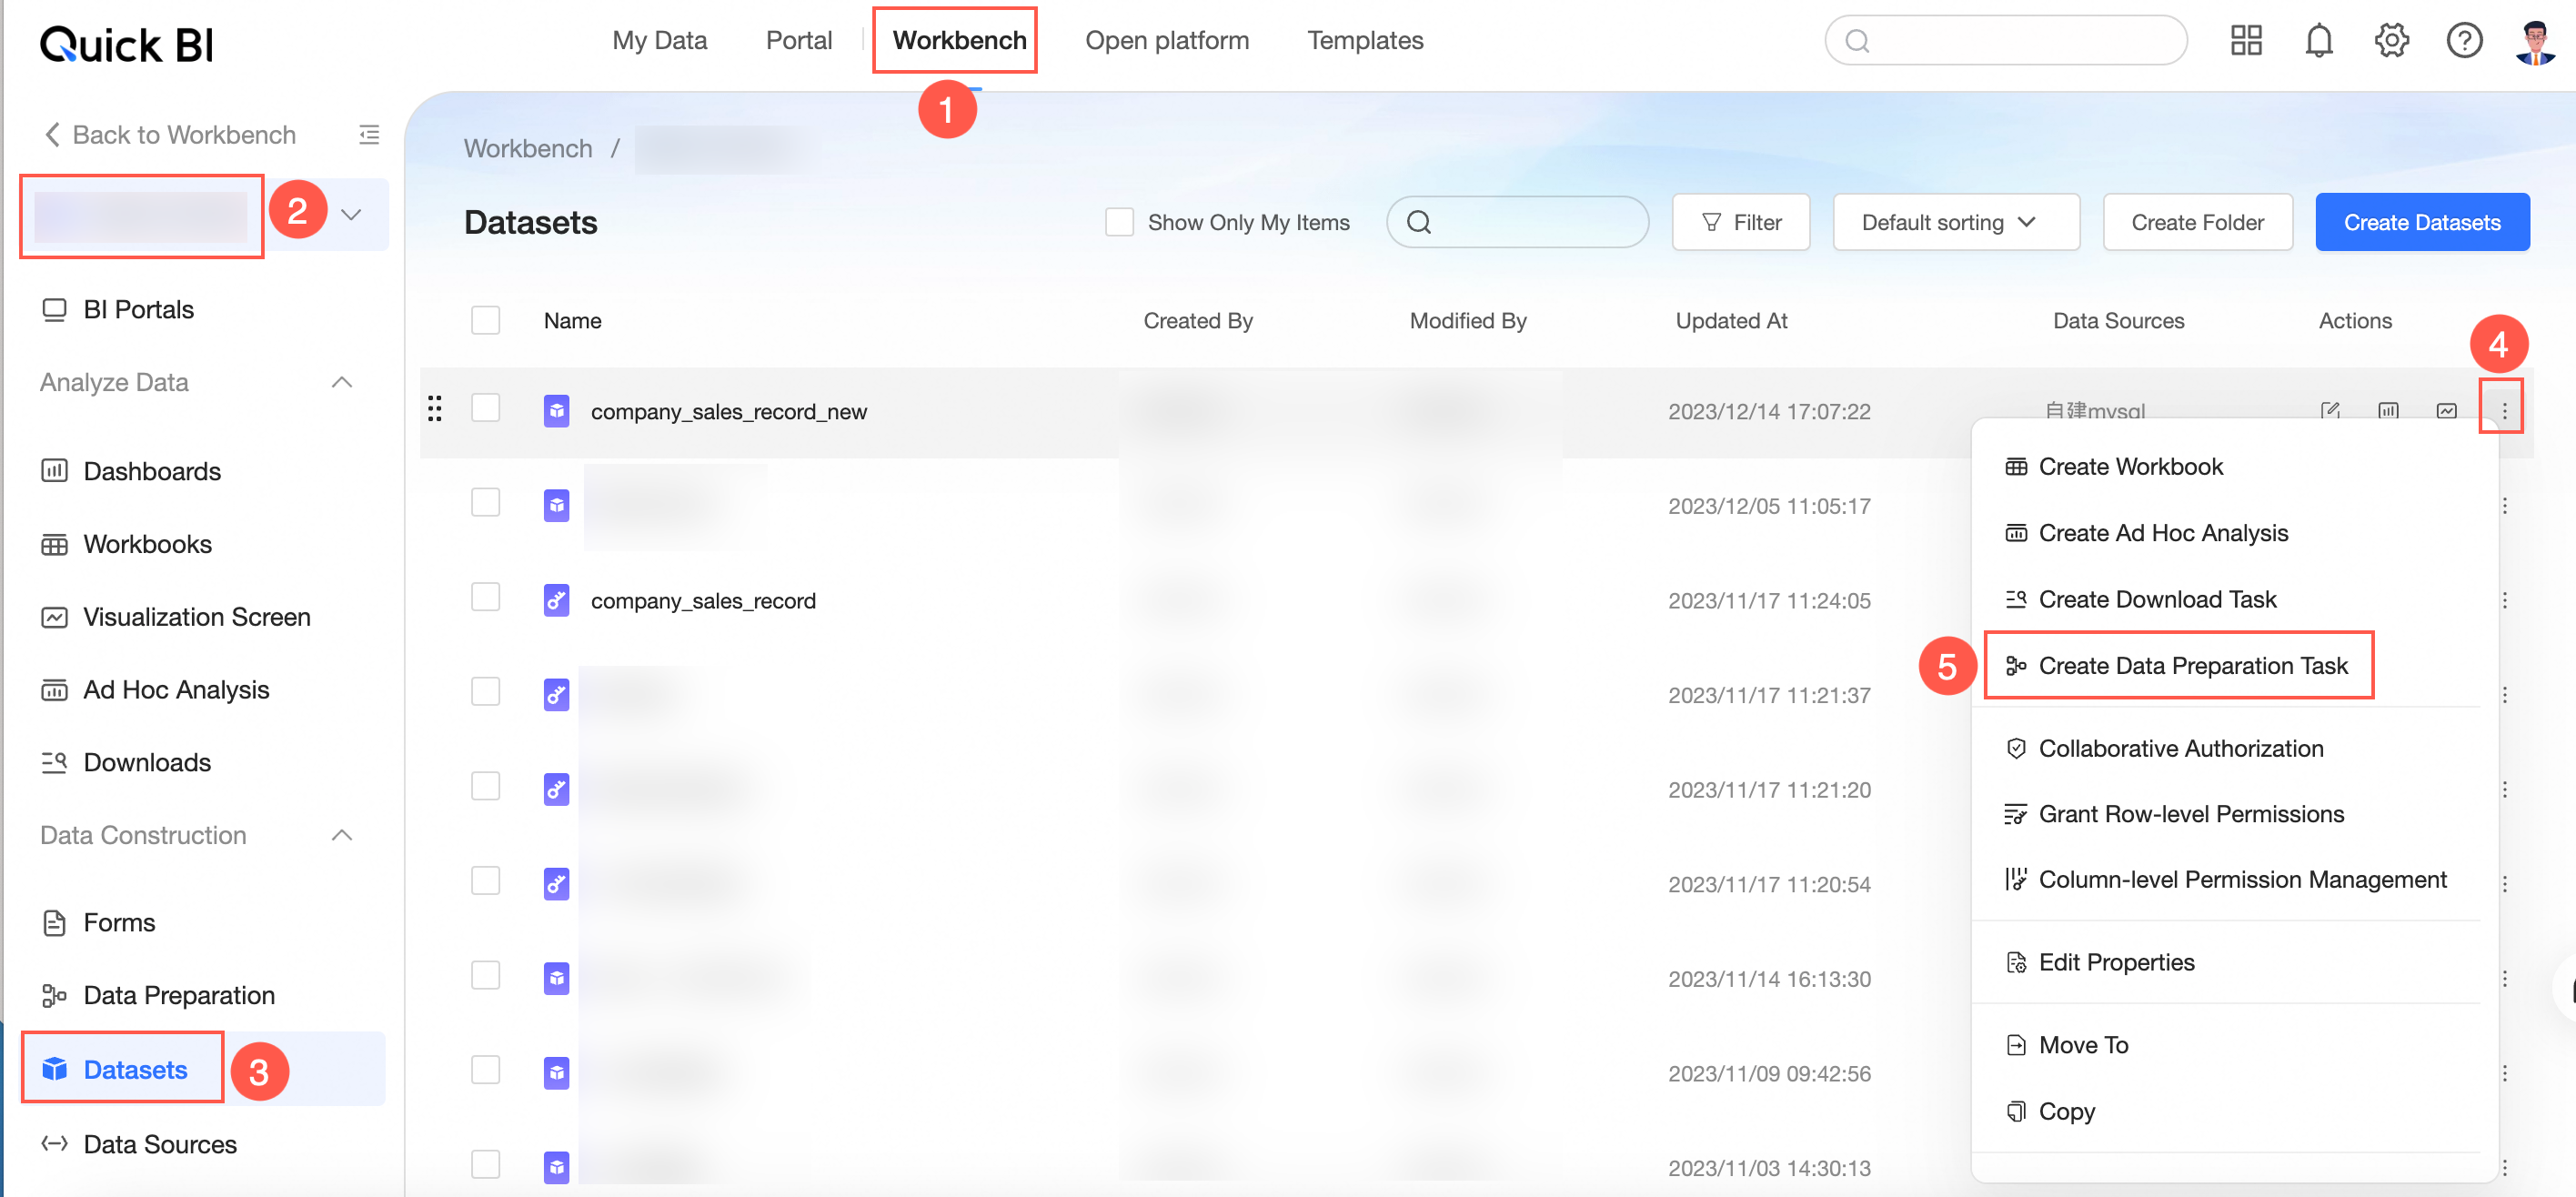
Method 3: Go to the workbench, select a workspace, and click Dataset. Find the target dataset, click the
 icon, and then select Create Data Preparation.
Method 4: Go to the workbench, select a workspace, and click Data Source. Select the target data source, find the target table, and click the
icon.The data preparation editor opens.

Input data
You can use a table from a data source or a dataset that you can access as input data.
In the data preparation editor, drag and drop the Data Input node from the node panel on the left onto the canvas to build your data flow.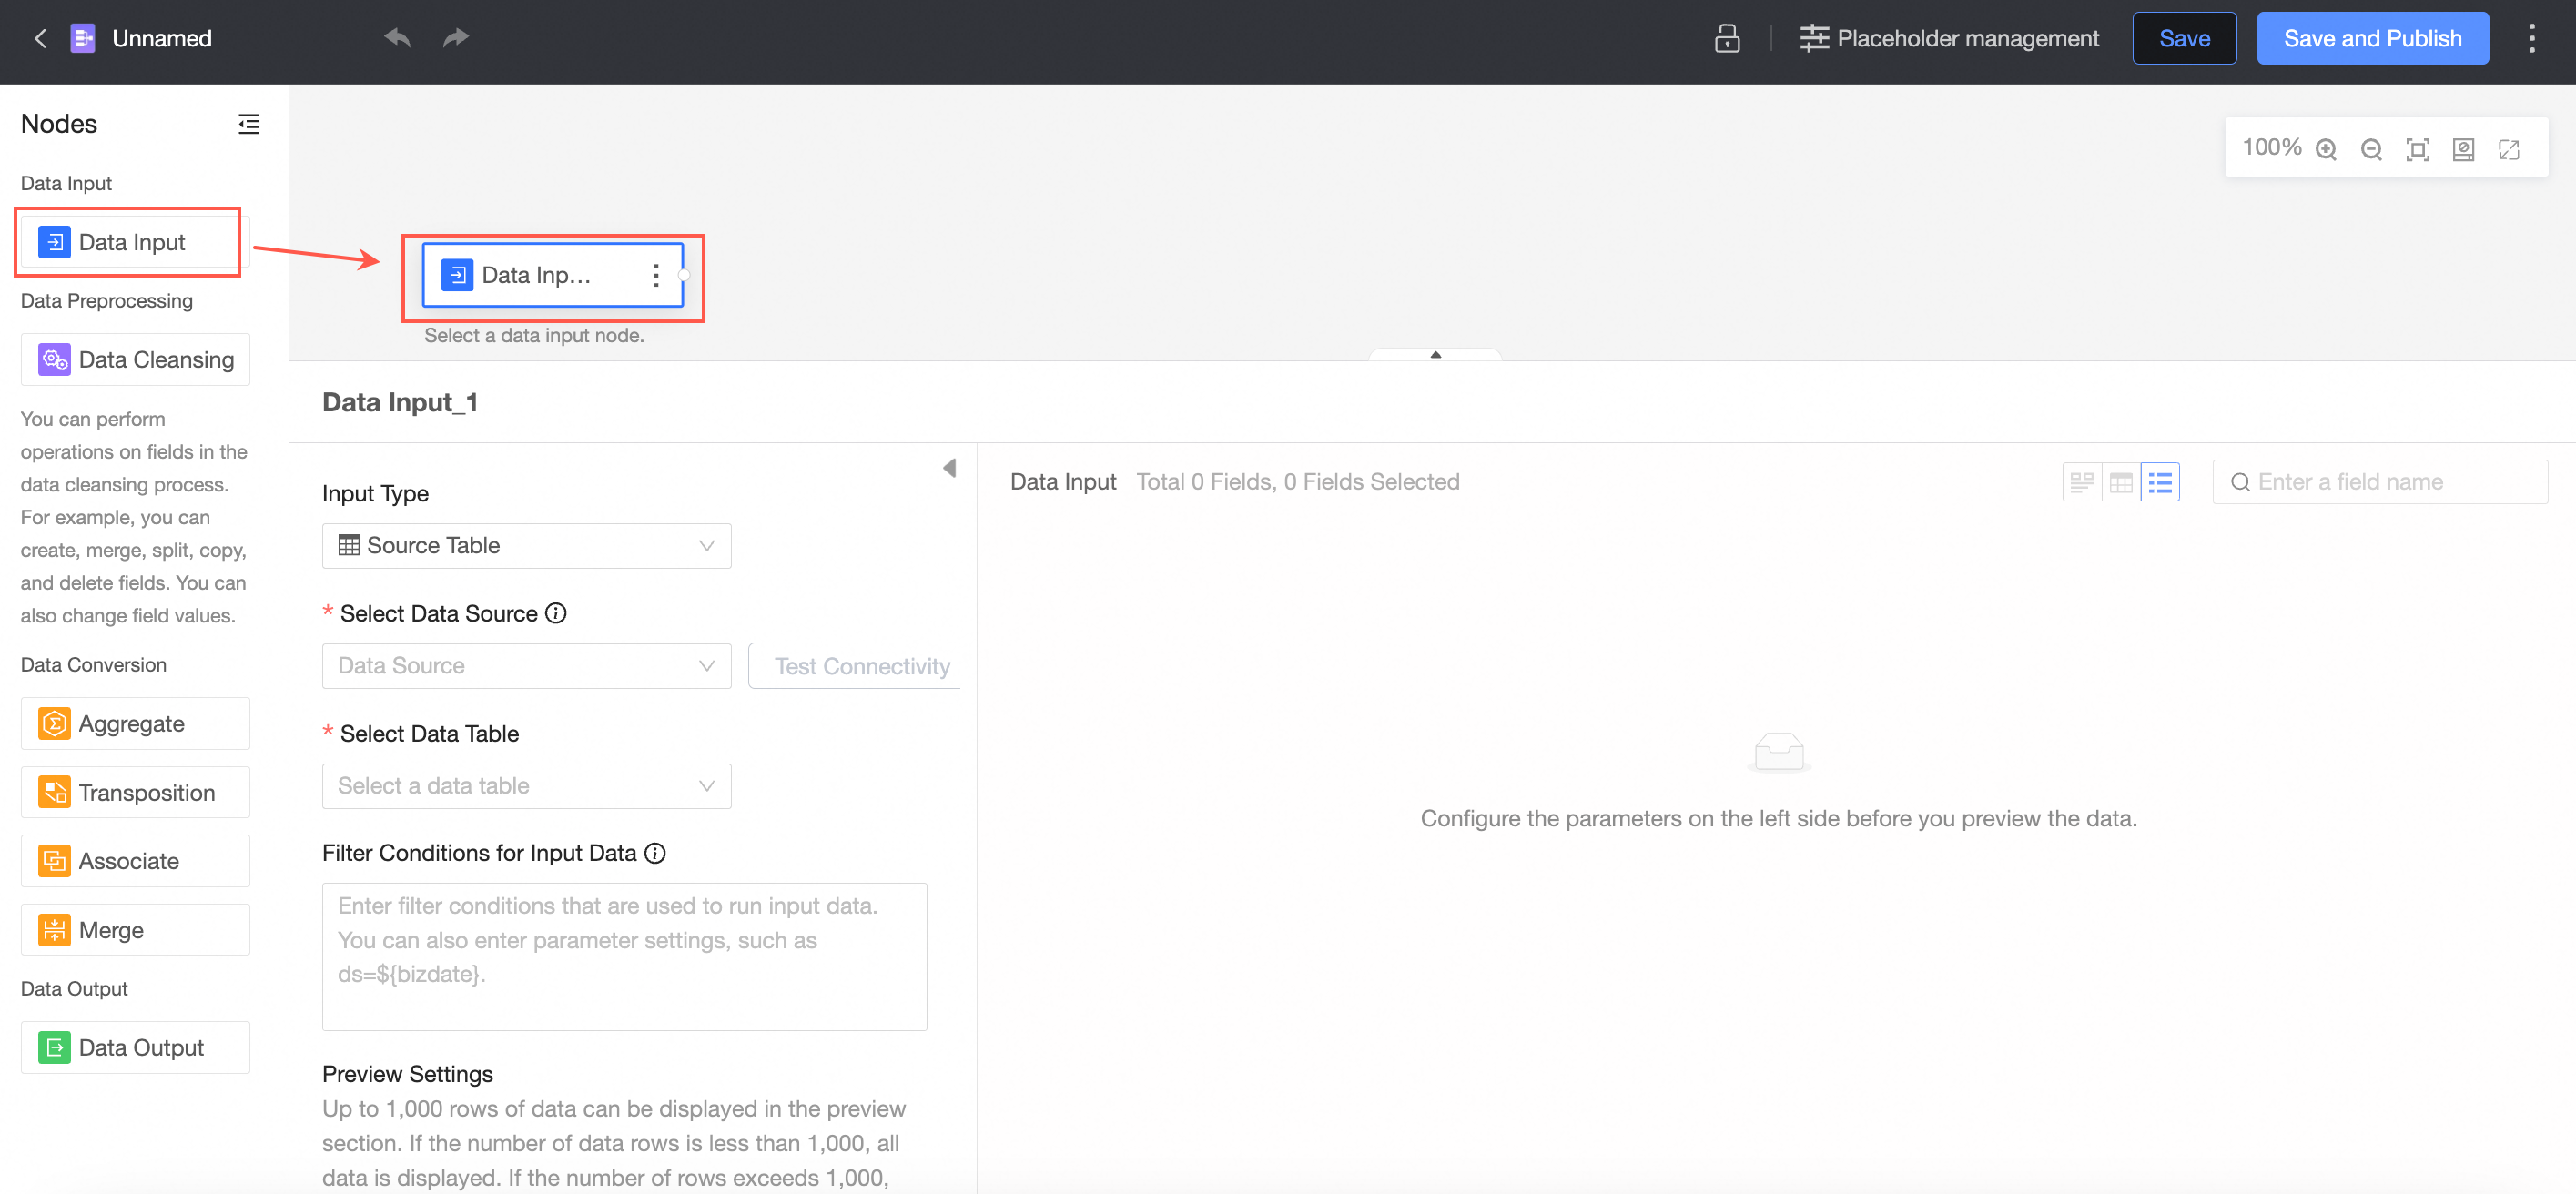
Configure nodes
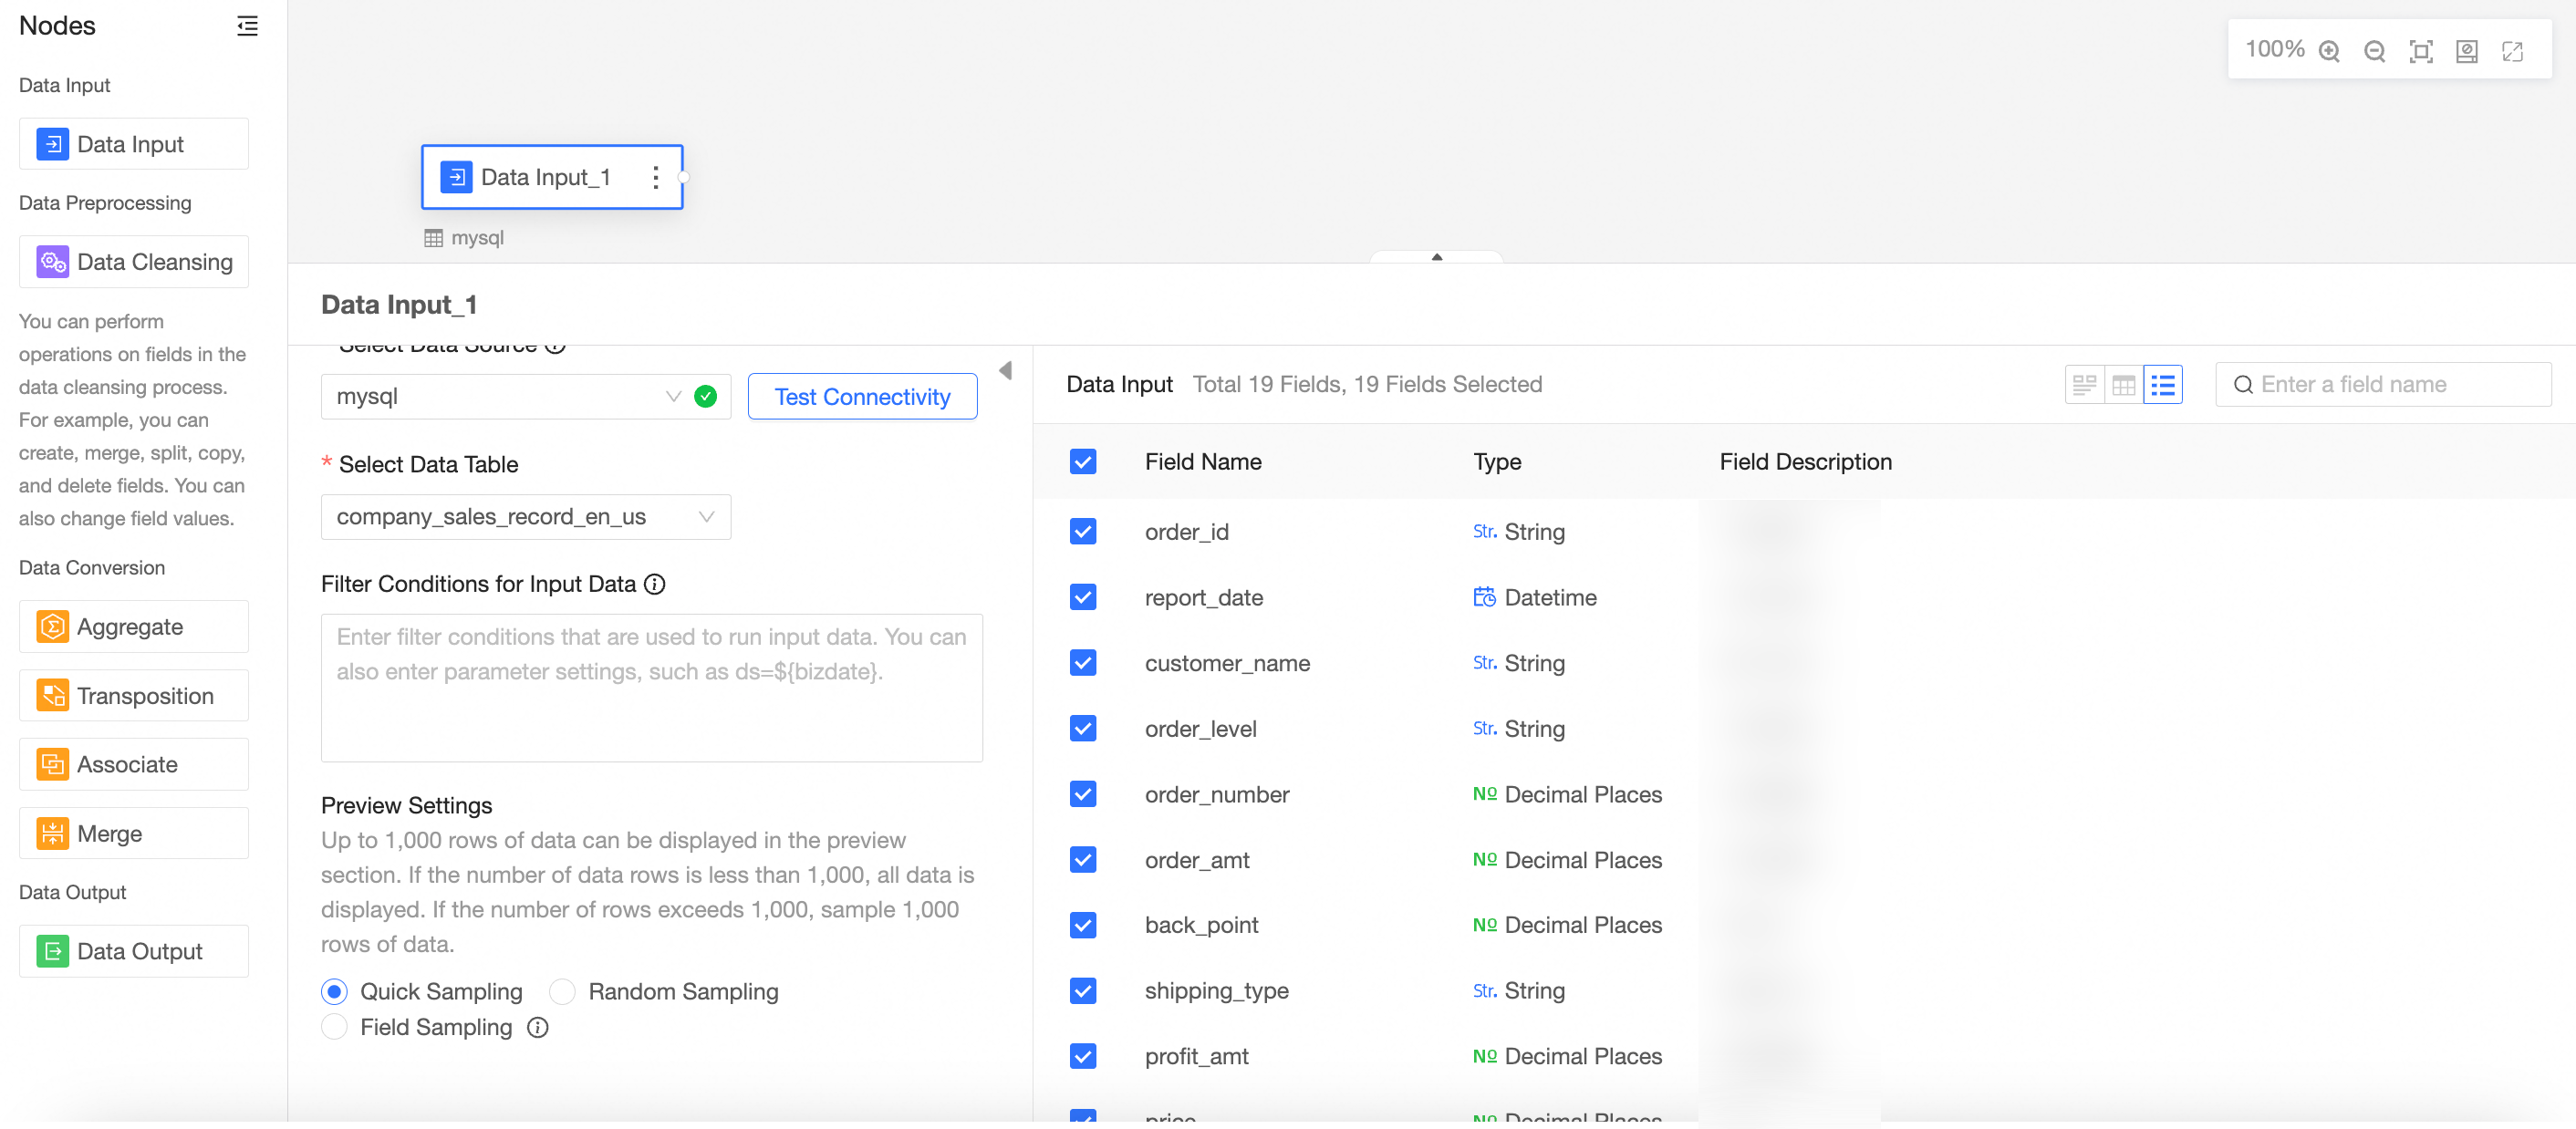
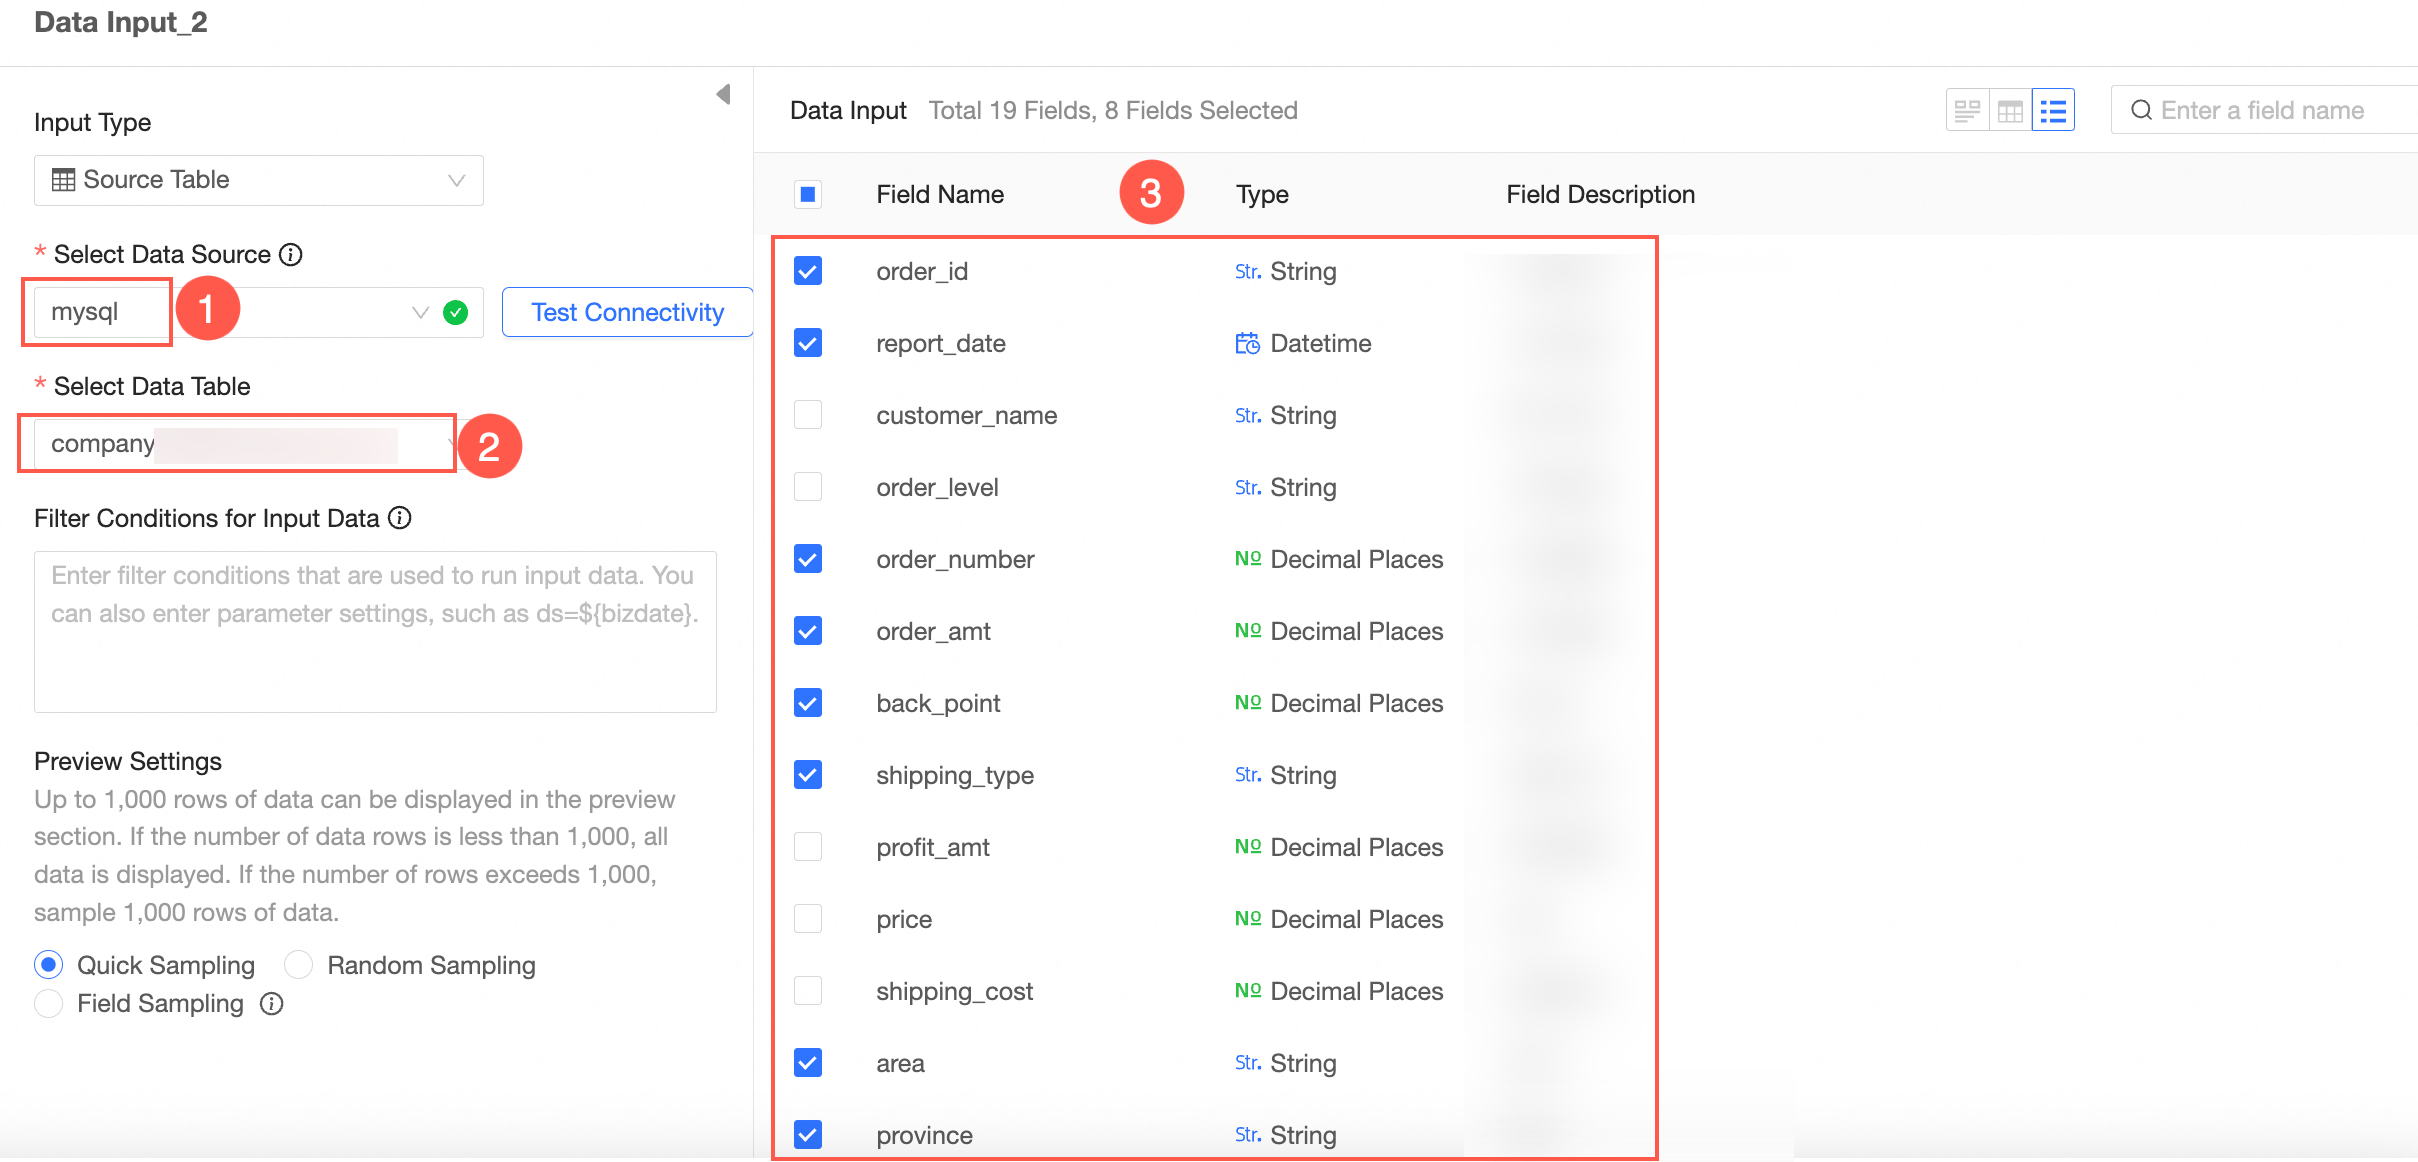
Input type: source table
Set Input type to source table.
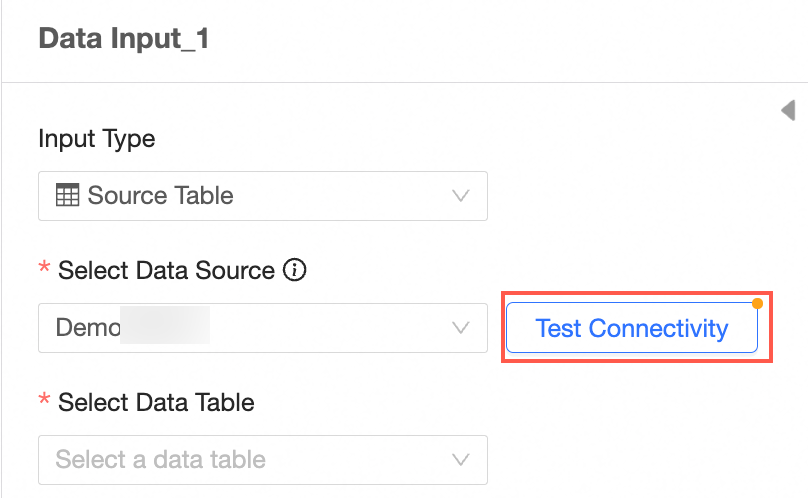
Select a data source.
For a list of supported data sources, see Data Source Feature List.
Test connectivity.
If the message Automatic connection failed, please click to test manually appears after you select a data source, click Test Connectivity.
NoteTo ensure a successful connection, add 106.15.233.0/24 to your database allowlist.
Select a data table.
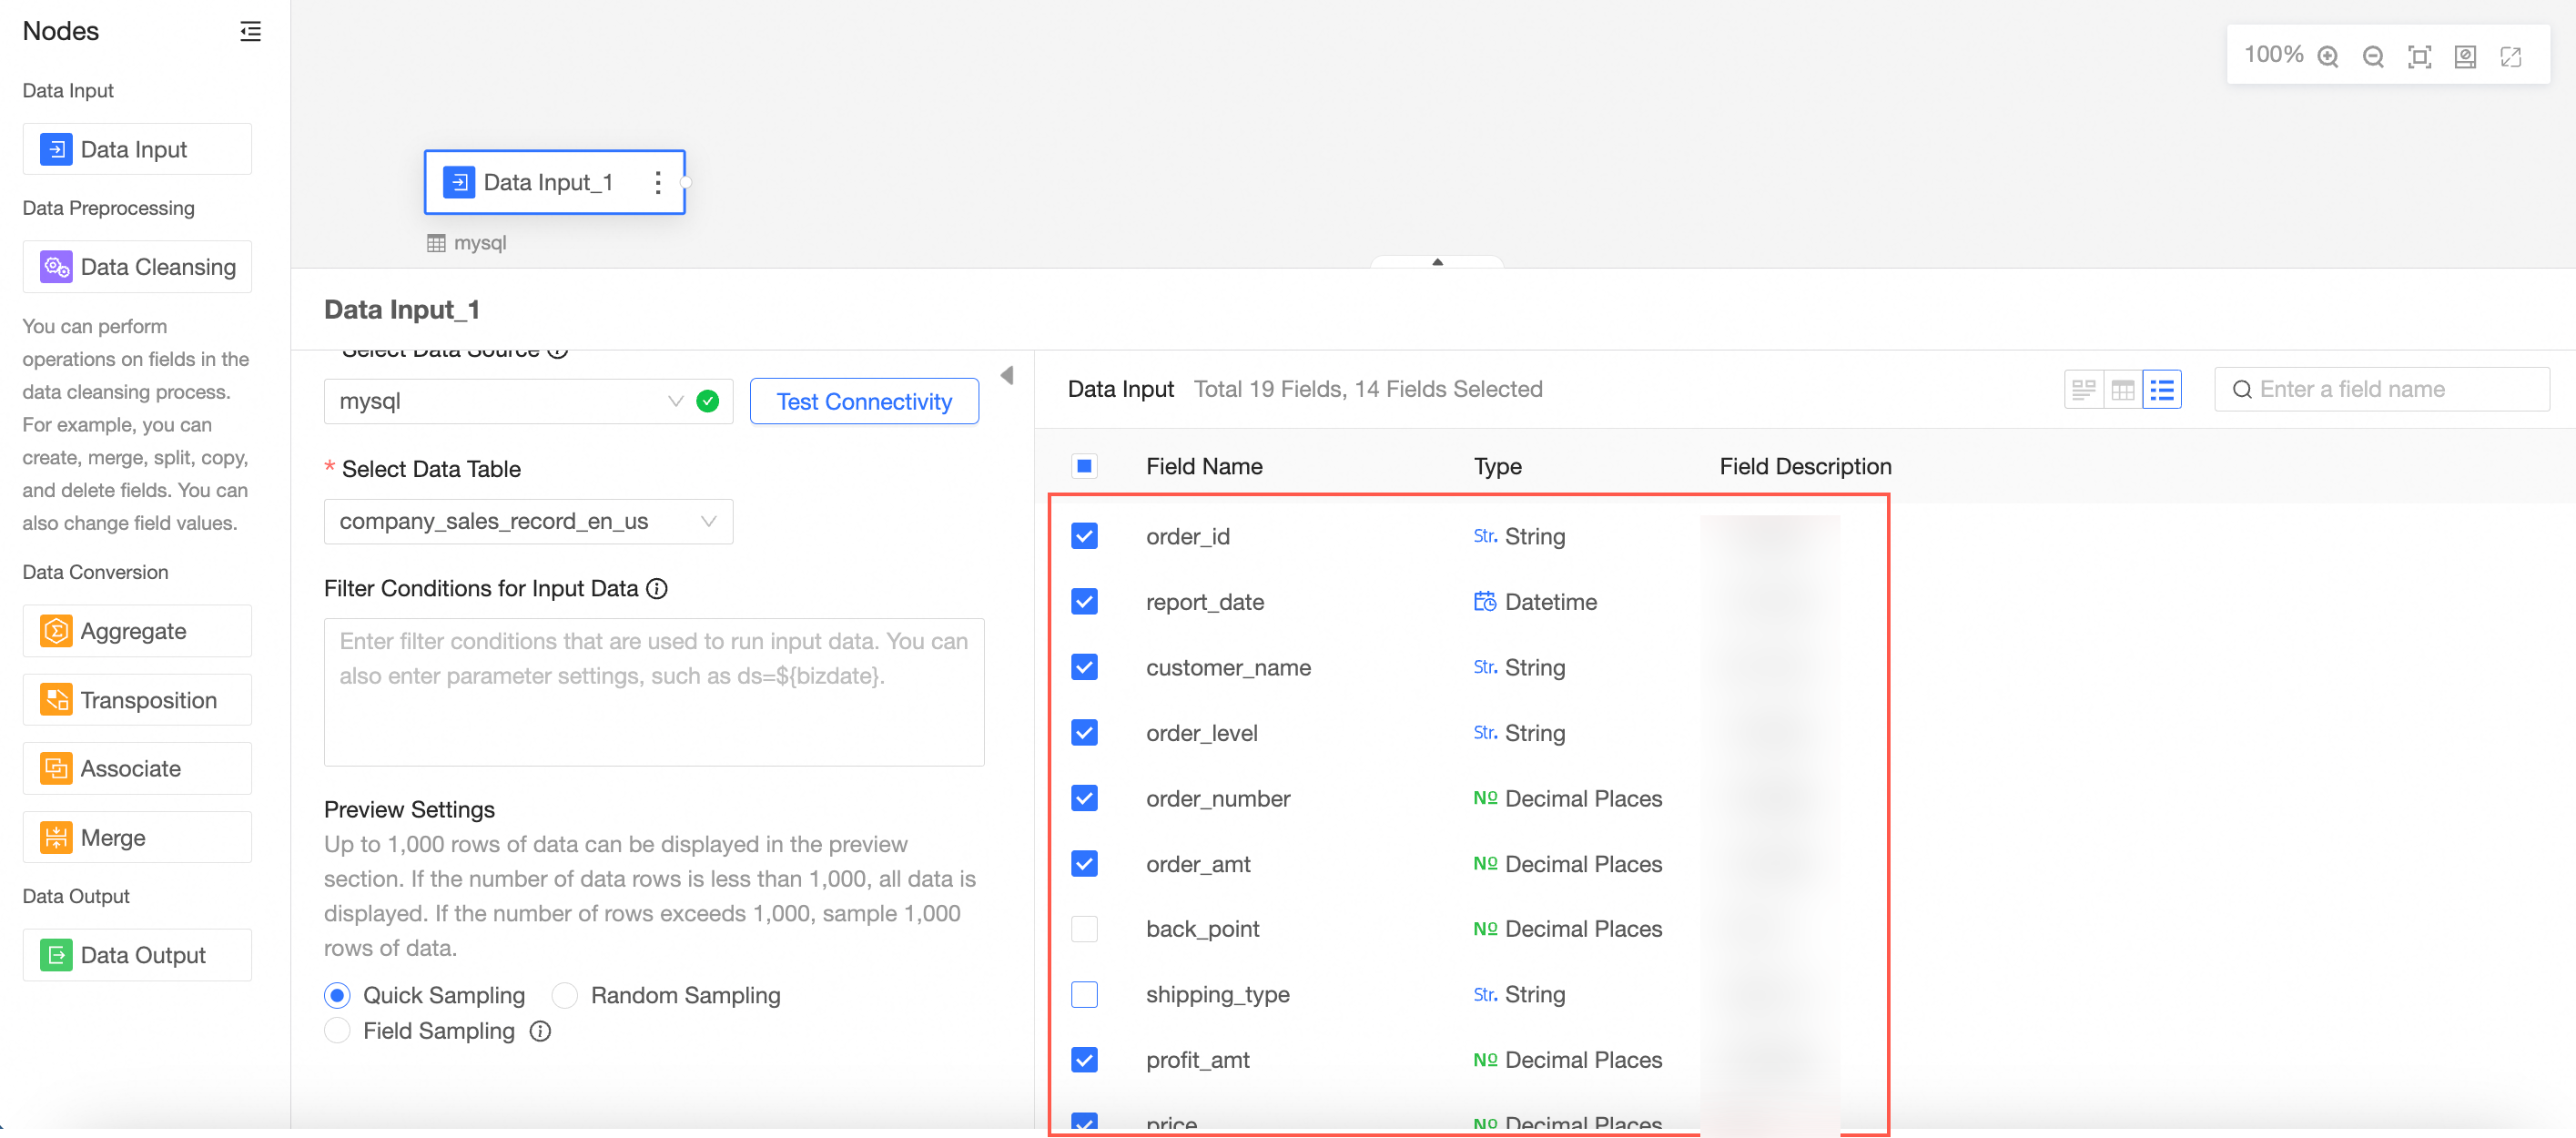
All fields from the selected table are displayed in the right-side panel.
Select the fields to use as input data.
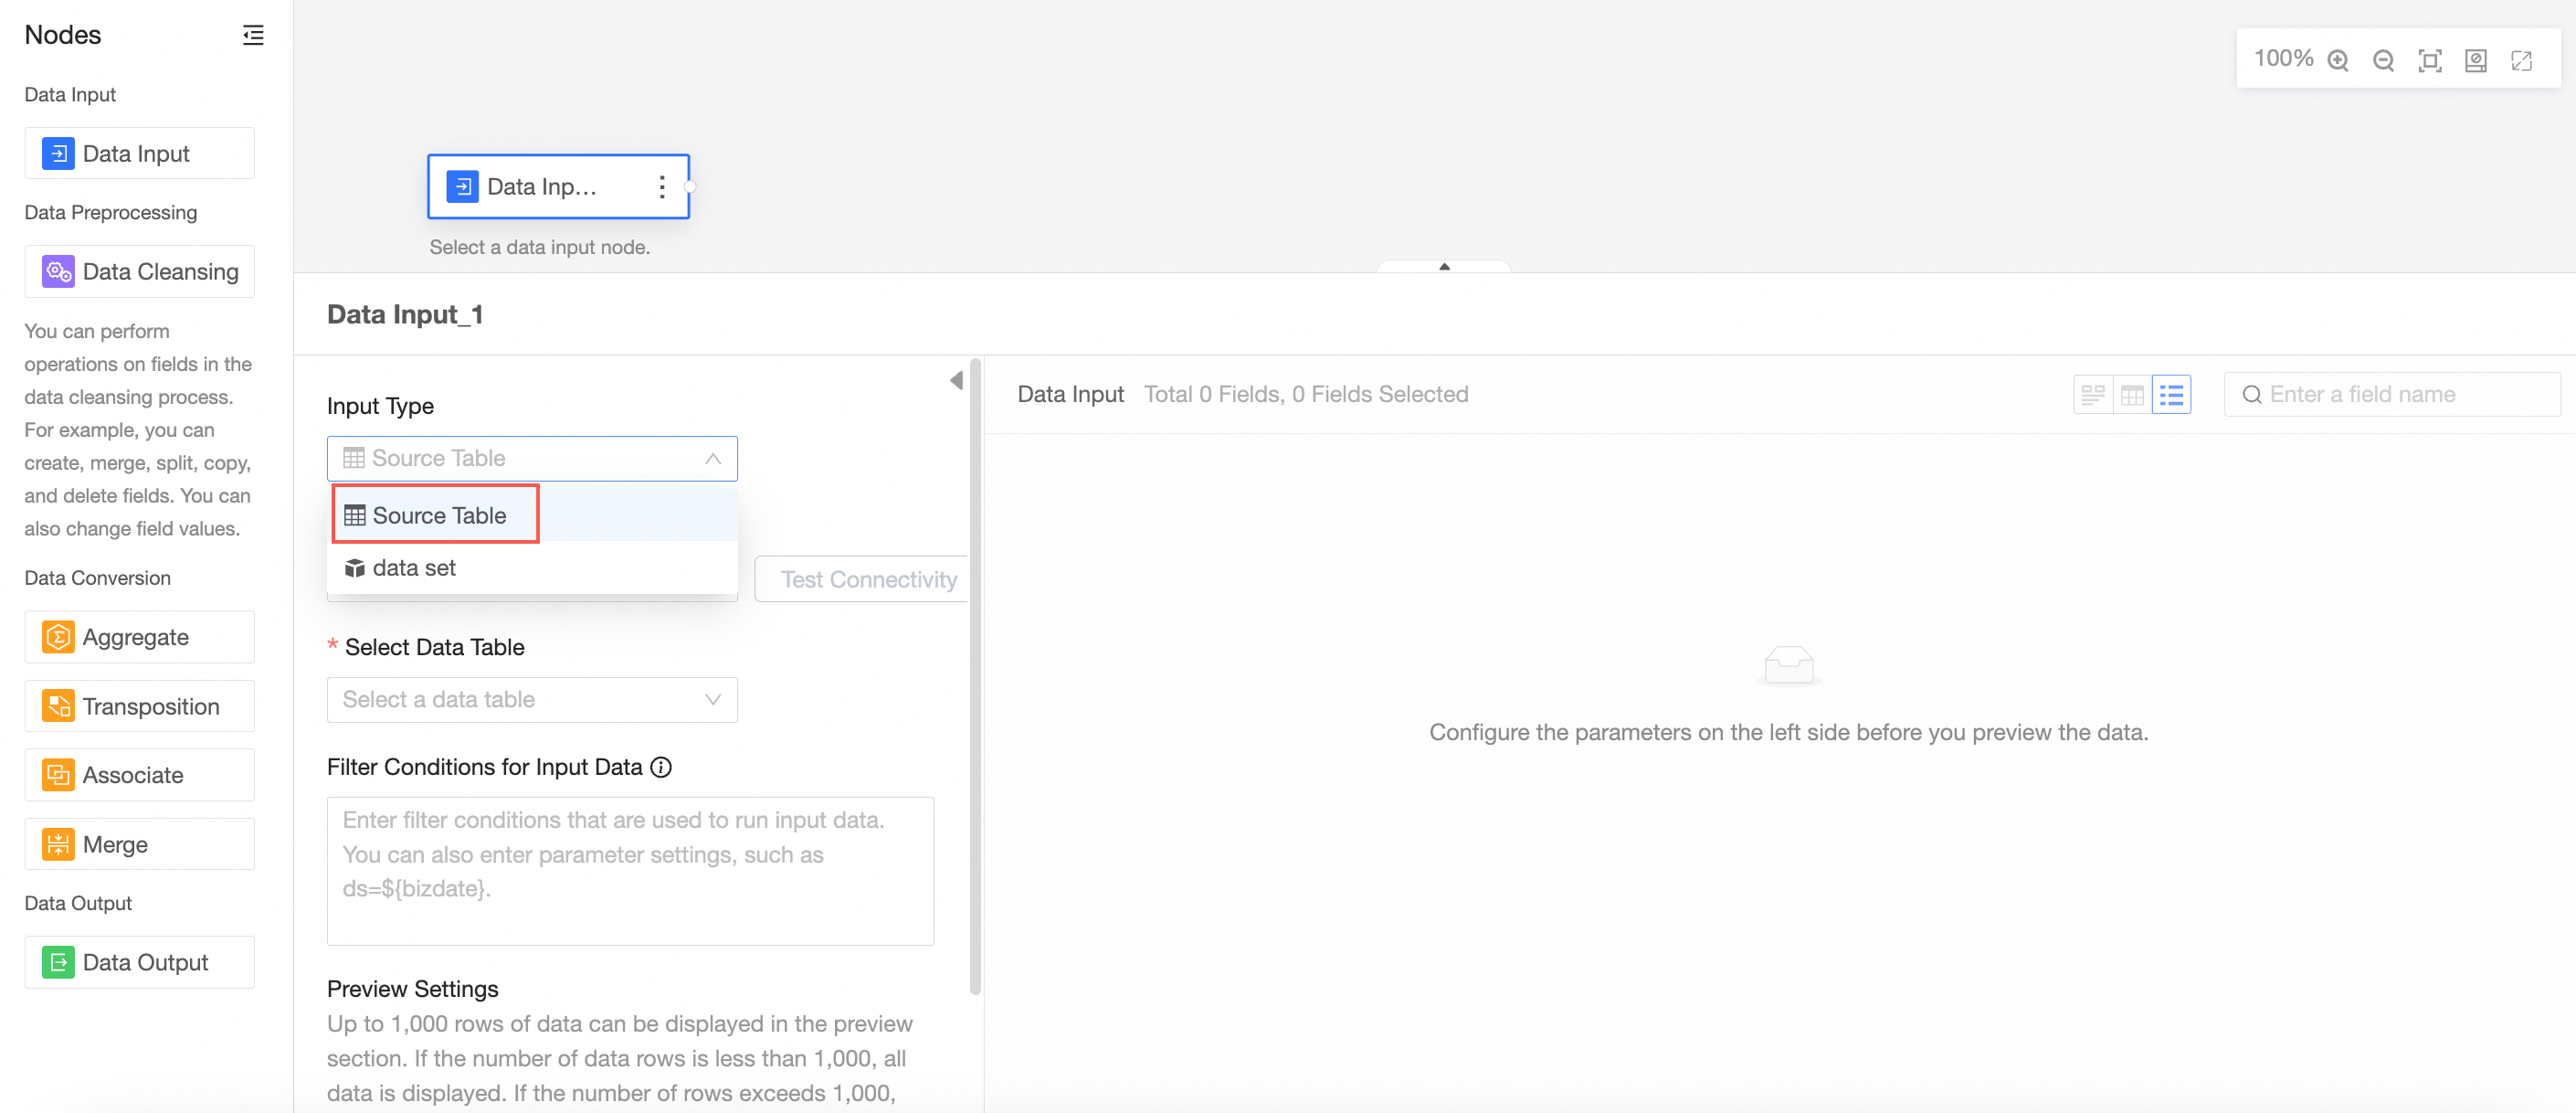
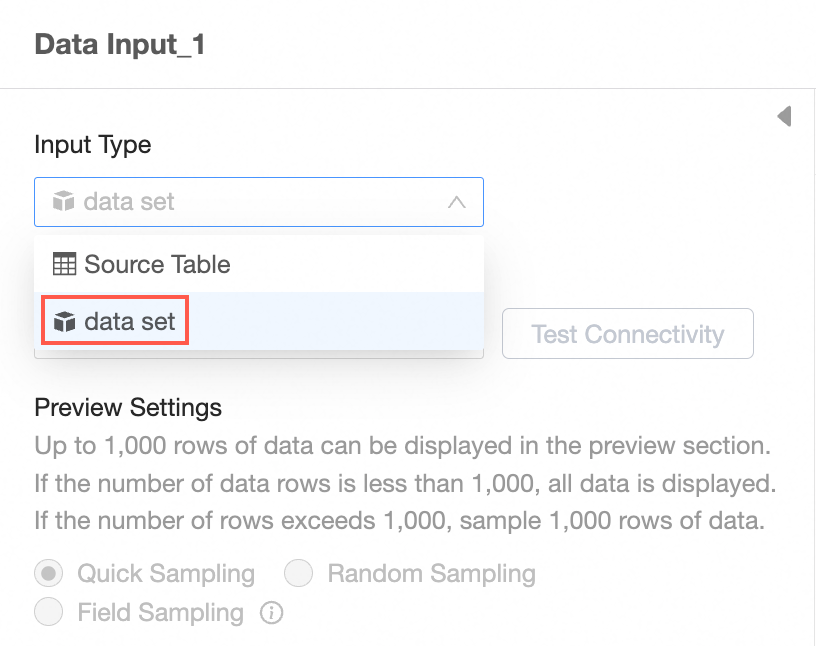
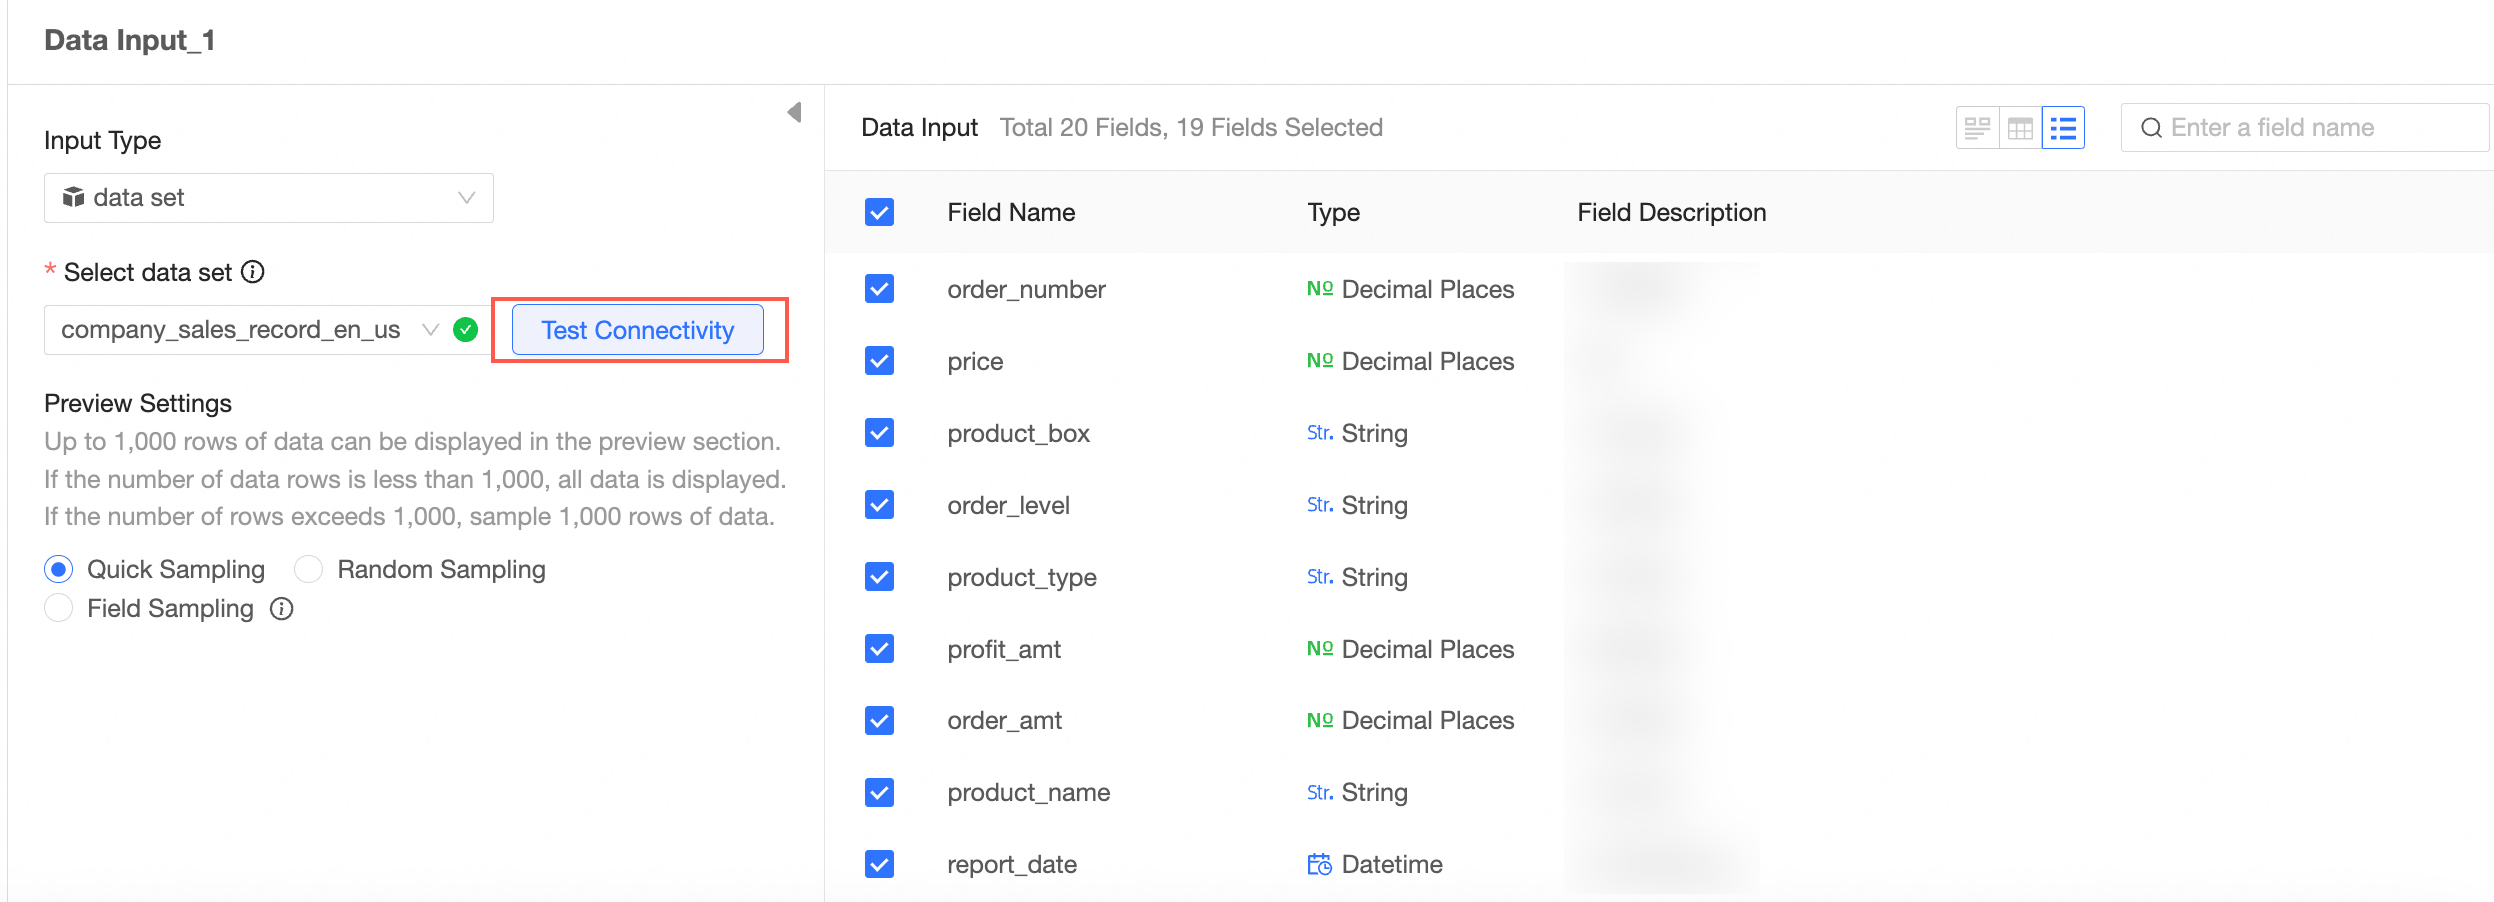
Input type: dataset
Set Input type to dataset.
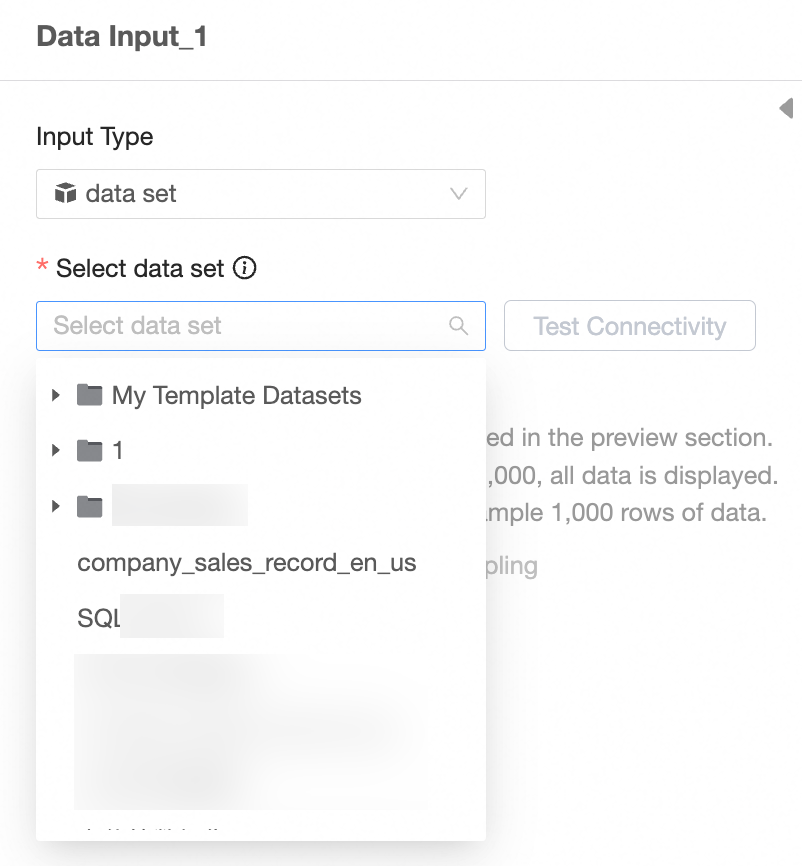
Select a dataset.
NoteInput datasets rely on the underlying data source. The data source type must support data preparation.
Test connectivity.
Select the fields to use as input data.
Repeat these steps to configure multiple data input nodes.
When you configure multiple data input nodes, you can select data sources from the same database or from different databases.
You can add up to five data input nodes.
This example shows how to configure two data input nodes.
Example configuration for Data Input 1.
Example configuration for Data Input 2.

Connect nodes
To transform input data, connect the input and transformation nodes to create a task flow.
This example combines order data from two different databases and then applies transformation and aggregation.
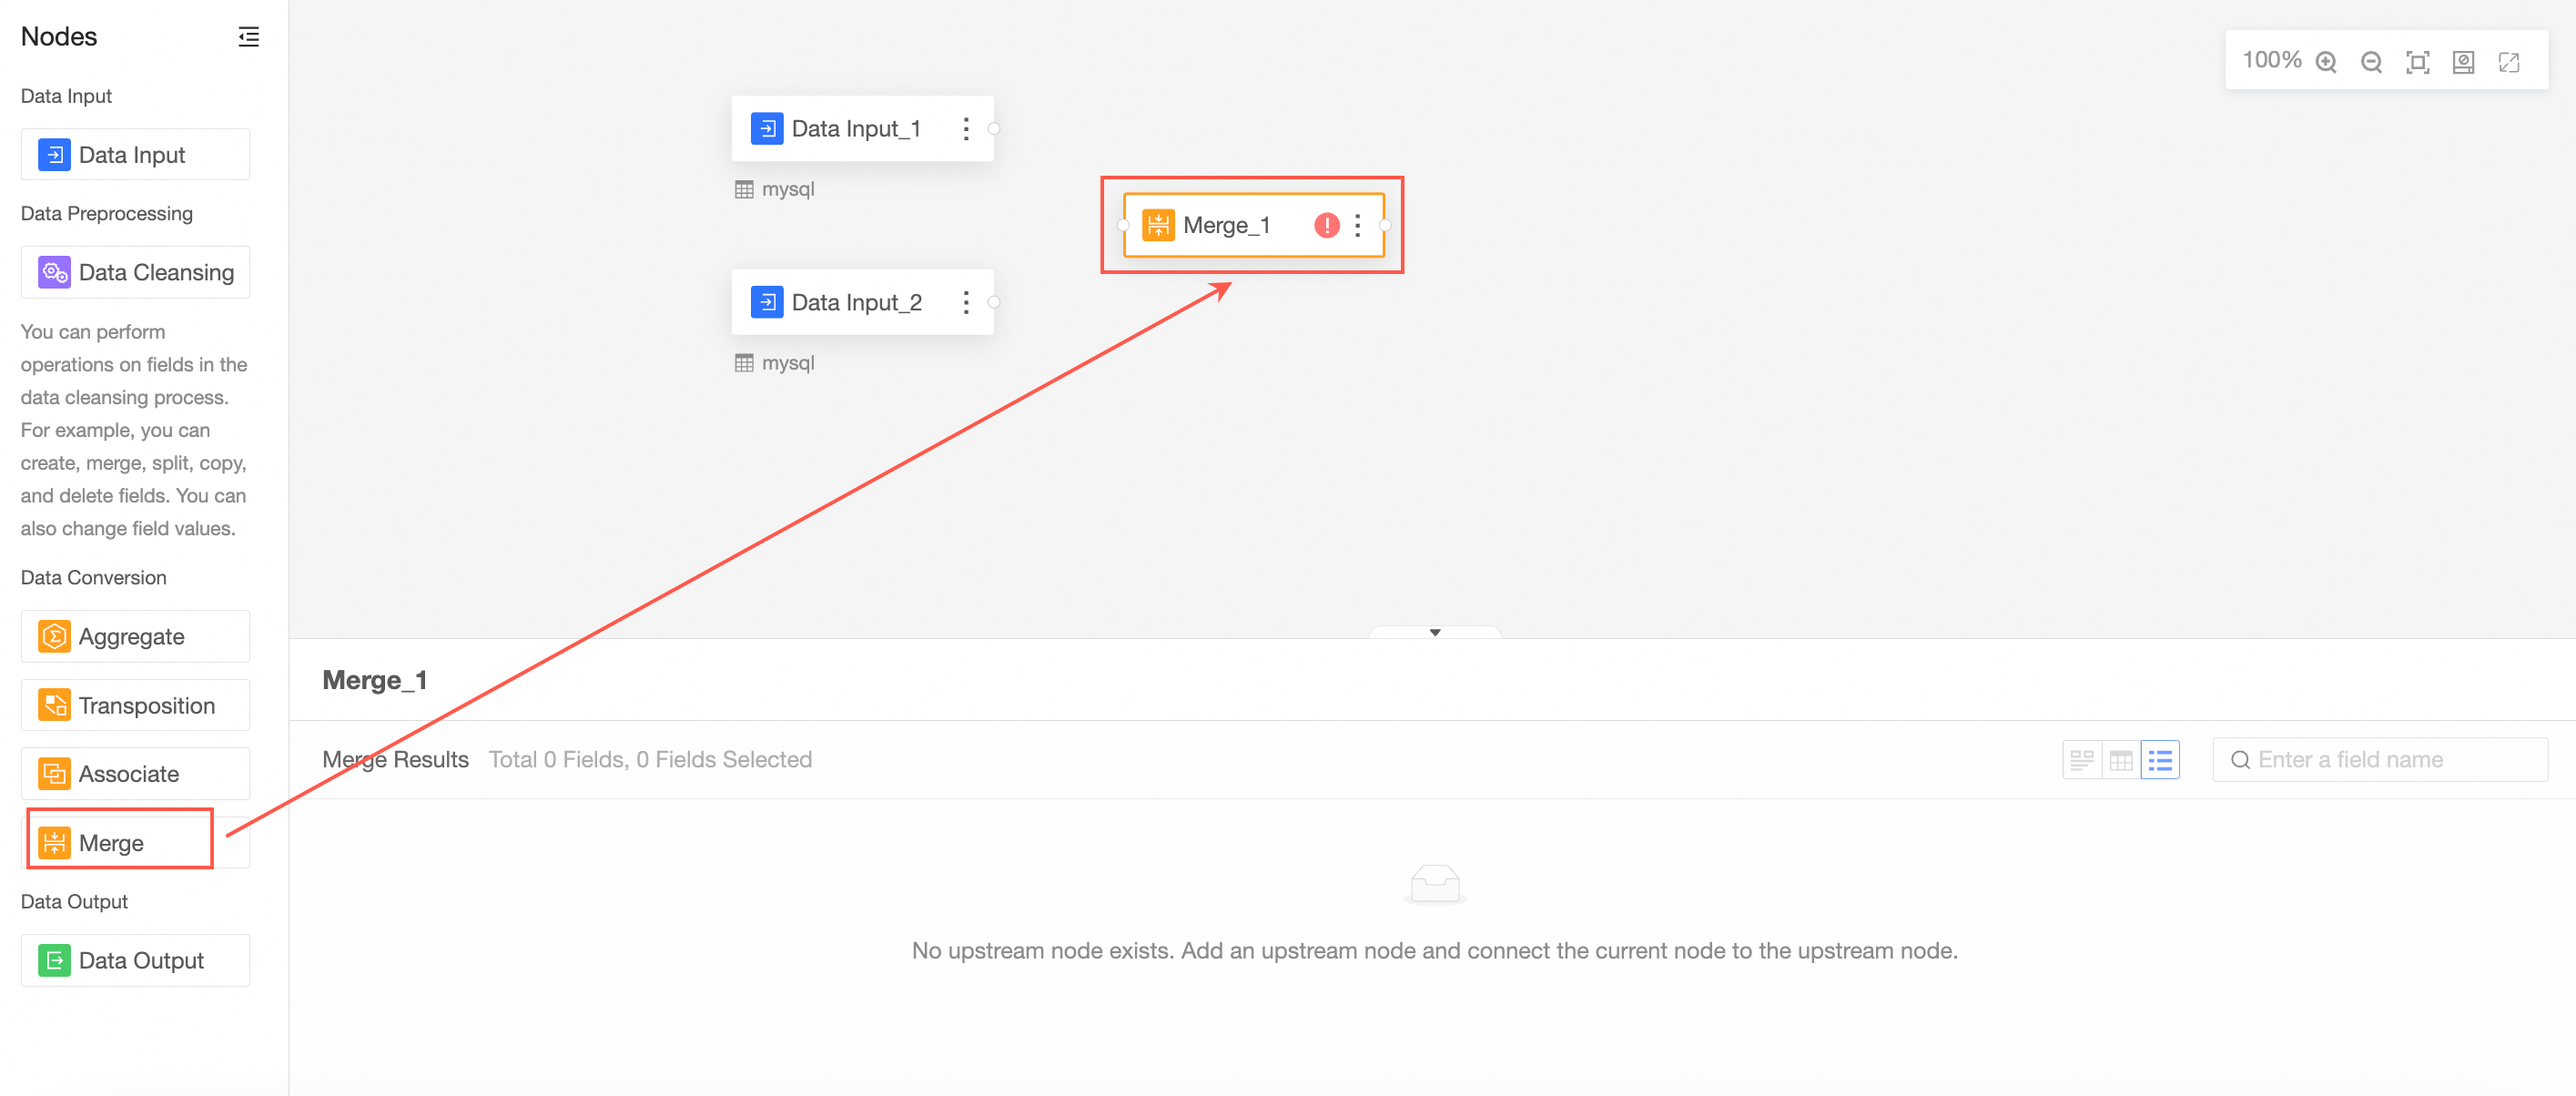
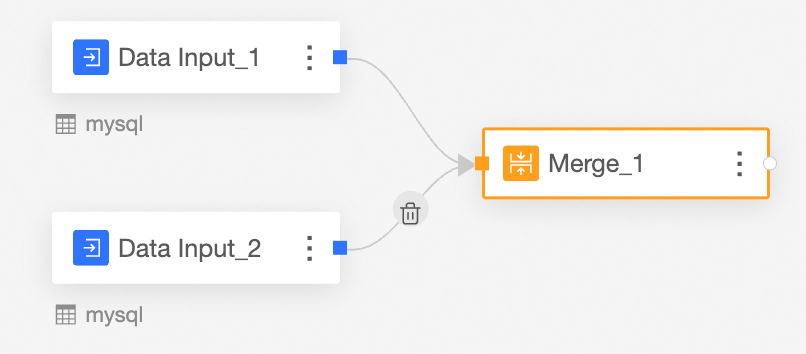
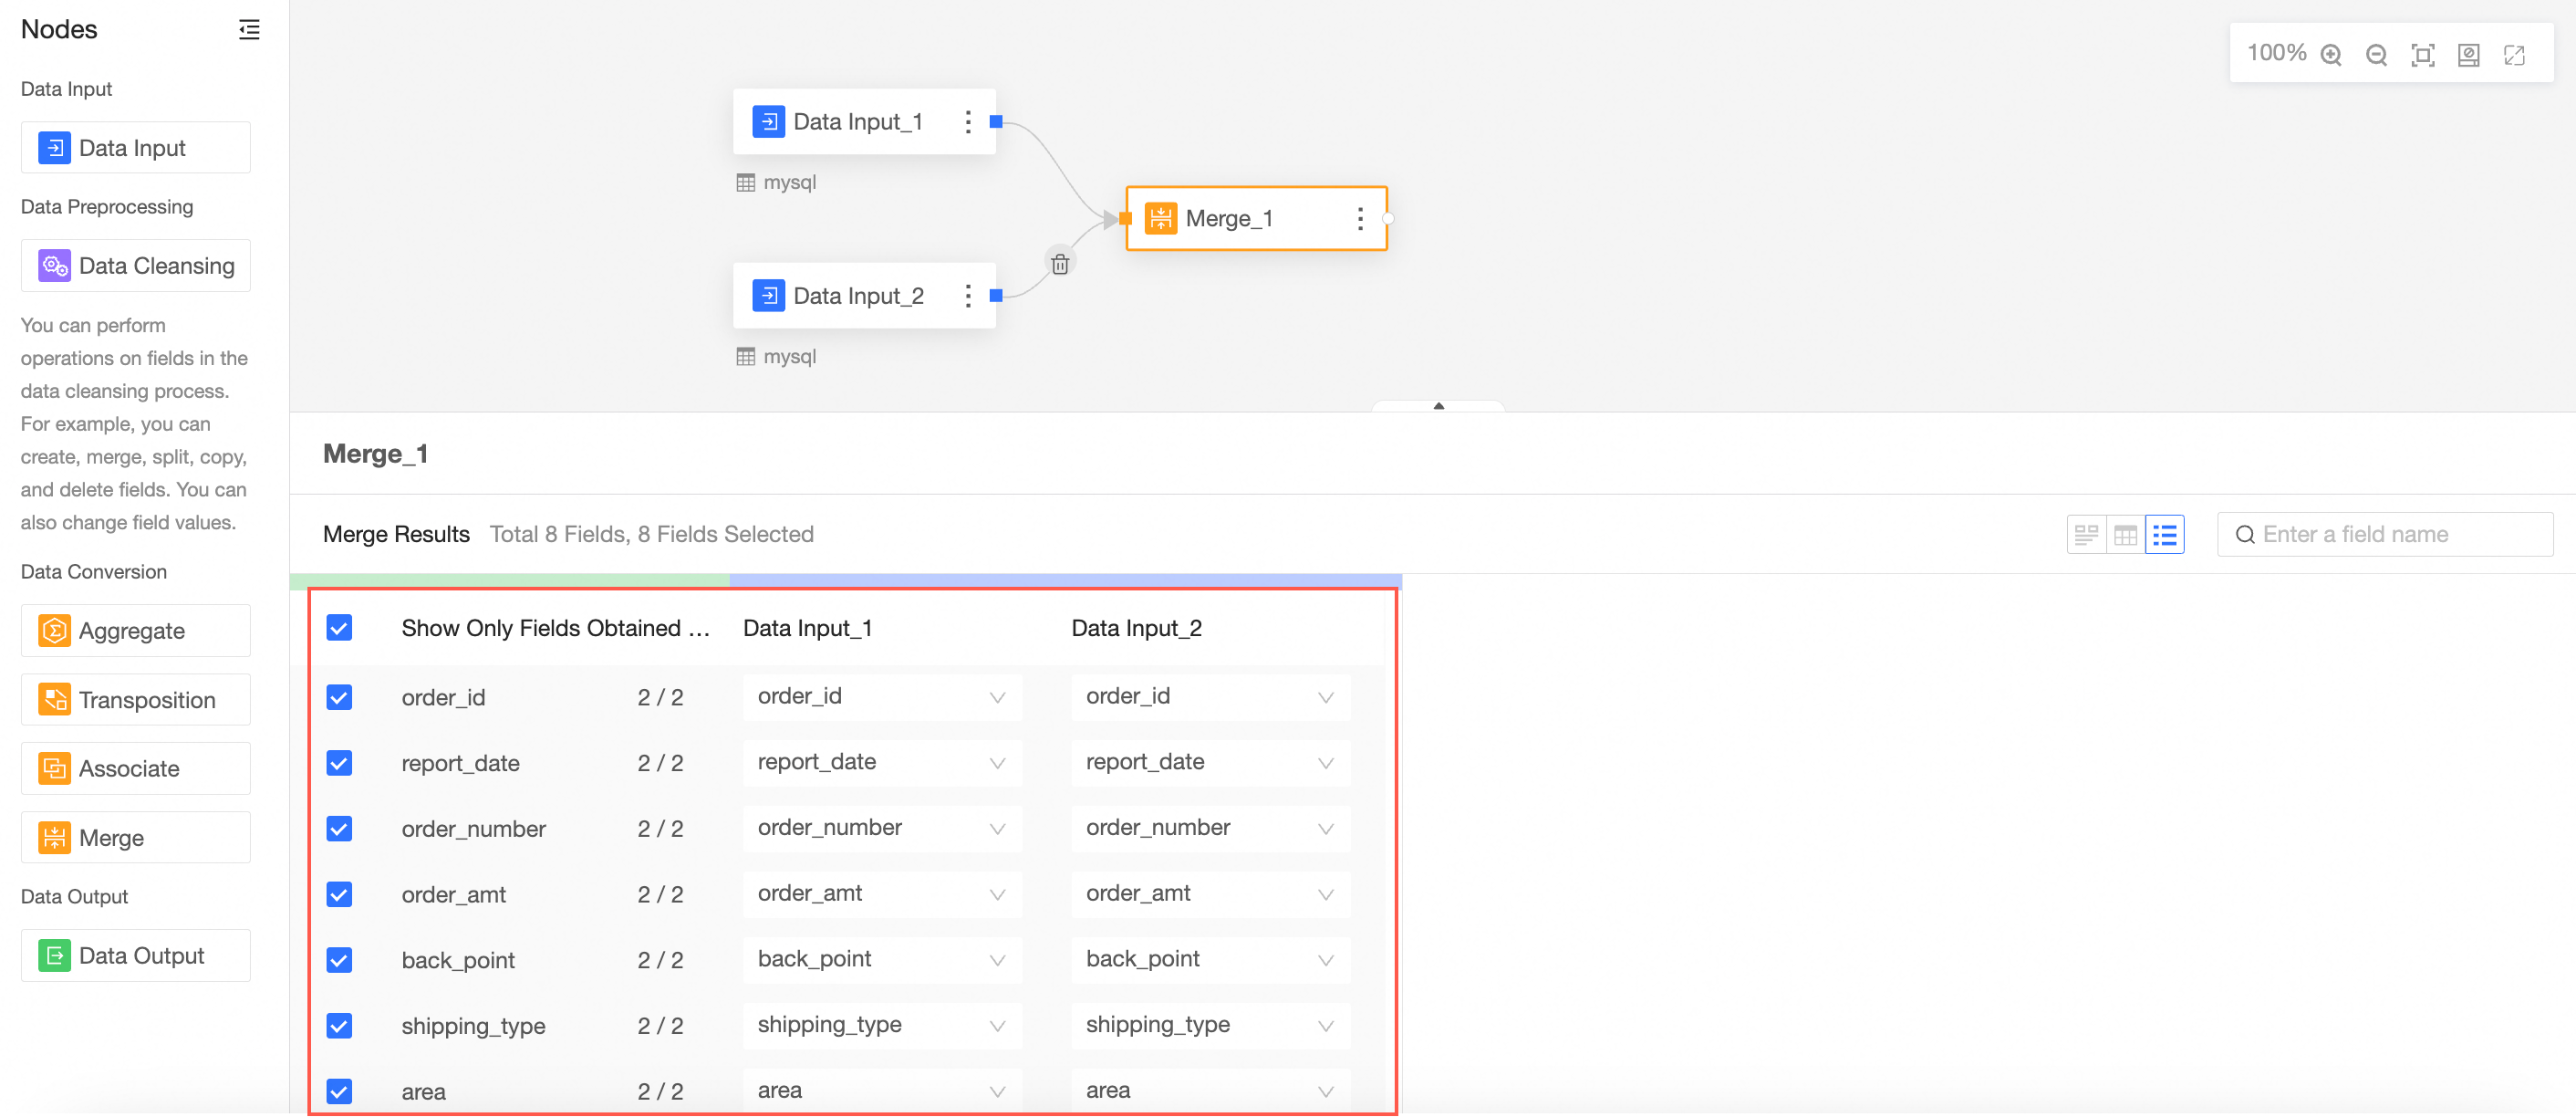
Union the Data Input nodes.
The Union node combines rows from Data Input 1 and Data Input 2 by matching fields that have the same name.
From the node panel on the left, drag and drop a Union node onto the canvas.
Connect the input nodes that you want to union.
Configure the Union node and view the results.
The fields in the Union node are the fields with matching names from Data Input 1 and Data Input 2.
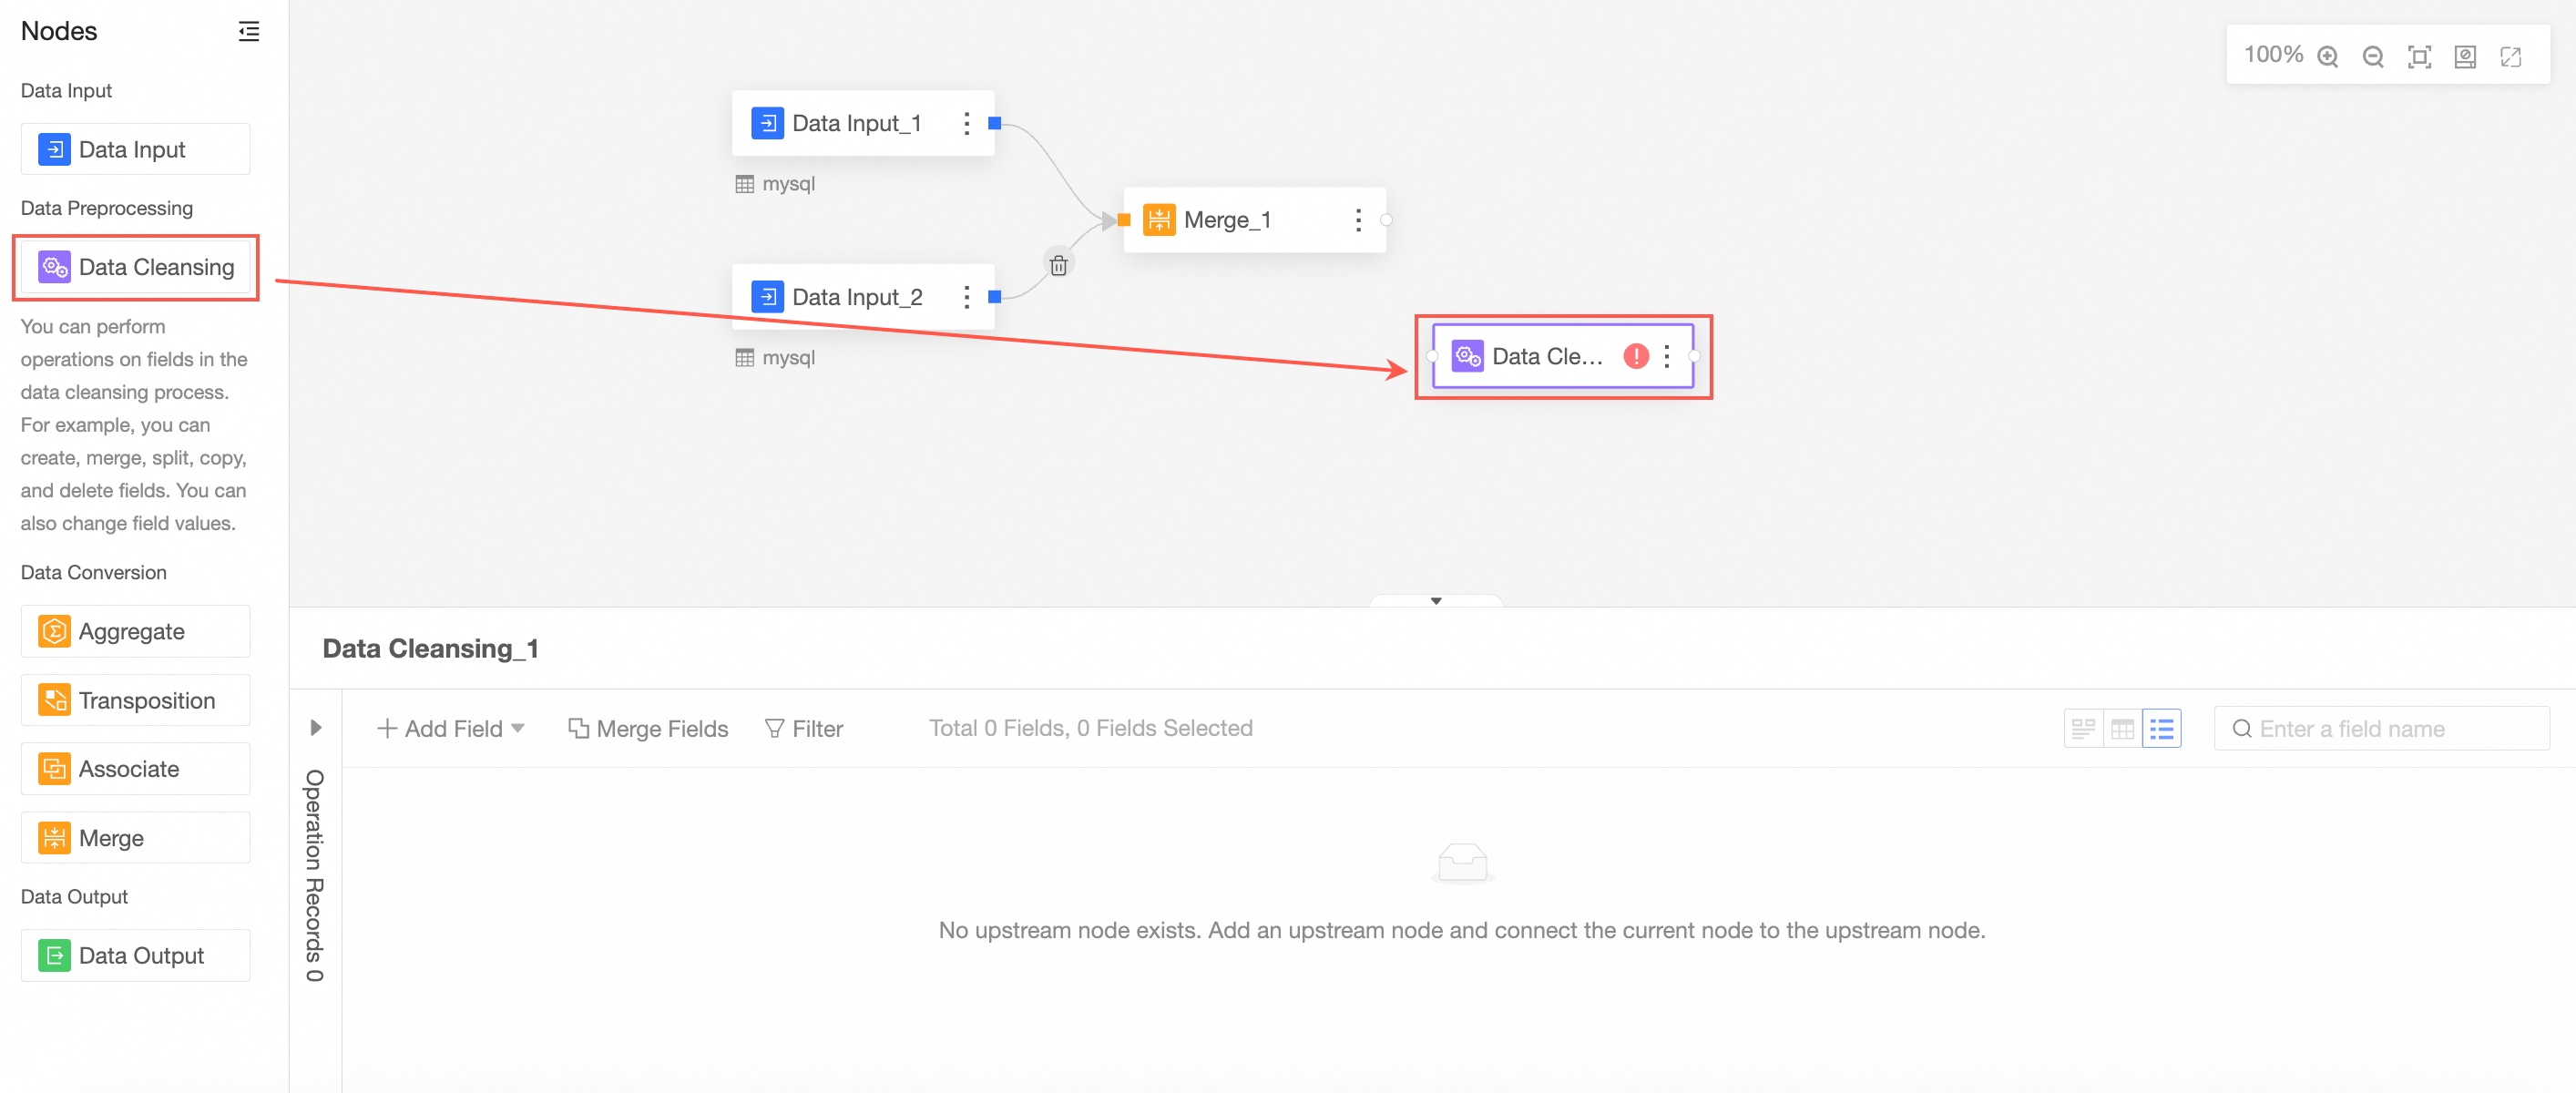
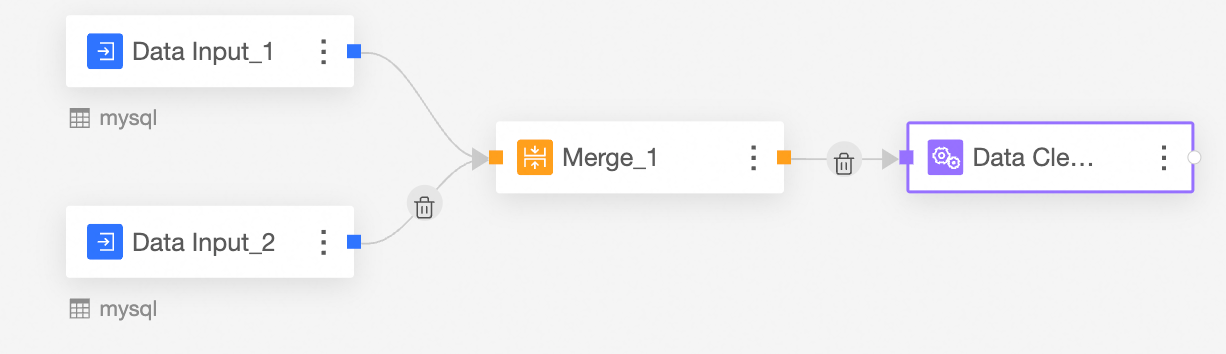
Transform the combined data.
From the node panel on the left, drag and drop a Transformation node onto the canvas.
Connect it to the upstream node.
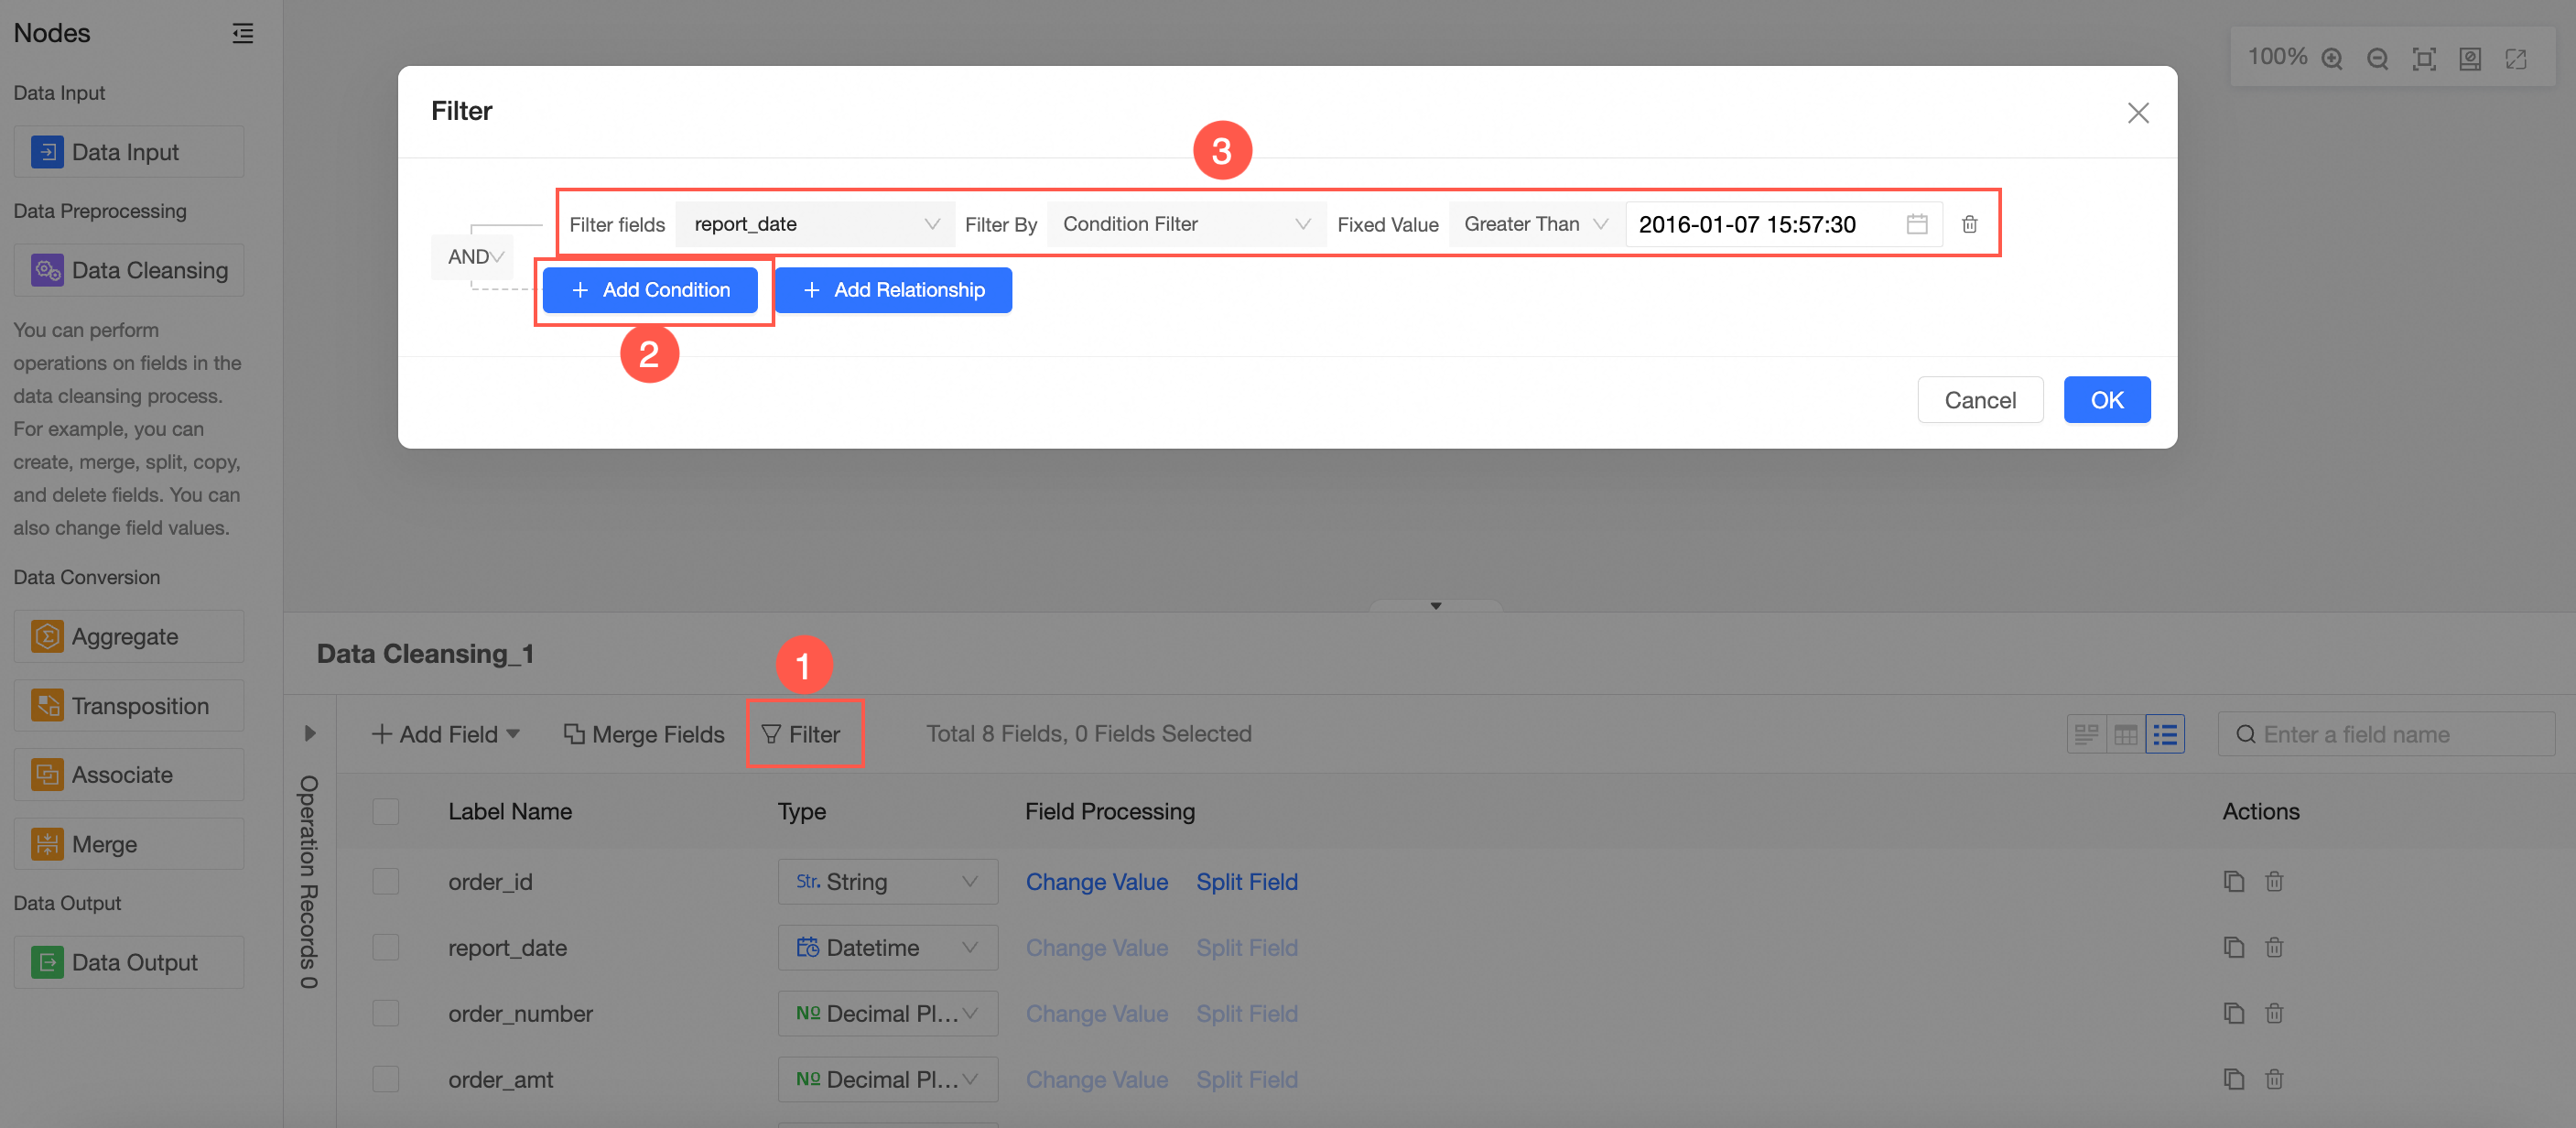
In the node's configuration panel, follow the instructions in the image to filter the fields.
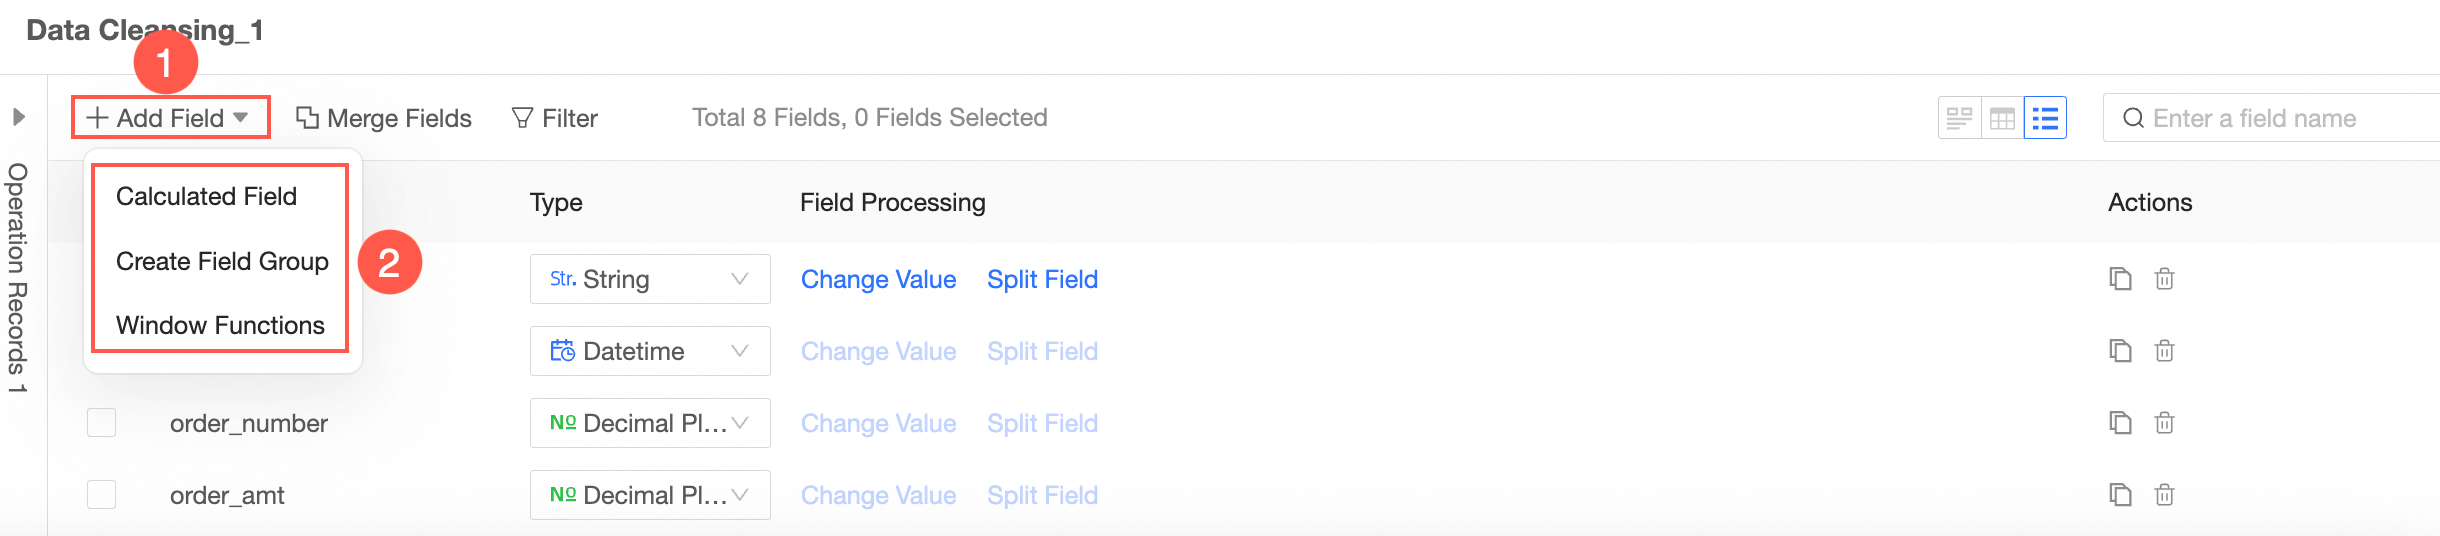
Follow the instructions in the image to add new fields. You can add calculated fields, group assignments, or window functions.
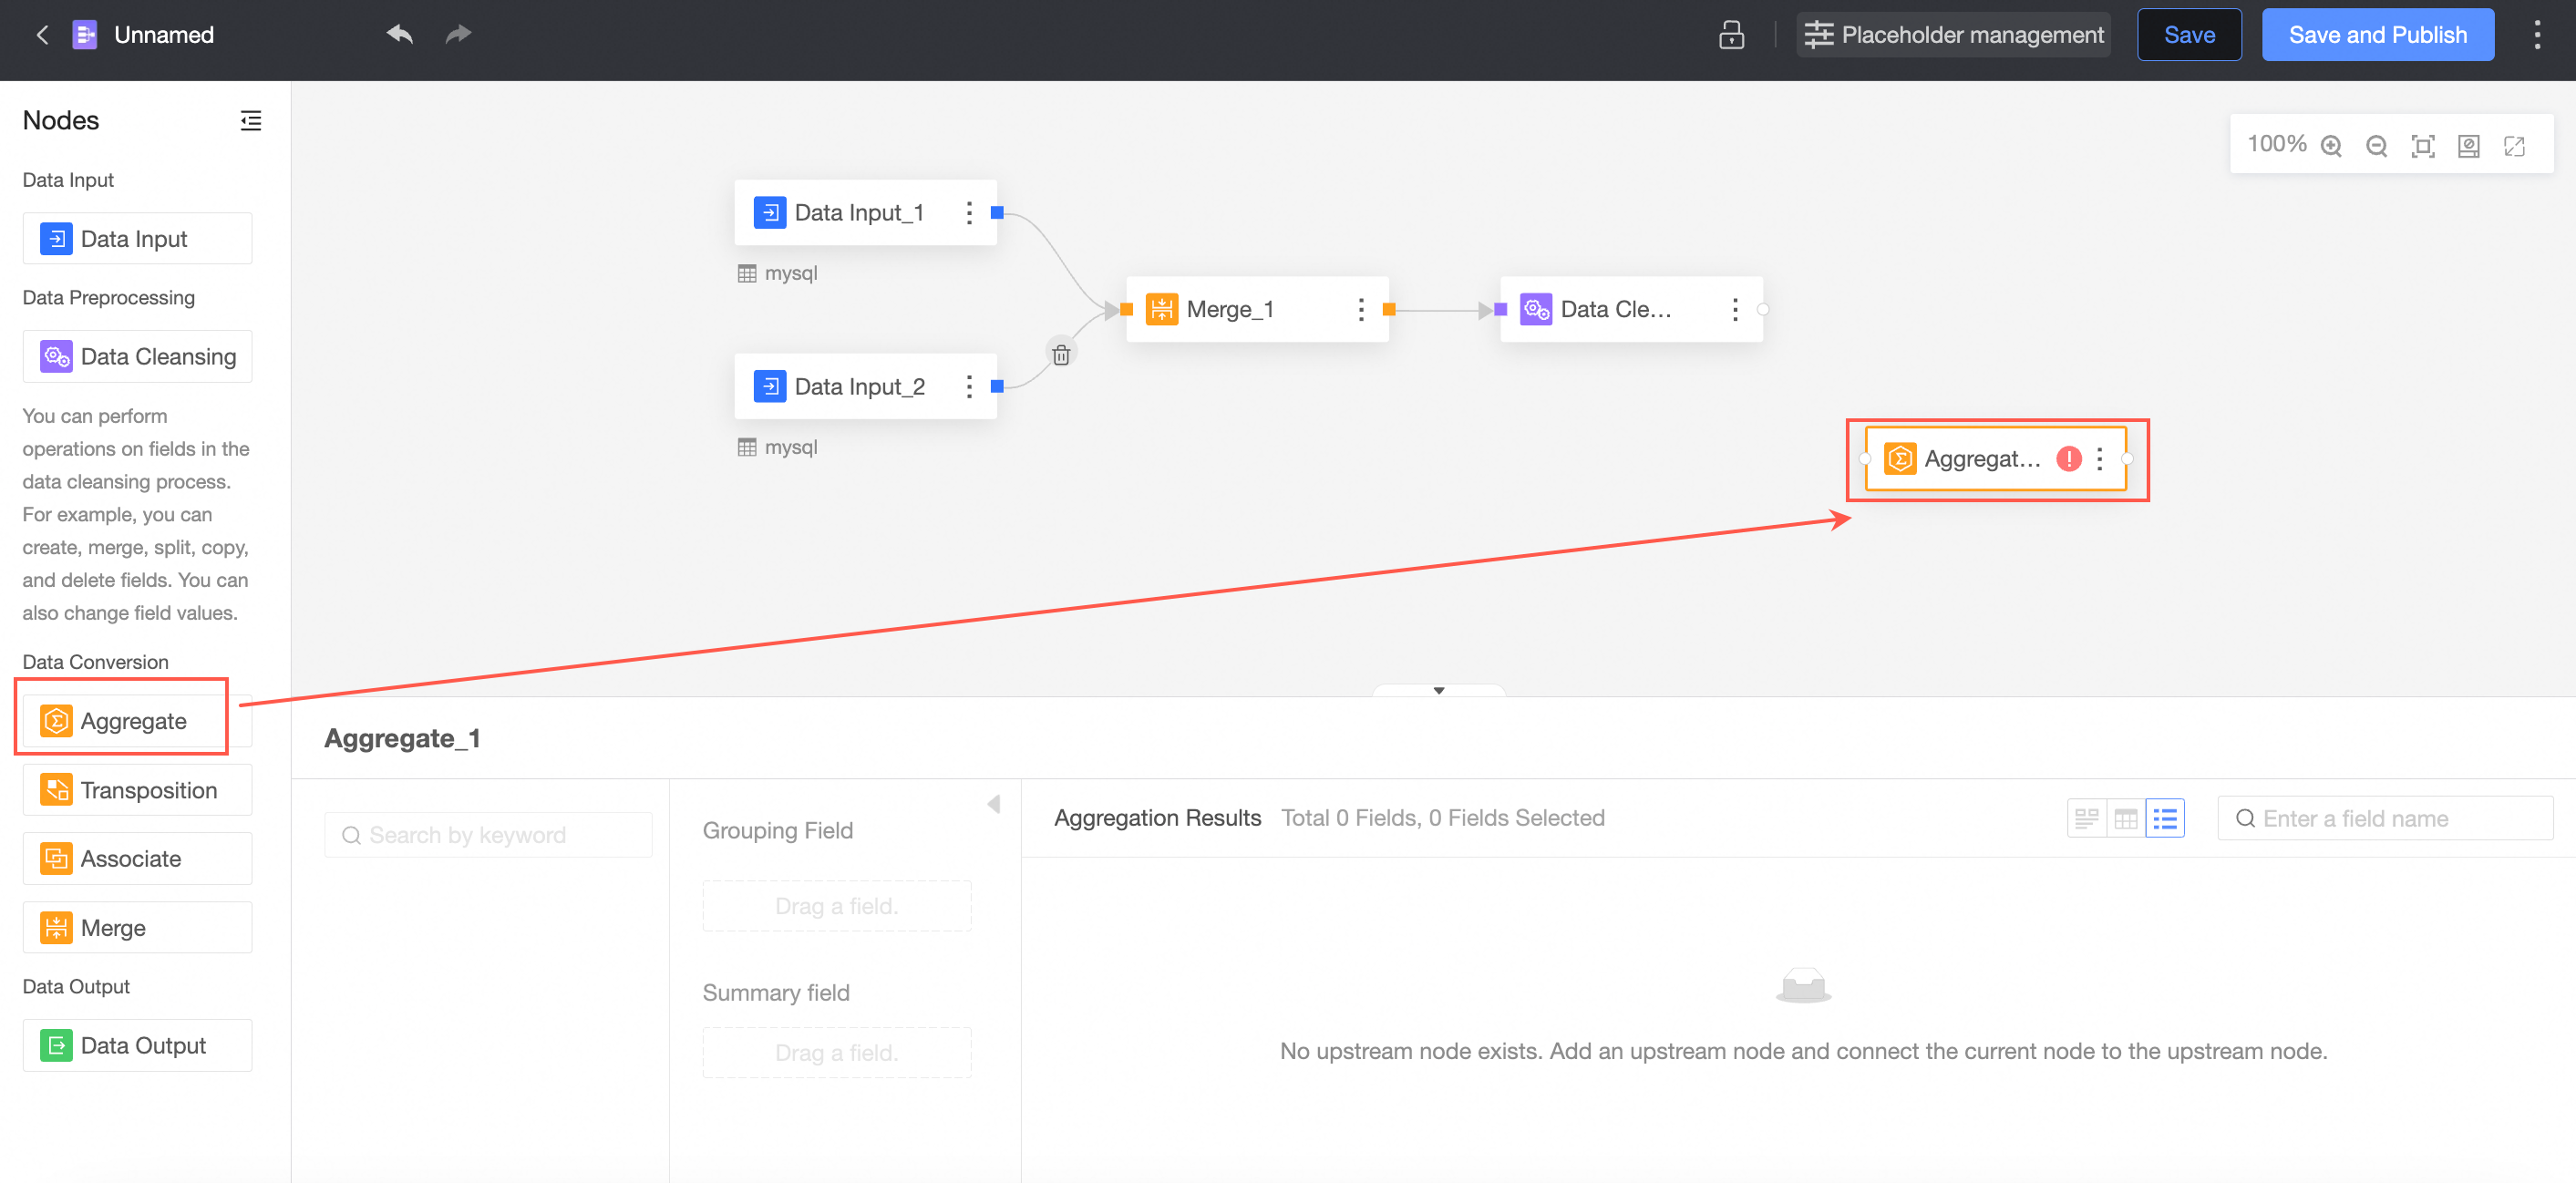
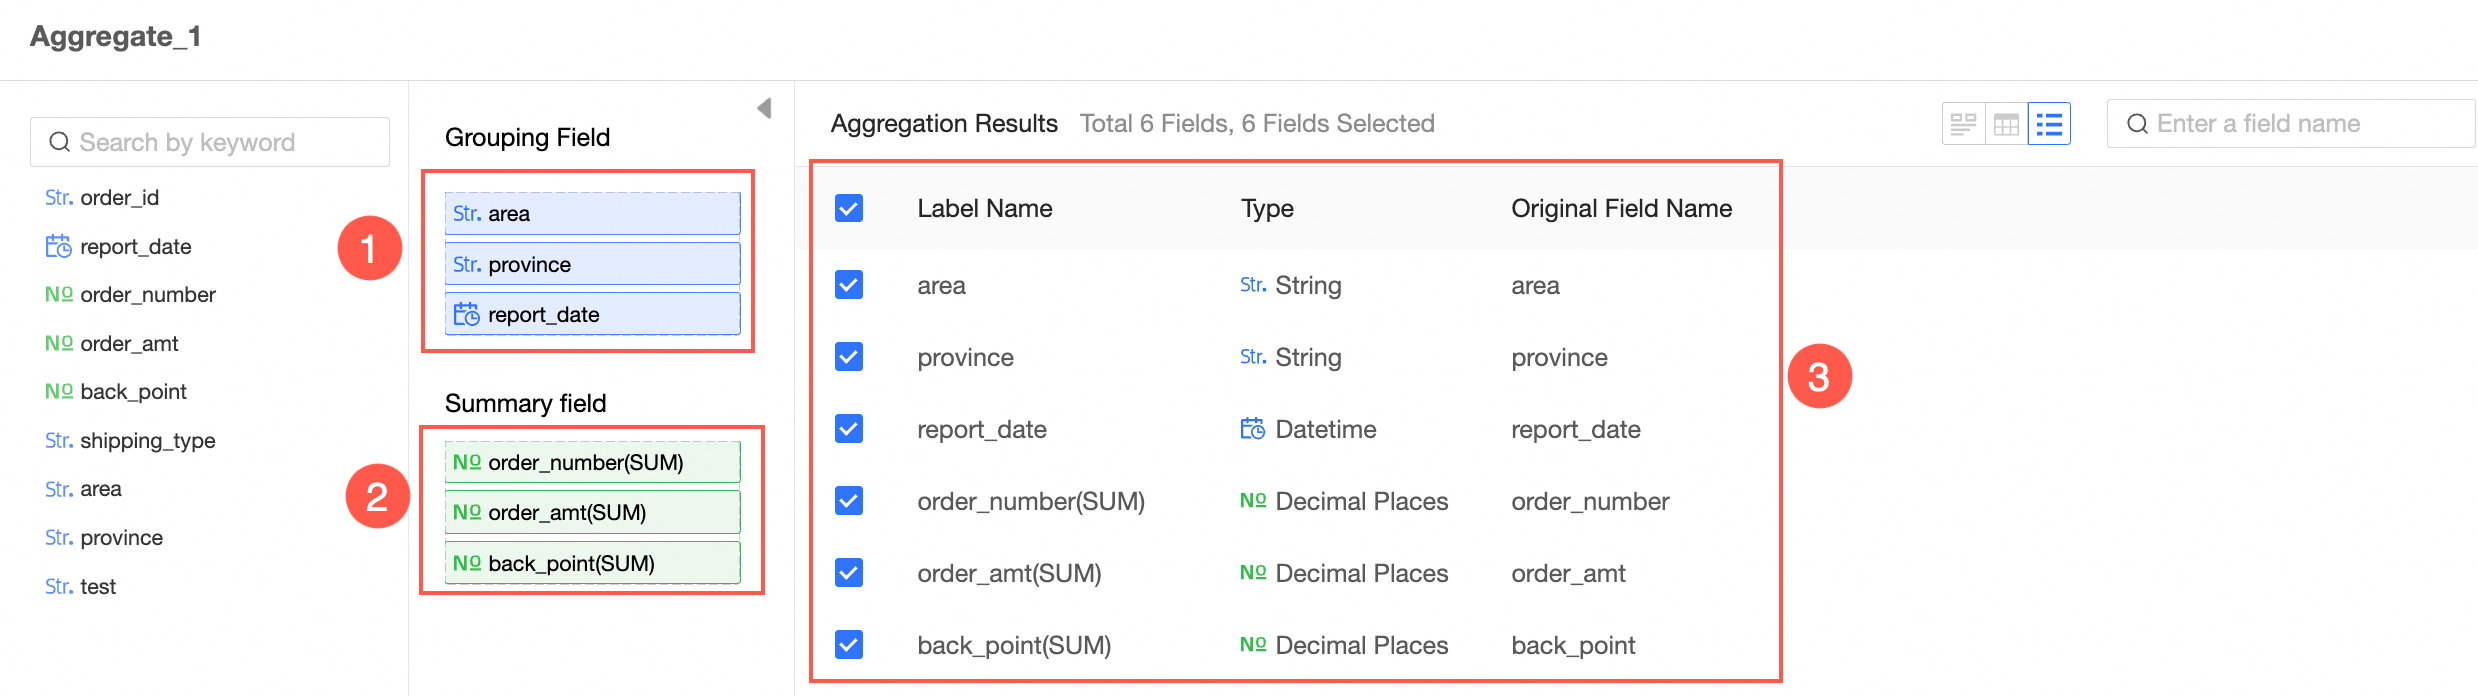
Aggregate the transformed data.
From the node panel on the left, drag and drop an Aggregate node onto the canvas.
Connecting requires an aggregate node.
In the node's configuration panel, follow the instructions in the image to set the grouping fields and summary fields.
Output data
You can output data to an existing or new database table, or to a dataset.
Partitioned table: Each write operation deletes the existing data in the table and inserts the new data.
Non-partitioned table:
overwrite data: Replaces all existing data in the table.
append data: Adds new data to the table. If a primary key or constraint conflict occurs, the operation fails and reports an error.
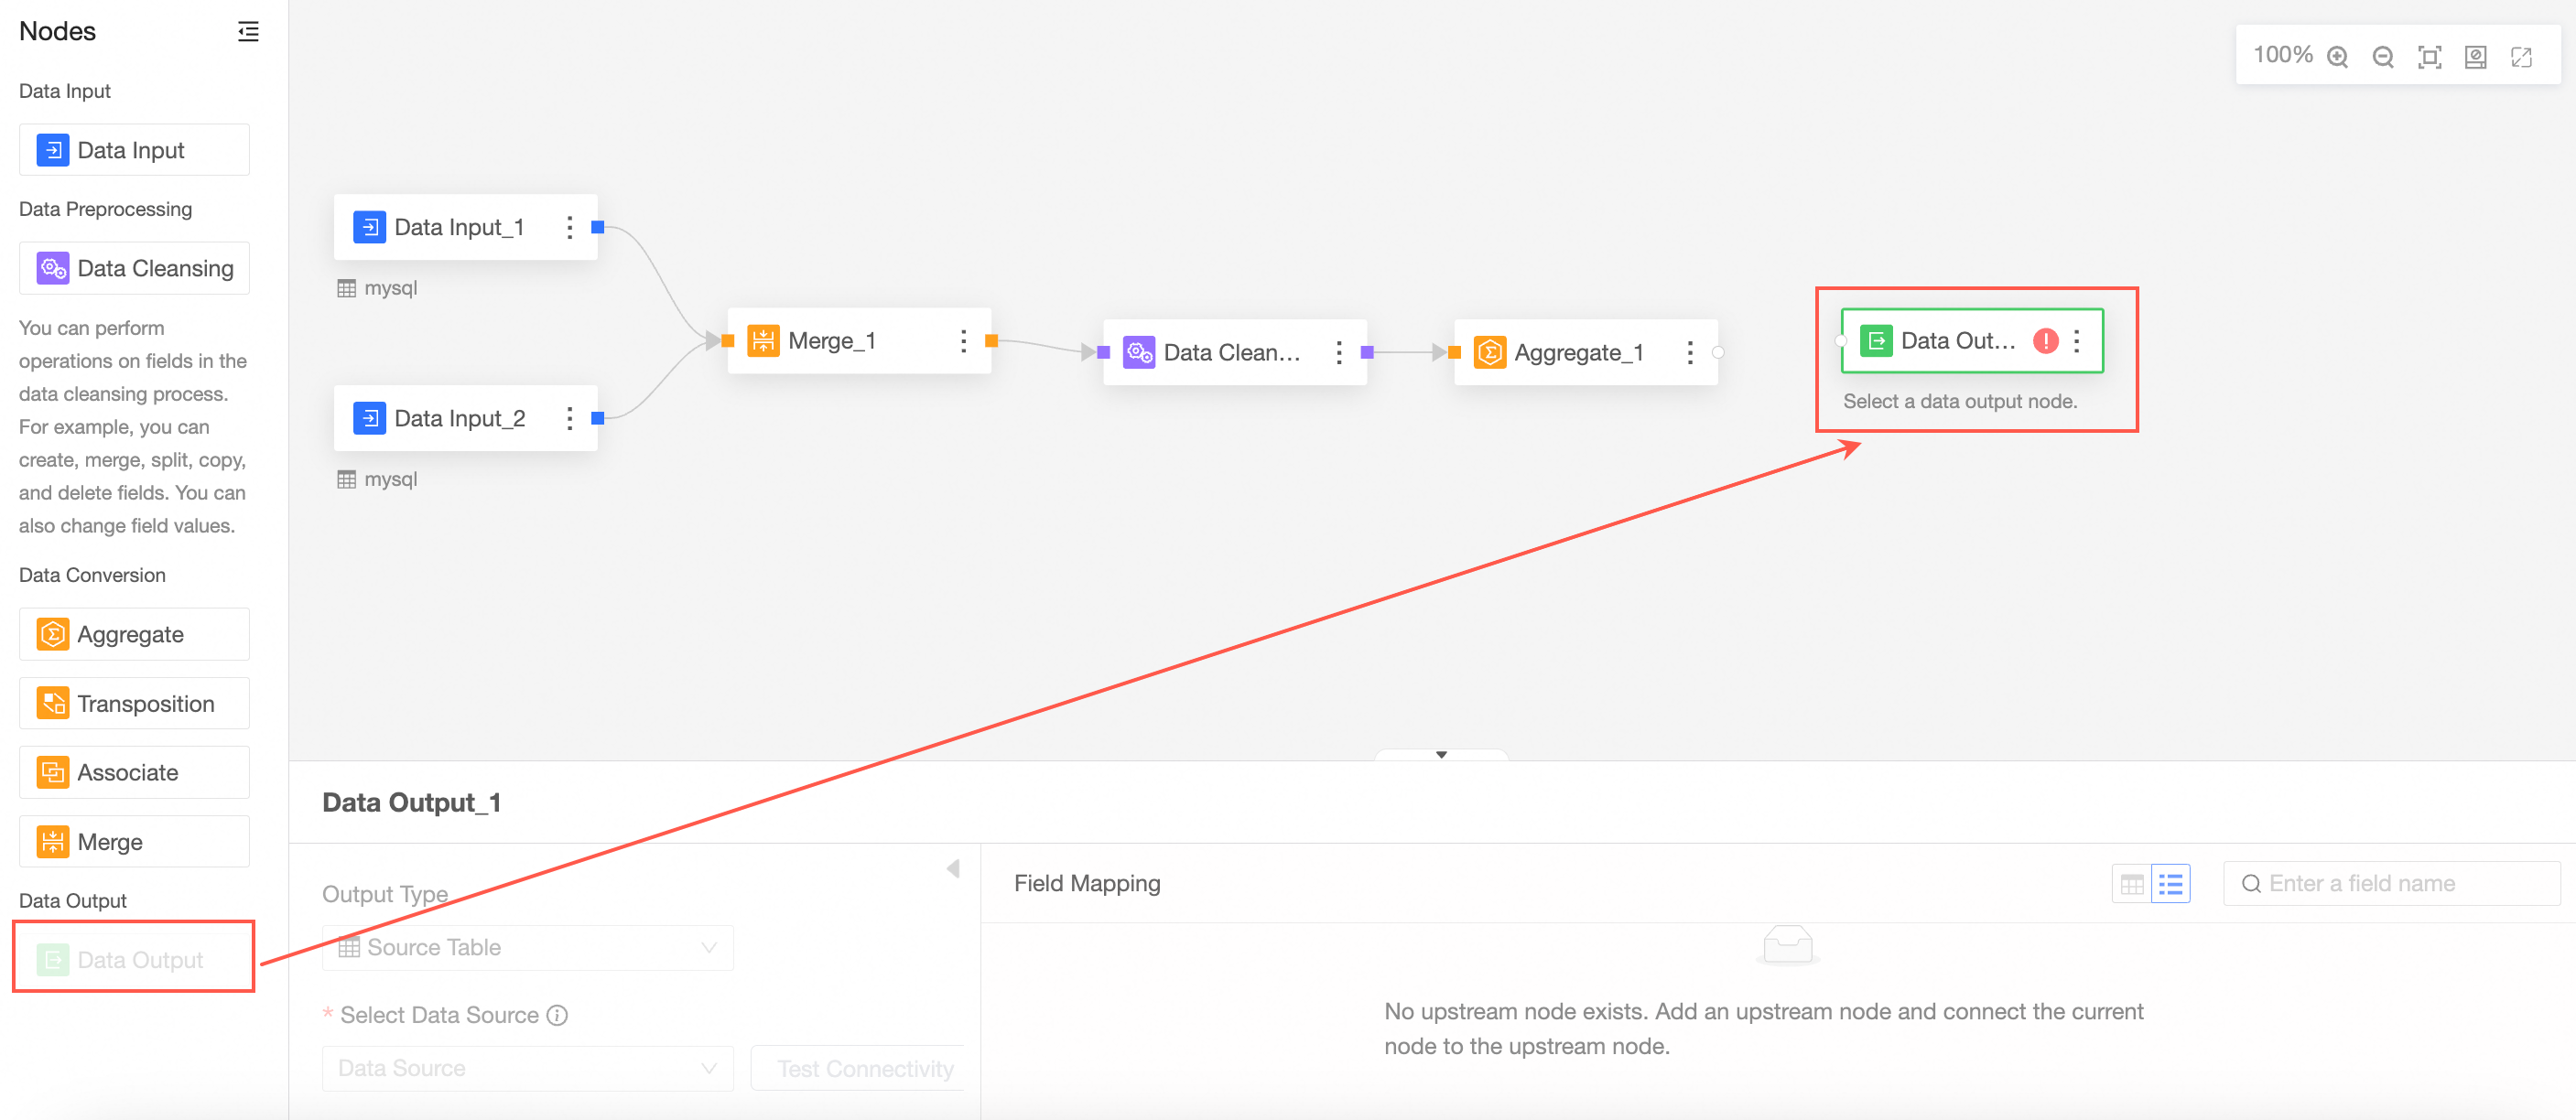
From the node panel on the left, drag and drop a Data Output node onto the canvas.
Connect it to the node from which you want to export data.
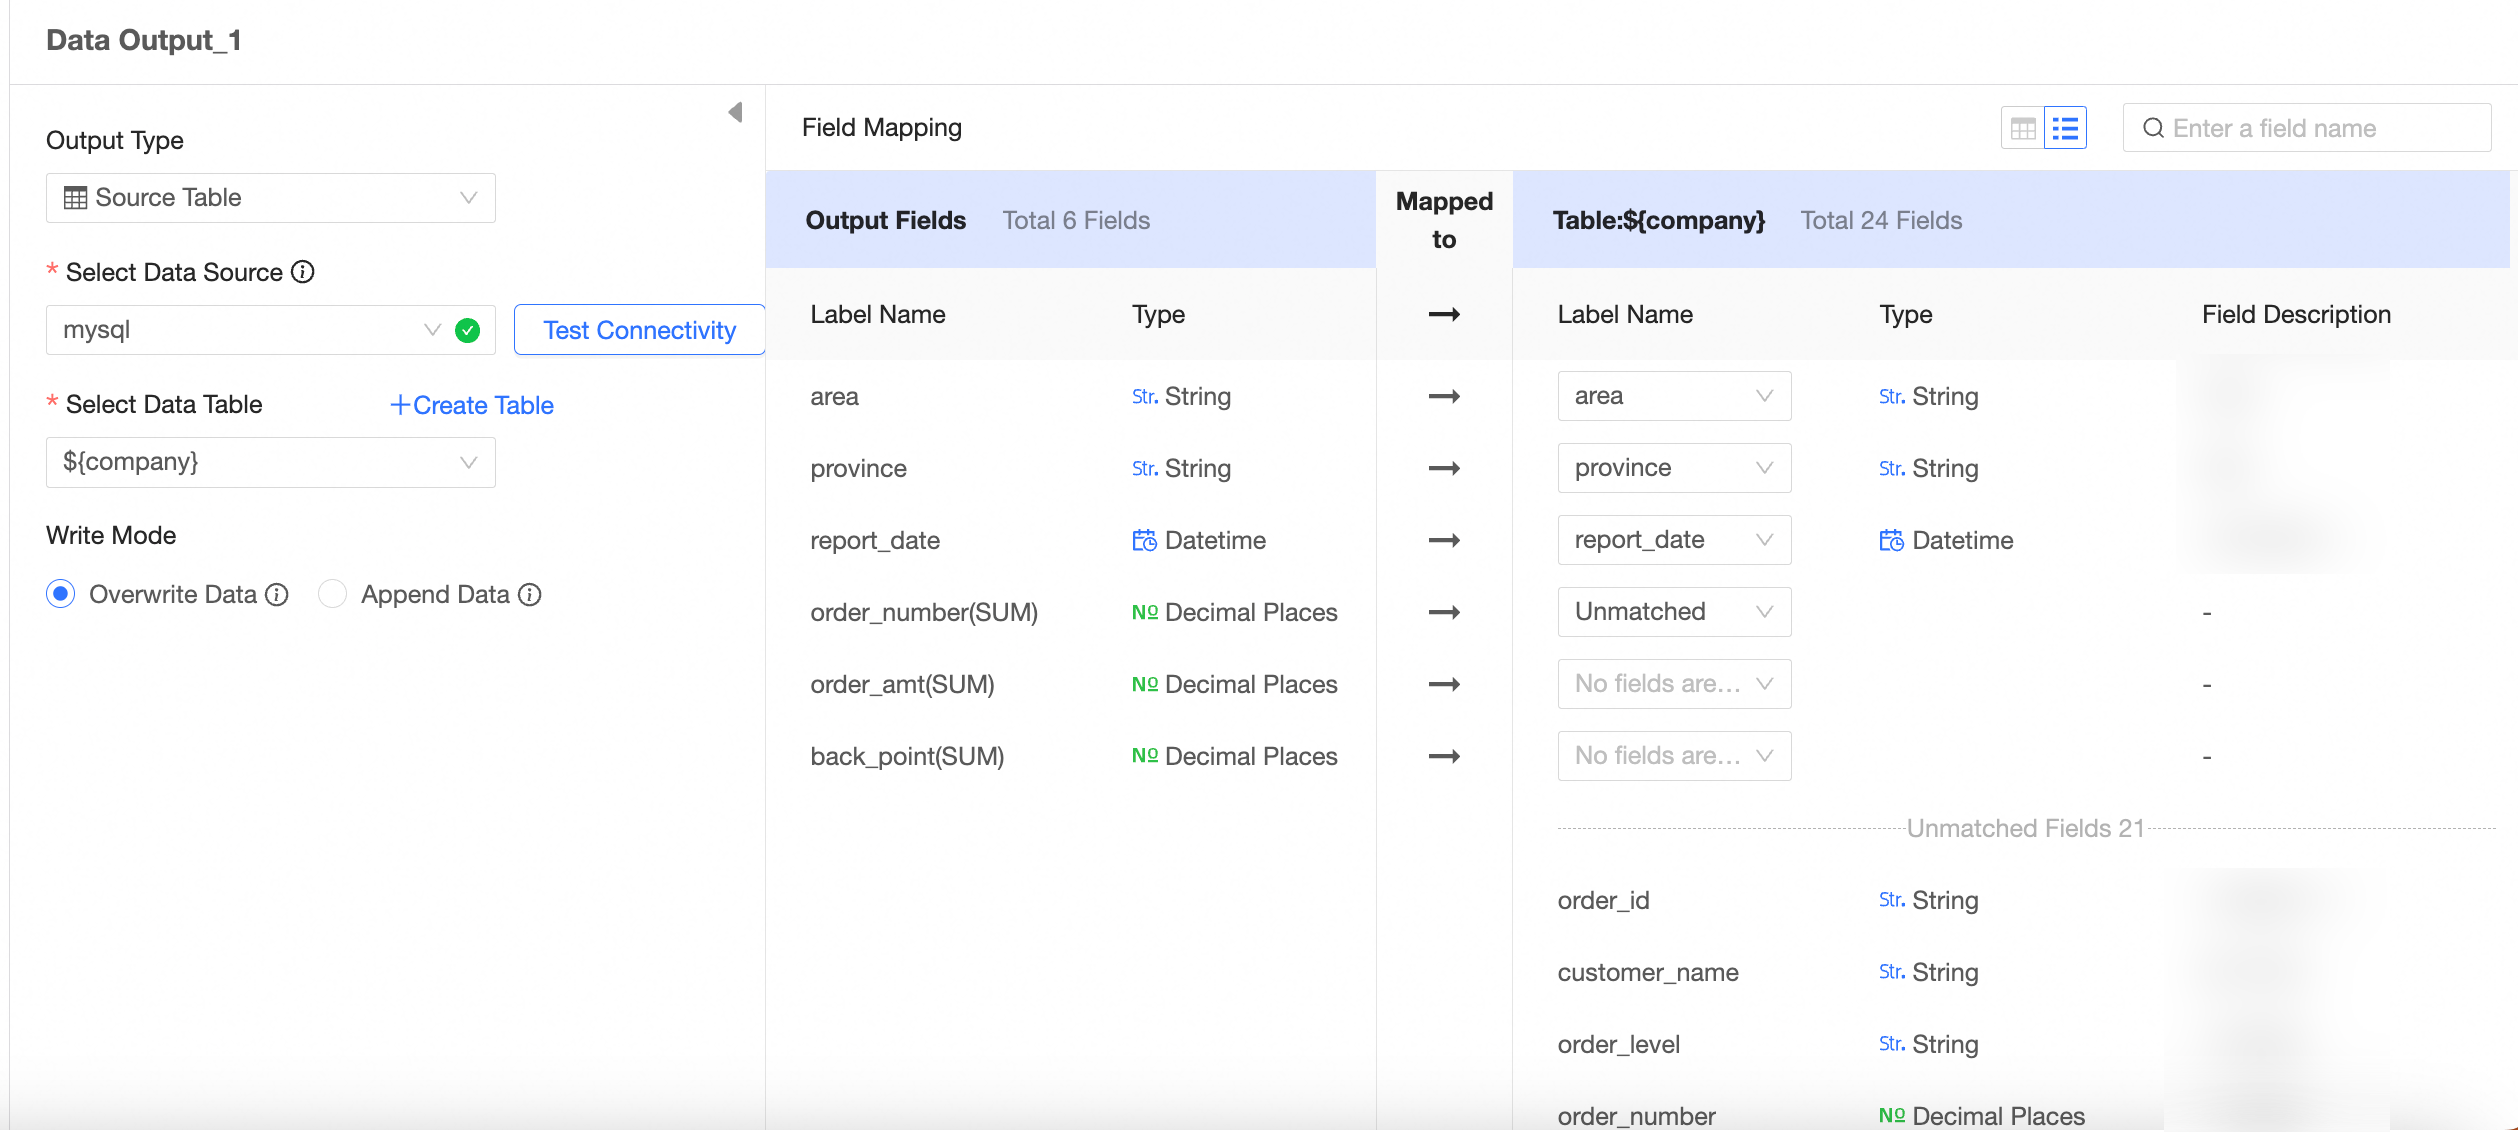
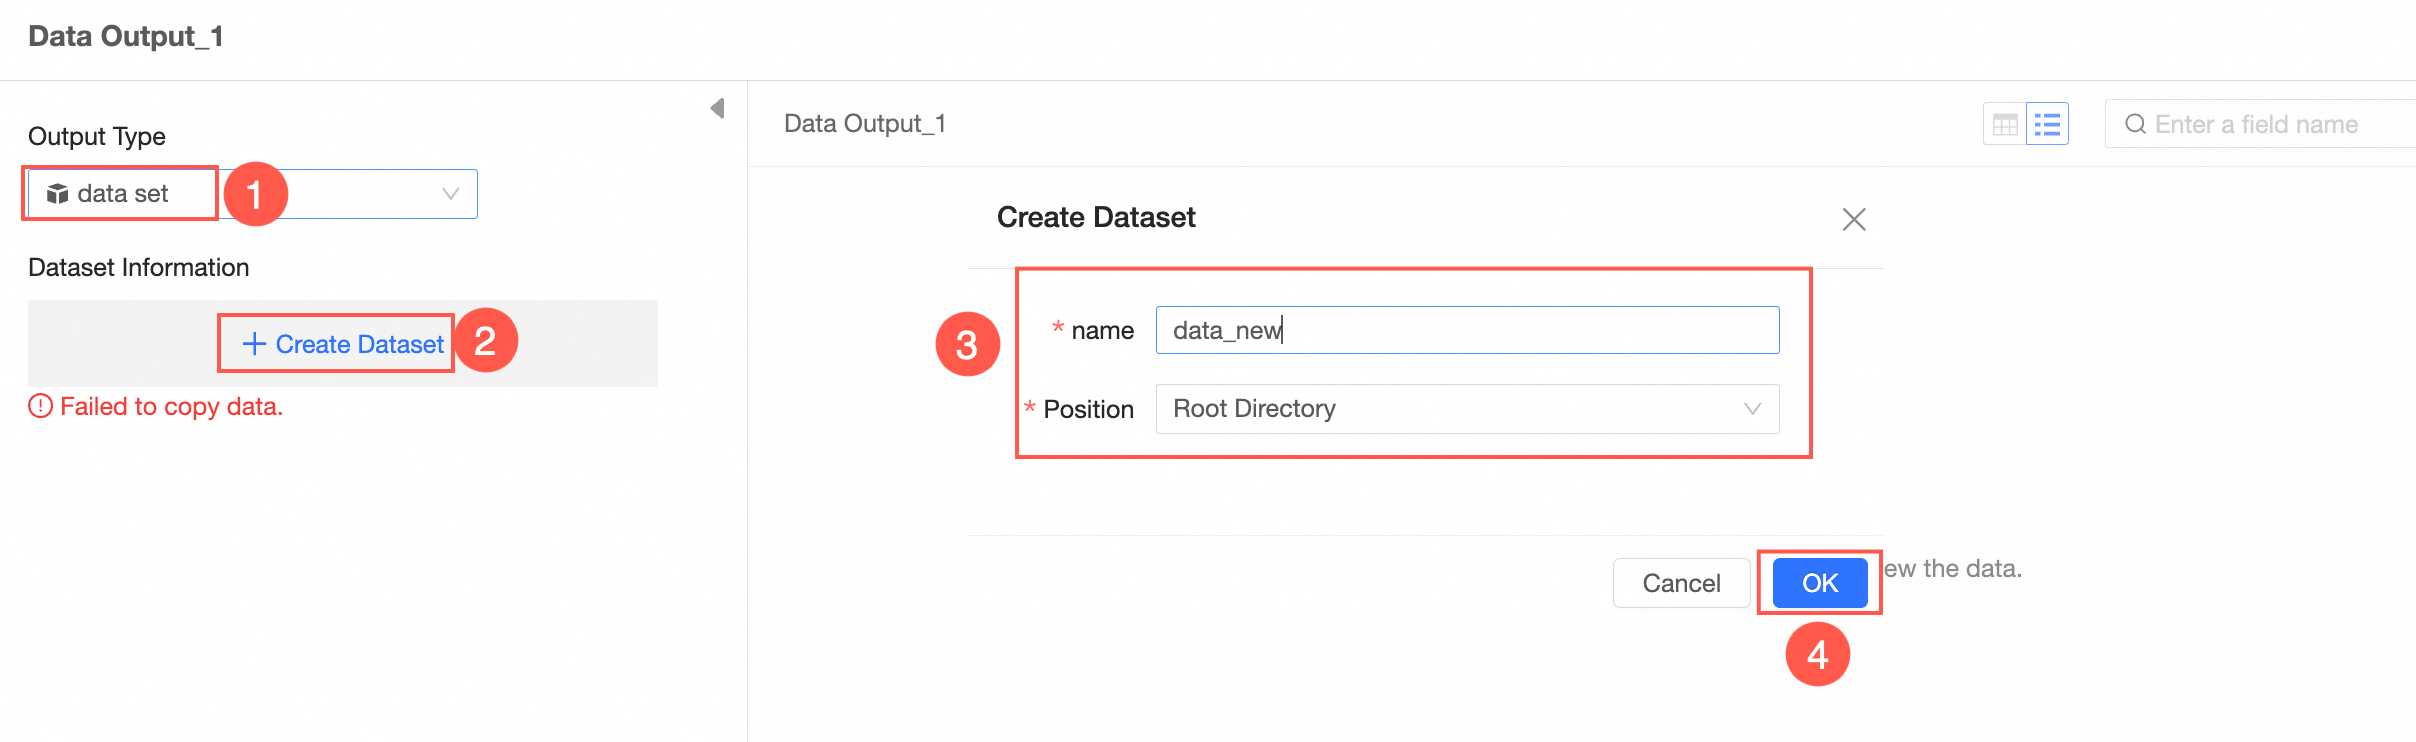
In the Data Output node's configuration panel, configure the output data as shown in the following images.
Output type: source table
Output type: dataset

After configuring the data output, run the task to write the data to the destination table or dataset. You can run the task manually or schedule automatic runs to update the data periodically. 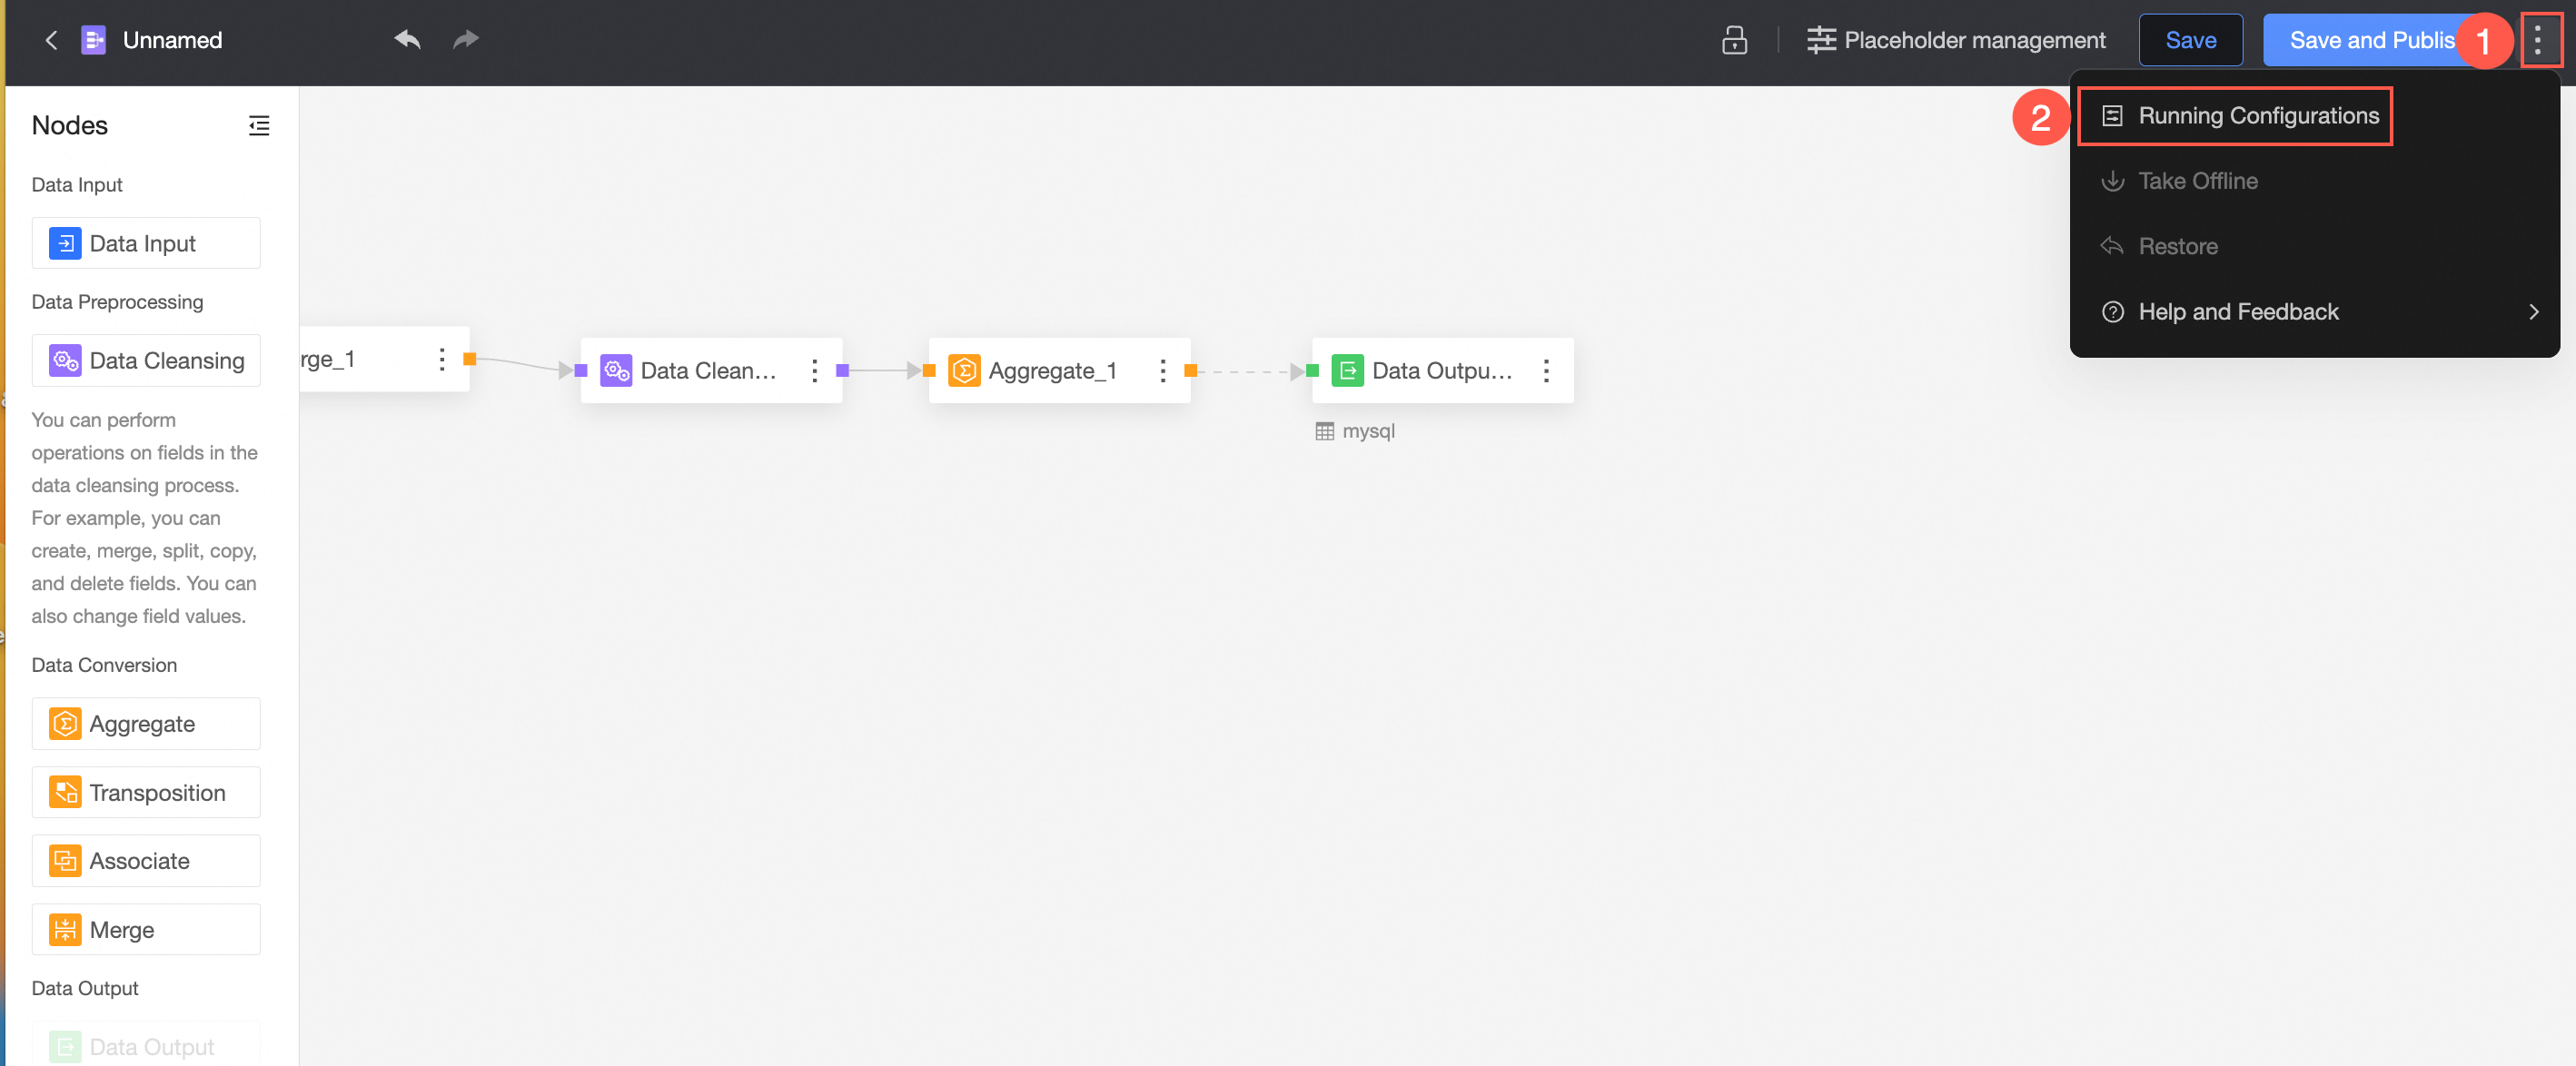 For more information, see Configure task execution.
To output to a dataset, an organization administrator must configure the necessary settings in the workspace information. For more information, see Create and manage workspaces.
Save and publish file
After finishing the configuration, click Save or Save and Publish to save the current data preparation file.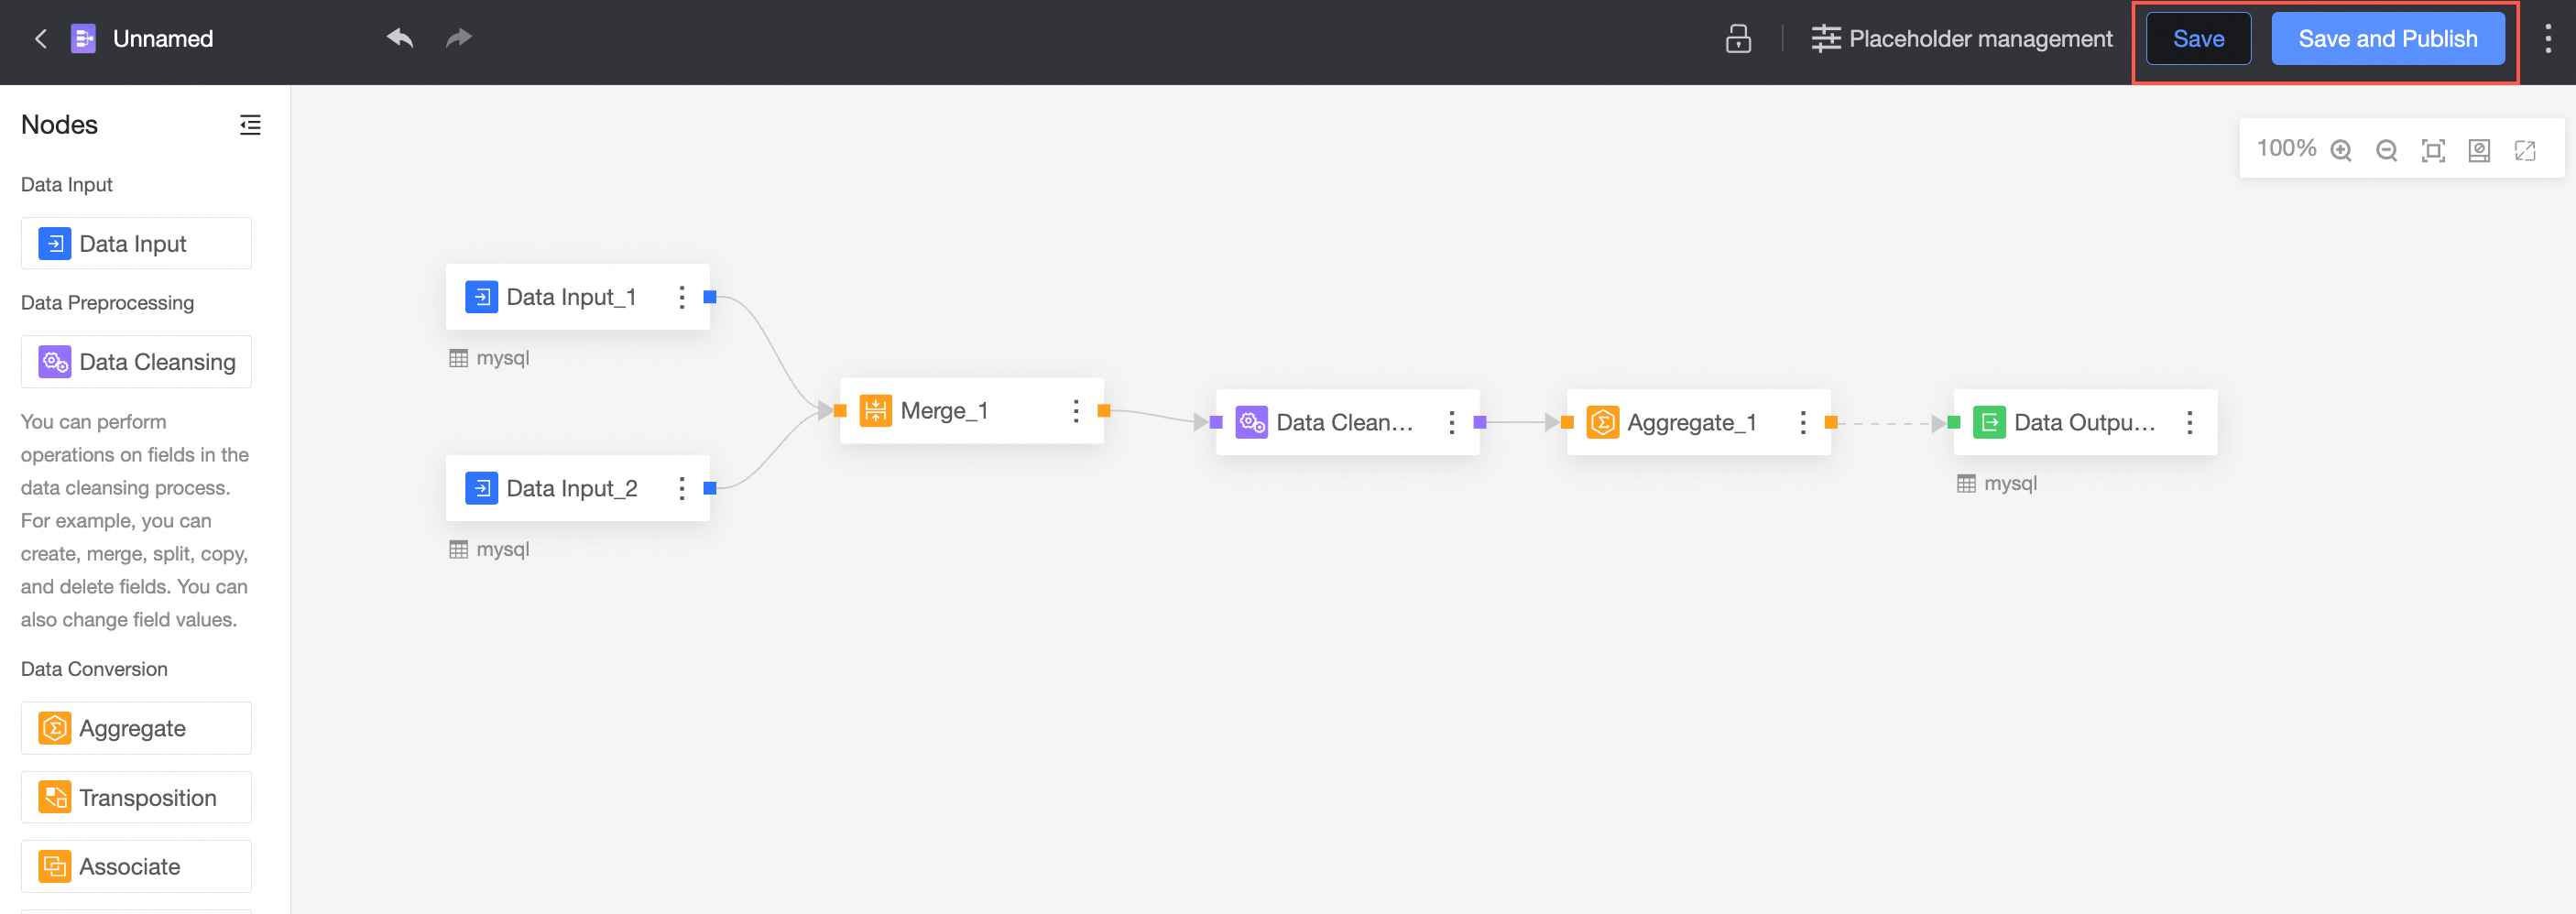
① Save
This action only saves the current configuration.
If you only save the data preparation file, your changes are not visible to other users:
When you create and save a new data preparation file, its status is Unpublished. You must click Save and Publish to publish it.
When you update a published data preparation file, republish it for the changes to take effect.
② Save and Publish
The Save and Publish feature saves the current operation and publishes the data preparation. This feature is visible only for an unpublished data preparation.