Grant permissions on a data source
Data sources have two types of collaborative permissions: Edit and Use. The Edit permission allows a user to create, edit, replace, and delete the data source, while the Use permission allows them to create datasets from it. This topic describes how to grant these permissions.
Restrictions
Only an organization administrator, permission administrator, workspace administrator, or resource owner can grant permissions.
The permissions you can grant vary by user type, as shown in the following table:
Note indicates that the user can perform the operation once granted the required permission.
  indicates that the user cannot perform the operation or be granted the permission.
Category
User type
Edit
Use
Workspace Members
developer

analyst


visitor
Users Outside the Workspace
developer/analyst/visitor

Entry point
Log on to the Quick BI console. In your workspace, go to the Data Sources page to configure Collaborative Authorization for a data source.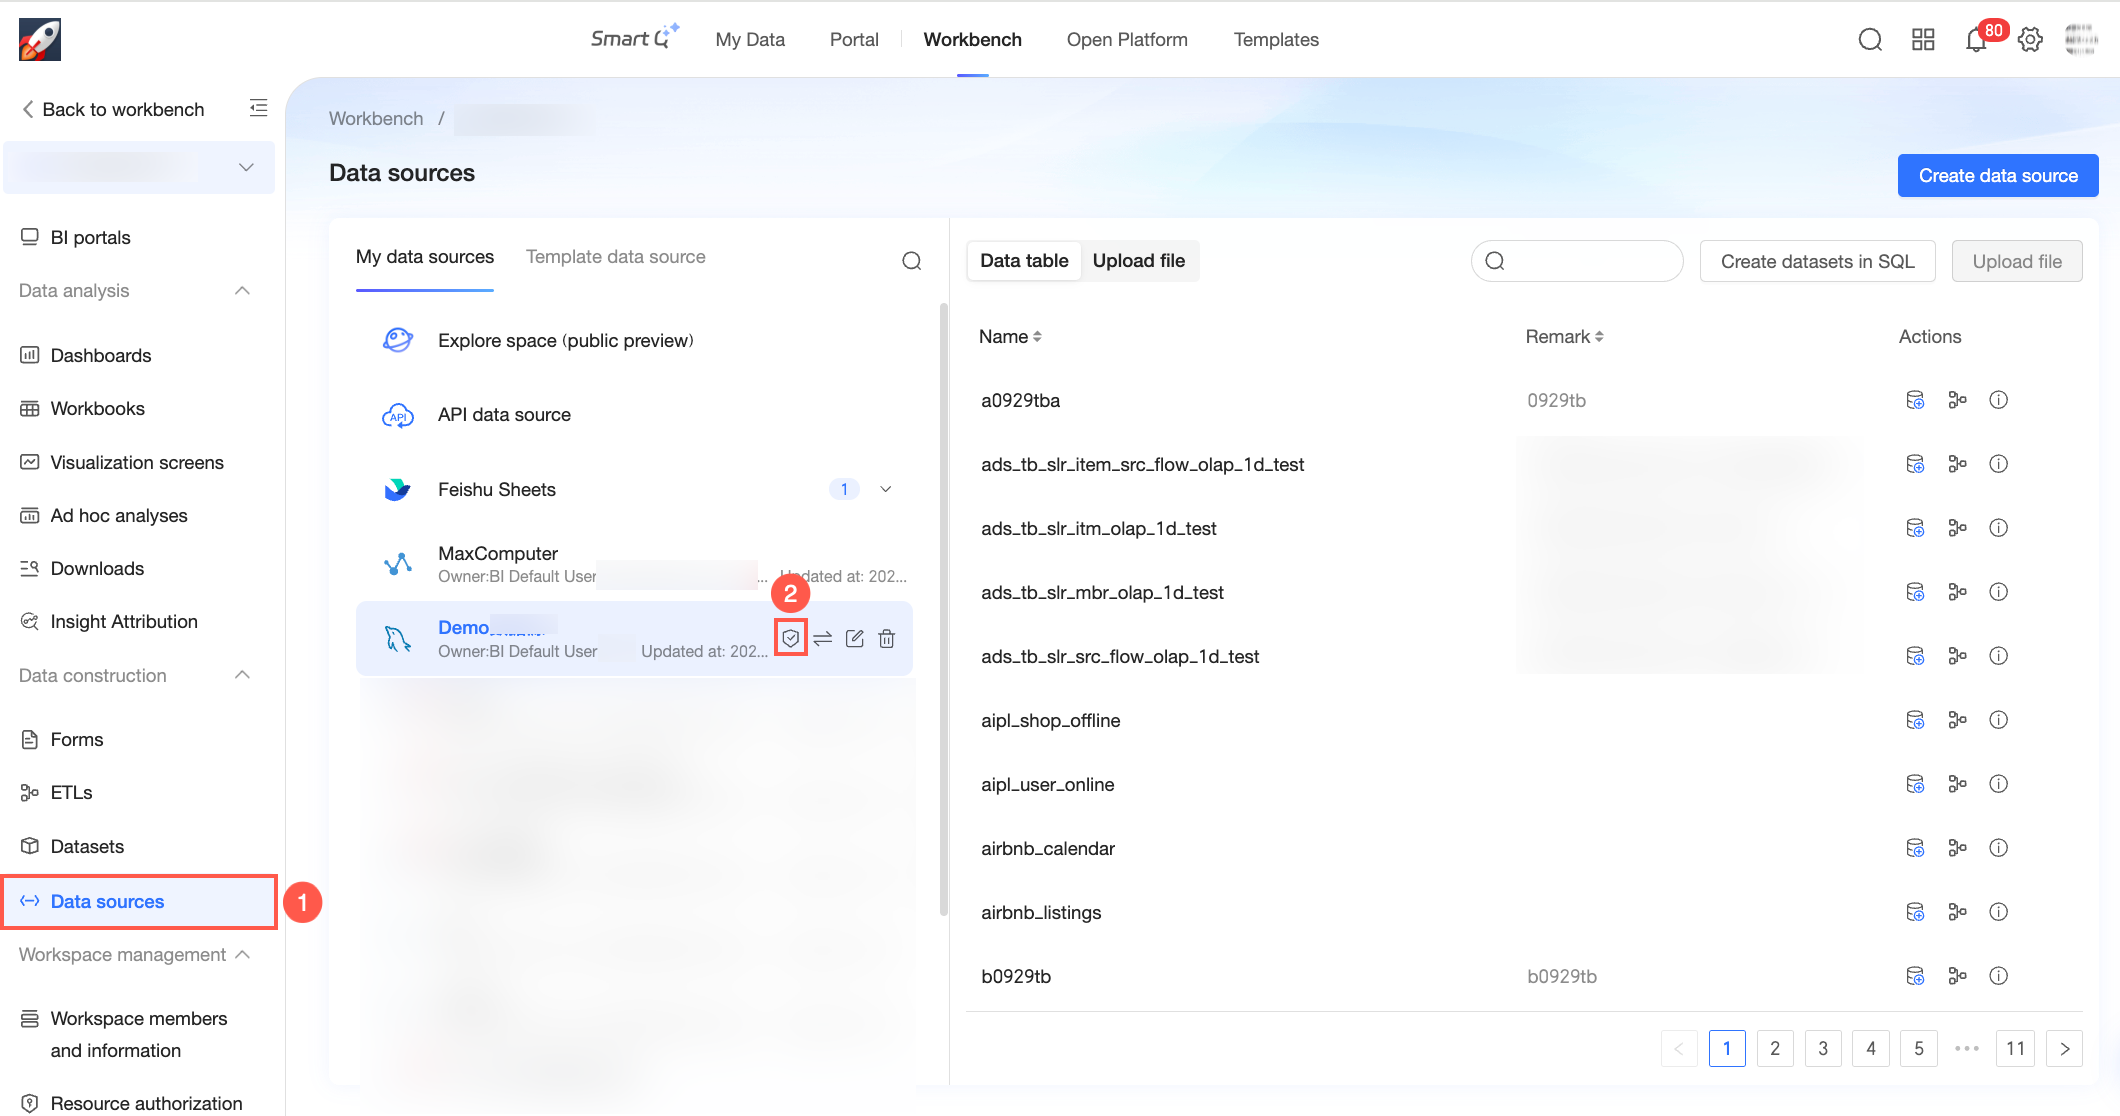
Procedure
The procedure for granting permissions depends on the data source type.
Table-based data sources
For database and application data sources, use the Collaborative Authorization panel to configure permissions for editing the data source and using its tables.
Find the target data source and click the
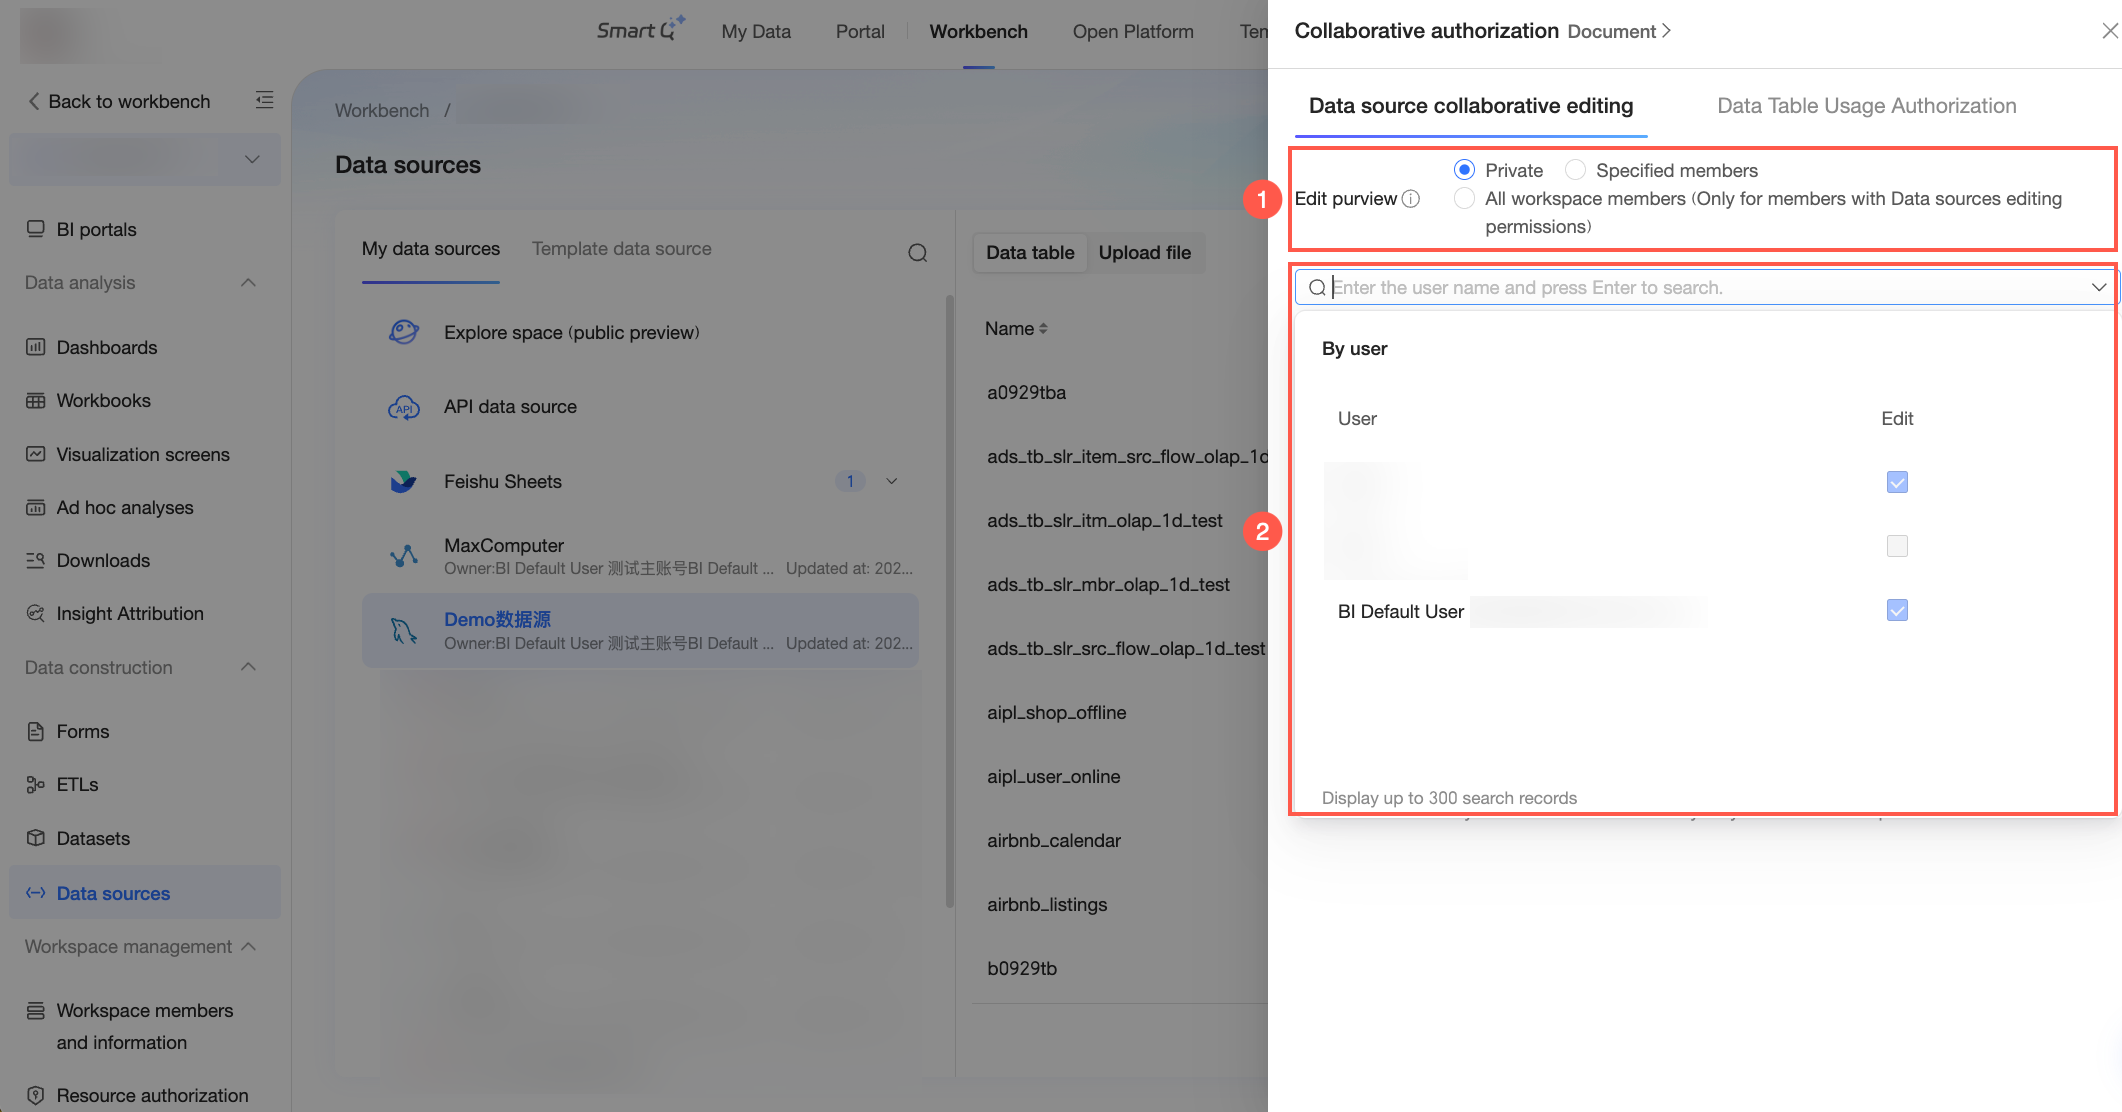
icon to open the Collaborative Authorization panel.On the Data Source Collaborative Edit tab, grant Edit permission for the current data source.
Parameter
Description
① Edit Permission Property
Set the mode for the Edit permission. You can select Private, Specified Members, or All Workspace Members.
If you select Private, only the data source owner and workspace administrators have Edit permission.
If you select Specified Members, only users added to the authorization list will have Edit permission.
If you select All Workspace Members, all eligible users in the current workspace automatically receive the permission. For eligibility details, see Restrictions.
② Add Authorization
If you set Edit Permission Property to Specified Members, you must click Add Authorization and select users from the drop-down list. This list shows only users who can be granted Edit permission. You can enter a username to search for a user.
NoteThe data source owner and workspace administrators have Edit permission by default and do not need to be added to this list.
On the Data Table Use Authorization tab, grant Use permission for tables within the data source. You can grant this permission on a per-table basis or for all tables at once.
Parameter
Description
All Data Tables
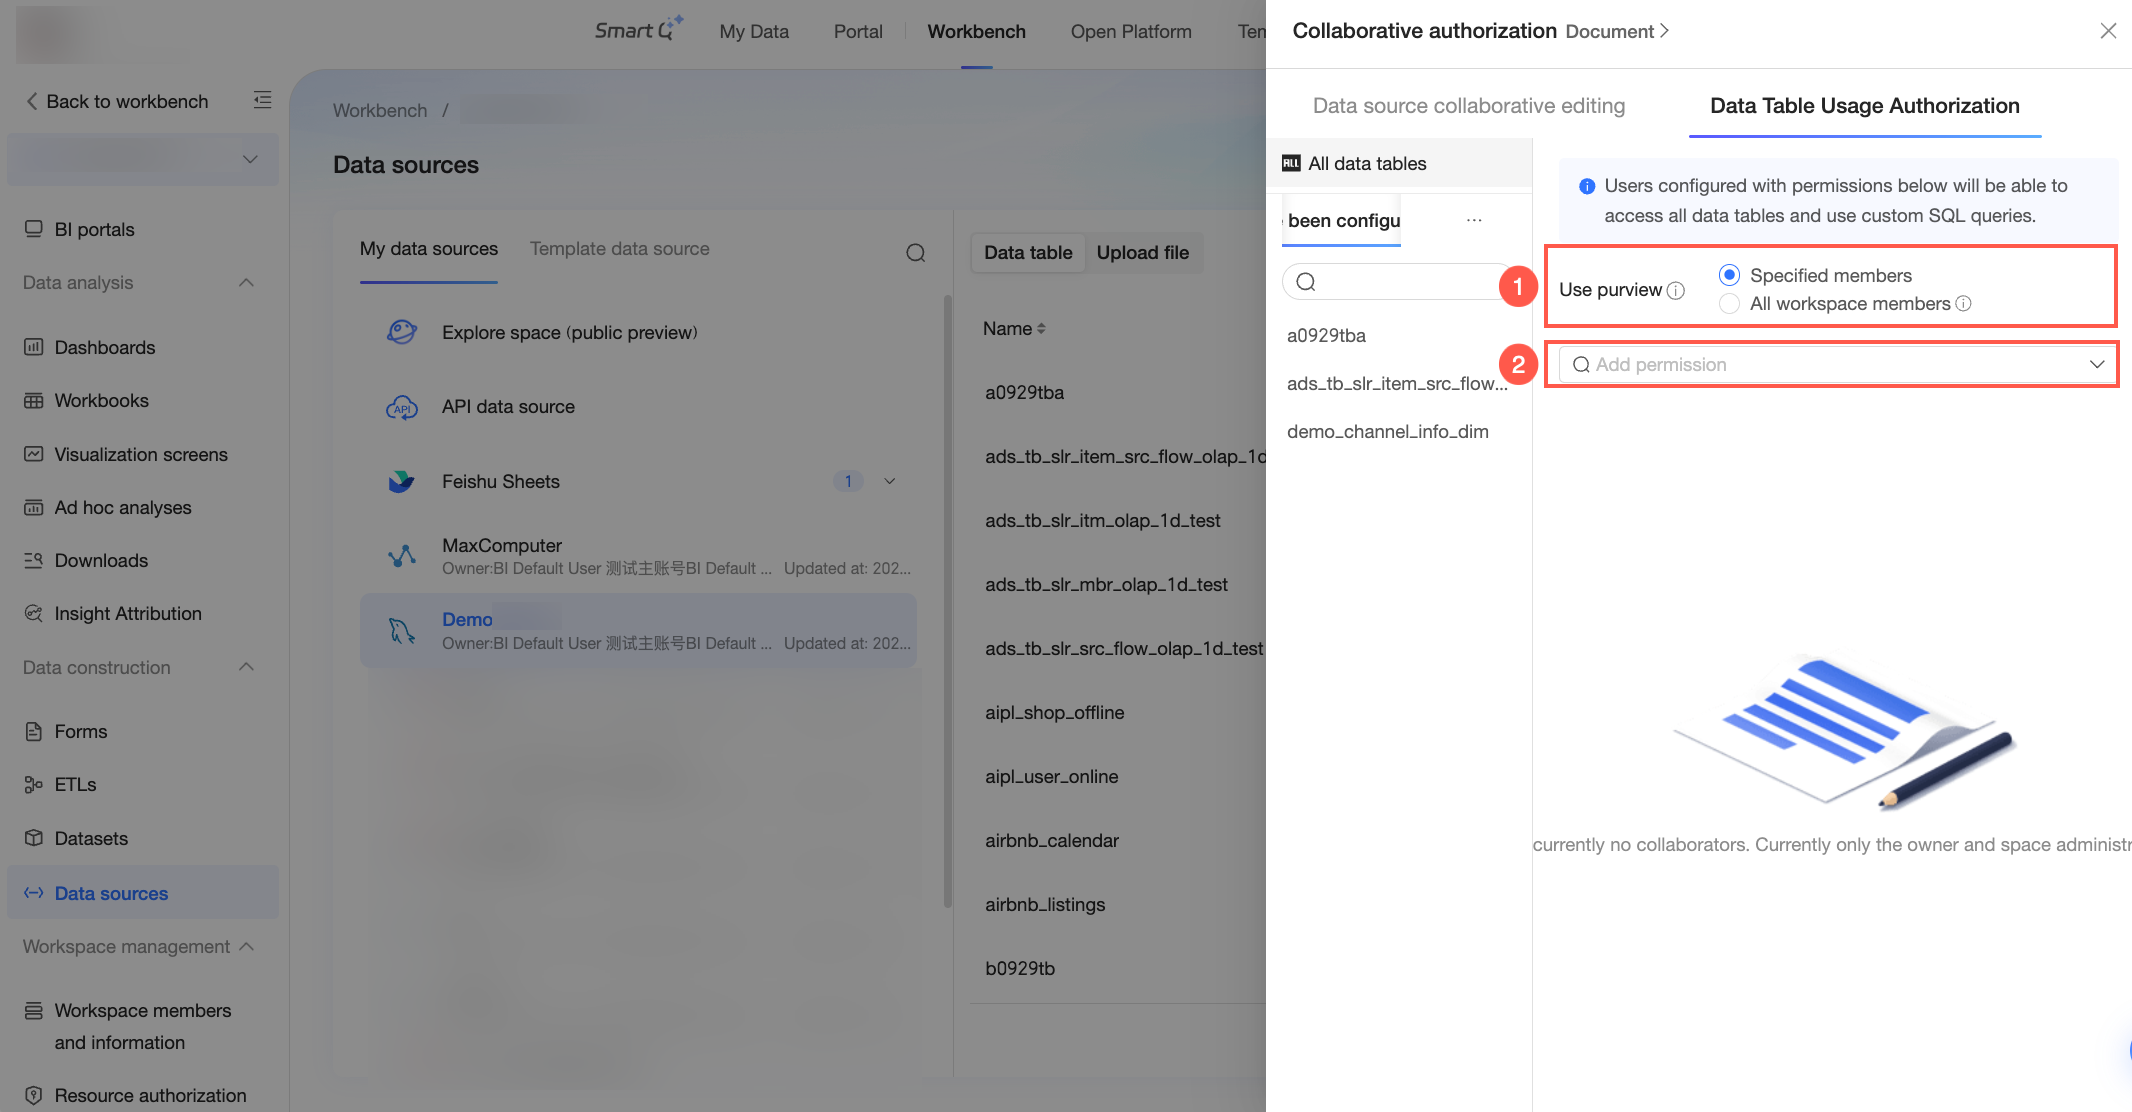
To grant permissions on all tables in a data source, select All Data Tables from the list on the left. This is suitable for non-sensitive data. In the panel on the right, configure the Use permission. Authorized users can use all tables in the data source and run custom SQL queries.
① Use Permission Property: Set the mode for the Use permission. You can select Specified Members or All Workspace Members.
If you select Specified Members, only users who are granted Use permission in the authorization list can use the data source.
If you select All Workspace Members, all eligible users in the current workspace automatically receive the permission for all tables. For eligibility details, see Restrictions.
② Add Authorization: If you set Use Permission Property to Specified Members, you must click Add Authorization and select users from the drop-down list. This list shows only users who can be granted Use permission. You can enter a username to search for a user.
Specific data tables
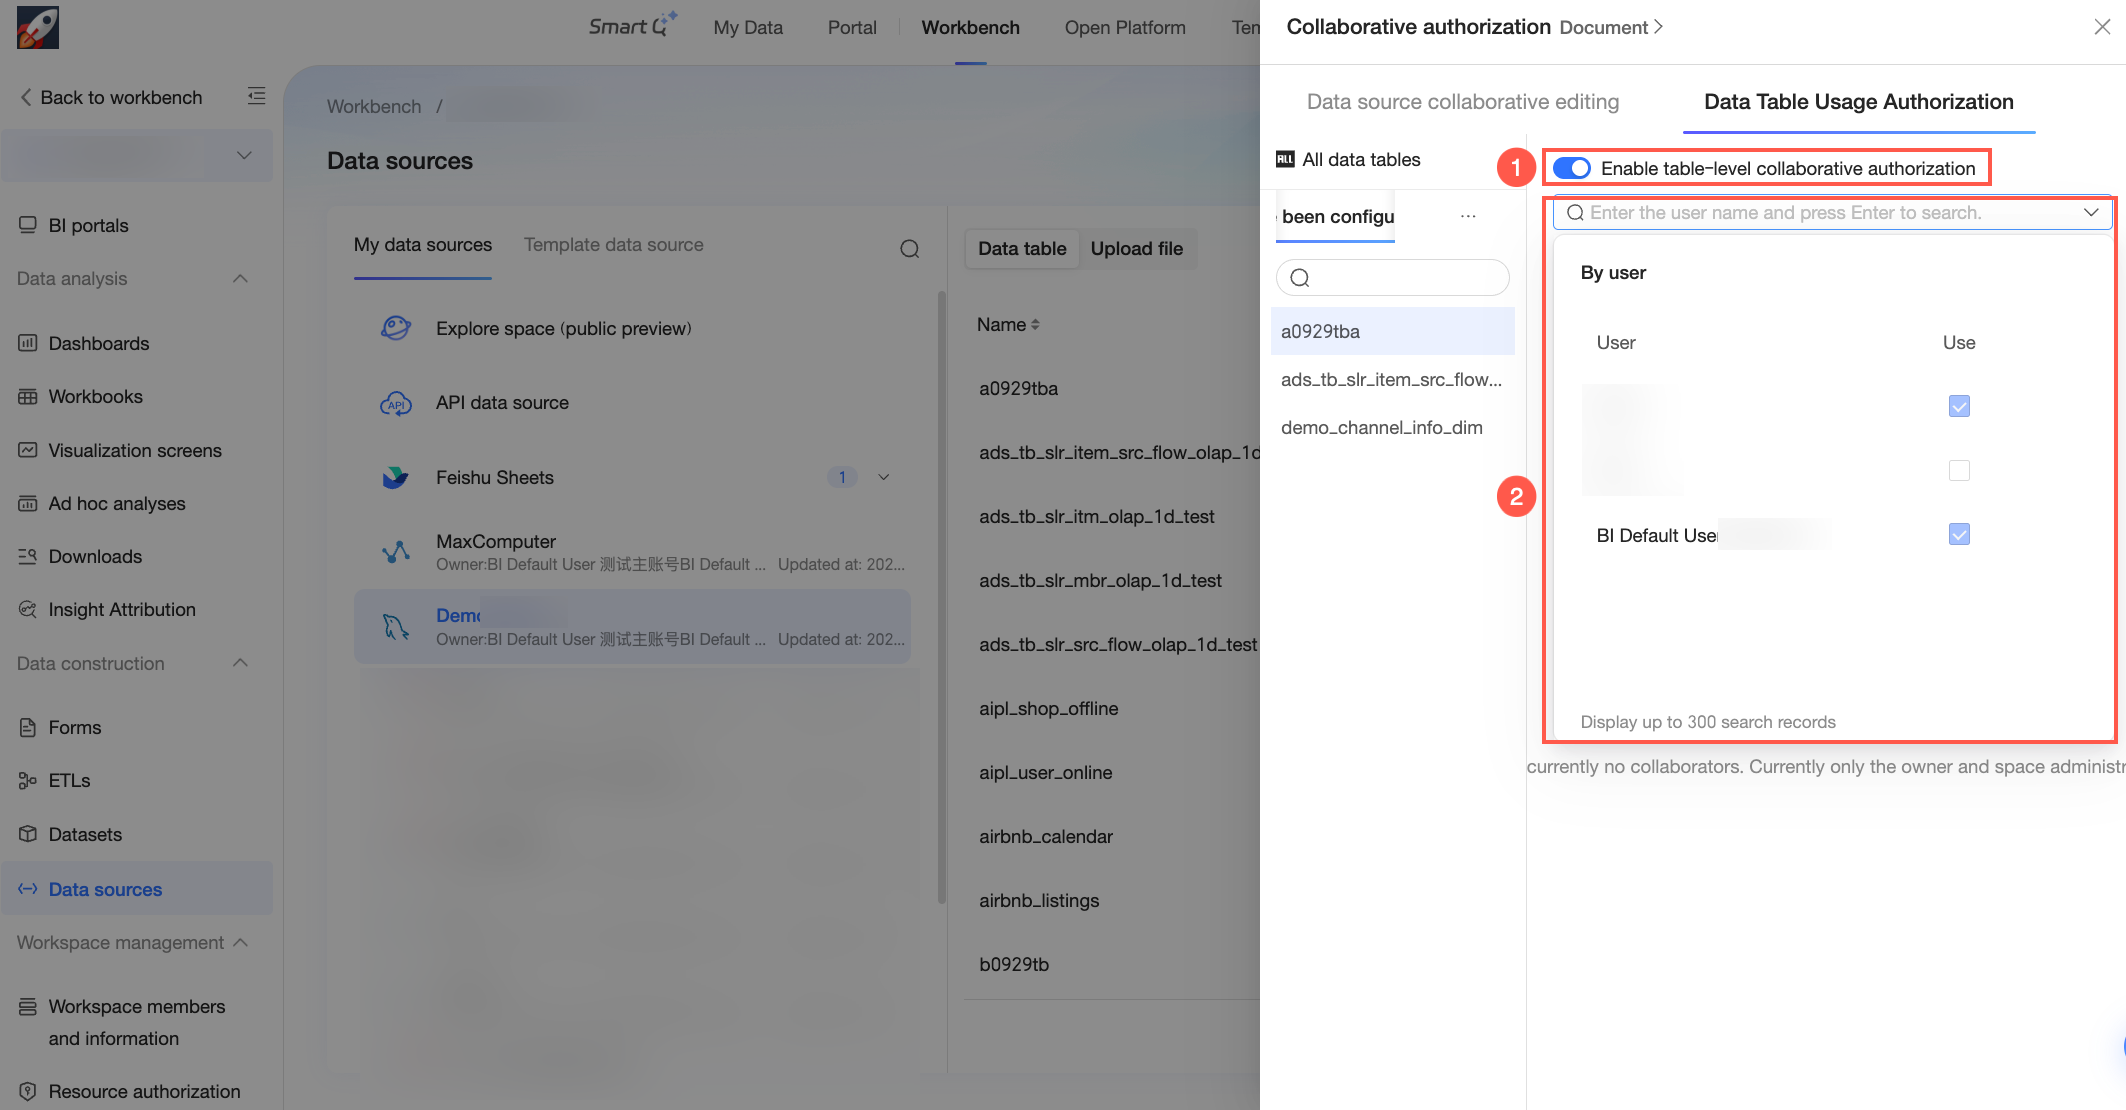
For sensitive data tables, such as those containing finance or customer information, select a specific table from the list on the left. Then, in the panel on the right, configure its Use permission. Only authorized users can use this table, and they cannot run custom SQL queries. The configuration options are as follows:
① Enable Table-level Collaborative Authorization: Turn on this switch to configure permissions for an individual table. This option is disabled by default. If you disable this switch later, the existing permission settings for the table are cleared and no longer apply.
② Add Authorization: Click Add Authorization and select users from the drop-down list to grant them Use permission for the table. This list shows only users who can be granted Use permission. You can enter a username to search for a user.
 icon to open the Collaborative Authorization panel.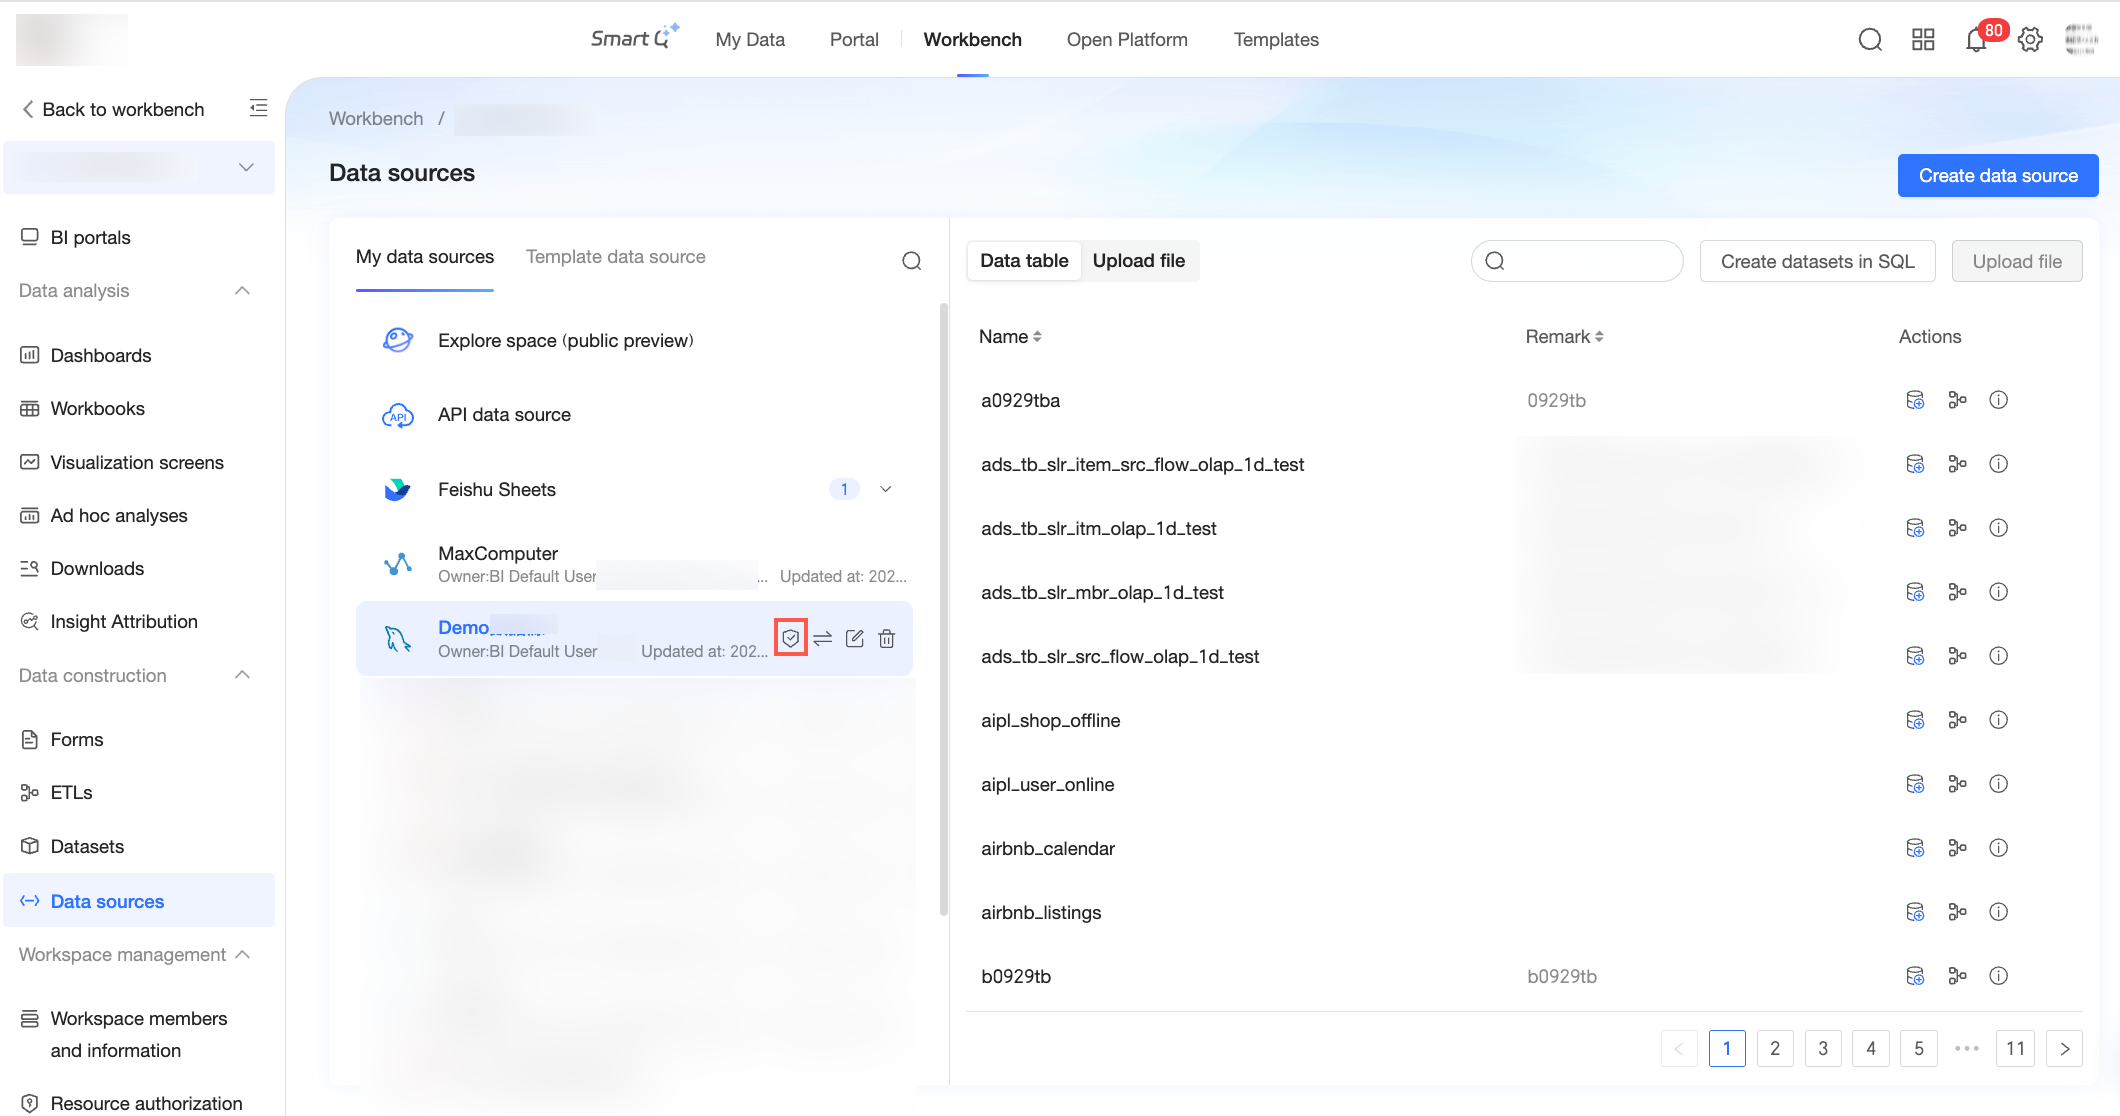
Other data sources
For API and file data sources, you can configure Edit and Use permissions on the Collaborative Authorization panel.
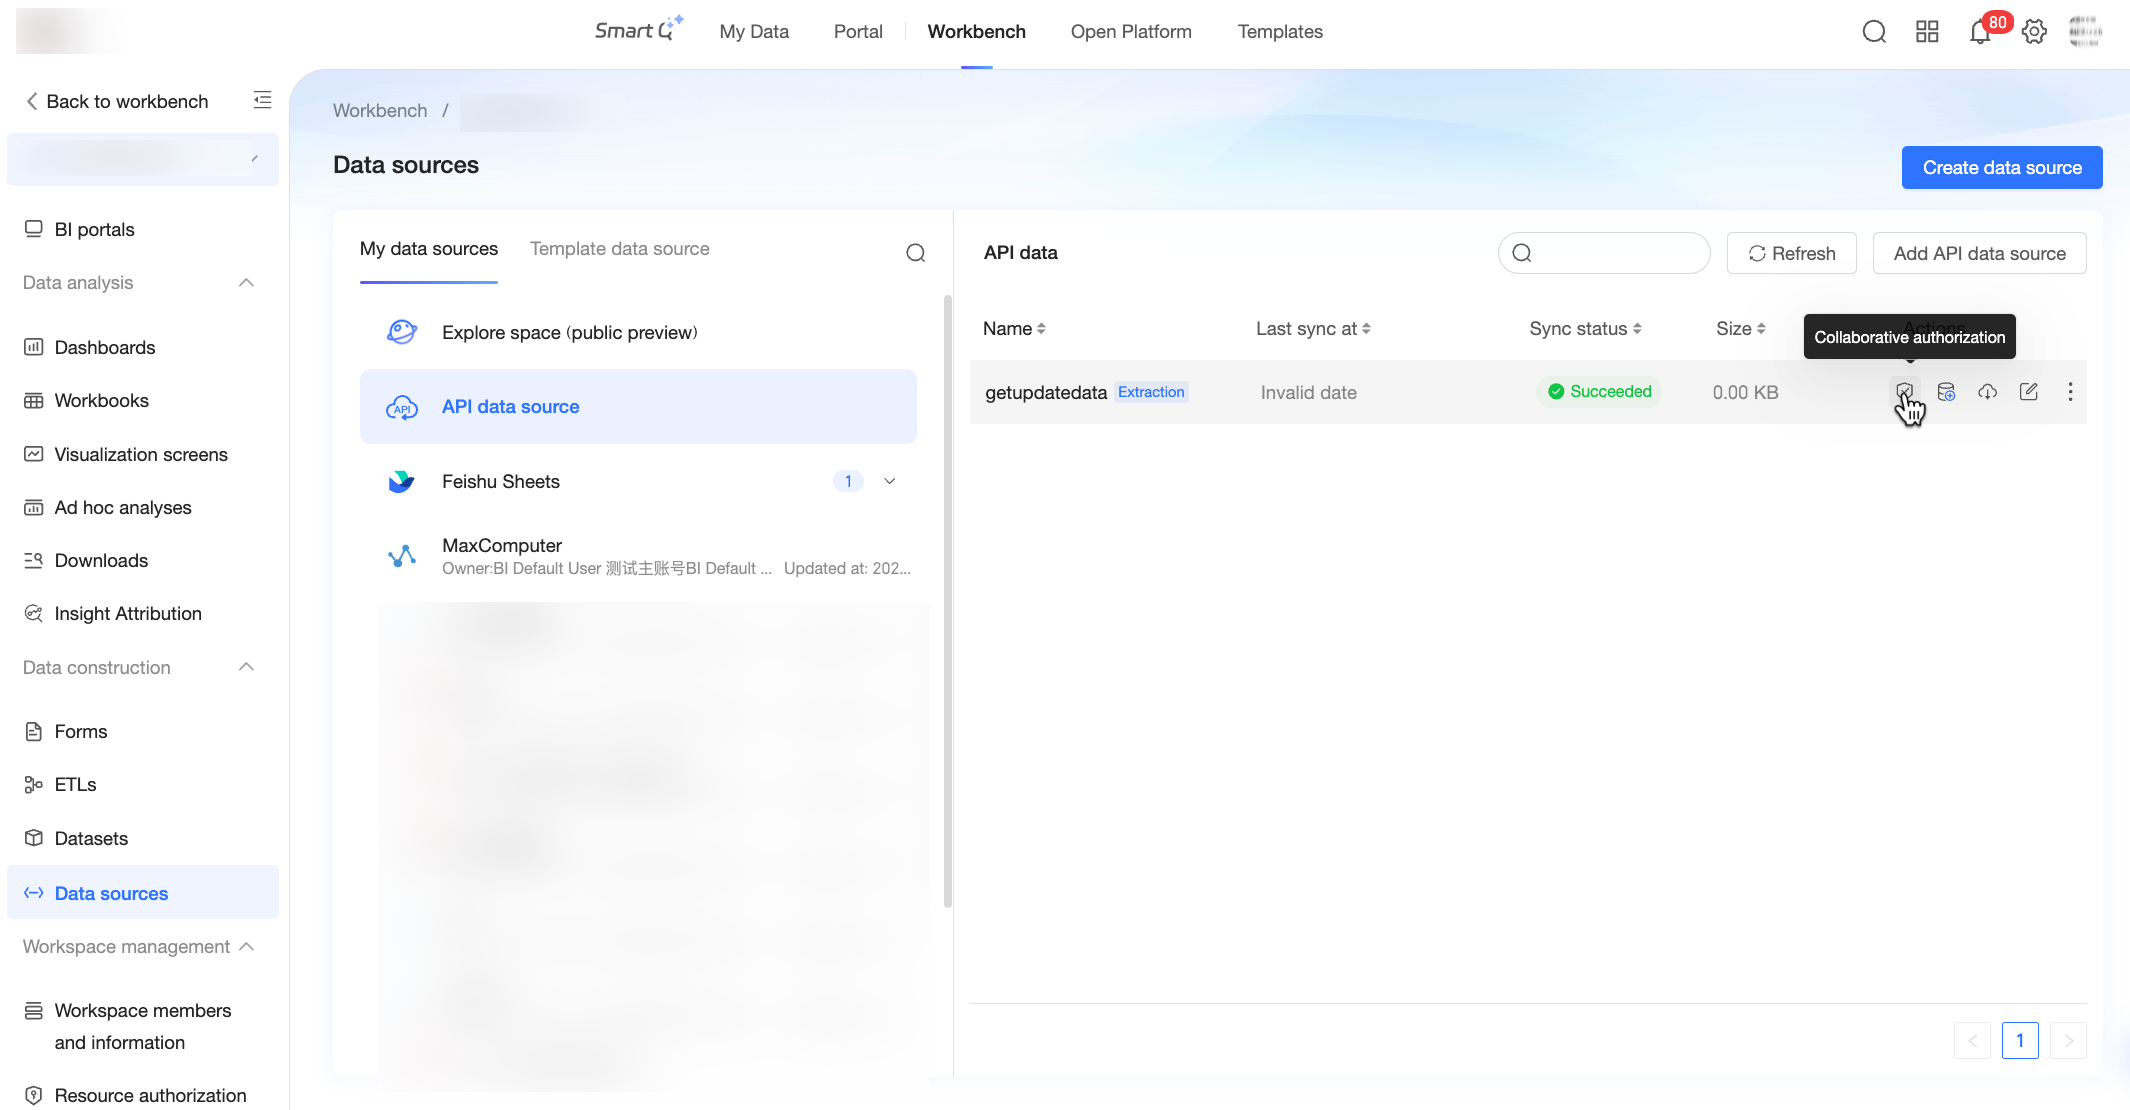
Find the target data source and click the
icon to open the Collaborative Authorization panel.In the Collaborative Authorization panel, configure the permissions for the data source.
Parameter
Description
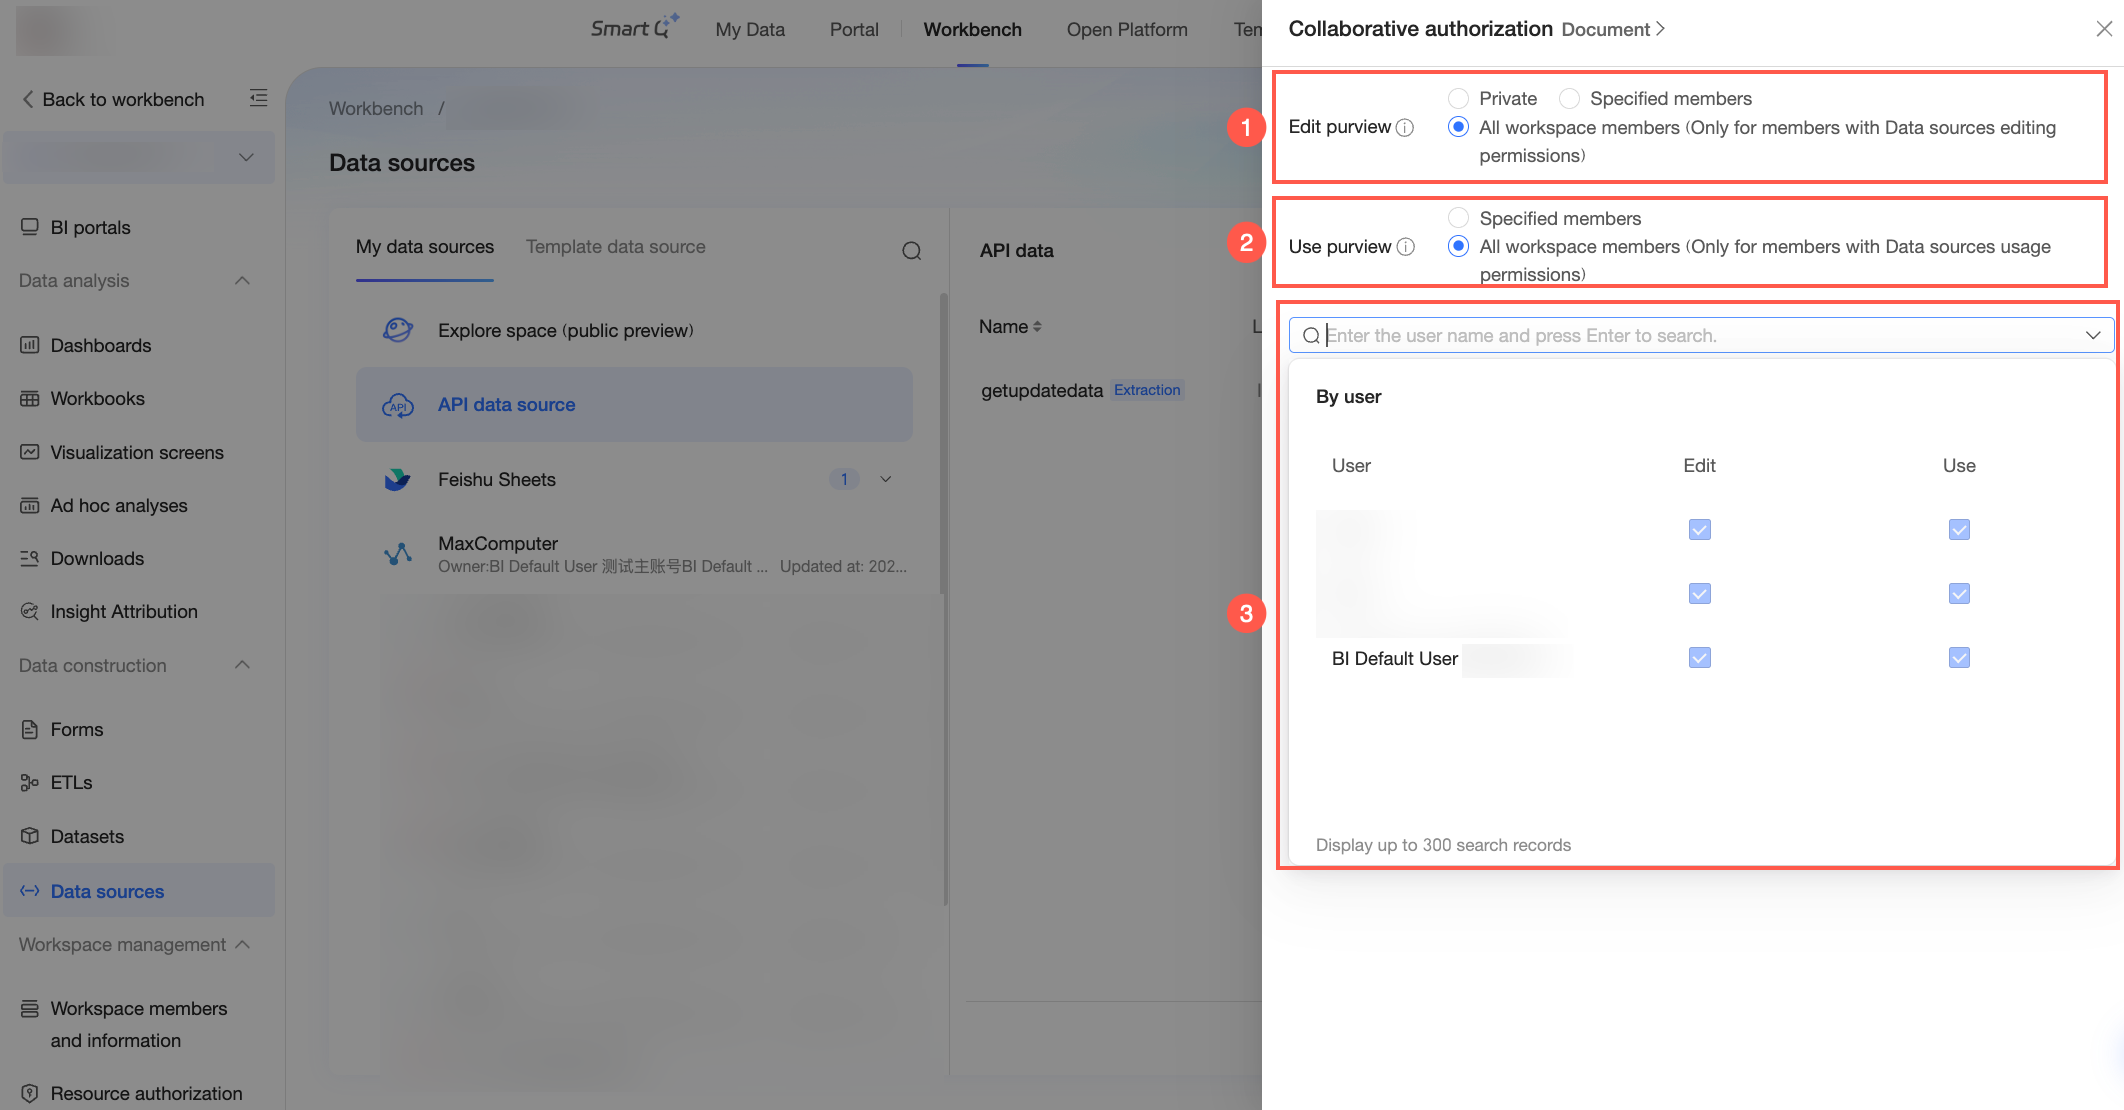
① Edit Permission Property
Set the mode for the Edit permission. You can select Private, Specified Members, or All Workspace Members.
If you select Private, only the data source owner and workspace administrators have Edit permission. Other members cannot edit the data source.
If you select Specified Members, only users who are granted Edit permission in the authorization list can edit the data source.
If you select All Workspace Members, all users in the current workspace who can be granted Edit permission on the data source automatically receive the permission. To determine whether a user can be granted Edit permission, see Restrictions.
② Use Permission Property
Set the mode for the Use permission. You can select Specified Members or All Workspace Members.
If you select Specified Members, only users who are granted Use permission in the authorization list can use the data source.
If you select All Workspace Members, all users in the current workspace who can be granted Use permission on the data source automatically receive the permission. To determine whether a user can be granted Use permission, see Restrictions.
③ Add Authorization
Click Add Authorization, select a user from the drop-down list, and check the box in the Edit or Use column to grant the permission.
NoteThese permissions are hierarchical. The Edit permission includes the Use permission. If you select the Edit checkbox, the Use checkbox is also selected by default and cannot be cleared.
The data source owner and workspace administrators have Edit permission by default and do not need to be authorized again.
Related operations
Administrators can manage permissions for multiple data sources from a centralized page, so you do not need to open the Collaborative Authorization panel for each data source.
Workspace-level centralized authorization: On the Resource Authorization page, a workspace administrator can view all resources within the current workspace and grant permissions as needed. For more information, see Resource Authorization.
Organization-level centralized authorization: On the Centralized Authorization page, an organization administrator can view all resources in the organization and grant permissions from both resource and user perspectives. For more information, see Centralized Authorization.