This topic describes how to query, grant permissions on, delete, rename, and transfer datasets. It also describes how to request permissions on datasets.
Prerequisites
You are on the dataset editing page. For more information, see Create a dataset.
Query datasets
On the Dataset management page, you can query datasets in the following three ways.
Query for only the datasets that you created.
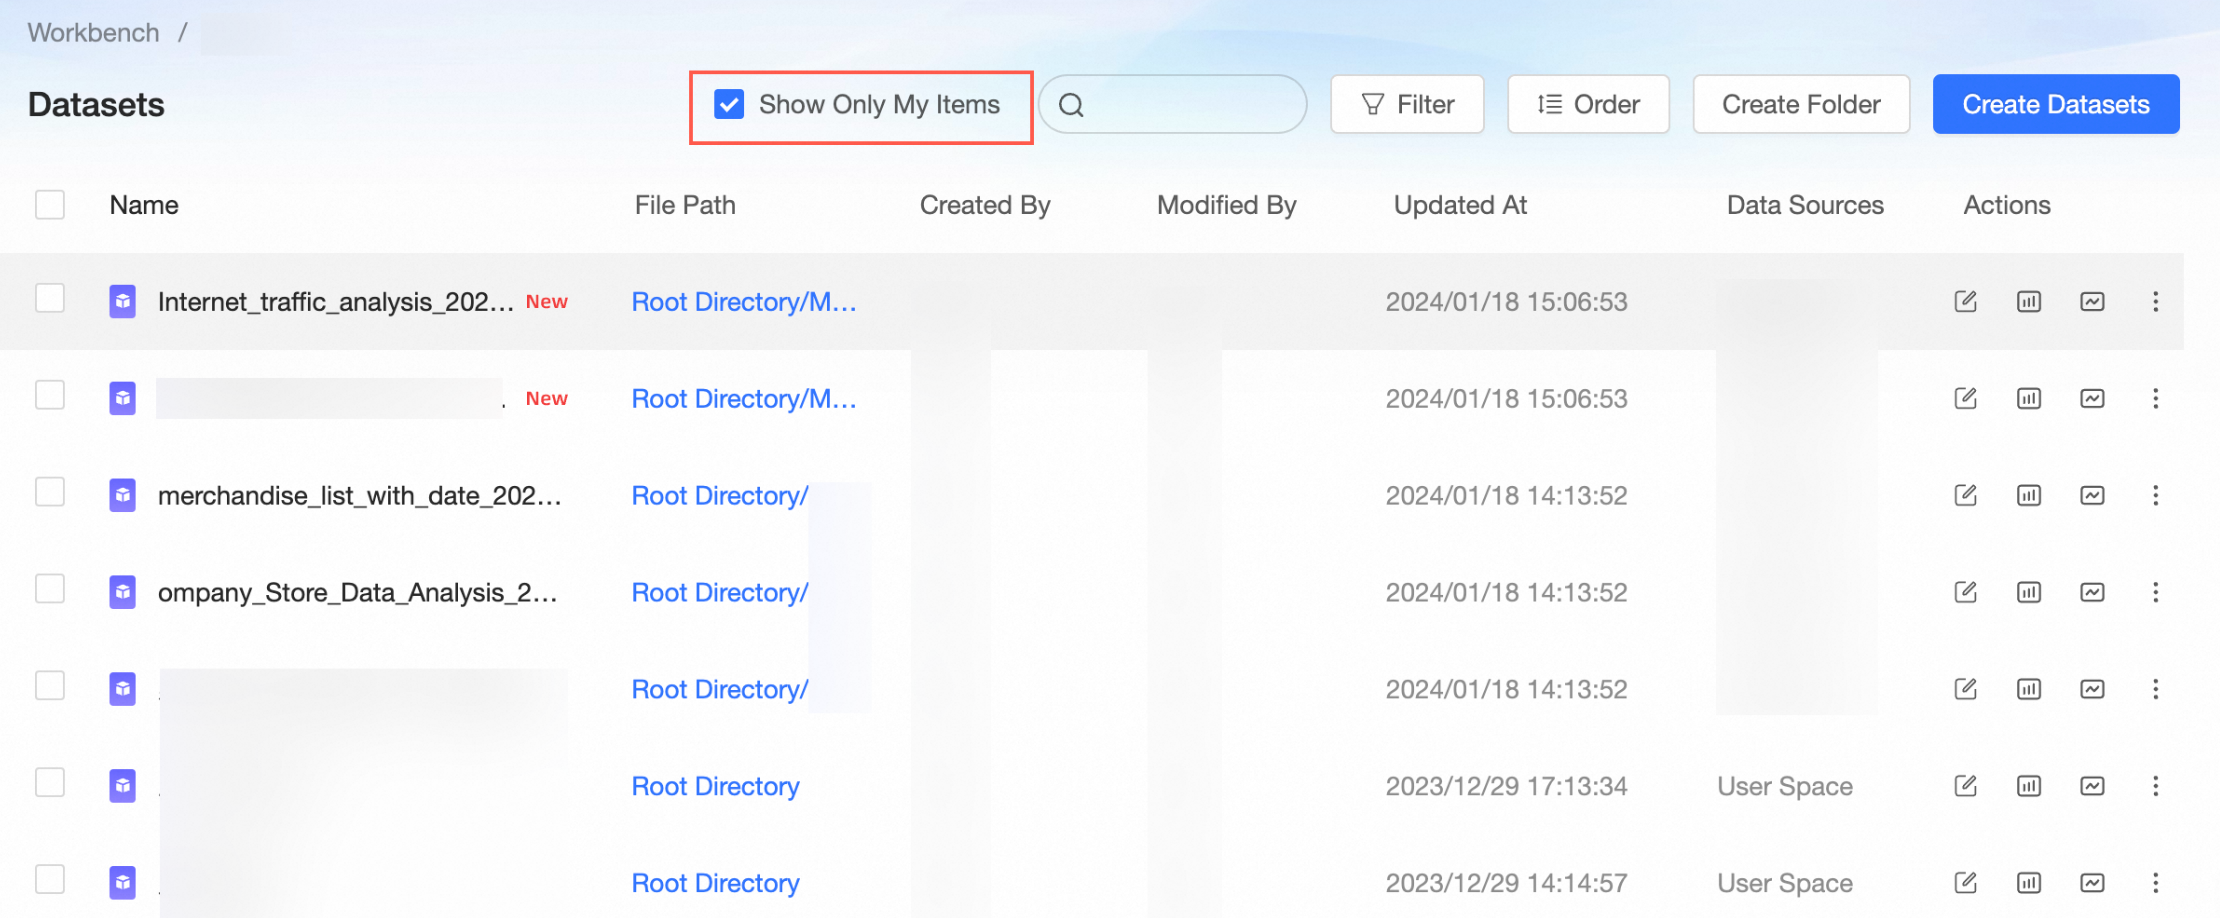
Search for datasets by name.
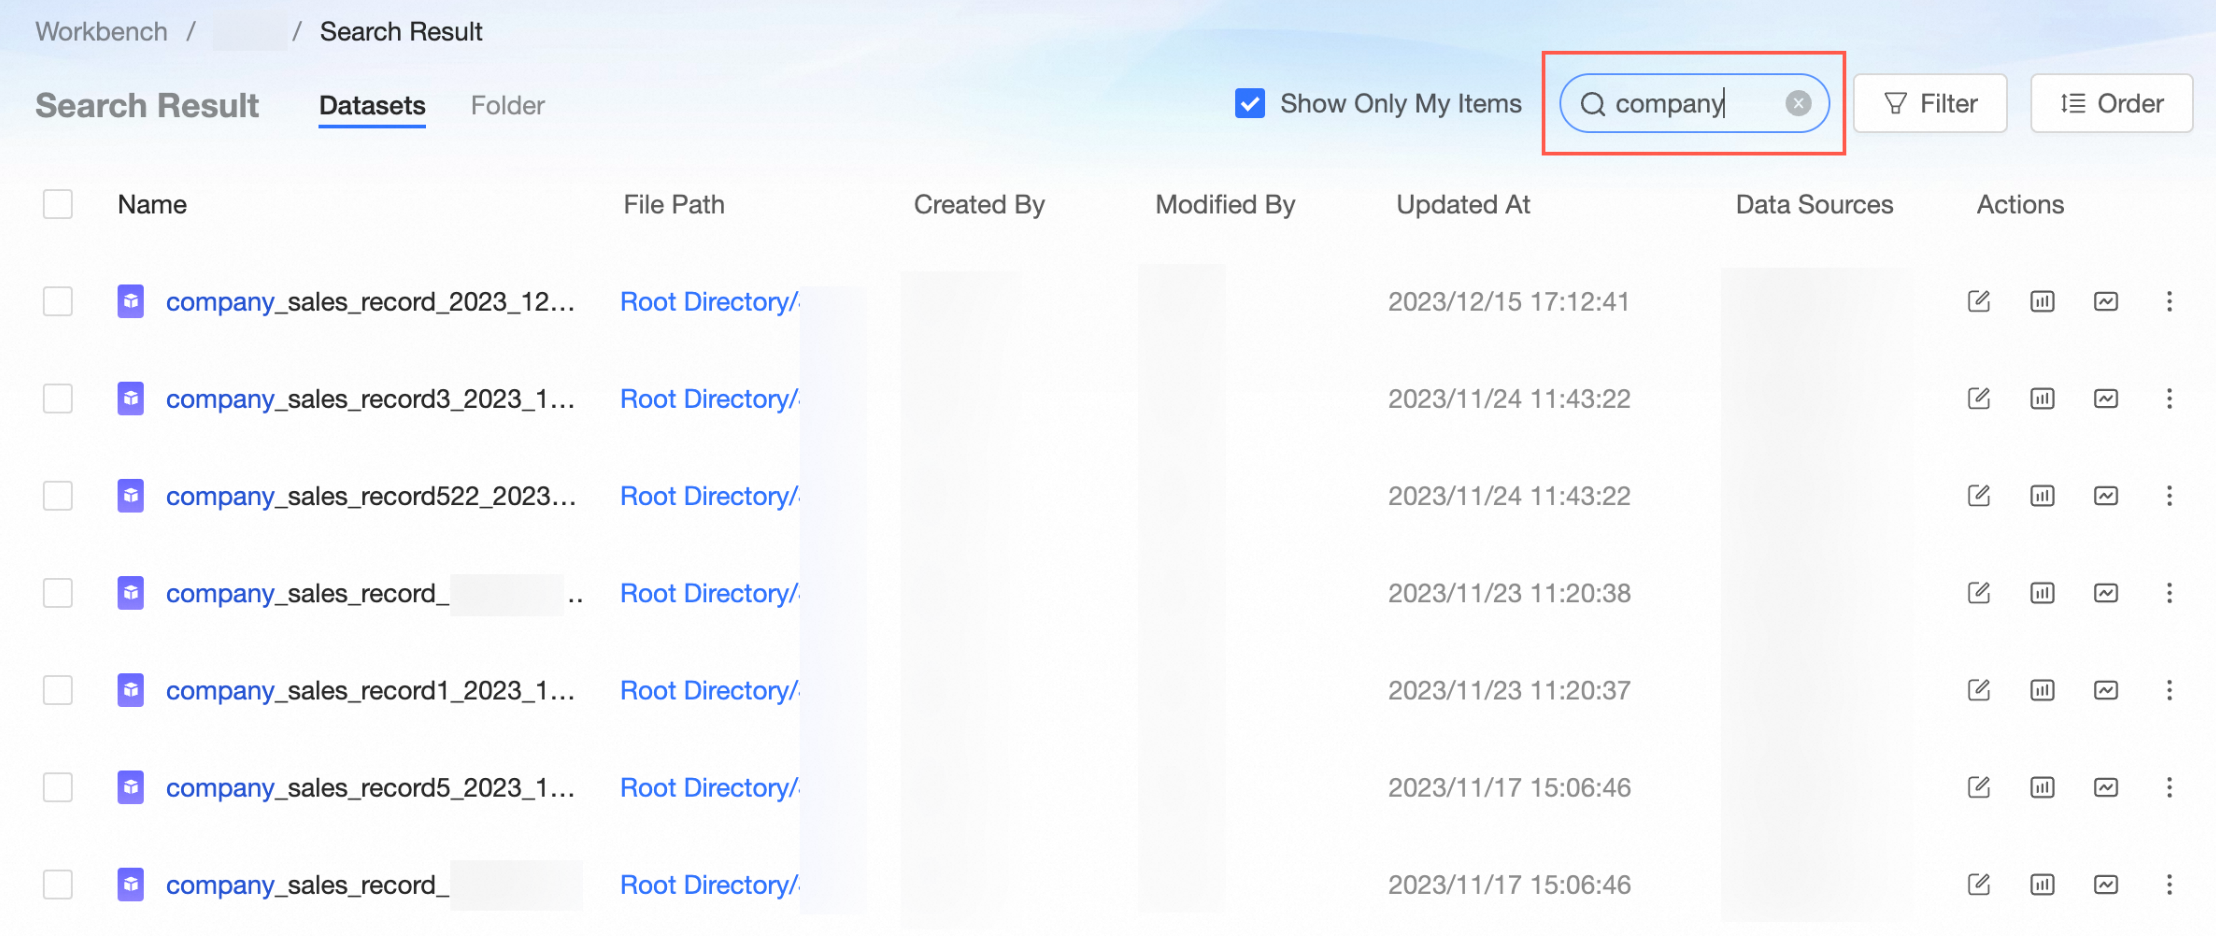
Filter datasets by creation time, creator, or dataset ID.
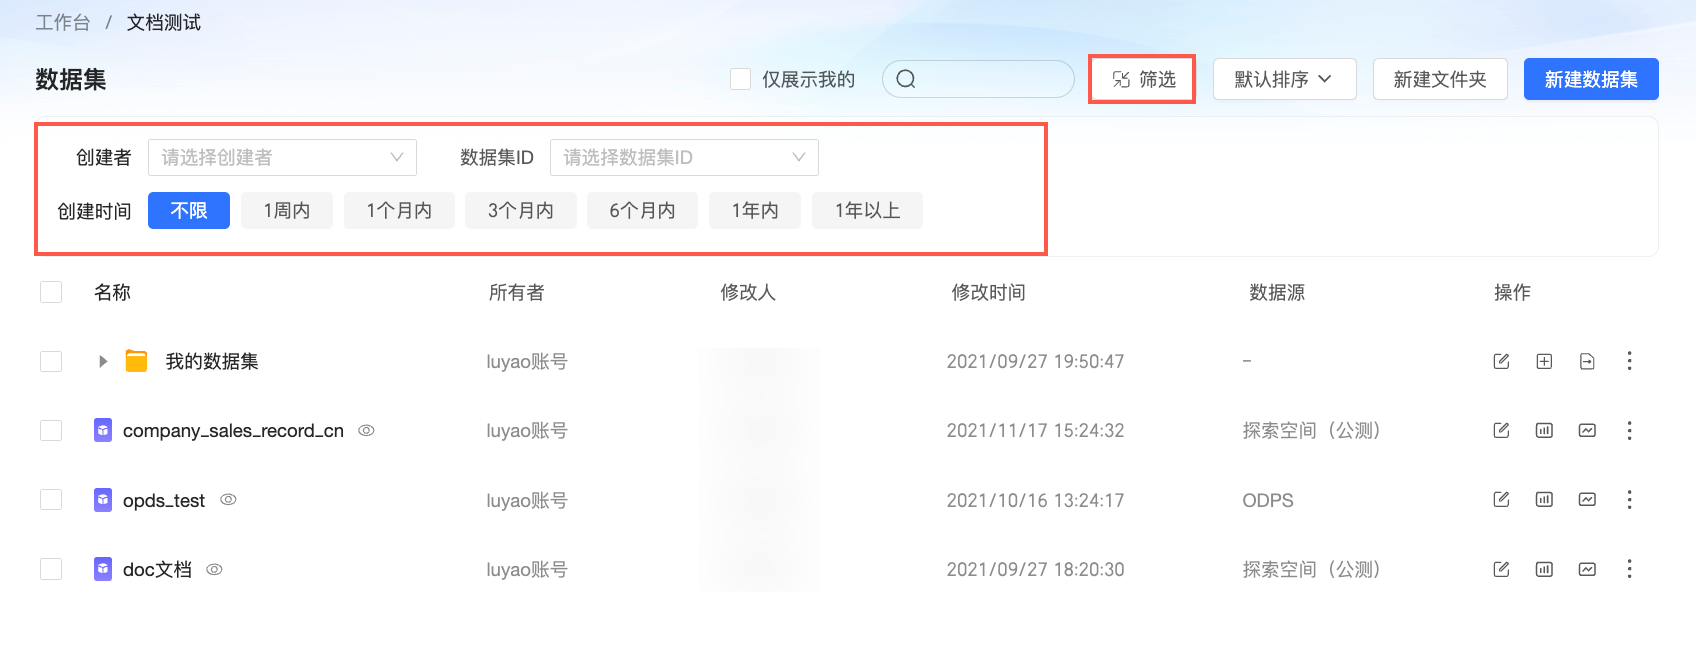
Dataset icon descriptions:
The
 icon indicates that the dataset was created from a physical table.
The
 icon indicates that the dataset was created using a custom SQL statement.
The
 icon indicates that row-level and column-level permissions are configured for the dataset.
 icon indicates that row-level and column-level permissions are configured for the dataset.
Request permissions to edit a dataset
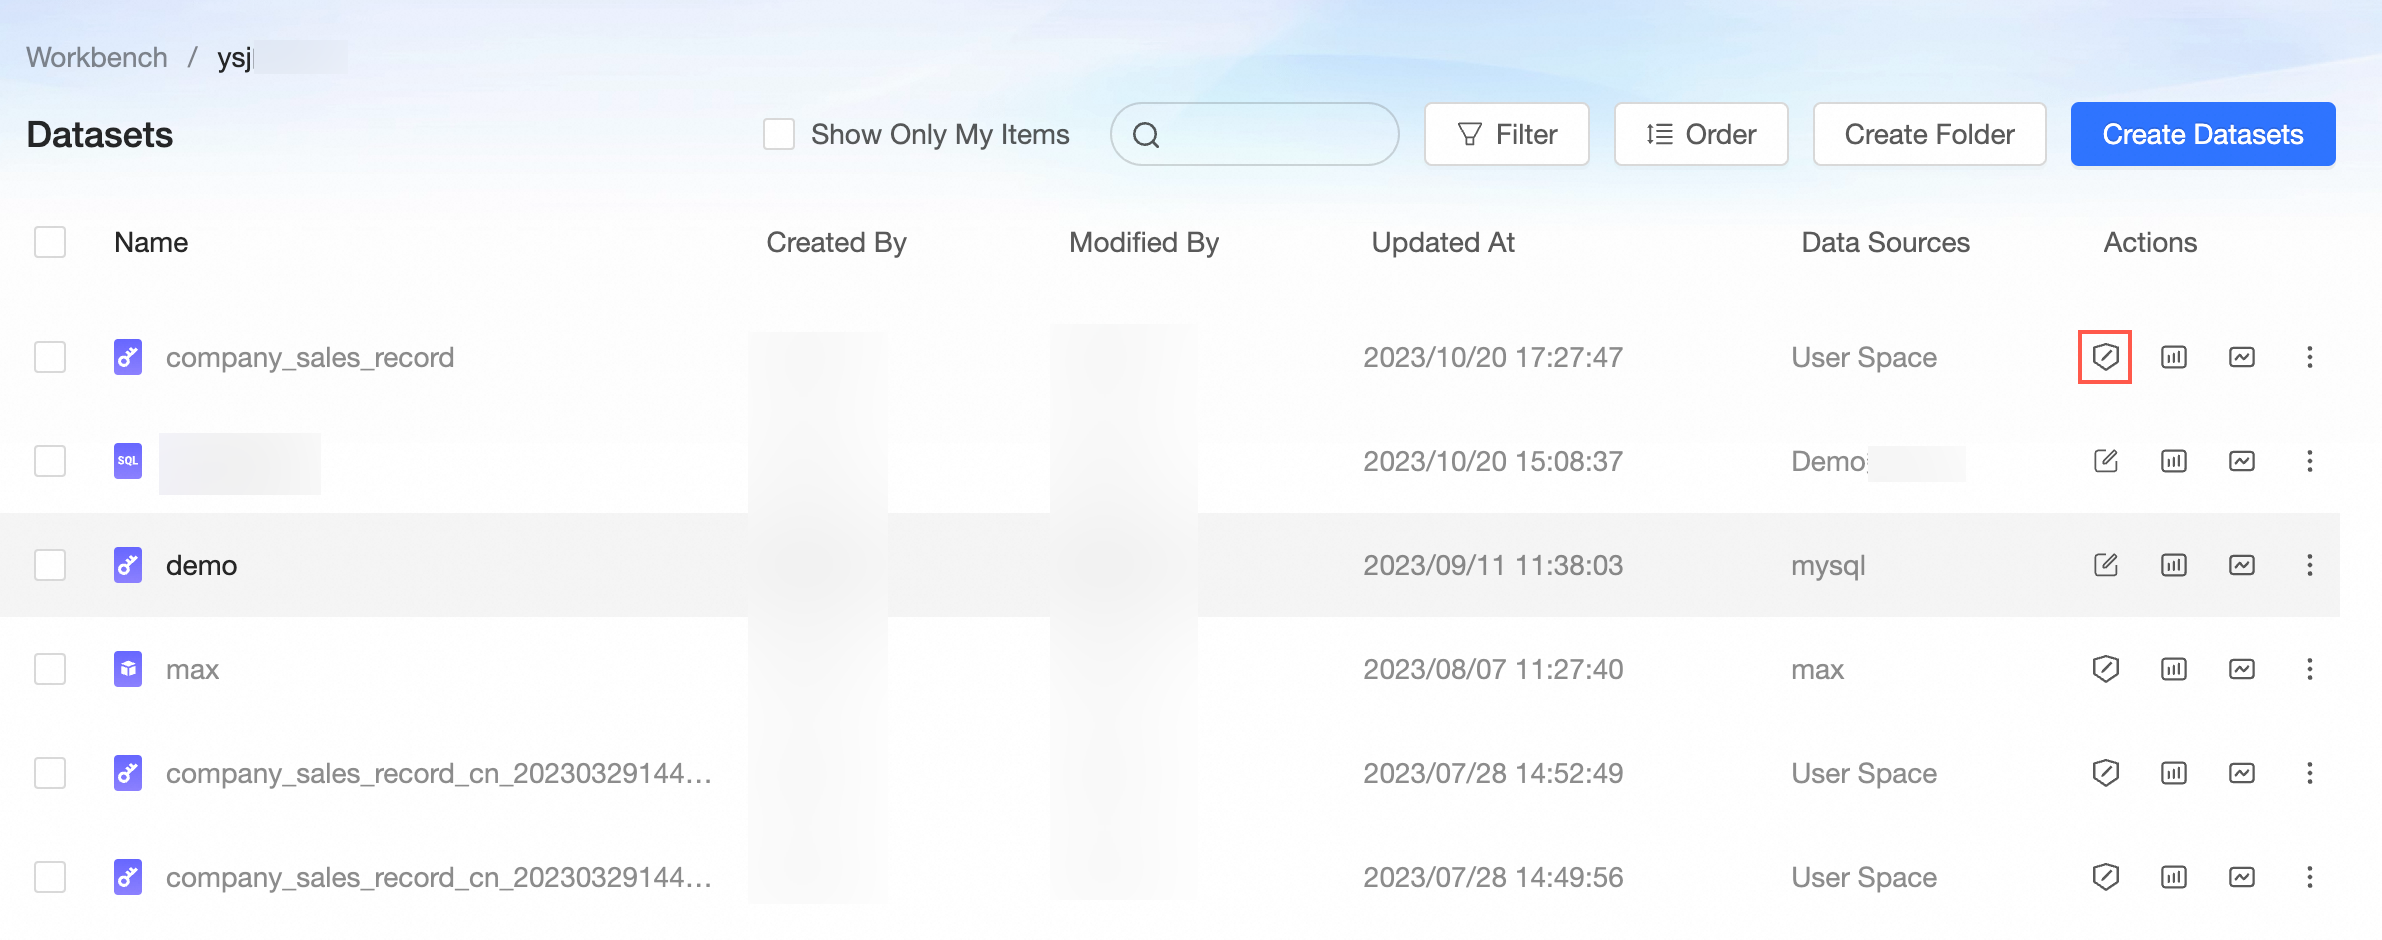
If you have Developer permissions in a workspace, you can view and use all datasets in that workspace. However, you can only edit the datasets that you created. To edit datasets created by others, you must request edit permissions.
On the Dataset management page, request permission to edit the dataset as shown in the following figure.
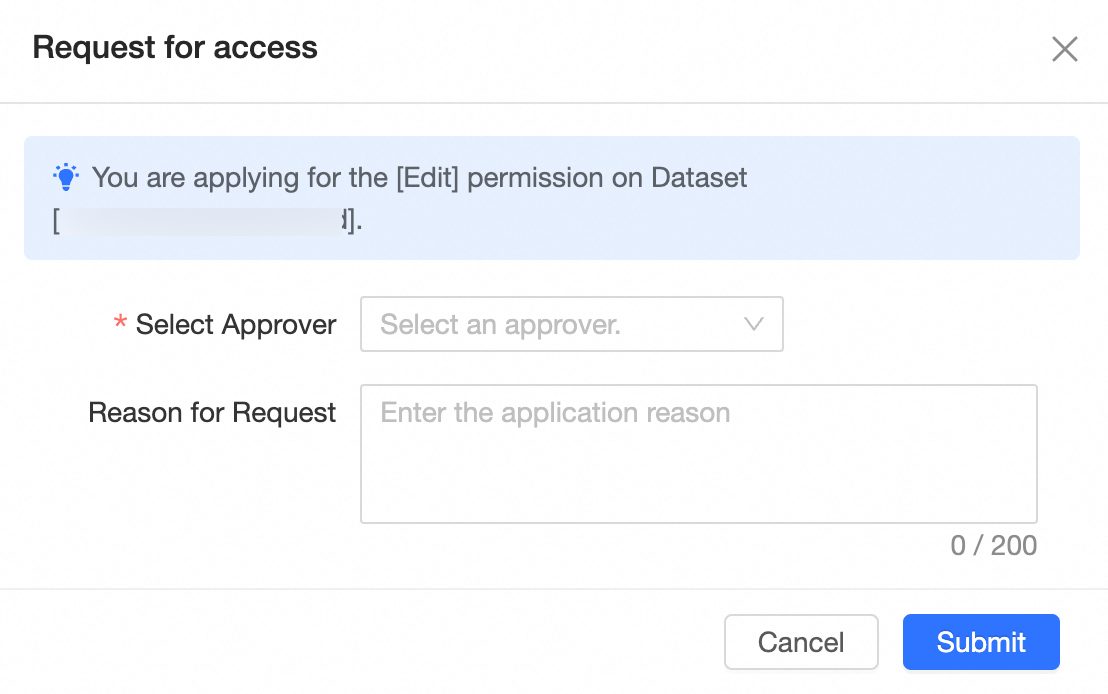
On the Request Permissions page, set the Select Approver and Reason For Request parameters, and then click Submit Request.
Request permissions to use a dataset
If you have Analytics permissions in a workspace, you can view all datasets in that workspace. To use a dataset, you must request permission to use it.
If a workspace member does not have permission to use a dataset, the dataset icon in the list is grayed out, as shown in the following figure.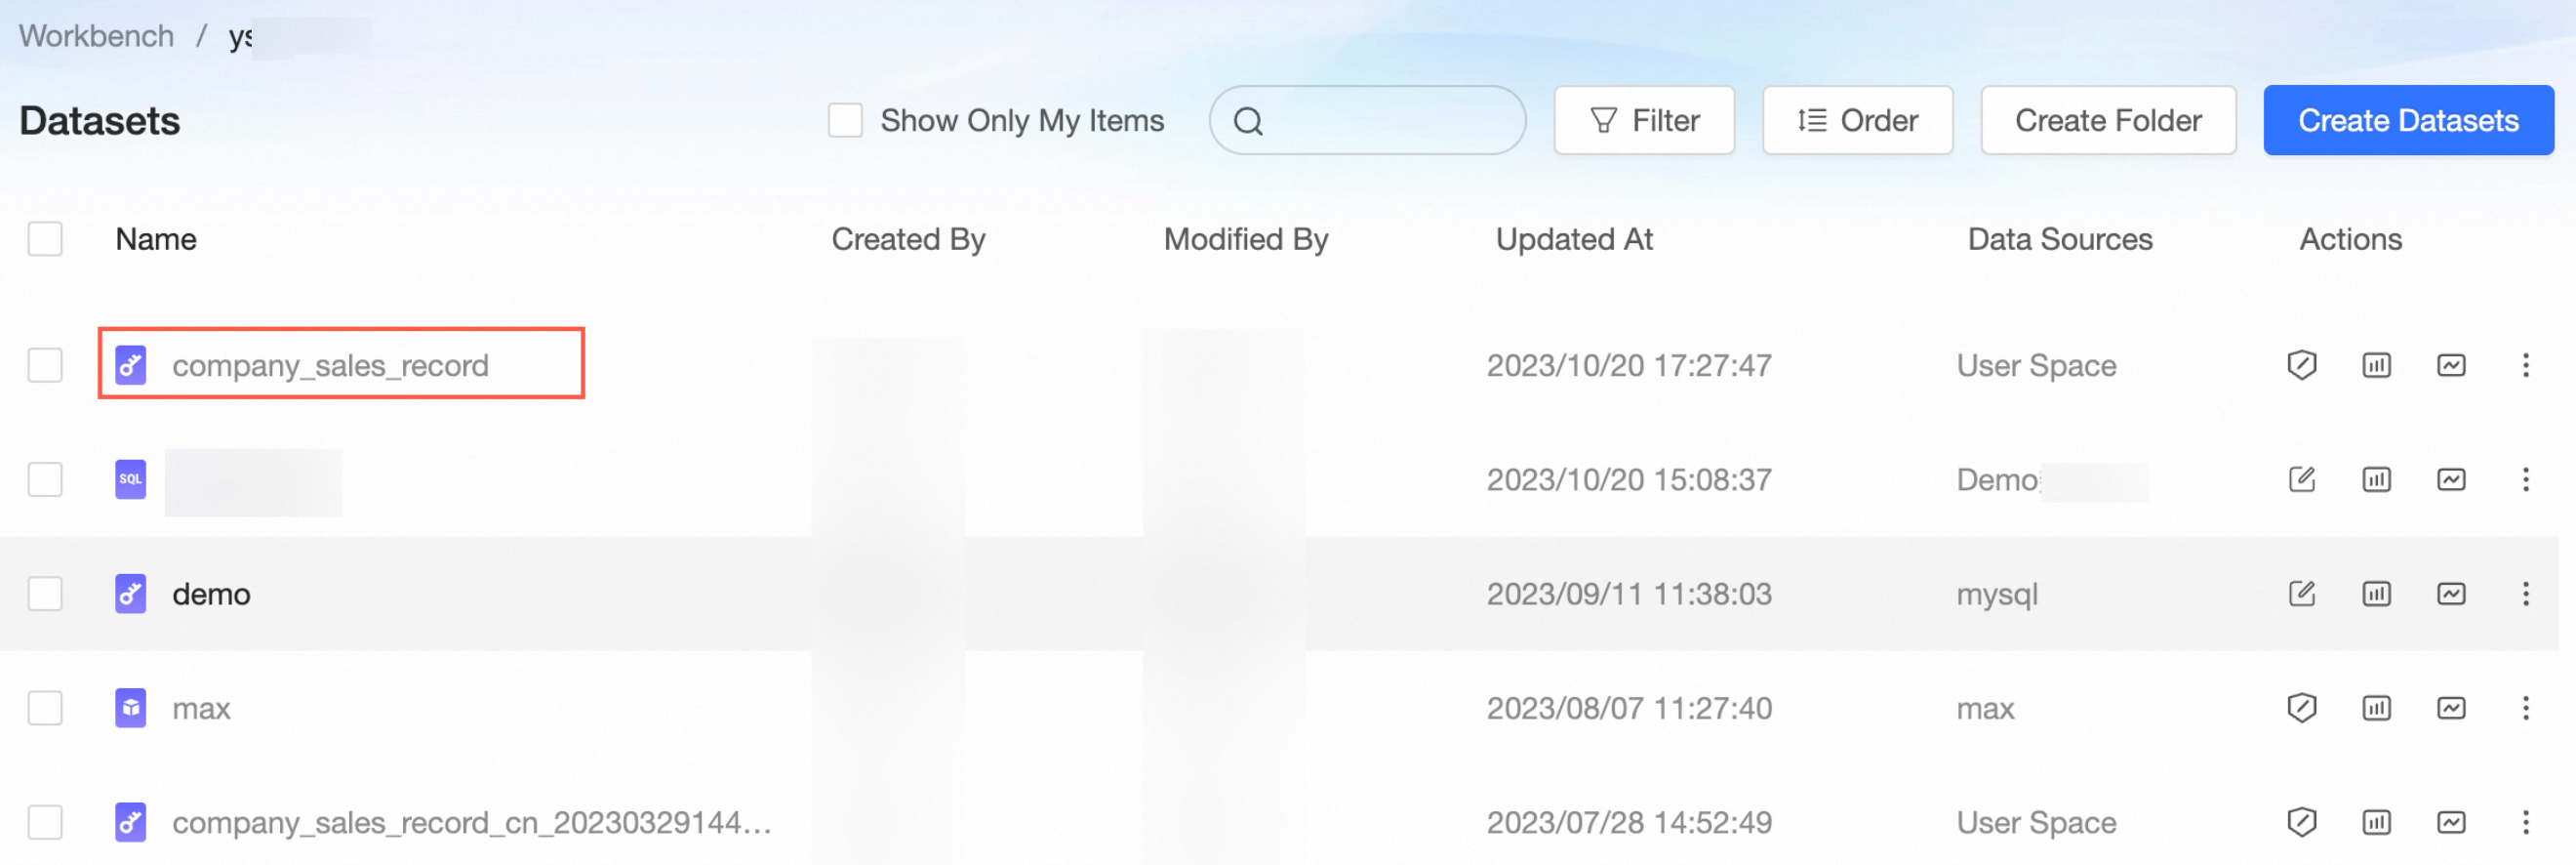
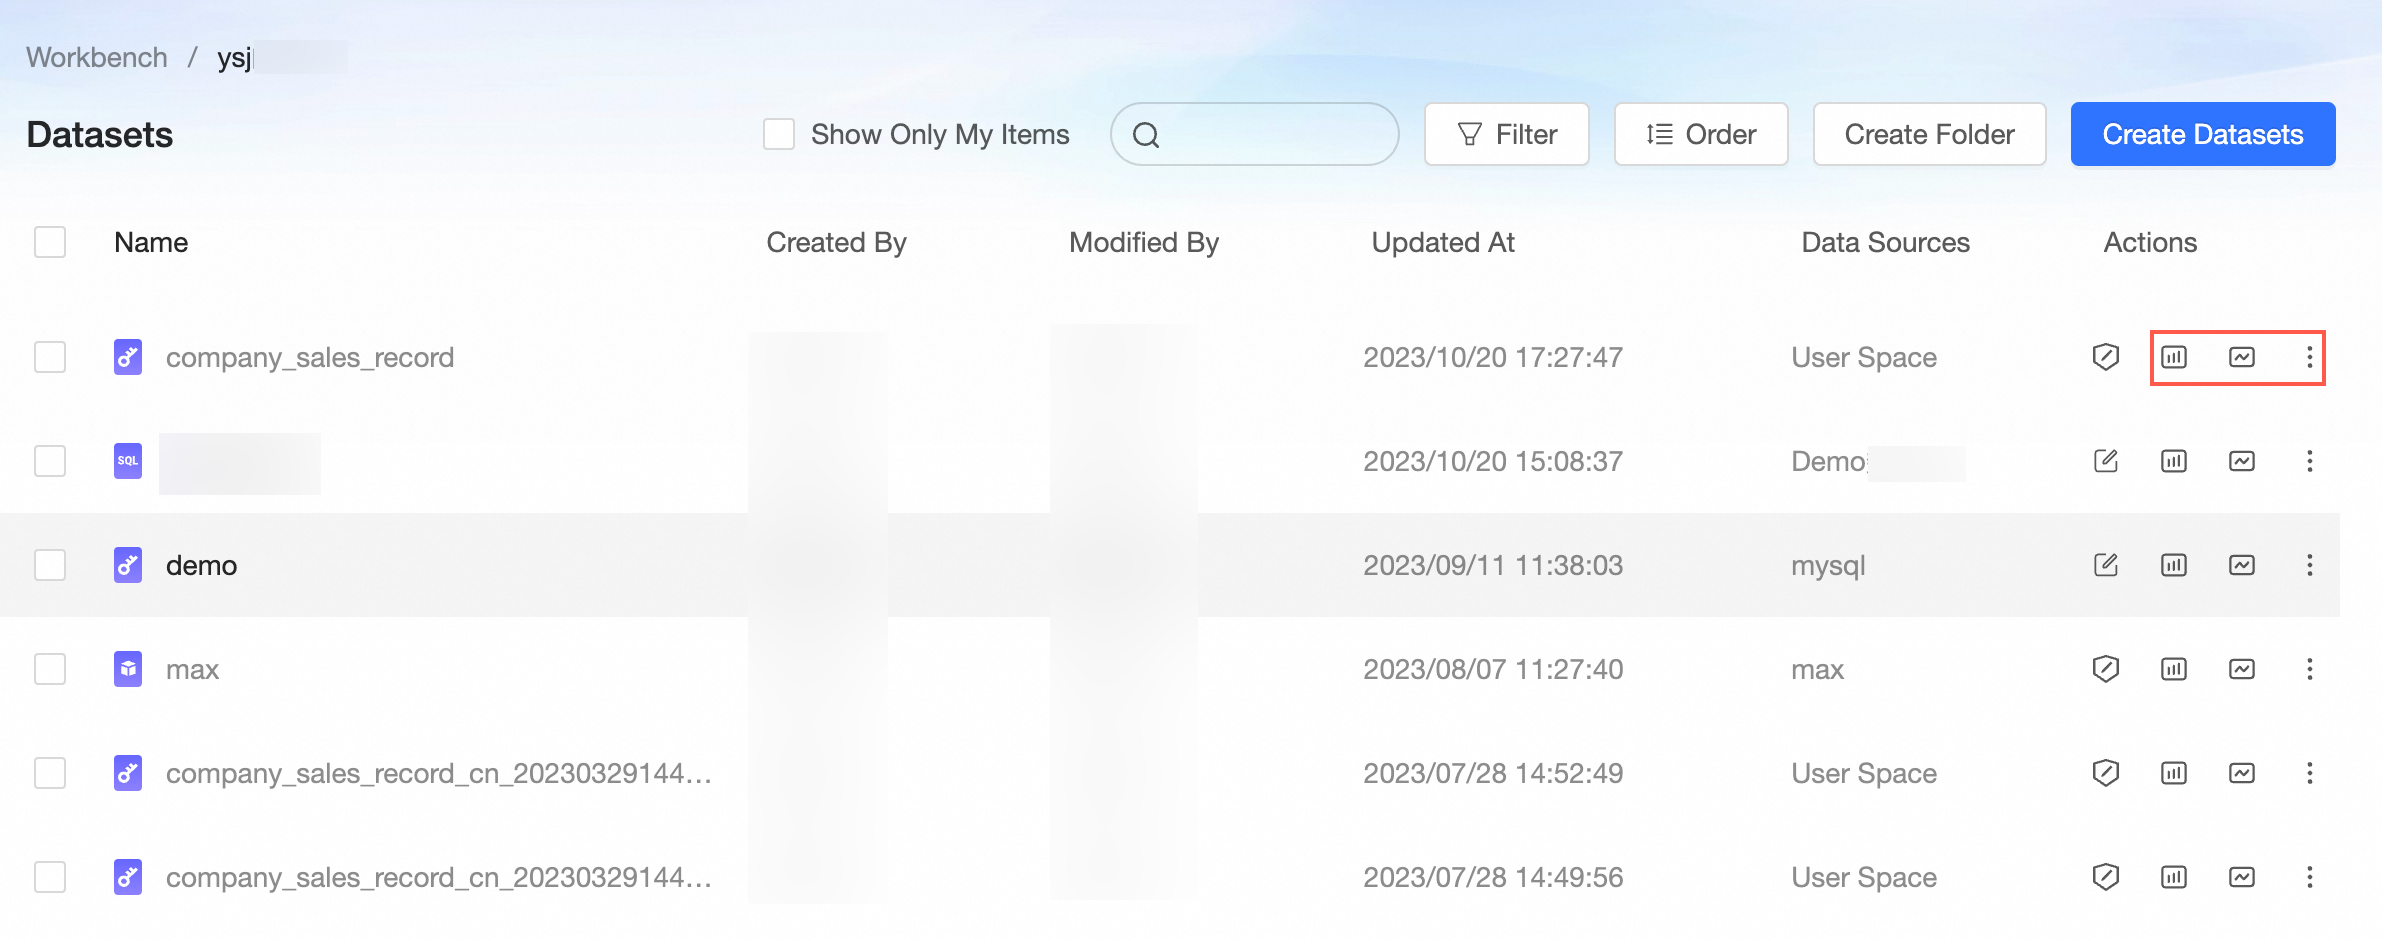
On the Datasets management page, find the target dataset. Then, attempt to use the dataset in a data analytics tool, such as Dashboard, Data Dashboard, Workbook, Ad Hoc Analysis, Downloads, or Data Preparation.
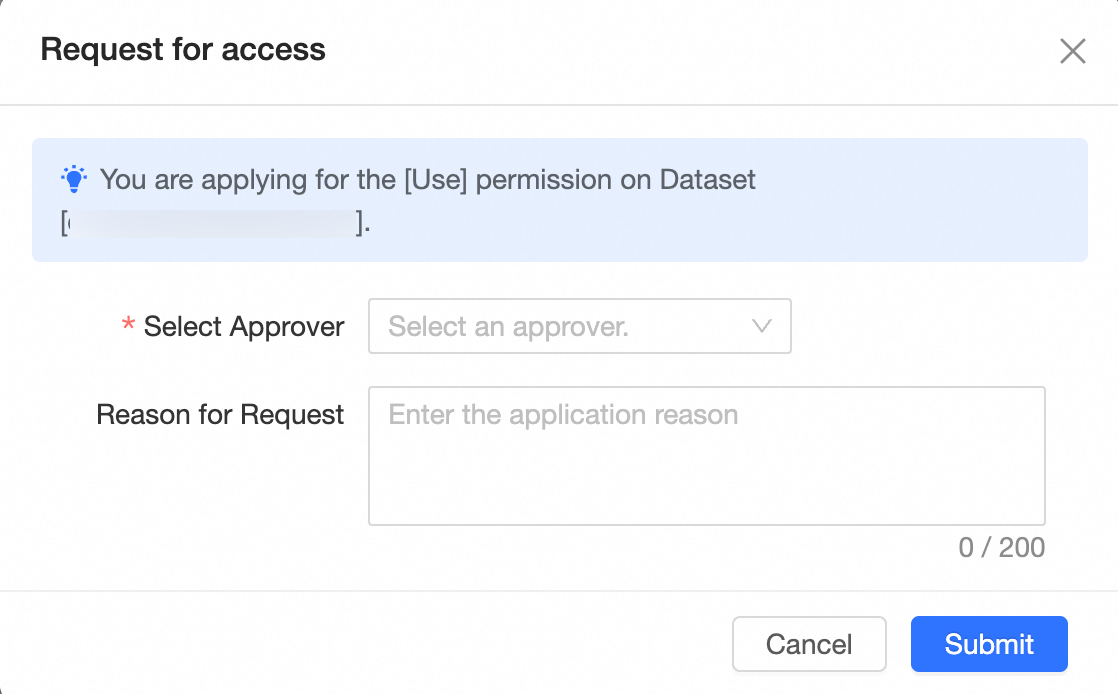
In the Request Permission dialog box, select an Approver, enter a Reason For Request, and then click Submit Request.
NoteAfter your request to use a dataset is approved, you do not need to request permissions again to use the same dataset for other types of data analytics.
Grant permissions to collaborators
Organization administrators, permission administrators, workspace administrators, or resource owners can grant permissions.
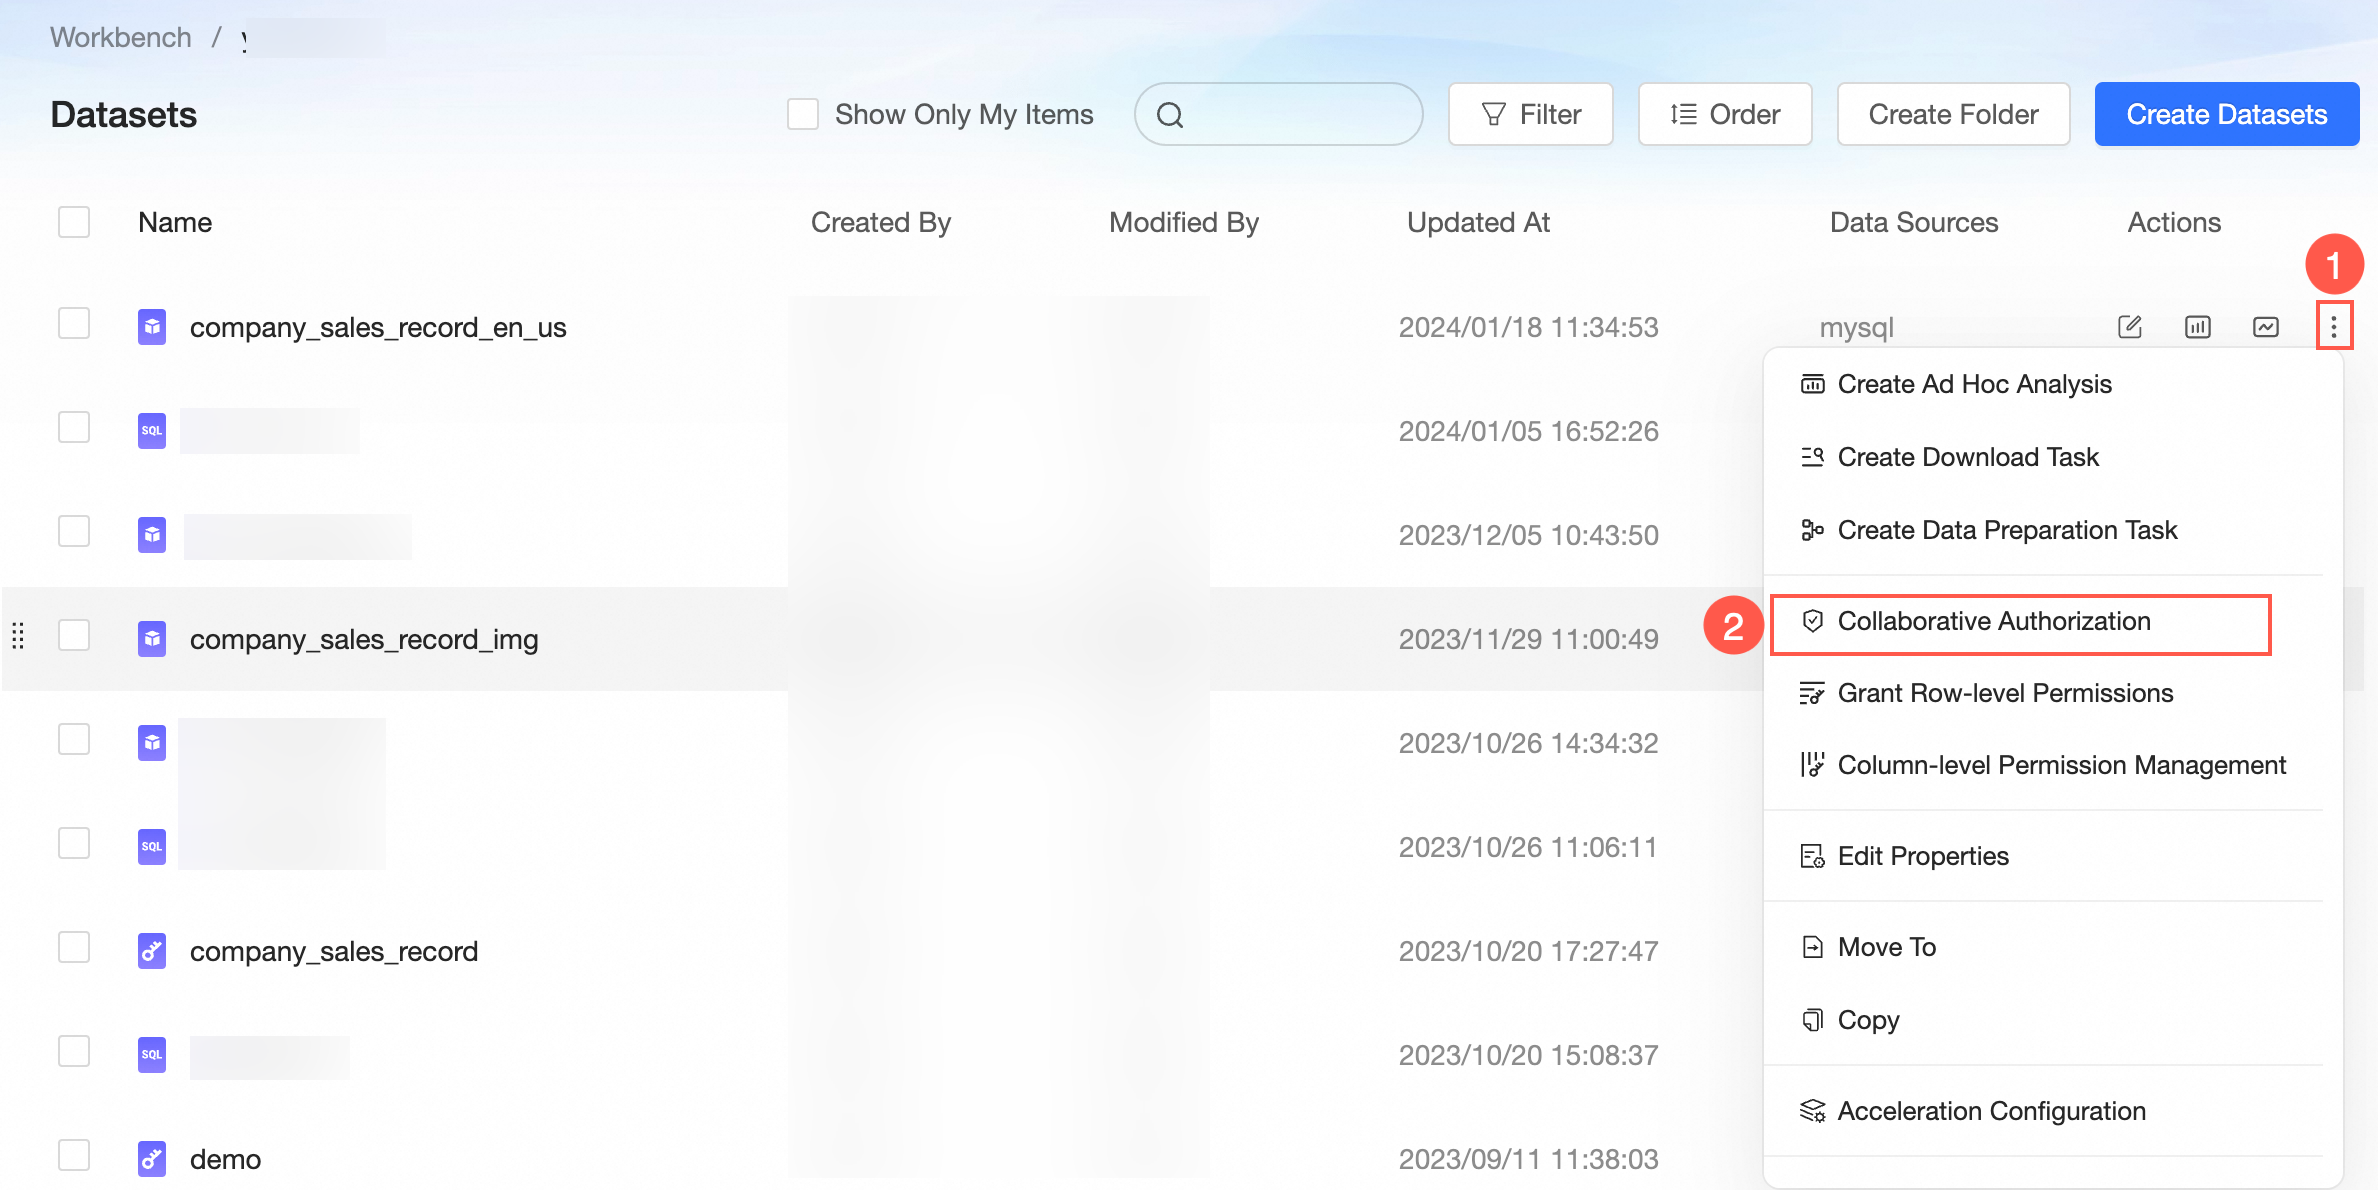
On the Dataset management page, grant permissions to collaborators as shown in the following figure. For more information, see Grant Users the Permissions on Datasets.
Copy a dataset
You can copy a dataset using the Save As operation.
On the Dataset management page, click the target dataset.
On the dataset editing page, click the
icon and select Save As.In the Save Dataset As dialog box, enter a dataset name and location, and then click OK.
 icon and select Save As.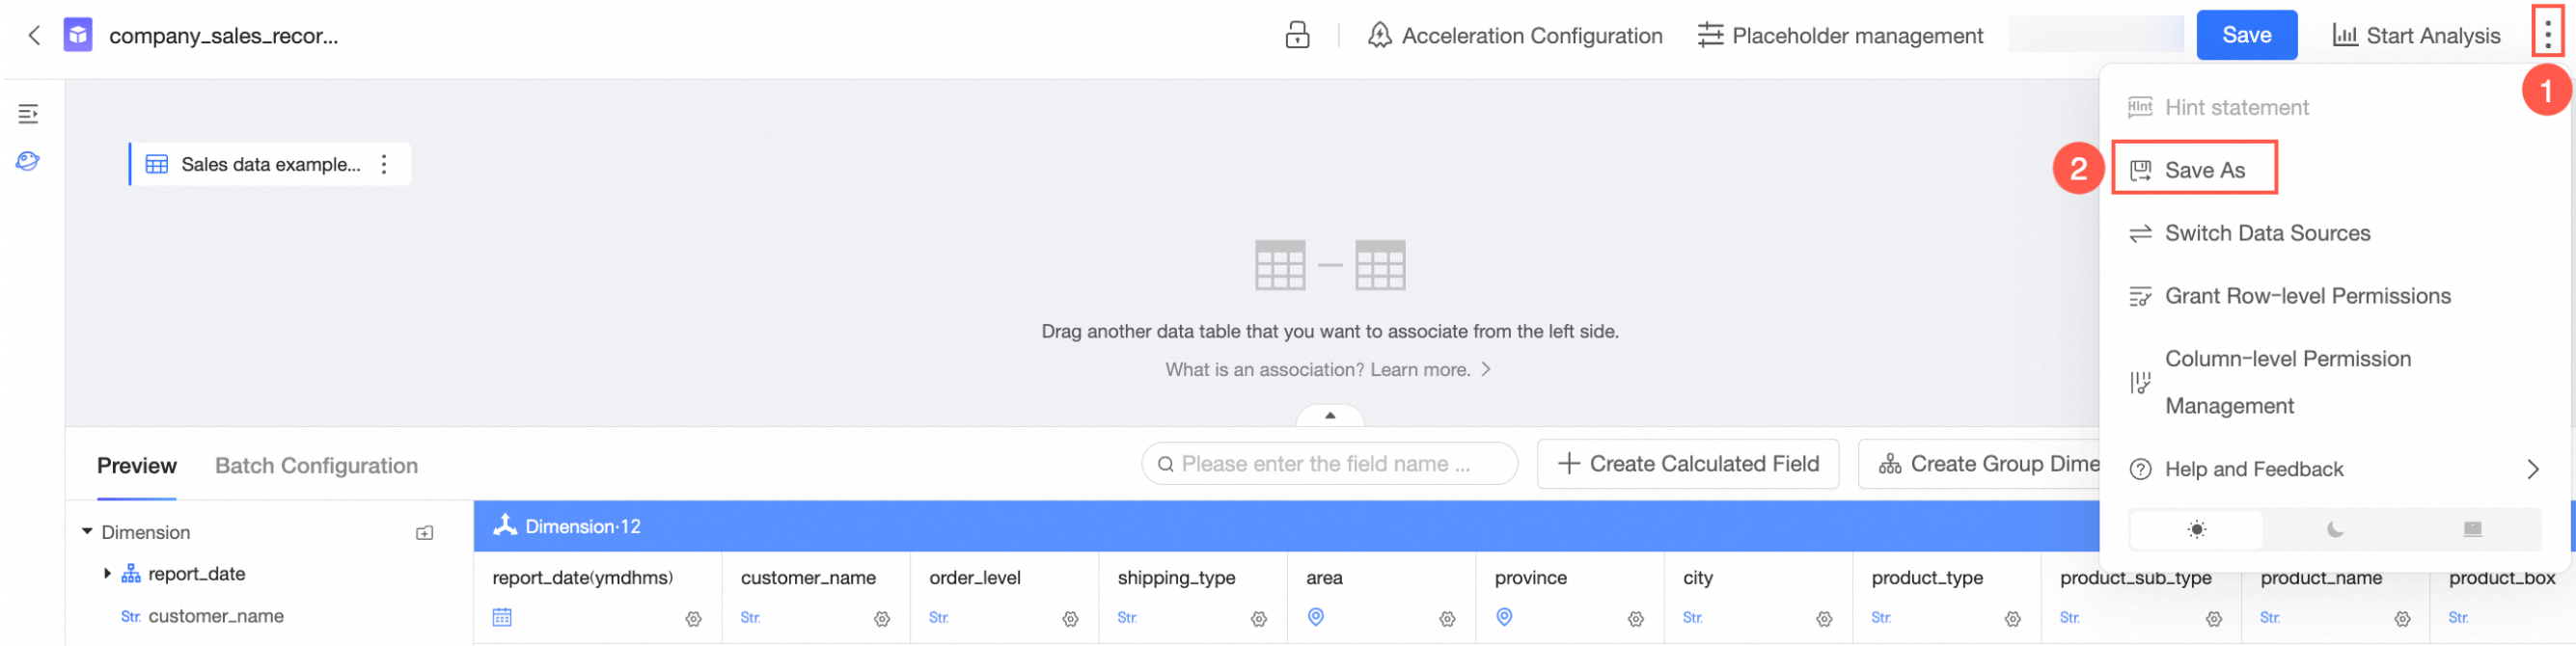
Rename and transfer a dataset
You can rename and transfer a dataset by editing its properties.
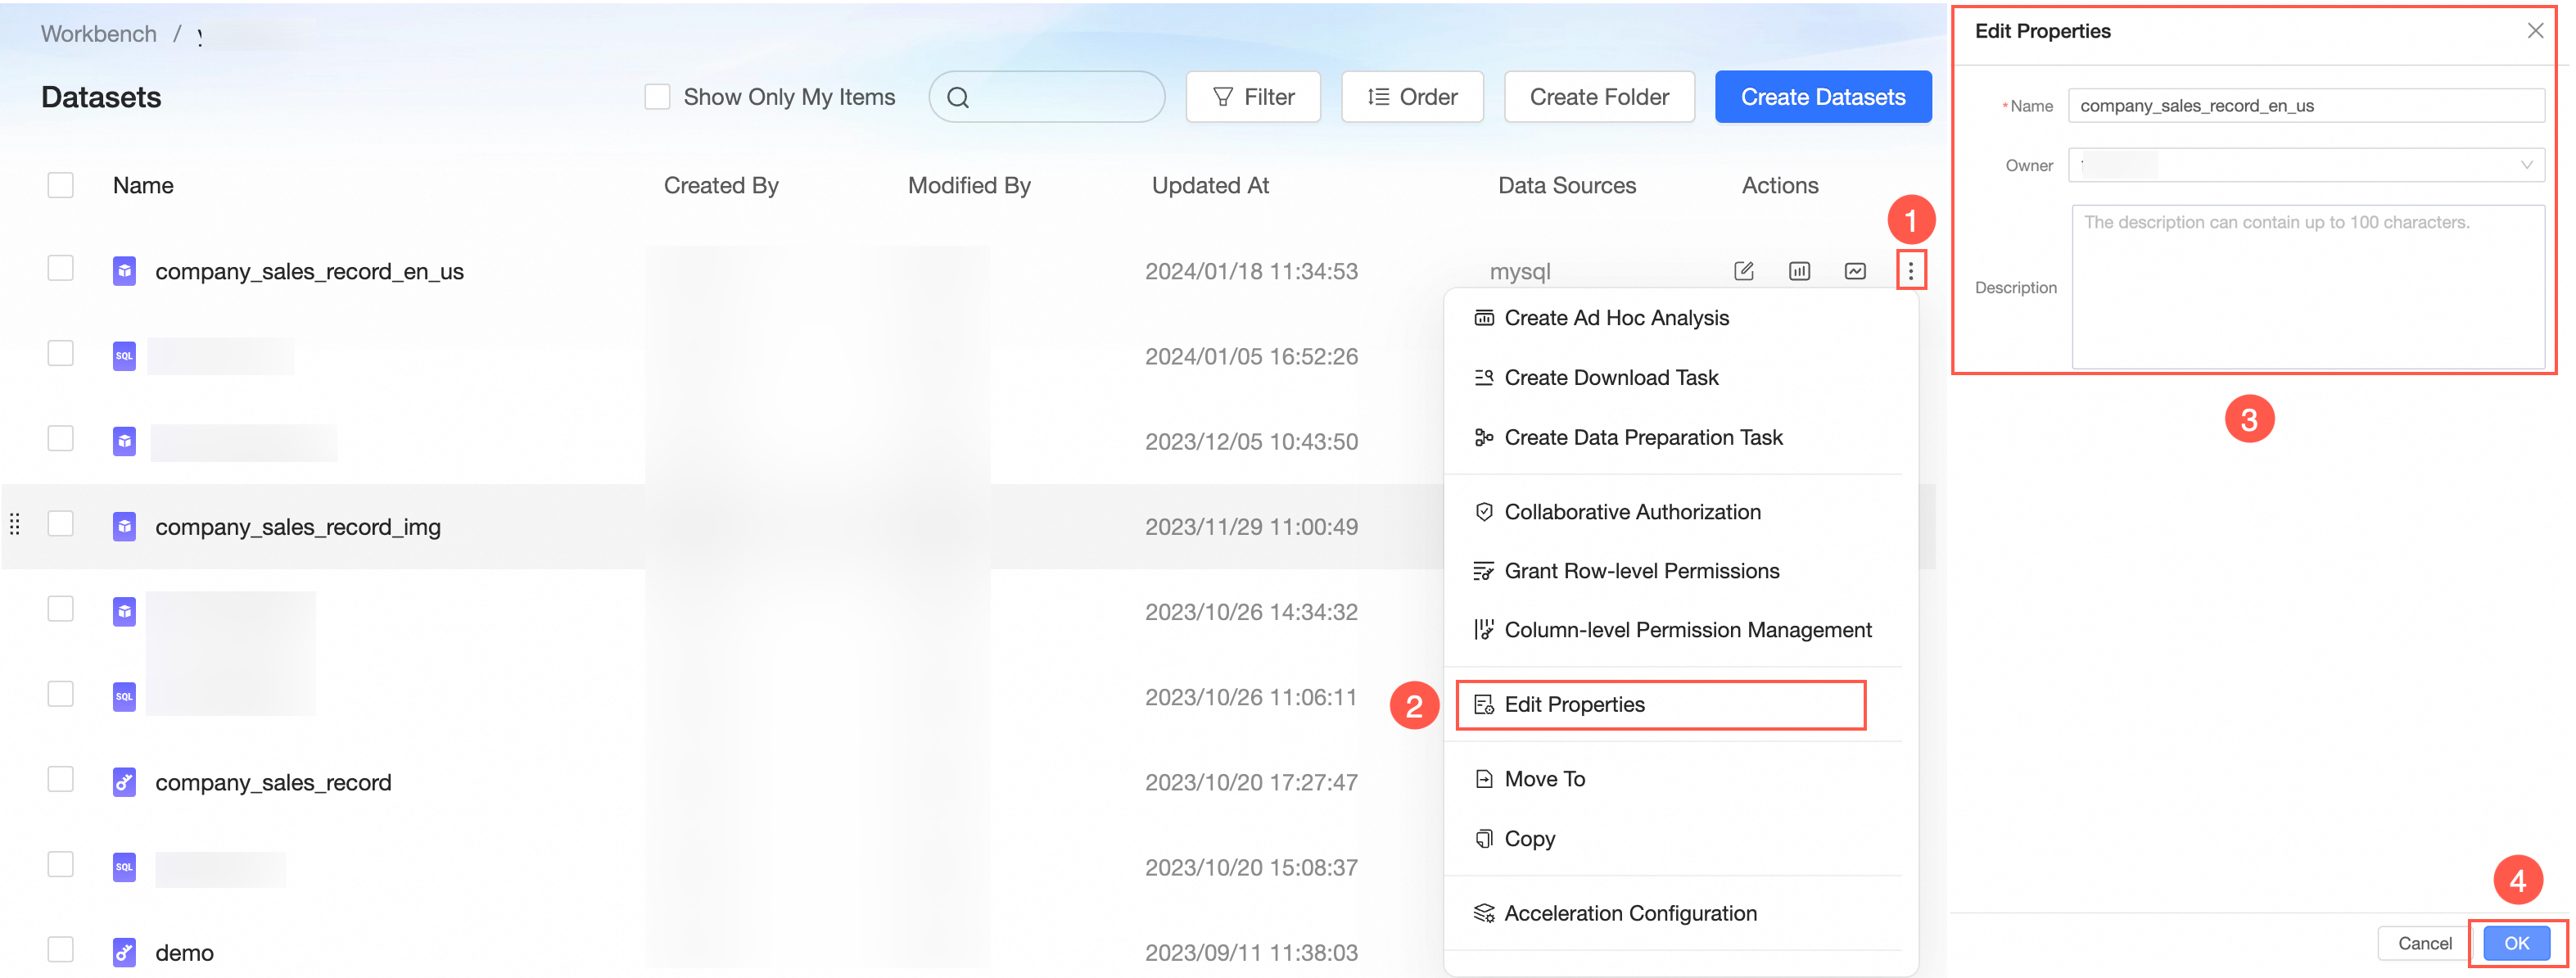
On the Dataset management page, you can transfer or rename the dataset as shown in the figure below.
On the Properties page, you can perform the following operations on the dataset.
Parameter name
Description
Name
Enter a custom name for the dataset to rename it.
NoteDataset names must be unique within the same folder. Datasets in different folders can have the same name.
Owner
Click the drop-down icon and select an owner to transfer the dataset.
Description
Add a description for the dataset.
Enable Full Table Scan
If you enable this feature, the system can perform a full table scan.
NoteOnly datasets created from a MaxCompute data source support the full table scan feature.
Click OK.
Delete a dataset
On the Datasets management page, you can delete a dataset as shown in the following figure.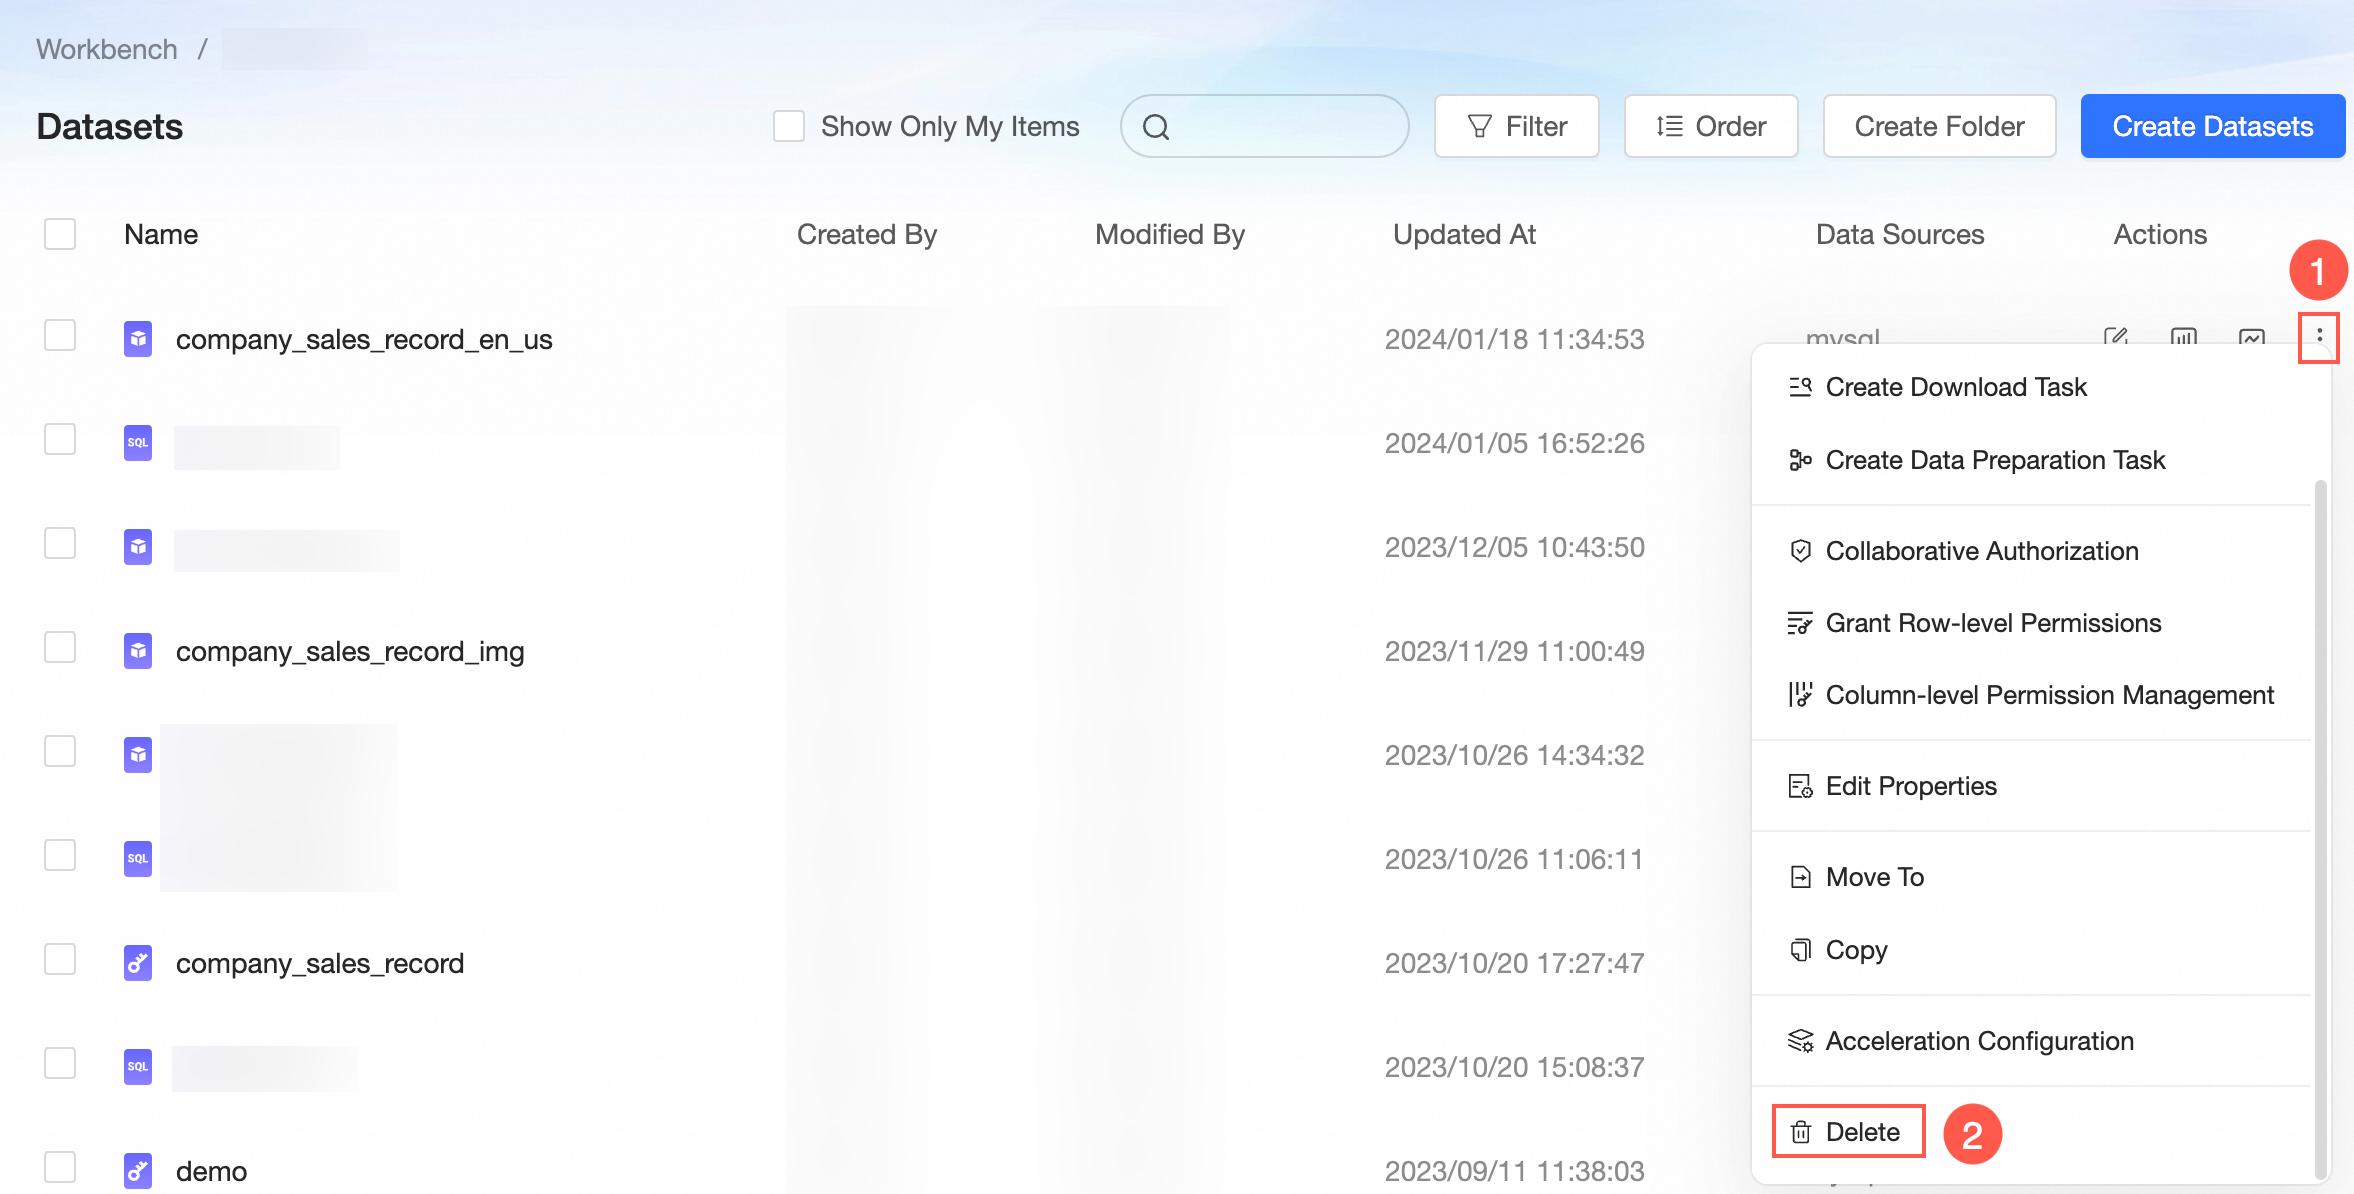
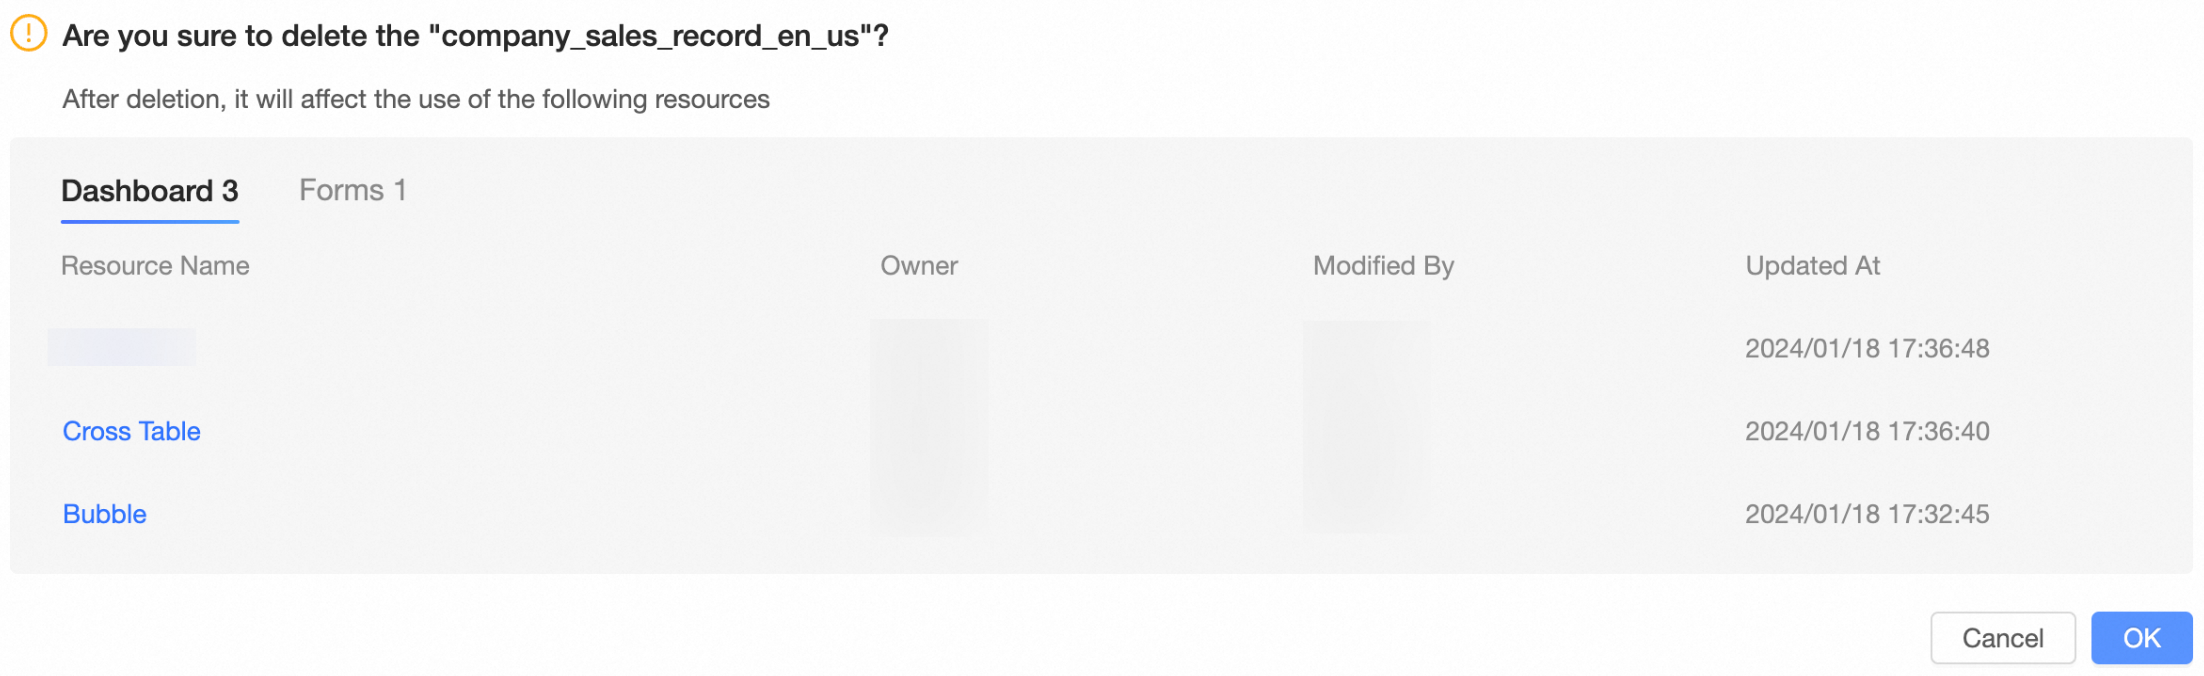
If the dataset is used by other resources, such as a Dashboard, Download, Workbook, Data Dashboard, Ad Hoc Analysis, Data Entry, or Exploratory Analysis, a message appears when you try to delete it. This message lists the affected published resources and includes their name, owner, modifier, and modification time. You can also click a resource name to view its details.
Manage datasets in batches
You can transfer ownership, move resources, purge the cache, and delete datasets in batches.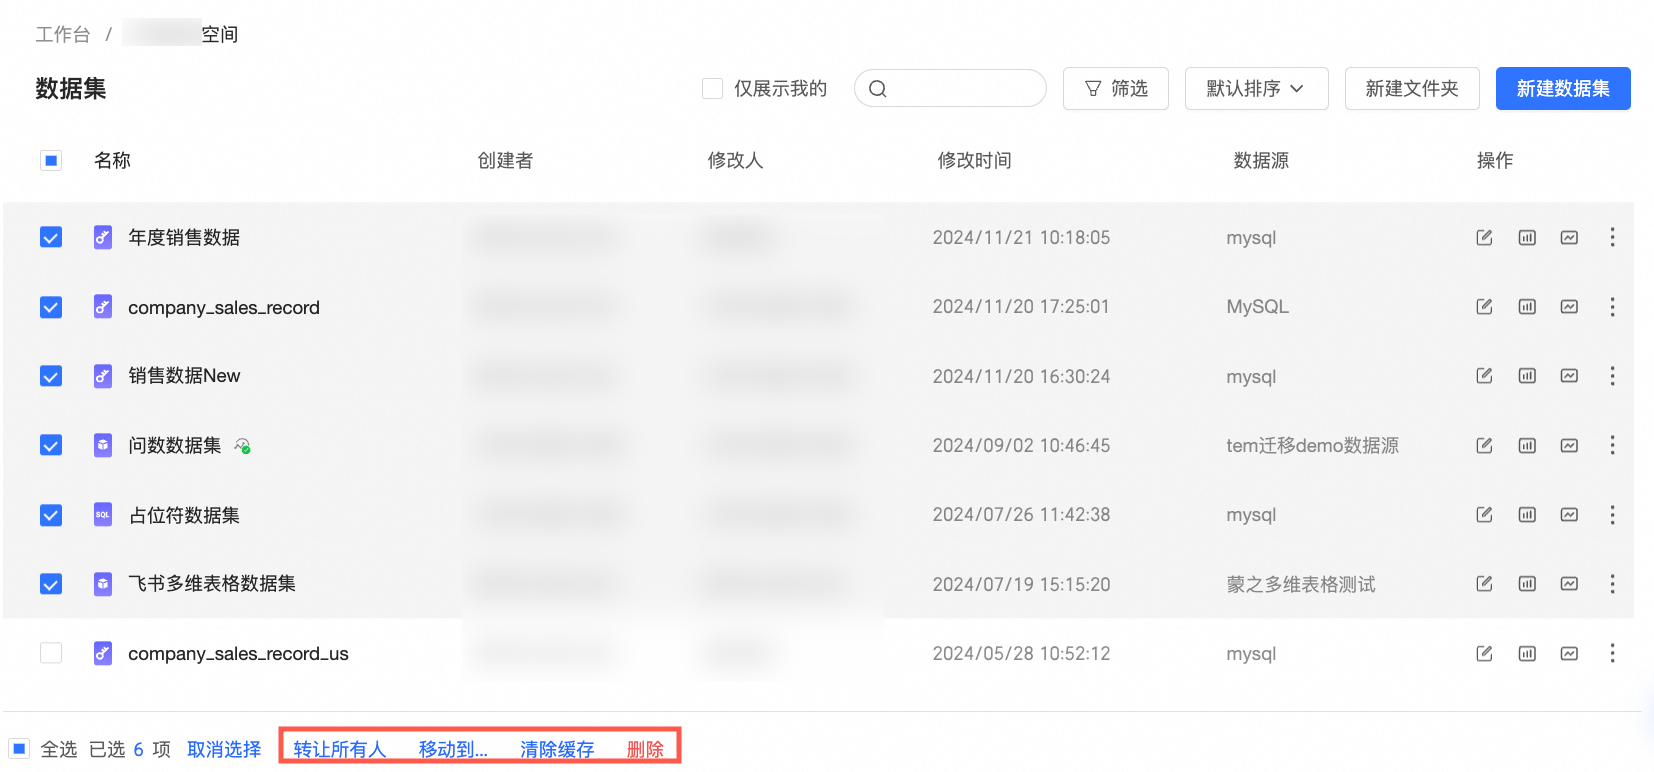
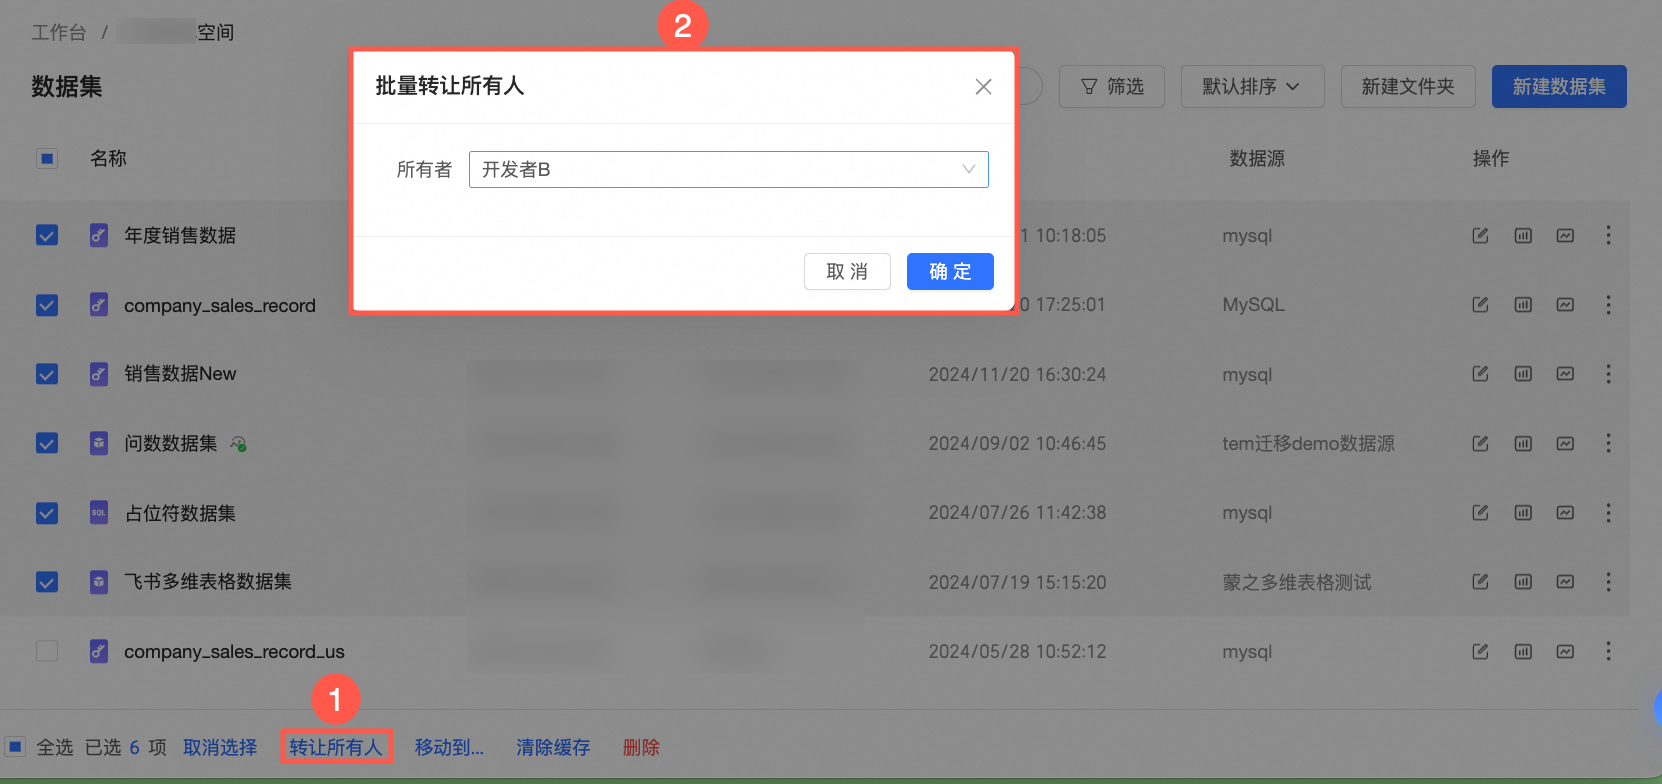
The following figure shows how you can transfer owners in a batch.
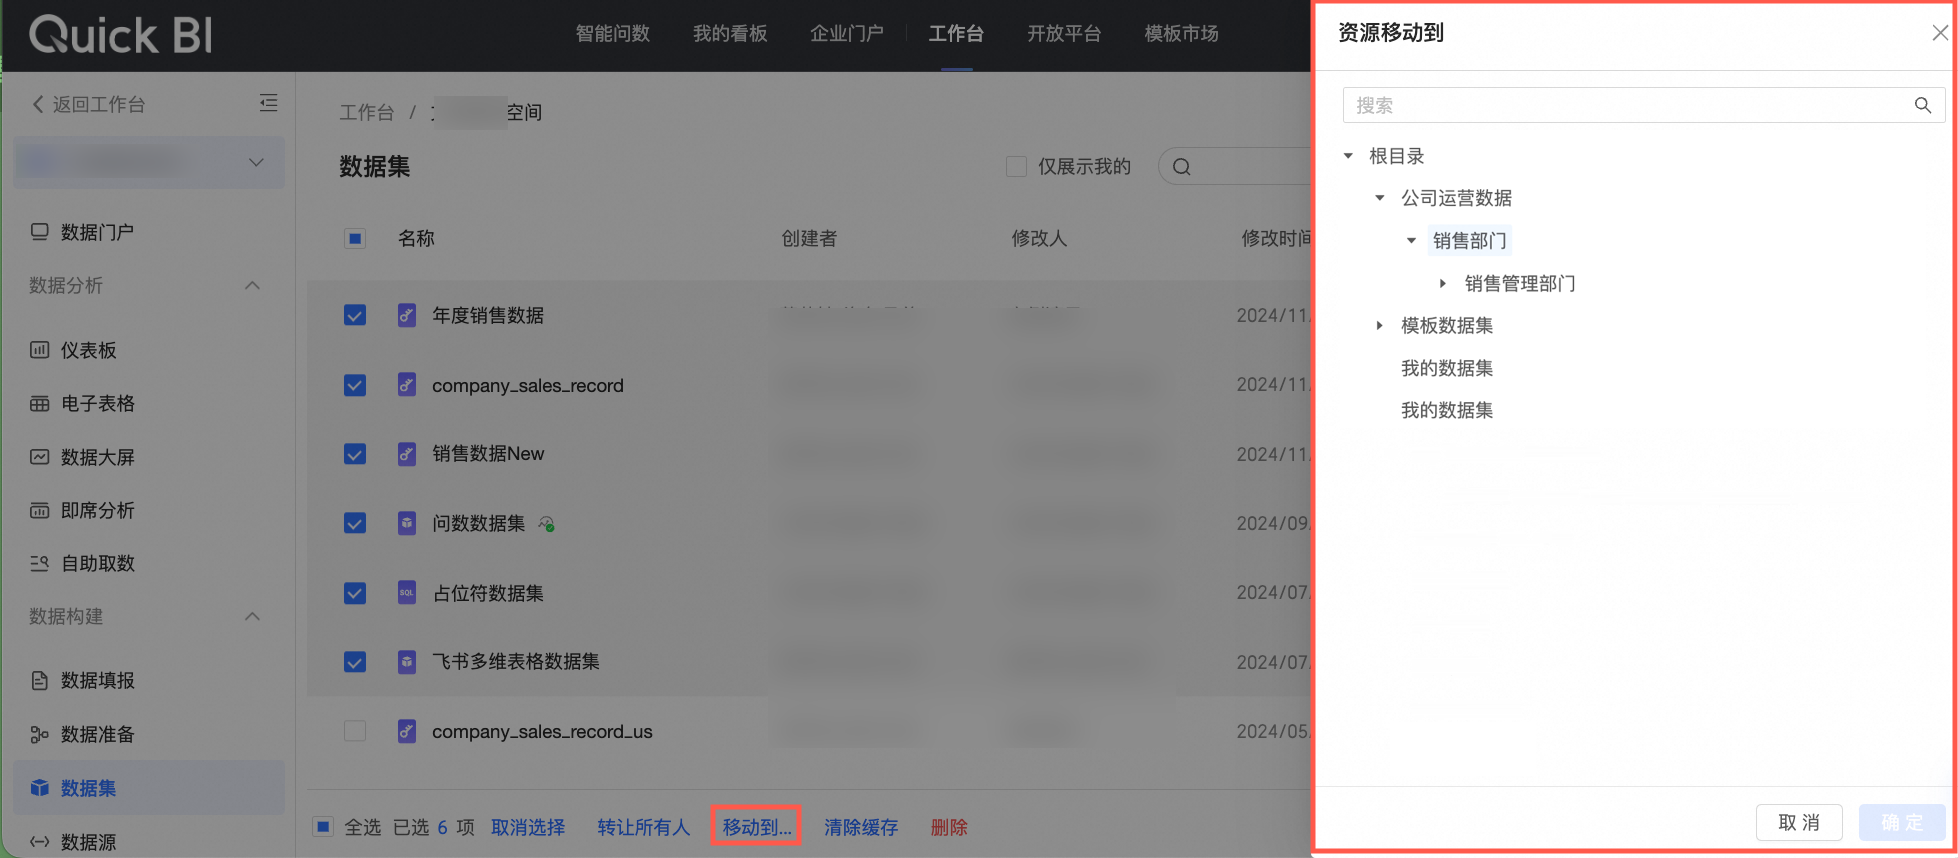
The following figure shows how you can batch shift resources.
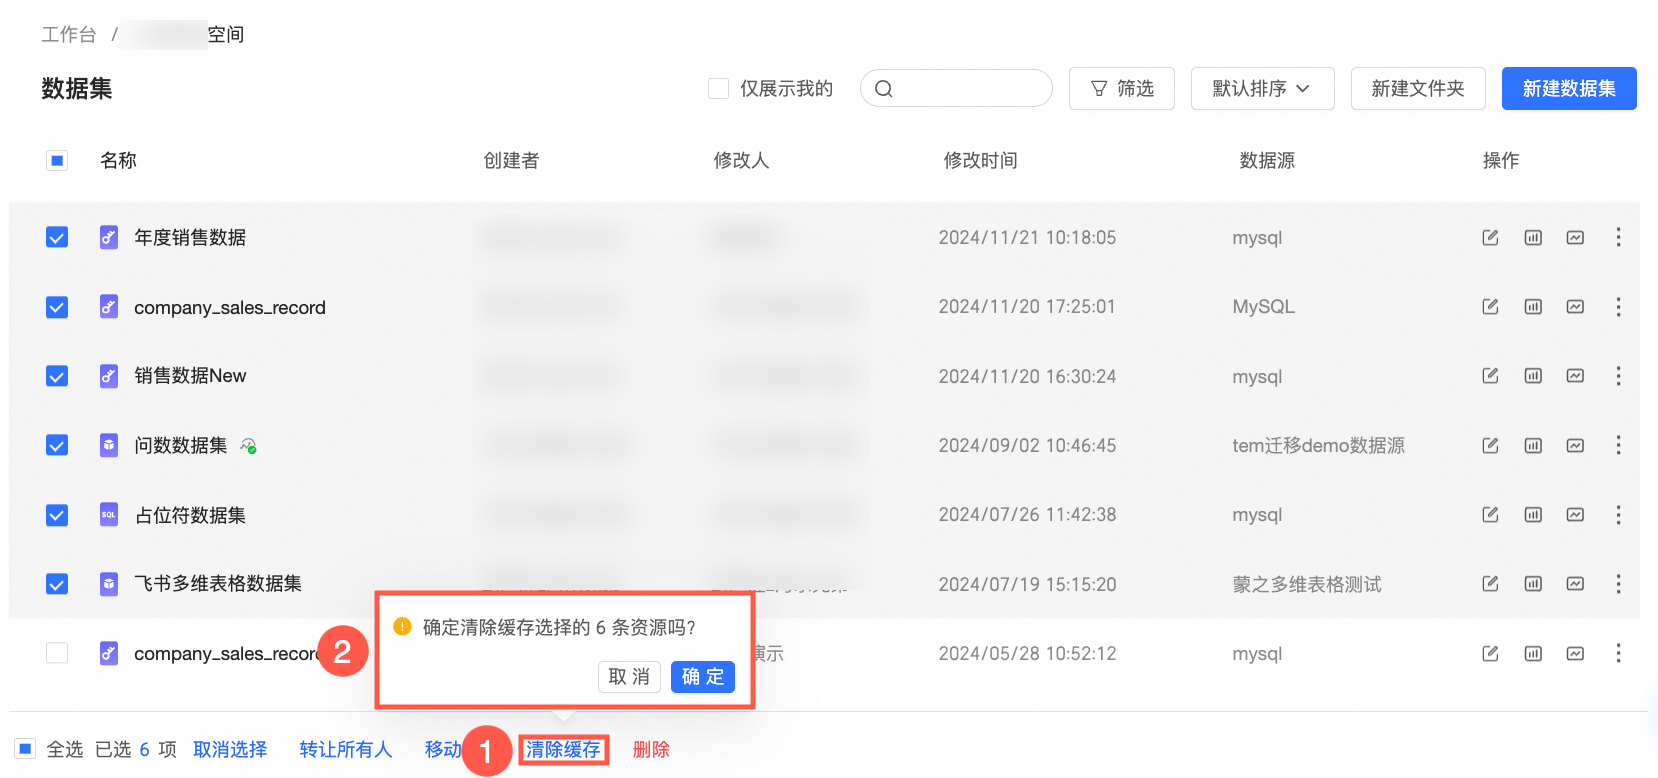
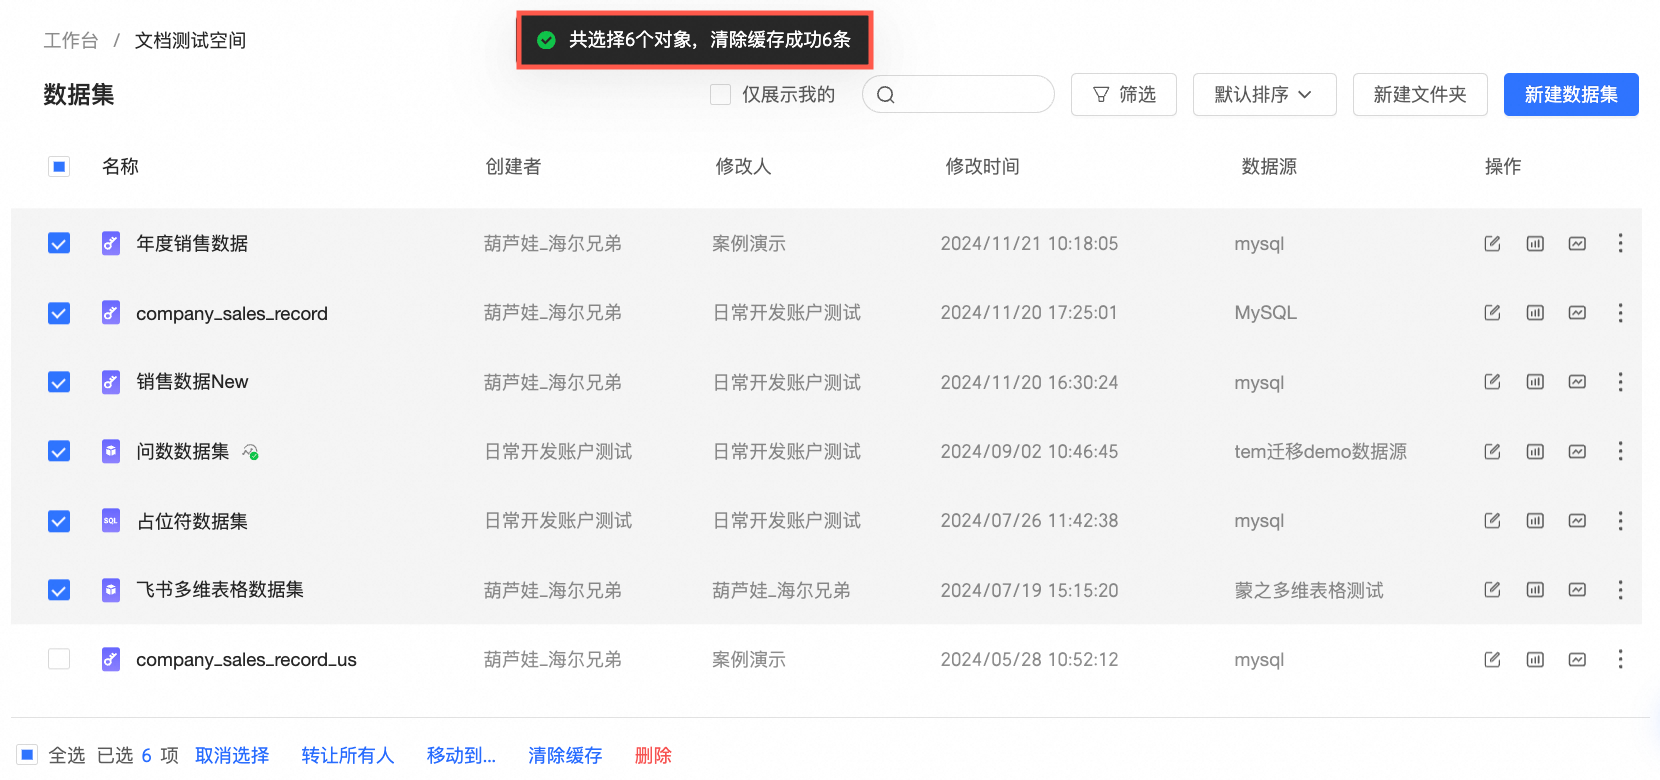
The following figure shows how to batch purge the cache.
After you click OK, a "Cache purged successfully" message appears if the operation is successful.
You can batch delete datasets as shown in the following figure.
If a selected dataset is used by other resources, such as a Dashboard, Download, Workbook, Data Dashboard, Ad Hoc Analysis, or Data Entry, the confirmation dialog box displays the affected published resources. In the Delete Resources list, you can switch between different datasets to view the affected resources and their details, such as name, owner, modifier, and modification time. You can also click a resource name to go to its editing page for more information.


Modify a dataset
Modifying a dataset involves adjusting its configuration, changing the table schema, and updating the data. After you modify a dataset, you must save the changes.
Only users with the Developer user type and a workspace role that includes permissions to create or edit datasets and use data sources can modify datasets.
Edit the dataset
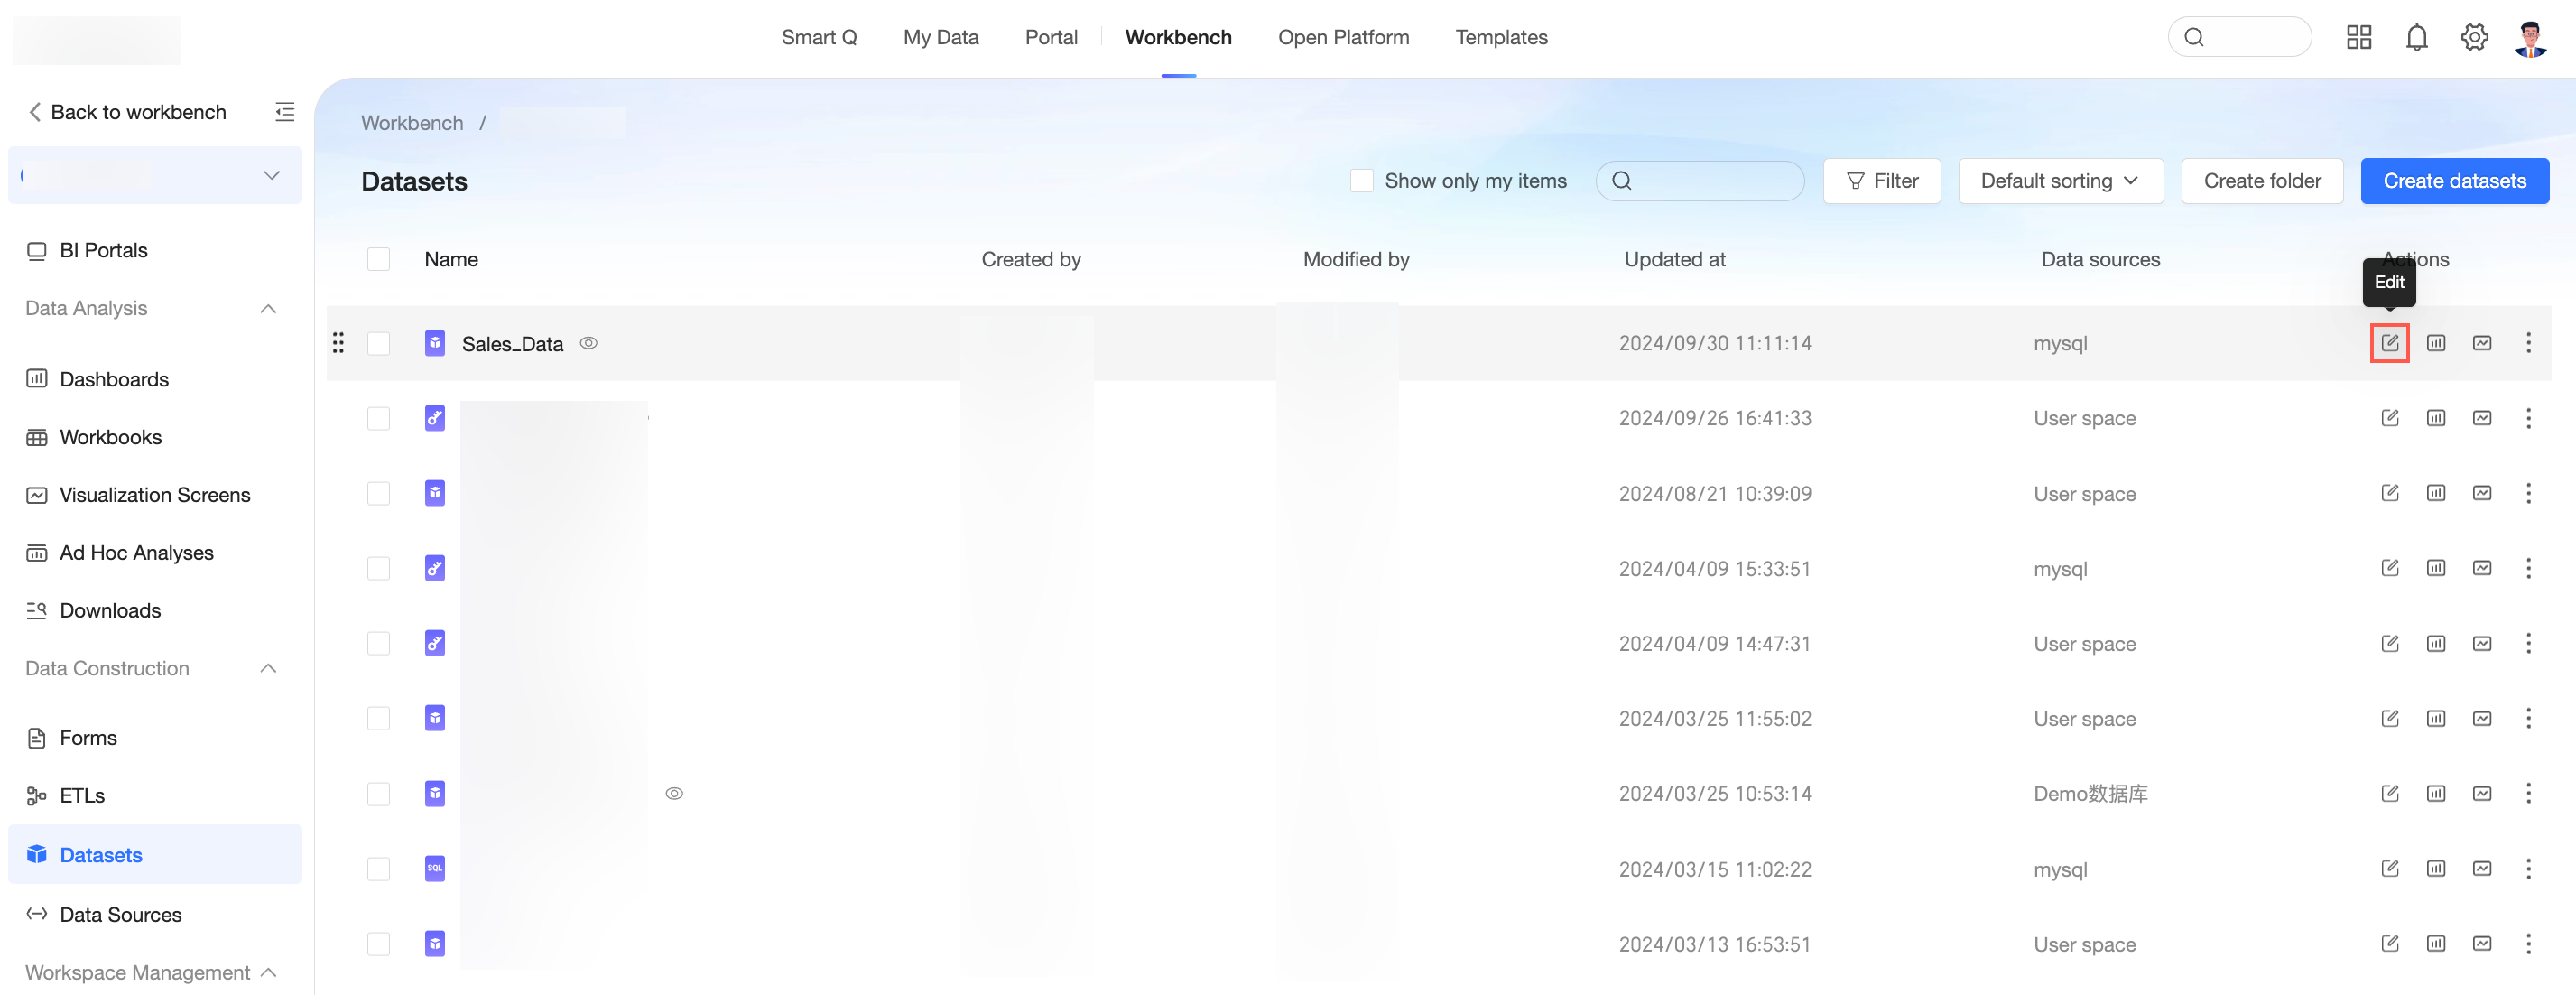
On the Dataset management page, find the dataset that you want to modify. Click the dataset name or the Edit button to go to the dataset editing page.
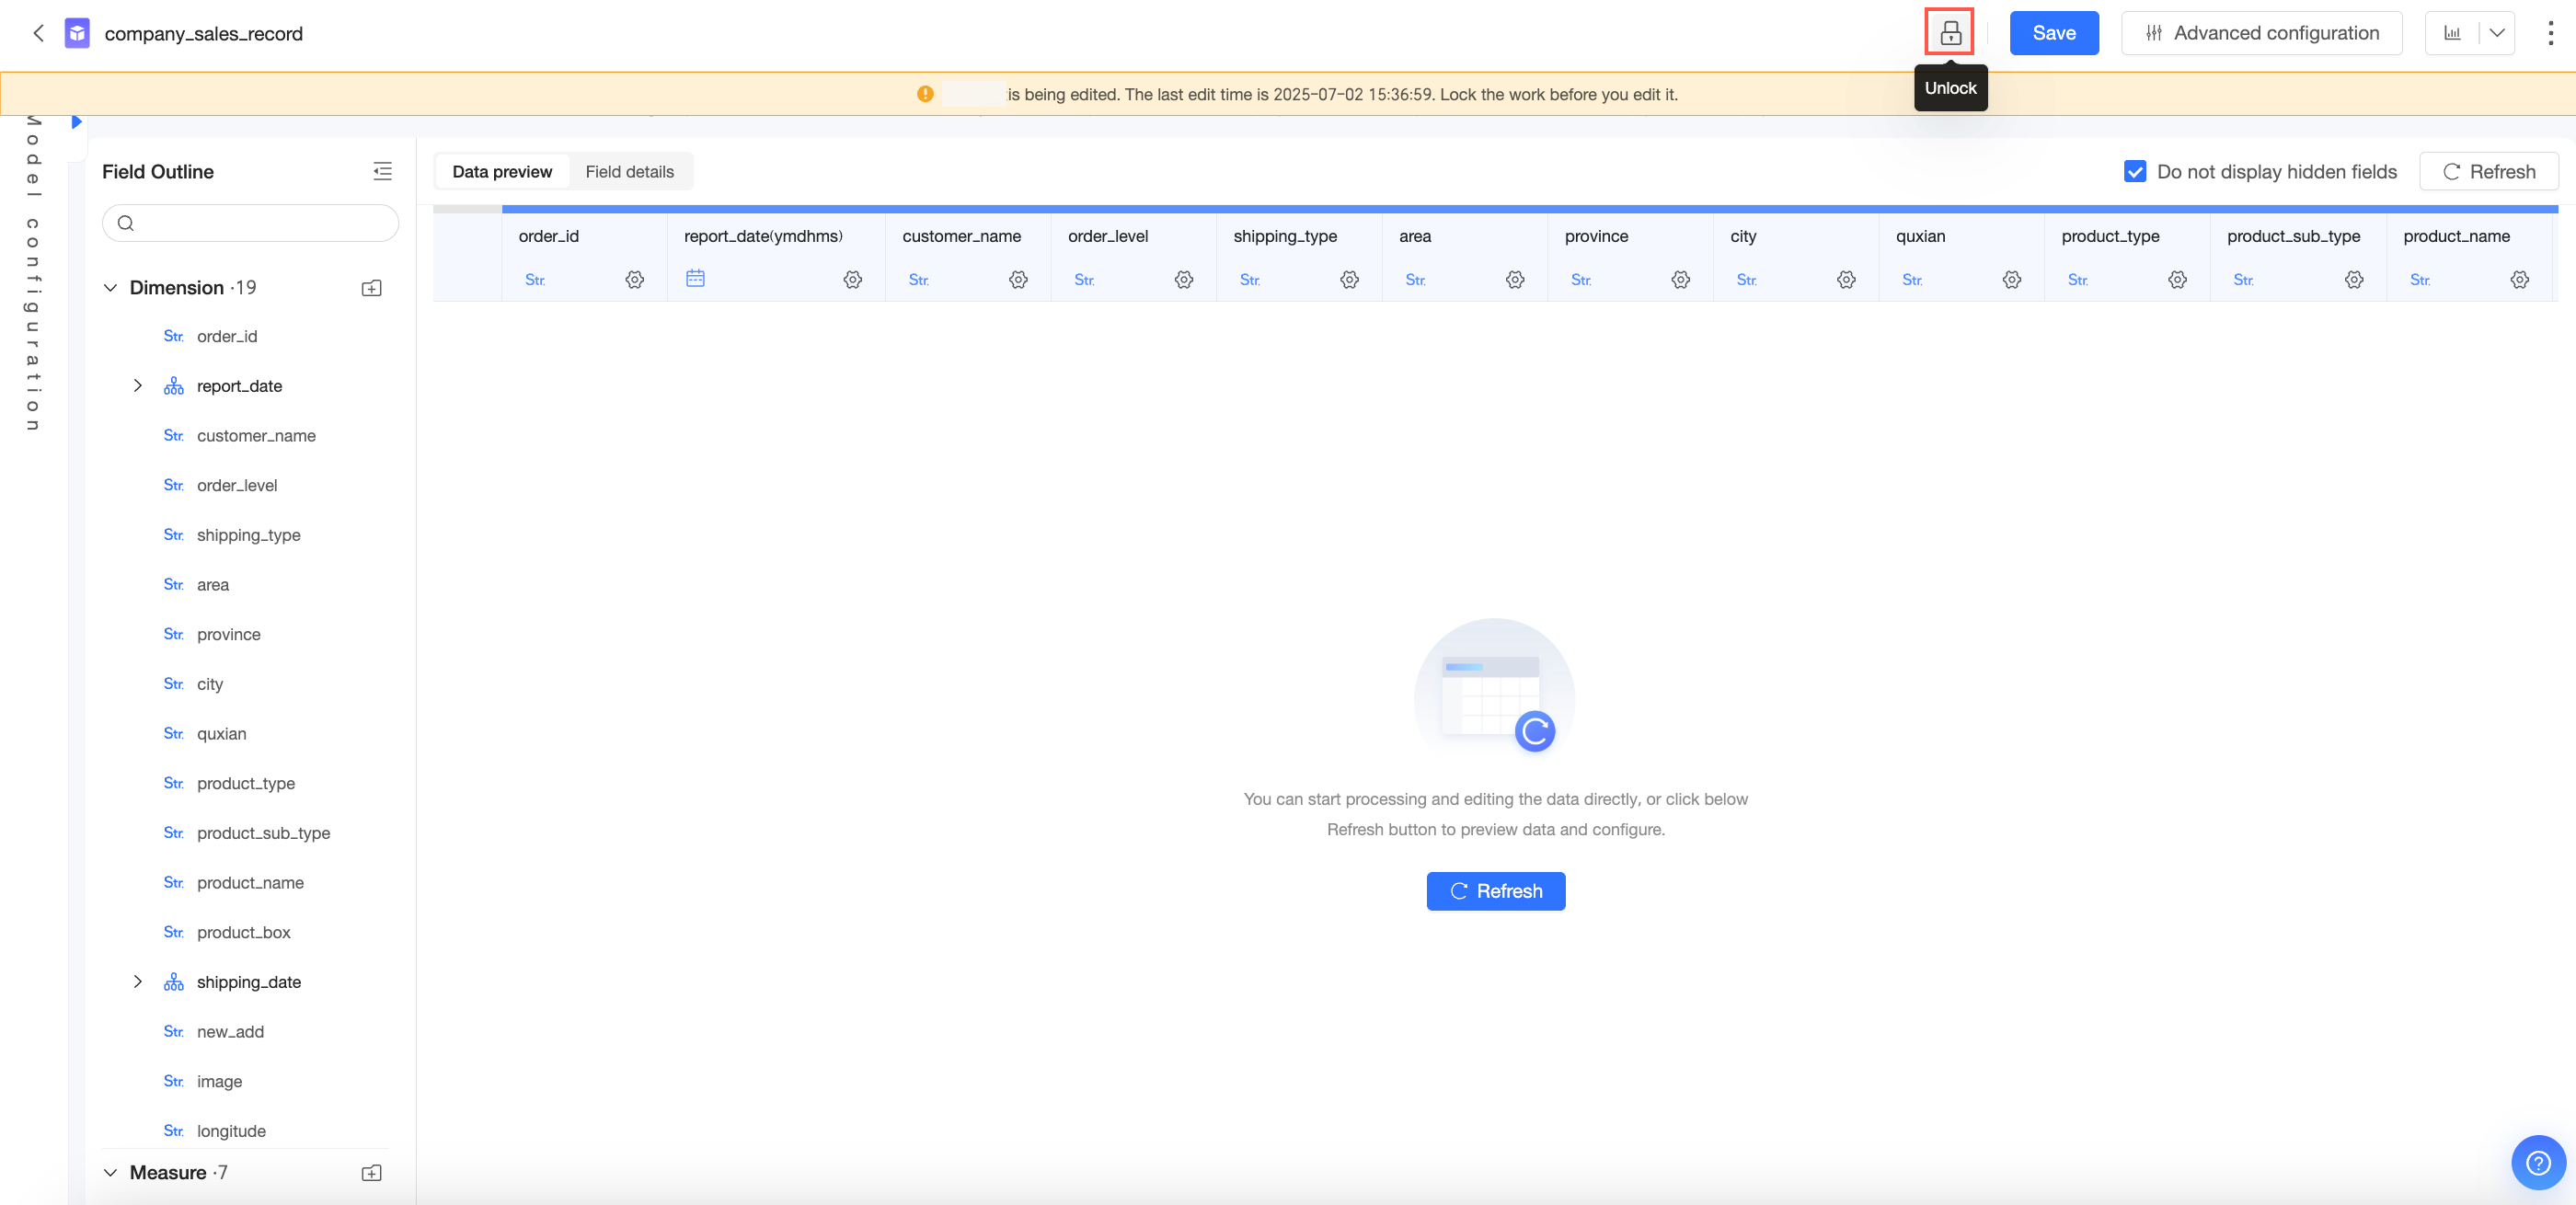
Unlock the dataset
A dataset cannot be edited by multiple users at the same time. If a dataset is being edited by another user, you must click the Unlock button to acquire the lock before you can edit the dataset.
NoteTo edit a locked dataset, you must click the Unlock button to acquire the lock. This action automatically revokes the editing access of the previous user.
You cannot save changes to a locked dataset. You must click the Unlock button to acquire the lock before you can save your modifications.
Modify dataset fields
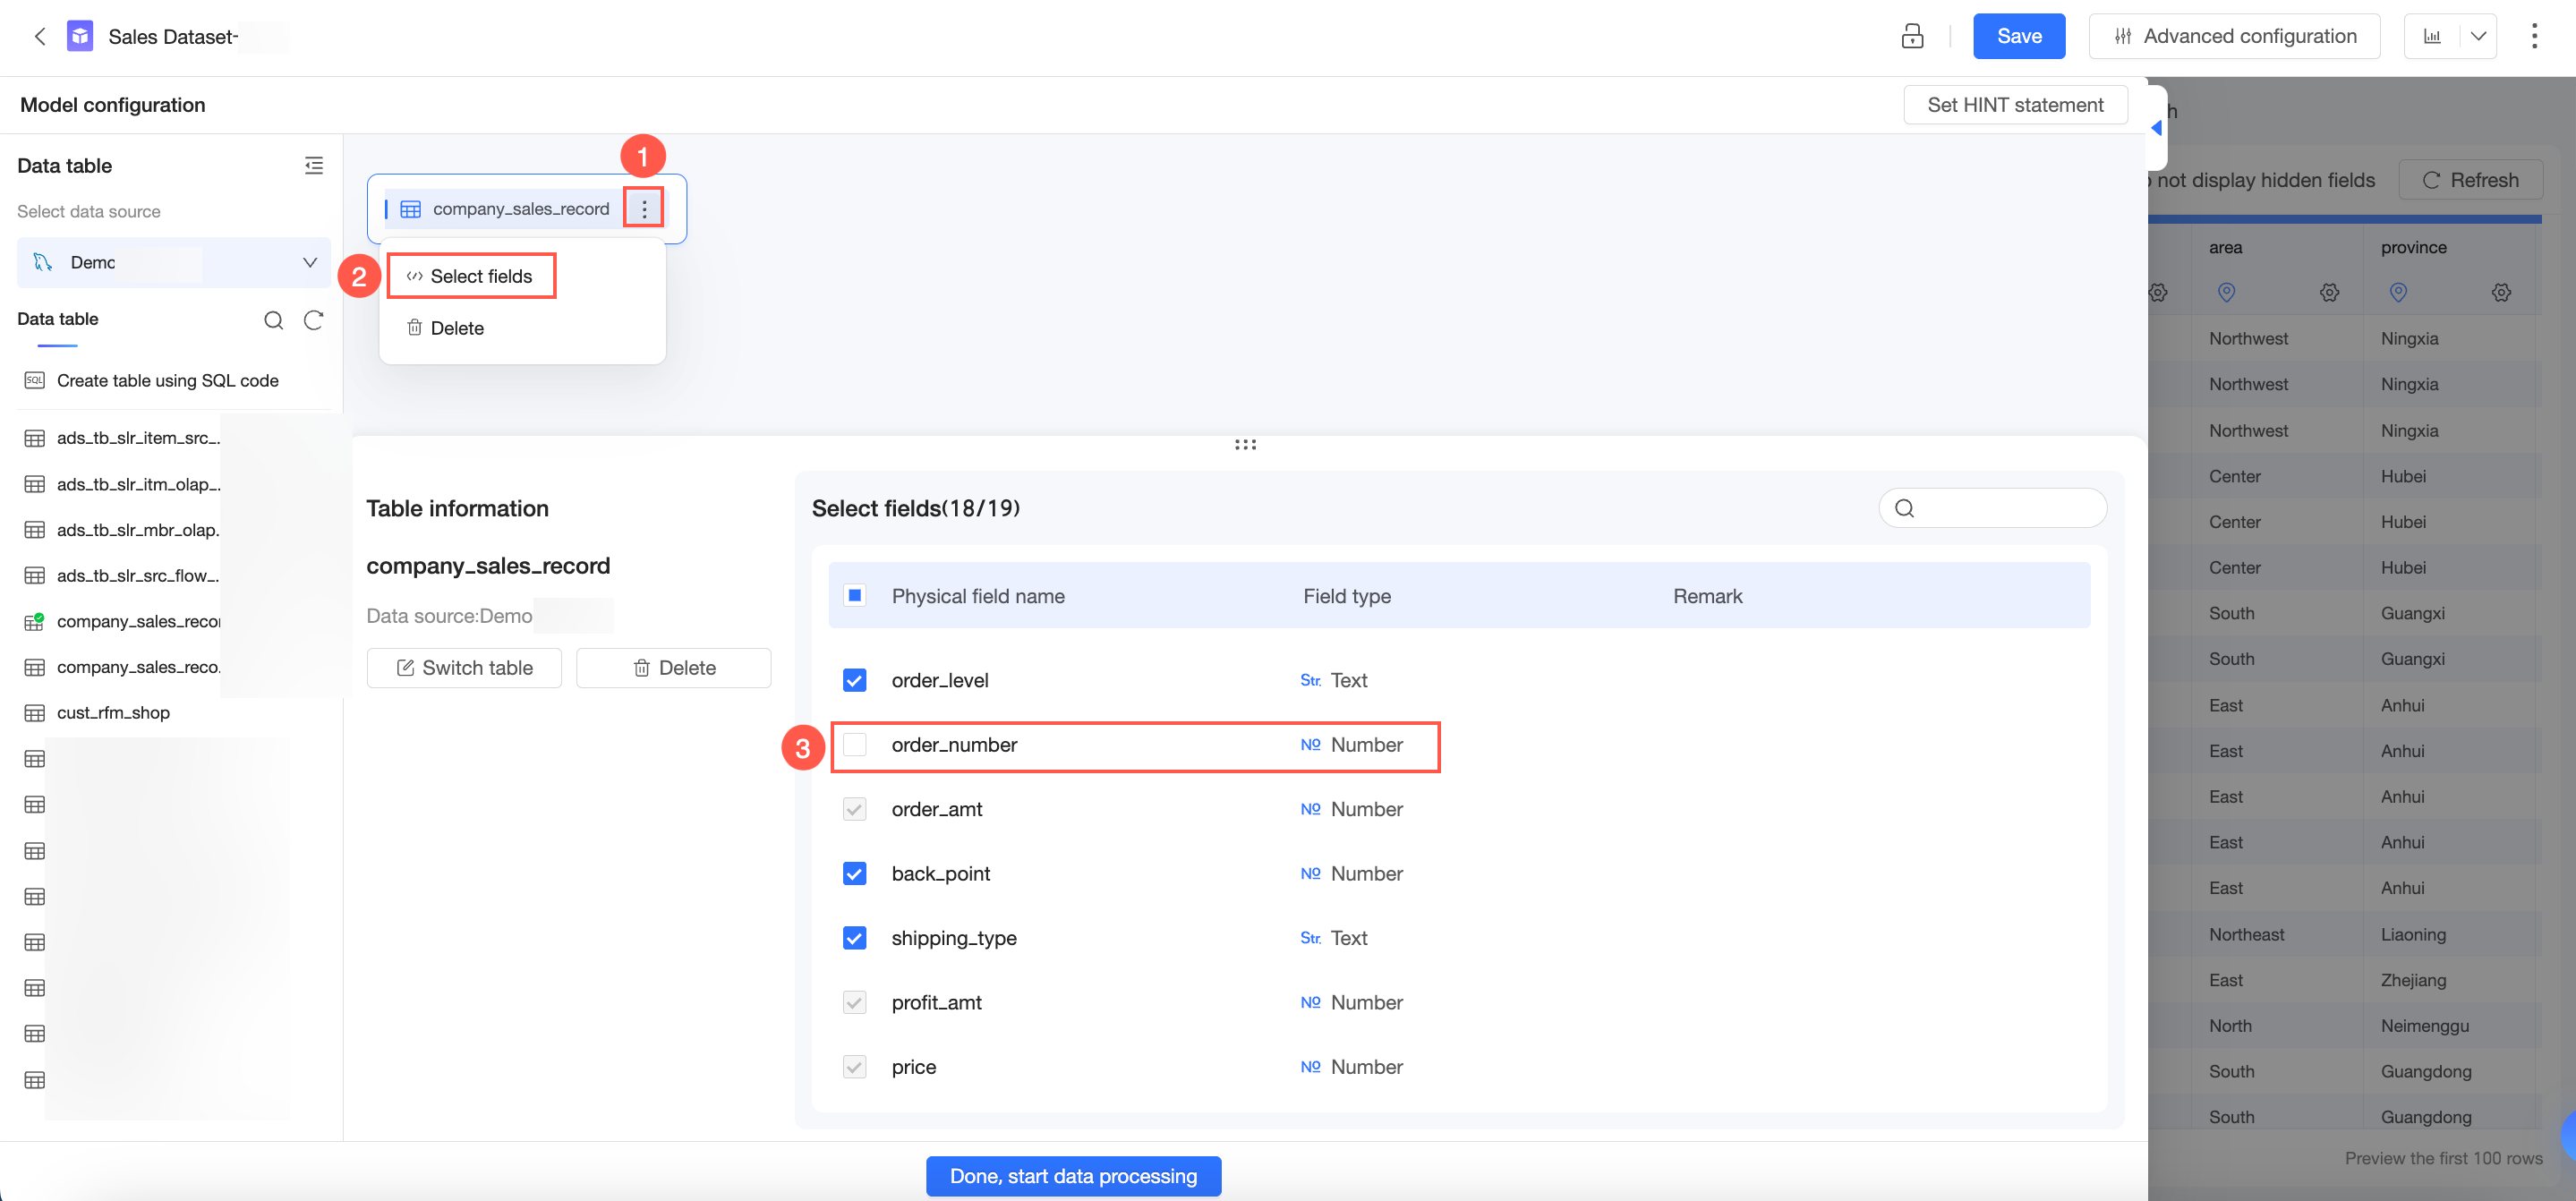
If the schema of the source database table changes, for example, when fields are added or deleted, you must update the fields in the dataset. On the dataset editing page, click Select Fields to view the details of the table fields in the current dataset.
NoteIn some scenarios, a field may be grayed out and you cannot deselect it. This is because the field has dependencies and cannot be deselected. To deselect the field, you must first remove its dependencies. For example:
The field is referenced in a calculated field.
The field is used to configure row-level or column-level permissions for the dataset.
If the dataset was created using a custom SQL statement, you must add or delete the corresponding fields in the SQL statement.
When you delete a field from a dataset, you must also update the configurations of any reports that use this field, such as dashboards and workbooks. This ensures that the reports are configured and displayed using the latest fields.
Clear invalid fields with one click
To remove fields from the dataset that no longer exist in the source database table, you can click One-click Clear in the field selection area to remove the invalid fields.