This topic describes how to integrate DingTalk, Lark, WeCom, and QQ messaging channels with OpenClaw using AppFlow.
Integrate DingTalk with AppFlow
1. Create a DingTalk app
1.1 Create an app
Select or create an organization.
Select organization
Go to the DingTalk Open Platform. Select an organization for which you have developer permissions, or select an organization and then get developer permissions.

Create organization
If you do not have an available organization, scan the following QR code with the DingTalk mobile app to create a new one.

You must use the DingTalk mobile app V6.5.45 or later.
Go to the DingTalk Open Platform and click Create. If you have created an app before but the app development guide is not displayed, click Get Started to go to the DingTalk app page.
In the left navigation pane of App Development, click DingTalk App. On the DingTalk App page, click Create App in the upper-right corner.

In the Create App panel, enter the App Name and App Description, upload an App Icon, and then click Save.
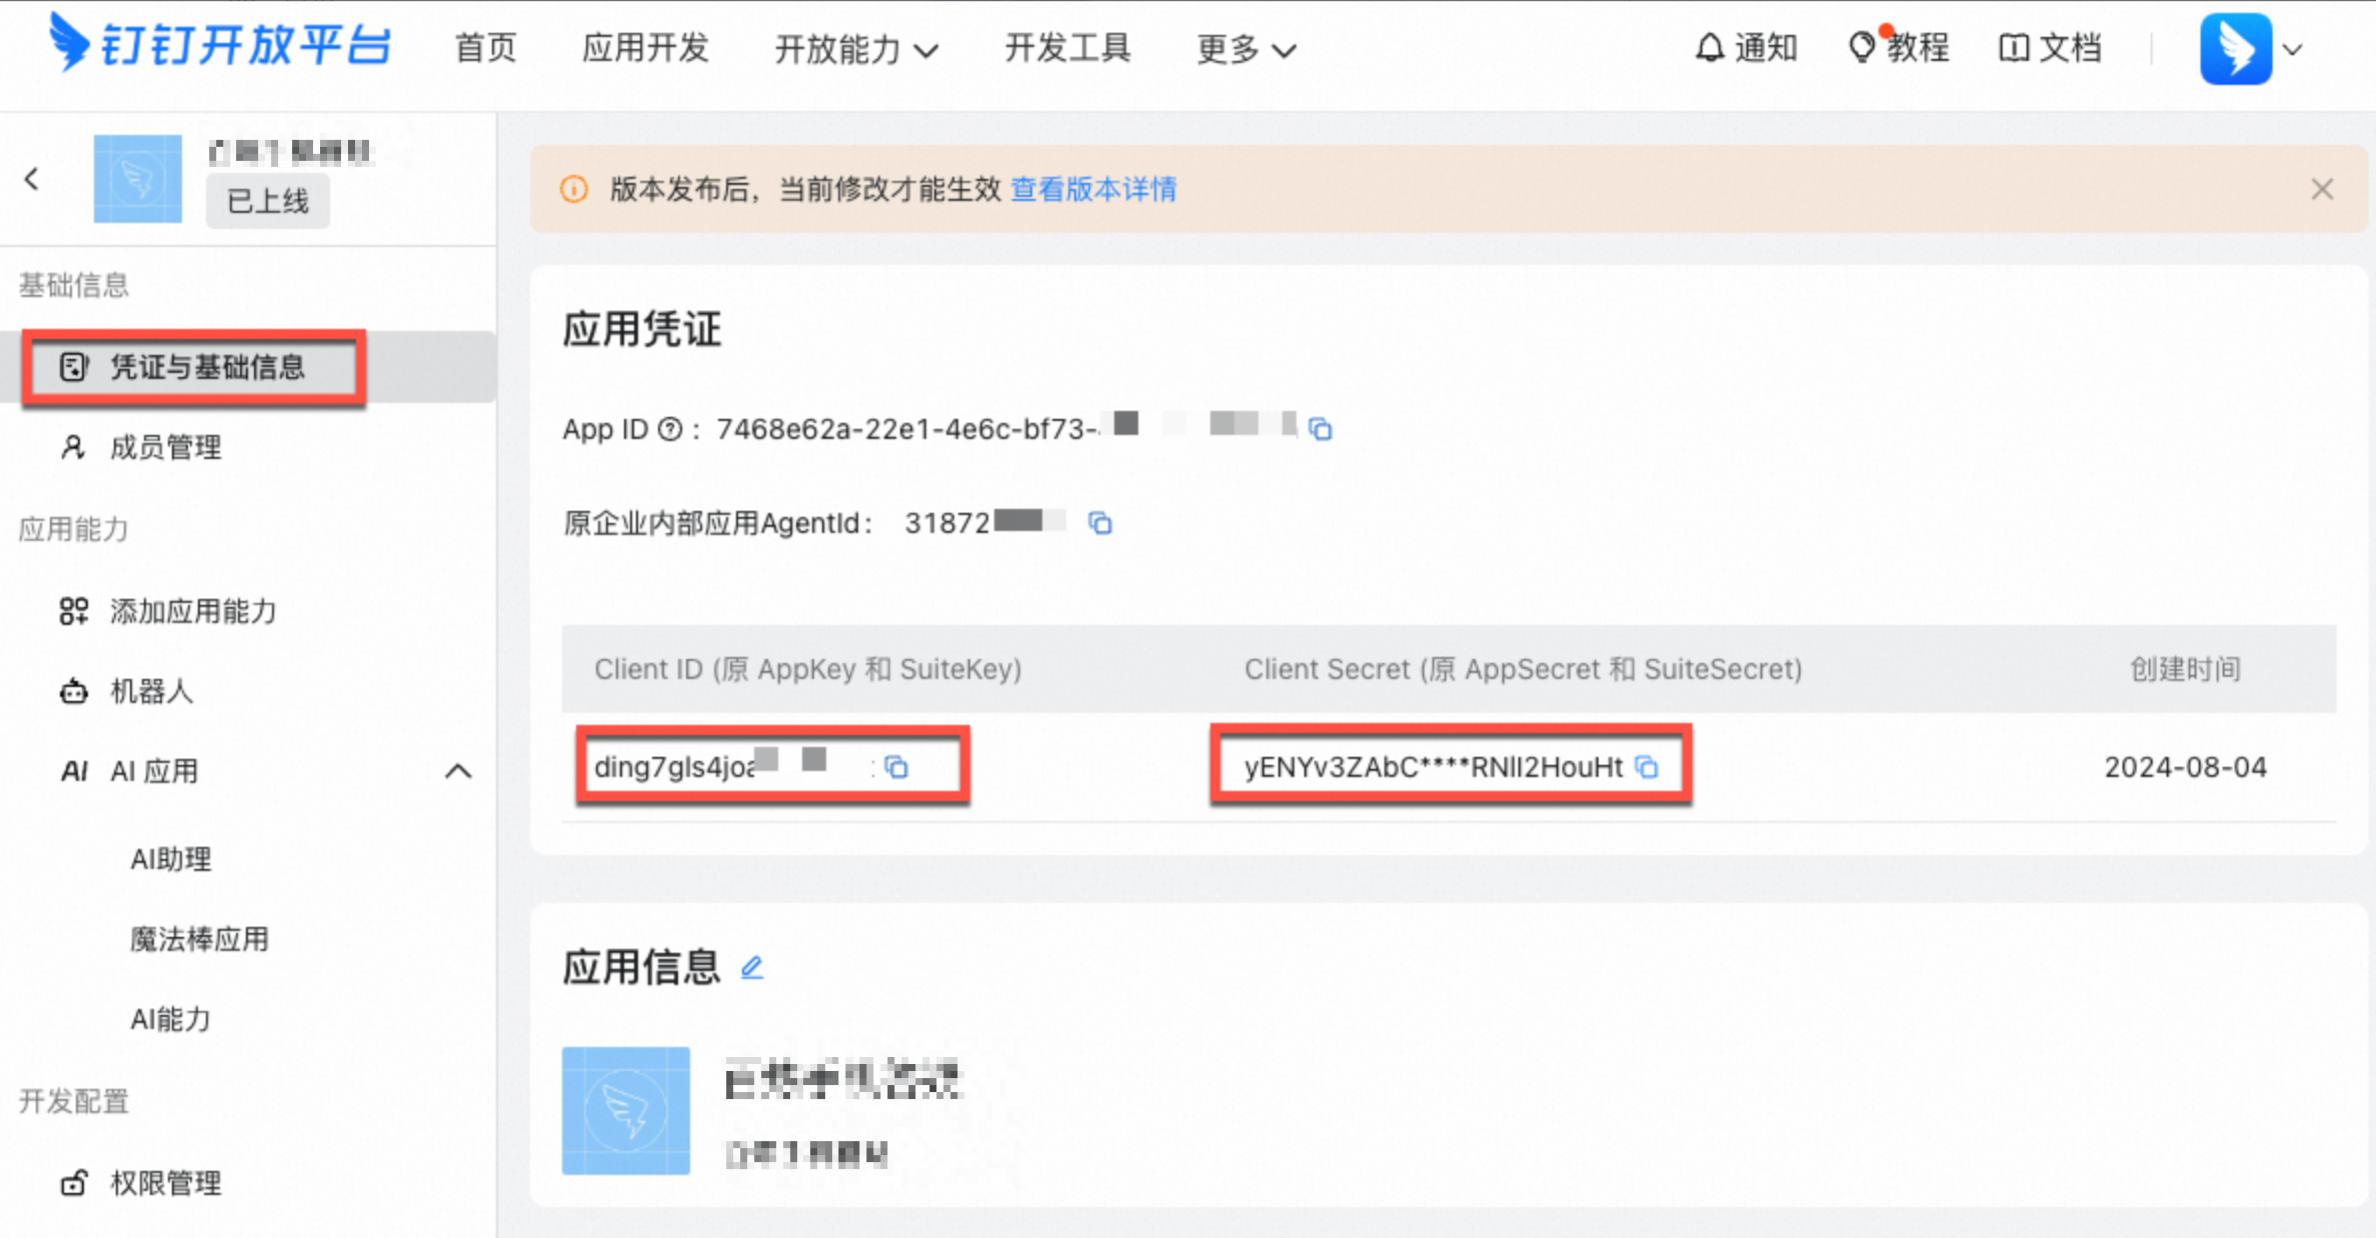
1.2 View Client ID and Client Secret
In the left navigation pane, select Credentials and Basic Information. Copy the Client ID and Client Secret. You will need these credentials to create the connection flow.
1.3 Create a message card
The DingTalk bot supports streaming responses through message cards. You must create a card template to send these messages.
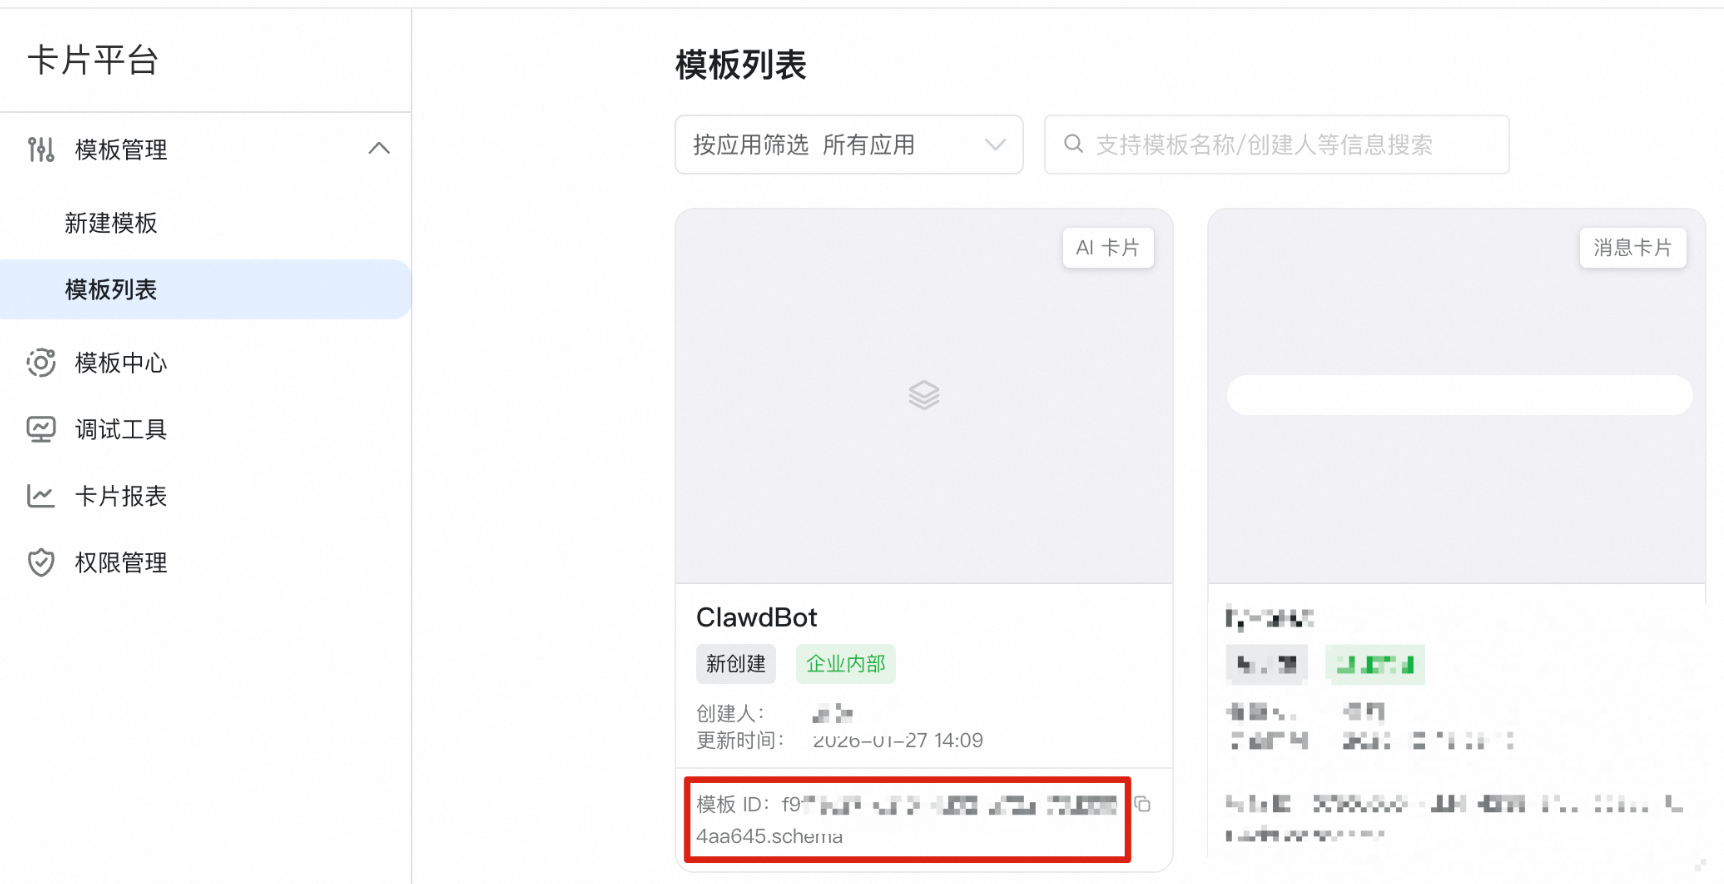
Go to the Card Platform - Template List and click New Template.
In the template creation dialog box, enter the required information and click Create.
Card Type: Select Message Card.
Card Template Scenario: Select AI Card.
Associated App: Associate the app that you created earlier.
On the mock editing page, do not use a preset template or perform any other operations. Immediately Save and then Publish the template. Then, click Back to return to the template list page.

Return to the template list and copy the template ID. You will need it to create the DingTalk connection flow.

1.4 Grant message card permissions
After you create the card, you must grant the app permission to send message cards.
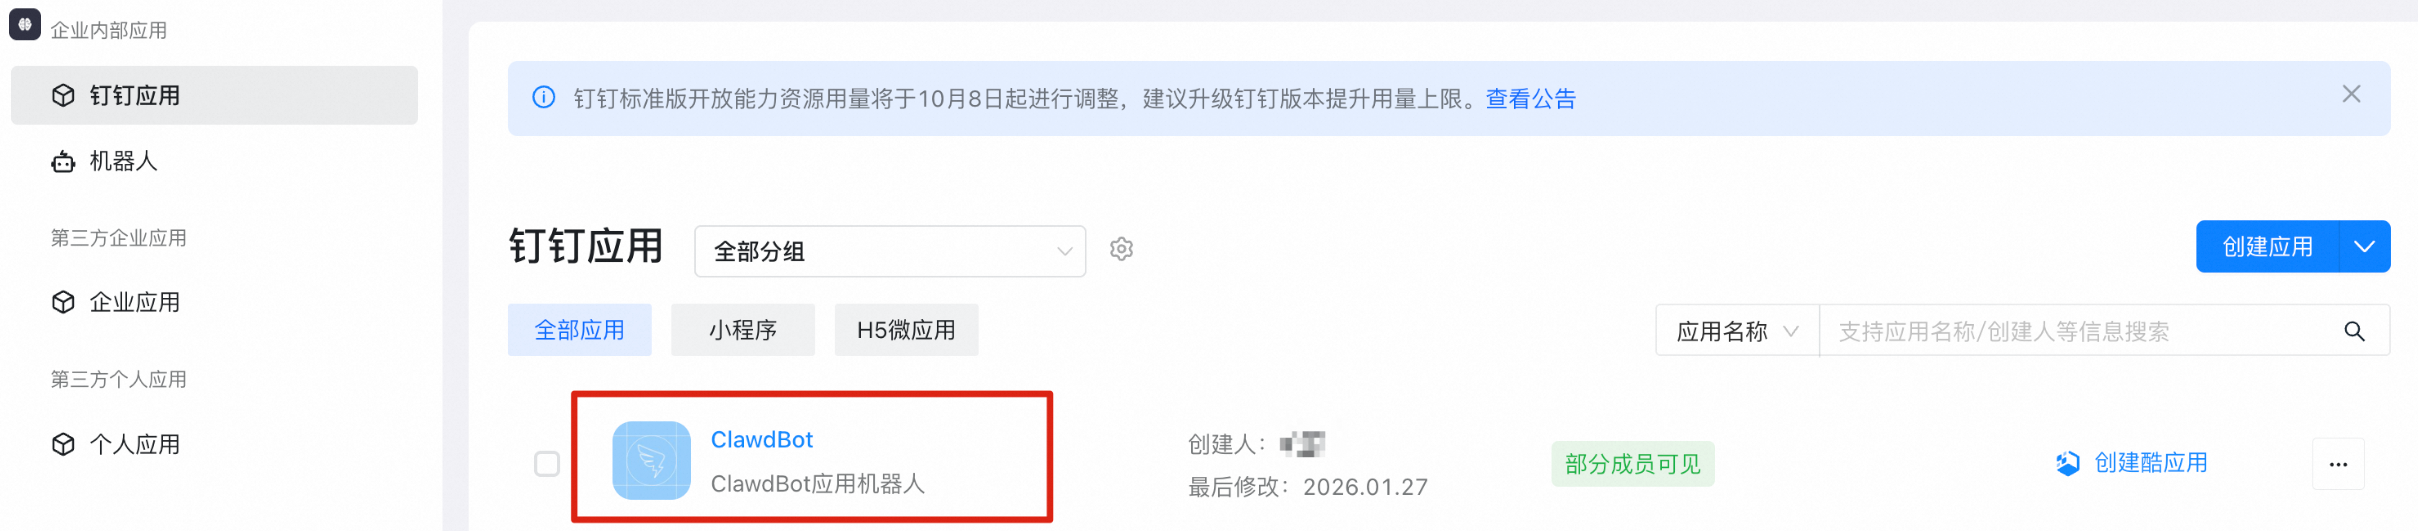
Go to the DingTalk app list. Find the app that you just created and click its name to go to the details page.
In the left navigation pane, select . In the search box, search for
Card. SelectAI Card Streaming Update Permission(Card.Streaming.Write) andInteractive Card Instance Write Permission(Card.Instance.Write), and then click Batch Apply.

2. Create an AppFlow connection flow
Create a connection flow using an AppFlow template. Click Use Now to begin.
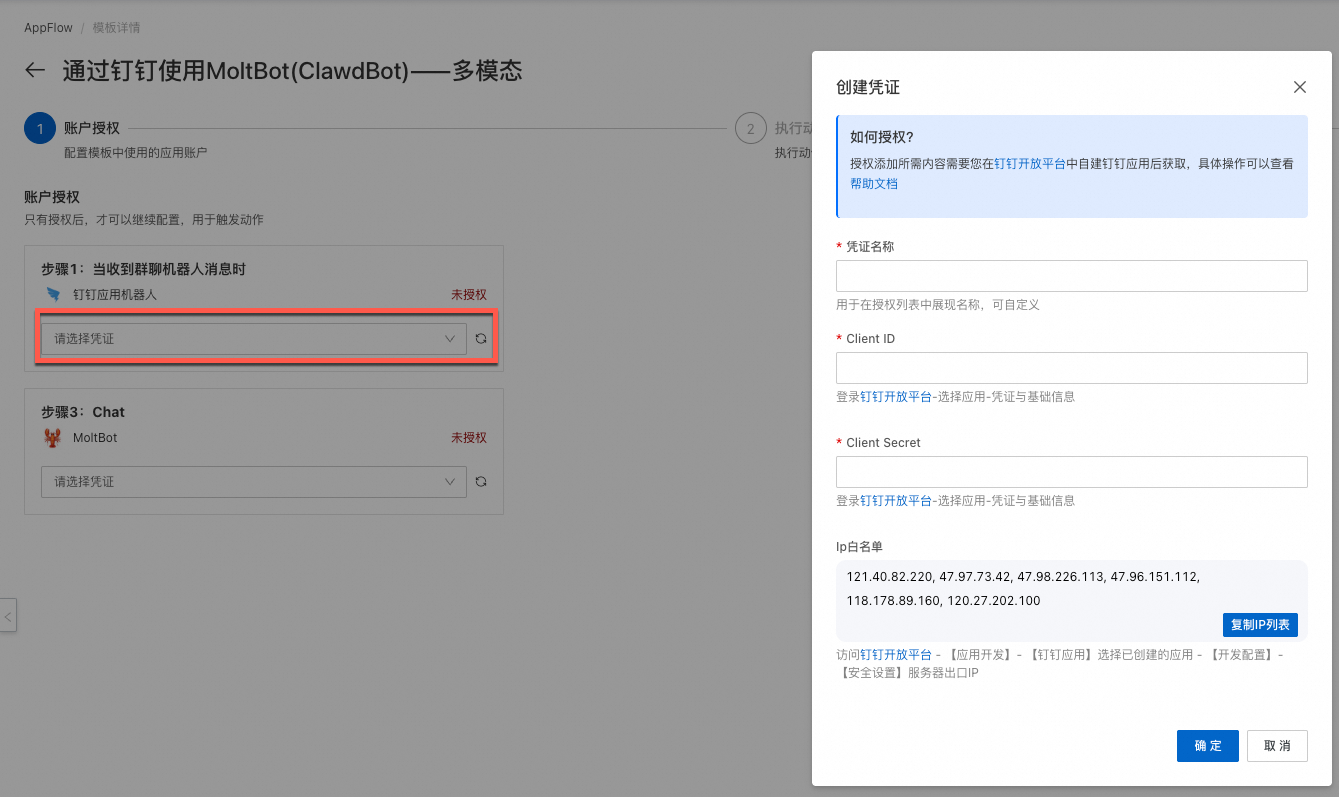
On the Account Authorization page of the connection flow wizard, click Add New Credential. In the dialog box that appears, enter the Client ID and Client Secret of the app that you created, and set a custom credential name.
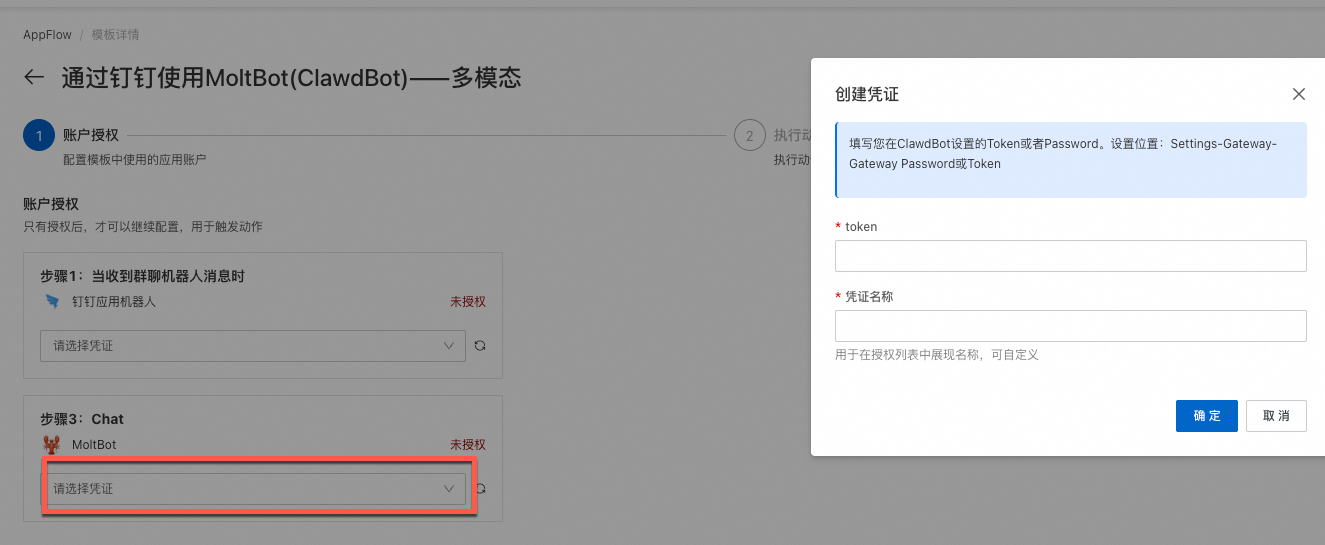
On the Account Authorization page of the connection flow wizard, click Add New Credential. Enter the Token that you obtained when you configured Moltbot in Step 2.
On the Configure Action page of the wizard, complete the configuration and click Next.
Public IP Address:Port: Enter the address in the format
Simple Application Server public IP address:service port. For example, if the public IP address is47.0.XX.XXand the service port is18789(the default value), enter47.0.XX.XX:18789.Template ID: Enter the AI card template ID that you saved in Step 1.3.
On the Basic Information page of the wizard, enter the Connection Flow Name and Connection Flow Description. We recommend that you keep the default values. Then, click Next.
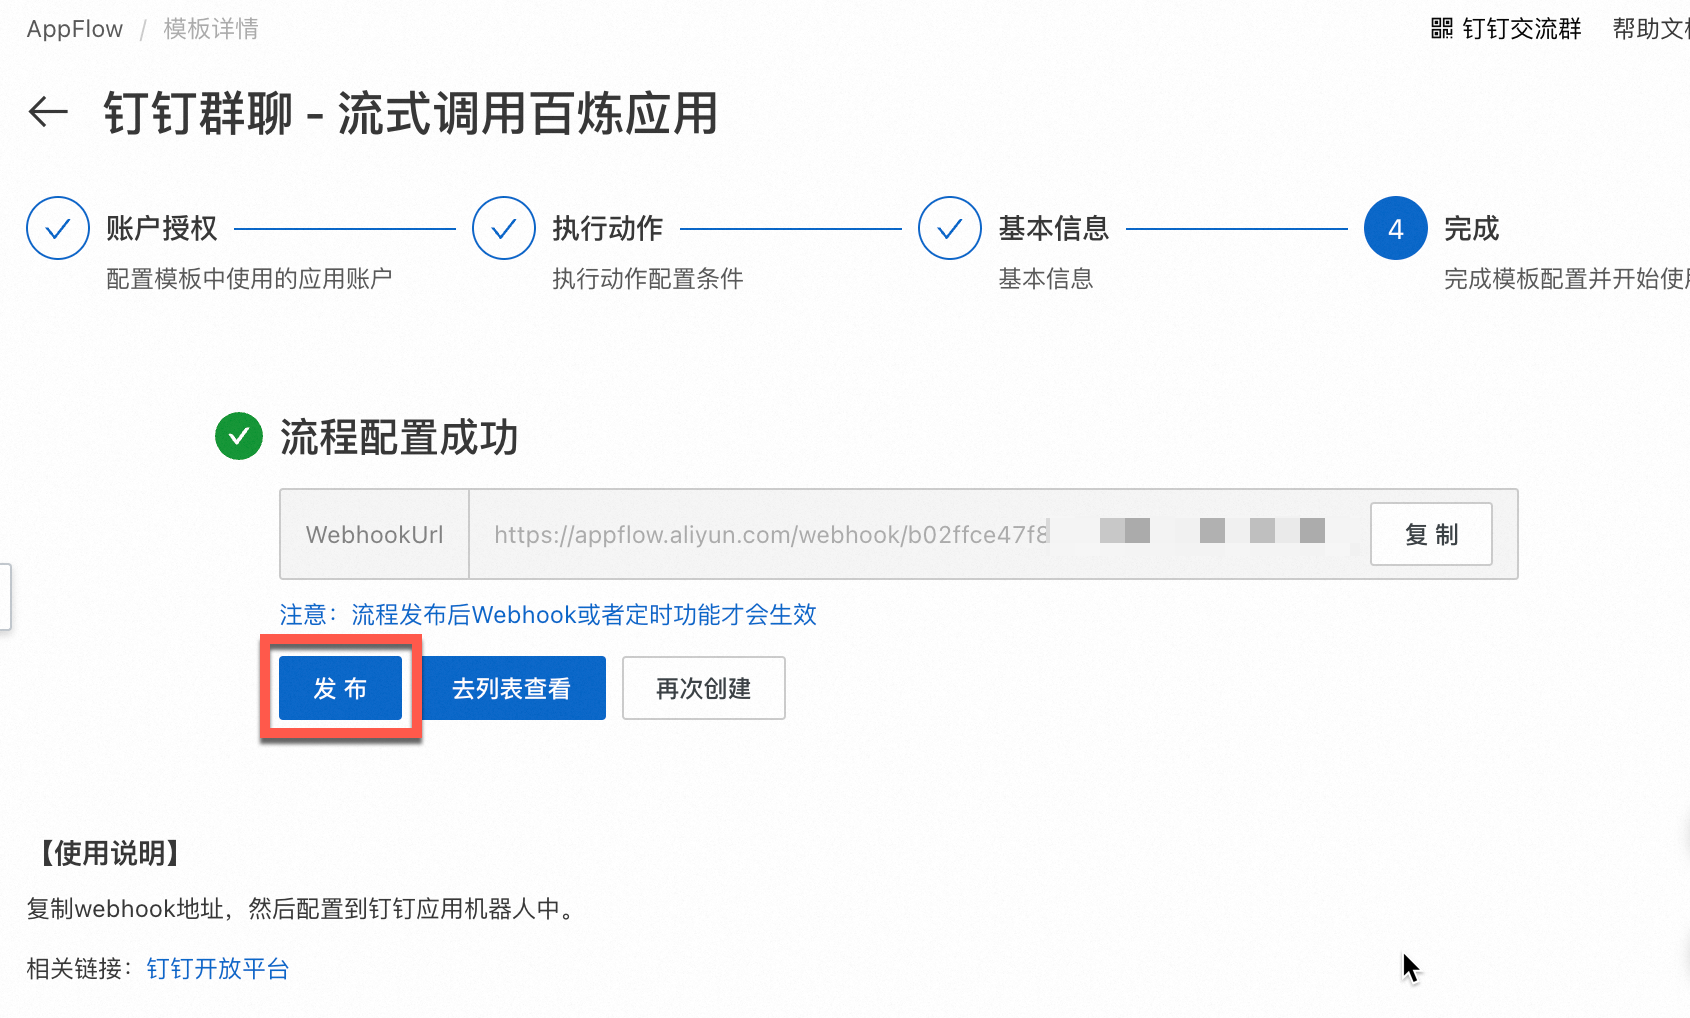
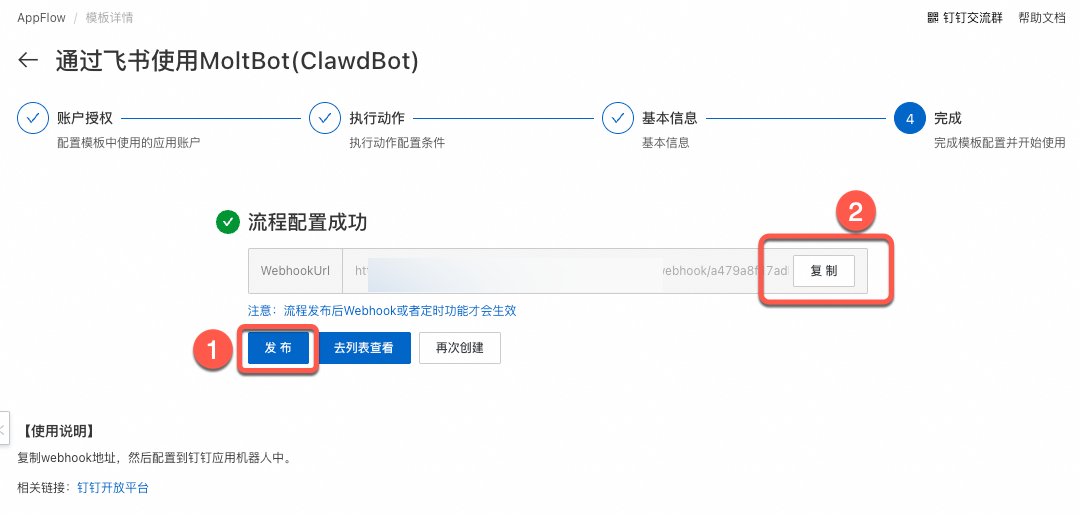
After the flow is successfully configured, copy the WebhookUrl and click Publish.
3. Configure the DingTalk bot
After you obtain the WebhookUrl, you can configure a bot in your DingTalk app to answer user questions.
3.1 Configure the DingTalk bot
Go to the DingTalk app list. Find the app that you just created and click its name to go to the details page.
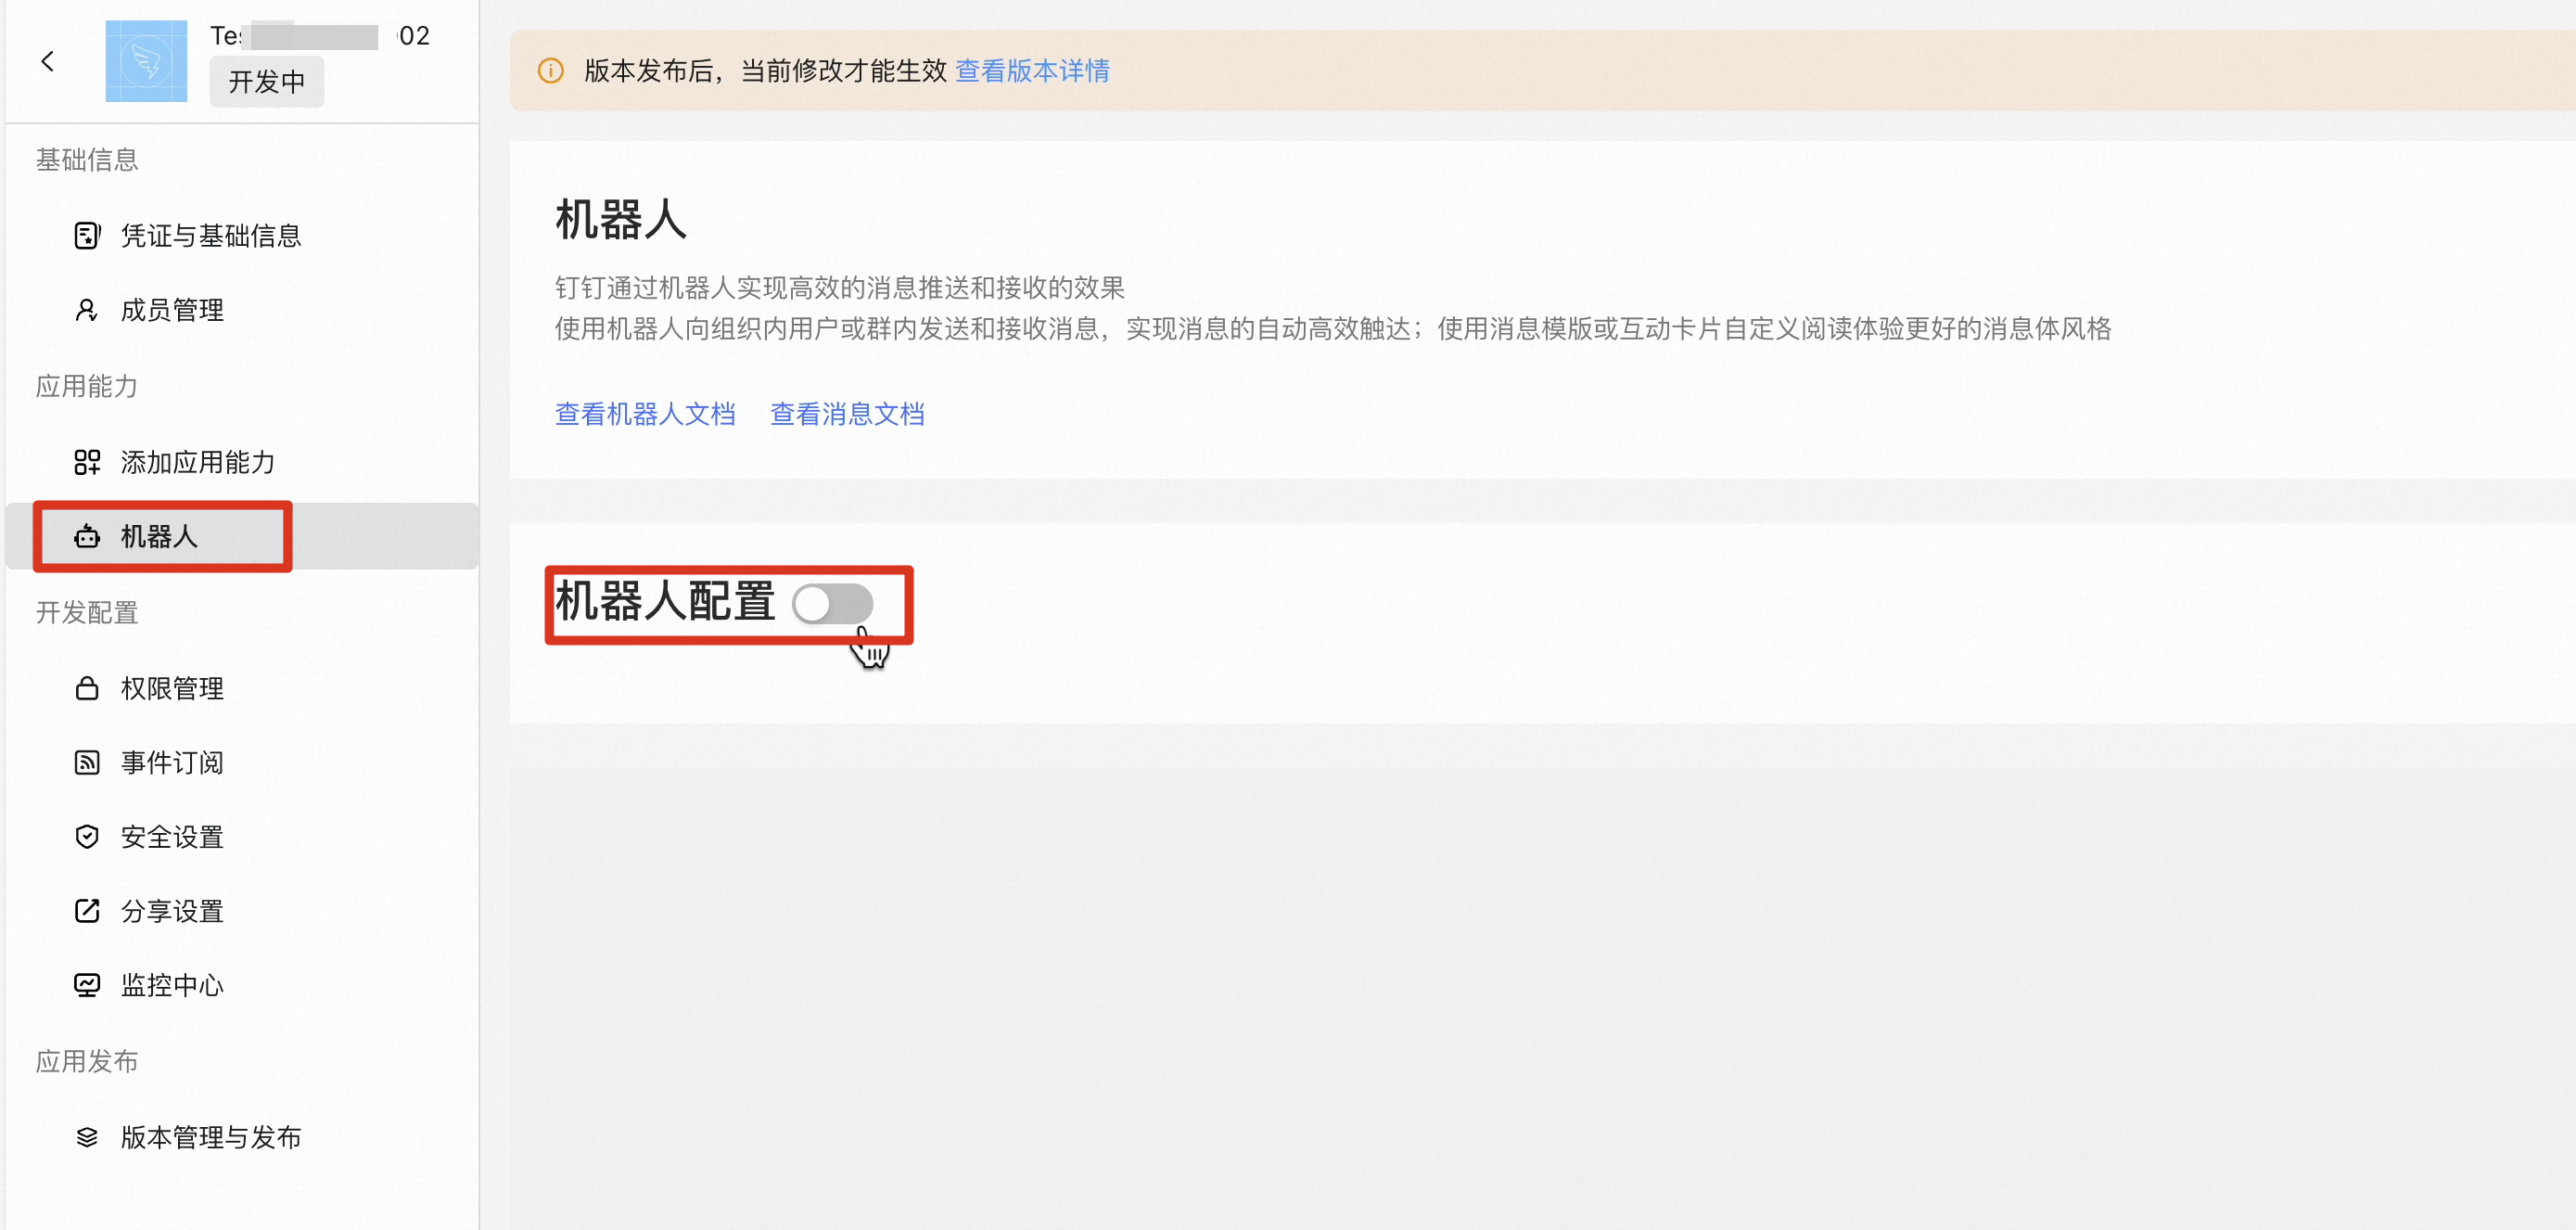
On the Add App Capability page, find the bot card and click Add.
On the bot configuration page, enable the Bot Configuration toggle. Complete the configuration as prompted on the page. For Message Receiving Mode, select HTTP Mode. For Message Receiving URL, enter the WebhookUrl that you copied after you published the AppFlow connection flow. Then, click Publish.
For Message Receiving Mode, you must select HTTP Mode. AppFlow currently supports only HTTP mode. If you select Stream mode, the bot cannot return messages.
3.2 Publish the app version
After the app is created, you must publish a version if you want to make it available to other users in your enterprise.
Click App Development. On the DingTalk App page, click the target app.
In the app's development navigation bar, click Version Management and Release. On the Version Management and Release page, click Create New Version. On the version details page, enter the App Version and Version Description, select the desired App Visibility Scope, and then click Save. In the pop-up window, click Publish Immediately.

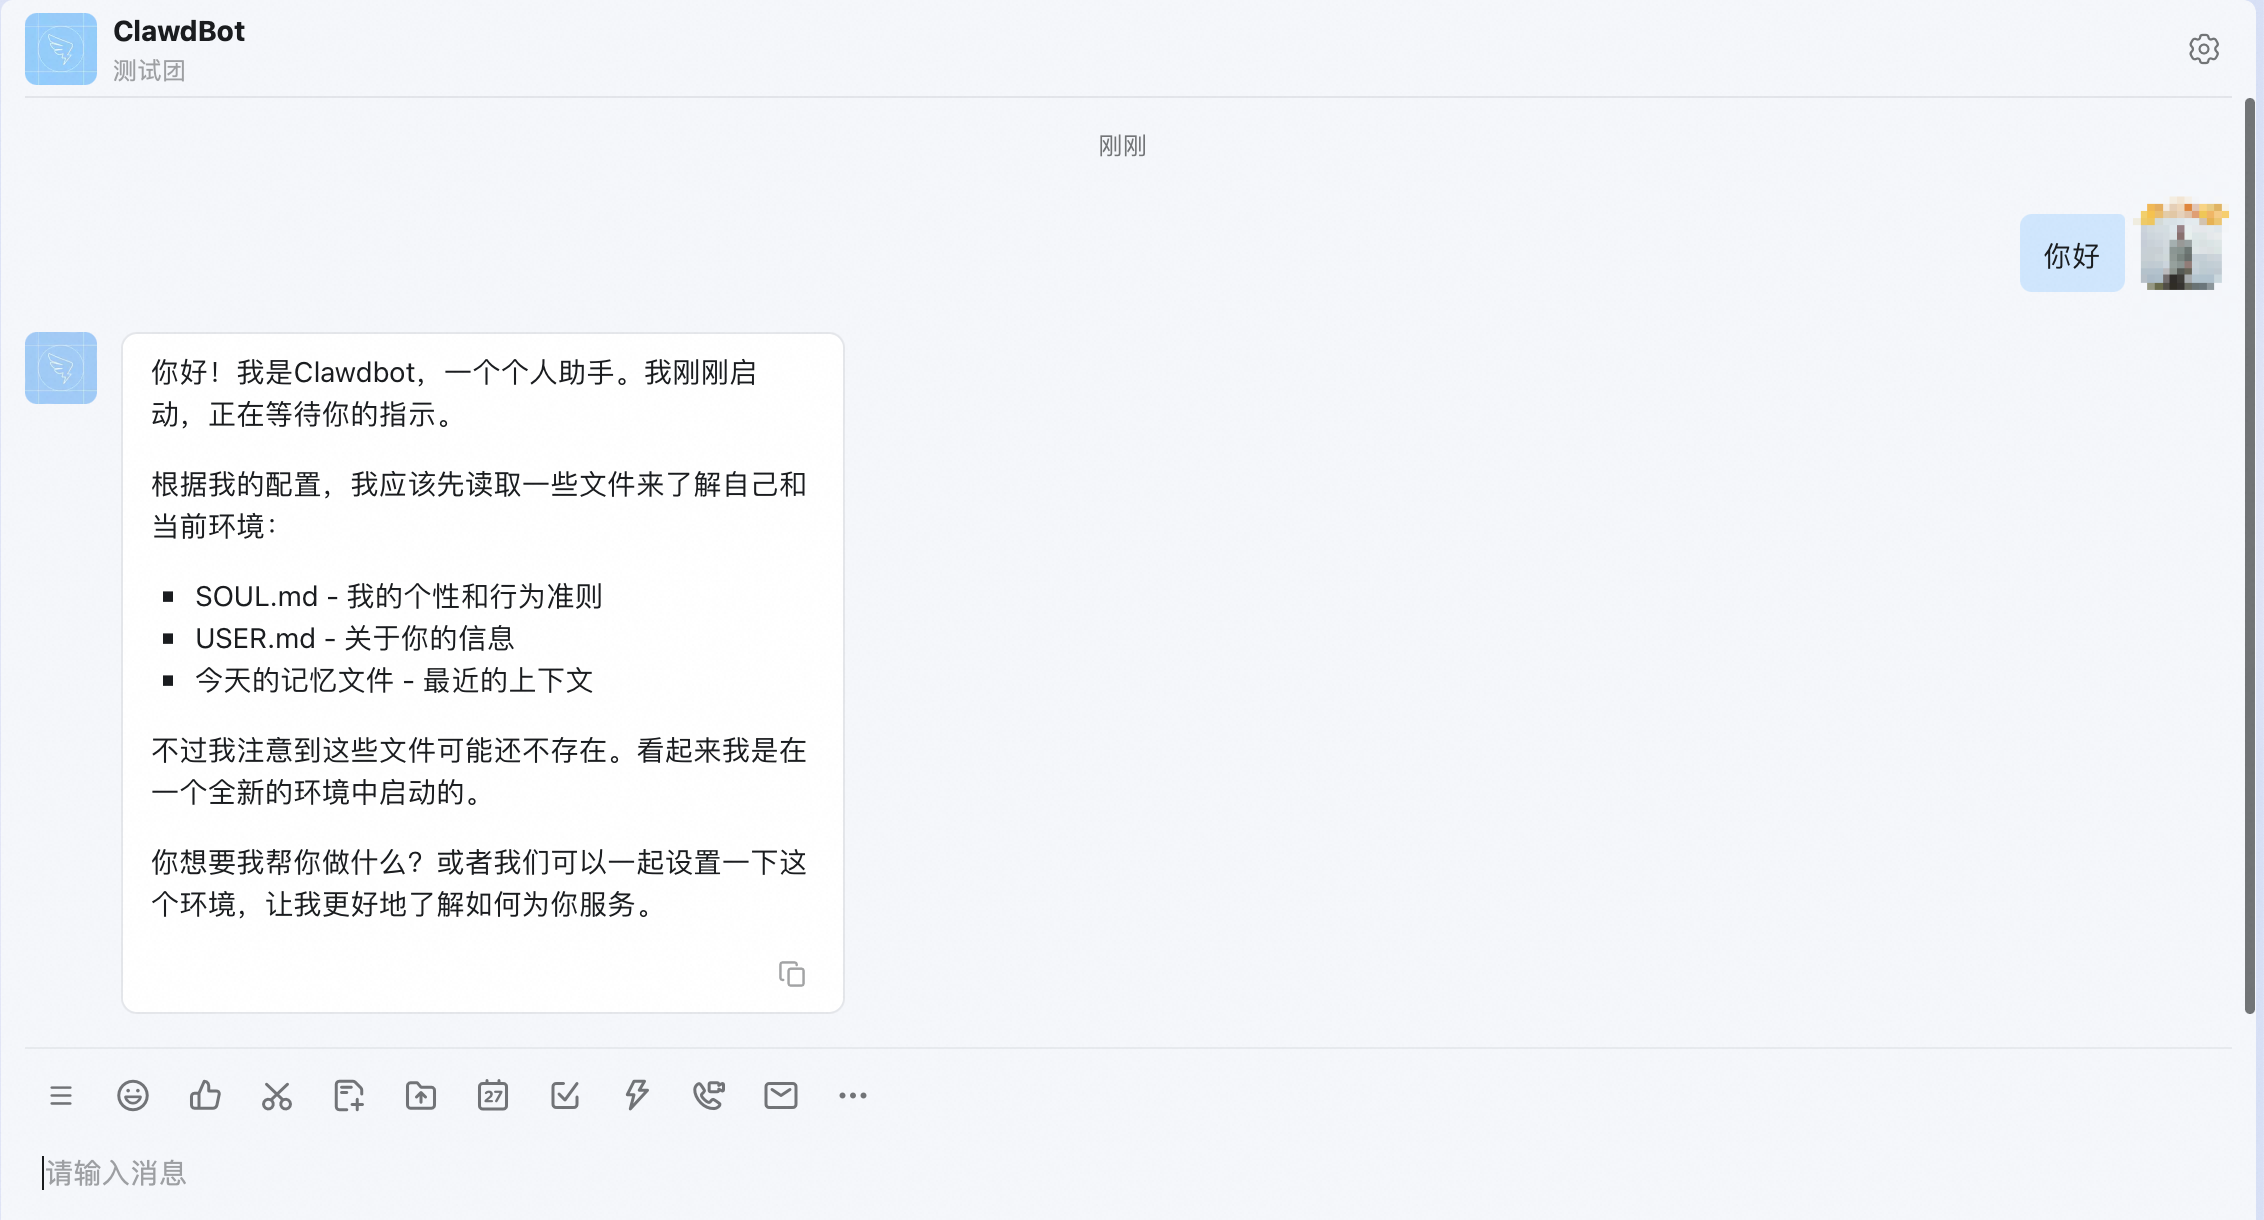
3.3 Test the bot
You can create a group chat or add the bot to an existing group chat and interact with it to test its functionality.
To change the Model Studio model, see How do I change the model that OpenClaw calls? To integrate models from other service providers, see How do I change the model that OpenClaw calls?.
Add the bot from Group Management in DingTalk. Go to the Group Settings page of a DingTalk group and click the bot card. On the bot management page, click Add bot. In the Addbot search box, enter the name of your bot and select it from the results. Click Add, and then click Finish Adding.
In the DingTalk group, you can interact with the bot by @mentioning it. You can also search for the bot by its name in the DingTalk search bar and start a private chat with it from the features page.
Integrate Lark with AppFlow
1. Create and configure an app
Log on to the Lark Developer Console, click Create Custom Enterprise App, enter the app information, and then click Create.
In the left navigation pane, click . On the Add by Capability tab, find the bot card and click Add.
In the left navigation pane, click . Enable the required API permissions by searching for and adding the following:
Permission code
Description
Notes
im:message:send_as_botAllows the bot to send messages as the app.
Required permission.
contact:user.employee_id:readonlyReads a user's user ID.
Required permission.
im:message.group_at_msg:readonlyAllows the bot to receive messages that
@it in a group chat.Core interaction permission.
im:message.p2p_msg:readonlyAllows the bot to read messages sent to it in private chats.
Required for one-on-one chats.
im:message.group_msgAllows the bot to receive all messages in groups where it is a member.
Sensitive permission.
Obtain the credentials required for the integration. You will need this information to configure the AppFlow connection flow.
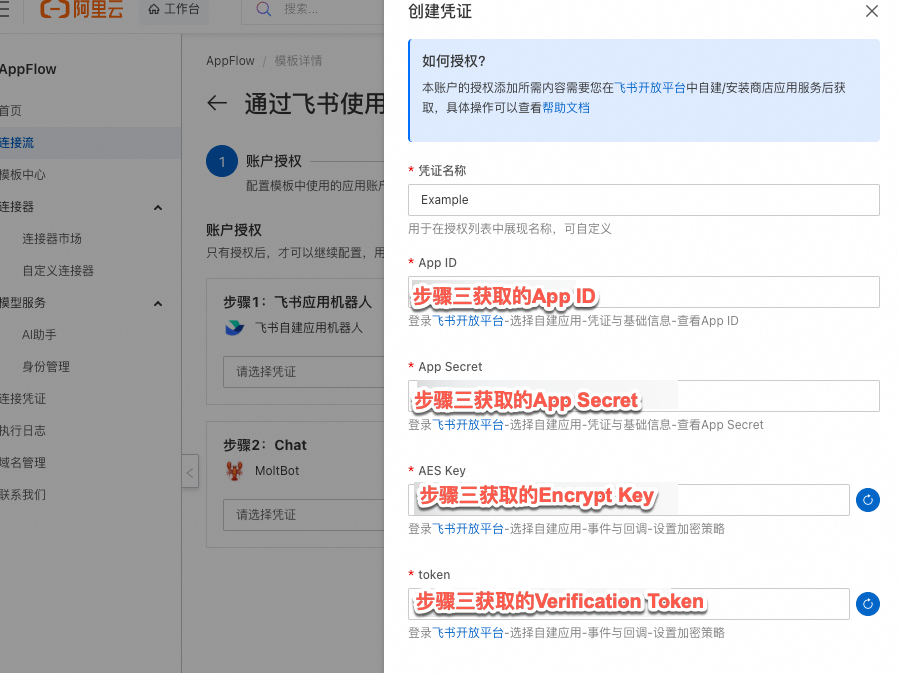
In the left navigation pane, go to the Credentials and Basic Information page. View and copy the App ID and App Secret.
In the left navigation pane, go to the Events & Callbacks page and find the Encryption Policy tab. Copy the Encrypt Key and Verification Token.
If the Encrypt Key is empty, click the reset icon
to generate a new one.
 to generate a new one.
2. Create a Lark connection flow
Go to Use MoltBot (ClawdBot) with Lark - Multimodal and click Use Now.
For use cases that require image understanding, you must also change the model to a multimodal model suitable for your business scenario. For more information, see How do I change the model that OpenClaw calls?.
Add a Lark authentication credential. Enter a credential name and provide the information that you obtained in Step 1. Then, click OK and select the new credential from the drop-down list.
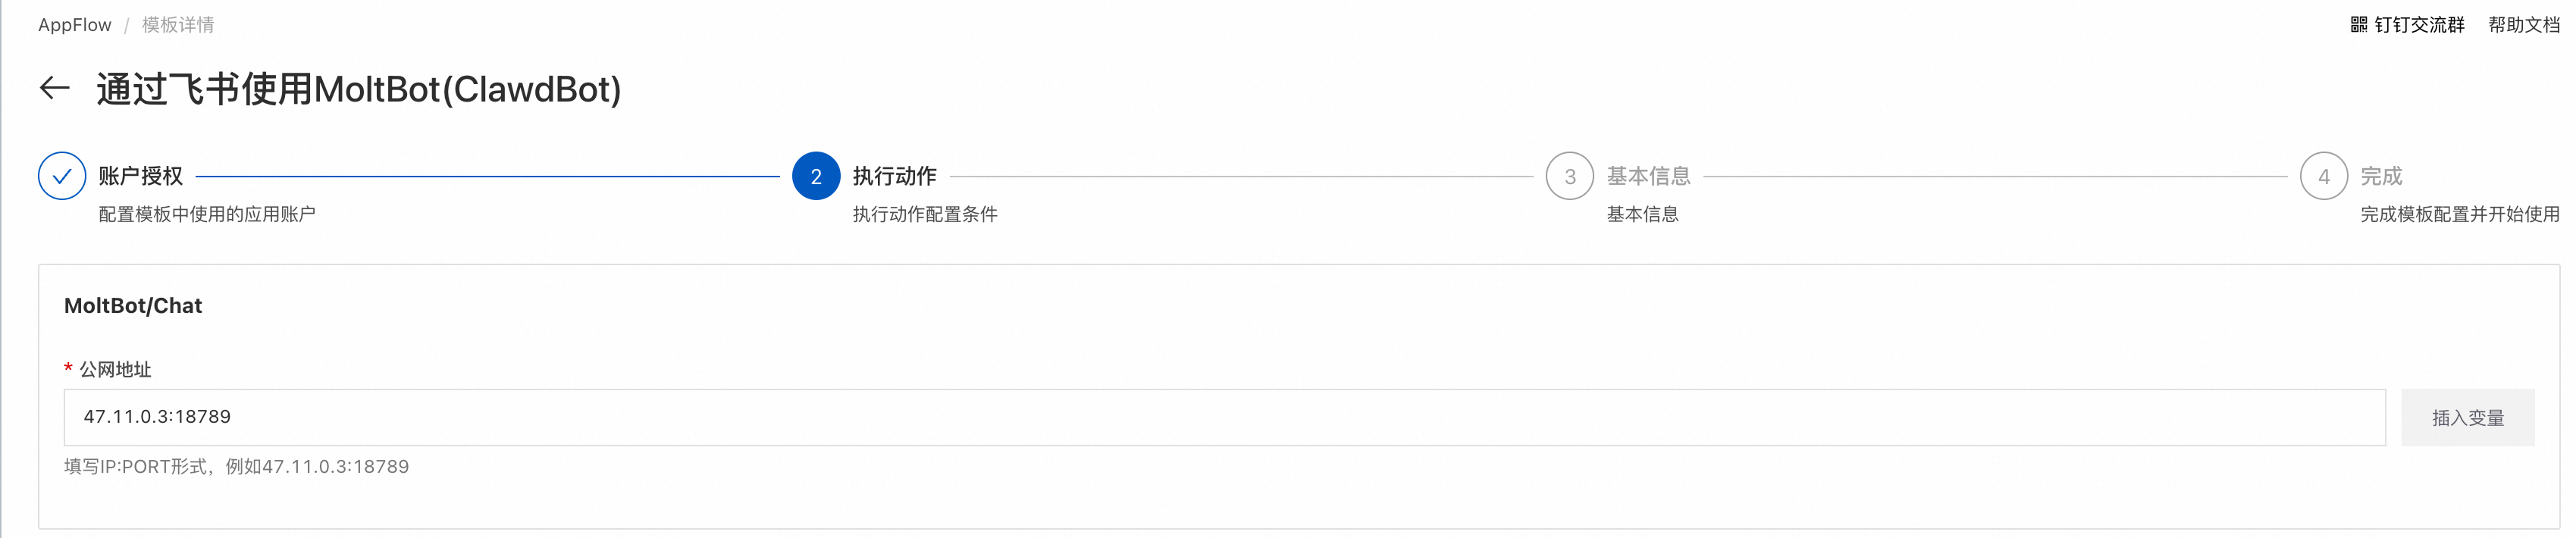
Click Next. Go to the server details page to obtain the server's public IP address and enter it in the
Your Public IP:Portfield as prompted. The default port is 18789.After the configuration is complete, click Publish, and then copy and save your WebhookUrl.
3. Configure the Lark bot
Return to the Lark Developer Console. In the left navigation pane, click Events & Callbacks. On the Event Subscription tab, click the
icon to configure the Subscription Method.Select Send events to a developer server, enter the WebhookUrl that you copied in the previous step, and then click Save.
On the Event Subscription tab, in the Added Events section, click Add Event. Then, search for and add the Receive Message event.
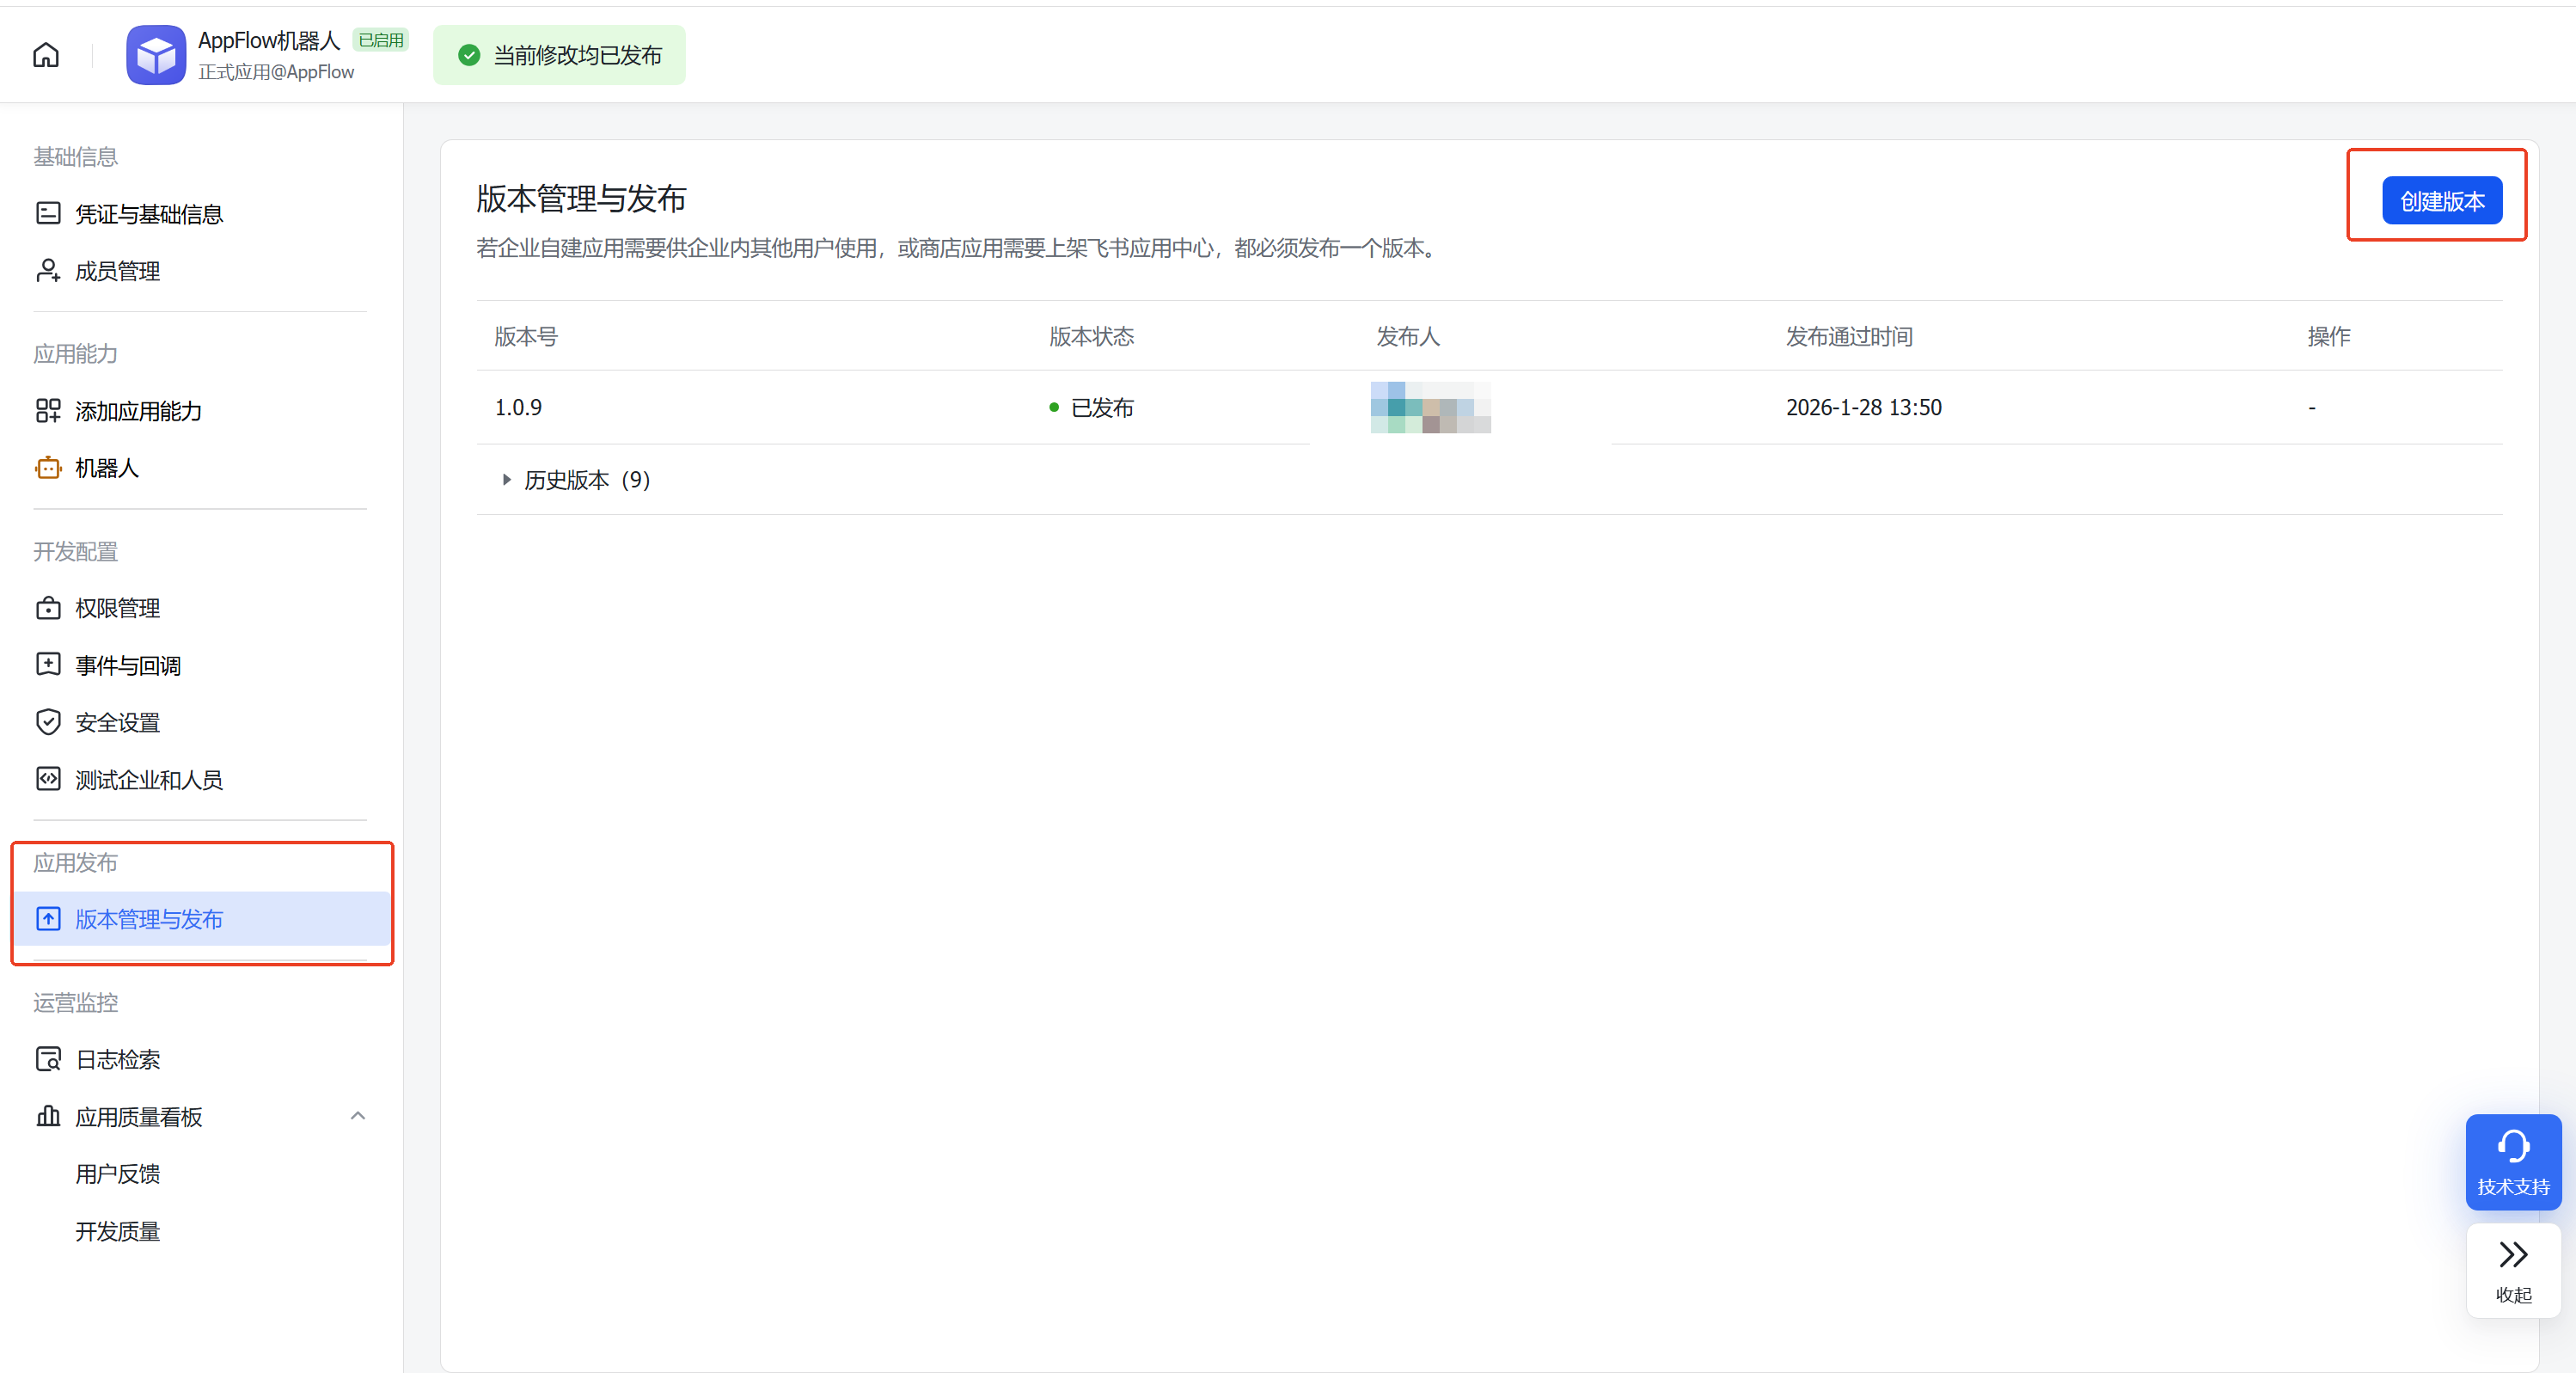
After you are finished, click Version Management and Release in the left navigation pane. Create a version or click the most recently edited version. Enter the required information, and then save and submit it for approval.
 icon to configure the Subscription Method.
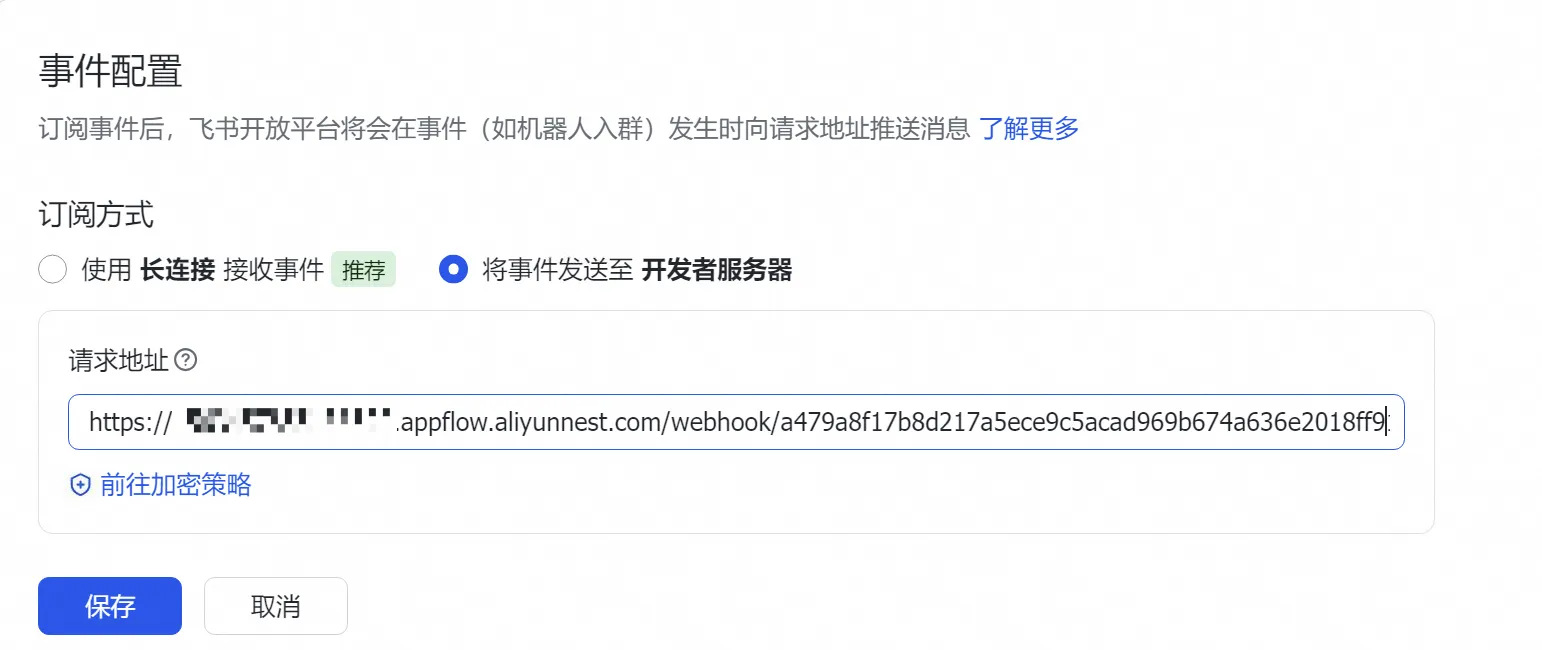
Integrate WeCom with AppFlow
1. Create an AppFlow connection flow
Go to Use MoltBot (ClawdBot) with a WeCom Smart Bot - Multimodal and click Use Now.
Add a new WeCom smart bot credential and click OK.
Credential Name: The display name for the credential in AppFlow. You can enter any name.
Bot name: The display name for the smart bot. You must use the same name when you configure WeCom later.
Token: You can click the refresh button on the right to generate a random token. Copy and save this token for use in the WeCom configuration.
EncodingAESKey: You can click the refresh button on the right to generate a random key. Copy and save this key for use in the WeCom configuration.
Click Next and enter the model name, Simple Application Server public IP address, and service port as prompted.
Enter a name and description for the connection flow. After the configuration is complete, click Next. After you publish the flow, copy and save the WebhookUrl.

2. Create a WeCom smart bot
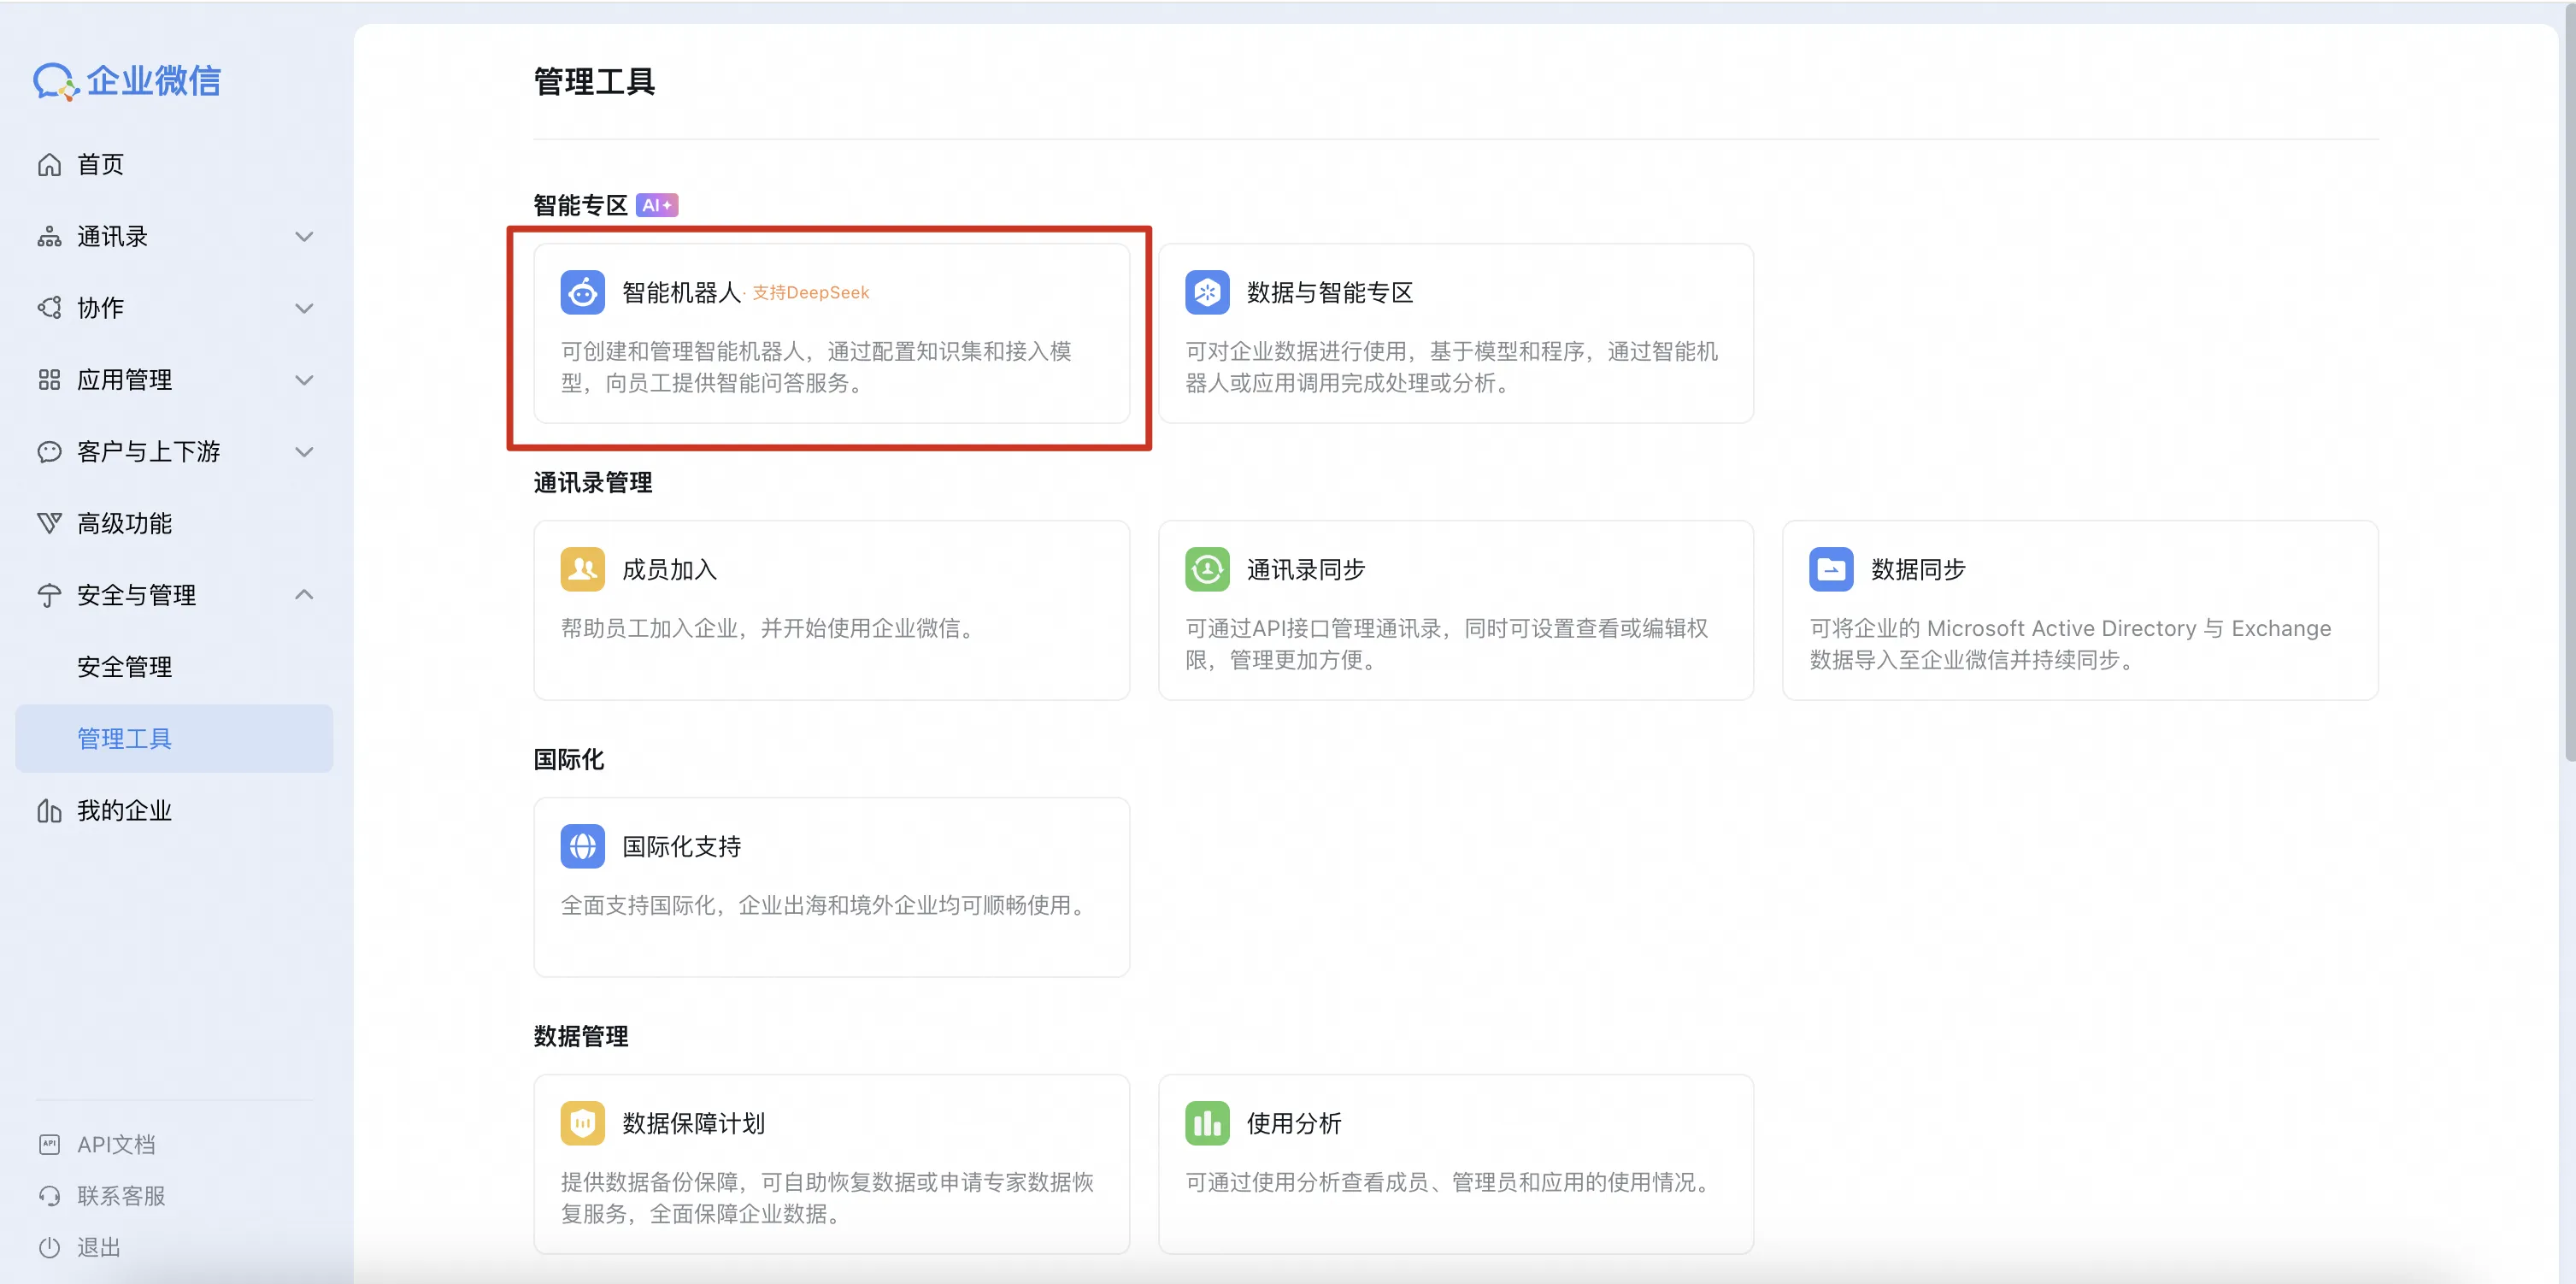
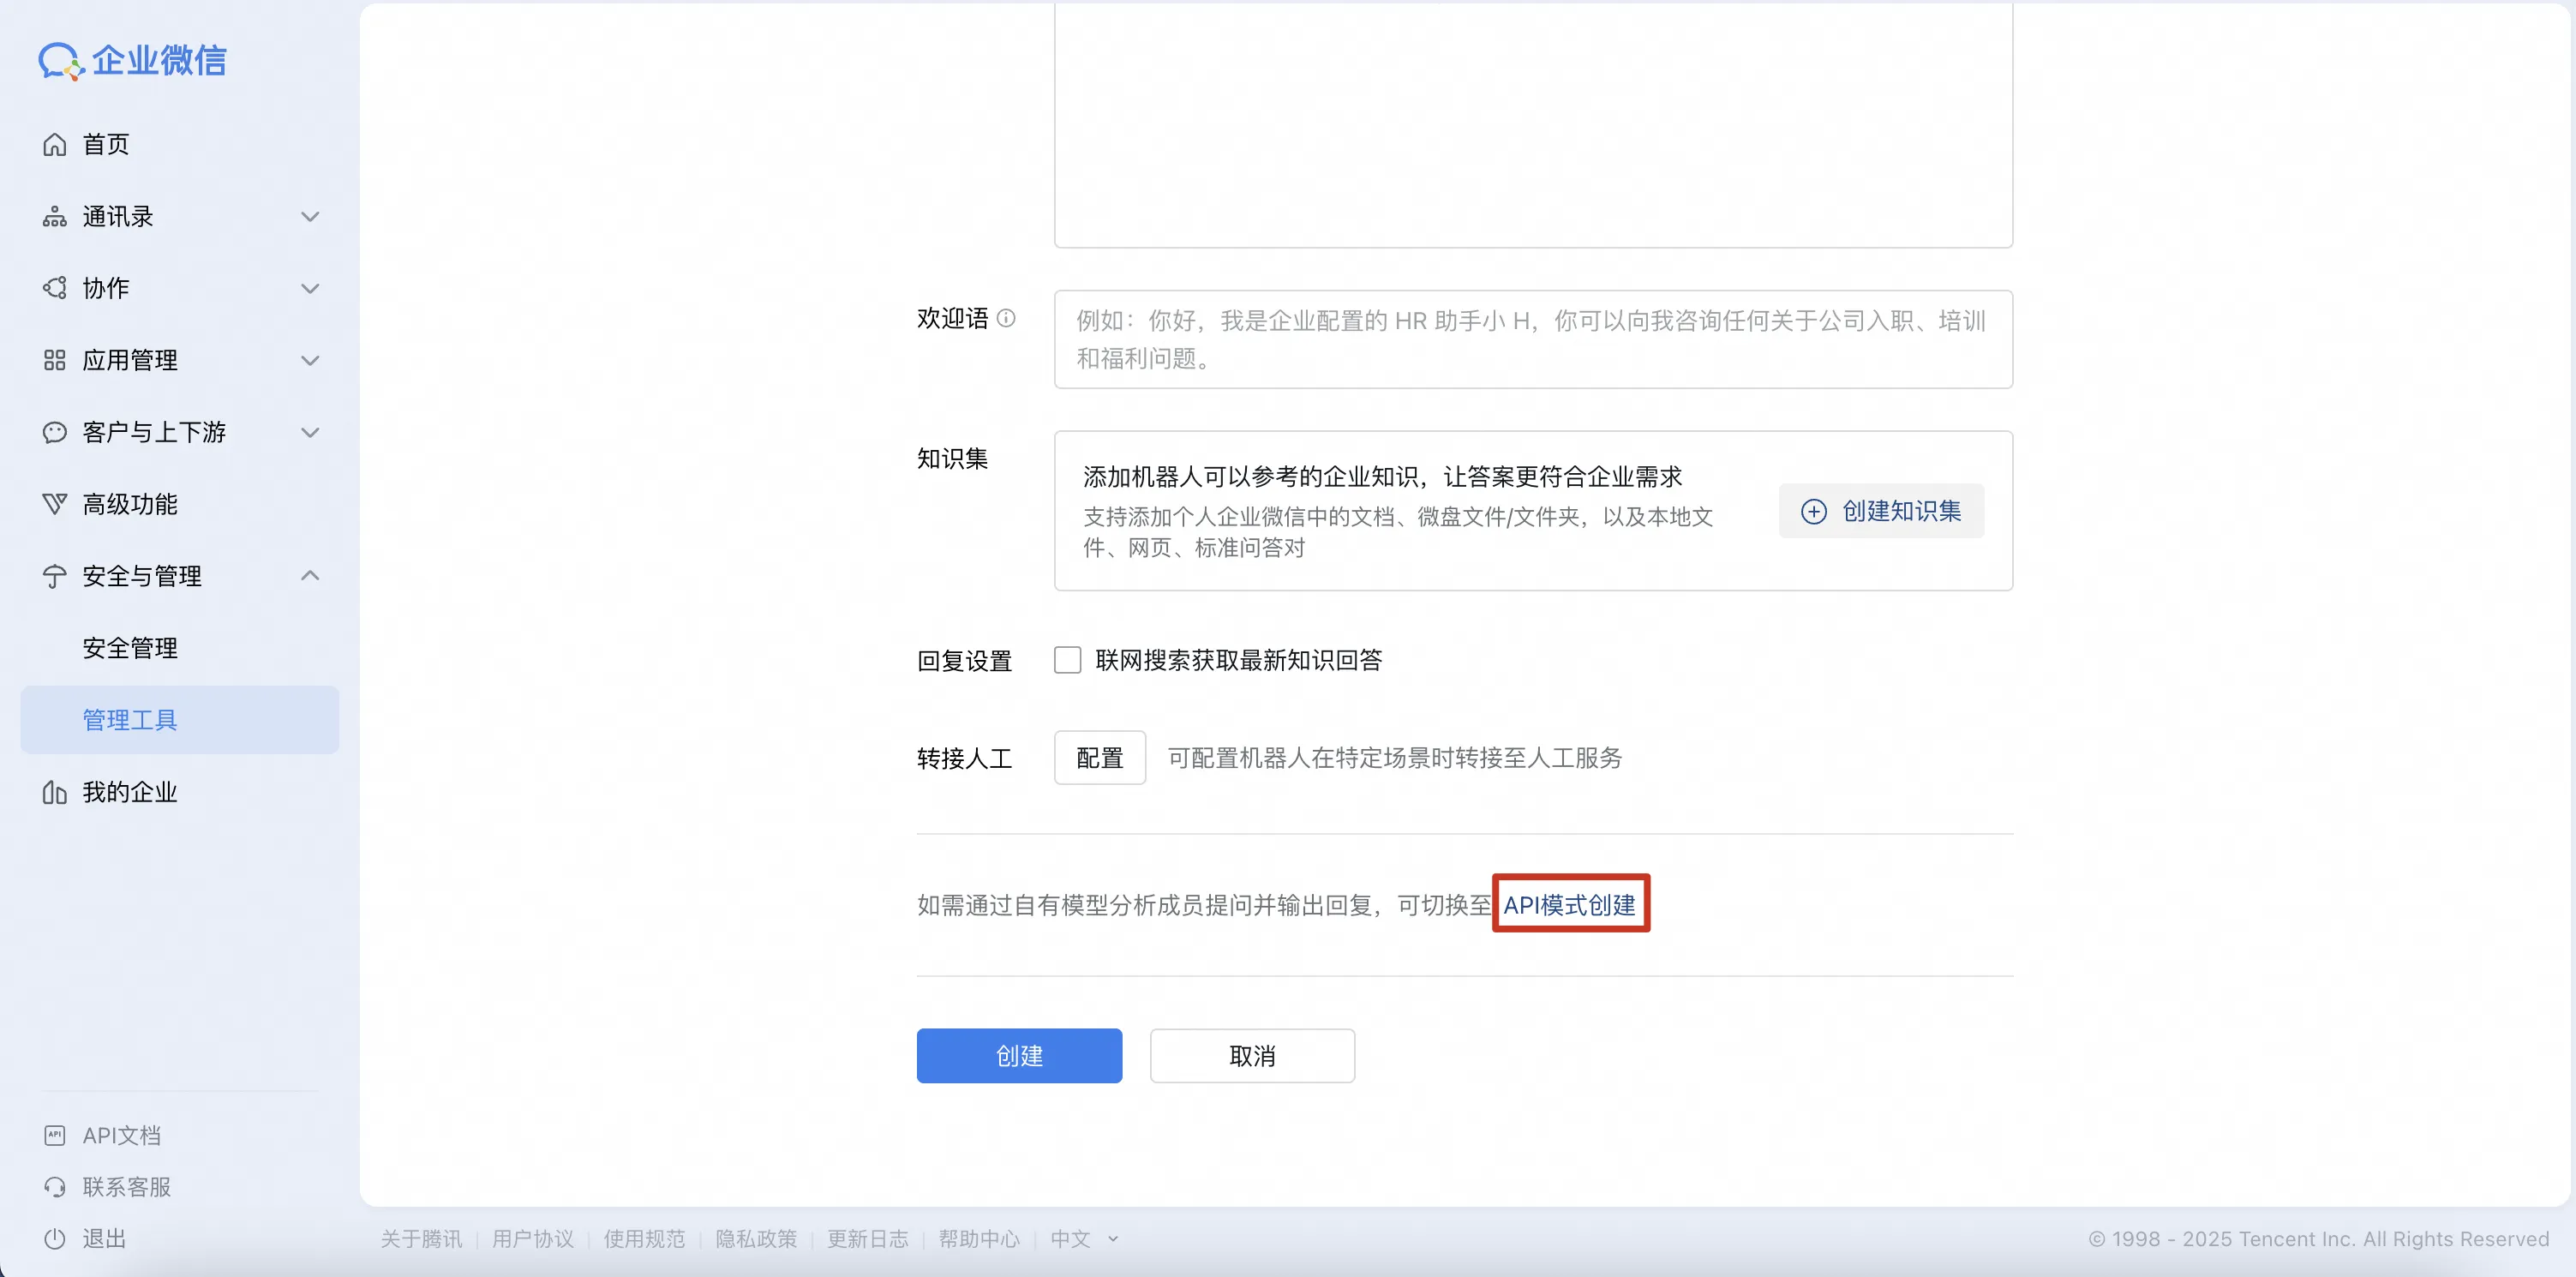
Go to the WeCom Admin Console. In the left navigation pane, click .
Select API Mode to create the bot.
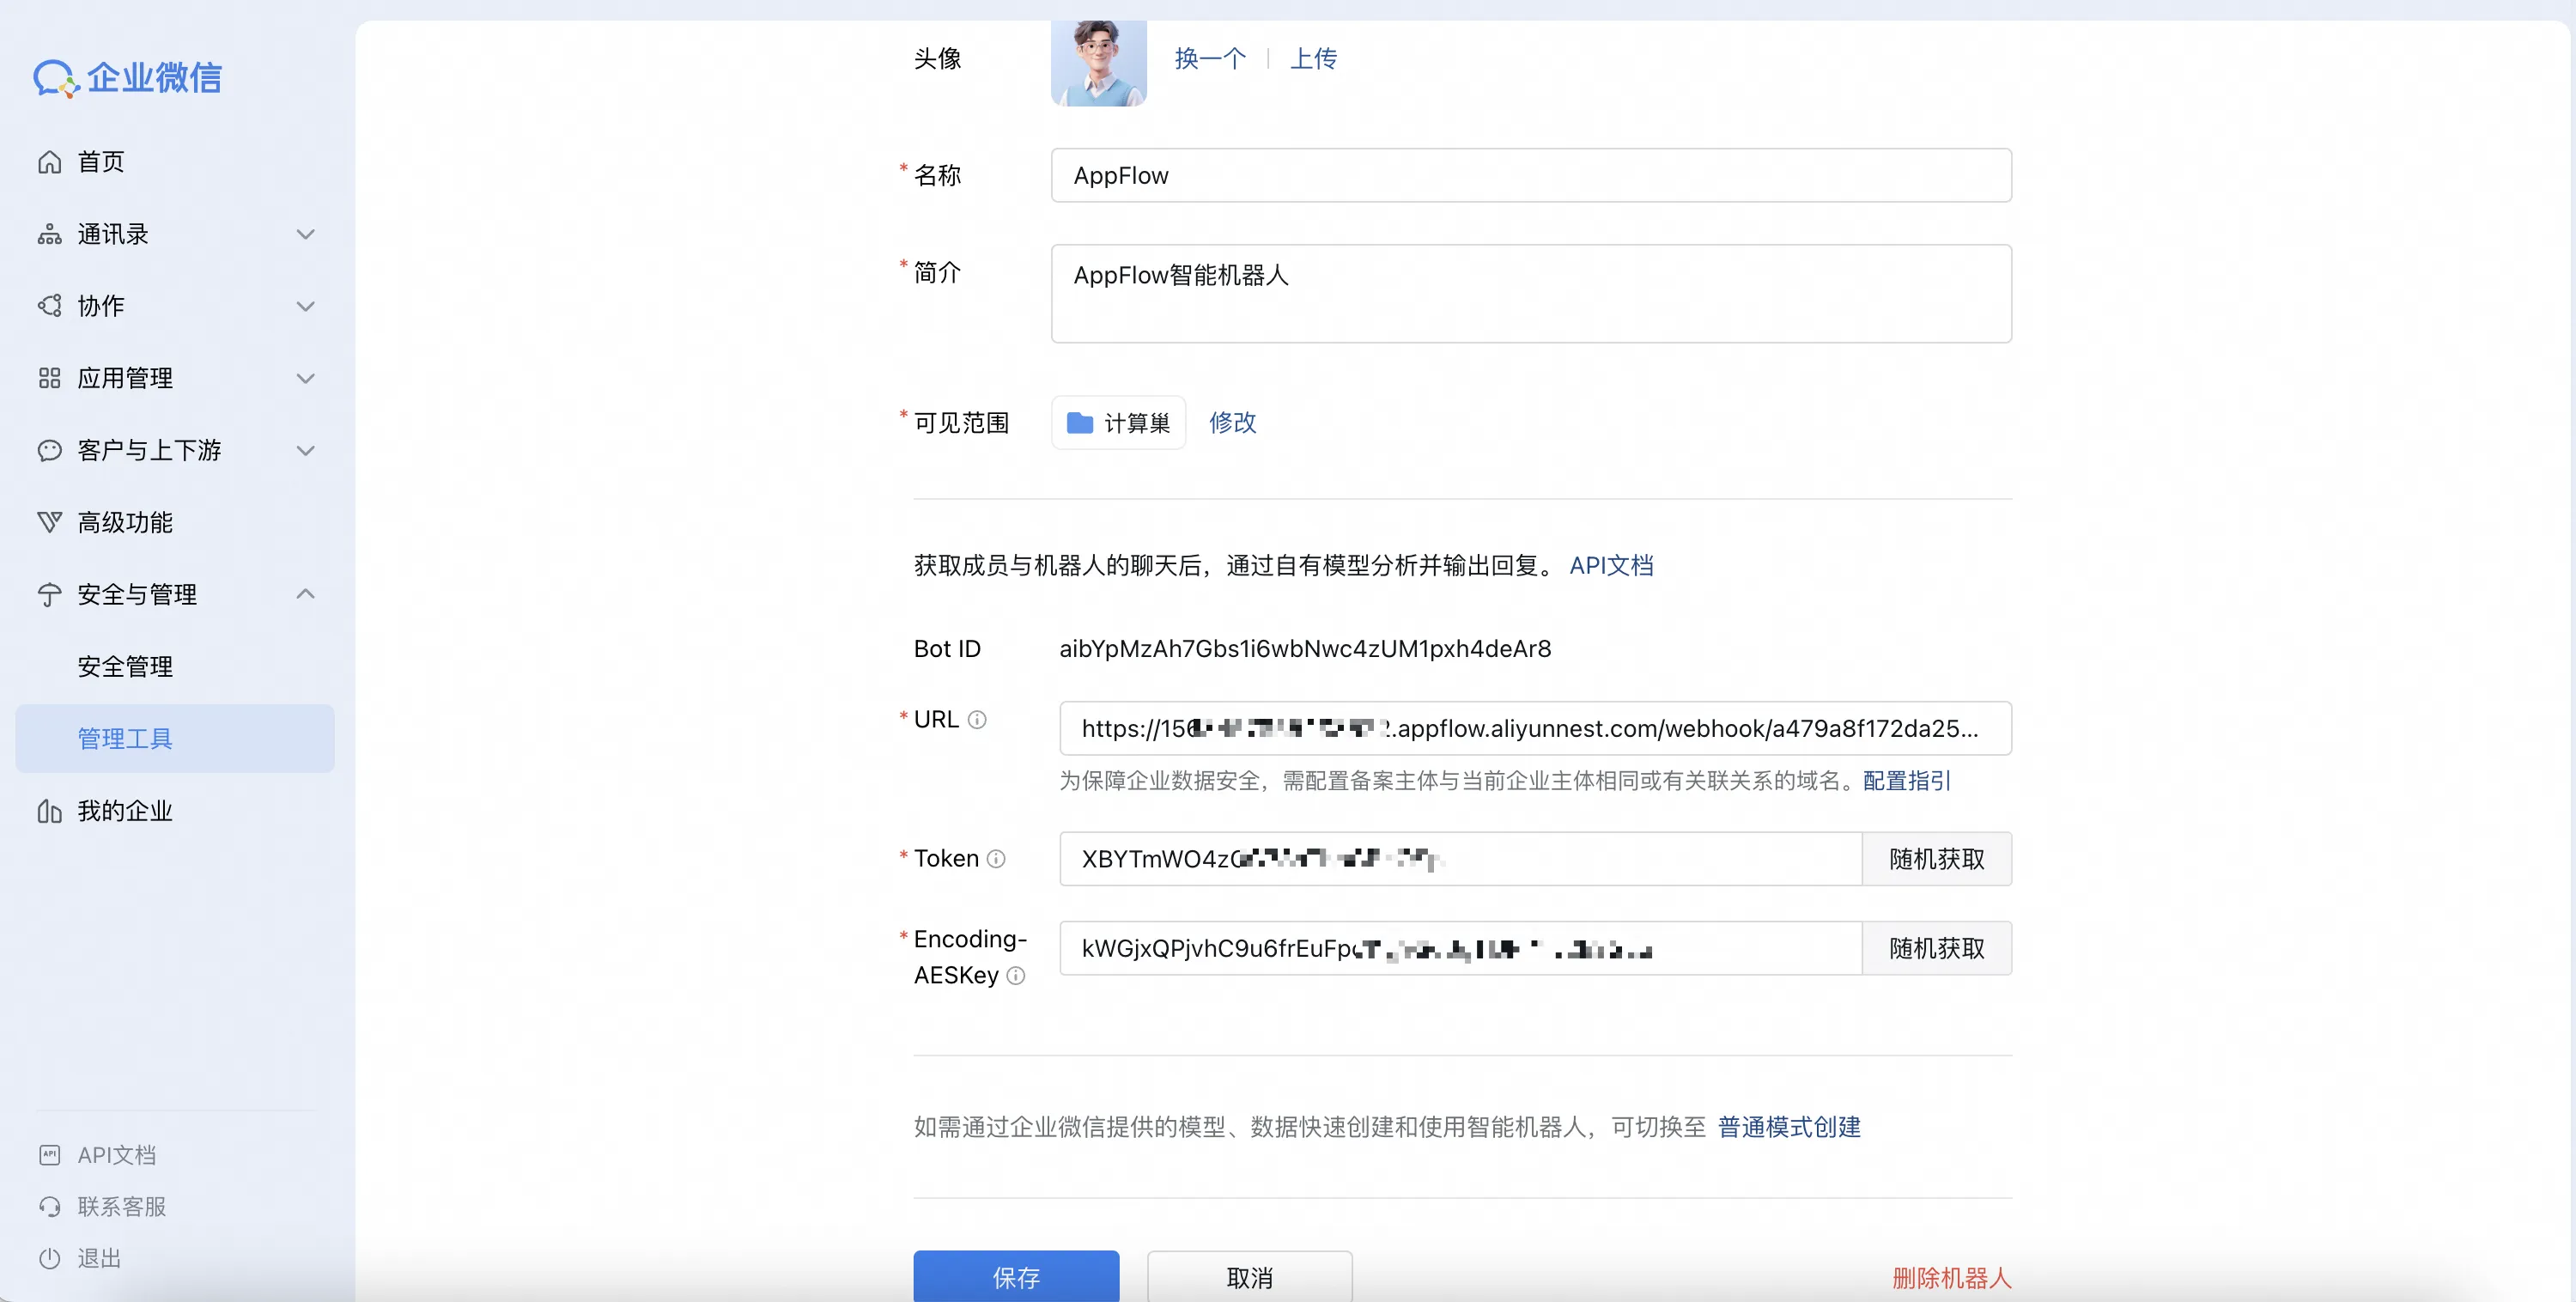
Follow the prompts to enter a name, description, and visibility scope, and then click Save. Note the following points during the configuration:
The bot name must be the same as the bot name that you entered for the AppFlow credential in Step 1.
For the URL, enter the WebhookUrl that you saved from AppFlow in Step 1.
For the Token and Encoding-AESKey, enter the corresponding values that you copied and saved from AppFlow in Step 1.
If the domain ownership verification fails, see the FAQ What do I do if the domain ownership verification fails? for a solution.
Integrate QQ with AppFlow
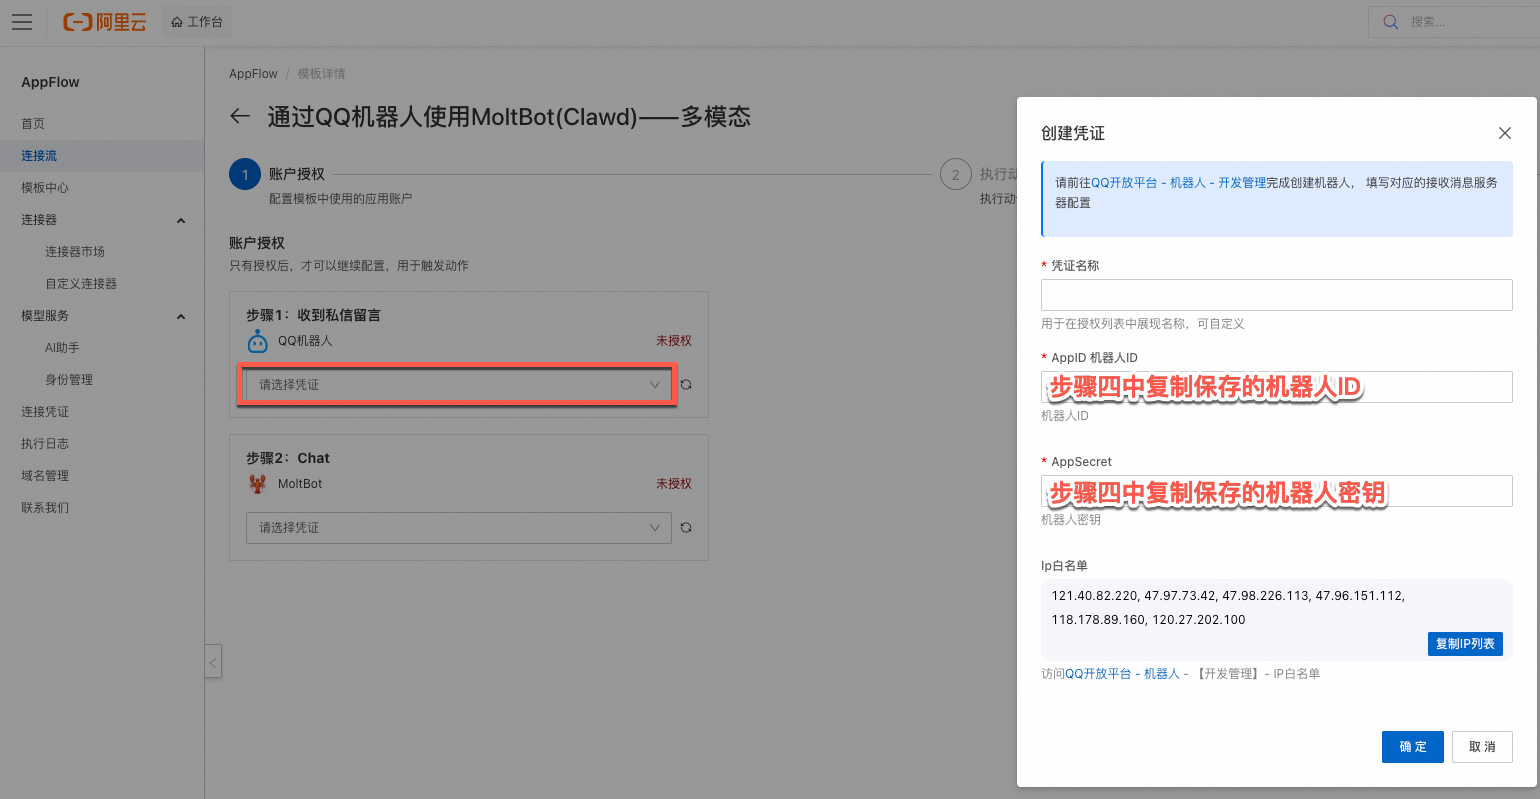
Create a connection flow using the Use MoltBot (Clawd) with a QQ Bot - Multimodal template by clicking Use Now.
On the Account Authorization page of the connection flow wizard, click Add New Credential. In the dialog box that appears, enter the App ID and App Secret of the bot that you created and set a custom credential name.
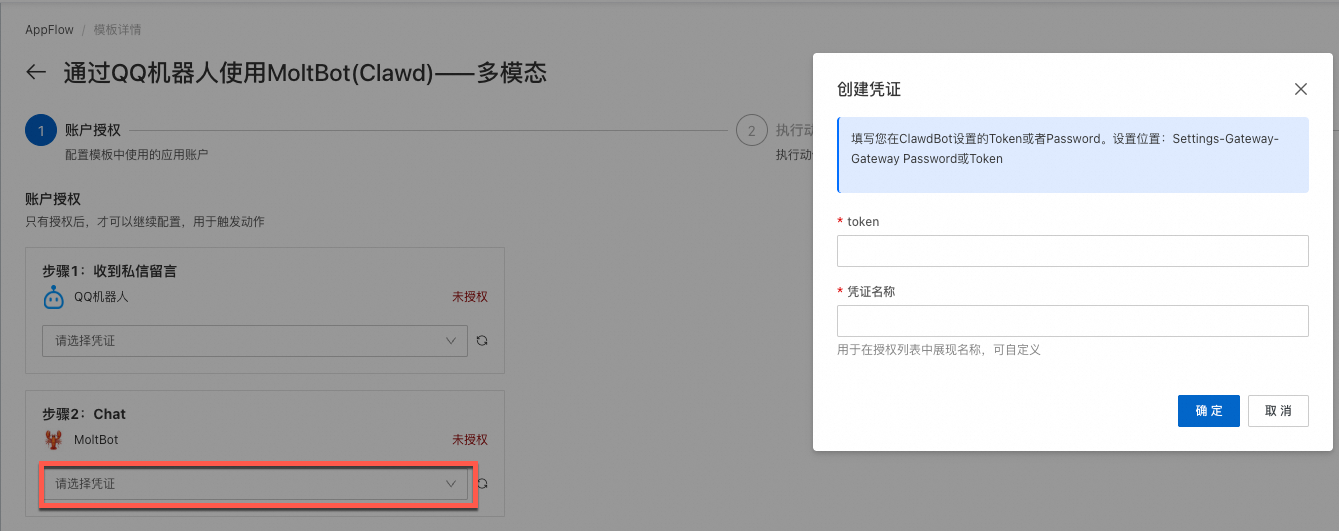
In the connection flow wizard, on the Account Authorization page, click Add new credential. Enter the Token that you obtained when you configured Moltbot in Step 2.
On the Configure Action page, complete the configuration and click Next. For Public IP Address:Port, enter the address in the format
Your Simple Application Server public IP address:service port. For example, if the public IP address is47.0.XX.XXand the service port is18789(the default), enter47.0.XX.XX:18789.On the Basic Information page, enter the Connection Flow Name and Connection Flow Description. We recommend that you keep the default values. Then, click Next.
After the configuration is complete, click Publish, and then copy and save your WebhookUrl.