This topic describes how to set caller number blacklist tags and other tags.
Function Overview
Inbound call control provides tag-based capabilities to handle incoming numbers in various ways. This feature is primarily used in IVR branch nodes to select the system parameter: caller number tag. It enables unified handling of numbers marked with specific tags—for example, routing them to voicemail, a virtual IP address (VIP) agent group, or blocking them via an inbound blacklist.
Add number tags
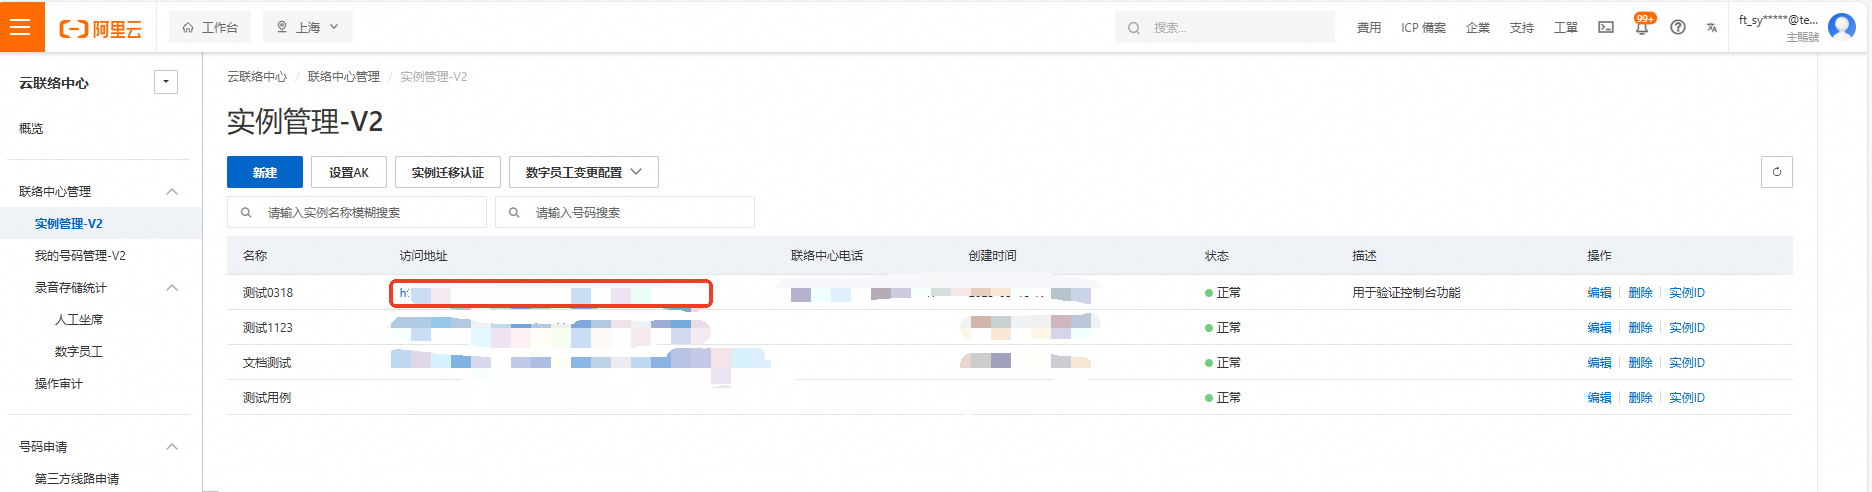
Log on to the Cloud Contact Center console. In the left navigation pane, choose Instance Management - V2, then click the endpoint of a specific instance to enter its console.
Click the menu button in the upper-right corner of the page and choose Voice Services to go to the Voice Services console. In the left navigation pane, choose Settings.
On the Settings page, choose the Inbound Call Control tab. Here, you can configure numbers, tags, and automatic tagging rules. Add numbers and assign corresponding tags.
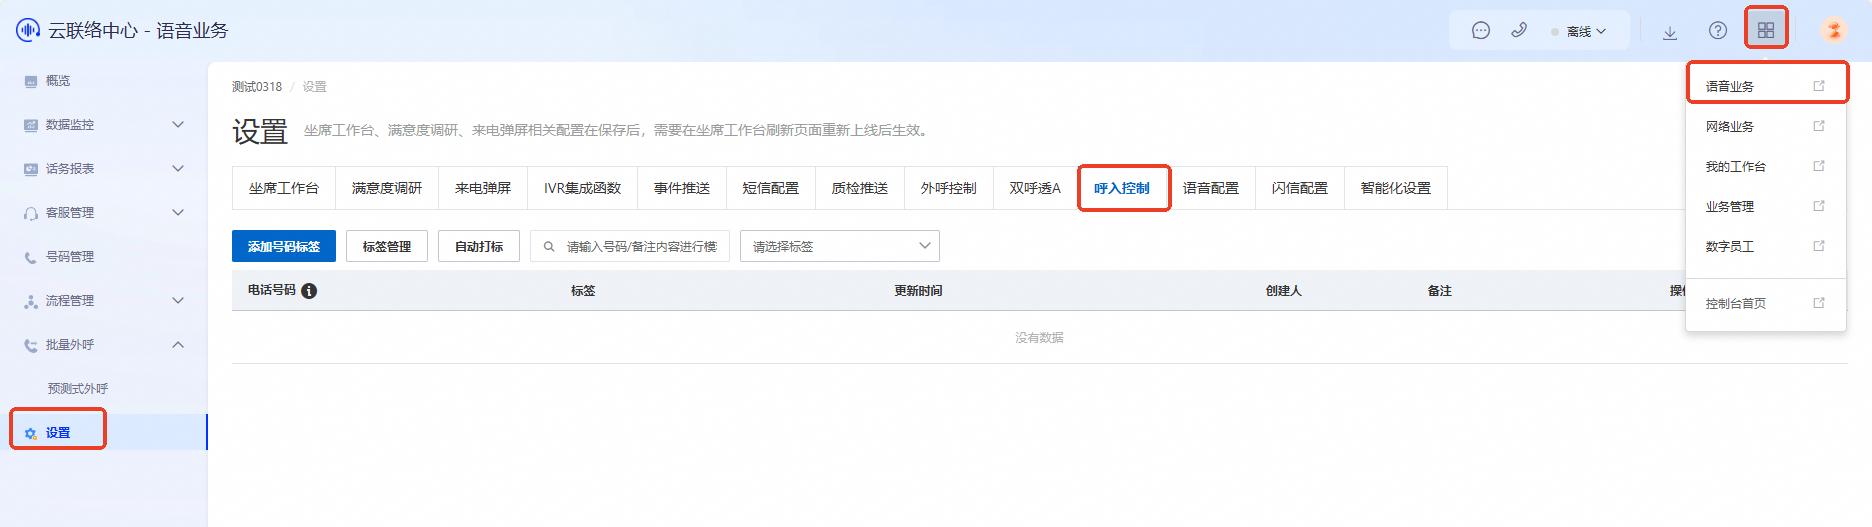
Click Add Number Tag. You can add new numbers and associate them with tags using either Manual Entry or File Upload. You can also add remarks.
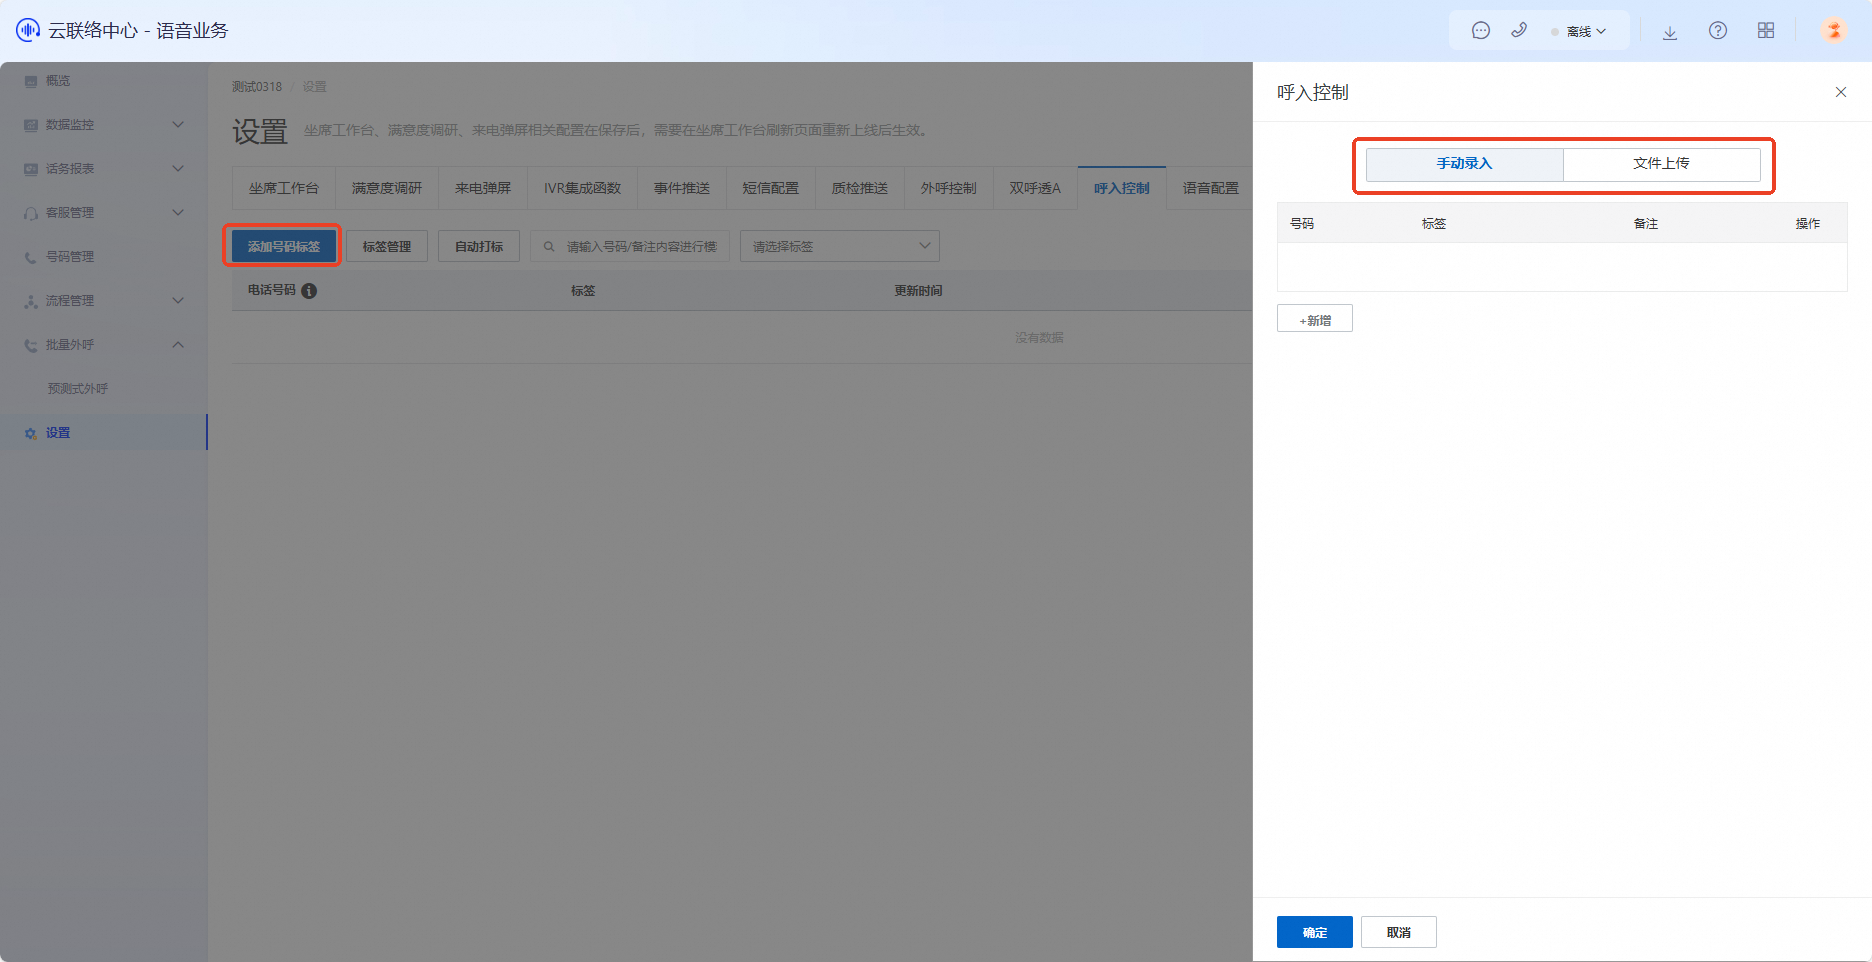
If you choose Manual Entry, add a new number, associate it with a tag, and optionally add remarks.
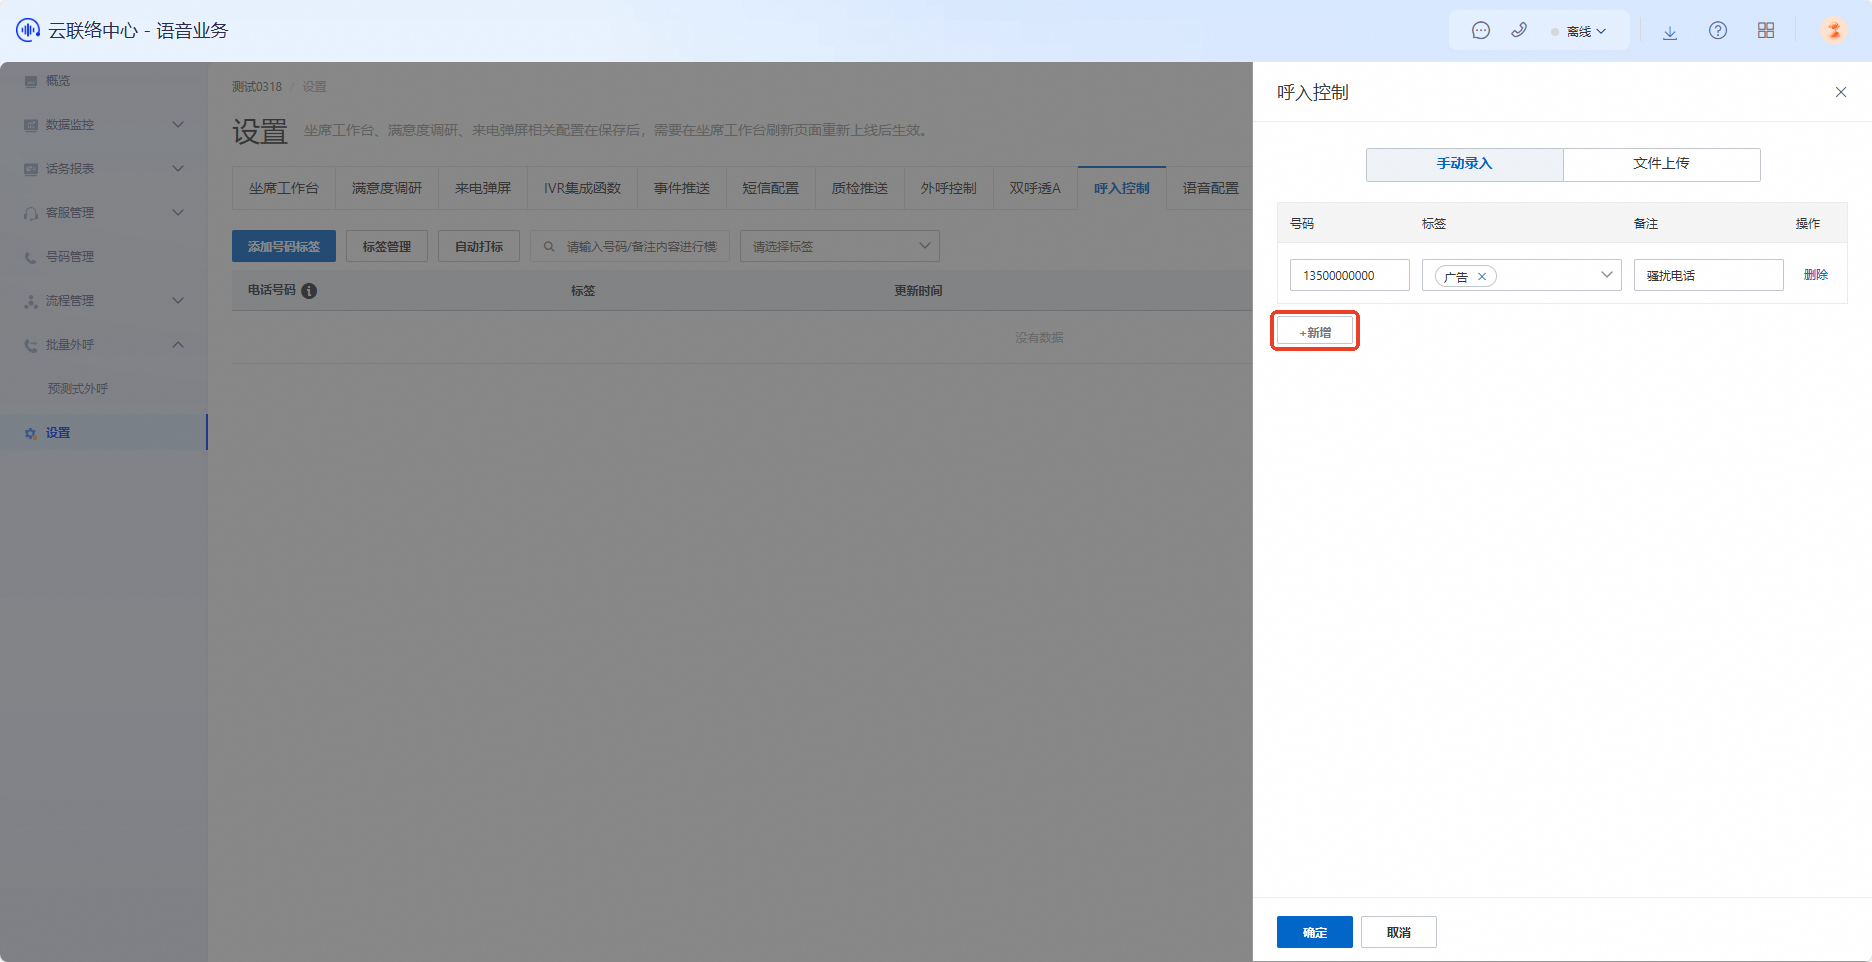
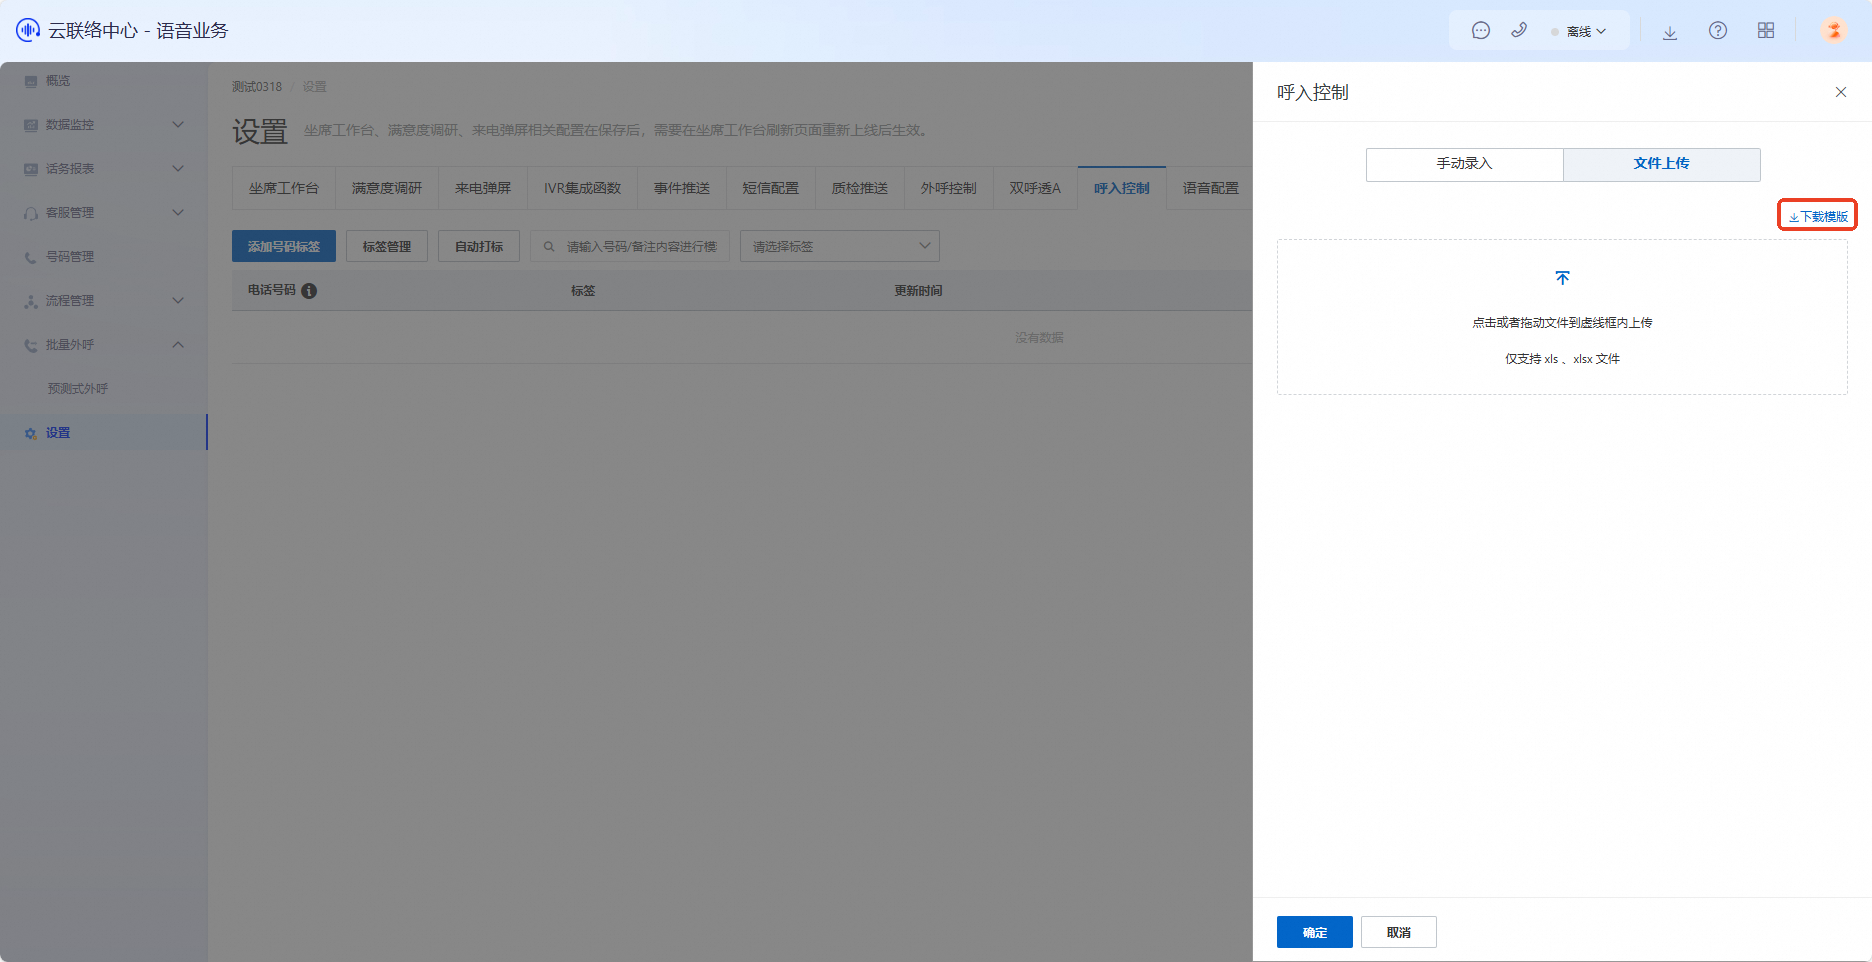
If you choose File Upload, download the template as prompted, then fill in the required information according to the template.
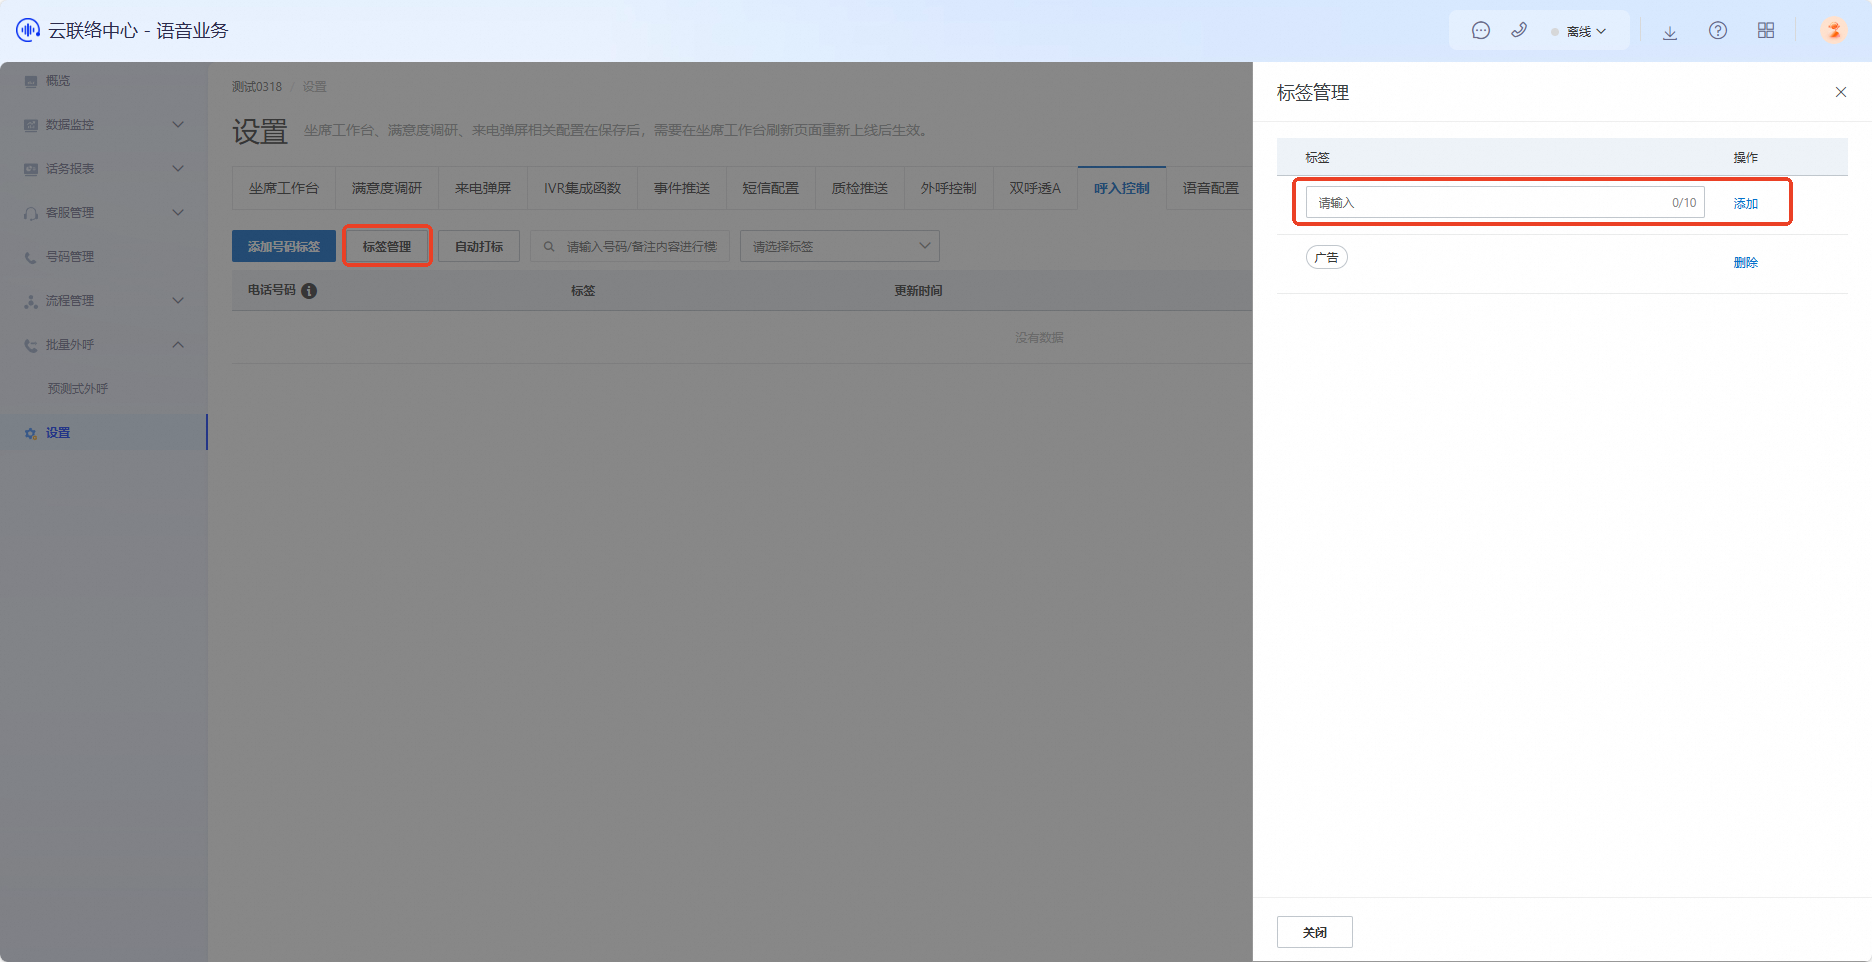
You can manage tags separately. Click Tag Management, then enter a tag name in the Tag Management panel that appears on the right.

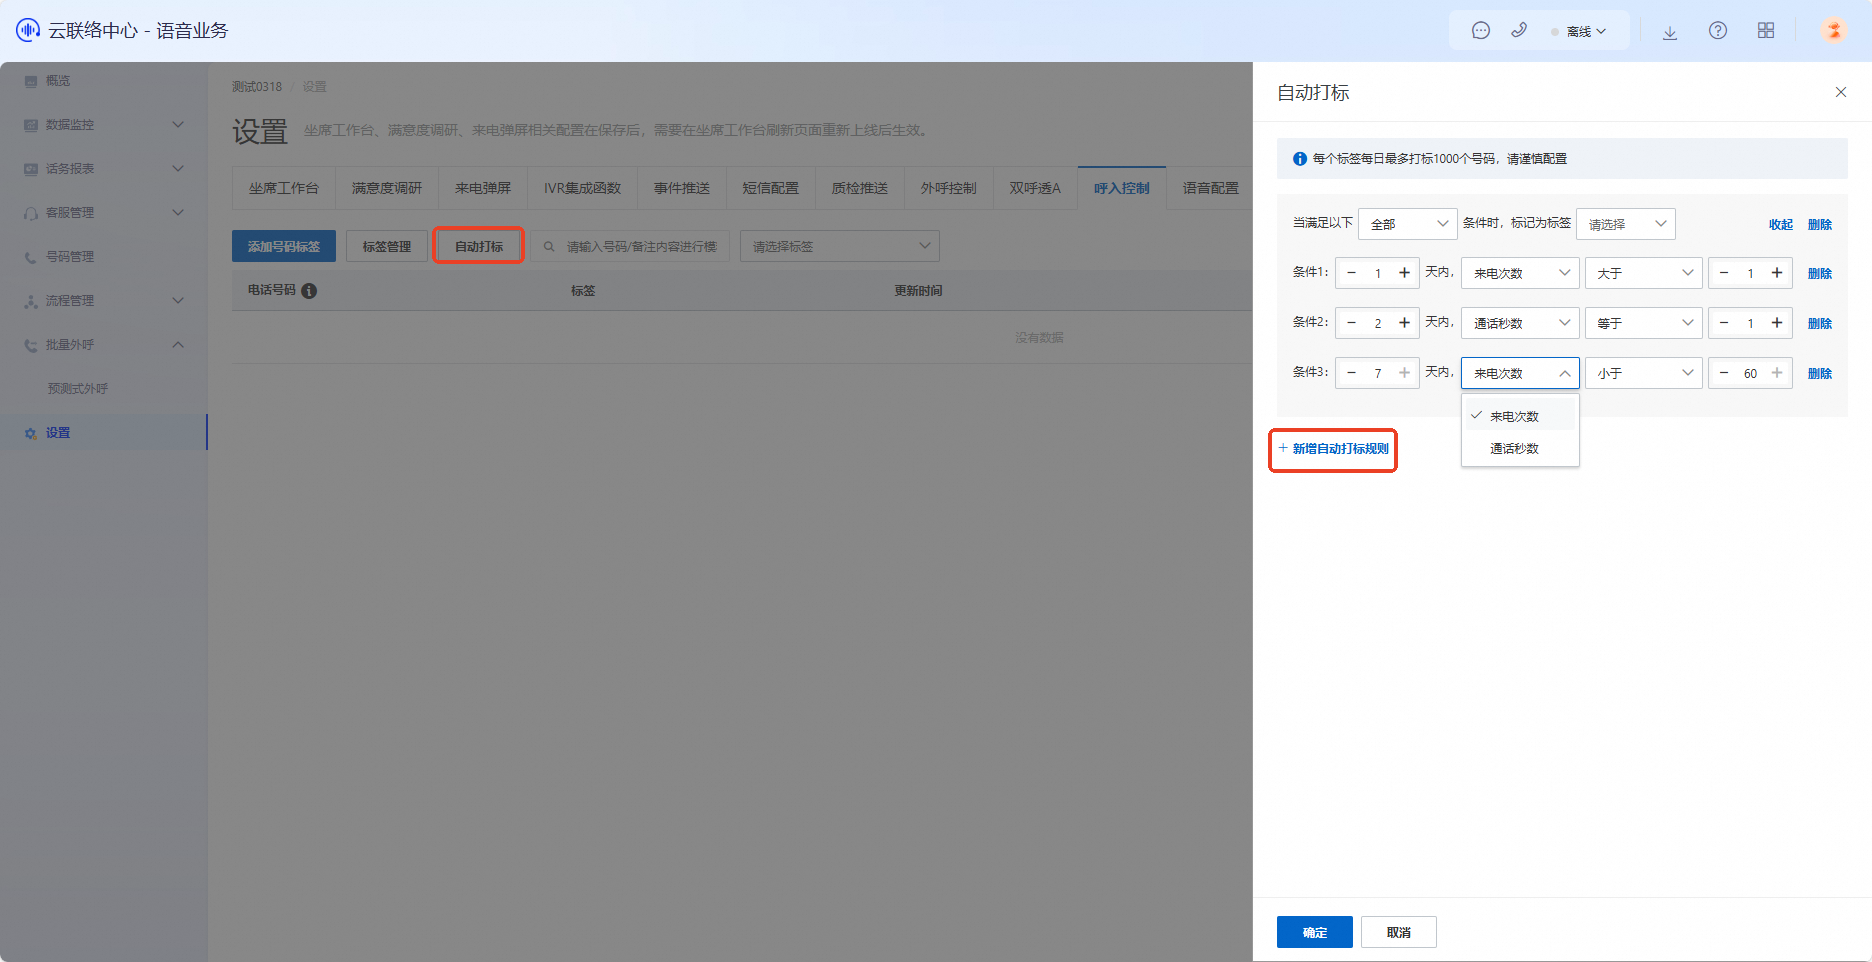
Click Automatic Tagging to configure automatic tagging rules. The platform uses these rules to automatically tag numbers.
You can define one to three conditions. Each condition applies to a time range of one to seven days. Choose either call count or call duration (in seconds) as the entity for evaluation. Use greater than, less than, or equal to as the comparison logic. Set the threshold value between 0 and 60. Finally, specify whether a number must meet all conditions or any one condition to be tagged with the selected label.
Reference caller number tags in IVR
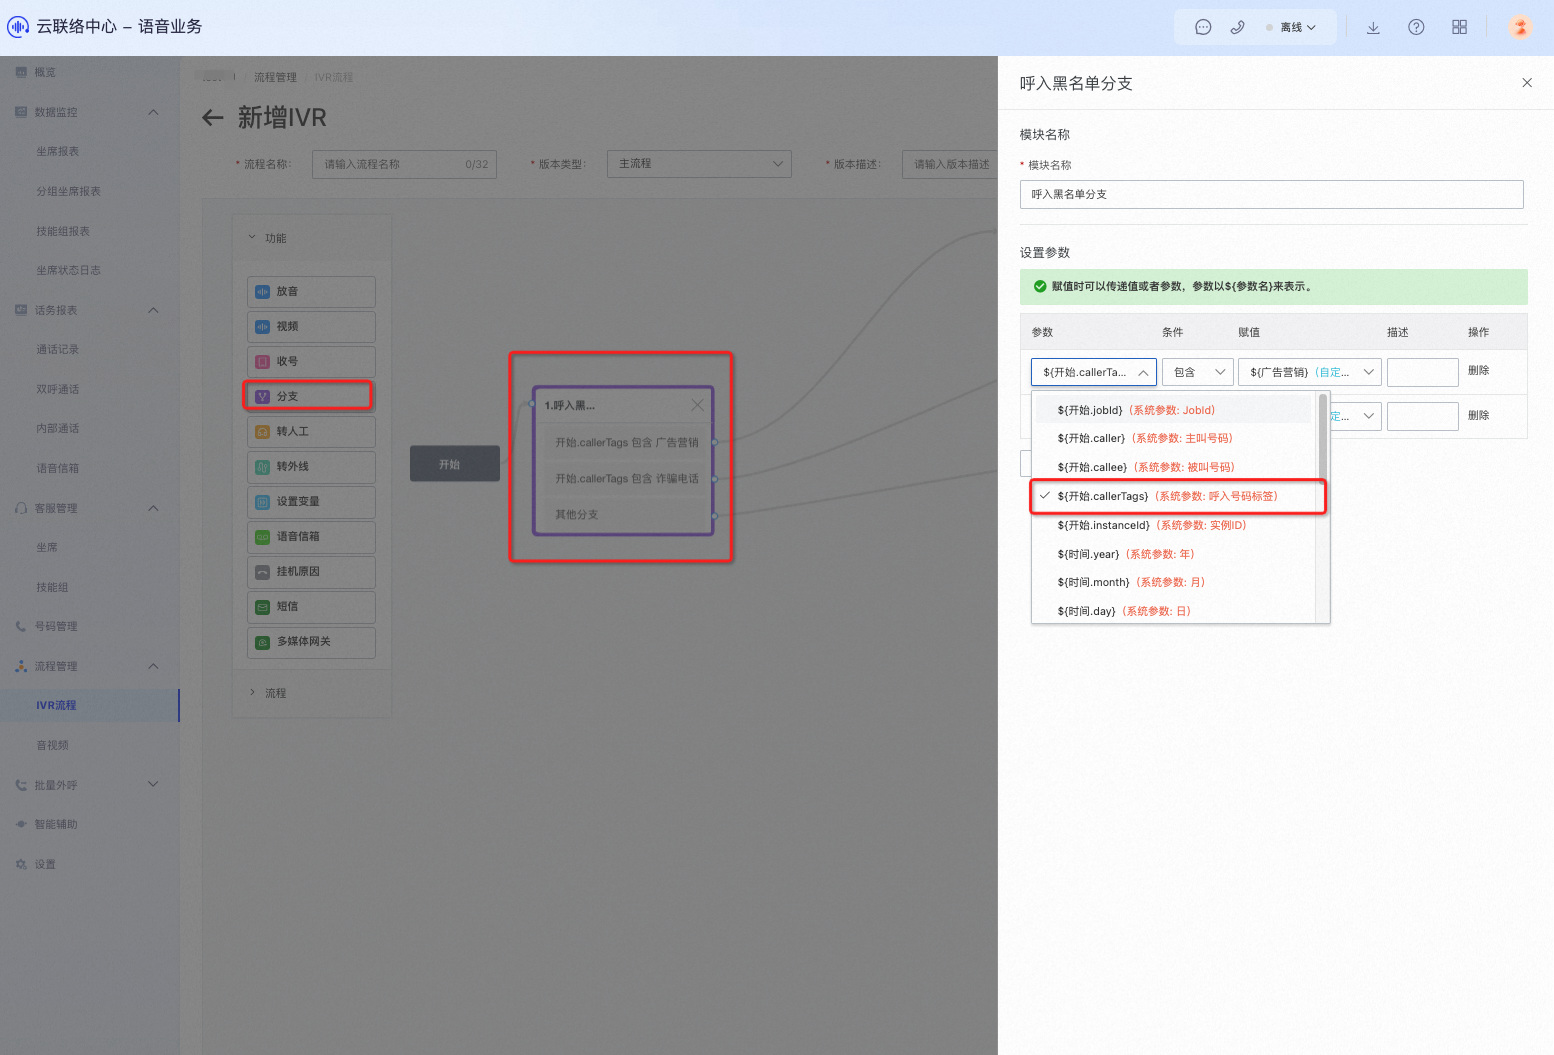
Create an IVR flow named Inbound Blacklist. Drag a Branch onto the canvas and name it Inbound Blacklist_Branch. Click the Inbound Blacklist_Branch module and configure the following parameters:
Parameter: Select “${Start.callerTags} System Parameter: Caller Number Tag”.
Condition: Select “Contains”.
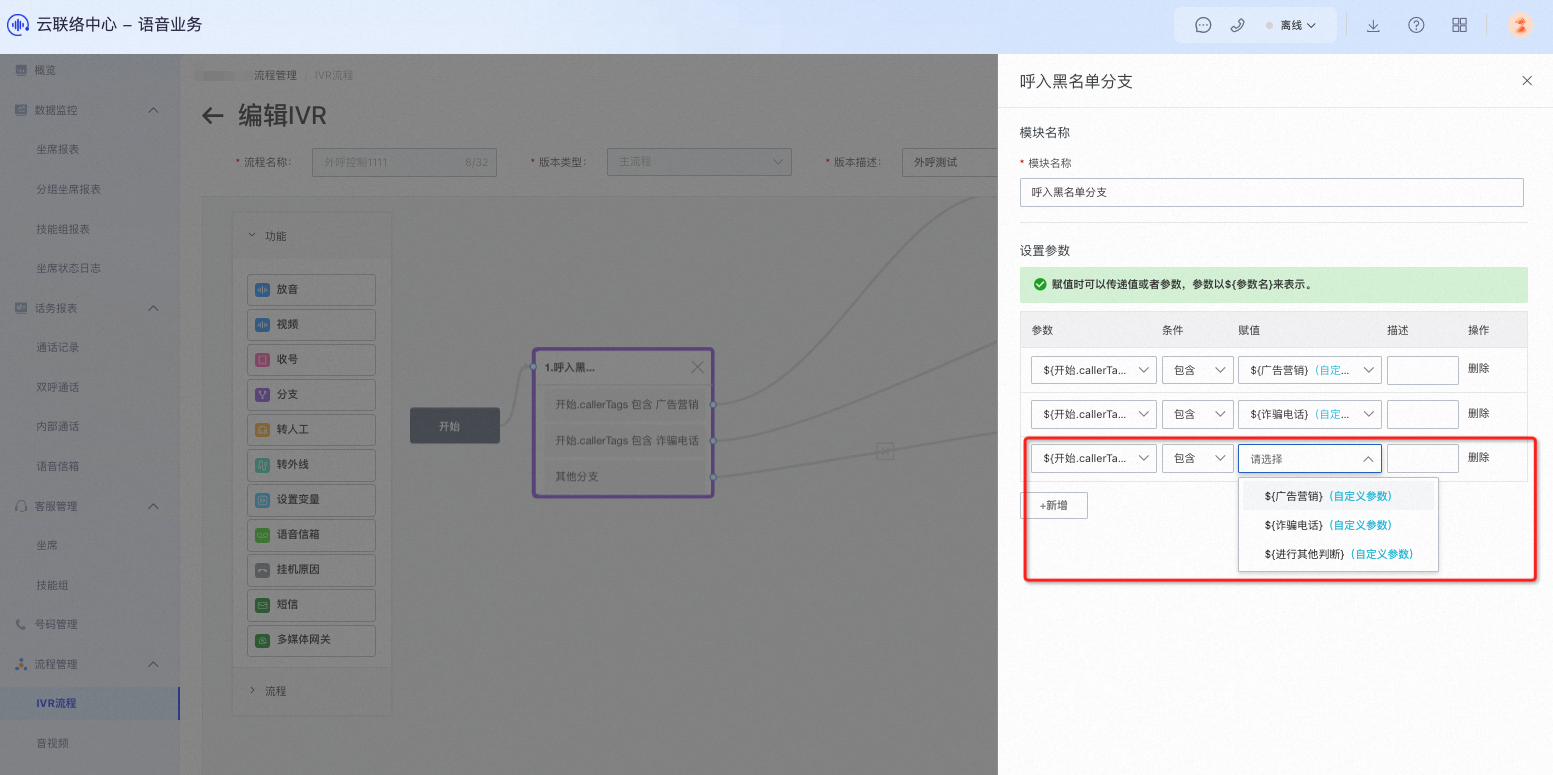
Value: Select a number tag you previously created in Settings. As shown in the following image, if you created an “Ad Marketing” number tag earlier, choose “${Ad Marketing} Custom Parameter” and assign it to the first node. Note that you can only select from existing tags defined in Settings—manual input is not allowed.
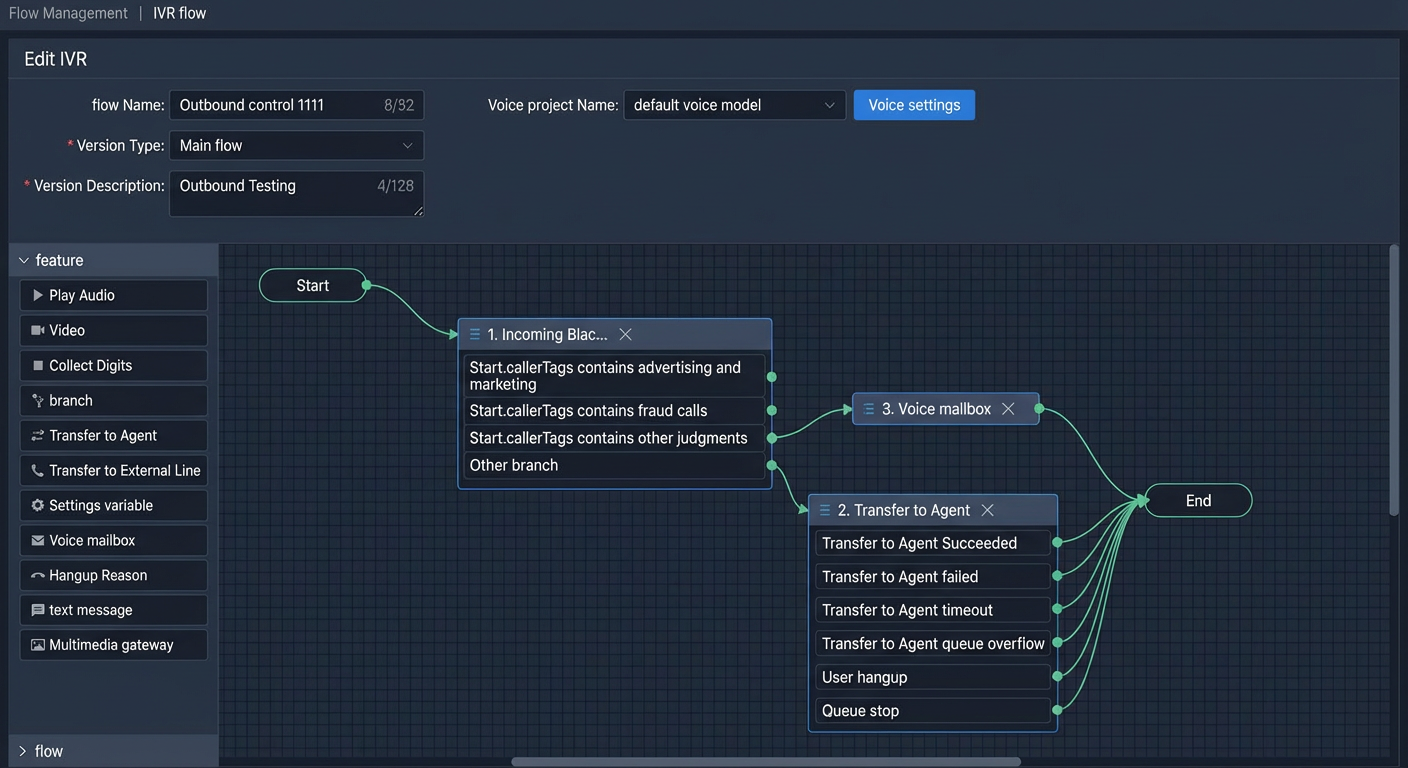
With these steps, you have completed basic inbound blacklist configuration. Numbers tagged as “Ad Marketing” will connect directly to an end node upon calling in. These calls will be automatically disconnected and cannot reach an agent.
The following demonstrates how to route calls to voicemail using an “Other Judgment” node. First, ensure you have added the relevant tag under Settings > Inbound Call Control > Tag Management. As shown below, set the value to “${Other Judgment} Custom Parameter”, then configure the node’s exit path to route to “Voicemail”. For detailed instructions, see Voicemail Module.
Configure other number tag nodes similarly based on your scenario—for example, route to agents, external lines, or other IVR flows.