The DataV Proxy application is a visual tool for configuring the DataV Proxy Service. You can use the application to securely access databases that are not publicly available, such as local or internal databases that do not have public endpoints. This document describes how to start the DataV Proxy application and use its features to configure the DataV Proxy Service.
How the DataV Proxy application works
An encrypted SQL query string and a database ID value are passed to the application.
The application connects to the database and retrieves the query results.
The query results are returned to the DataV page.
Start the DataV Proxy application
For Windows:
Download the DataV Proxy application installation package.
Decompress the package and double-click the
datav_proxy_wins.exefile.Register and log on to the DataV Proxy application.
On the DataV Proxy application page, you can add a data source, query logs, and perform other operations. For more information, see Configure the DataV Proxy application.
For Linux/Mac:
Run the following command to download the DataV Proxy application.
wget https://sh-conf.oss-cn-shanghai.aliyuncs.com/doc_files/datav_proxy.zipDecompress the installation package and navigate to the project folder.
Run the following commands. The DataV Proxy service starts on port
8001by default.chmod 777 ./* sh exec.sh startNoteTo set a port number and start the service, run the
sh exec.sh start -p [port_number]command. For example,sh exec.sh start -p 8080.To stop the service, run the
sh exec.sh stopcommand.
After the service starts, access
http://<domain_name_or_IP_address>:<port>in a browser.Domain name or IP address: The public domain name or IP address of the server where DataV Proxy is installed.
Port: The startup port of the DataV Proxy service.
Register and log on to the DataV Proxy service application.
On the DataV Proxy service application page, you can add a data source, query logs, and perform other operations. For more information, see Configure the DataV Proxy application.
Configure the DataV Proxy application
Access
http://{IP_address_or_domain_name}:{port}(for example,http://10.10.10.10:8001) to open the DataV Proxy application configuration page.NoteIf you are accessing the service for the first time, you must register and log on.
Configure a data source.
Configure the basic information for your database. After you complete the configuration, click Test Database Connection and Test SQL to verify the data source.
ImportantBefore you add a data source, you must add the IP address of the DataV Proxy service to your database whitelist. For example, if you use an ApsaraDB RDS for MySQL database, add the
IP address of the serverfrom Step 1 to the ApsaraDB RDS for MySQL whitelist. For more information, see Connect to an ApsaraDB RDS for MySQL instance using a client or the CLI.Click Data Source Configuration, select a data source type, and then click Add.
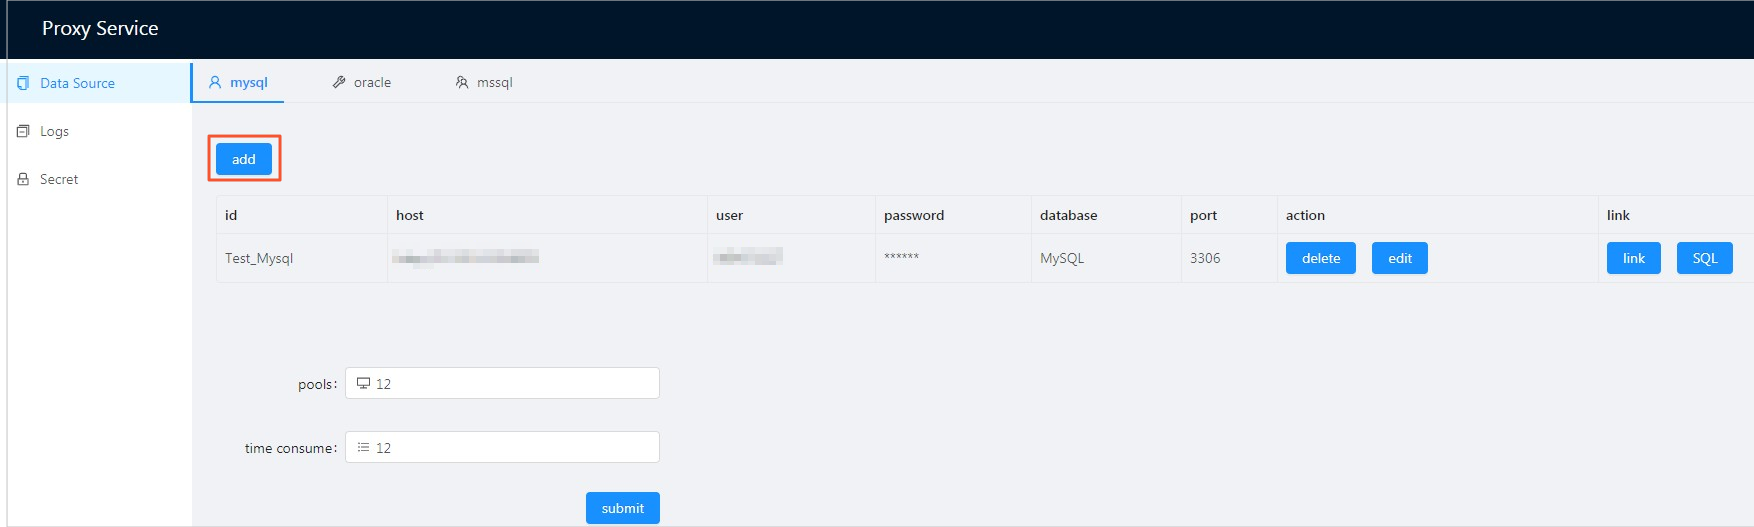
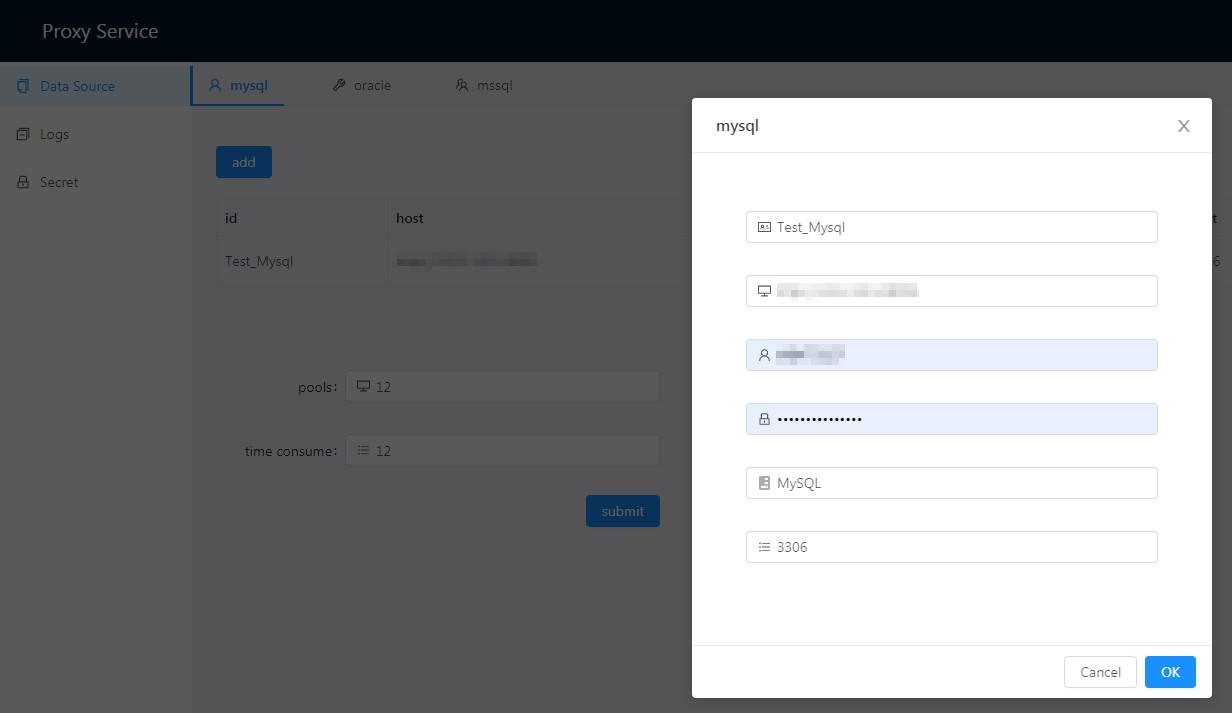
In the dialog box that appears, enter the configuration information for the data source.
Parameter
Description
idThe ID of the data source. This is a custom ID and must be unique.
hostThe IP address or domain name of the server where the database is located. For an ApsaraDB RDS for MySQL instance, enter the public endpoint of the instance. You can find the endpoint on the Basic Information page of the instance. For example, rm-bp1xxxxxxxxxxxxxhmo.mysql.rds.aliyuncs.com.
userThe username for logging on to the database.
passwordThe password for logging on to the database.
databaseThe name of the database.
portThe port number of the database. For an ApsaraDB RDS for MySQL instance, the port is typically 3306.
Test the configured data source.
Click Test Database Connection to test the database connectivity.
Click Test SQL. In the dialog box that appears, enter an SQL statement to verify that you can query data from the database.

Query logs.
You can query project logs by specifying a range of log lines and searching for lines that contain a keyword.
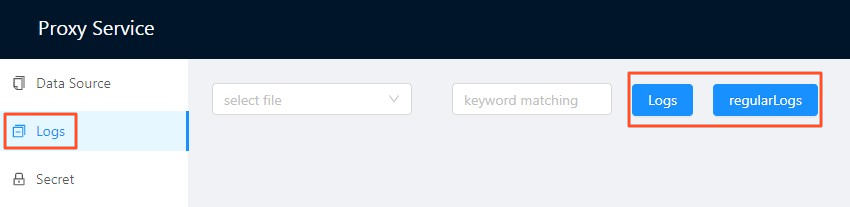 Important
The Windows version supports only viewing logs. You cannot specify a line range or perform a keyword match query.
Generate a key.
The key is used for the DataV data source configuration. Click One-click Generate New Key/Secret to generate a new key and secret. The previous key and secret become invalid.
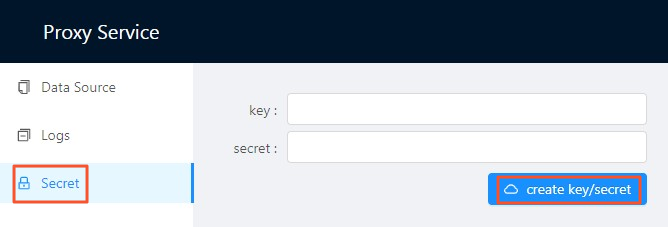 Important
The initial key and secret are empty. Click One-click Generate New Key/Secret to generate them.
Use the DataV Proxy application
Log on to the DataV console.
Click My Data > Data Source Management > Add Data.
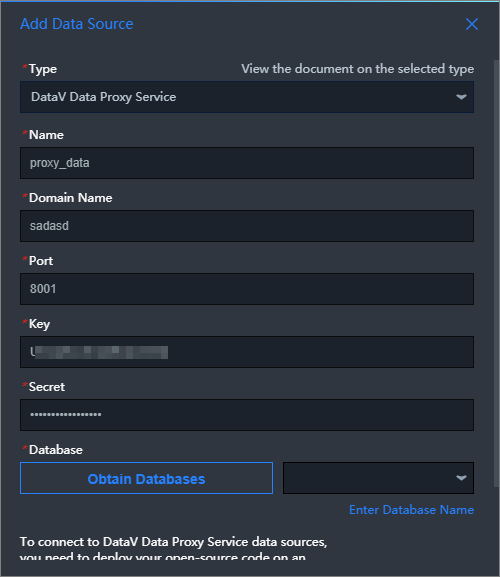
In the Add Data dialog box, enter the required information.

Parameter
Description
Type
Select DataV Proxy Service.
Name
The name of the data source. You can customize the name.
Domain Name
The IP address or domain name of the DataV Proxy server. You can get this from the Configure the DataV Proxy application section.
Port
The startup port of the DataV Proxy service. You can get this from the Configure the DataV Proxy application section. The port is typically 8001.
Key
Corresponds to the key generated in Step 4 of the Configure the DataV Proxy application section.
Secret
Corresponds to the secret generated in Step 4 of the Configure the DataV Proxy application section.
Database
Displays the IDs of the data sources that have been added in the DataV Proxy application.
After you enter the information, the system automatically tests the connection.
Click Get Data List and then select a data source from the Get Data List. The connection is successful if the list displays the IDs of the data sources that you added in the DataV Proxy application.
ImportantBrowser security policies prevent HTTPS pages from making HTTP requests. Because DataV Proxy is accessed through a browser, its protocol must match the protocol of the DataV page. If you use an IP address or do not have an HTTPS domain name for your proxy, you must use the HTTP URL for the DataV console to access the DataV Proxy application. To access DataV Proxy from a DataV page that uses HTTPS, you must configure an HTTPS endpoint for your DataV Proxy.
Click OK to add the data source.
After the data source is added, you can configure it for a widget to display its data. For more information, see Configure widget data.