This topic describes how to integrate the Huawei third-party channel SDK for Mobile Push.
Preparations
You have integrated the Mobile Push SDK. For more information, see Android SDK integration.
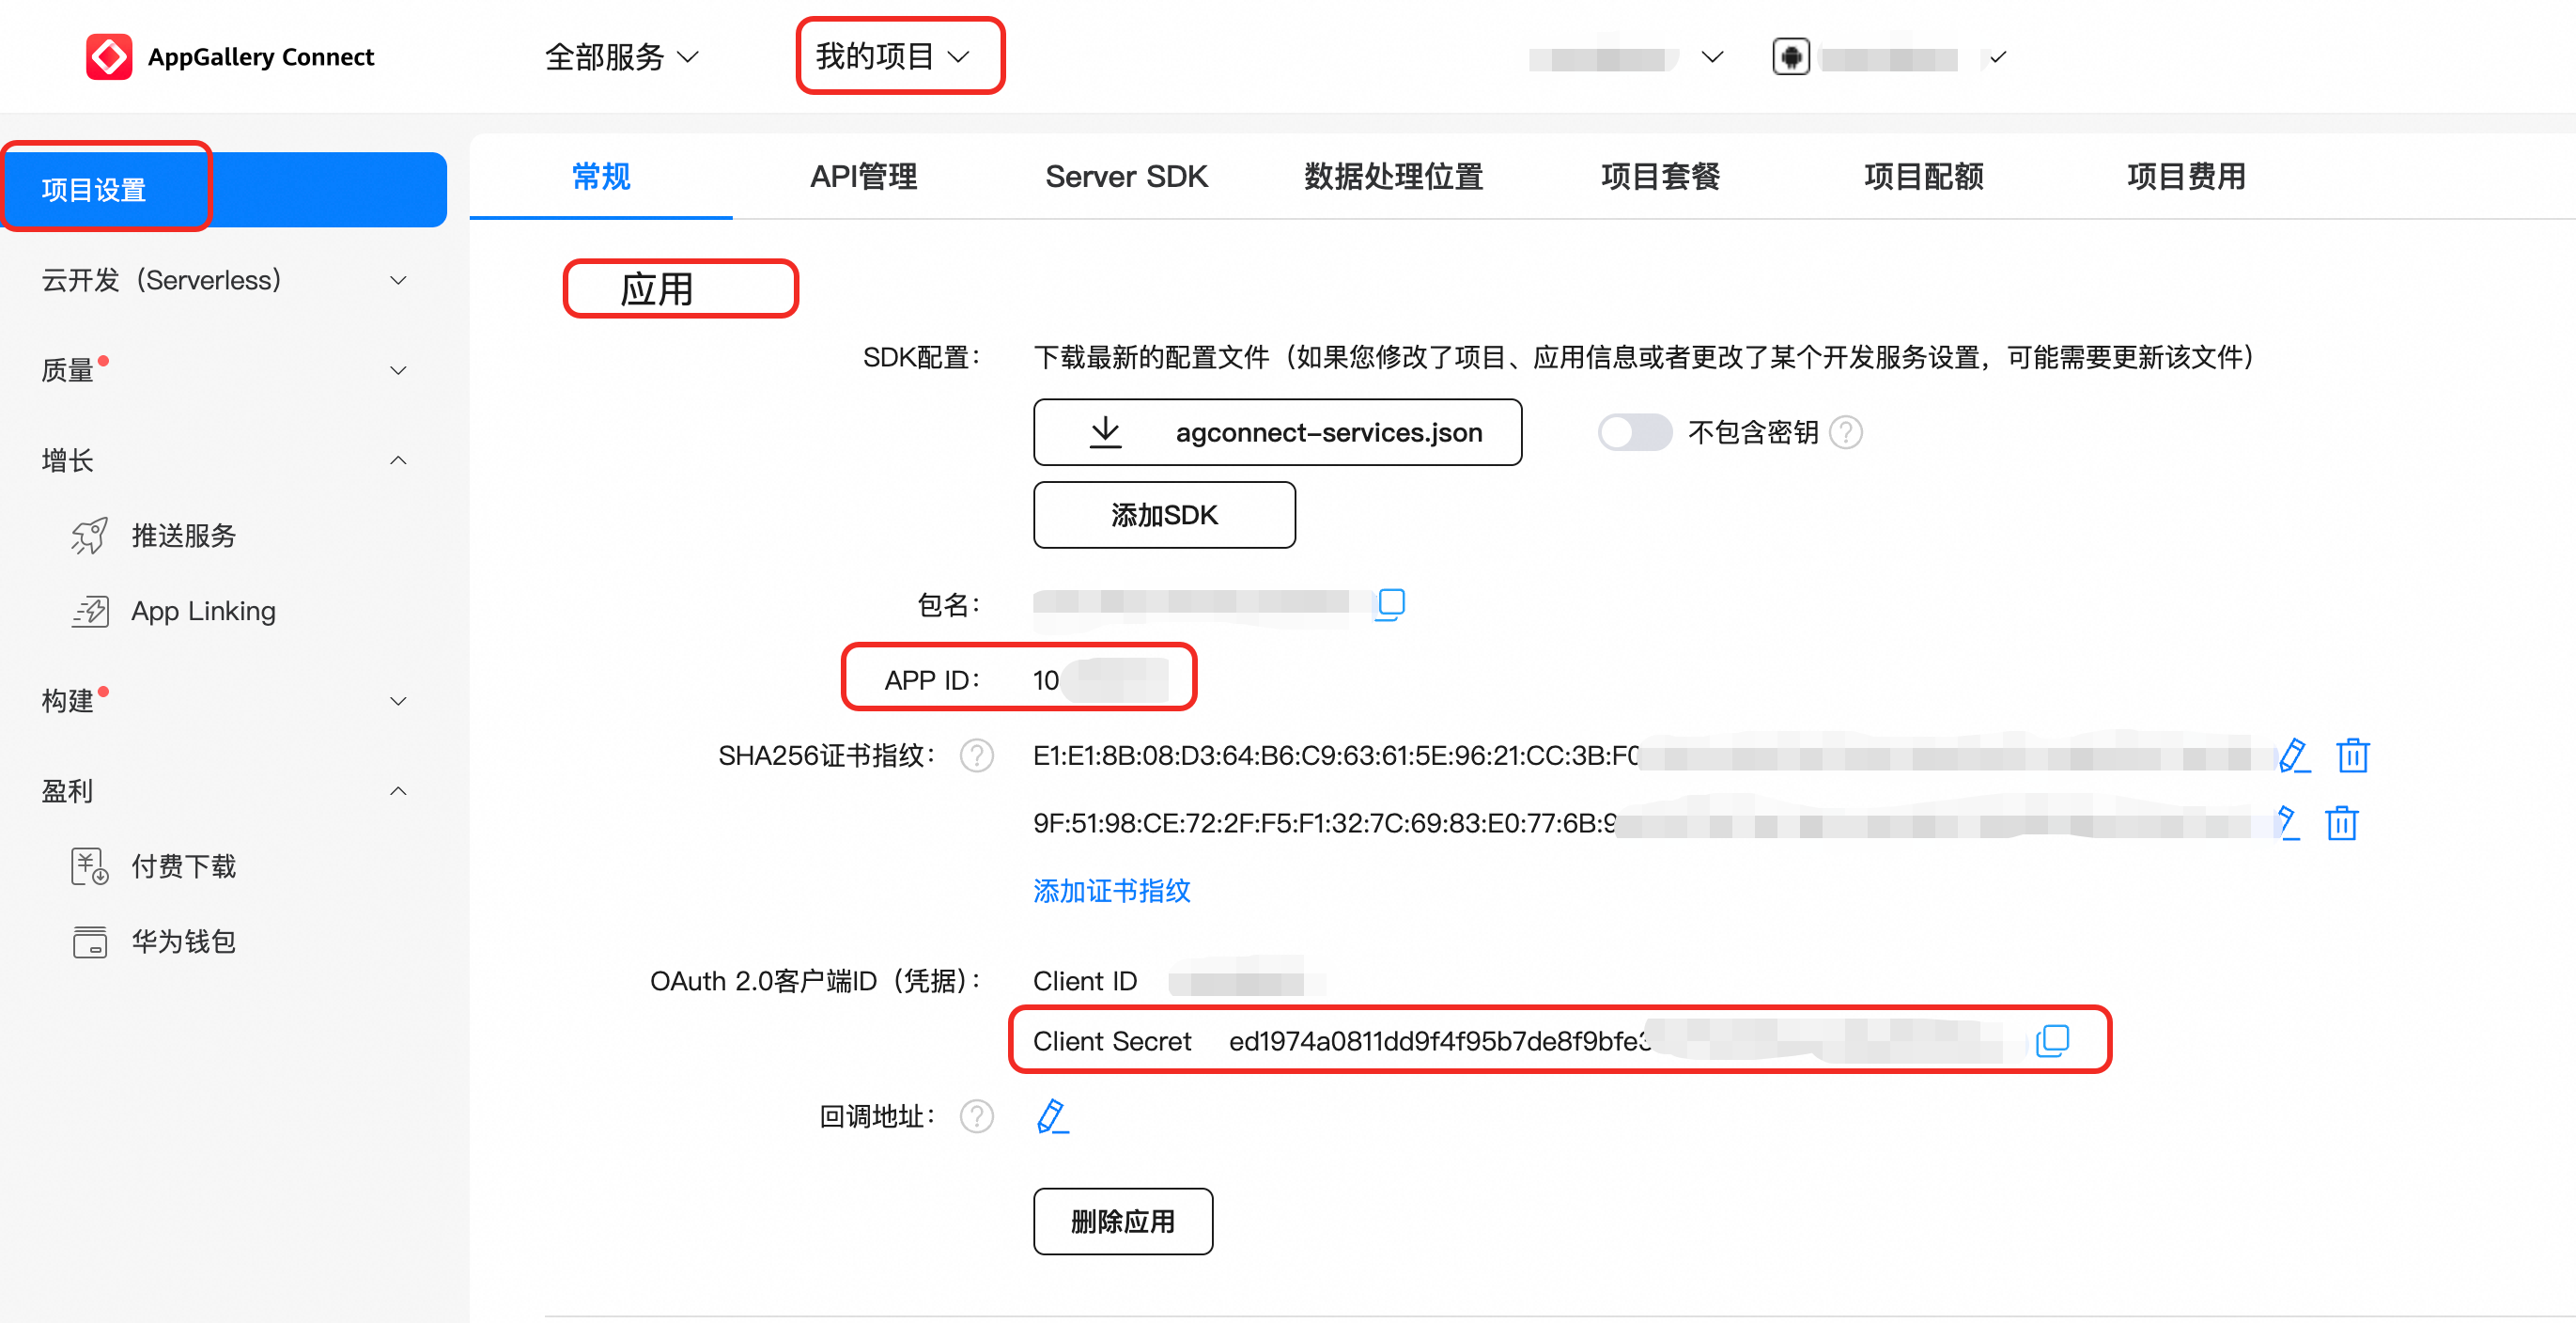
You have registered an application on HUAWEI Developers. If you have not, log on to HUAWEI Developers to register your application. Then, obtain the App ID and Client Secret from your application details.
You have configured the SHA256 certificate fingerprint on HUAWEI Developers. If you have not, see the official Huawei document Configure in AppGallery Connect.
You have set up message receipts. If you have not, see Message Receipt.
ImportantIf you use the assistive pop-up window, arrival rate statistics for the Huawei channel only include notifications that users click. Notifications that are not clicked are excluded from the statistics. To help Mobile Push collect more comprehensive push data, set up message receipts on the Huawei side.
To enable receipts, configure the webhook address:
https://amspush-ack.aliyuncs.com/hw/.If you configure multiple webhook addresses, you must set this address as the default receipt. Alternatively, you can configure the receipt ID in the Default Receipt ID field in the console.
You have configured the push key in the EMAS console. If you have not, log on to the EMAS Mobile Push console and set your Huawei push key (AppID, AppSecret, and Default Receipt ID). For more information, see Configure third-party channel keys.
NoteThe AppSecret required to configure Huawei push parameters in the EMAS console is the Client Secret from your application information on HUAWEI Developers.
Step 1: Add the SDK to your application
Starting from version 3.2.0, the third-party channel extension package is provided as an AAR file. This eliminates the need to configure the manifest file and reduces the risk of errors.
1.1 Configure the Maven repository
The following sections describe the recommended configuration methods: dependencyResolutionManagement for Gradle 7.0 and later, and allprojects for versions earlier than Gradle 7.0.
1.1.1 dependencyResolutionManagement method
In your root-level (project-level) Gradle file (<project>/settings.gradle), add the Maven repository address to the repositories block within the dependencyResolutionManagement block.
dependencyResolutionManagement {
  repositories {
    maven {
      url 'https://developer.huawei.com/repo/'
    }
  }
}
1.1.2 allprojects method
In your root-level (project-level) Gradle file (<project>/build.gradle), add the Maven repository address to the repositories block within the allprojects block.
allprojects {
  repositories {
    maven {
      url 'https://developer.huawei.com/repo/'
    }
  }
}
1.2 Add SDK dependencies
In your module-level (app-level) Gradle file (usually <project>/<app-module>/build.gradle), add the SDK dependencies to the dependencies block.
Read the Android SDK version guide to download the corresponding SDK version or obtain the latest SDK configuration information.
Version 2.x of the Huawei Push SDK was unpublished on September 30, 2021. To avoid push disruptions, upgrade the Push SDK and the Huawei third-party channel SDK to version 3.2.4 or later as soon as possible.
Starting from September 15, 2023, Huawei Push Service has imposed daily limits on local notifications. Upgrade the Push SDK to version 3.7.0 or later. For more information, see New Huawei Push Service control rules and adaptation.
dependencies {
    implementation 'com.aliyun.ams:alicloud-android-third-push:x.x.x'
    implementation 'com.aliyun.ams:alicloud-android-third-push-huawei:x.x.x'
}
Step 2: Configure and use the SDK
2.1 Configure the AppID
In the app-level AndroidManifest.xml file, add a meta-data tag under the application node to configure the AppID.
<meta-data
	android:name="com.huawei.hms.client.appid"
 	android:value="appid=YOUR_HUAWEI_APP_ID" />
2.2 SDK initialization
Initialize the SDK in the Application class and after the Mobile Push SDK initialization code. Otherwise, the third-party channel registration may fail.
Initialize the SDK as follows:
// The registration method automatically skips registration if Huawei Push Kit is not supported.
HuaWeiRegister.register(application)// The registration method automatically skips registration if Huawei Push Kit is not supported.
HuaWeiRegister.register(application);The registration method automatically checks for Huawei Push Kit support and skips registration if it is not supported.
2.3 Obfuscation configuration
If code obfuscation is enabled in your project, add the following ProGuard configuration for the third-party channel.
# Huawei channel
-keep class com.huawei.** {*;}
-dontwarn com.huawei.**
Step 3: Verify the integration
3.1 Enable SDK logging
val pushService = PushServiceFactory.getCloudPushService()
// For debug packages only. This line is not required for release packages.
pushService.setLogLevel(CloudPushService.LOG_DEBUG)CloudPushService pushService = PushServiceFactory.getCloudPushService();
// For debug packages only. This line is not required for release packages.
pushService.setLogLevel(CloudPushService.LOG_DEBUG); 3.2 Verification method
When the Huawei channel initializes successfully, you can view the following logs:
What to do next
You can now push notifications to the notification bar on mobile devices through the third-party channel from the EMAS console. However, to process the logic after a notification is clicked, you must use the assistive pop-up window to receive push data. For more information, see Integrate the assistive pop-up window.
When you use the Mobile Push console or OpenAPI to send pushes through a third-party channel, configure the server-side parameters as described in the assistive pop-up window document. If these parameters are not set, pushes will not be sent through the third-party channel.
Third-party channel FAQ
Error 6003 is returned during Huawei channel registration: The certificate fingerprint configuration does not match. Perform the Huawei third-party channel integration steps again.
Troubleshoot third-party channel and pop-up window issues on Android
Conflicts between the Android third-party channel SDK and other third-party SDKs