Alibaba Cloud data source: MaxCompute
Connect Quick BI to an Alibaba Cloud MaxCompute database by adding a MaxCompute data source. This allows you to analyze and visualize your data. Quick BI supports connections to MaxCompute over the public network.
Prerequisites
You have created an Alibaba Cloud MaxCompute project. For more information, see Create a MaxCompute project.
Background information
Add a MaxCompute data source in Quick BI to analyze data from your Alibaba Cloud MaxCompute data warehouse. For more information about MaxCompute, see What is MaxCompute?.
MaxCompute data sources use a "synchronous loading + caching" strategy to load the table list, rather than an asynchronous one. If a cache miss occurs, it takes 10 to 15 seconds to retrieve the metadata.
If you do not configure table permissions in Quick BI, the displayed table list for the MaxCompute data source depends on the permissions of the AccessKey account used for the data source. Only tables for which the account has
Listpermission are displayed.
Limitations
Supports MaxCompute versions 1.0 and 2.0.
Only a workspace administrator or a developer can add a data source.
Procedure
Log on to the Quick BI console.
To add the data source:
Go to the create data source page as described in Create Data Source.
On the Alibaba Cloud Databases tab, select MaxCompute.

In the Configure Connection dialog box, set the following parameters.
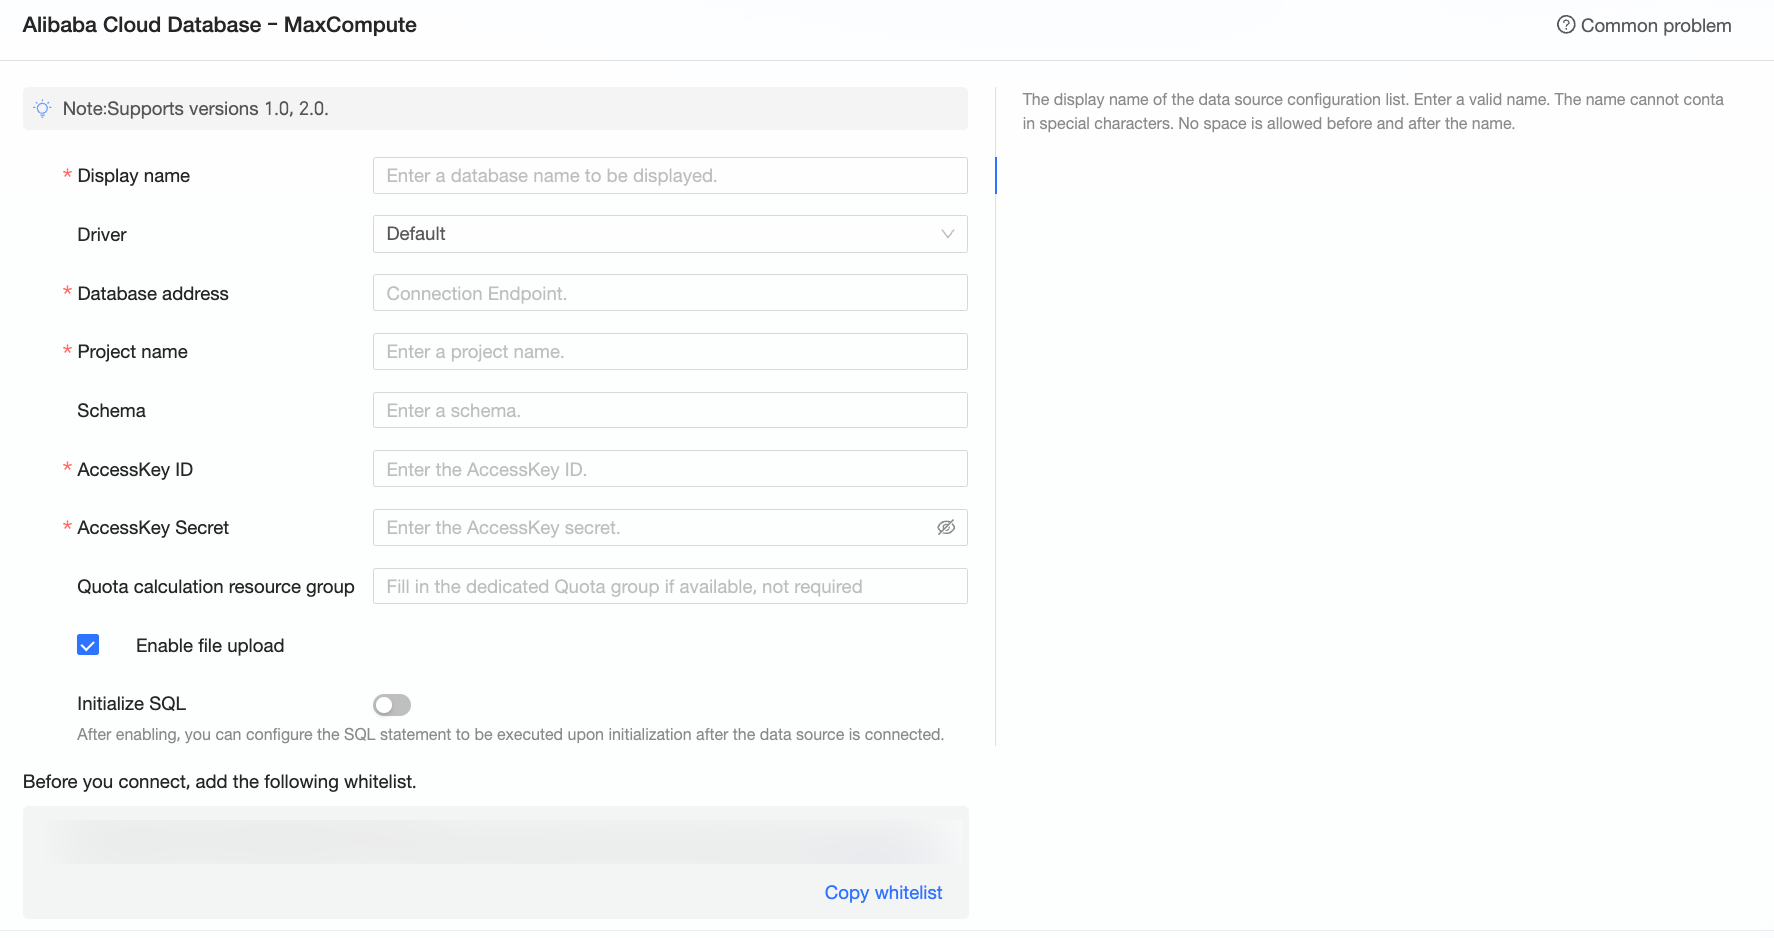
Parameter
Description
Display Name
The display name for the data source in the data source list.
Enter a valid name. The name cannot contain special characters or leading or trailing spaces.
Database Address
The URL for connecting to the MaxCompute project. You can use a public endpoint or an internal endpoint. We recommend using an internal endpoint to avoid potential fees for public network traffic. If the connection fails, you may need to disable allowlist restrictions.
Select the internal endpoint that corresponds to the region where your project is located. You can find the region in the upper-left corner of the MaxCompute console.
For example, the internal endpoint for the China (Hangzhou) region is
https://service.cn-hangzhou-intranet.maxcompute.aliyun-inc.com/api.Project Name
The name of the target MaxCompute project.
Log on to the MaxCompute console. After you switch to the correct region in the upper-left corner, you can view the MaxCompute project name on the Project Management tab.
Schema
Enter the name of the schema to connect to.
If your MaxCompute project uses a three-layer model, you must specify a schema. If it uses a two-layer model, you do not need to specify a schema.
AccessKey ID and AccessKey Secret
The AccessKey ID and AccessKey Secret with permissions to access the target MaxCompute project.
Ensure that the account has
CreateInstance,List, and tableDescpermissions for the project. If you need to upload files, the account also requires theCreateTableandWritepermissions. You can obtain the AccessKey ID and AccessKey Secret from the RAM console.Quota resource group
If you use the MaxQA query acceleration feature of MaxCompute, enter the name of the MaxQA Quota group. If you leave this field empty, Quick BI uses the MaxCompute MCQA 1.0 feature for query acceleration by default.
Enable file upload entrance
If enabled, you can upload files. This option is enabled by default.
Initialization SQL
If enabled, you can configure SQL statements to run immediately after Quick BI establishes a connection to the data source.
Only
SETstatements are allowed. Separate multiple statements with a semicolon (;).Click Test Connection to verify the connection.
 Note
For information about data source permission control issues, see Solutions to common errors and permission control issues when connecting Quick BI to a MaxCompute data source.
If the connection test is successful, click OK to add the data source.
The new data source appears in the data source list.
NoteQuick BI caches the table list for MaxCompute data sources. If you are adding this data source for the first time, you may need to wait 10 to 15 seconds for the table metadata to synchronize. To update the table list, click the Refresh button in the upper-right corner.

Next steps
After you create the data source, you can create a dataset and analyze your data.
To add tables from your MaxCompute data source or create a custom SQL query in Quick BI, see Create a dataset.
To add visualizations and analyze data, see Create a dashboard and Overview of visual charts.
To perform in-depth analysis using the drill down feature, see Step 3: Configure and use drill down.