Publish a dashboard
After creating a dashboard, you must save and publish it to enable team collaboration. You can also unpublish or delete a dashboard when it is outdated or no longer needed. This topic describes how to save, save and publish, preview, unpublish, and republish dashboards.
Prerequisites
You are logged in to the Quick BI console and have created a dashboard. For more information, see Overview.
Background
The save and publish actions are separated, allowing you to save your work without immediately making it public. This separation enables features such as save and publish, unpublish, and republish.
Save
Click Save (①) in the upper-right corner. In the dialog box, edit the report name and select a save location (②). You can also select the Enable auto-save option (③) to automatically save your changes. When you are finished, click OK (④).
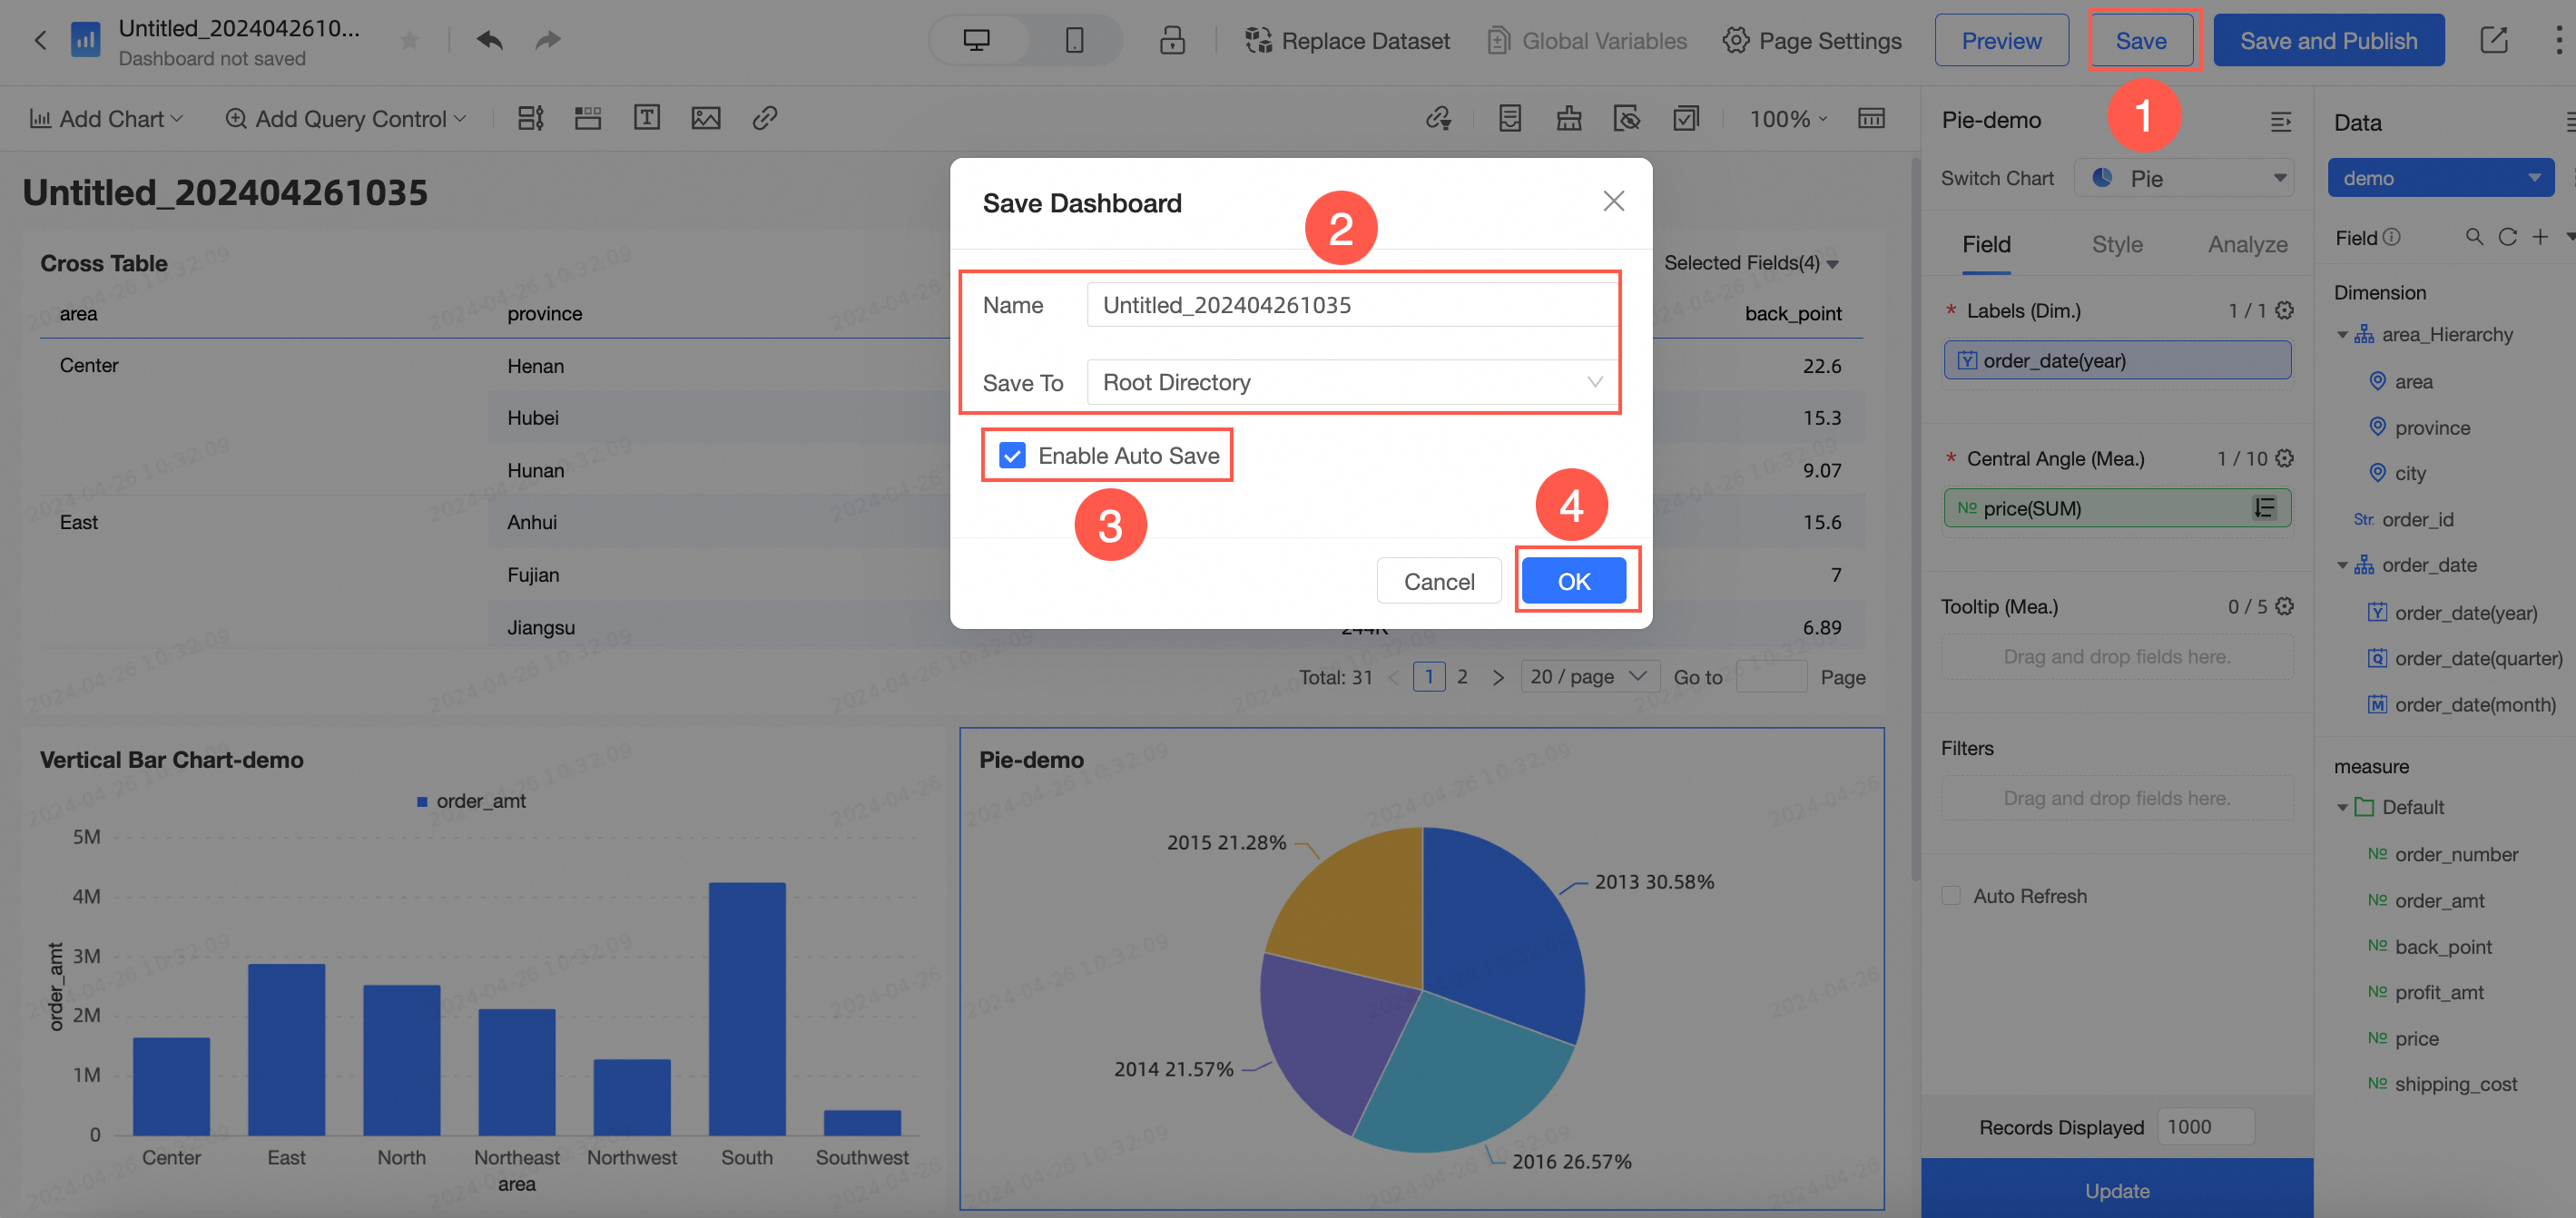
If you only save a dashboard, your changes are not visible to other users:
When you add a new dashboard, it is saved with an unpublished status. You can publish the dashboard by clicking Save and publish.
When you update a published dashboard, use Republish to publish the changes.
Save and publish
The save and publish action saves your current work and publishes the dashboard. Click Save and Publish in the upper-right corner and configure the settings in the dialog box.
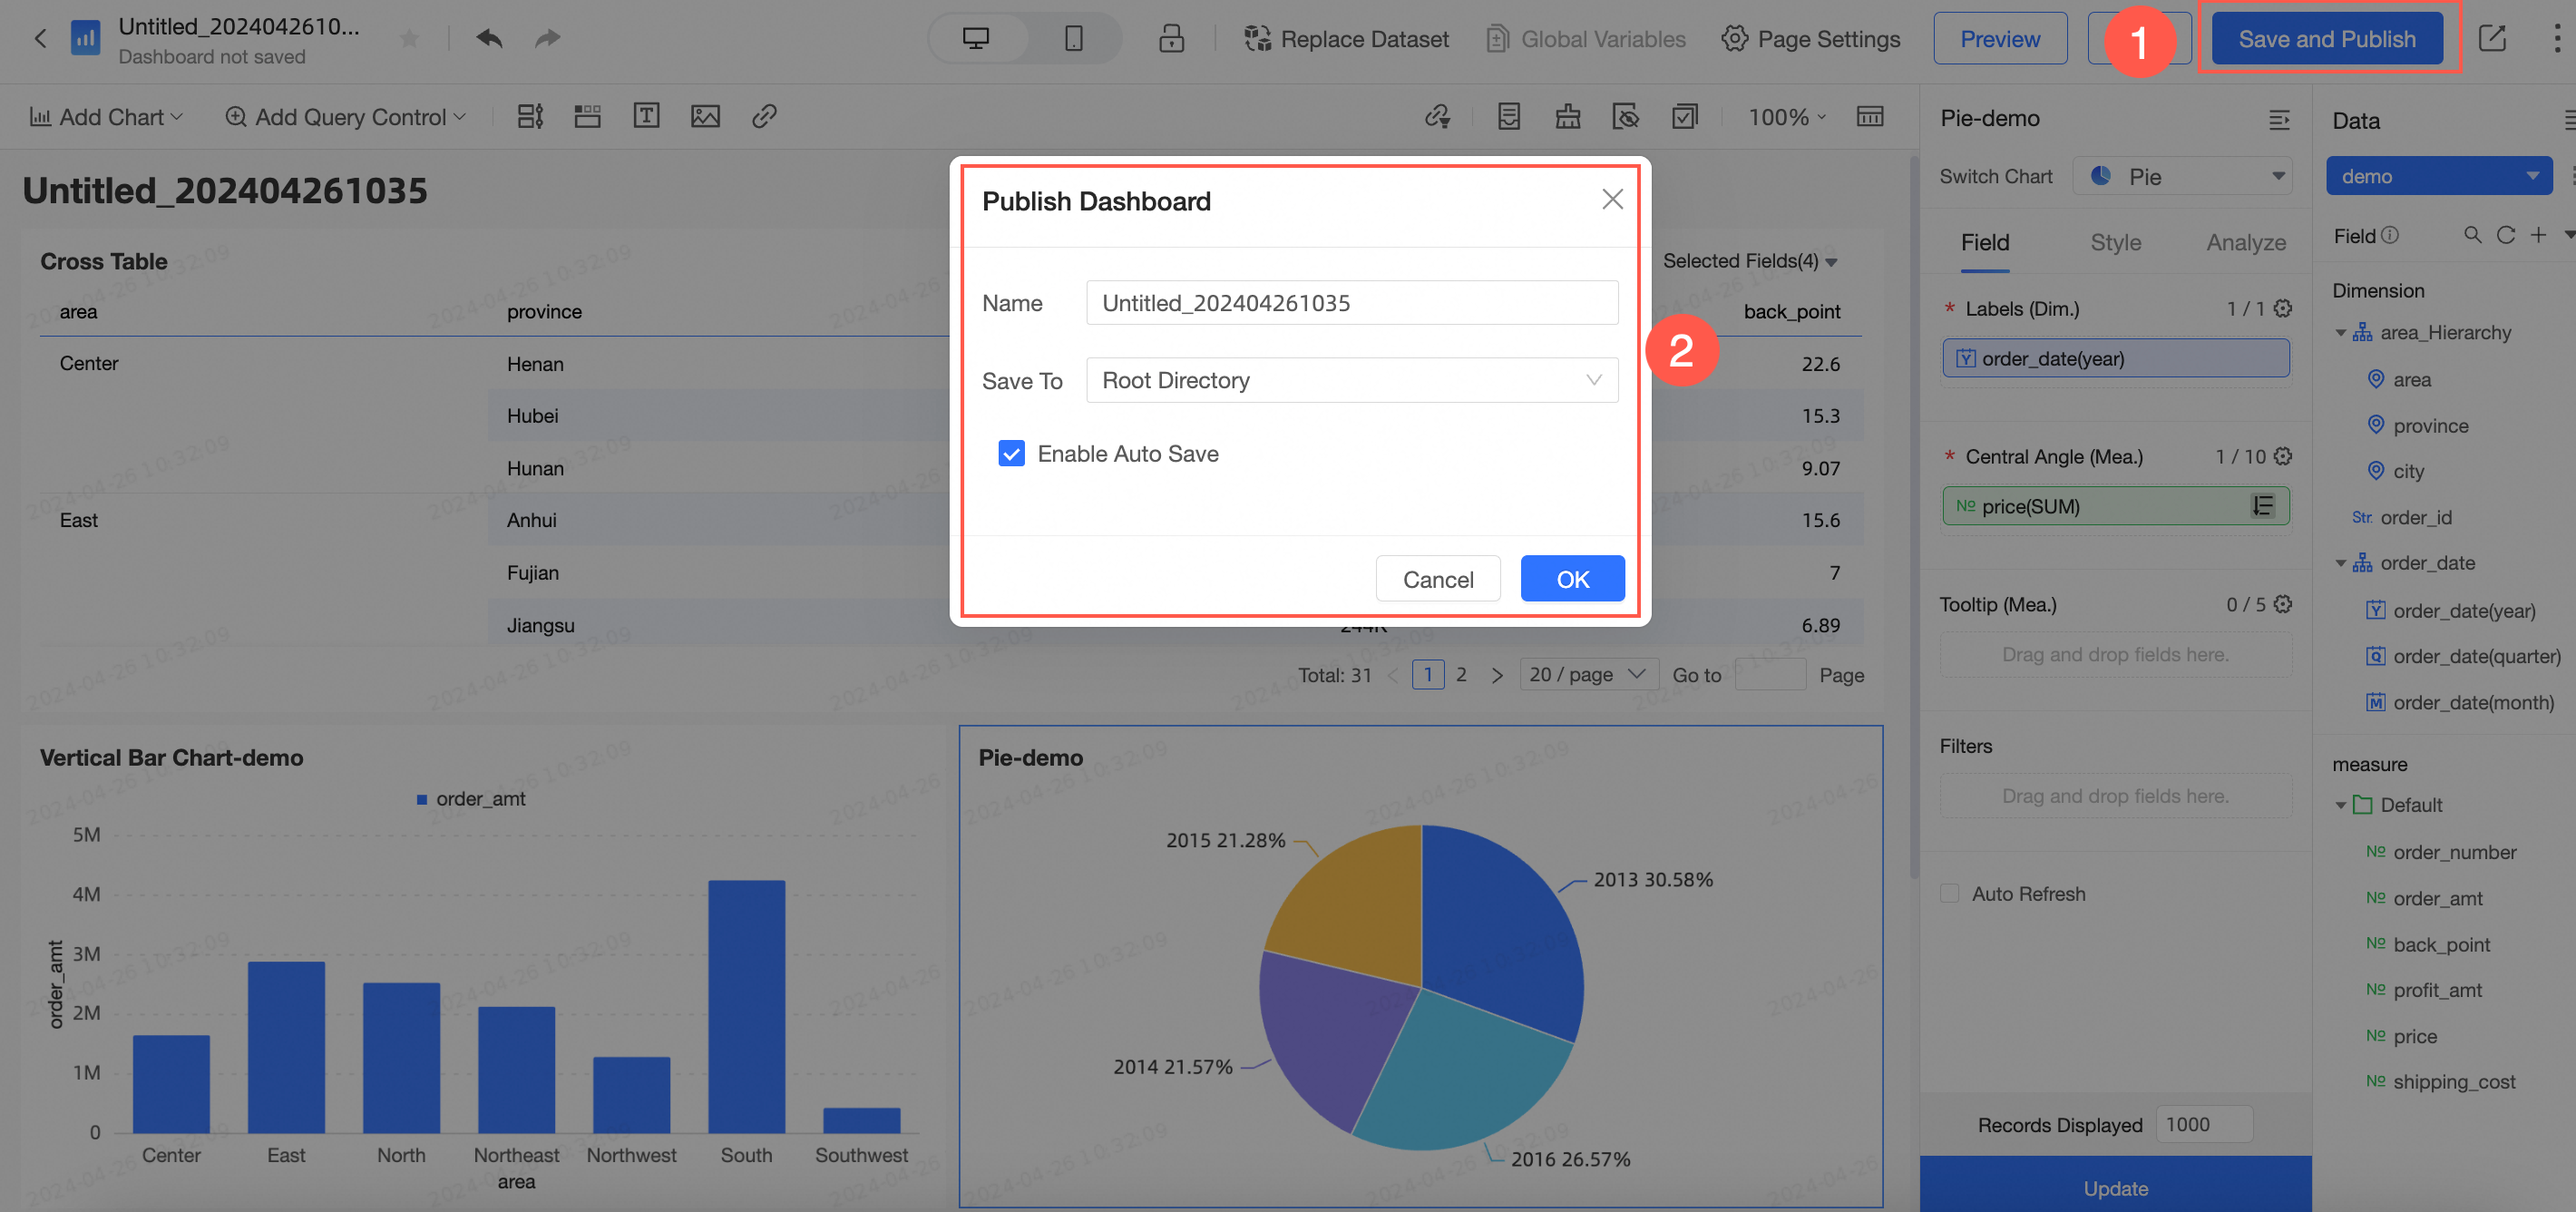
If the dashboard's workspace requires publishing approval (meaning the Publish Works option is enabled under Approval Settings), you must Select Approver, optionally enter a reason for the application, and then click
 Submit Application. The dashboard is published only after the request is approved. For more details, see Create and manage a workspace.
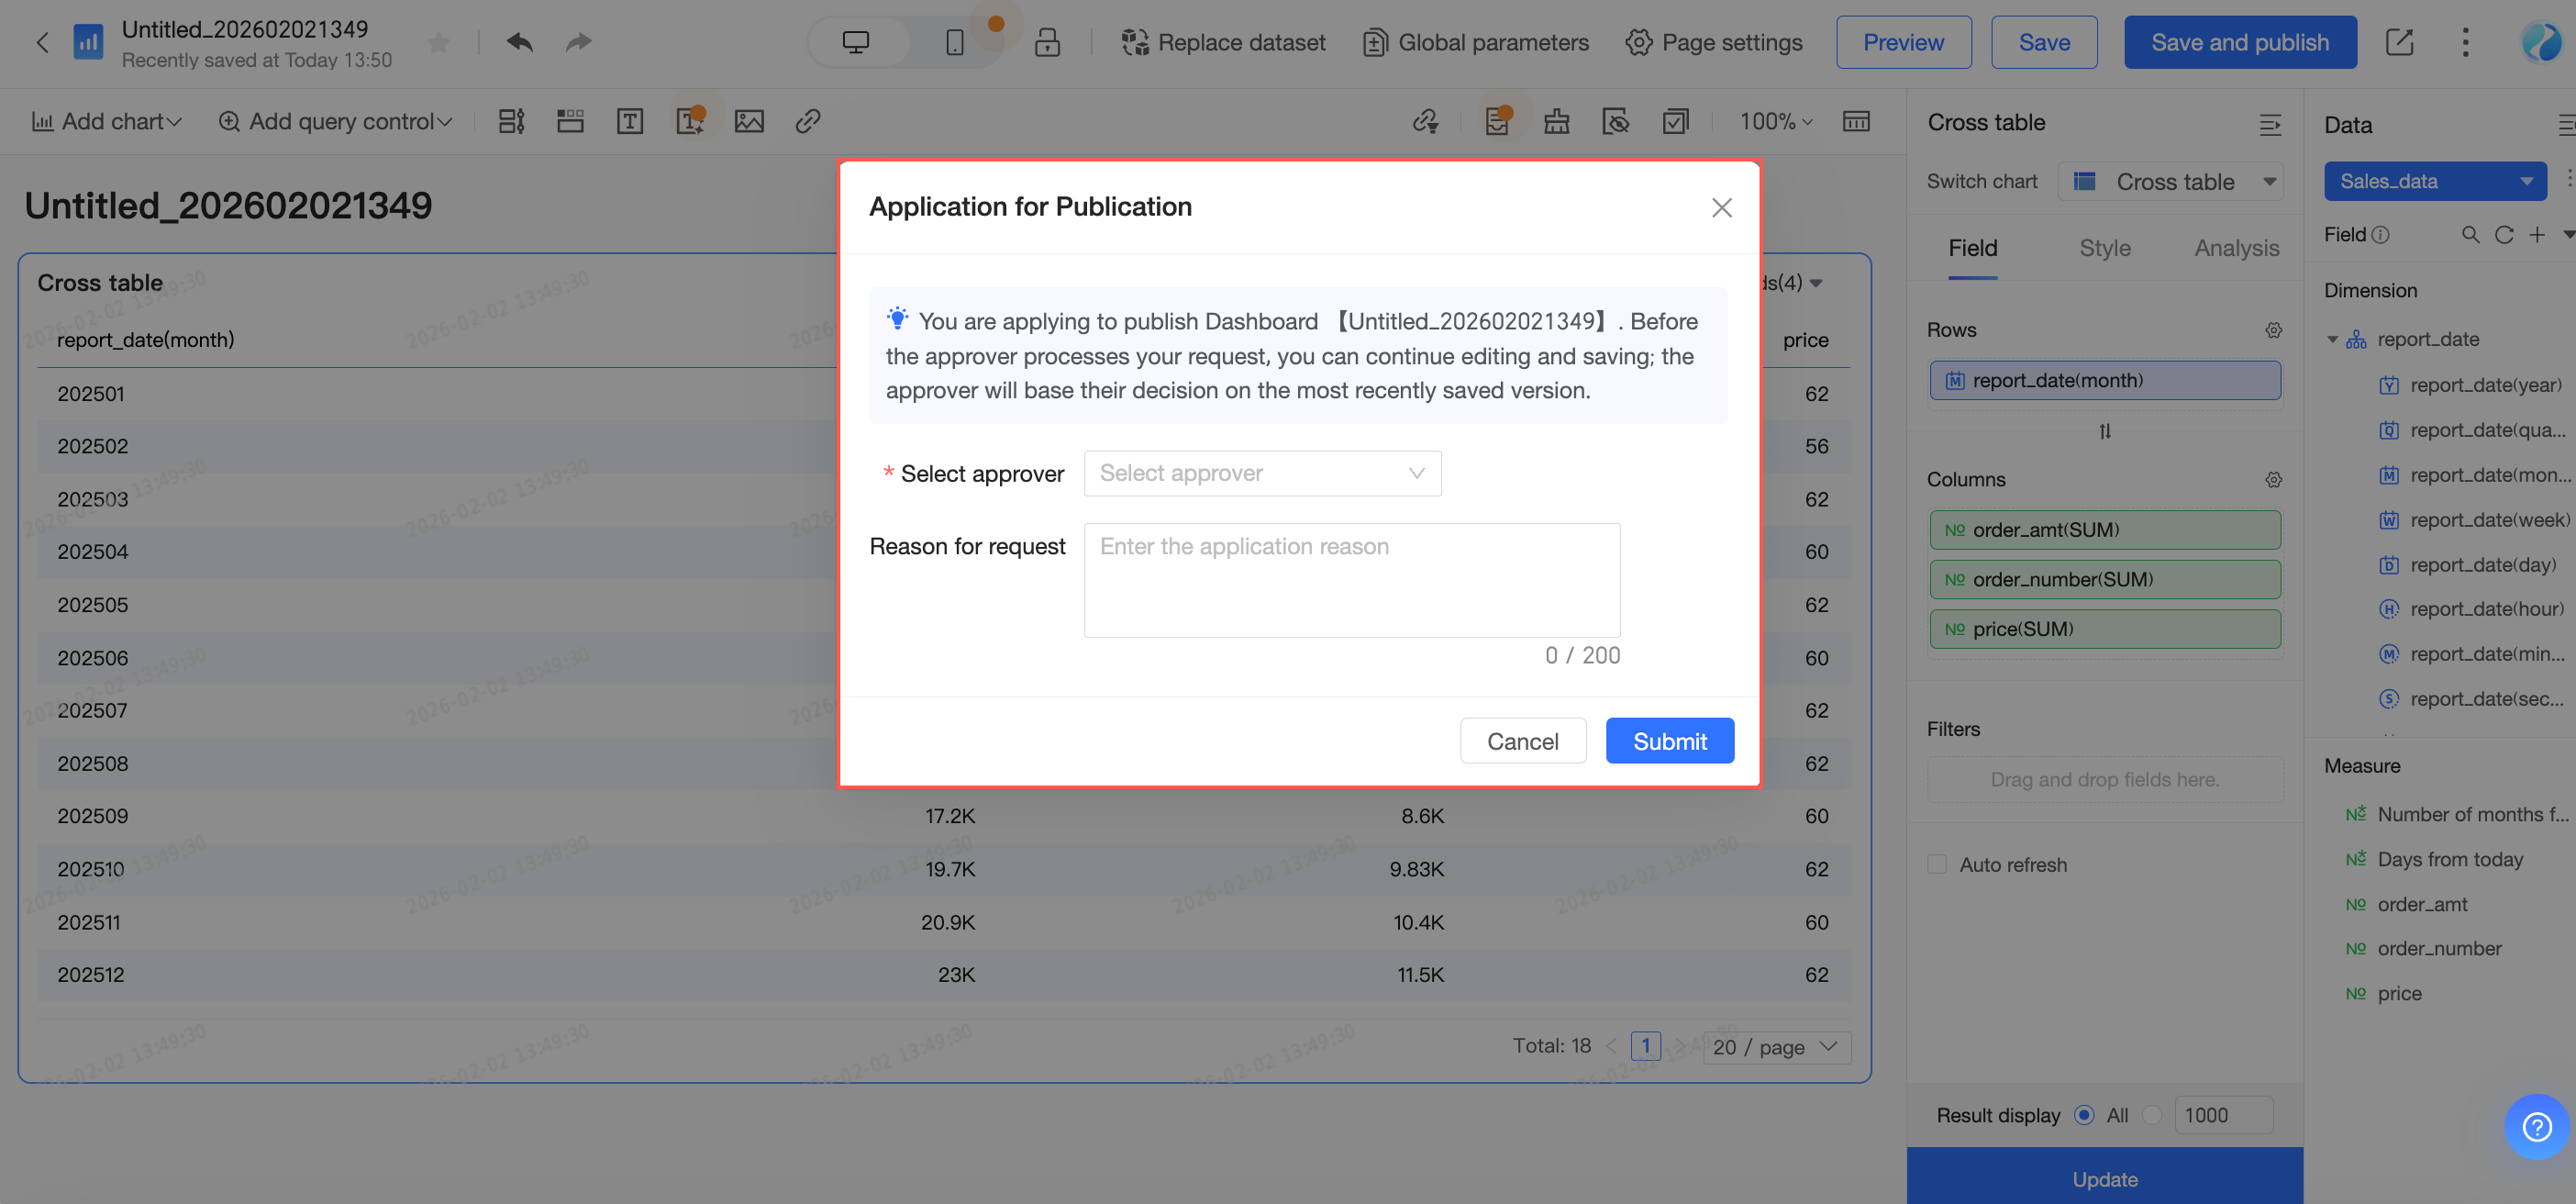
You can continue to edit the dashboard after submitting a publishing request. If you save changes after submitting the request, the most recently saved version is submitted for approval.
Workspace administrators can publish dashboards without approval.
Preview
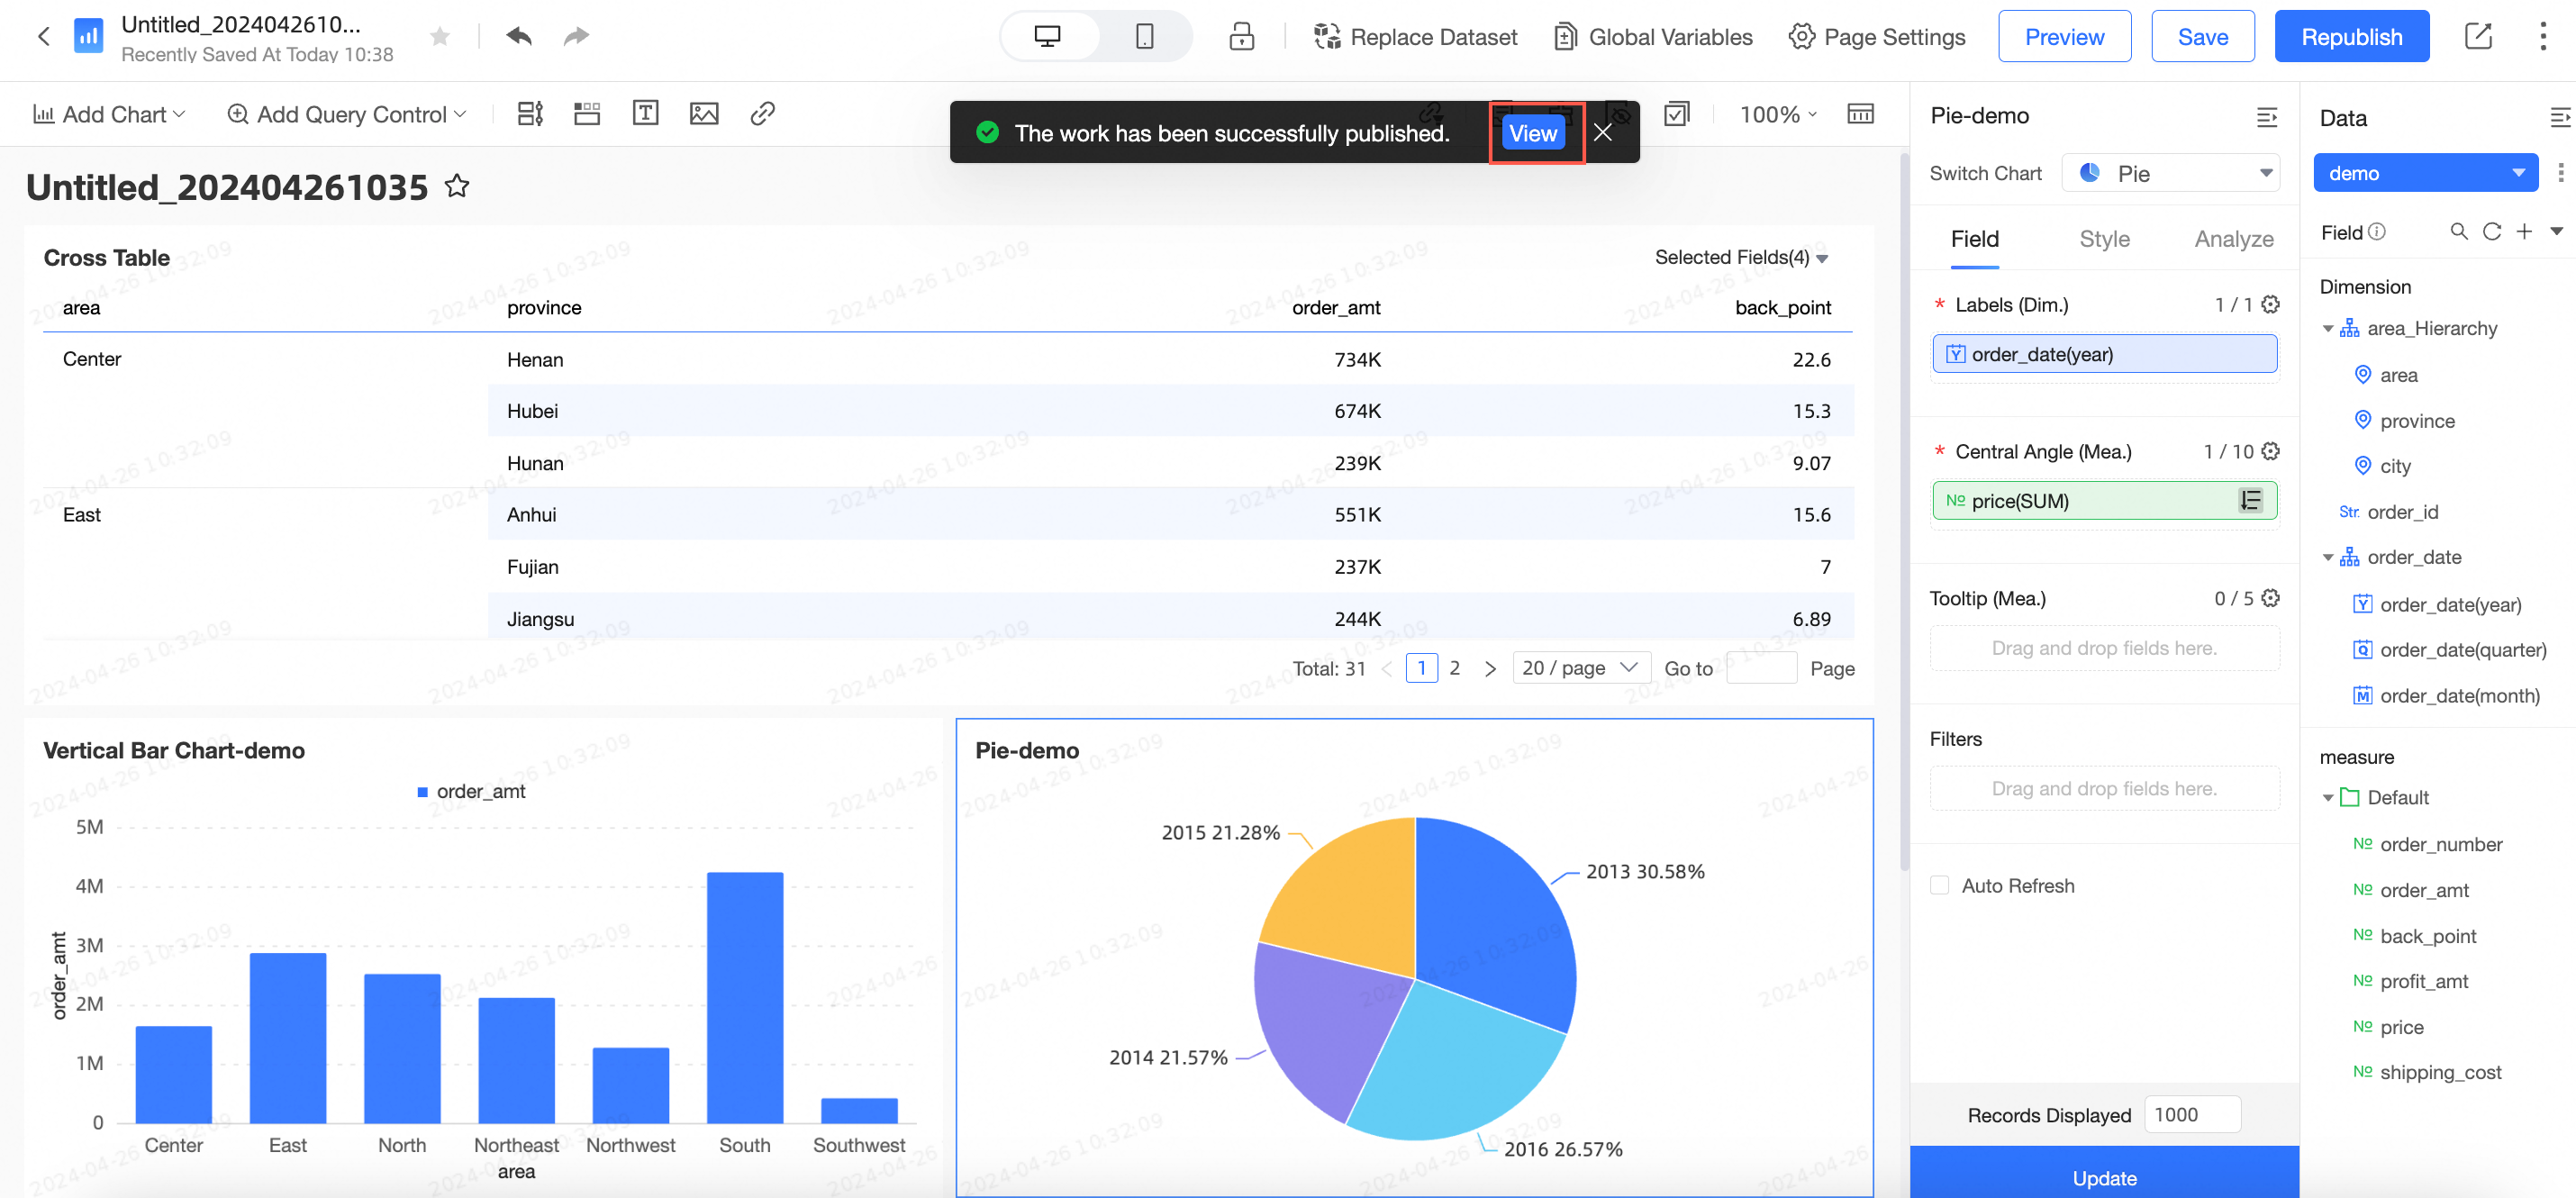
After you publish a dashboard, clicking View on the editing page opens the preview page.
You can click View to open the preview page after you save and publish or republish the dashboard.
Unpublish
You can unpublish a dashboard to take it offline, making it invisible to other users.
In the upper-right corner of the dashboard edit page, click
 and select Unpublish.
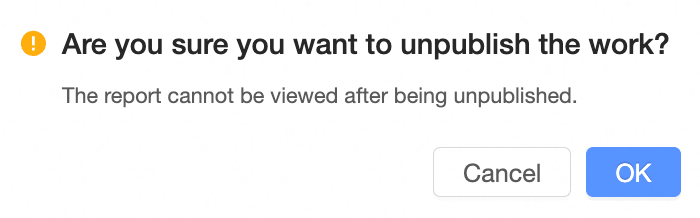
In the unpublish confirmation dialog box, click OK.
 and select Unpublish.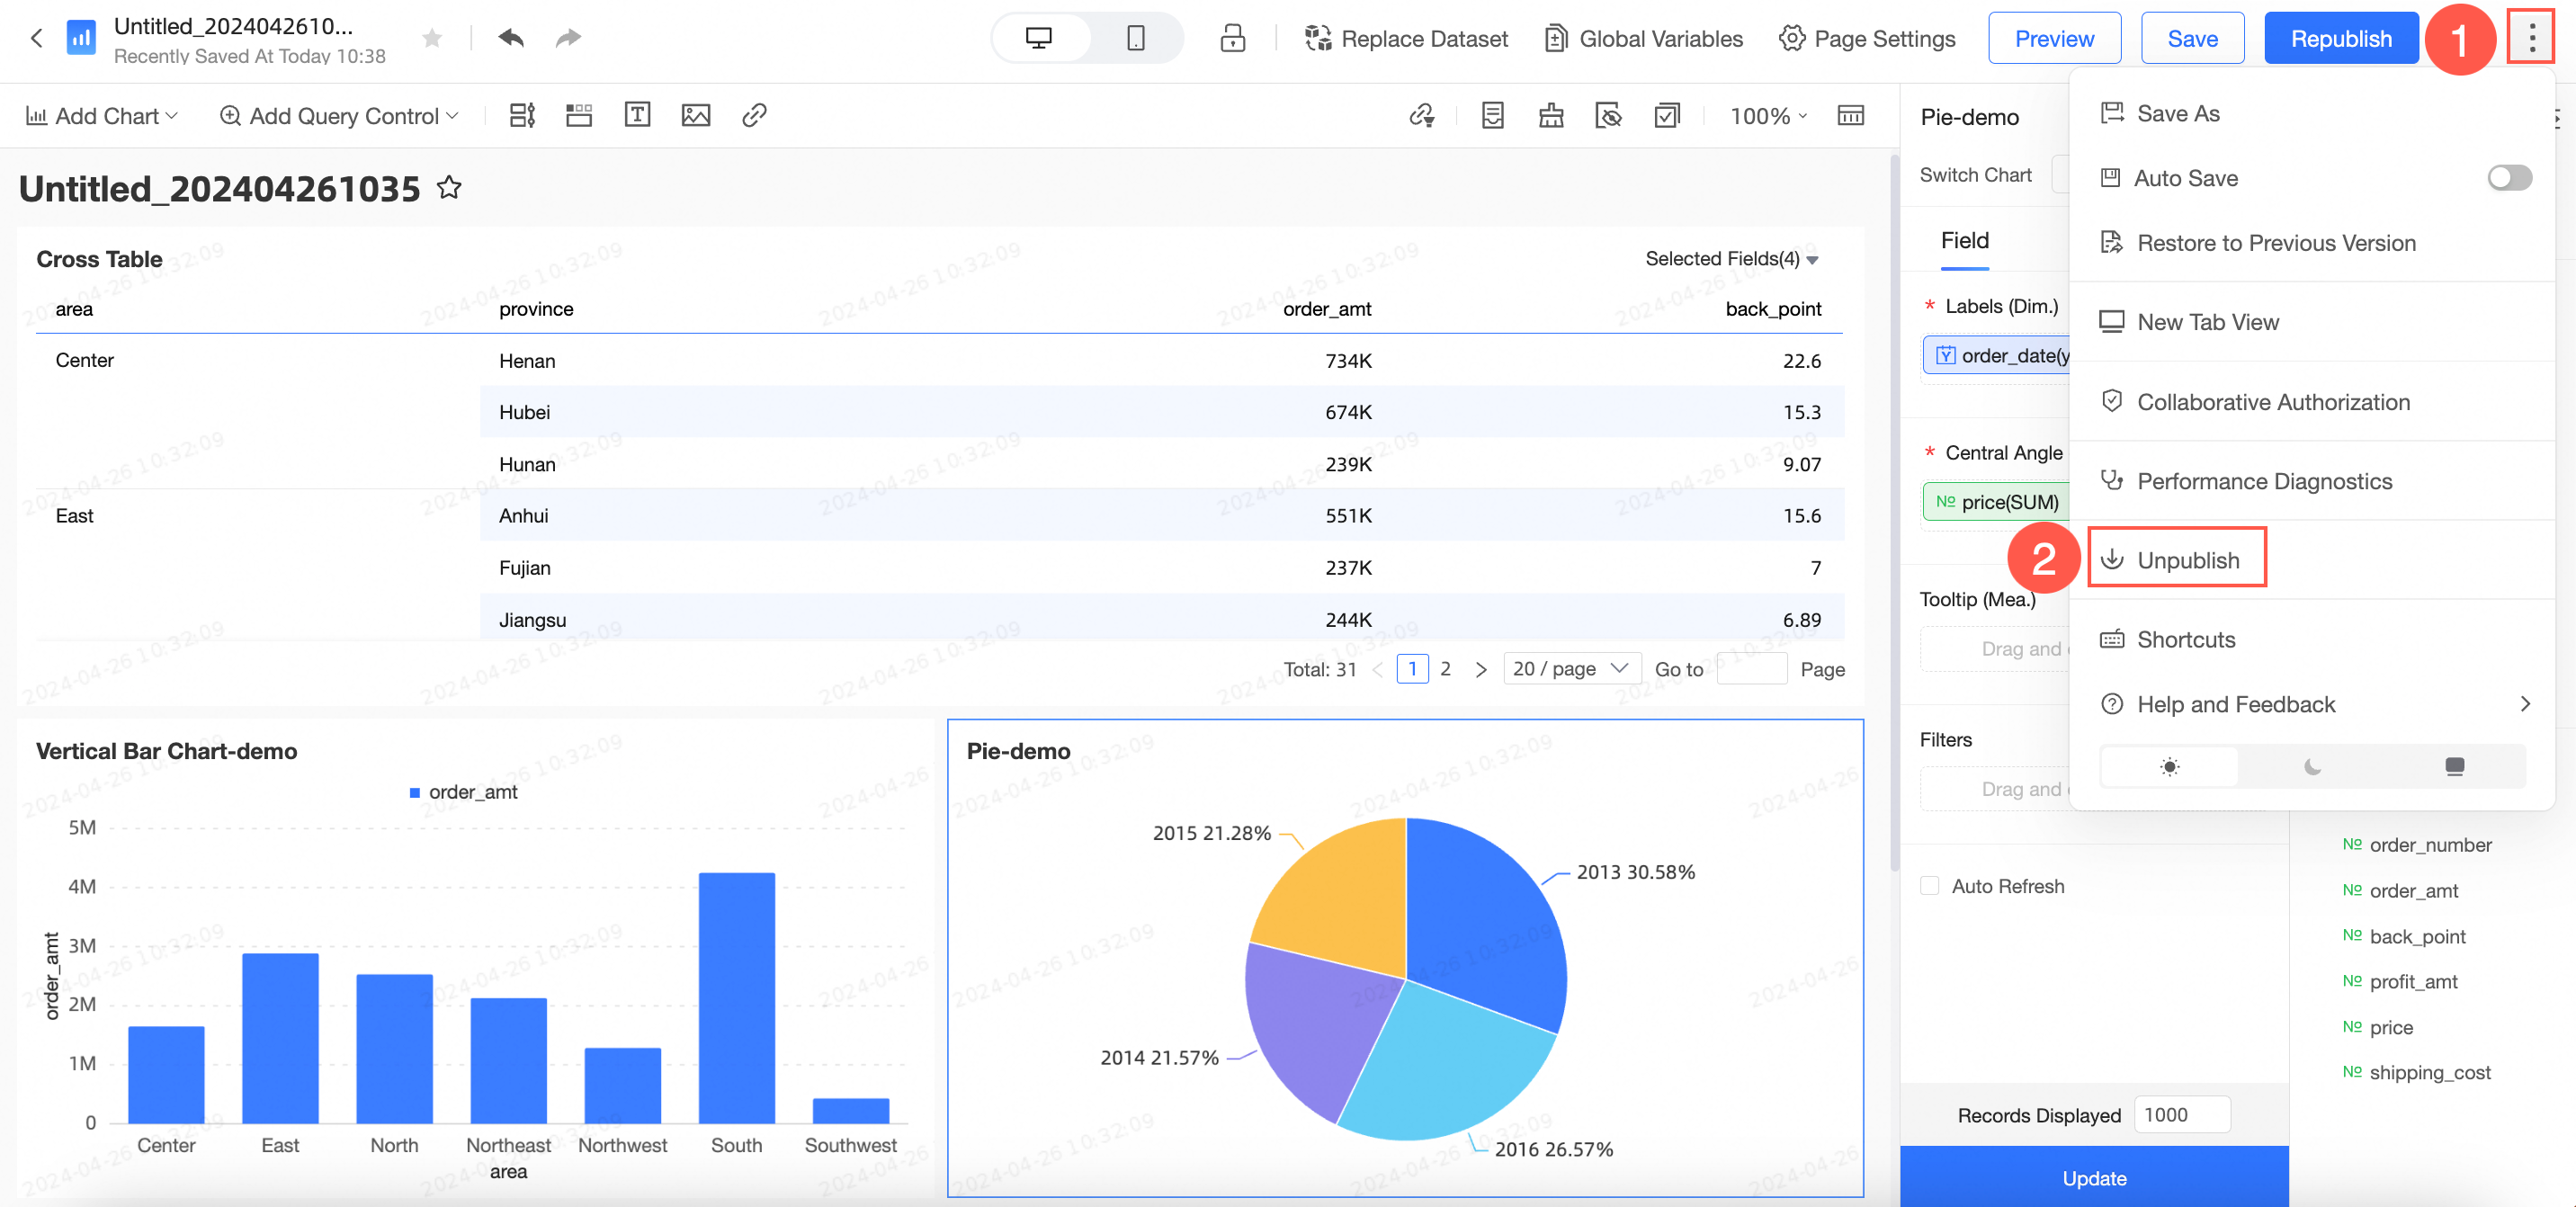
Republish
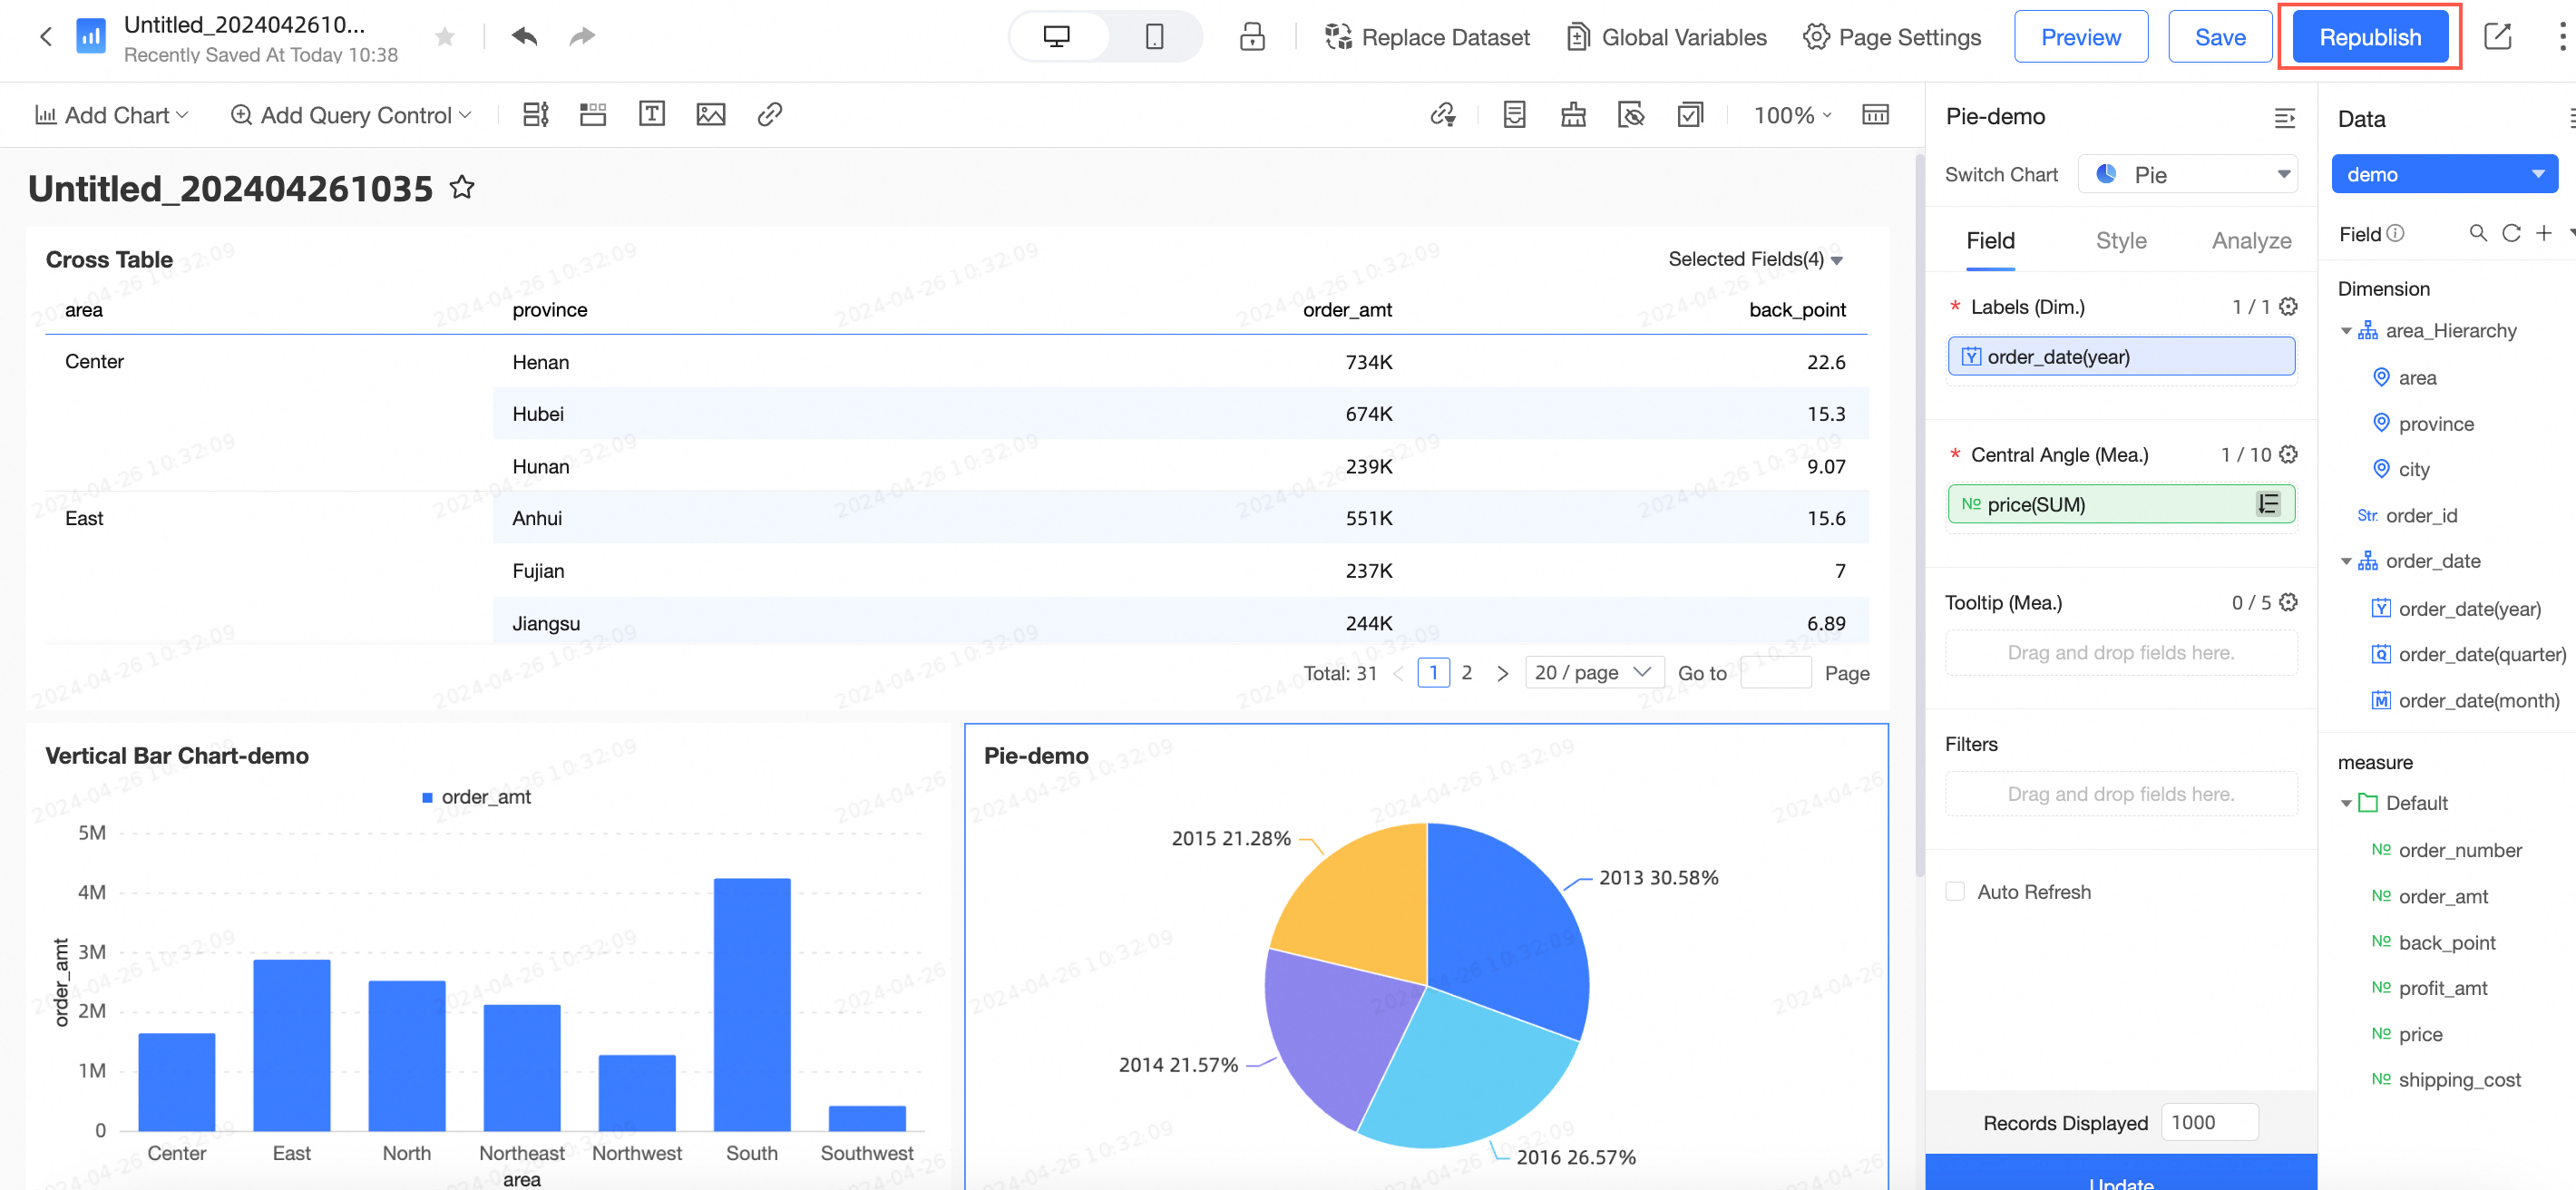
After you update a published dashboard, an update prompt appears on its edit page and its status changes to saved but unpublished. You can then republish the dashboard to make the updates live for users.
 If the dashboard's workspace requires publishing approval (meaning the
 Publish Works option is enabled under Approval Settings), every republish action triggers a new approval request. The changes take effect only after the request is approved. For more details, see Create and manage a workspace.
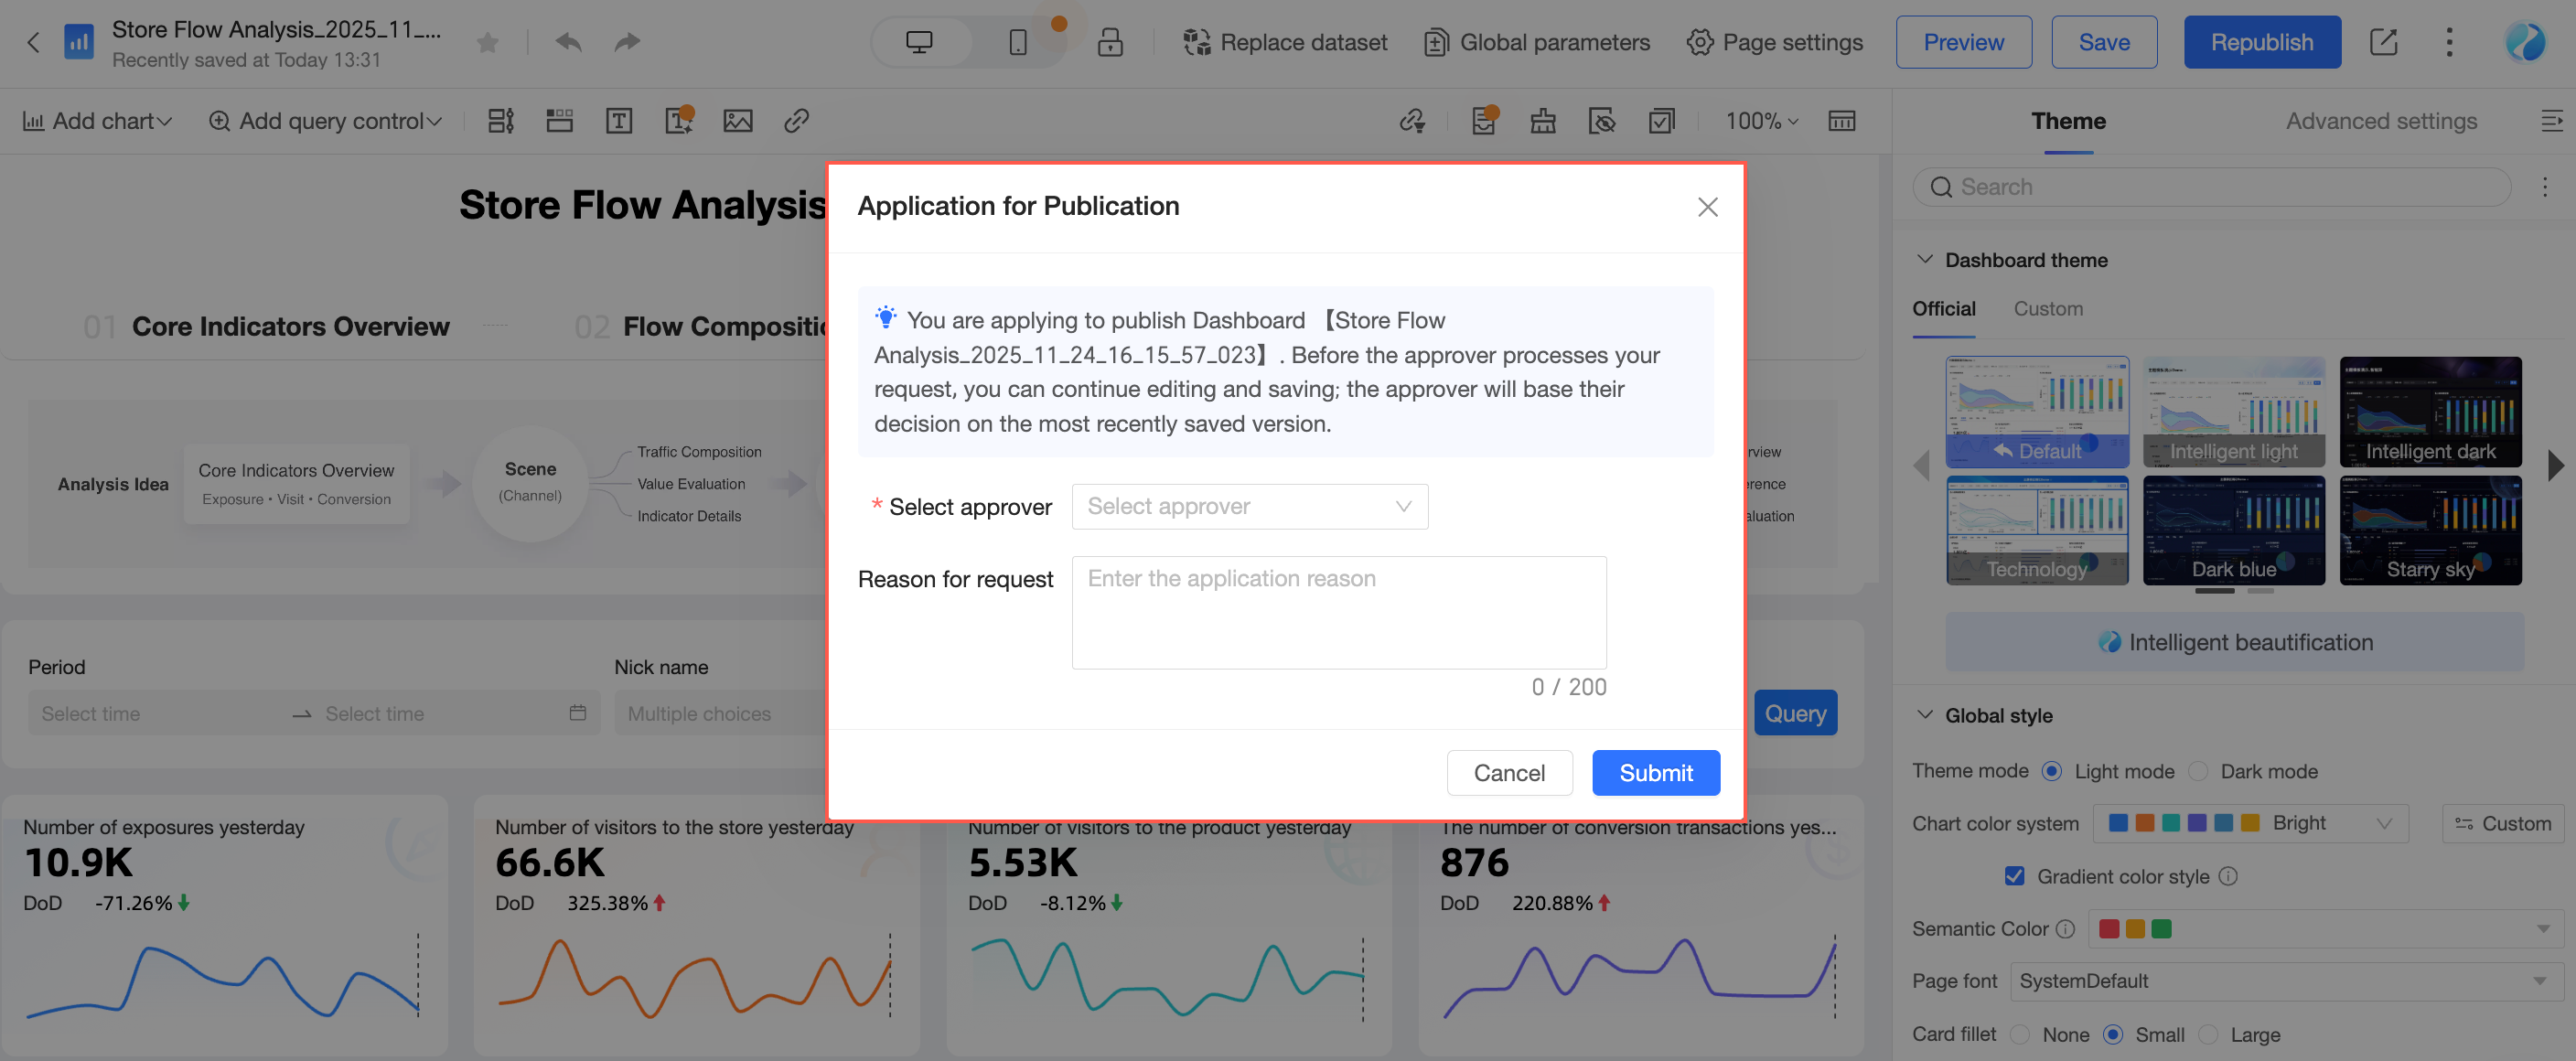
You can continue to edit the dashboard after submitting a publishing request. If you save changes after submitting the request, the most recently saved version is submitted for approval.
Workspace administrators can publish dashboards without approval.