1. Introduction
Prerequisite components: Start Excel or Get Opened Excel
You can use this component to set the content alignment for a specified area.
2. Inputs
For information about the input parameters, see the component panel in the ROS Visual Editor.
3. Outputs
For information about the output parameters, see the component panel in the ROS Visual Editor.
4. Component Usage Examples
4.1. Component configuration example
For
Opened Sheet Object, select v_Sheet_obj_1, which is the output of a prerequisite component, such as Get Active Sheet or Activate Sheet.For
Area Start Row Number, keep the default value of 1.For
Area Start Column Letter, keep the default value of A.For
Area End Row Number, keep the default value of 2.For
Area End Column Letter, keep the default value of C.For Horizontal Alignment, select Center.
For Vertical Alignment, select Center.
Keep the default values for the advanced options.
4.2. Example execution result
Not applicable
5. Example flow
Build the flow
You can use the Start Excel component to open the specified Excel file.
You can use the Get Active Sheet component to obtain the active sheet object.
You can use the Set Excel Area Alignment component to set the content alignment for the specified area.
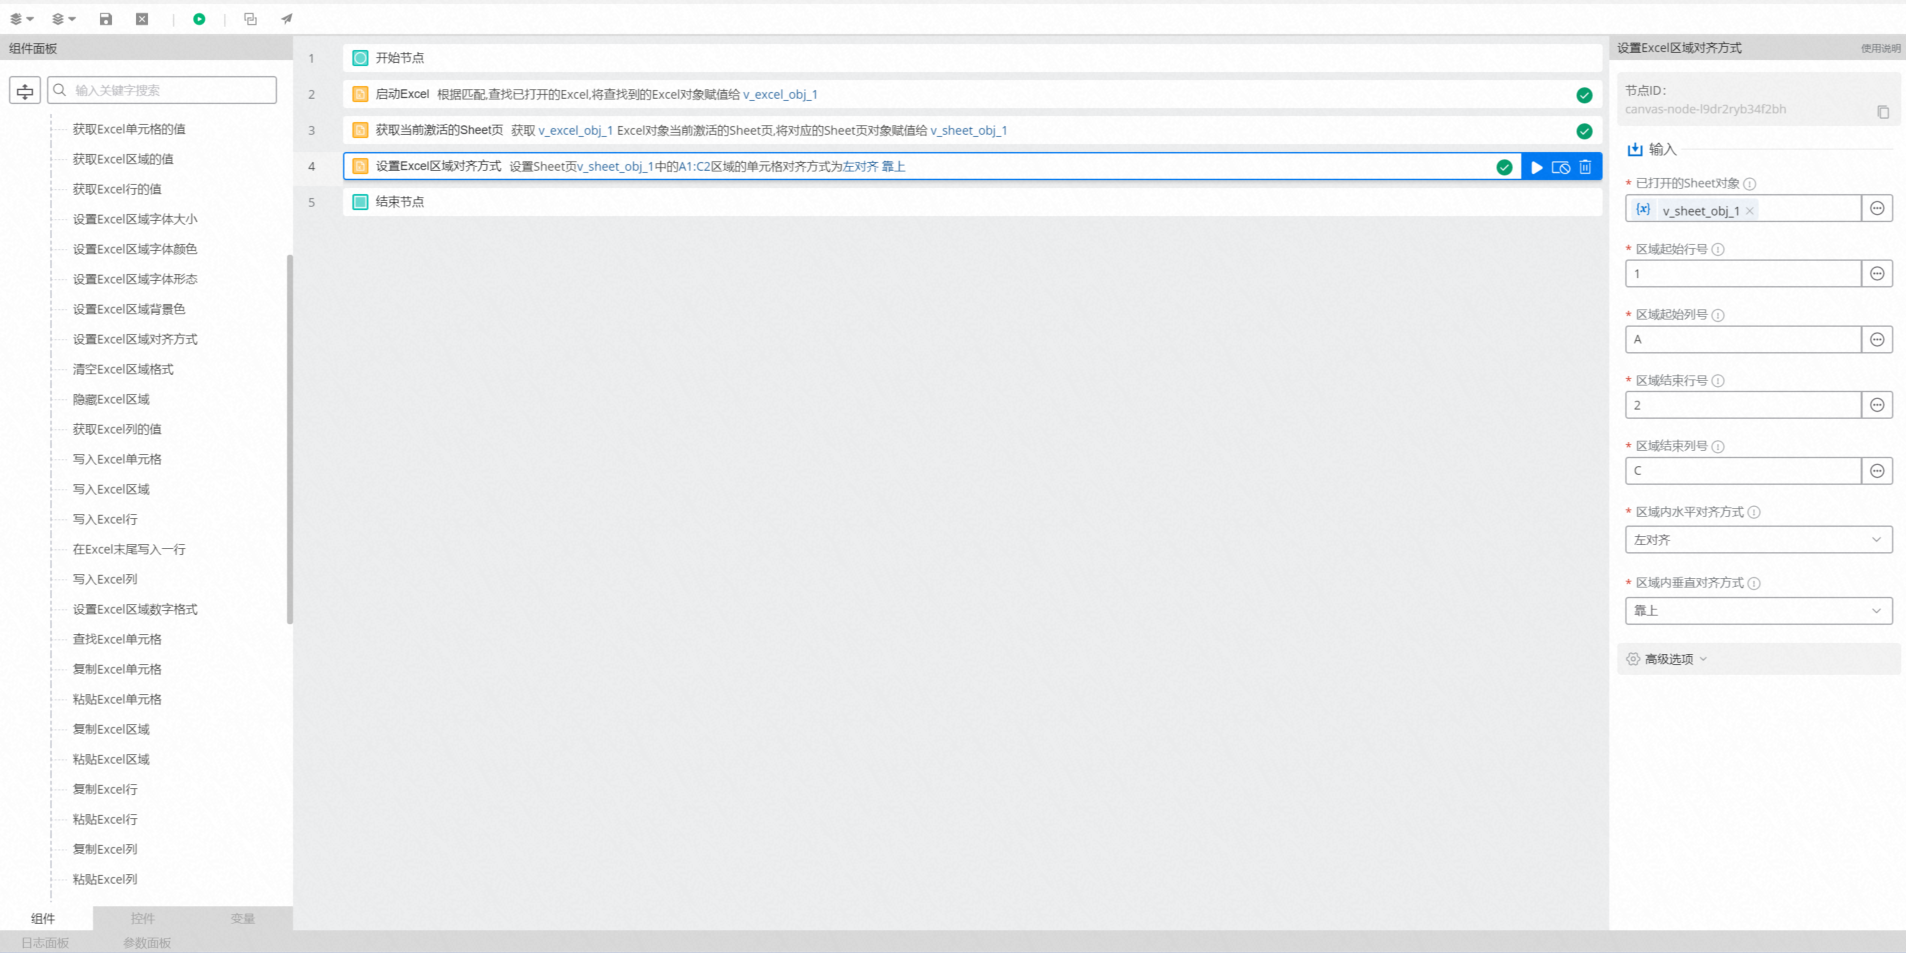
Result
As shown in the following figure, after this flow successfully executes, all content in the specified area of the table is aligned to the top left.