Model management
Prerequisites
You have successfully connected the Alibaba Cloud Model Studio connector in the CXG Setup module. For details, see Add CXG AI Connector.
You have either CXG Admin or CXG Manage AI Model Configuration permissions.
Model management provides two methods for adding models:
Method 1: Add a foundation model
Step 1: Add a foundation model
Navigate to CXG Setup > AI > Model Management to open the model configuration page.
 On the Add Model page, select Foundation Model for Model Source. You can currently select models such as DeepseekV3.2 and Qwen3-Max. More models will be available in the future.

Step 2: Configure the model
By default, an added model has empty parameters. You can create new configurations, adjust parameters, and save each version as a separate copy, which lets you manage multiple configurations for a single model. You can then use each configuration in a Prompt Template for different business use cases.
To modify a model configuration on the Model Management page, click the dropdown menu on the far right of the model entry and select Configure.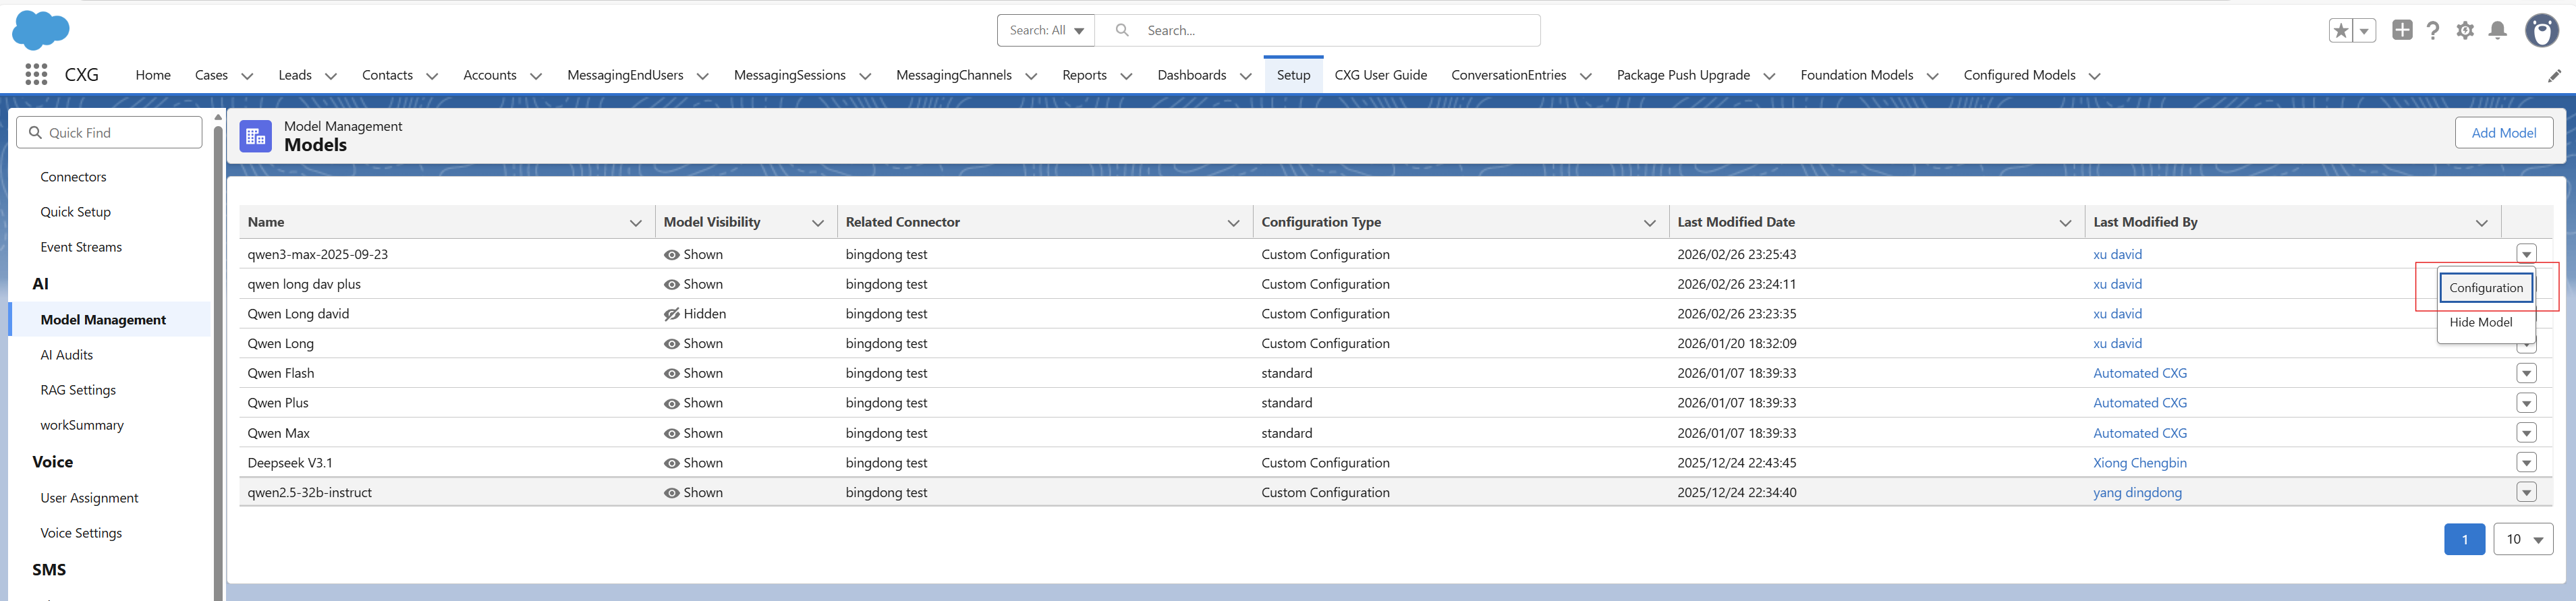 The system prompts you to select either Update Configuration or Create a new Configuration:
If you select Update Configuration, enter the new parameter information and click Confirm to save.
If you select Create a new Configuration, set a configuration name and parameters, then click Confirm.

Method 2: Bring Your Own Model (BYOM)
The Bring Your Own Model (BYOM) feature lets you import custom models from Alibaba Cloud Model Studio. This lets you move beyond the limitations of Foundation Models by integrating your own fine-tuned models, giving you granular control over their parameters.
Step 1: Fine-tune a model
To use a custom fine-tuned model, you must first train it on the Alibaba Cloud Model Studio platform. For instructions, see the following documents:

If you use a sub-workspace, the main account administrator must grant model permissions to it before you can use its API key.
Go to the Business space management page, click Model permission and flow control settings for the sub-workspace, and authorize the required models. After authorization, the models become available in the sub-workspace.
Step 2: Add a fine-tuned model
Navigate to CXG Setup > AI > Model Management to open the model configuration page.
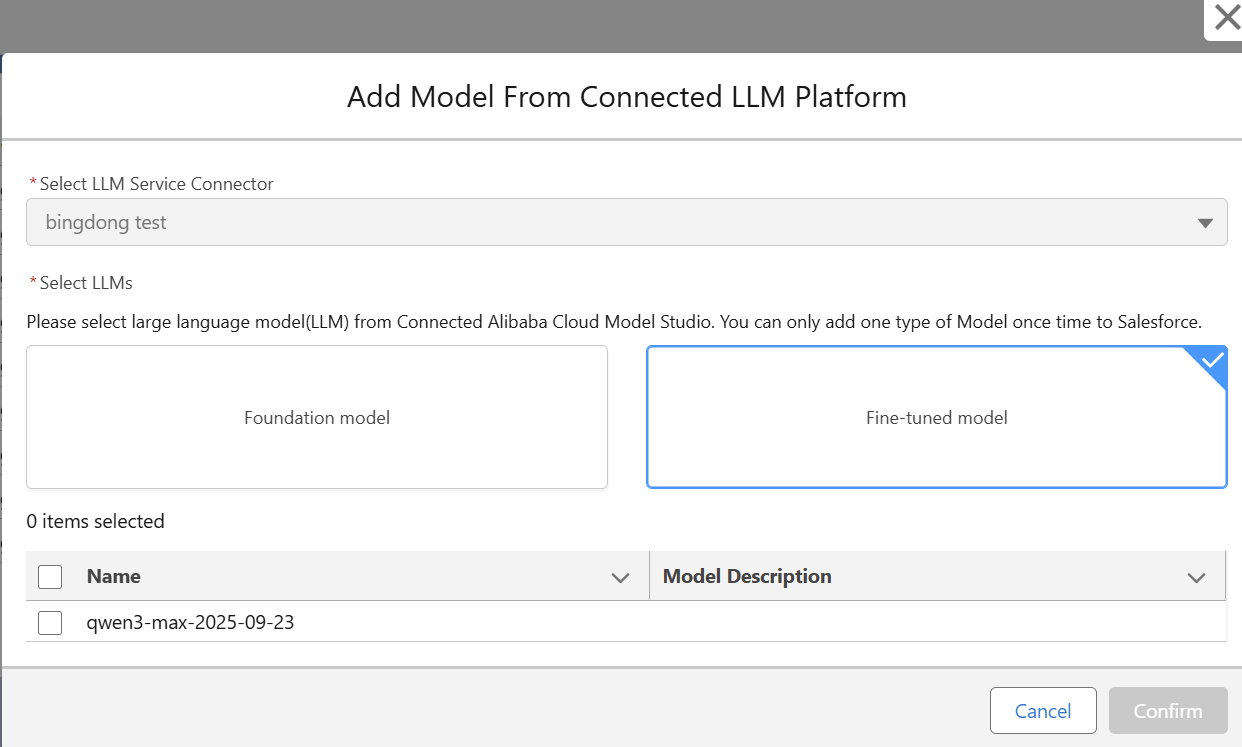
On the Add Model page, select Fine-tuned Model for Model Source. This loads all your deployed models. Once you confirm and add a model, it becomes available for selection in a Prompt Template.
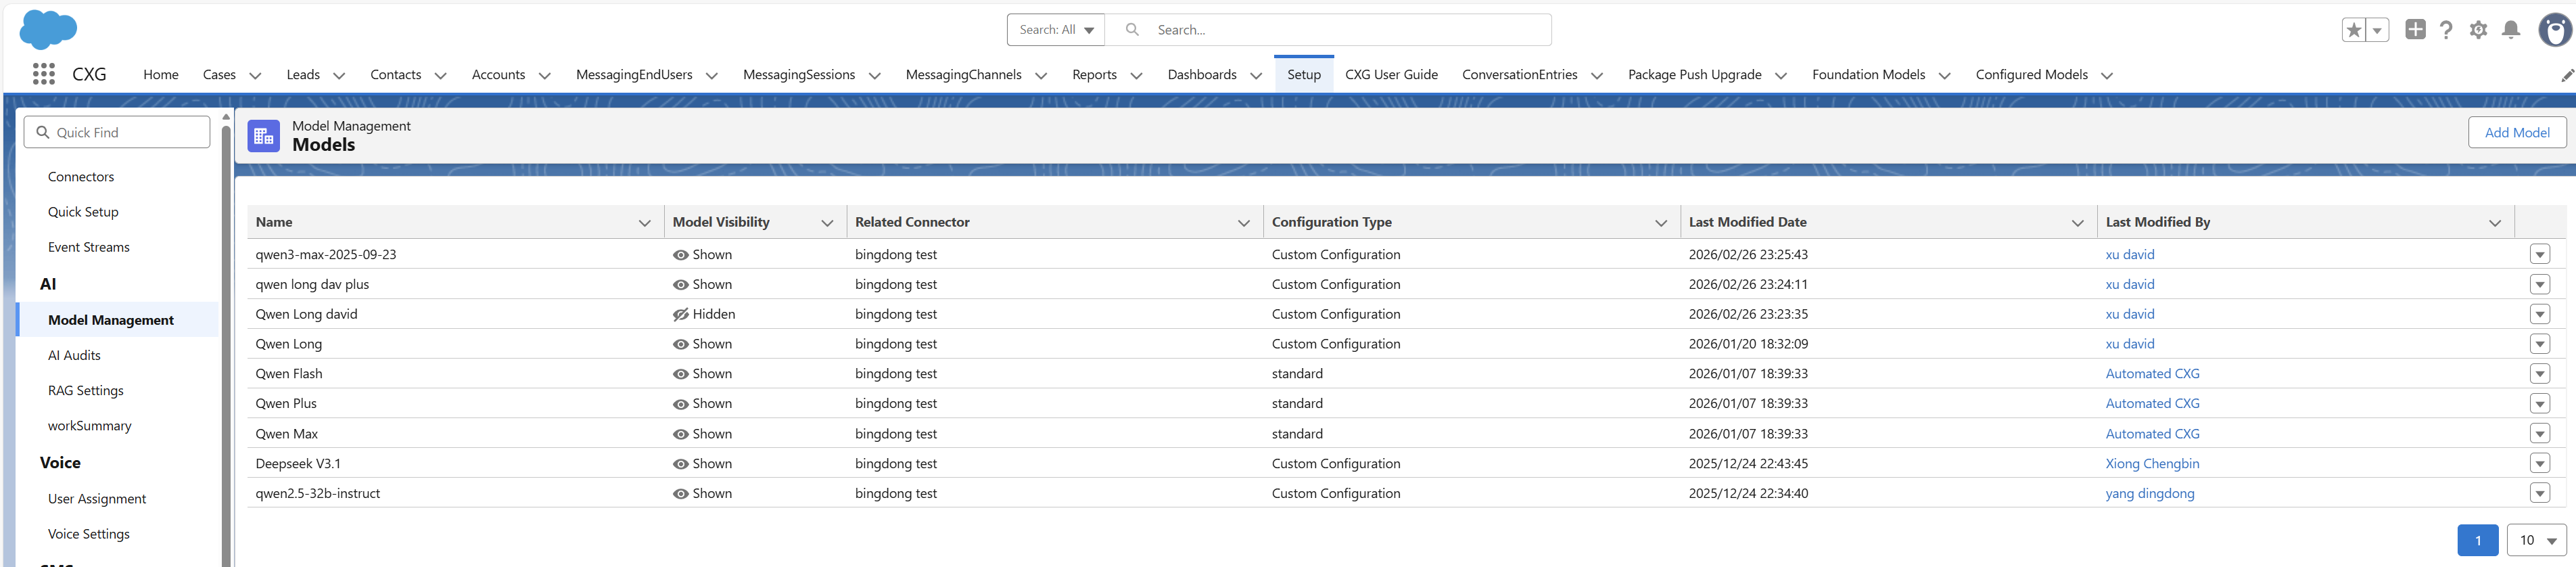
After you save, you can view the new model configuration record in the list.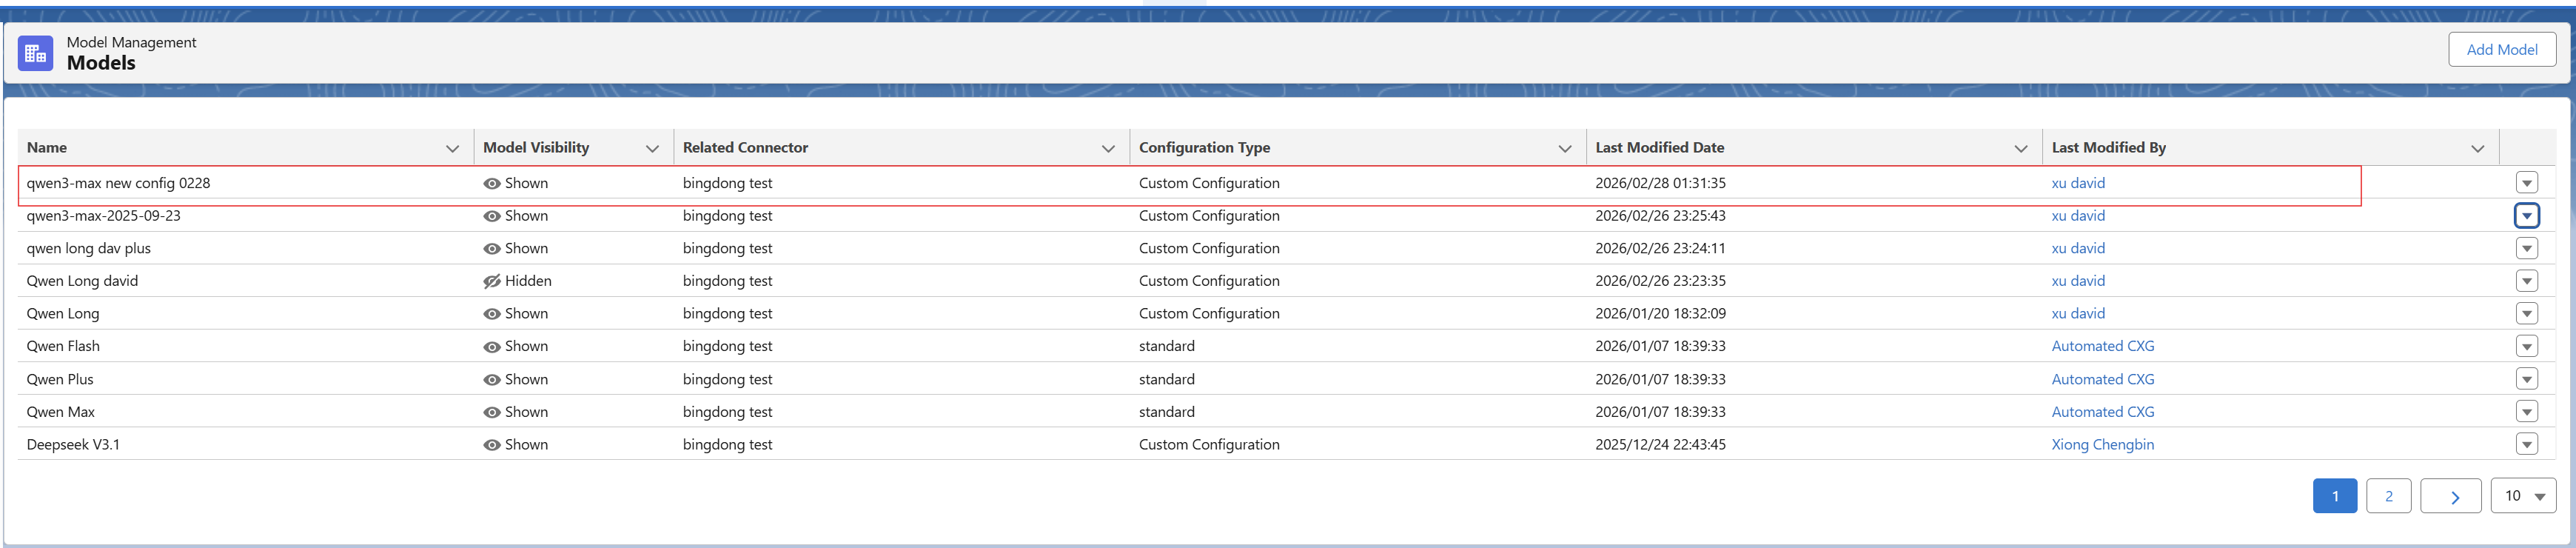 To change the model's visibility on the Prompt Builder page, click the dropdown menu on the far right of the record and select Hide or Show.
The Model Visibility column shows each model's status (Shown / Hidden).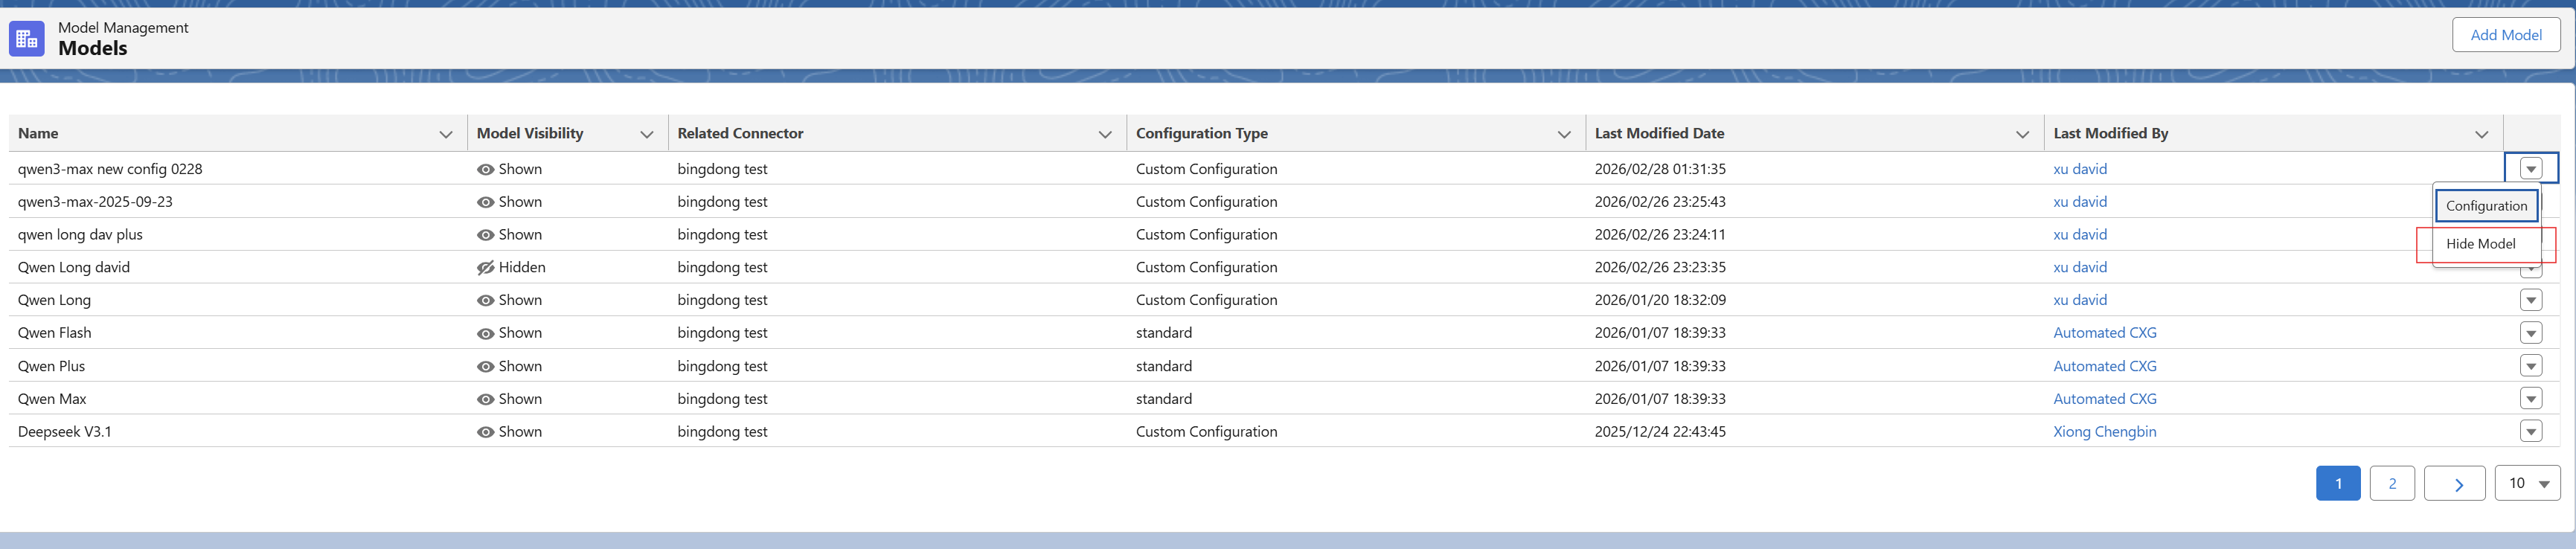
Step 3: Configure the model
By default, an added model has empty parameters. You can create new configurations, adjust parameters, and save each version as a separate copy, which lets you manage multiple configurations for a single model. You can then use each configuration in a Prompt Template for different business use cases.
To modify a model configuration on the Model Management page, click the dropdown menu on the far right of the model entry and select Configure.The system prompts you to select either Update Configuration or Create a new Configuration:
If you select Update Configuration, enter the new parameter information and click Confirm to save.
If you select Create a new Configuration, set a configuration name and parameters, and then click Confirm.
 After saving, you can view the new model configuration record in the list.To change the model's visibility on the Prompt Builder page, click the dropdown menu on the far right of the record and select Hide or Show.
The Model Visibility column shows each model's status (Shown / Hidden).
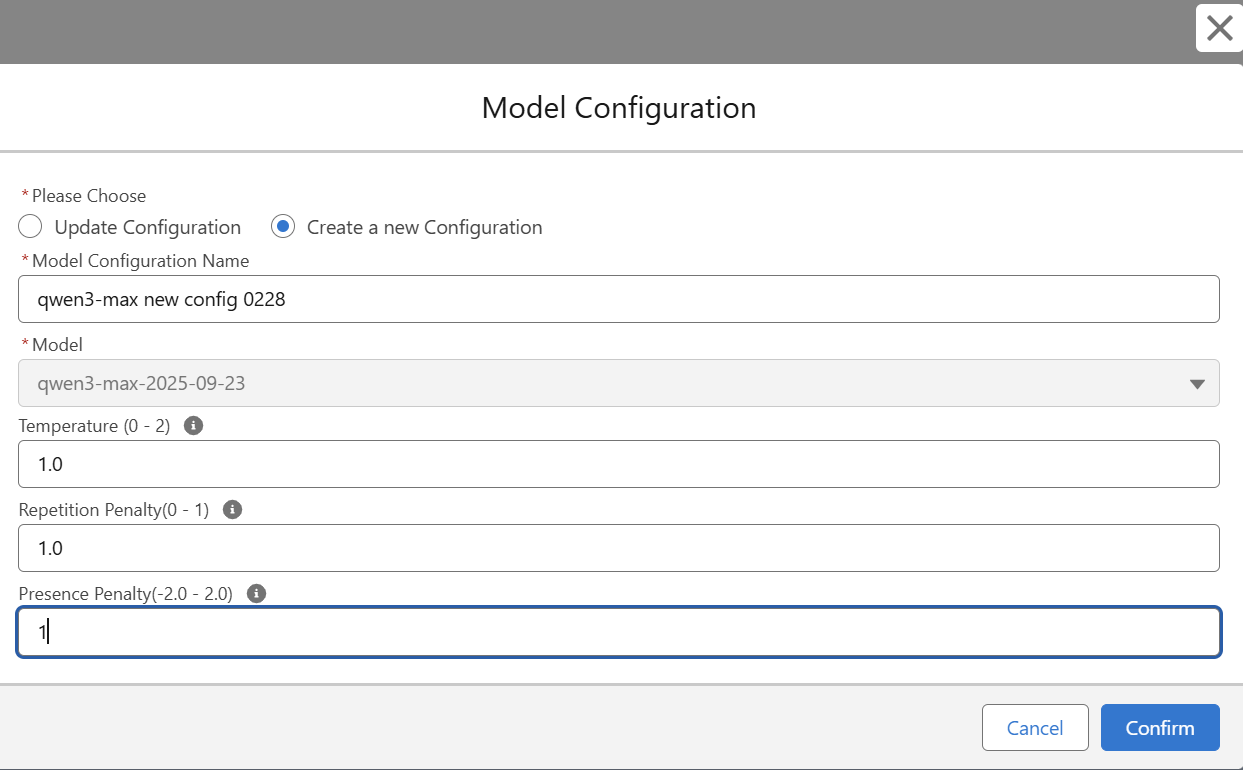 After saving, you can view the new model configuration record in the list.
Use Custom models in a Prompt Template
After configuring a model with either method, you can add it as a Custom model type in a Prompt Template.
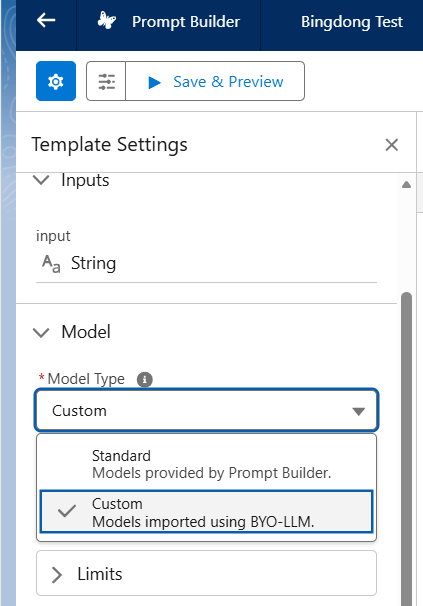
In the Prompt Builder module, go to the Template page. In the model configuration options on the left, set Model Type to Custom. You can then select any of your added models.
After you save and publish the prompt, you can call the model in the relevant business scenario.