CuteFTP is a user-friendly FTP client that provides fast and stable file transfers. If you need to deploy a new website on a Web Hosting instance, or upload, download, update, or back up website files already on the instance, you can use CuteFTP to efficiently perform operations such as uploading, downloading, and creating files.
Step 1: Connect to a Web Hosting instance
Before you begin, ensure you have CuteFTP installed. You can download the tool from the official CuteFTP website. This topic uses CuteFTP 9.0 as an example. The user interface (UI) may vary in other versions.
- Obtain the FTP login credentials for your Web Hosting instance.
- Log on to the Host Management Console.
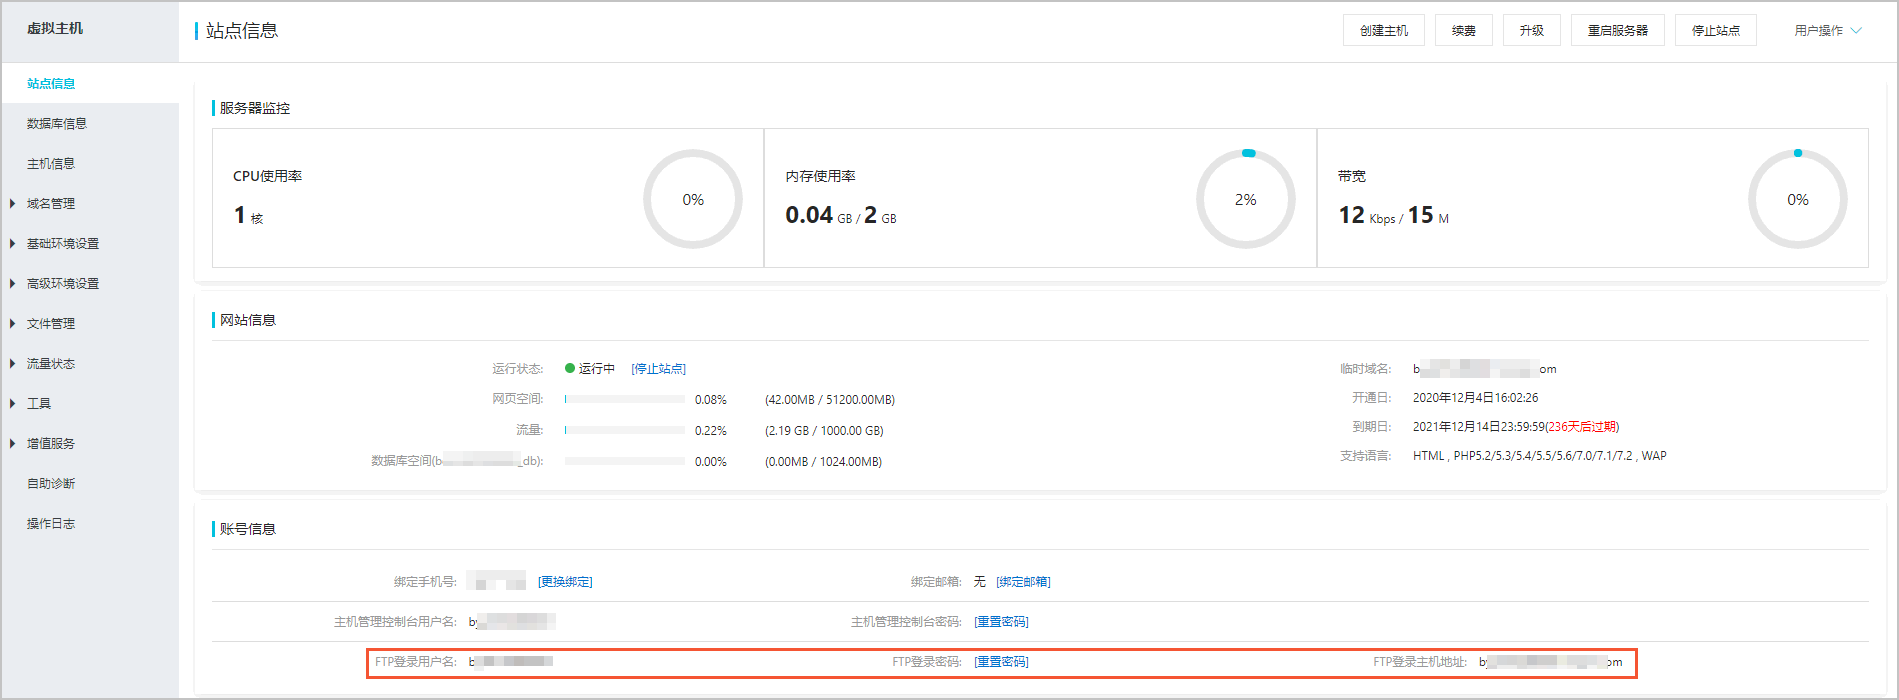
- Find the target Web Hosting instance and click Manage in the Actions column.
- In the navigation pane on the left, click Site Information.
- On the Site Information page, find the FTP login credentials in the Account Information section.The FTP login credentials include the username, password, and FTP host address.Note If you forget your FTP password, you can reset it. For more information, see Reset Passwords for the Host Management Console and FTP.
Start CuteFTP.
(Optional) If you are using a non-Chinese version of CuteFTP, follow these steps to change the language to Chinese:
In the top menu bar, choose .
In the navigation pane on the left, choose .
In the Language File: section, select chinese.Ing.
Click OK.
Close and restart CuteFTP.
In the top menu bar, choose .
In the Site Properties dialog box that appears, on the General tab, configure the site parameters.
The following table describes the main parameters.
Parameter
Description
host address
Enter the FTP host address.
username
Enter the FTP login username.
password
Enter the FTP login password.
For security, the password field displays asterisks (
*) instead of the characters you type.login method
Select Normal.
Click the Type tab in the Site Properties dialog box and set the Port (O) to 21.
Click Connect (E) to connect to your Web Hosting instance.
The CuteFTP interface is displayed.
The following table describes each area of the interface.
Number
Description
①
Local pane: Displays the files on your local computer.
②
Remote pane: Displays the files on your website. Double-click a directory to enter it.
③
Status area: Shows the status of commands, connections, and file transfers.
④
Log area: Contains the following two windows.
Queue window: Lists queued connection tasks.
Log window: Displays connection logs.
Step 2: Manage website files
After you connect to your Web Hosting instance using CuteFTP, you can view, upload, download, create, or delete website files.
View hidden files
For security reasons, Web Hosting hides some files and directories to prevent accidental deletion. Follow these steps to view them.
In the Site Properties dialog box, click the Actions tab, and then click Filter (F)....
In the Filter Properties tab of the Filter dialog box, configure the settings.
Use the following settings:
Select Enable filtering (E) and Enable server side filtering (server applies filter) (S).
In the Remote filters (M) text box, enter
-a.
Click OK.
On the Actions tab, click Connect (E).
After you reconnect, you can view hidden files, such as
.bash_logout,.bash_profile, and.bashrc.NoteOn Linux-based Web Hosting instances, hidden file names typically start with a period (
.).
Upload, download, create, or delete website files
You can perform the following operations:
Upload files: In the local pane, select the files to upload, and then double-click them or drag them to the remote pane.
Download files: In the remote pane, select the files to download, and then double-click them or drag them to the local pane.
Create a file or directory: In an empty area of the remote pane, right-click and select Create Directory.
Delete files: Select the files to delete, right-click them, and then click Delete.
Managing website files using CuteFTP is similar to using FileZilla. For more information, see Manage website files using FileZilla.
Related topics
To compress or decompress your uploaded website files, see Compress and decompress files.
On Linux-based Web Hosting instances, you can enable or disable the FTP feature. For more information, see Enable and disable the FTP feature.