This topic explains how to configure push domains, streaming domains, interactive messaging applications, and SDK licenses in the ApsaraVideo Live console. This guide covers the following steps: Prerequisites, Push domain configuration, Streaming domain configuration, Interactive scenario configuration, Create an SDK license, and Recording and playback configuration.
Prerequisites
-
You have registered an Alibaba Cloud account and completed identity verification. For instructions, see Individual identity verification or Enterprise identity verification.
-
You have activated ApsaraVideo Live. For more information, see Activate the service.
-
Prepare two domain names: one as a push domain and the other as a streaming domain. You must complete the ICP filing for these domains. For more information, see Register an Alibaba Cloud domain and ICP filing.
Note-
If your live center is outside the Chinese mainland and you use Outside Chinese Mainland, ICP filing is not required for your domains.
-
If the push domain and streaming domain are subdomains of the same primary domain, you only need to complete the ICP filing for the primary domain.
-
-
You have granted the AliyunLiveFullAccess and AliyunVODFullAccess system policies to a RAM user. For instructions, see Create a RAM user and grant permissions.
Configure an ingest domain
Configure the ingest domain in the ApsaraVideo Live console.
Add an ingest domain
In the navigation pane on the left, choose Domain Names. On the Domain Management page, click Add Domain.
In the Add Domain Name step, configure the parameters.
Set Domain Type to Ingest Domain.
For more information about how to select an acceleration region, see How do I select an acceleration region for a domain name?
For Accelerated Domain Name, enter the ingest domain that you prepared.
For more information about how to select a live center, see How do I select a live center?
ImportantThe ingest domain and the streaming domain must be in the same live center. You cannot change the live center after the initial configuration.
NoteWhen you add a domain name to ApsaraVideo Live for the first time, you must verify the ownership of the domain name. Follow the on-screen instructions. For more information, see Verify the ownership of a domain name.
Click Next. Configure a CNAME record to enable live streaming acceleration. The CNAME record directs end-user requests to Alibaba Cloud Points of Presence (POPs) for acceleration. Follow the on-screen instructions. After the configuration is complete, the CNAME validation result is displayed as shown in the following figure.
After you complete the preceding steps, the ingest domain is configured. The result in the console is shown in the following figure.

There may be a delay before the CNAME status changes to Configured in the console. The CNAME configuration is successful after the CNAME record is validated.
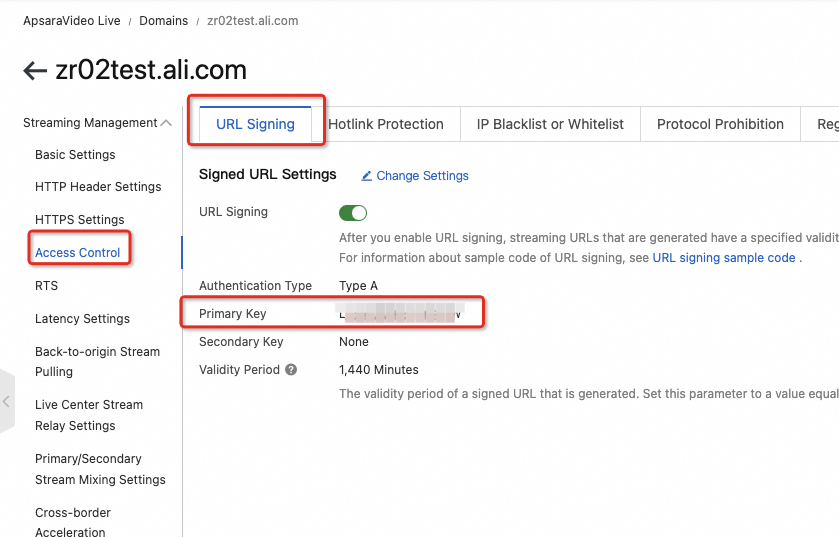
View the URL signing information
URL signing protects your content from being downloaded or used by unauthorized sites. URL signing is enabled by default when you add a domain name.
On the Domain Names page of the ApsaraVideo Live console, find the target ingest domain and click Domain Settings.
Choose Streaming Management > Access Control.
Record and save the Primary KEY for the ingest domain. You will need this key for server-side deployment. The following figure shows the location of the primary key in the console.
Streaming domain configuration
Configure your streaming domain in the ApsaraVideo Live console.
Add a streaming domain
The steps to add a streaming domain are the same as for adding a push domain, except you must select Streaming Domain for the Business Type parameter.
The streaming domain must be in the same live center as the push domain.
After you add the streaming domain, it appears in the domain list in the console.
In the domain management list, the CNAME Status for the streaming domain is Configured, the Business Type is Streaming Domain, the Live Center is China (Shenzhen), and the Status is Running.
View the authentication key
URL authentication is enabled by default. Save the streaming domain's primary key. The process is the same as for viewing the authentication key for the push domain.
Associate the push domain
Associate the push domain with the streaming domain.
-
In the left-side navigation pane, choose Domain Name Management.
-
In the Domain Management list, find your target streaming domain and click Domain Settings.
-
Choose Live Management > Basic Settings. Click the Push Information tab, and then click Add Push Information.
-
Select the push domain from the same live center and click OK.
After completing these steps, the streaming domain and push domain are associated. The result is shown in the console.
On the Basic Settings > Push Information tab for the streaming domain, you can see that the push domain is successfully associated. Information such as the associated push domain, CNAME, push protocols, and push URLs is displayed.
Cross-origin resource sharing
Cross-origin resource sharing (CORS) is a standard HTML5 solution that allows web pages to securely request and access resources from a different origin. For more information, see cross-origin resource sharing.
-
In the left-side navigation pane, choose Domain Name Management.
-
In the Domain Management list, find your target streaming domain and click Domain Settings.
-
Choose Live Management > HTTPS Header Configuration and click Add.
-
Set the parameter to
Access-Control-Allow-Originand the value to*.
For more details, see Configure HTTP headers. After the configuration is successful, the result is shown in the console.
On the HTTP Header Configuration page, the parameter list shows that the value for Access-Control-Allow-Origin is * and the Status is Successful.
HTTPS
Configuring HTTPS acceleration encrypts sensitive information during transmission to prevent security risks, such as information leakage from captured session IDs or cookies. It also validates data integrity to prevent man-in-the-middle (MITM) attacks, such as DNS hijacking or content tampering. For instructions, see Configure HTTPS for secure acceleration.
After you purchase an SSL certificate, you must log on to the console to apply for it. The certificate can be used only after the application is approved. For details, see Purchase a commercial SSL certificate.
After the configuration is successful, the result is shown in the console.
On the HTTPS Settings page, the HTTPS Certificate switch is turned on. Information such as the certificate type, name, brand, and expiration date is displayed below.
Transcoding template
The live transcoding service helps prevent poor playback experiences or stuttering that can occur when the push bitrate is too high or too low. For details on configuring general-purpose transcoding, see Configure a general-purpose transcoding template.
Make a note of the AppName. The template takes effect only when the AppName in the push URL matches the AppName of the transcoding template.
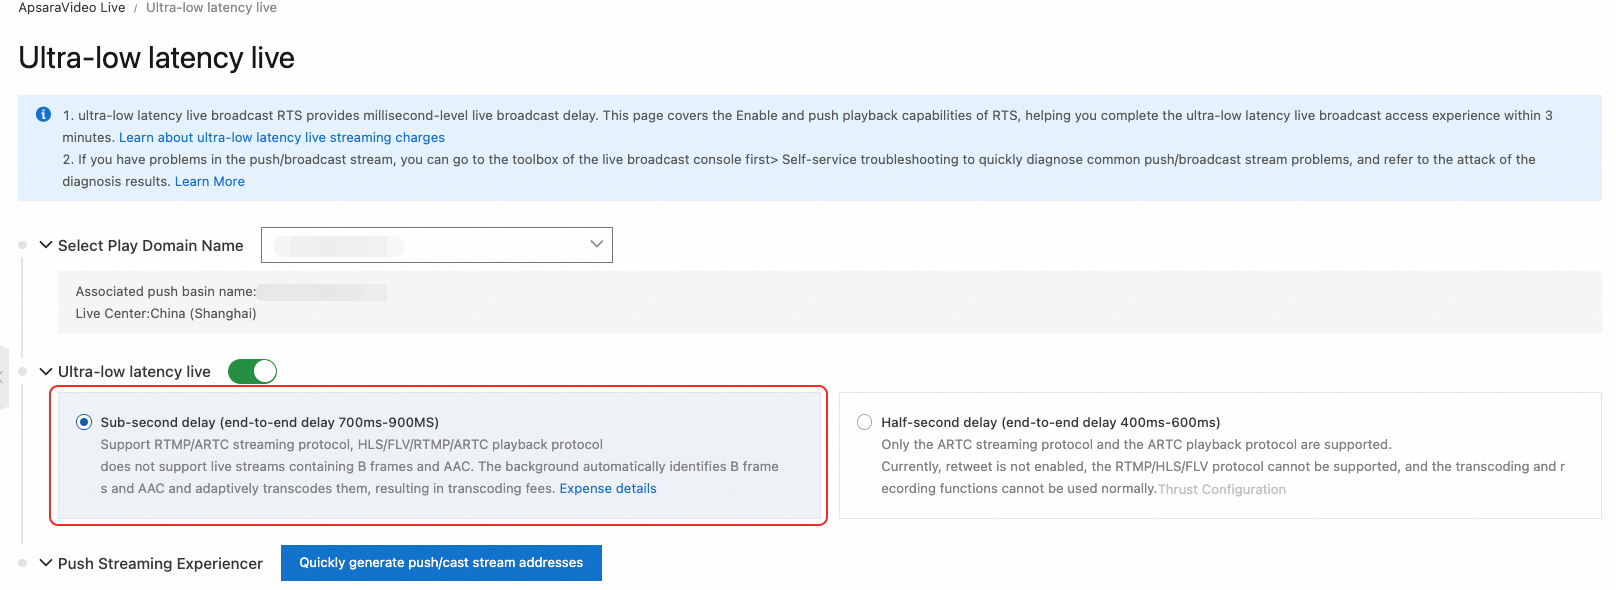
Enable Real-Time Streaming
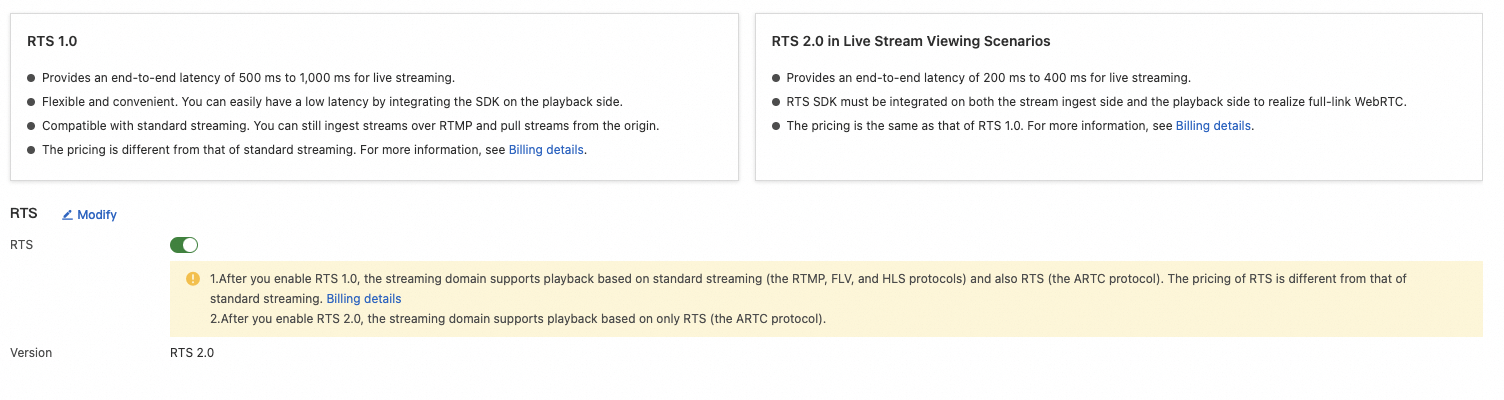
Real-Time Streaming (RTS) is a premium feature of ApsaraVideo Live that provides a live streaming service with ultra-low latency, high concurrency, and high-definition, smooth playback. For more information, see Overview of Real-Time Streaming (RTS).
Log on to the ApsaraVideo Live console.
In the navigation pane on the left, choose Live+ > Real-Time Streaming.
Select a streaming domain.
Turn on the Real-Time Streaming switch and select Sub-second Latency (700 ms to 900 ms end-to-end latency).
Interactive scenario configuration
Interactive messaging application
Interactive messaging powers key features such as stream status notifications, announcements, likes, muting, and bullet comments. For co-streaming, it also manages viewer requests to join the video call. To enable these features, you must first create an interactive messaging application. Follow these steps:
-
In the left-side navigation pane of the ApsaraVideo Live console, choose .
-
Click Create Application.
-
In the Create Application dialog box, select a region, enter an application name, and leave callback settings and security audits disabled for now.
-
Click Create. The new application is added to the application list, and an AppID, AppKey, and AppSign are automatically generated.
View the application details and save the AppID, AppKey, and AppSign. You will need these credentials for your server-side deployment.
ApsaraVideo for RTC application
This project includes both basic live rooms and co-streaming rooms. Co-streaming rooms allow viewers to request to join a video call with the host. Co-streaming rooms require audio/video calls and stream mixing, so you must create an ApsaraVideo for RTC application. This application enables viewers to co-stream with the host. The following figure shows the co-streaming model. When a viewer co-streams with the host, other viewers receive the mixed stream from all participants.

Create an ApsaraVideo for RTC application in the console. The steps are as follows. For a complete guide on quickly setting up a co-streaming scenario, see Quick start for co-streaming.
-
In the left-side navigation pane of the ApsaraVideo Live console, choose Live+ > ApsaraVideo for RTC (formerly Interactive Live Streaming) > Application Management.
-
On the Application Management page, click Create Application. Enter a custom Instance Name, select the Terms of Service check box, and then click Buy Now.
NoteCreating an application is free of charge. You are billed on a pay-as-you-go basis for your actual usage. For more information, see Billing for audio/video calls.
-
After the application is created, refresh the Application Management page to view it.
-
Click the ApsaraVideo for RTC application. On the Bypass Live Streaming page, in the Global Bypass Live Streaming to ApsaraVideo Live section, enable Bypass Live Streaming. Configure the playback domain by entering the streaming domain you configured previously in the Add a push domain step (it cannot be a subdomain), and enable Single-stream Forwarding. If you need to configure recording or snapshots, you must do so for this domain.
View the management details and save the Application ID and AppKey. You will need these credentials for your server-side deployment.
SDK license
The MediaBox A/V SDK used in this project requires a license. For mobile platforms such as Android and iOS, we recommend applying for licenses for the Player, Push, and Queen (beauty and effects) modules. You can create the necessary SDK licenses based on your business needs.
-
In the left-side navigation pane of the ApsaraVideo Live console, choose SDK Management > My Licenses.
-
Click Create Application and bind the license.
-
Enter the application information based on your business needs. For parameter details, see Manage licenses. Then, click Next.
-
Select the required feature modules and click Next.
-
For all feature modules, you can choose a trial version (valid for 1 month) or an official version (valid for 1 year). You can apply for one trial version per feature module for each app.
-
The Queen module is available in different versions. The default versions are Short Video Basic and Queen Basic. You can select other versions from the drop-down list based on your business needs.
-
The Player and Live Push modules do not support version switching. The Standard version is used by default.
-
Confirm your application information. If it is correct, click Create to complete the application creation. To modify the information, click Previous to return to the configuration page.
After the application is created, return to the My Licenses page. Download the License File and save the license key. You will need them for your server-side deployment.
Recording and playback configuration
This project's live rooms include a playback feature. To enable this, you must configure live stream recording.
Recording to ApsaraVideo VOD
To configure standard live stream recording, follow these steps:
-
Log on to the ApsaraVideo Live console.
-
In the left-side navigation pane, choose .
-
On the Live Stream Recording page, select the streaming domain you want to configure.
-
On the Store in ApsaraVideo VOD tab, click Add.
-
In the dialog box that appears, select a transcoding template and click OK. You also need to specify the AppName and StreamName as needed, select a Storage Address and Recording Period (default is 30 minutes), and configure the Recording and Transcoding Template ID.
NoteWe recommend that you configure the transcoding template to convert audio to the AAC format for better compatibility.
If you have not configured a transcoding template in ApsaraVideo VOD, go to the ApsaraVideo VOD console to configure one.
For detailed instructions, see: Record and store in ApsaraVideo VOD
Recording to OSS
To configure standard live stream recording, follow these steps:
-
Log on to the ApsaraVideo Live console.
-
In the left-side navigation pane, choose .
-
On the Live Stream Recording page, select the streaming domain you want to configure.
-
On the Store in OSS tab, click Add.
-
In the dialog box that appears, enable recording of transcoded streams, select a transcoding template ID, and click OK. You also need to specify the AppName and StreamName, set the Storage Location, Recording Duration for New Slices (default is 180 seconds), and Storage Format (m3u8, flv, mp4, and cmaf are supported).
NoteFor detailed instructions, see: Record and store in OSS
Summary
Now that you have completed the required console configurations, which include Prerequisites, Push domain configuration, Streaming domain configuration, Interactive scenario configuration, Create an SDK license, and Recording and playback configuration, you need to record the following information for project deployment:
-
The domain names and primary keys for the push and streaming domains.
-
The AppID, AppKey, and AppSign for the interactive messaging application.
-
The Application ID and AppKey for the ApsaraVideo for RTC application.
-
The License File and license key for the MediaBox A/V SDK.