Manage organization members
This topic describes how an organization administrator can find, edit, update, export, and delete users.
Prerequisites
Users have been added to the organization. For more information, see Add users.
Limits
The following limitations apply when an organization administrator deletes a user:
An administrator cannot delete themselves.
A user who is a workspace owner cannot be deleted.
Note
When a user is deleted from an organization, they lose their organization-granted permissions and any content they created within the organization. Operations in their personal workspace are not affected.
After an organization administrator deletes a user, an administrator must add the user again to restore their access. Proceed with caution.
For more information about how to add users, see Add users.
An administrator can delete users from the organization. This action cannot be undone.
You cannot delete a workspace owner. To do so, you must first transfer the workspace and then delete the user.
When a user is deleted from the organization, the system automatically transfers resources they own within a workspace, such as reports and datasets, to the workspace owner.
Procedure
Go to the organization management page to manage users.
Log on to the Quick BI console.
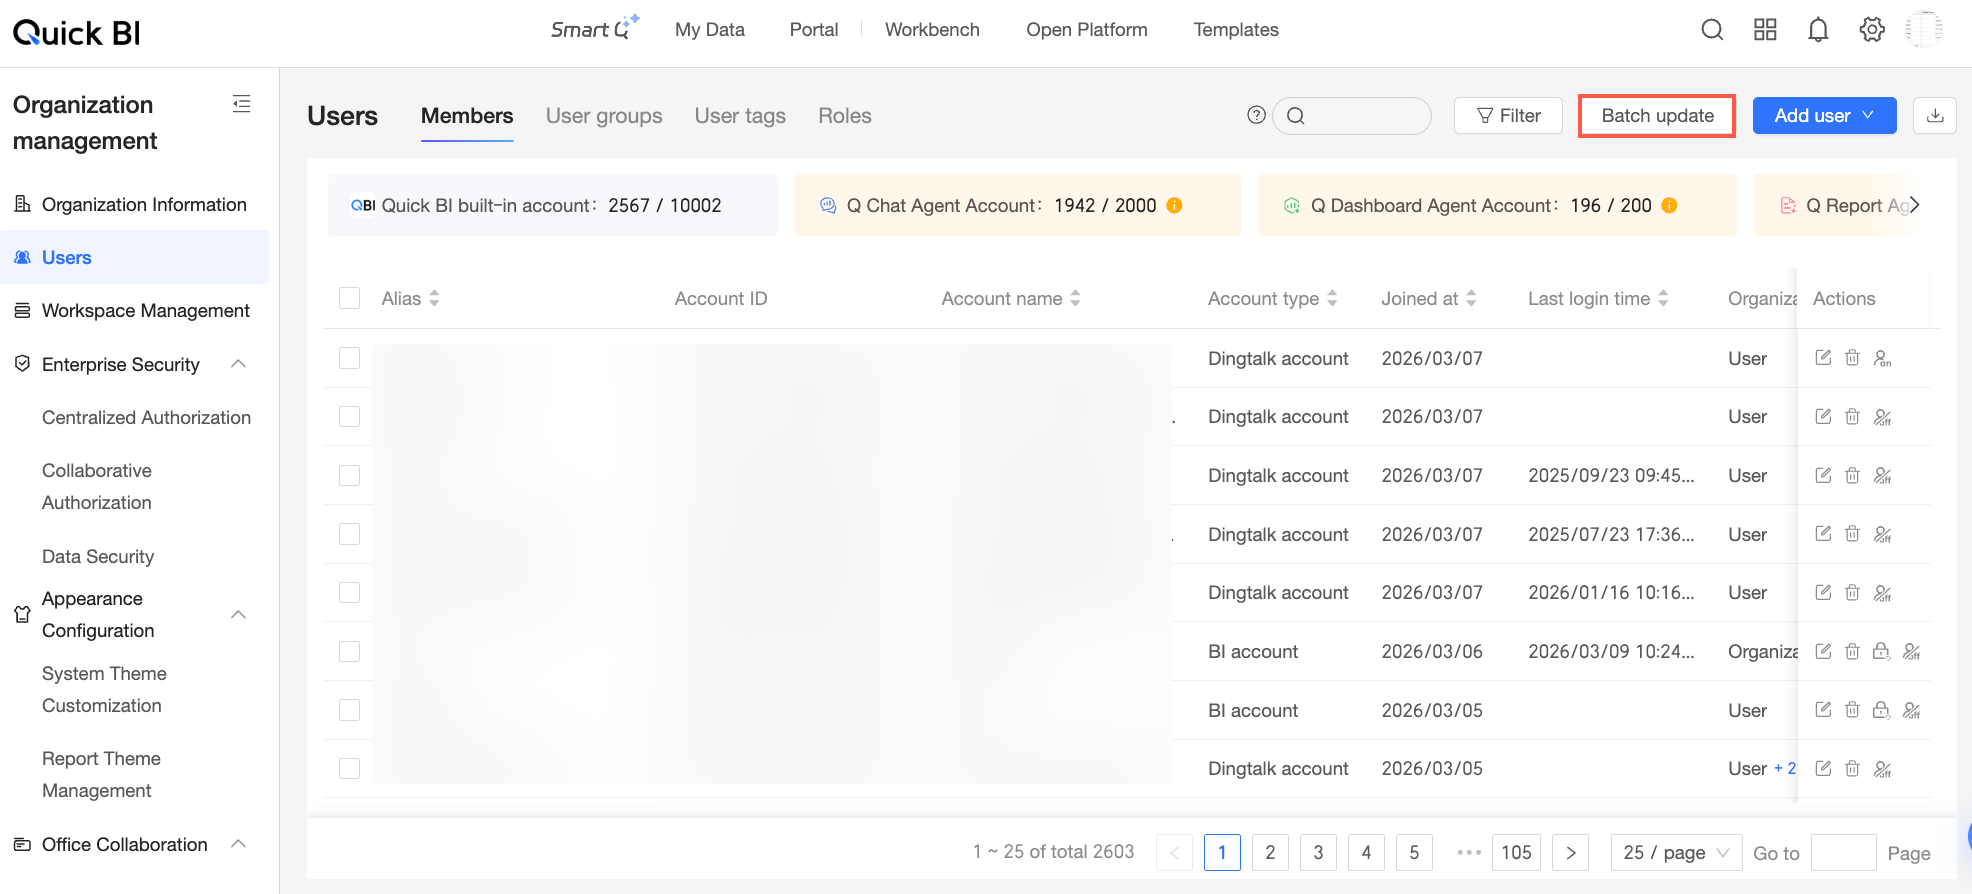
Follow the steps shown in the figure to go to the user management page.
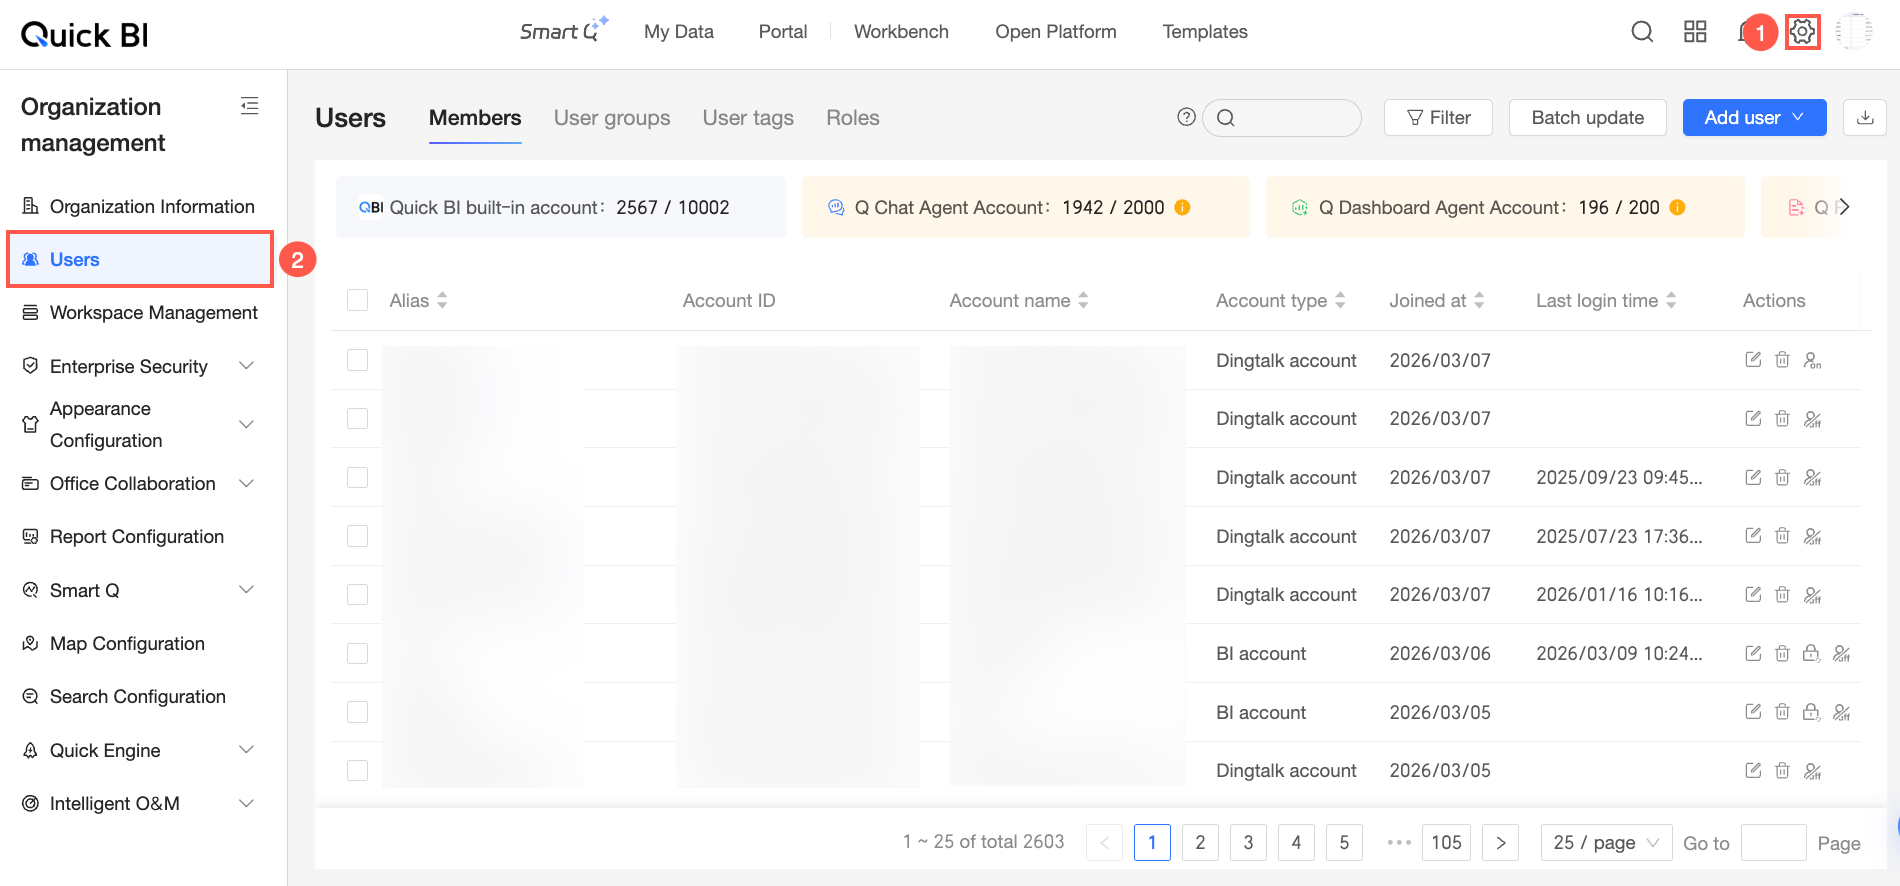
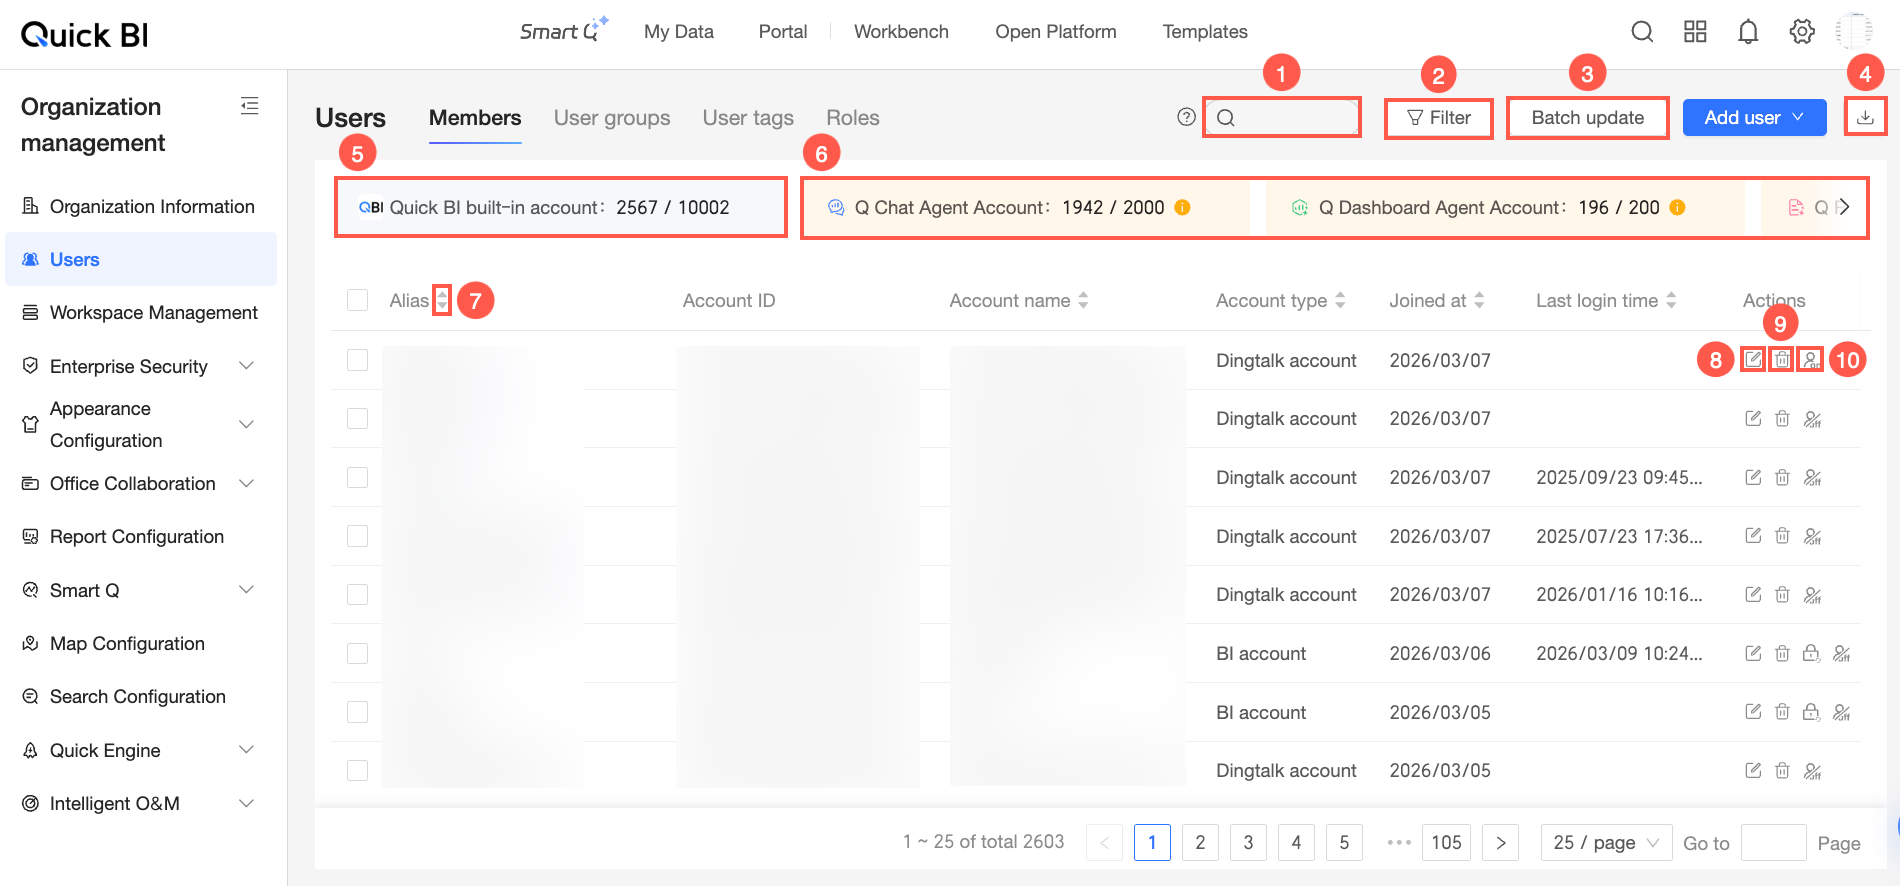
On the Members tab, you can perform the following operations:
Actions
Description
① Search for users
In the search box at the top of the page, enter a keyword from the user's alias or account name and click the
 icon to search.
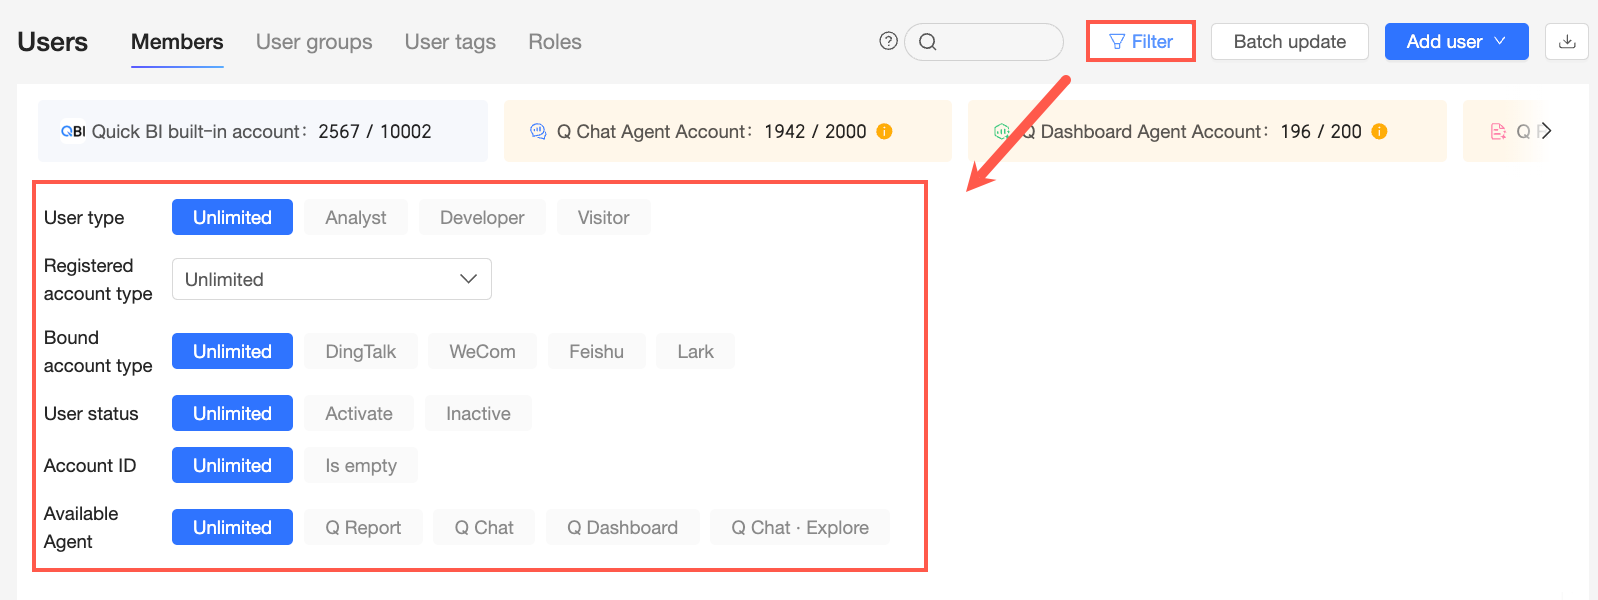
② Filter users
Filter users by user type, registration account type, bound account type, user status, user ID, and available Agent.
③ Bulk update users
Click Bulk update at the top of the page. In the Update user information in bulk dialog box, upload an Excel file to update user information.
You can select whether to update the user group, contact information, and user tag.
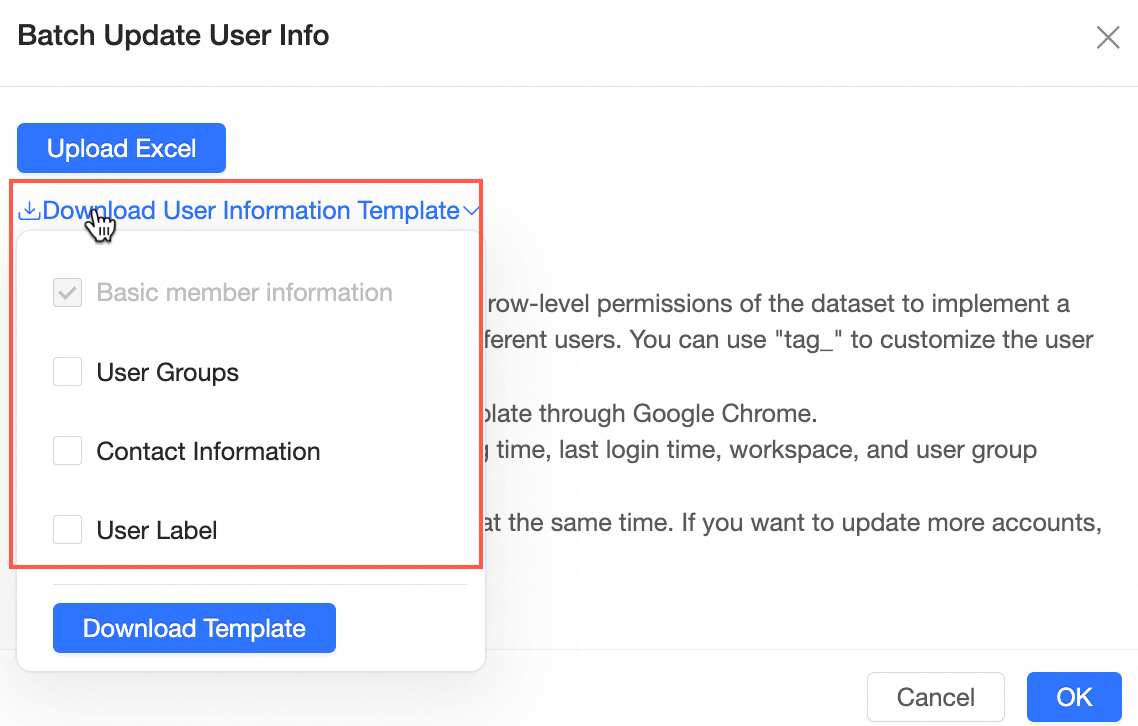
You can update information such as user ID, alias, user type, organization role, tag_XXX, email, phone number, and user group. For more information, see Bulk update user information.
NoteYou can only update information for existing users in the organization. You cannot add new users with this feature.
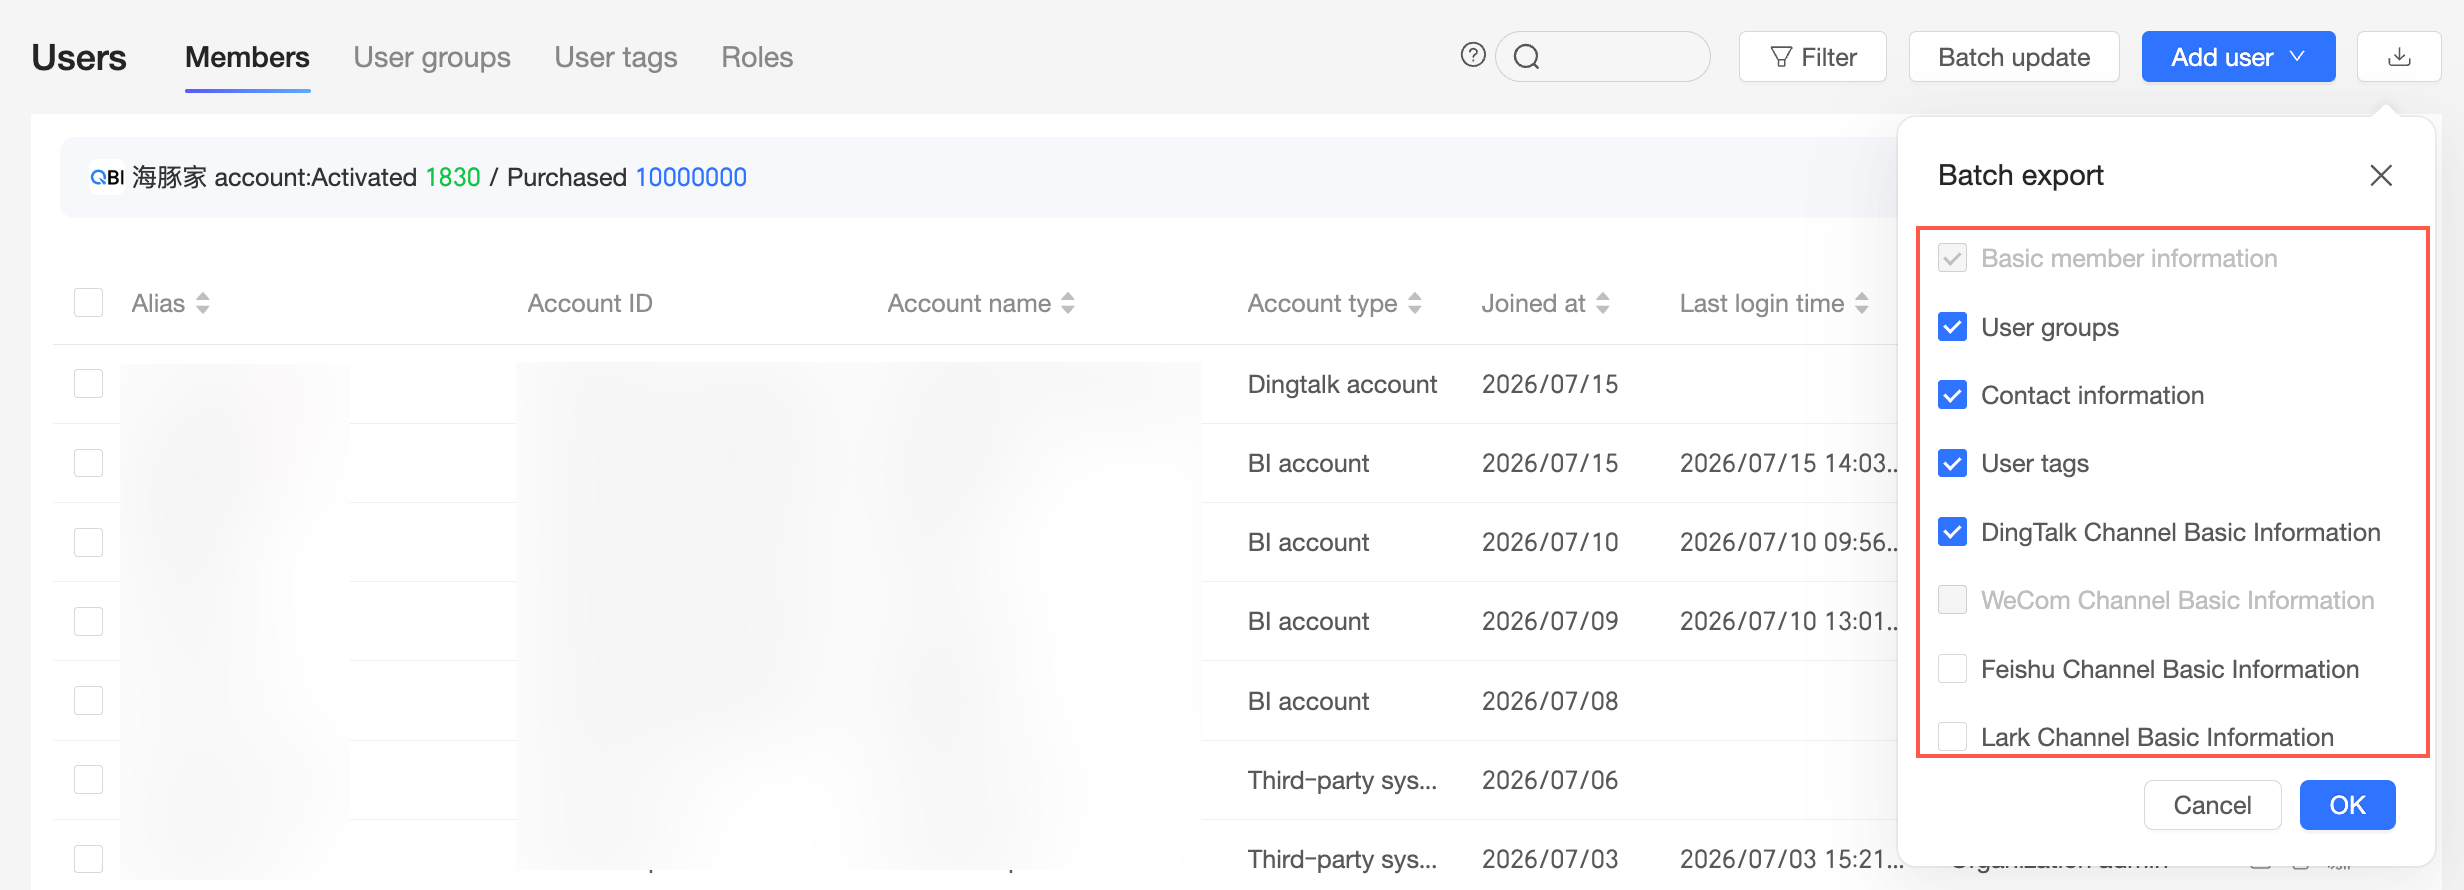
④ Batch export users
Click Batch export at the top of the page to download the user list.
You can choose to include user group, contact information, user tags, basic DingTalk information, basic WeCom information, basic Feishu information, and basic Lark information.

If you select all options, the downloaded file includes fields such as user ID, Account, Account type, Alias, Join date, Last login time, user type, organization role, User status, tag_XXX, Email, Phone number, and User group.
NoteLast login time:
If a user has never logged in to Quick BI, this field is empty.
When a user accesses the Quick BI mobile app through a bound DingTalk, WeCom, or Feishu account, the system does not update the last login time for the bound account.
When a user logs in with a DingTalk, WeCom, or Feishu account that has been added to the Quick BI organization, through either a browser or the mobile app, the system updates the last login time for that account.
⑤ Quick BI account quota
This area shows the number of activated and purchased accounts for your organization.
Hover over this area and click the
icon to go to the Access Analytics page and view user access data within the organization.⑥ Agent capability quota
This area shows the number of used and purchased seats for each AI Agent in your organization.
Hover over an Agent's data area and click the
icon to show only users assigned to that Agent.⑦ Sort list
Click the
icon in a column header to sort that column in ascending or descending order.⑧ Edit a user
In the Actions column for the target user, click the
icon. In the User Details dialog box, you can edit the following user information.a: Modify the user's alias and bind their phone number, email address, and work accounts.
b: Modify the user's user group, user type, and available Agent.
c: View the workspaces the user has joined and set their role within those workspaces.
d: If the user no longer belongs to the organization, click Delete user. Confirm the deletion in the Delete User dialog box.
⑨ Delete a user
In the Actions column for the target user, click the
icon.NoteYou cannot delete a workspace owner. To do so, you must first transfer the workspace and then delete the user.
You can also select one or more users, or select all, and click Delete to delete them in bulk.
⑩ Disable or activate a user
Click the
icon to disable or activate a user.You can also select one or more users, or select all, and click Disable or Activate to perform the action in bulk.
NoteDue to WeCom platform requirements, you may need to log in to WeCom before performing related operations. If prompted, click the login entry to proceed.
 icon to go to the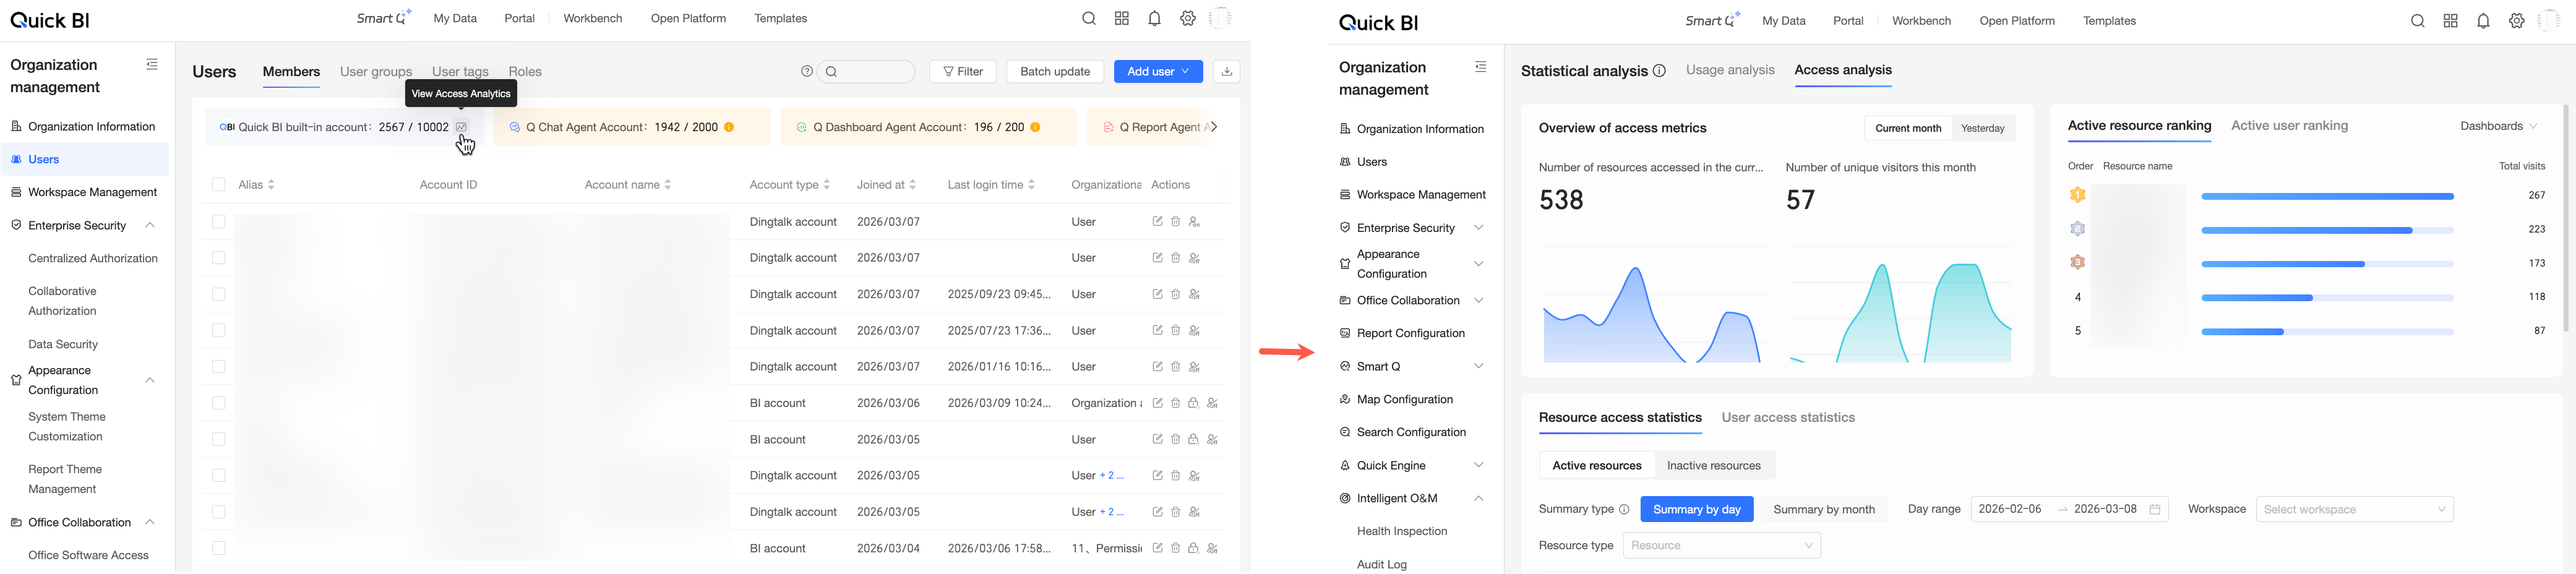
 icon to show only users assigned to that Agent.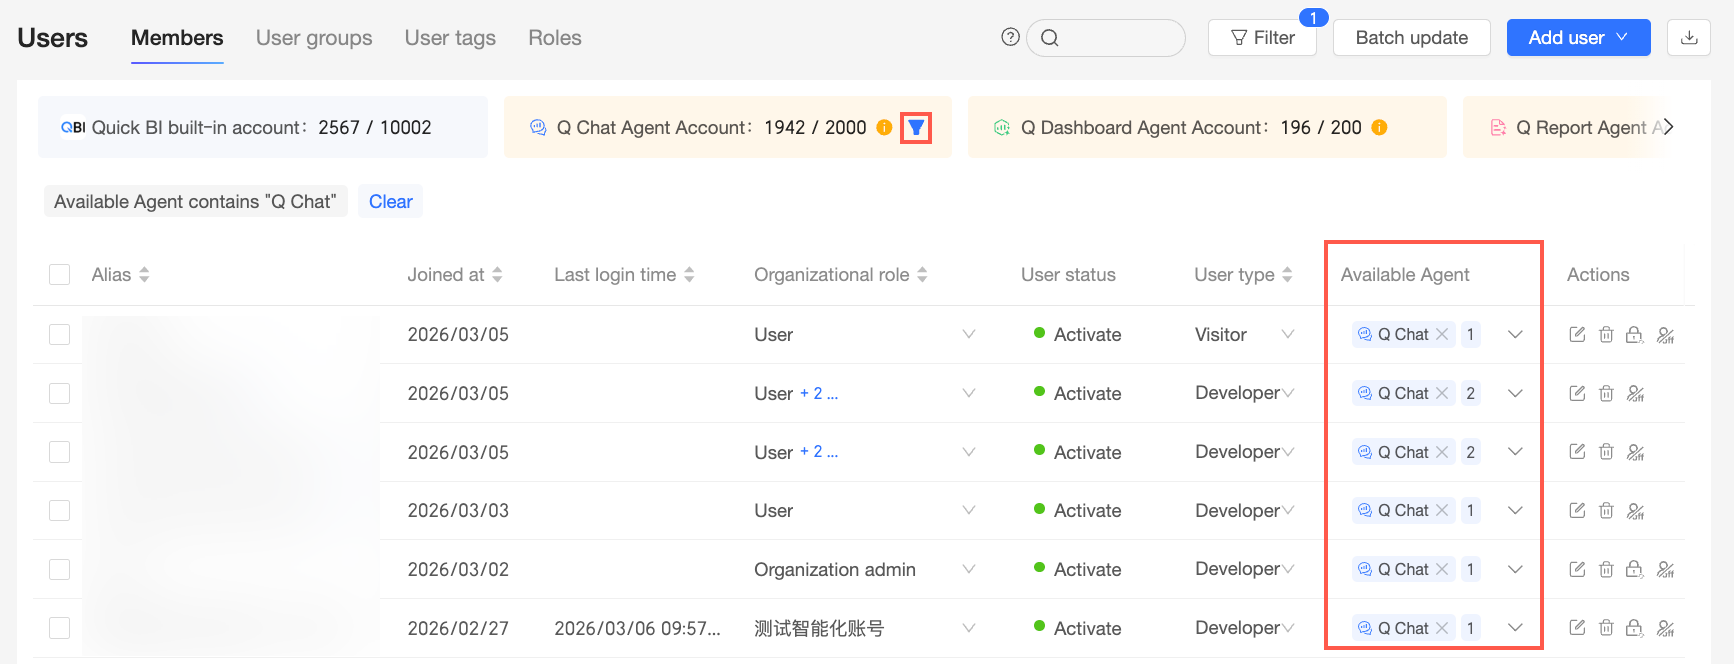
 icon in a column header to sort that column in ascending or descending order.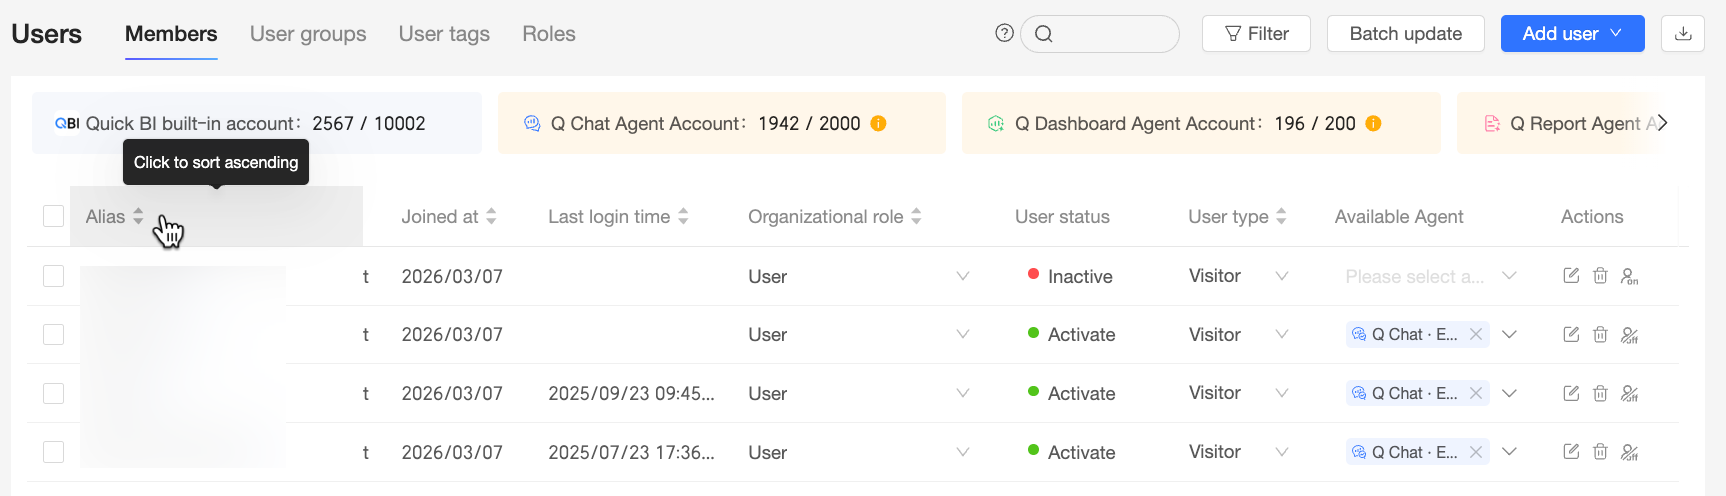
 icon. In the User Details dialog box, you can edit the following user information.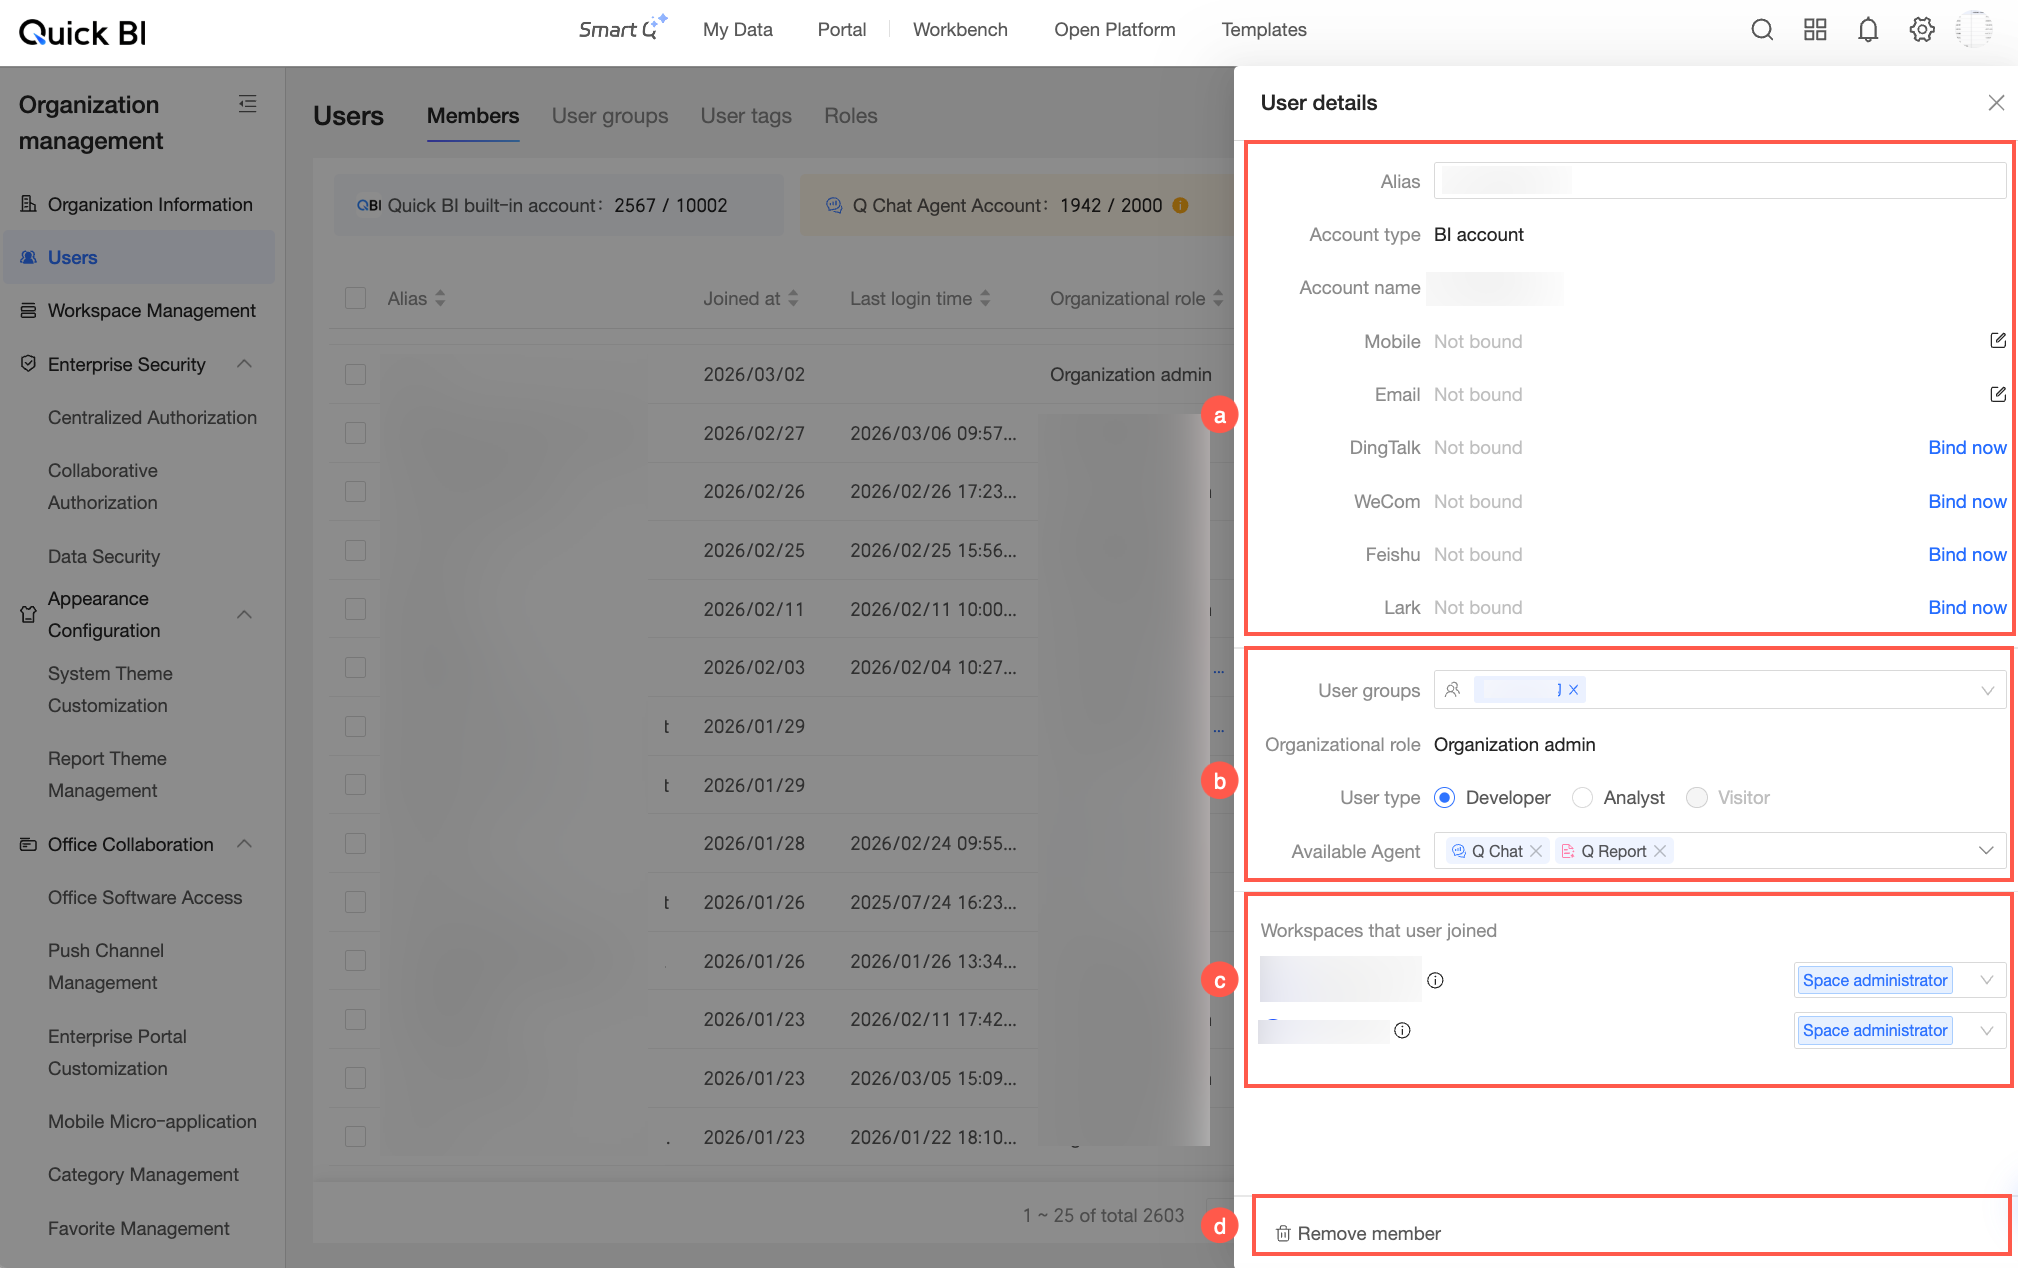
 icon.
icon.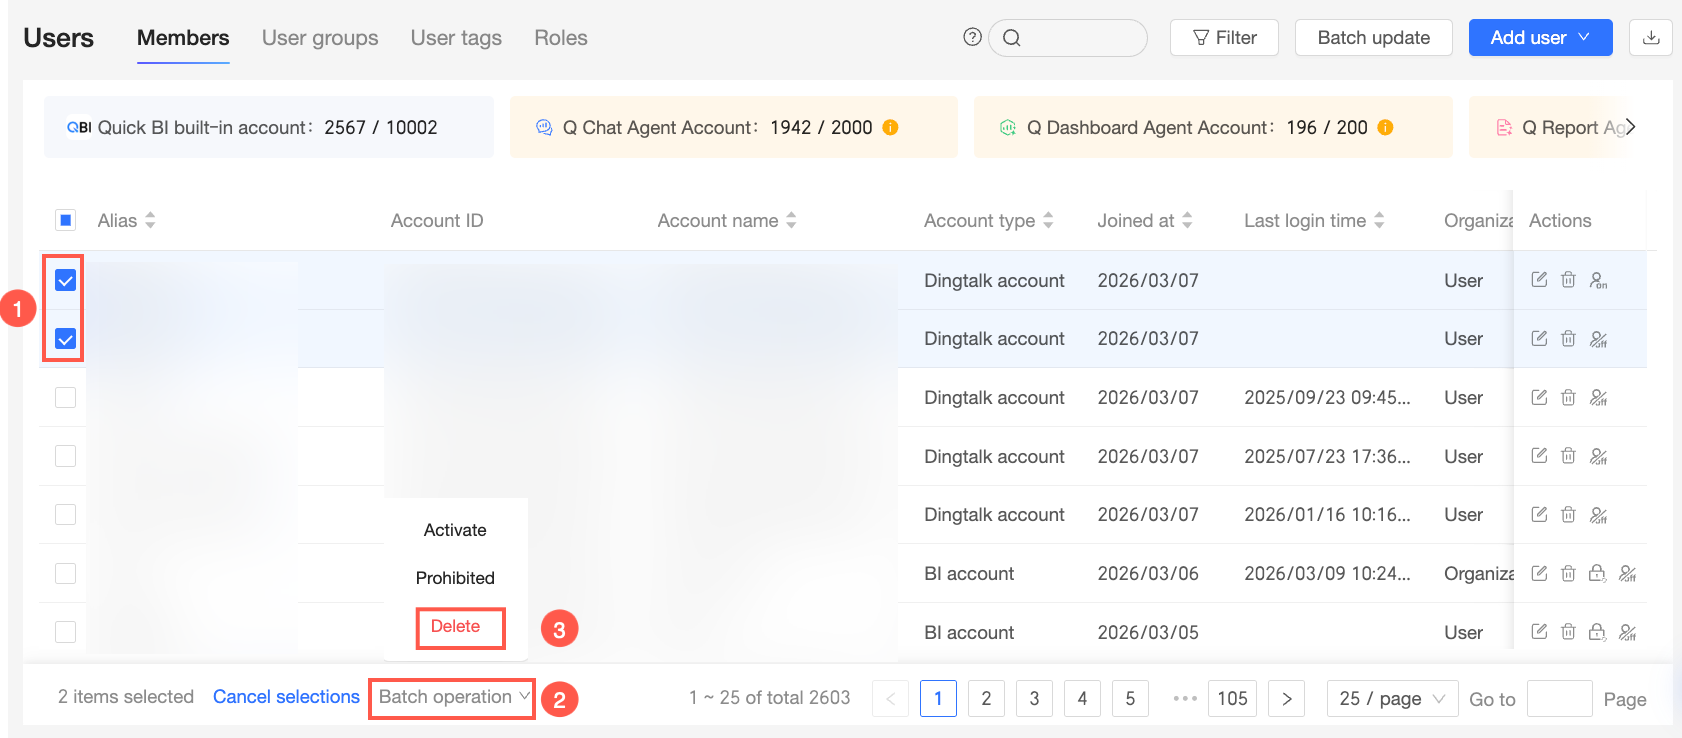
 icon to disable or activate a user.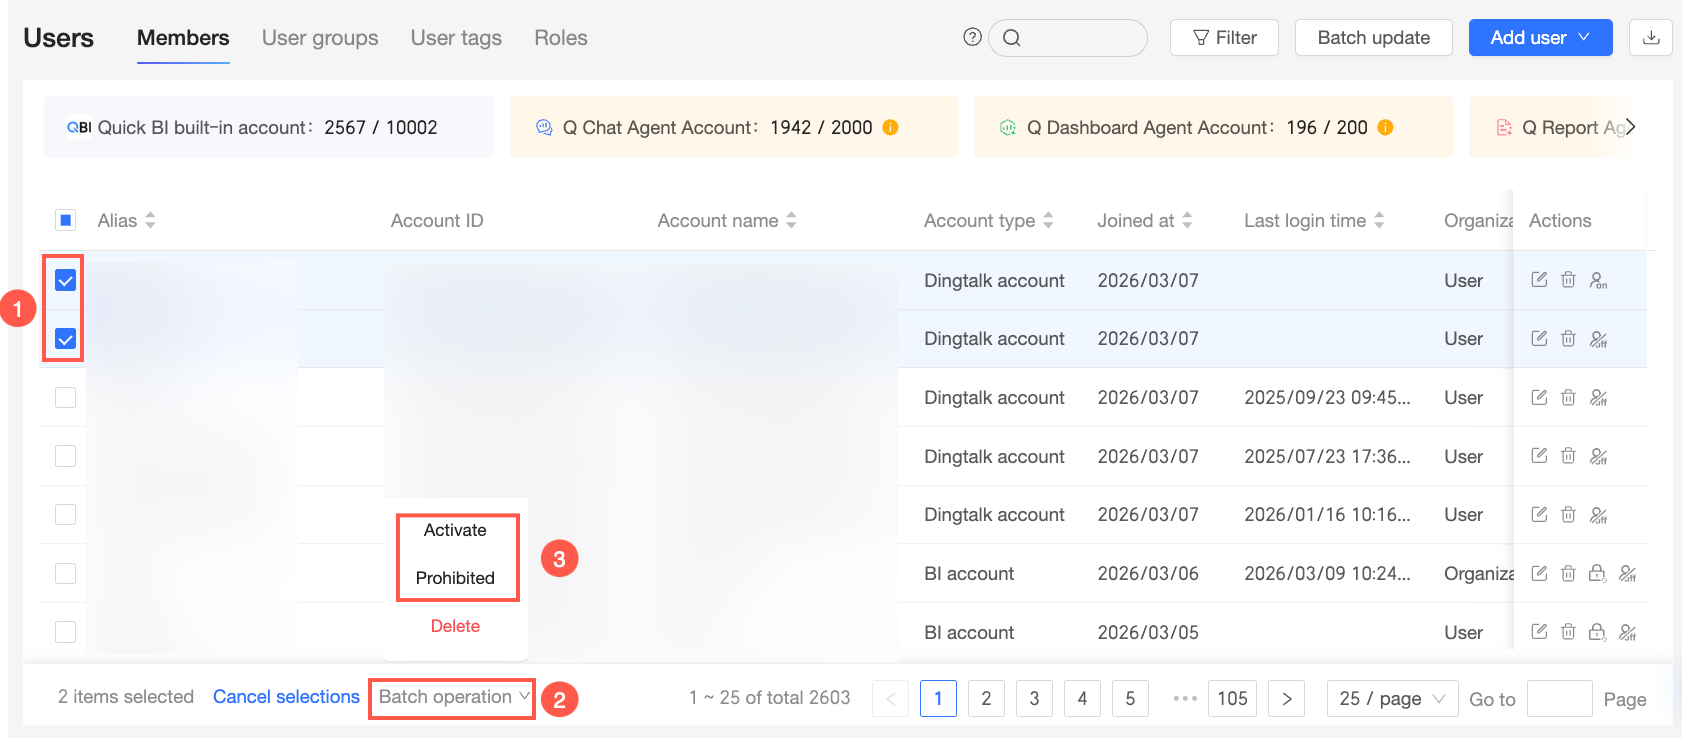

Batch update member information
You can only update information for existing users in the organization. You cannot add new users with this feature.
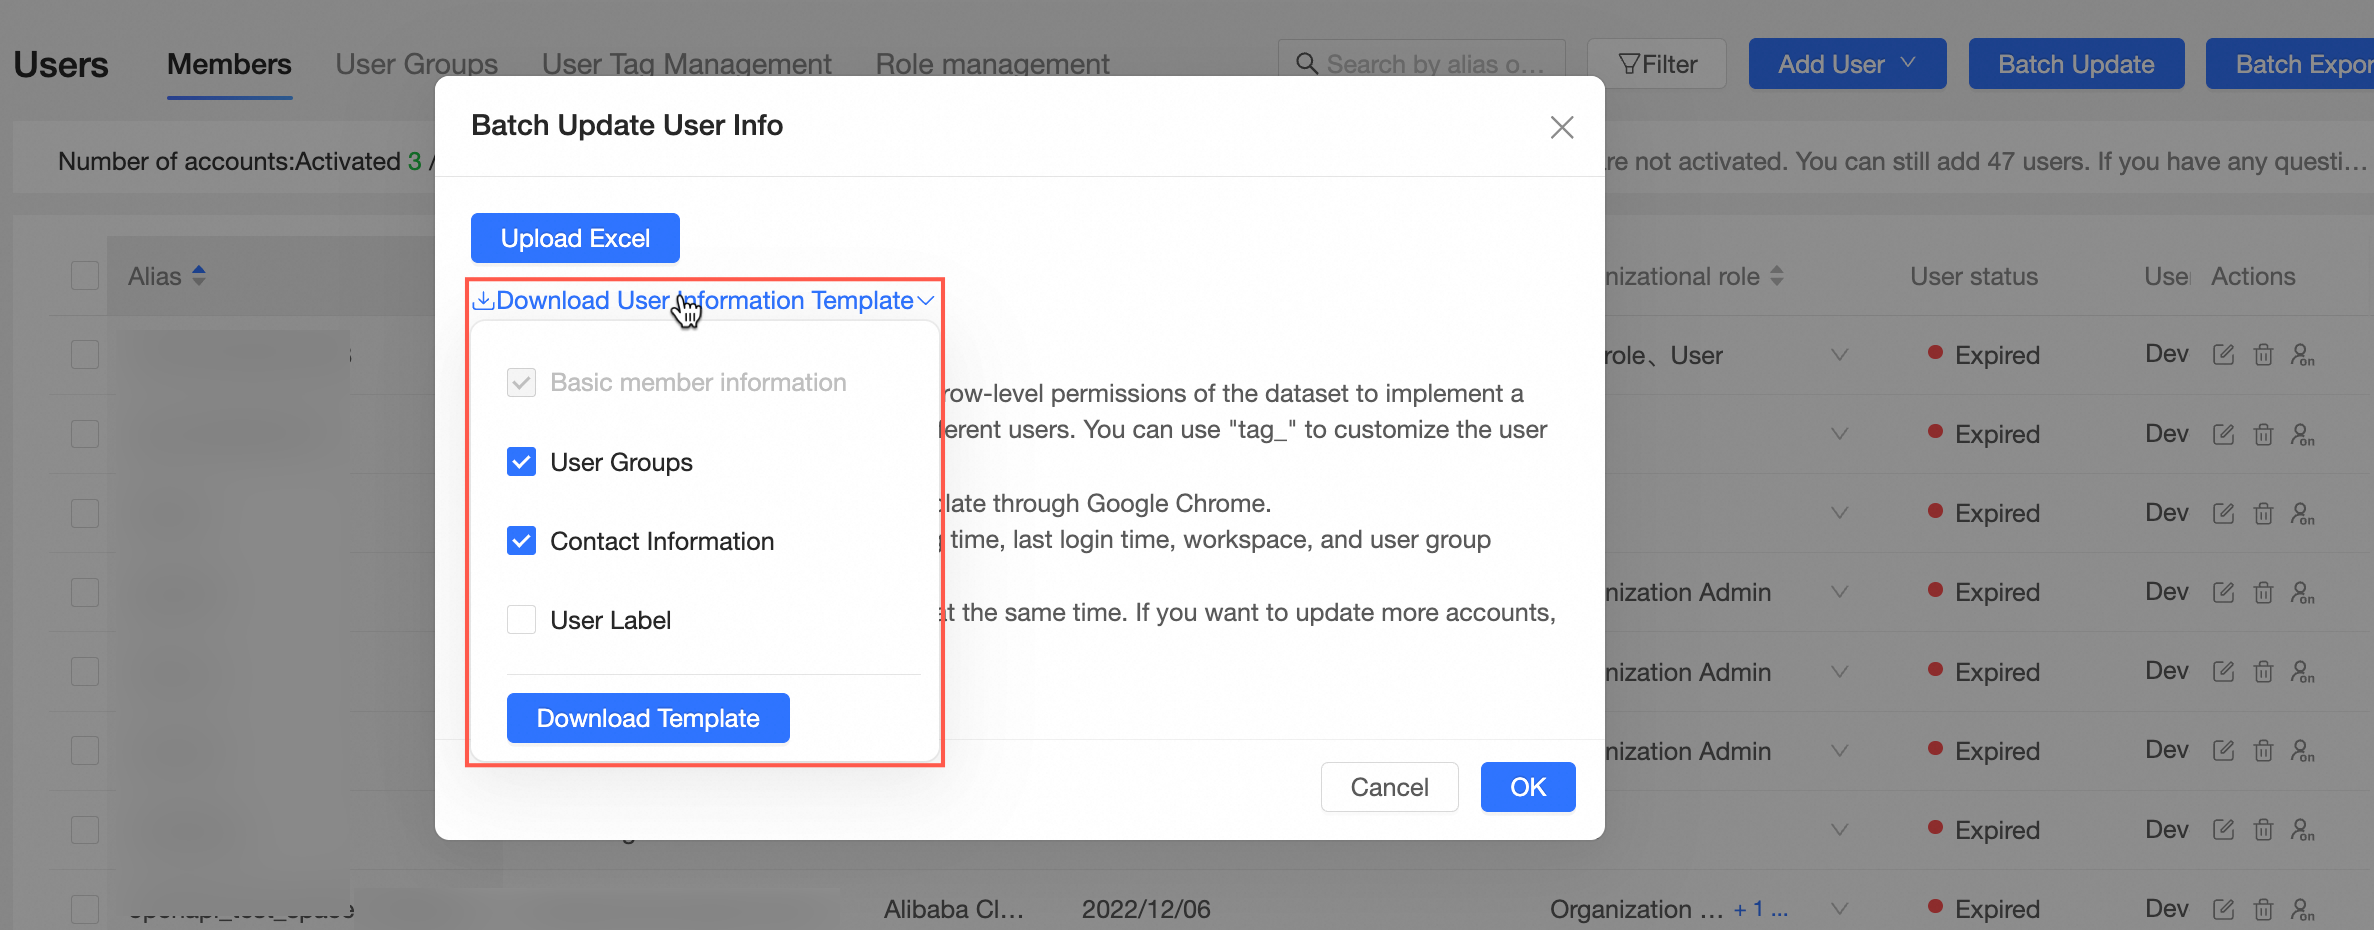
On the User Management page, on the Members tab, click Bulk Update in the upper-right corner.
In the Bulk Update User Information dialog box, click Get Bulk Update User Information Template to download the template.
You can select fields for User Group, Contact Information, and User Tag as needed.
Modify the information in the template.
The following describes the key fields in the template.
Field name
Description
User ID
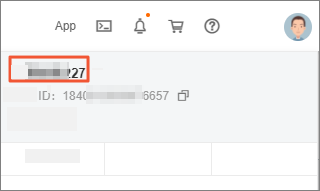
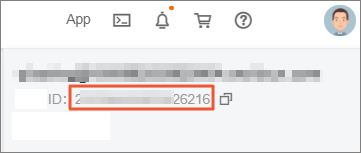
The user ID of an Alibaba Cloud user.
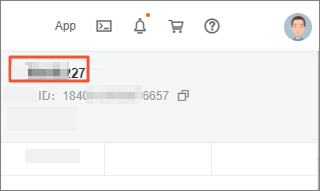
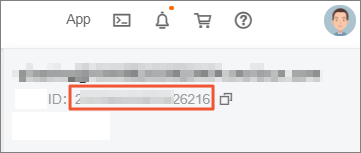
If the user has an Alibaba Cloud account, log on to the Alibaba Cloud console and obtain the account ID.
If the organization user is an Alibaba Cloud account, the user ID is shown in the following figure.
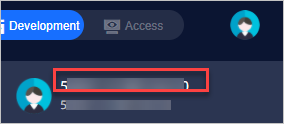
If the organization user is a RAM user, the user ID is shown in the following figure.
Account
The name used to log on to Alibaba Cloud.
If the user has an Alibaba Cloud account, log on to the Alibaba Cloud console and obtain the account name.
If the organization user is an Alibaba Cloud account, the account is shown in the following figure.
If the organization user is a RAM user, the account is shown in the following figure.
NoteIf the RAM account is
zhangsan@1111.onaliyun.com, enter onlyzhangsan.
Account type
The supported account types are Alibaba Cloud account and RAM user.
Alias
The alias of the account in Quick BI. You can customize the alias.
An alias can contain only Chinese characters, English letters, digits, underscores (_), forward slashes (/), backslashes (\), vertical bars (|), parentheses (()), and brackets ([]). The alias can be up to 50 characters long.
Date joined
The date when the user joined the Quick BI organization.
Last logon time
The time when the user last logged on to Quick BI.
User type
The following user types are supported:
Developer: Enterprise IT personnel, data analysts, and data operations personnel.
Analyst: Business personnel who need to perform business analysis and do not require advanced technical skills.
Analysts analyze data by creating items such as dashboards and workbooks.
Visitor: Users who only view reports, such as managers or executives, or frontline business personnel who only view data results. Visitors can view the content of dashboards, workbooks, and sites by using URLs or subscriptions.
Organization role
At the organization level, there are three preset organization roles. You can also add custom organization roles.
Organization administrator: Manages project information, status, and members. An organization administrator can assign the organization administrator role to other organization users.
We recommend that you assign this role to one to three people, such as project managers (PMs) or personnel in charge of the BI platform.
Permissions administrator: Manages permissions on project resources. We recommend that you assign this role to one to three people, typically personnel in charge of the BI platform. A permissions administrator can grant the permissions administrator role to user accounts and is mainly responsible for centrally allocating and managing permissions in the backend.
Standard user: A user who is not assigned the organization administrator or permissions administrator role.
Custom organization role: A custom role that you can create based on your business needs.
Available Agent
The Agent capabilities that the current user can use. You can enter Q-Question, Q-Build, Q-Report, and Q-Explore. Separate multiple Agents with commas (,).
For example, to assign the Q-Question and Q-Report seats to a member, enter: Q-Question,Q-Report.
NoteIf User type is set to Visitor, the Q-Build Agent cannot be used.
Make sure that the organization role assigned to the user has permissions to use the relevant Agents. Otherwise, the user cannot use the Agent capabilities even if Agent seats are assigned. For more information about how to configure permissions for an organization role, see Organization roles.
The entire workbook upload task fails in the following cases:
Adding an unpurchased module to the Available Agent field.
The remaining quota is less than the required quota for new additions.
User status
Active or Inactive.
Email
The email address that is bound to the account during registration.
Phone number
The phone number that is bound to the account during registration.
User group
The user group to which the current account belongs.
tag_example
You can add custom user tag fields. The name of a custom column must start with tag_, such as tag_example.
Value description:
$ALL_MEMBERS$: Indicates that the user has permissions to access all data.
Enter a specific value, such as north. This indicates that the user has permissions to access data in the north region.
NoteIf a tag corresponds to multiple permissions, separate them with a comma (,), for example, north,east.
Click Select Excel File to upload the user information from your local device.
We recommend that you use the Chrome browser to upload the file.
We recommend that you get the template for bulk updating user information and fill it out according to the requirements.
To prevent upload failures, make sure that the file does not have any of the following issues:
A user account does not exist in the organization.
An account alias already exists in the organization.
A user group path does not exist.
The Excel file contains more than 5,000 rows.
The column order is changed, except for tag_ columns.
The number of users to be added exceeds the license limit.
Click OK to complete the bulk update of organization users.