Edit, search, move, share, transfer, and delete workbooks in Quick BI.
Prerequisites
You have created a workbook. For more information, see Create a workbook.
Limitations
Only workspace administrators, workspace developers, workspace analysts, and users with custom roles that grant the Create (Edit) permission for workbooks can manage workbooks, including creating, renaming, and deleting folders.
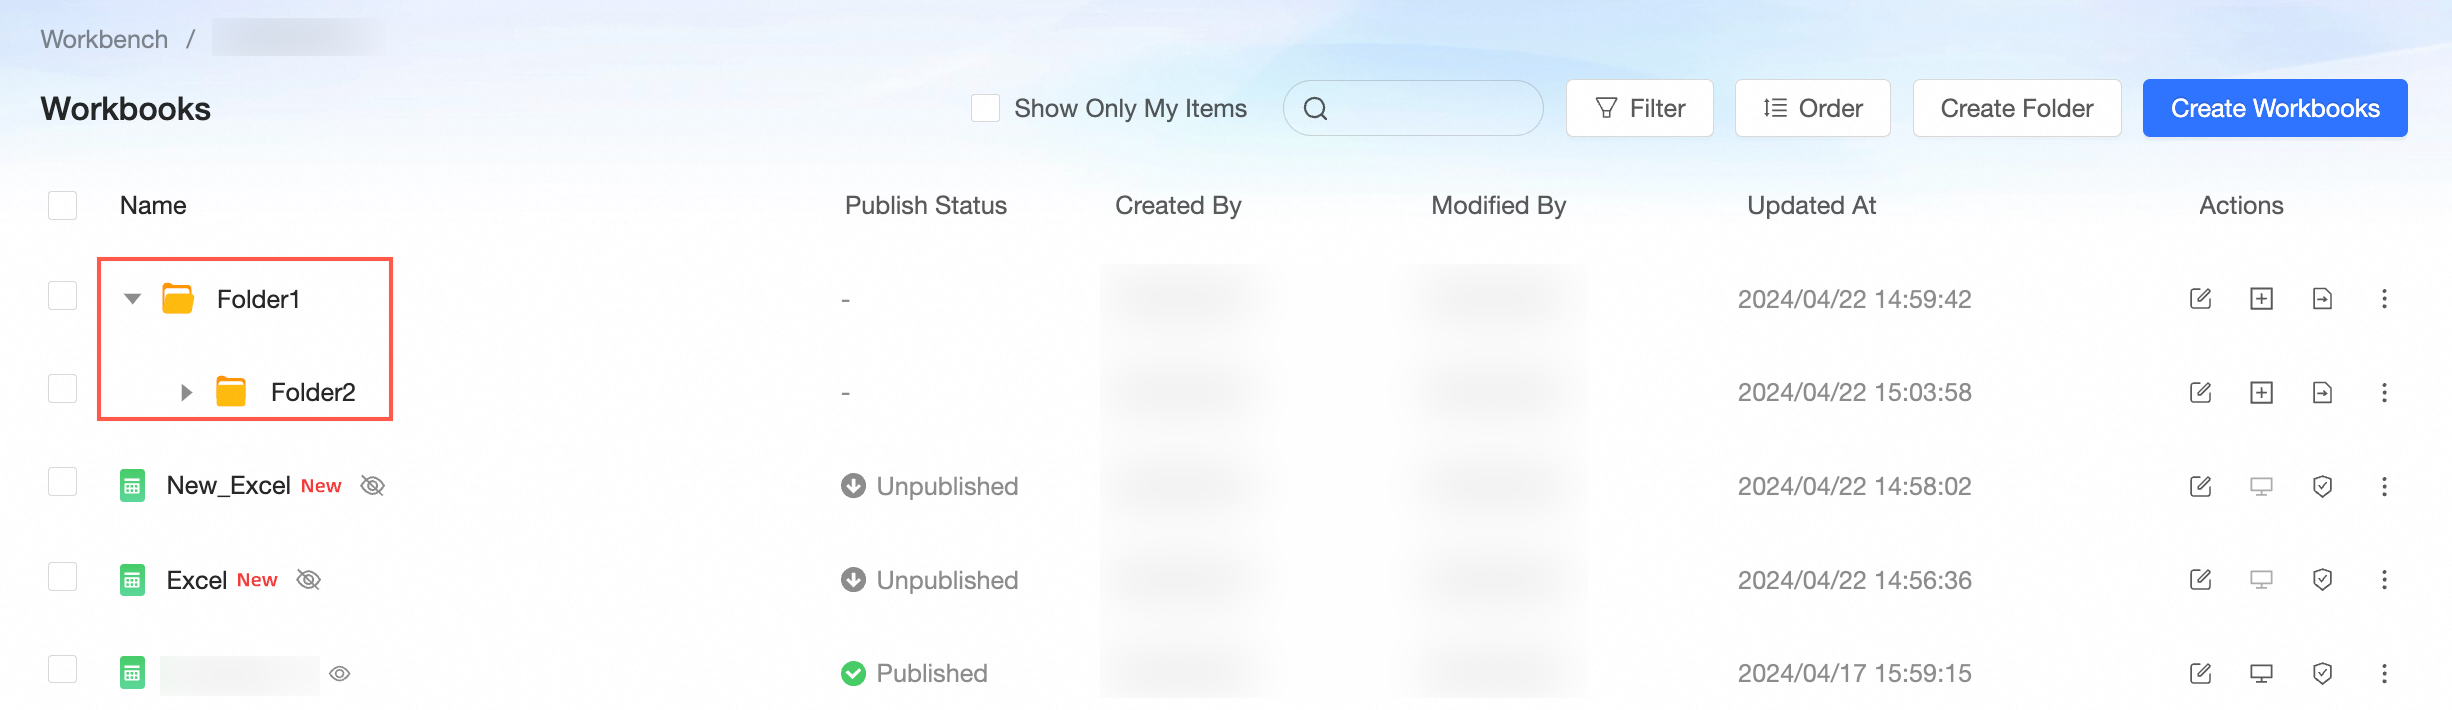
Access the Workbooks page
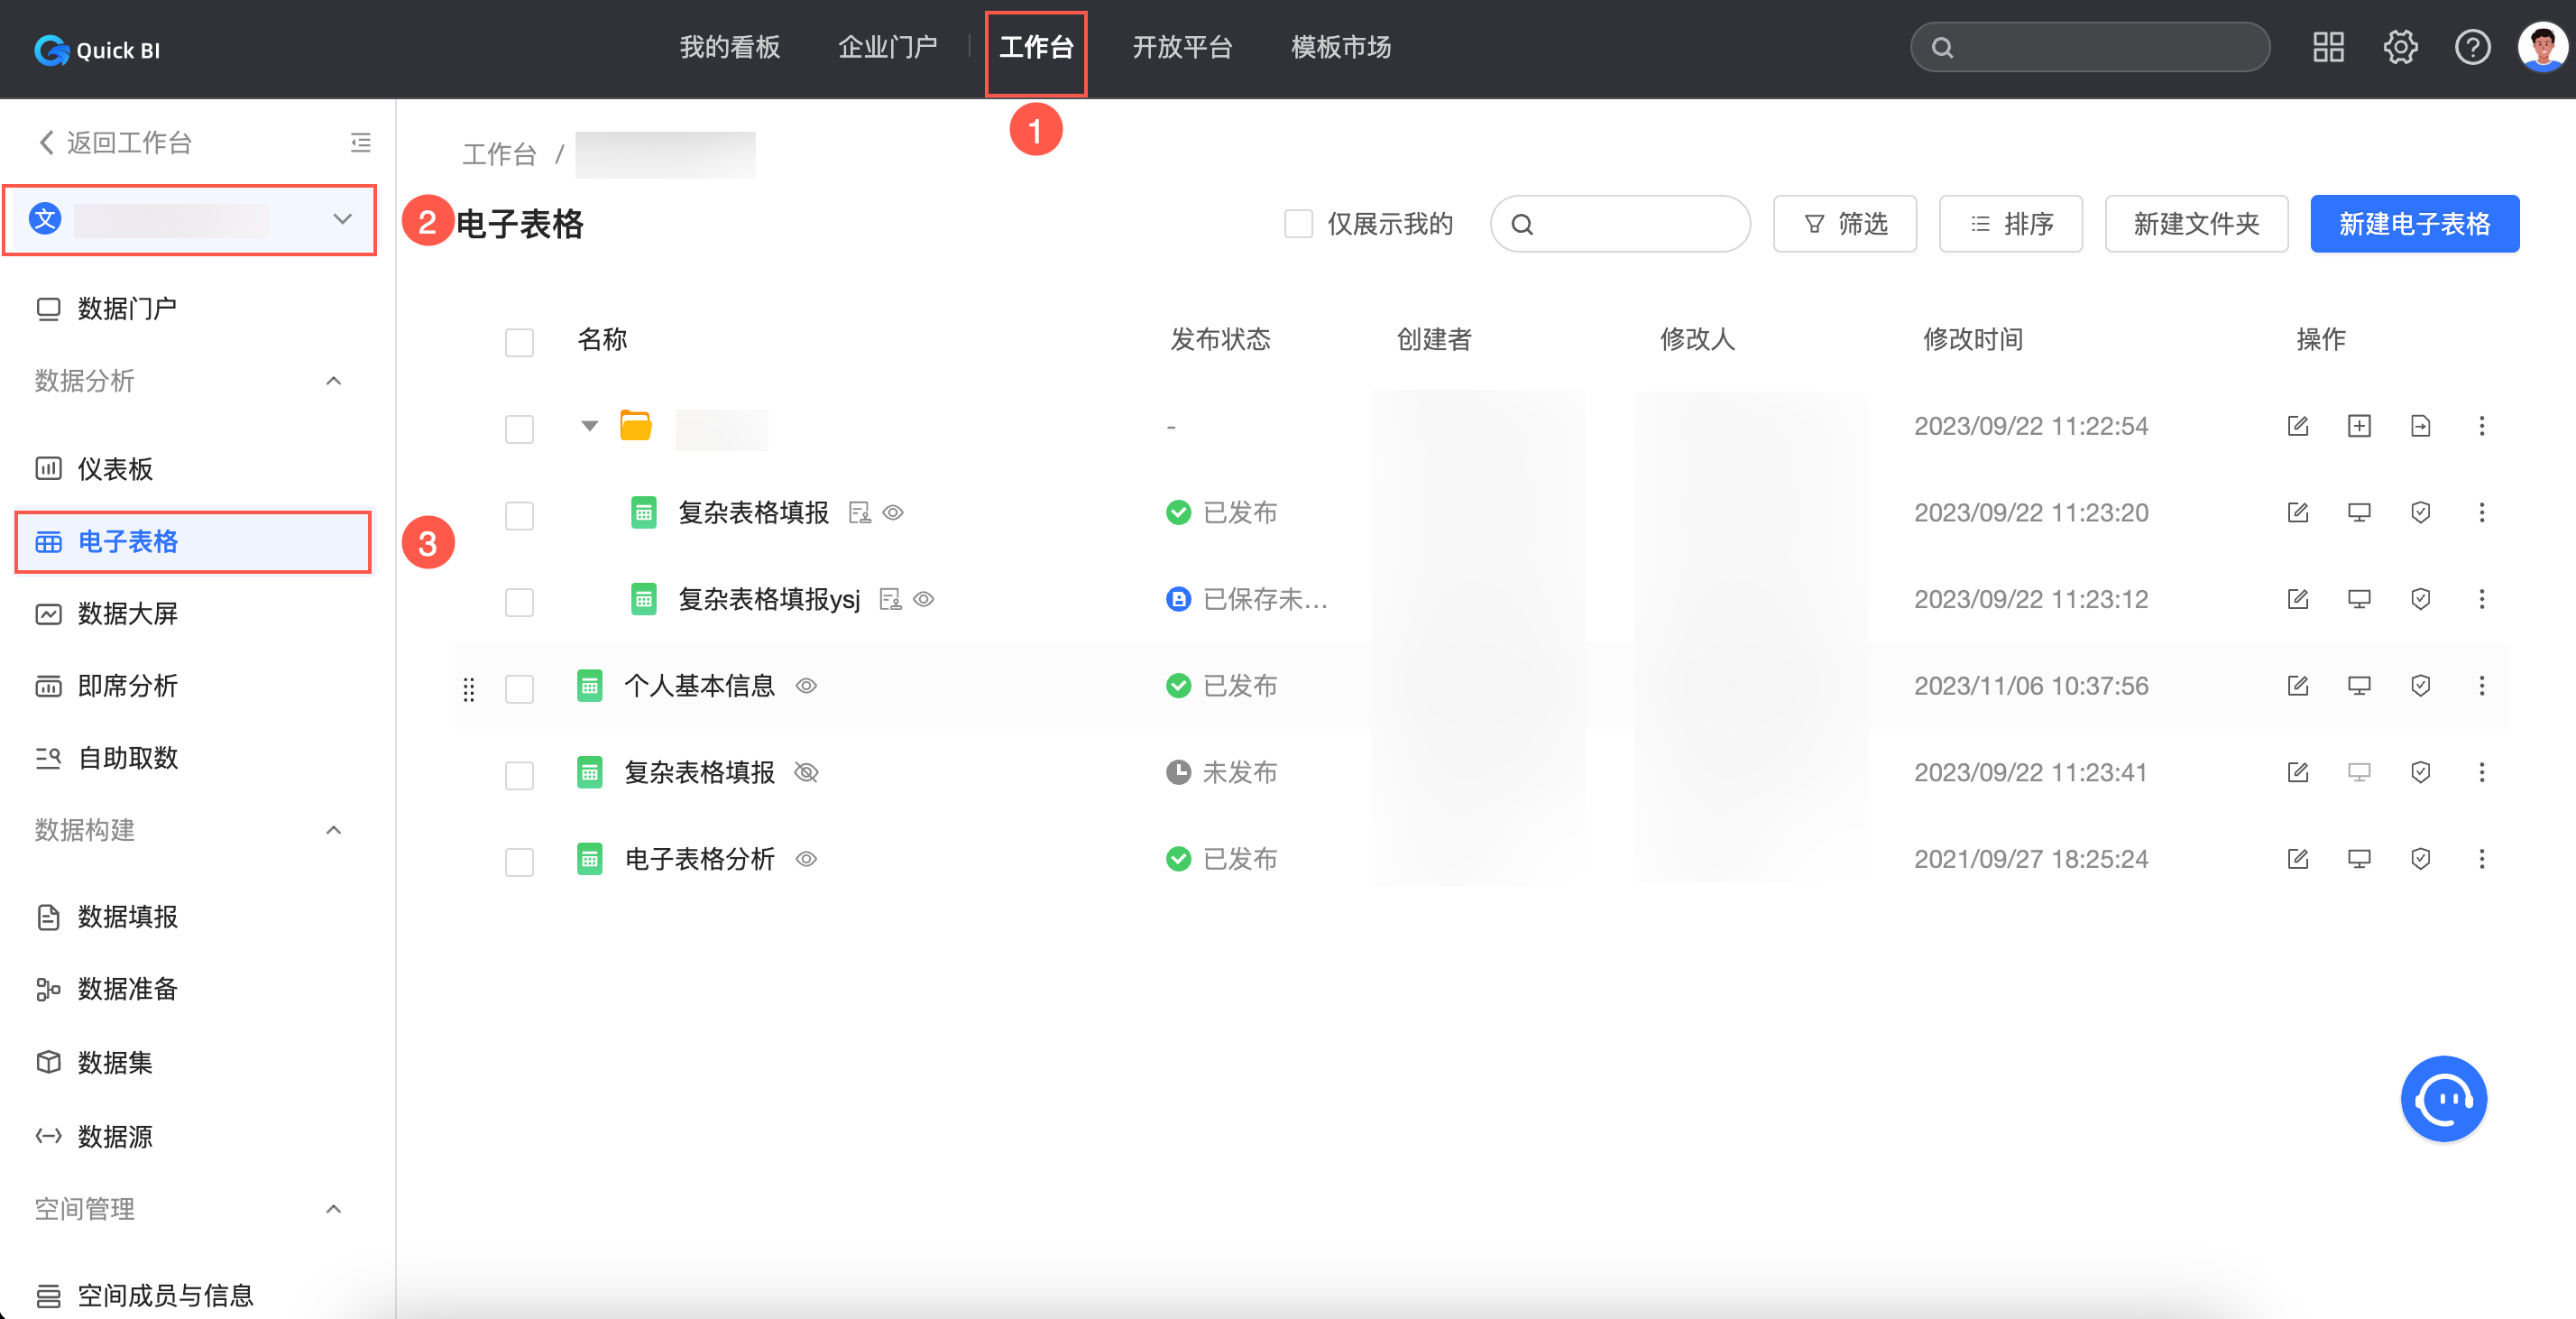
Log on to the Quick BI console and go to the Workbooks page.
Edit a workbook
-
On the Workbooks page, find the workbook that you want to edit, right-click it, and select Edit.
Alternatively, click the
 icon in the workbook's row.
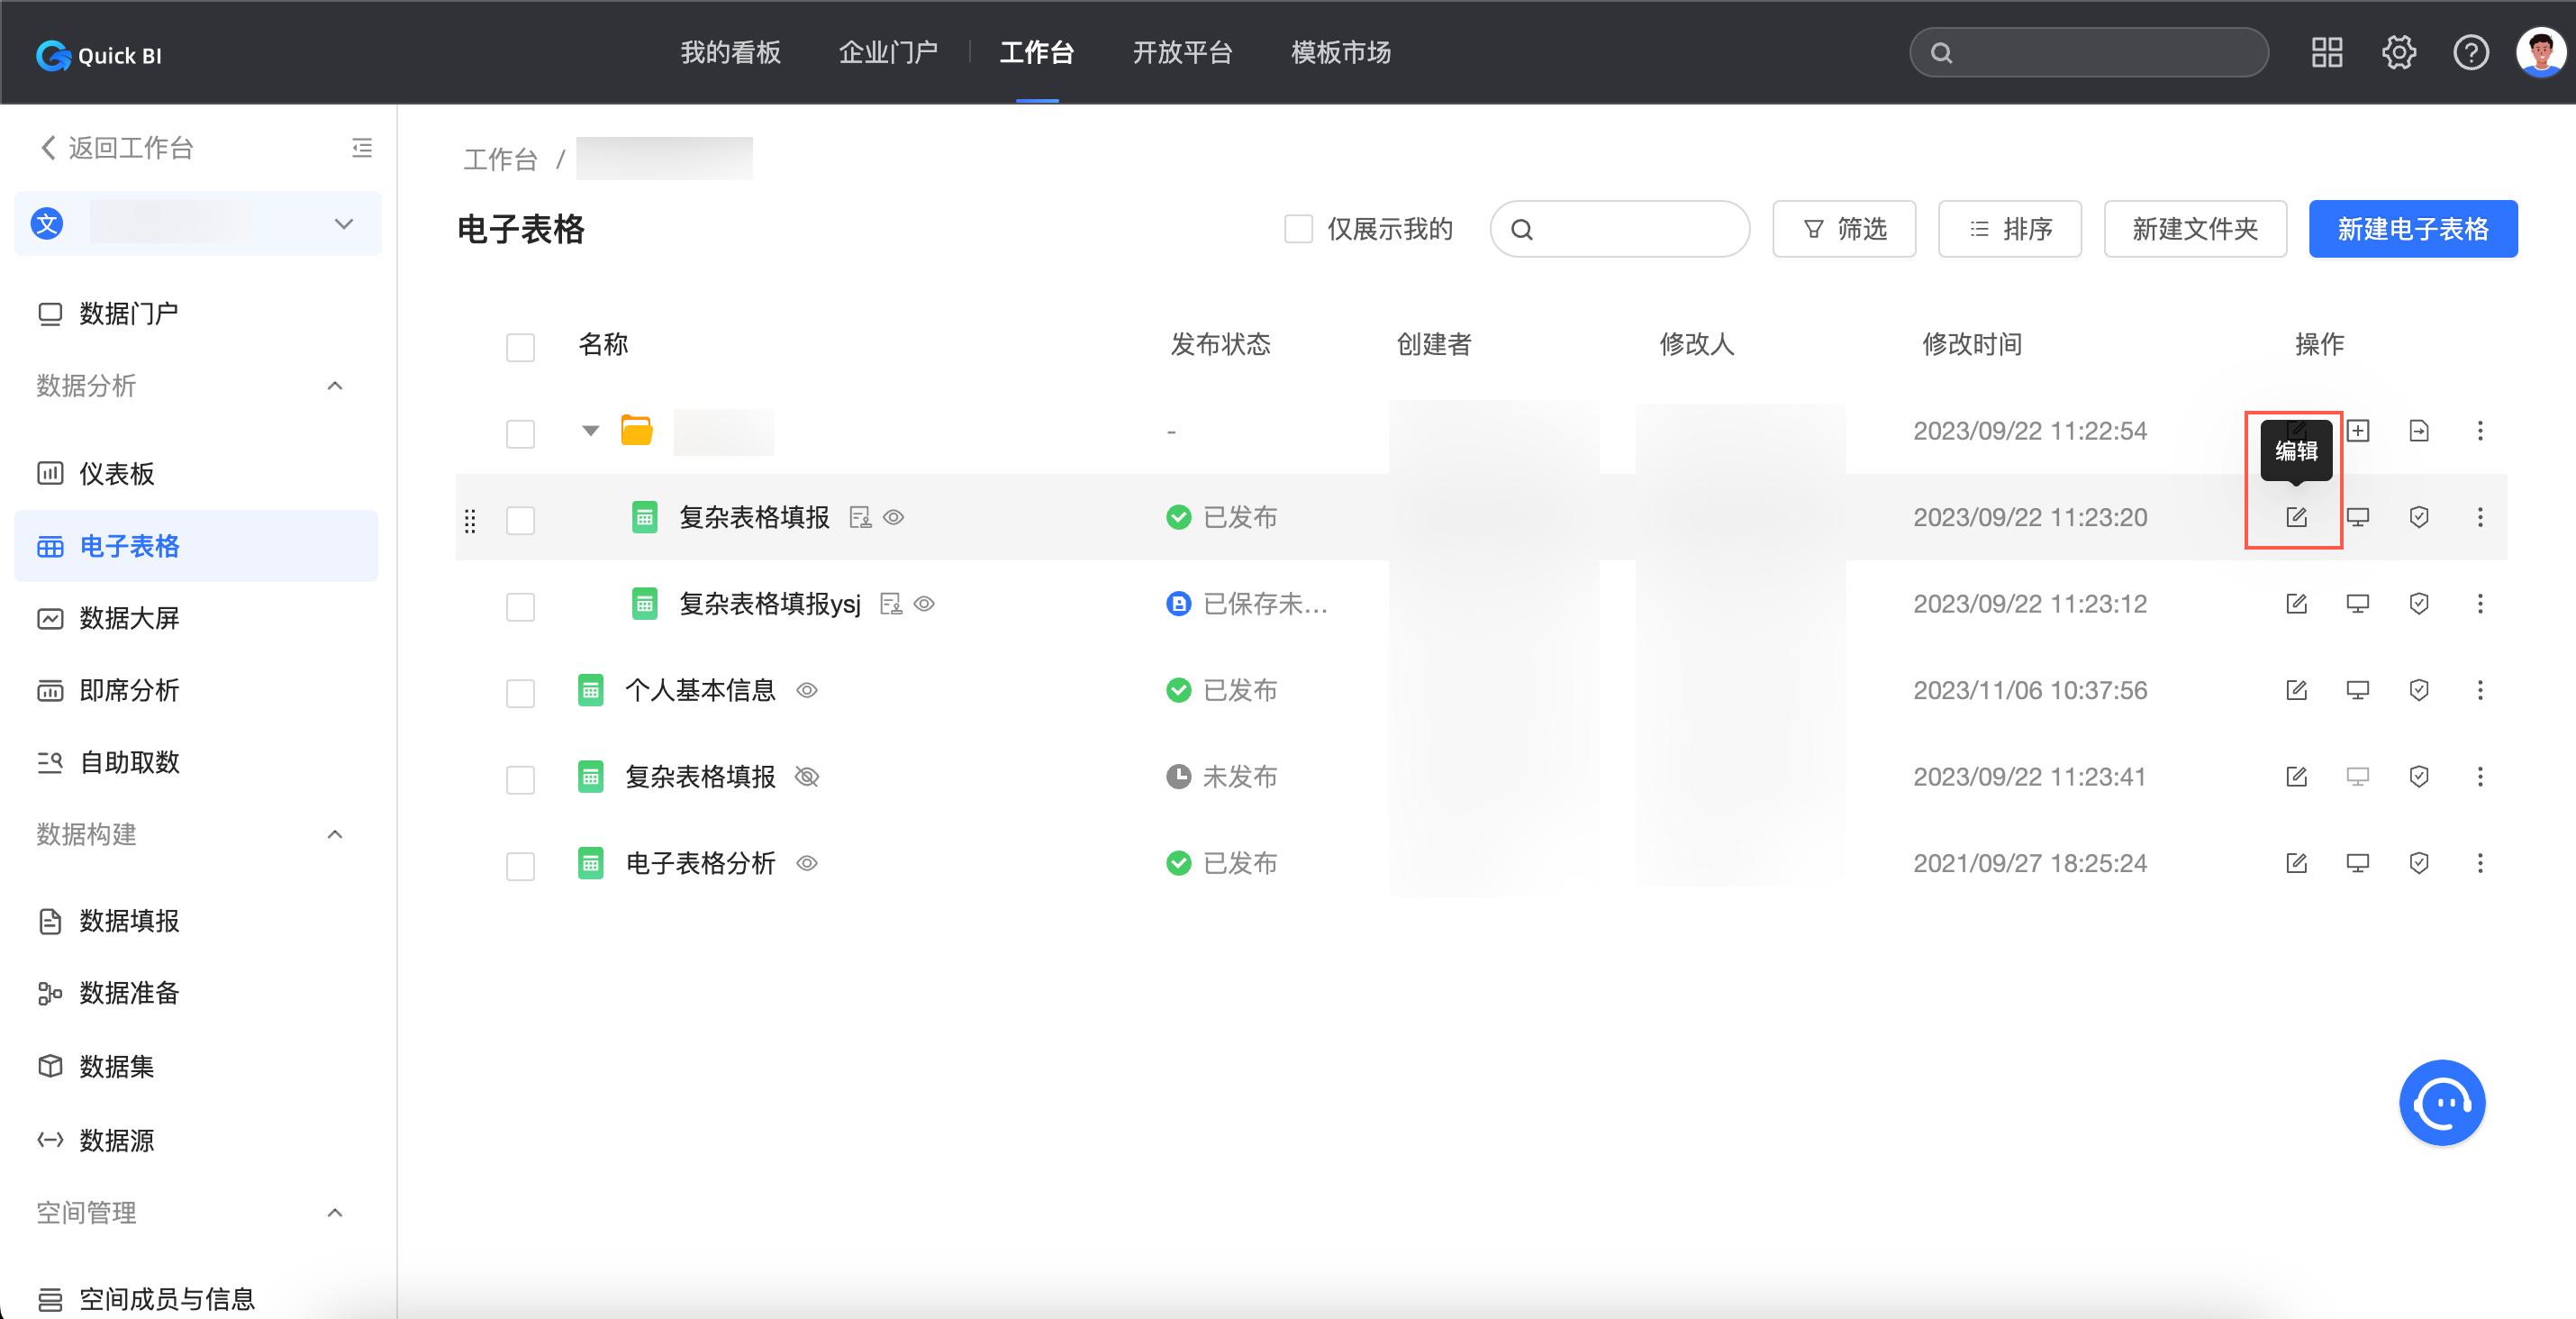
-
On the workbook editing page, make your edits.
Search, filter, and sort workbooks
-
On the Workbooks page, find the target workbook.
-
Search
Enter a keyword in the search box to find a workbook by name.

-
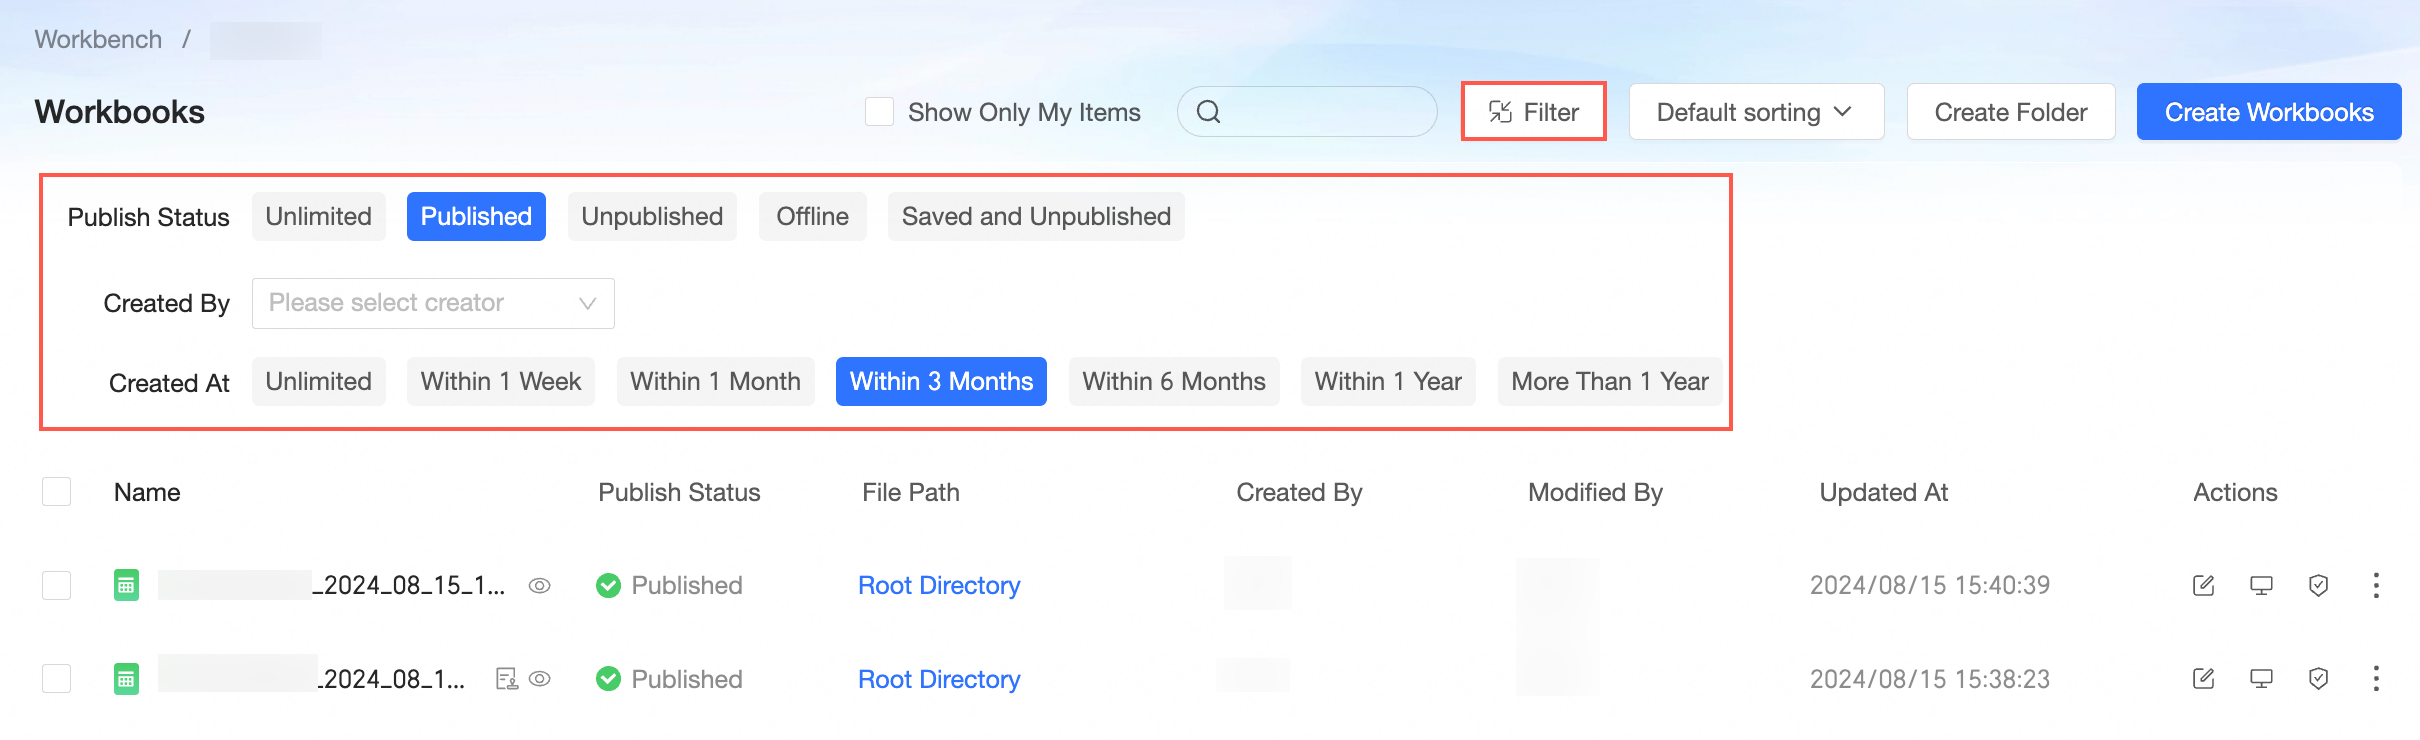
Filter
Click the filter icon to display the filter area. Filter by publish status, creator, and creation time.

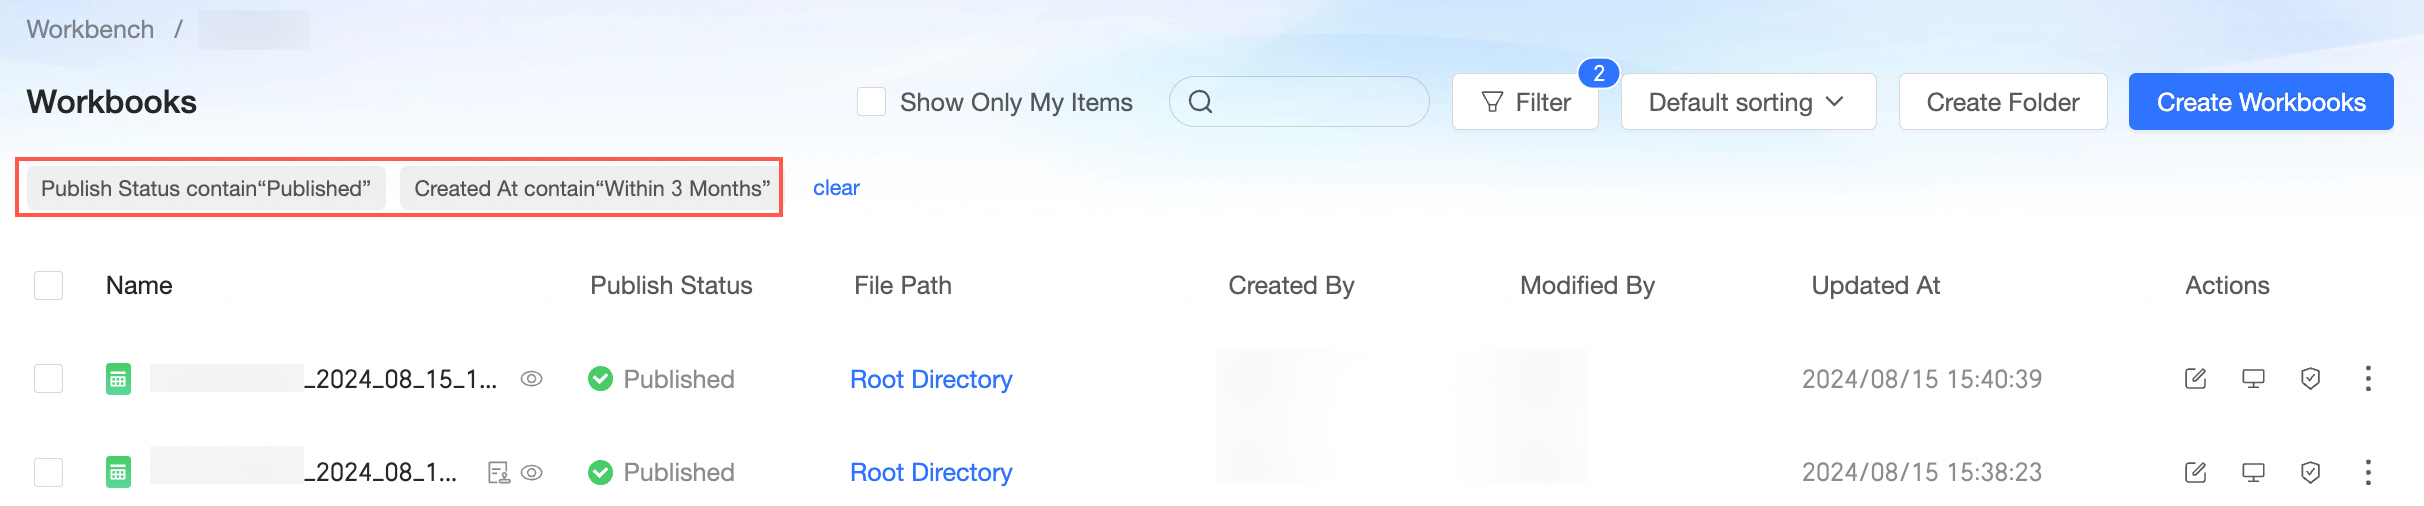
Click the
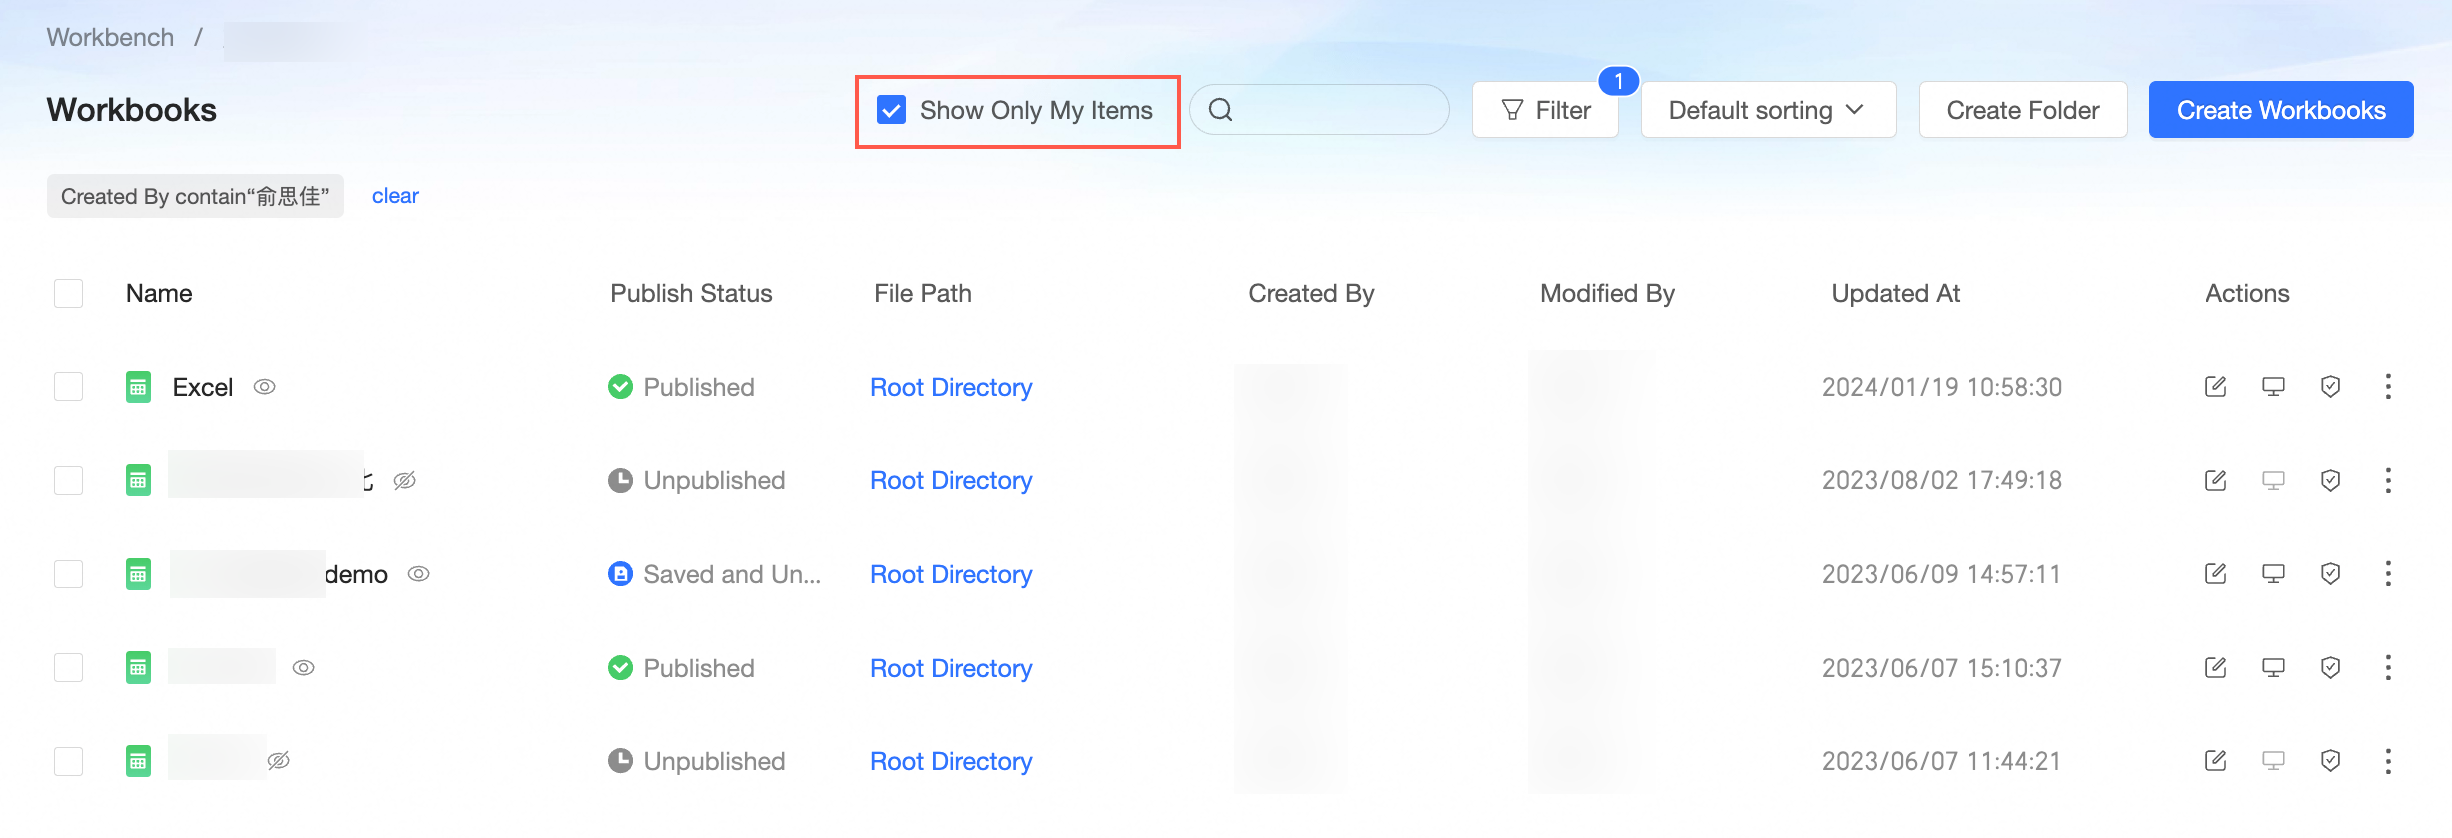
icon to hide the filter area. Active filter conditions remain visible and can be removed or cleared.Select Show mine only to quickly find the workbooks you created.
-
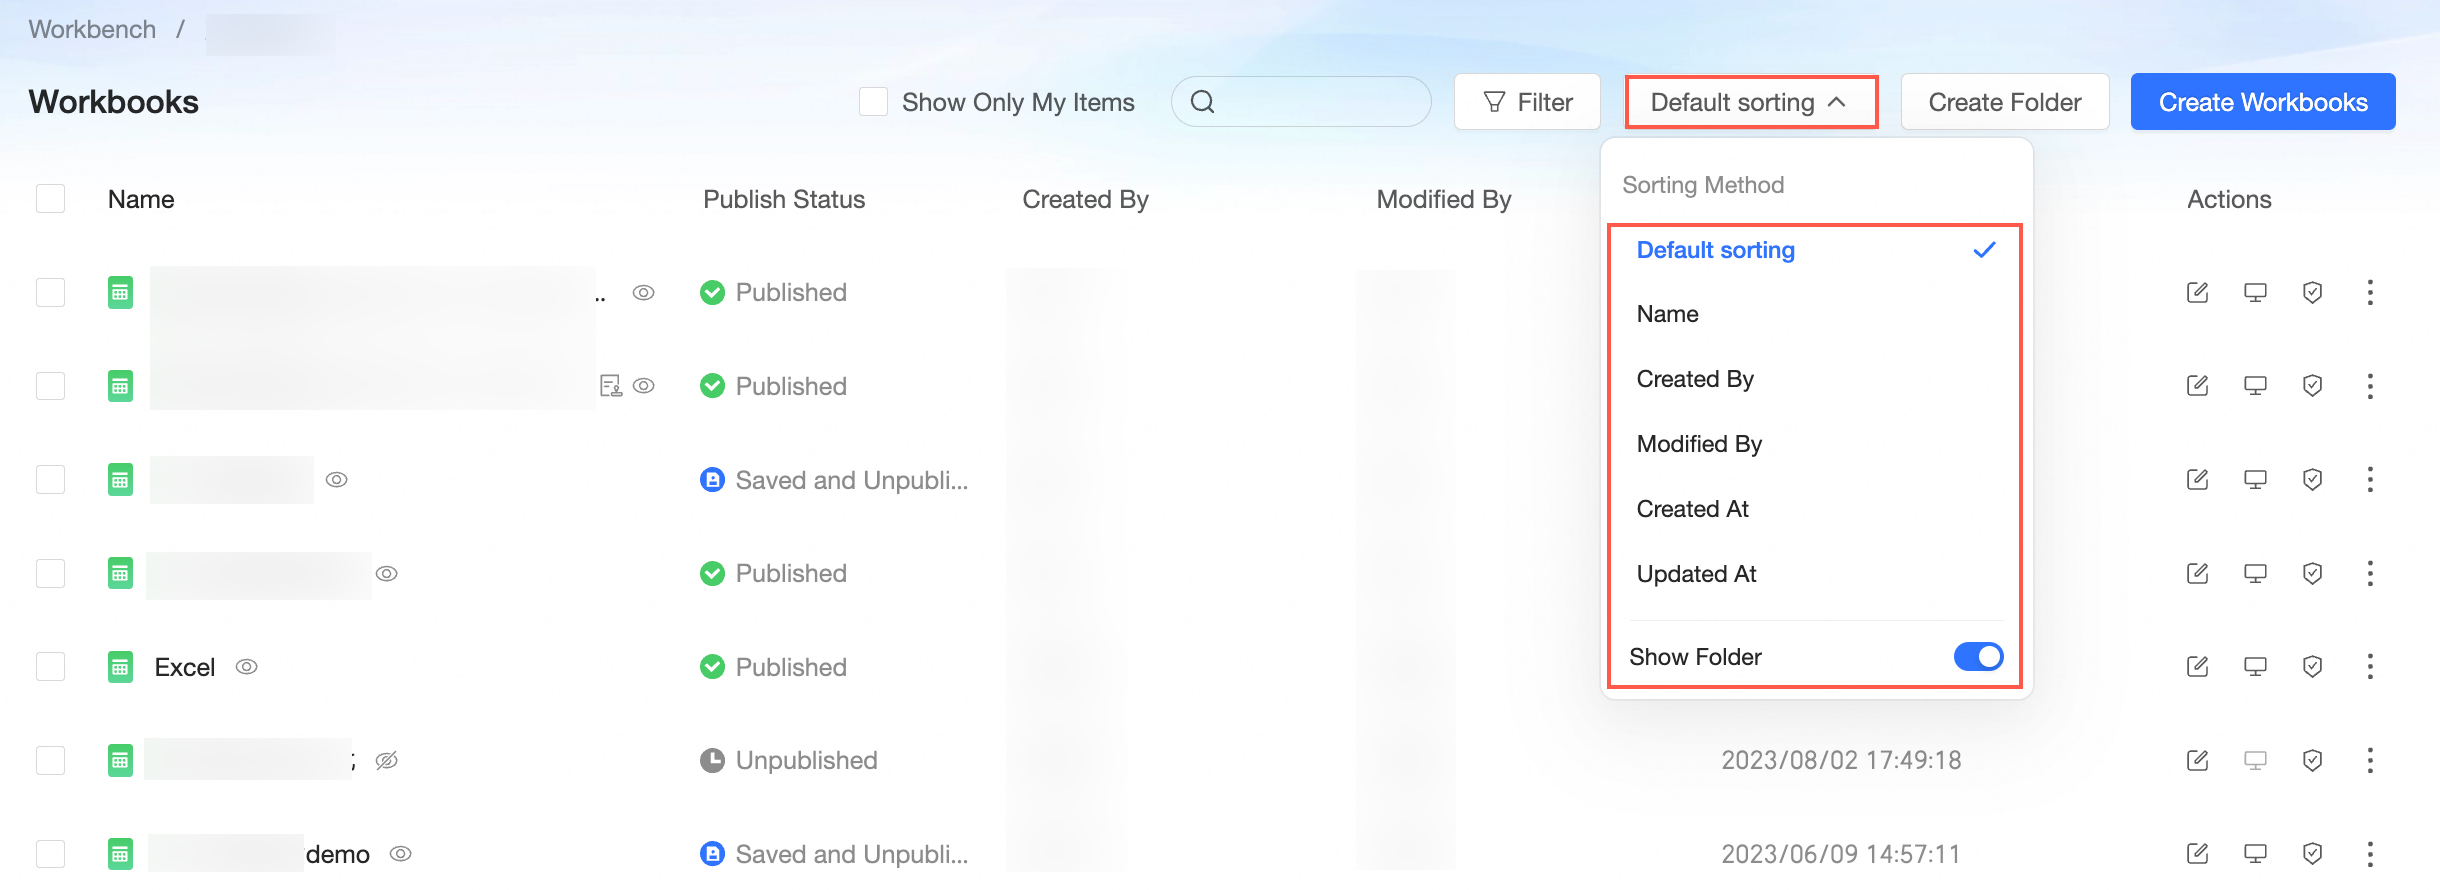
Sort
Sort workbooks by Name, Creator, Modifier, Creation time, or Modification time. By default, Keep folder structure is selected, which excludes folders from sorting.
-
Transfer and rename a workbook
-
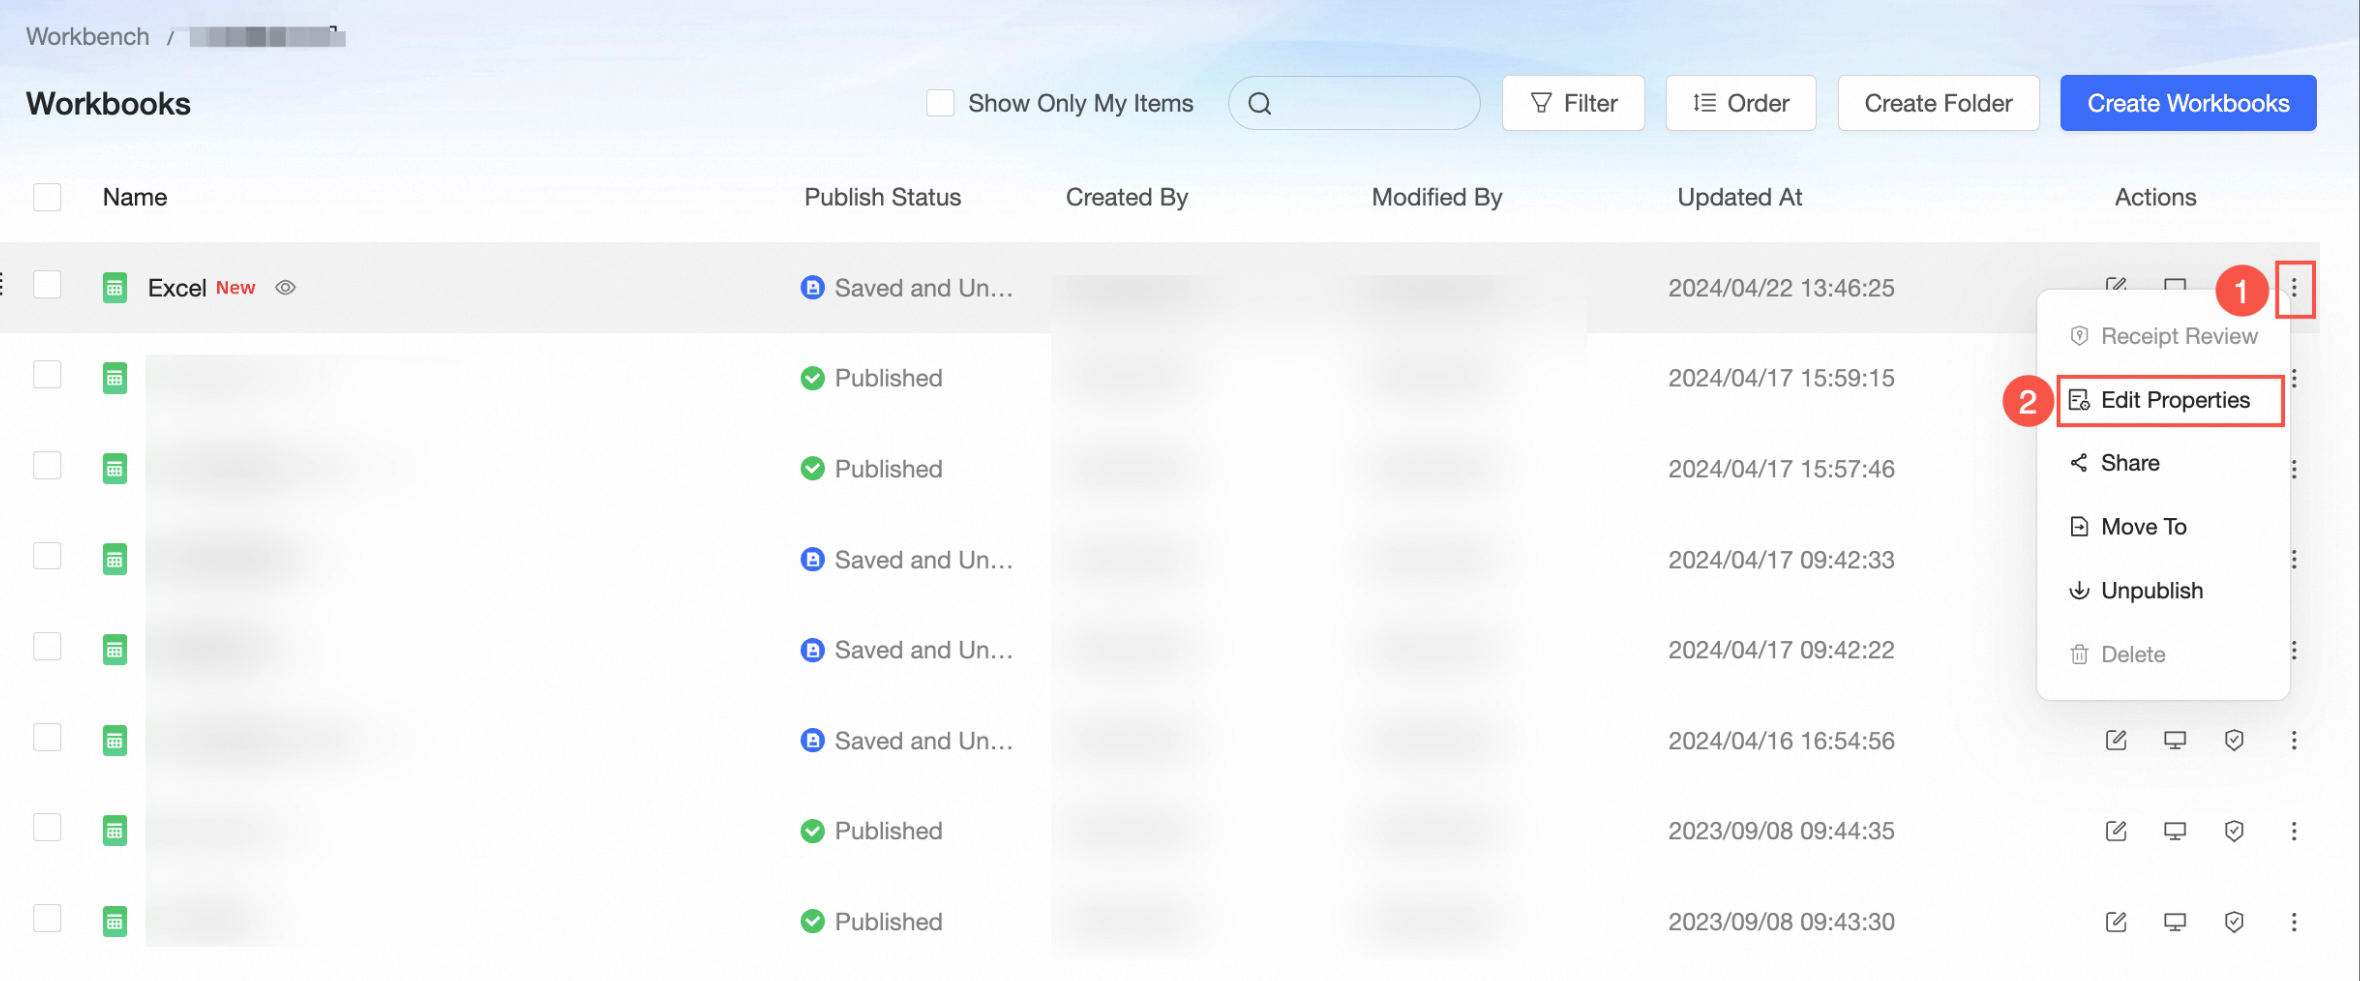
On the Workbooks page, find the workbook, right-click it, and select Properties.
-
In the Properties panel, configure the following parameters.
Parameter
Description
Name
Modify the workbook name.
NoteWorkbook names must be unique within the same folder but can be the same across different folders.
Owner
Select a new owner from the drop-down list to transfer the workbook.
Description
Add a description for the workbook.
-
Click OK.
Set collaborative authorization
-
On the Workbooks page, find the target workbook, right-click it, and select Collaborative Authorization.
Alternatively, you can click the
icon in the workbook's row.For more information, see Grant report permissions.

Share a workbook
You can share a workbook only if its publish status is Published.
-
On the Workbooks page, right-click the workbook that you want to share and select Share to open the Share link dialog box.
-
In the Share link dialog box, select a link type.
-
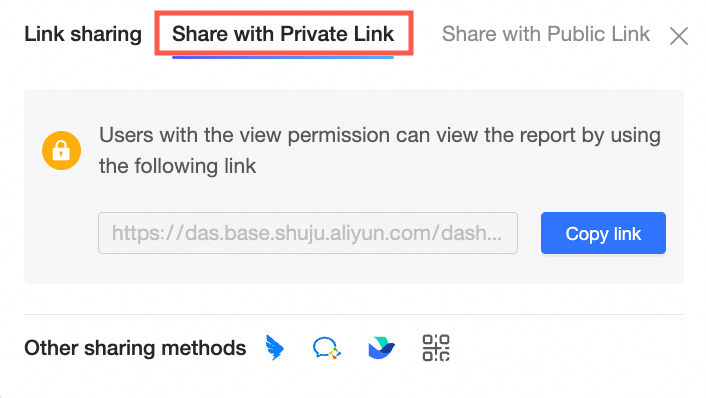
Share with a private link
-
On the Share link page, click Private Link.
-
Click Copy link. You can then send the link to users with view permissions.
-
-
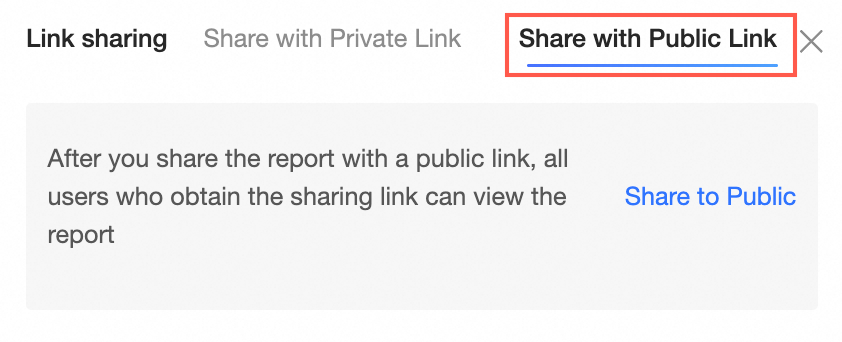
Share with a public link
Making a report public generates a URL that anyone can access without an Alibaba Cloud account.
-
On the Share link page, click Public Link.
-
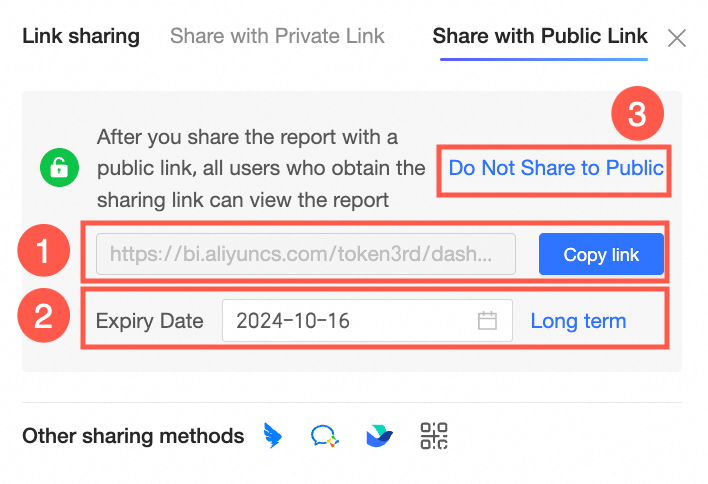
Click Share Publicly. You can then view the URL and its expiration date, or select the option to make it private again.
You can set an Expiration date. Click Permanent to make the link valid indefinitely. To stop sharing the report publicly, click Make private.
-
Click Copy Link to send the link to other users.
-
-
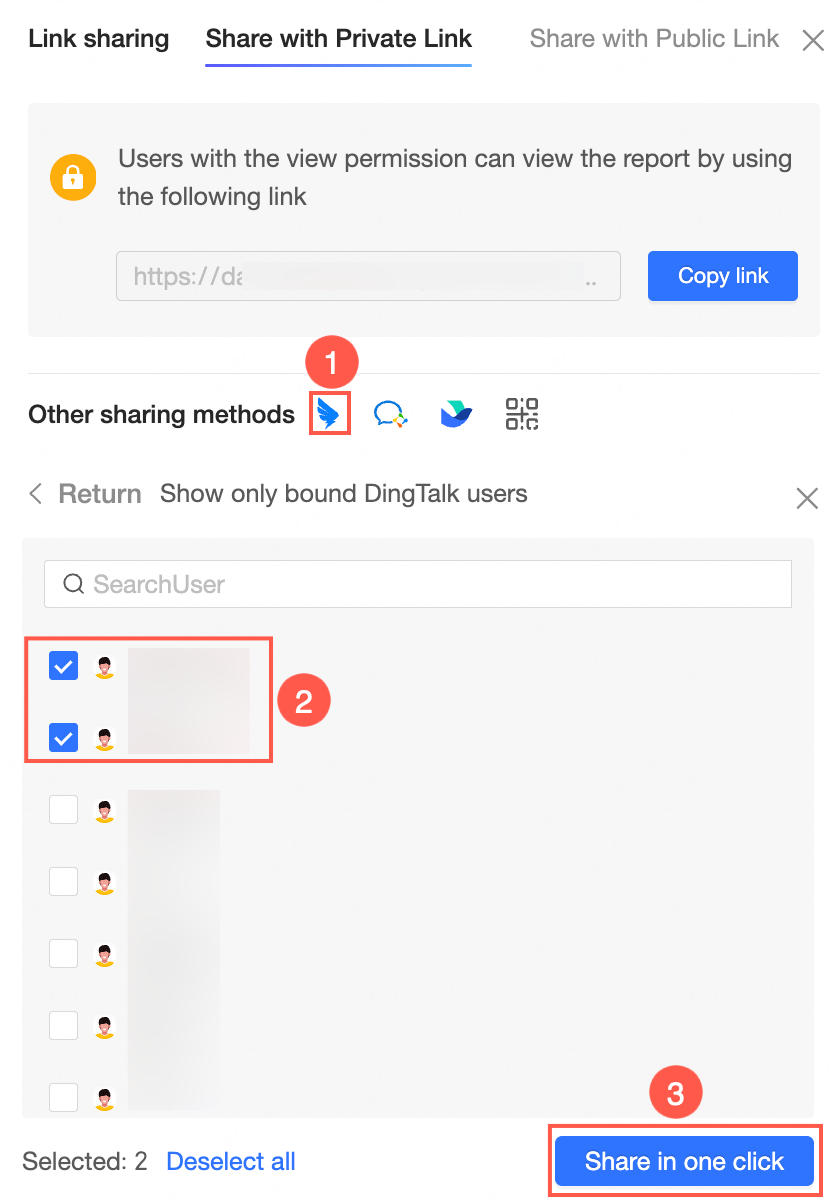
Other sharing methods
You can also share with users of integrated DingTalk, Lark, or WeCom applications by using the options under Other sharing methods.
NoteThis sharing method is unavailable if no third-party applications are integrated. An organization administrator must grant API authorization for the application. For more information, see DingTalk API authorization, WeCom API authorization, and Lark API authorization.
-

Move a workbook
-
On the Workbooks page, follow the steps in the figure to move the workbook.
-
In the Move resource to panel, select the destination folder and click OK.

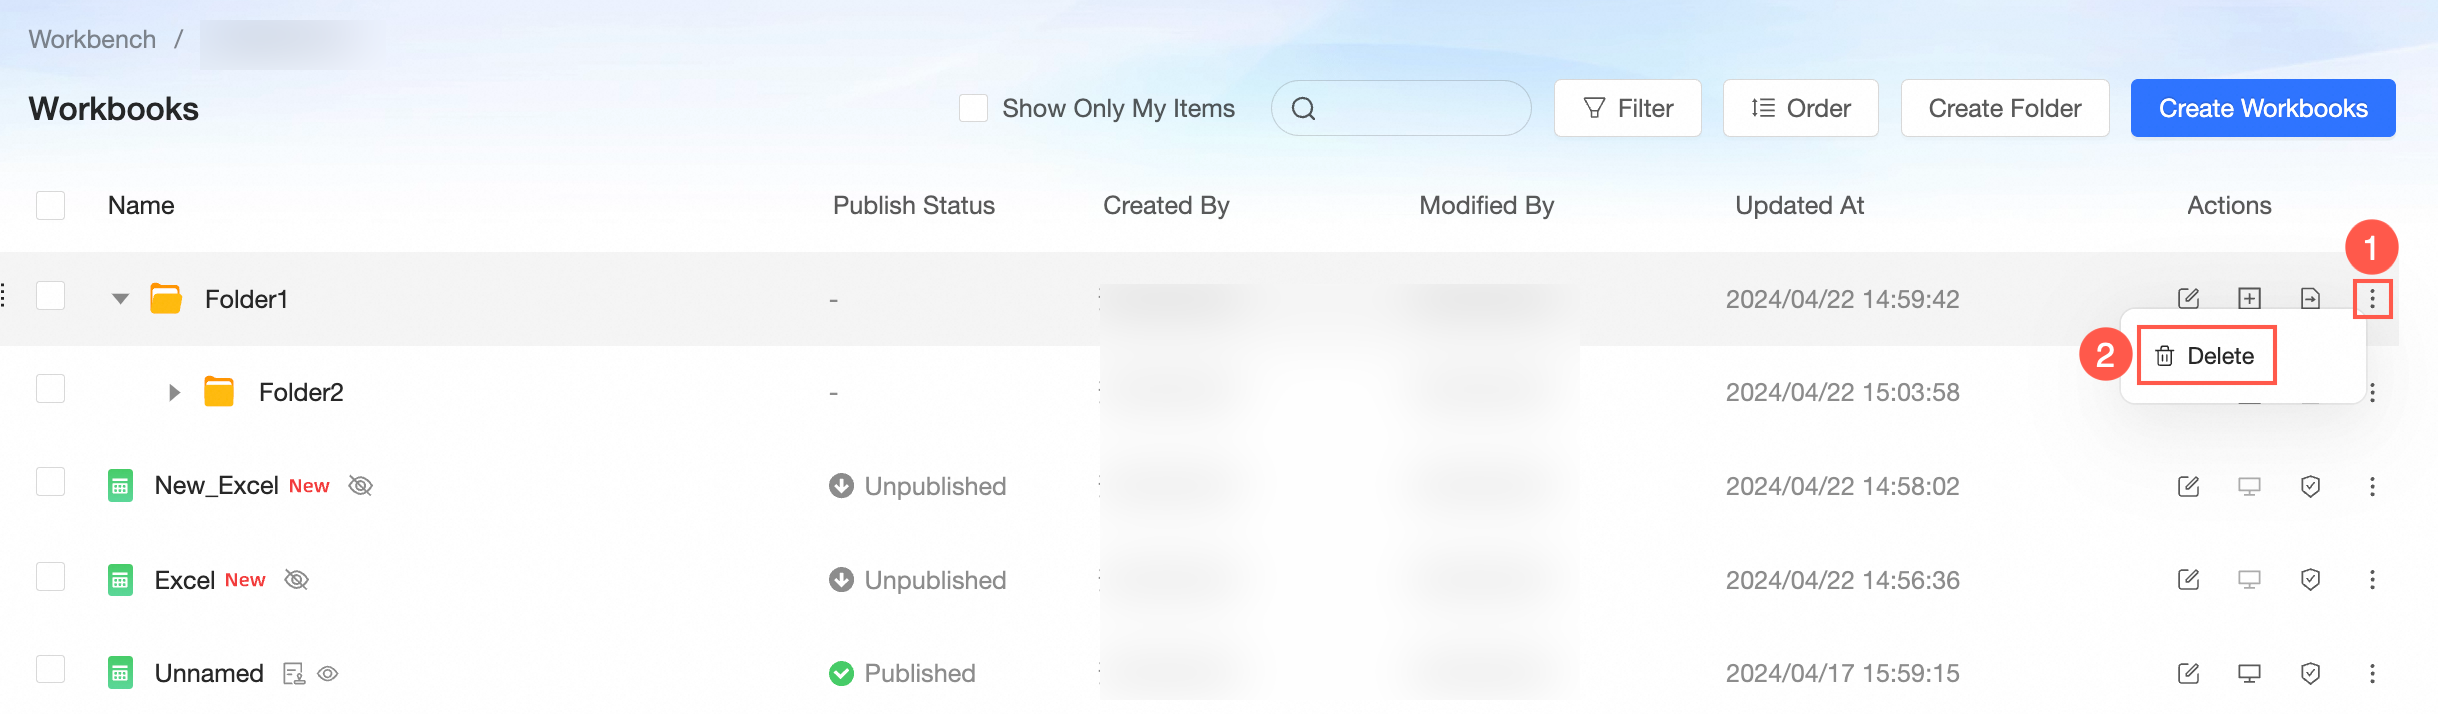
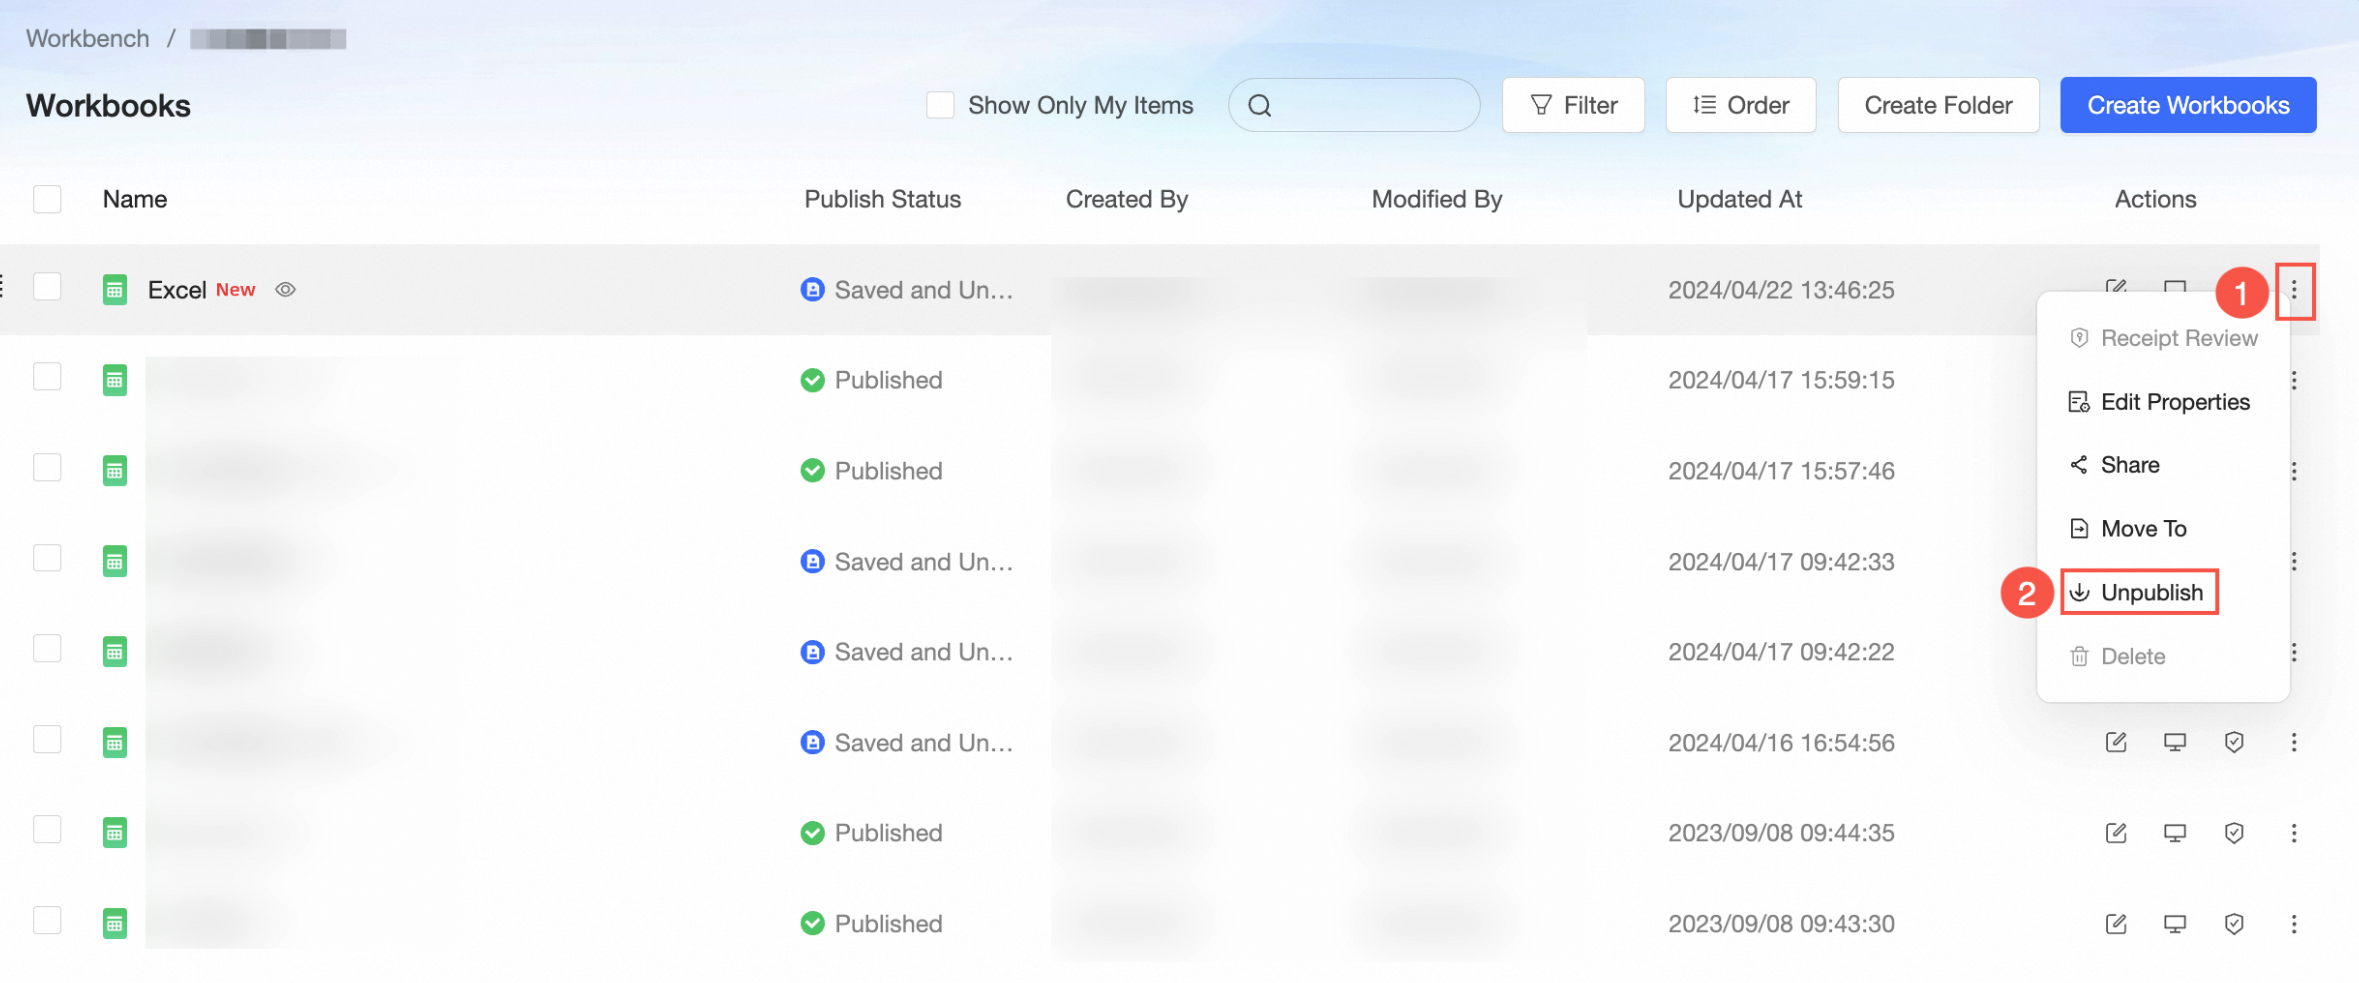
Delete a workbook
Before you can delete a workbook that has a Published status, you must first unpublish it.
-
(Optional) On the Workbooks page, follow the steps in the figure to unpublish the workbook.
NoteIf the workbook's publish status is Unpublished, skip this step.
-
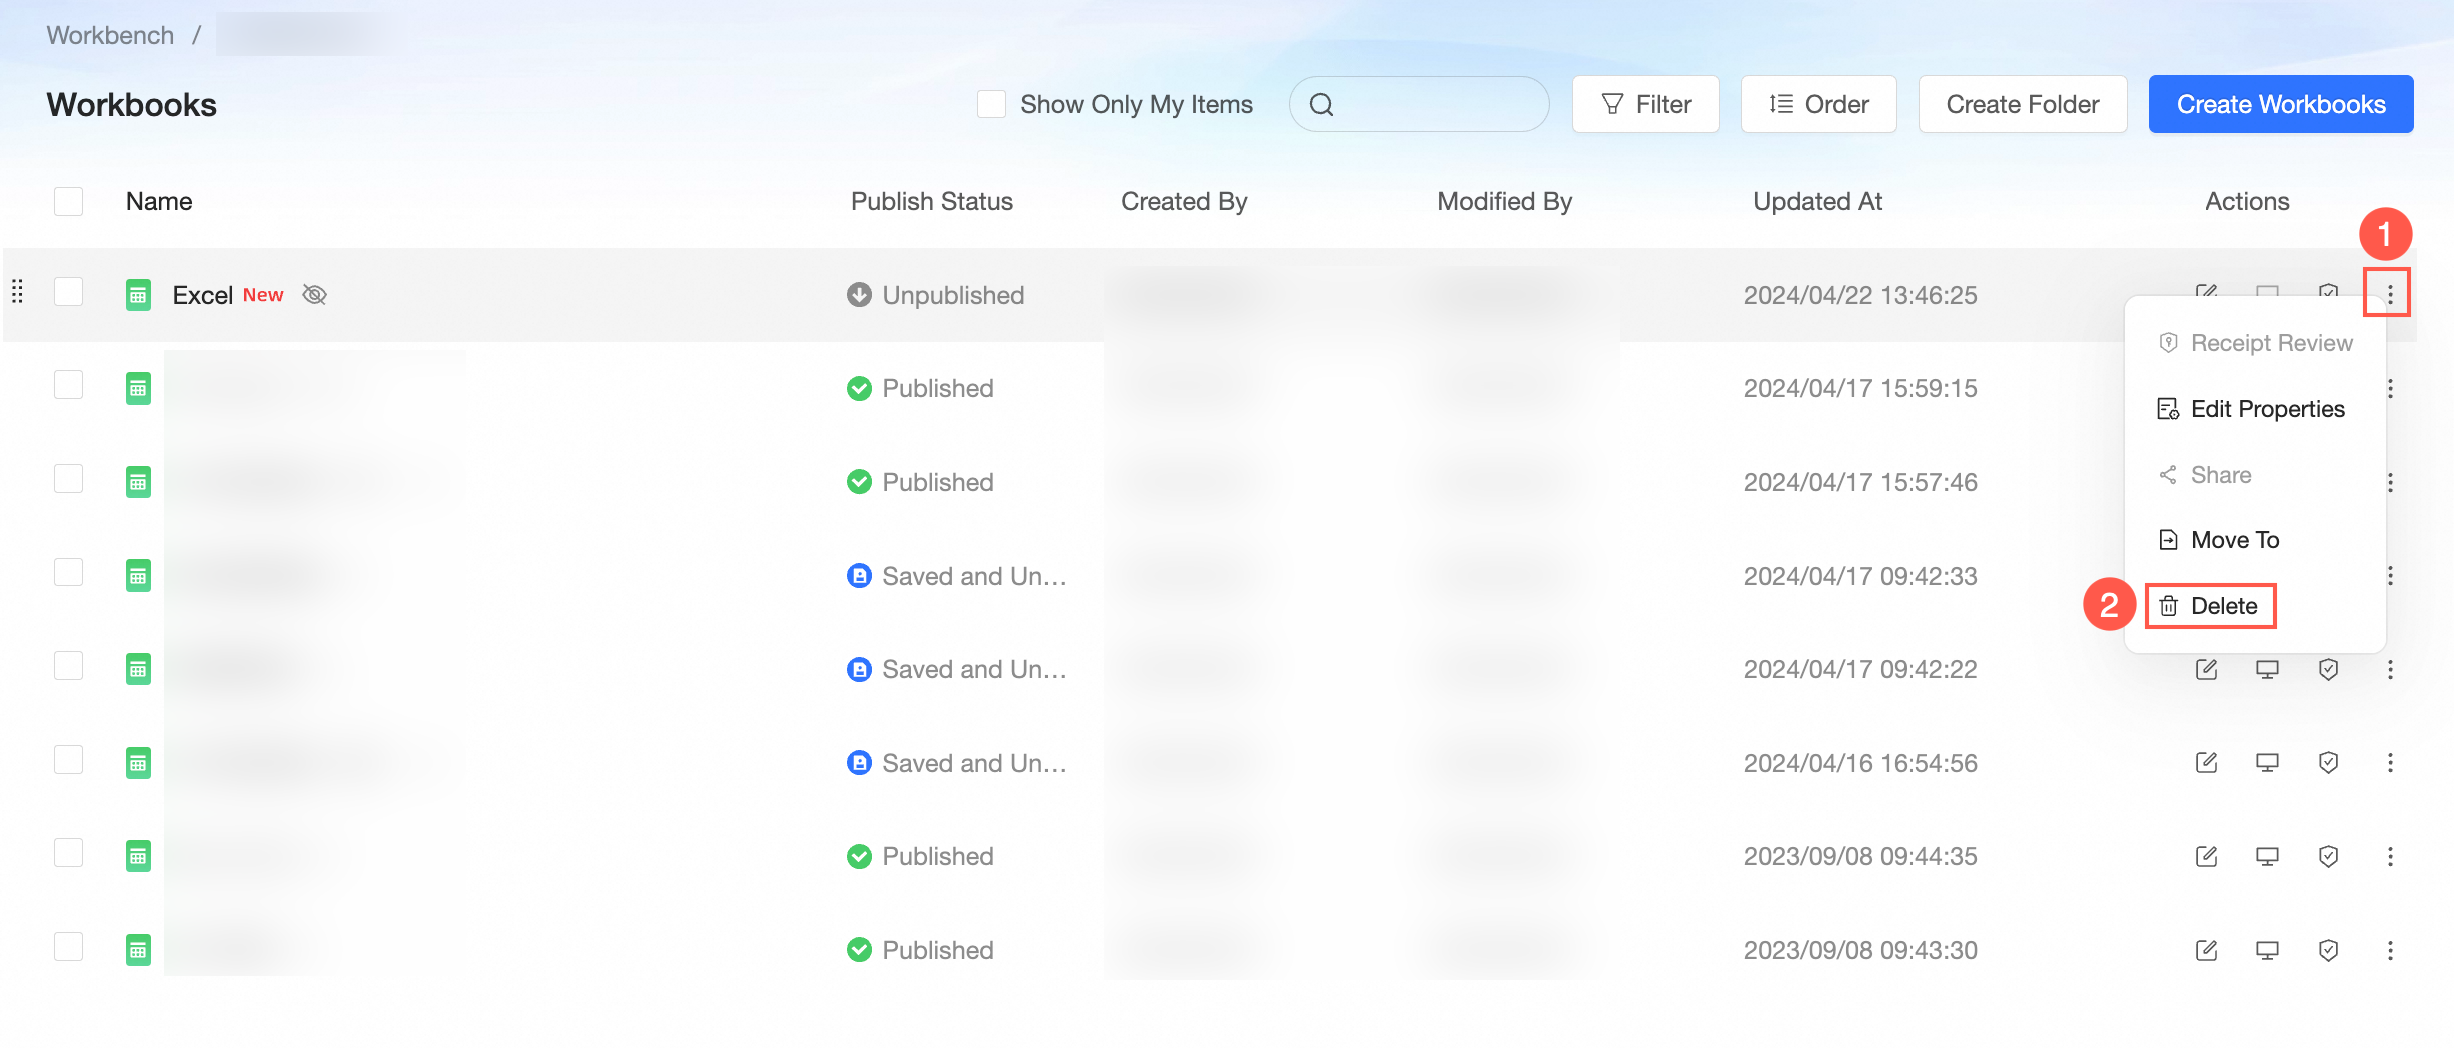
On the Workbooks page, follow the steps in the figure to delete the workbook.
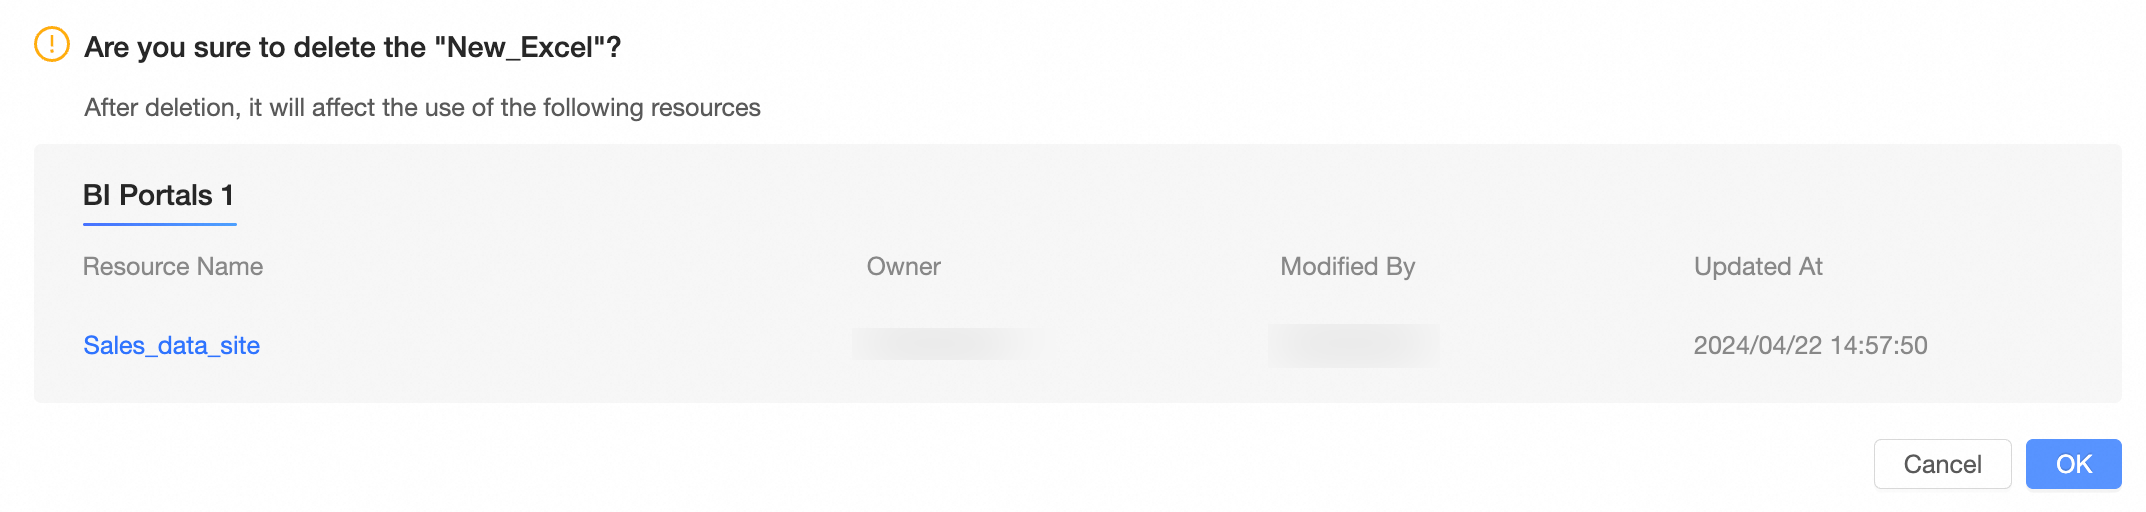
If a data portal, subscription, or monitoring and alerting rule was created from this workbook, a message lists the affected published resources, including their names, owners, modifiers, and modification times.
-
In the confirmation dialog box that appears, click OK.
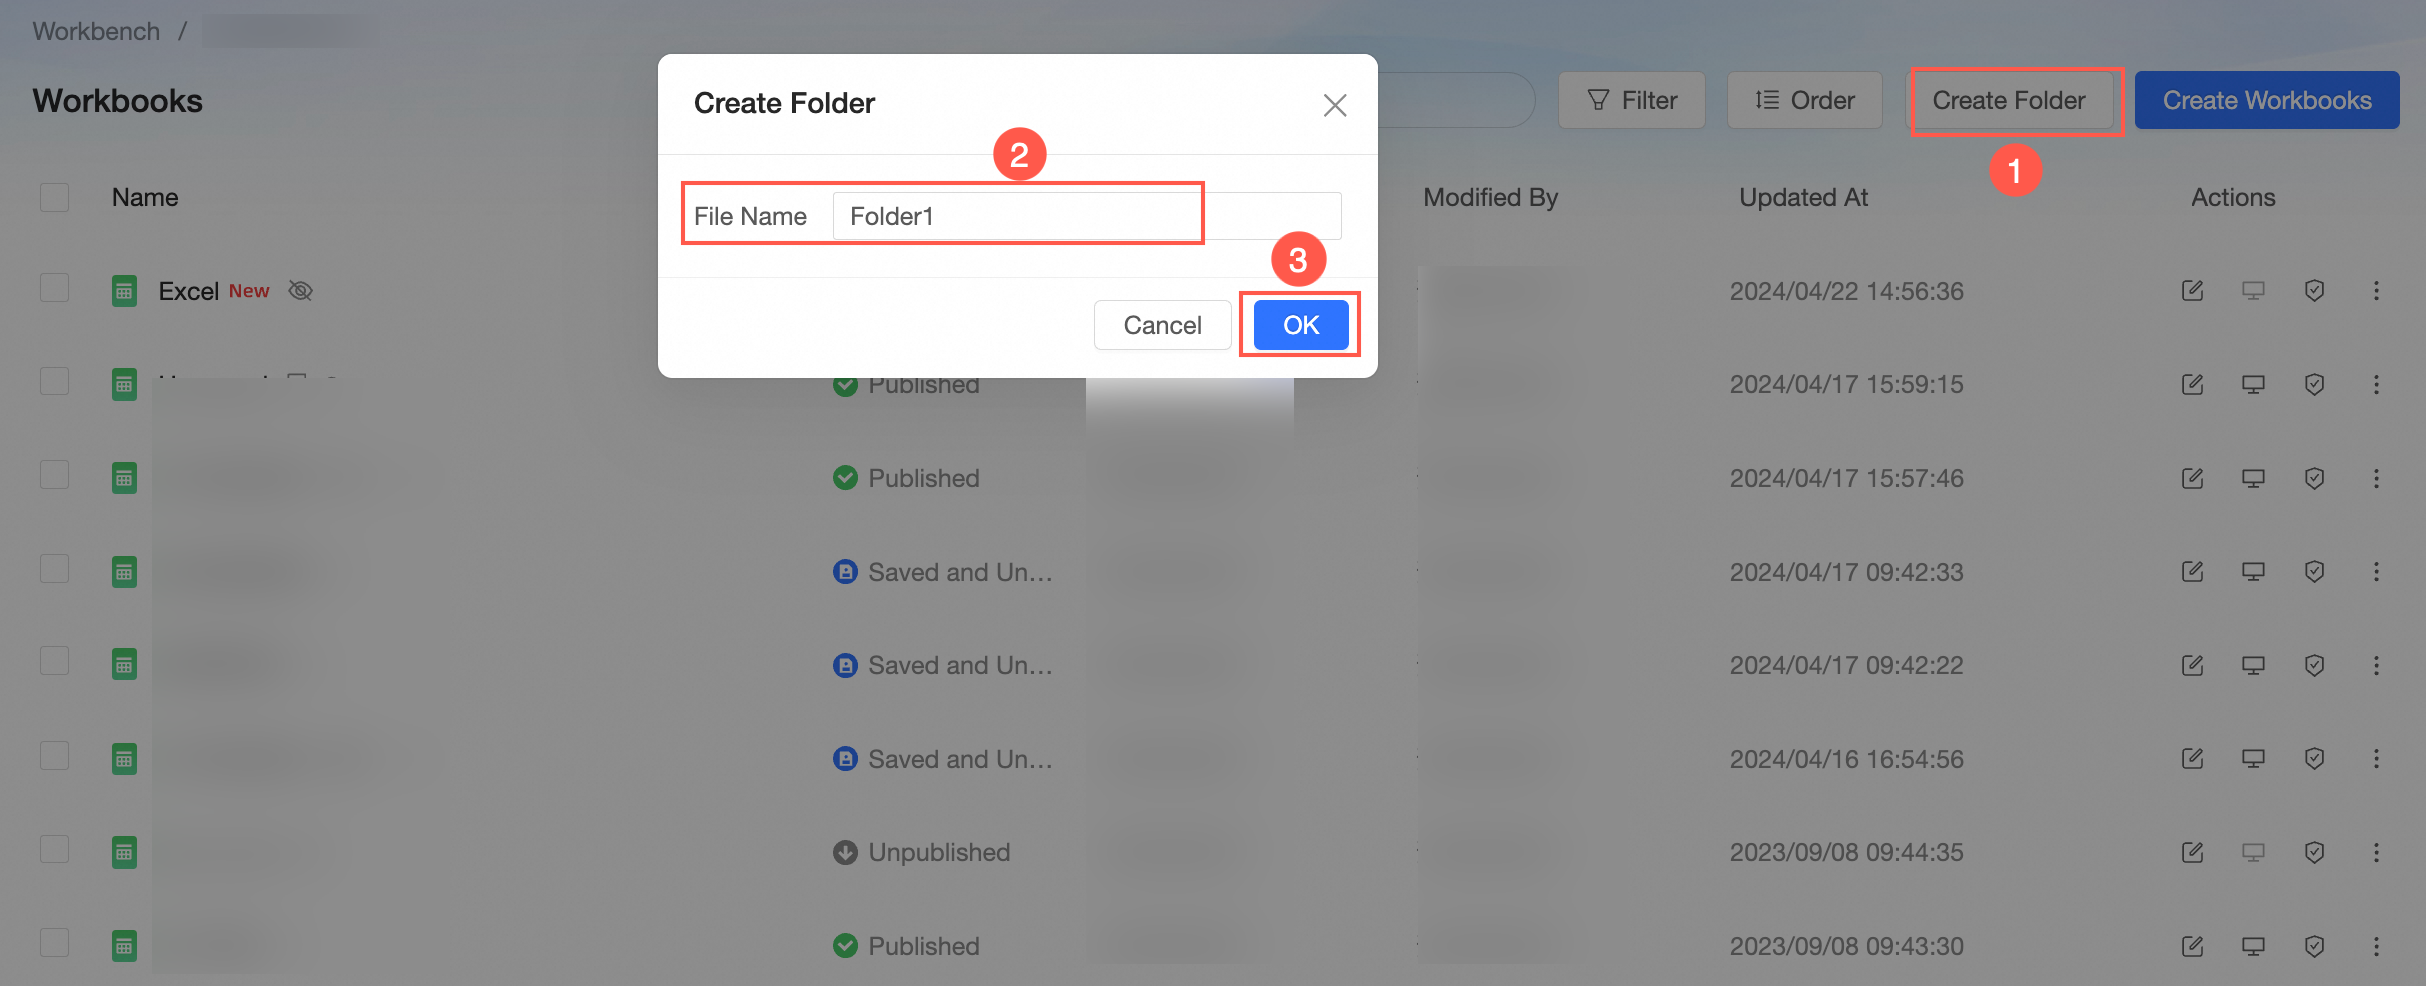
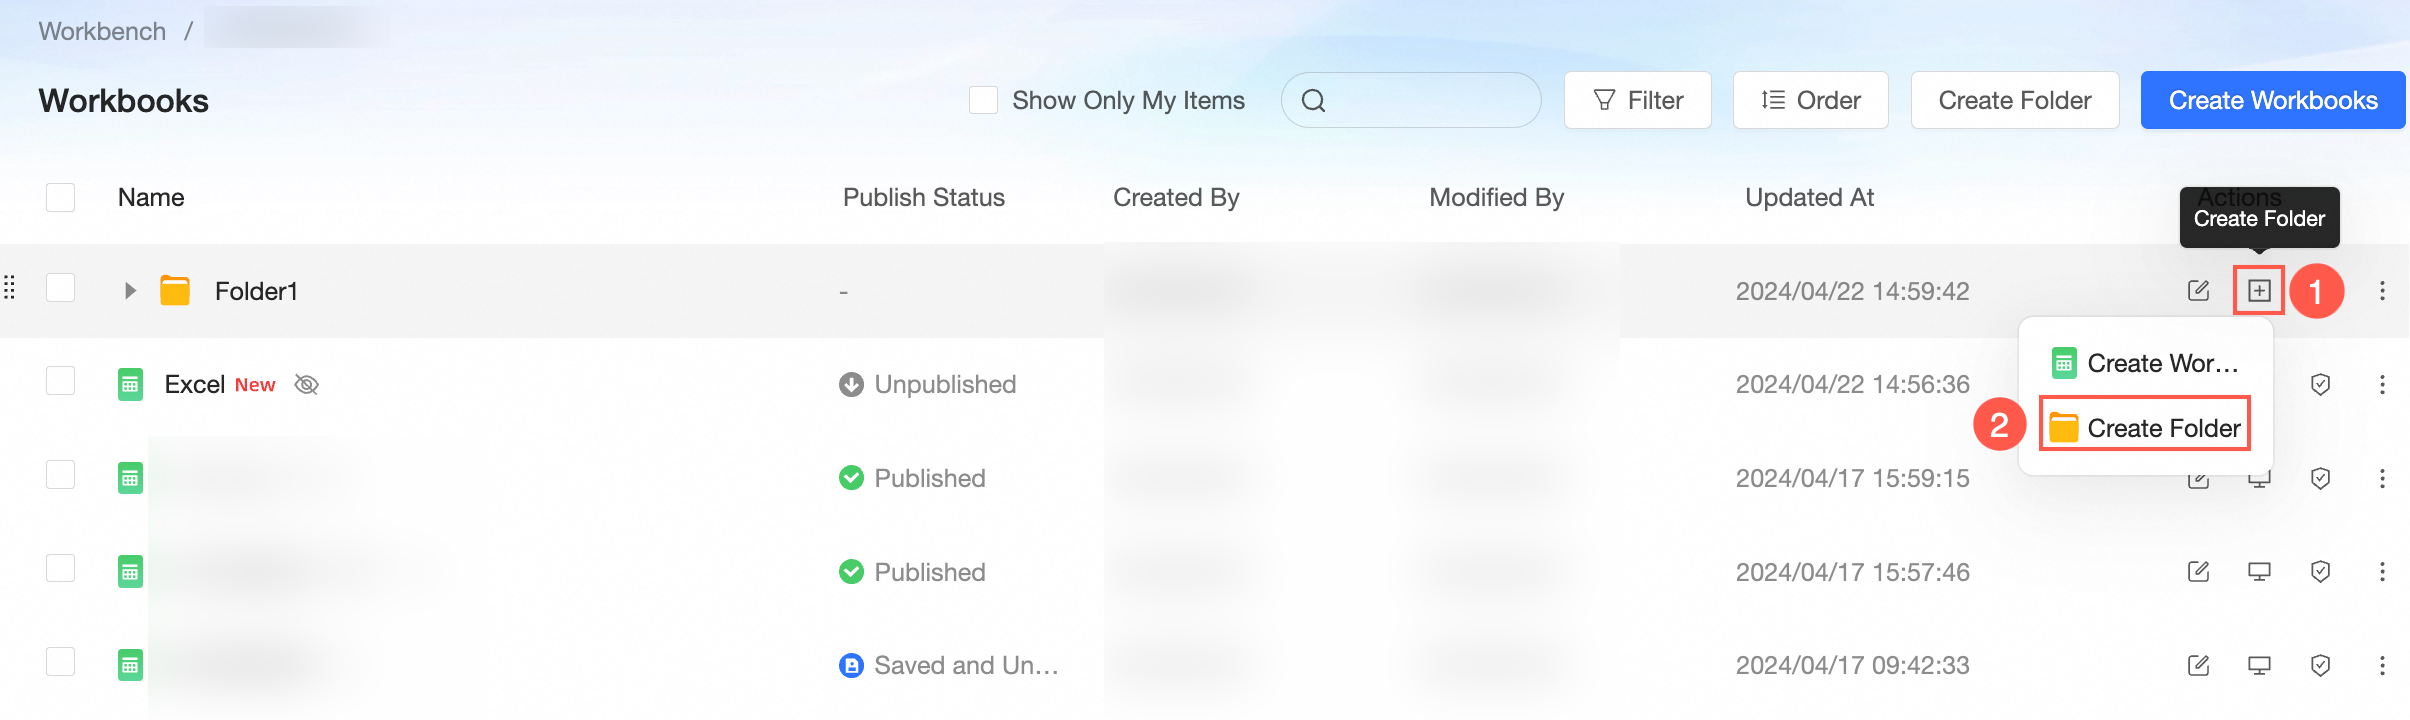
Create a folder
-
On the Workbooks page, follow the steps in the figure to create a folder.
-
Find the folder and click the New folder icon in the Actions column to create a subfolder.
NoteYou can create a folder hierarchy up to five levels deep.
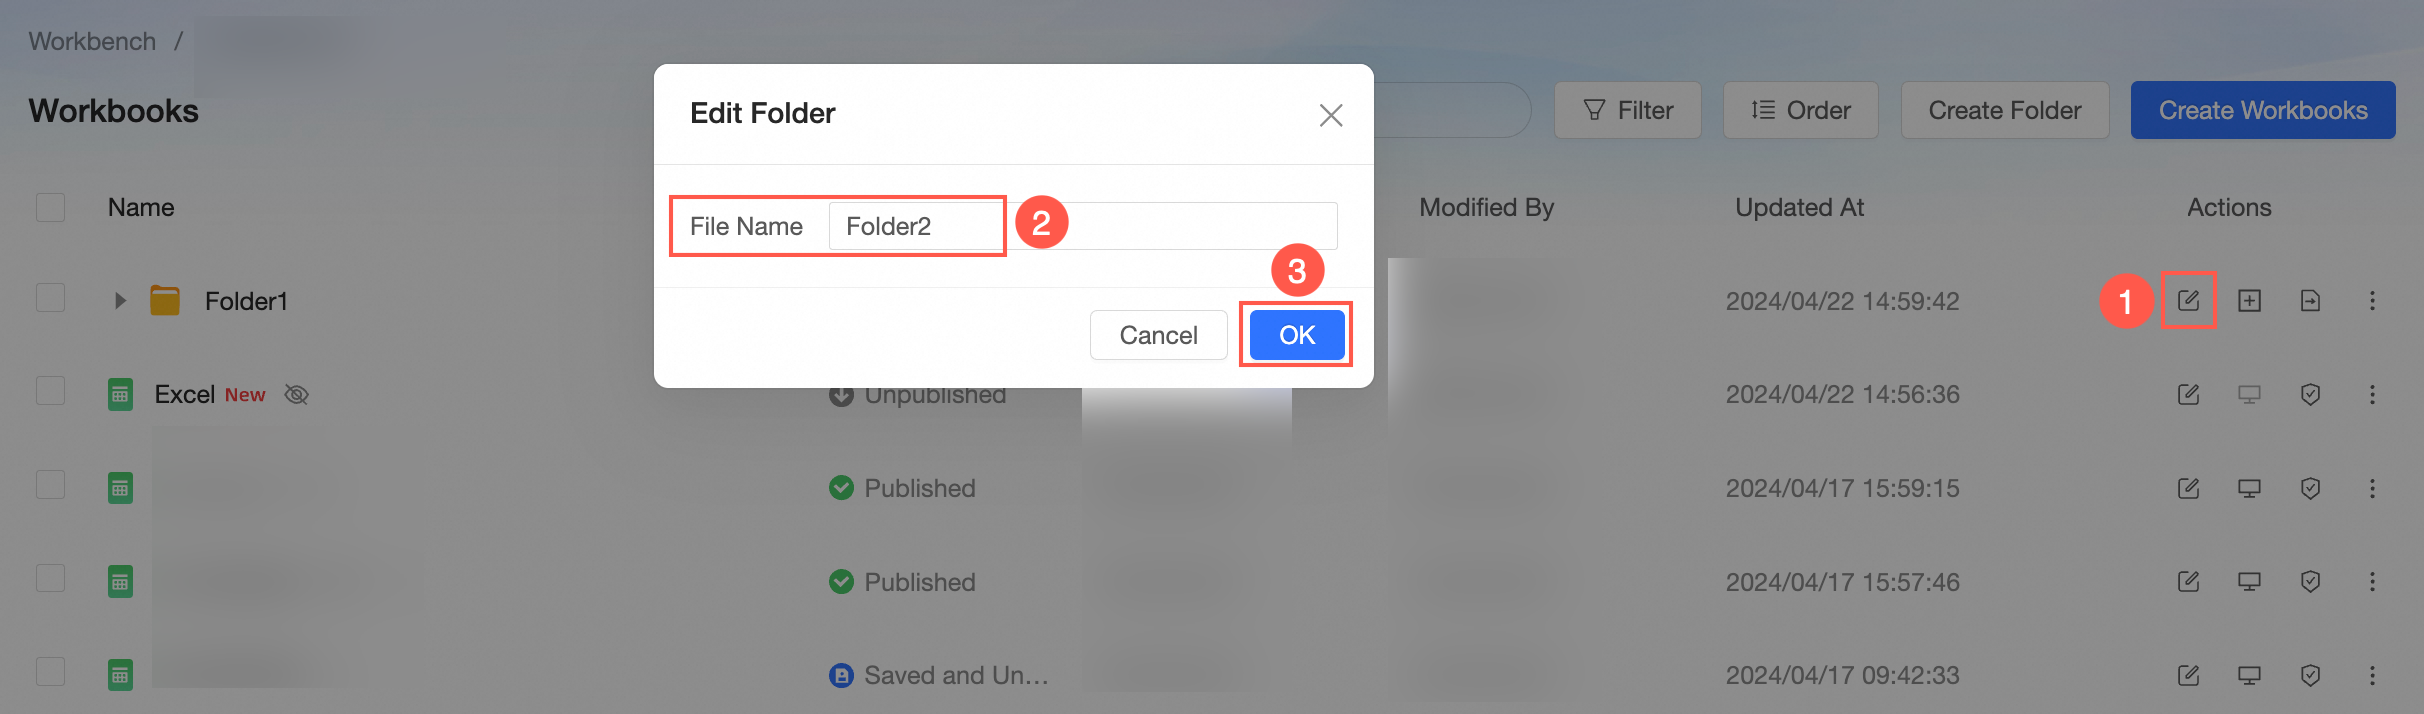
Rename a folder
-
On the Workbooks page, follow the steps in the figure to rename the folder.
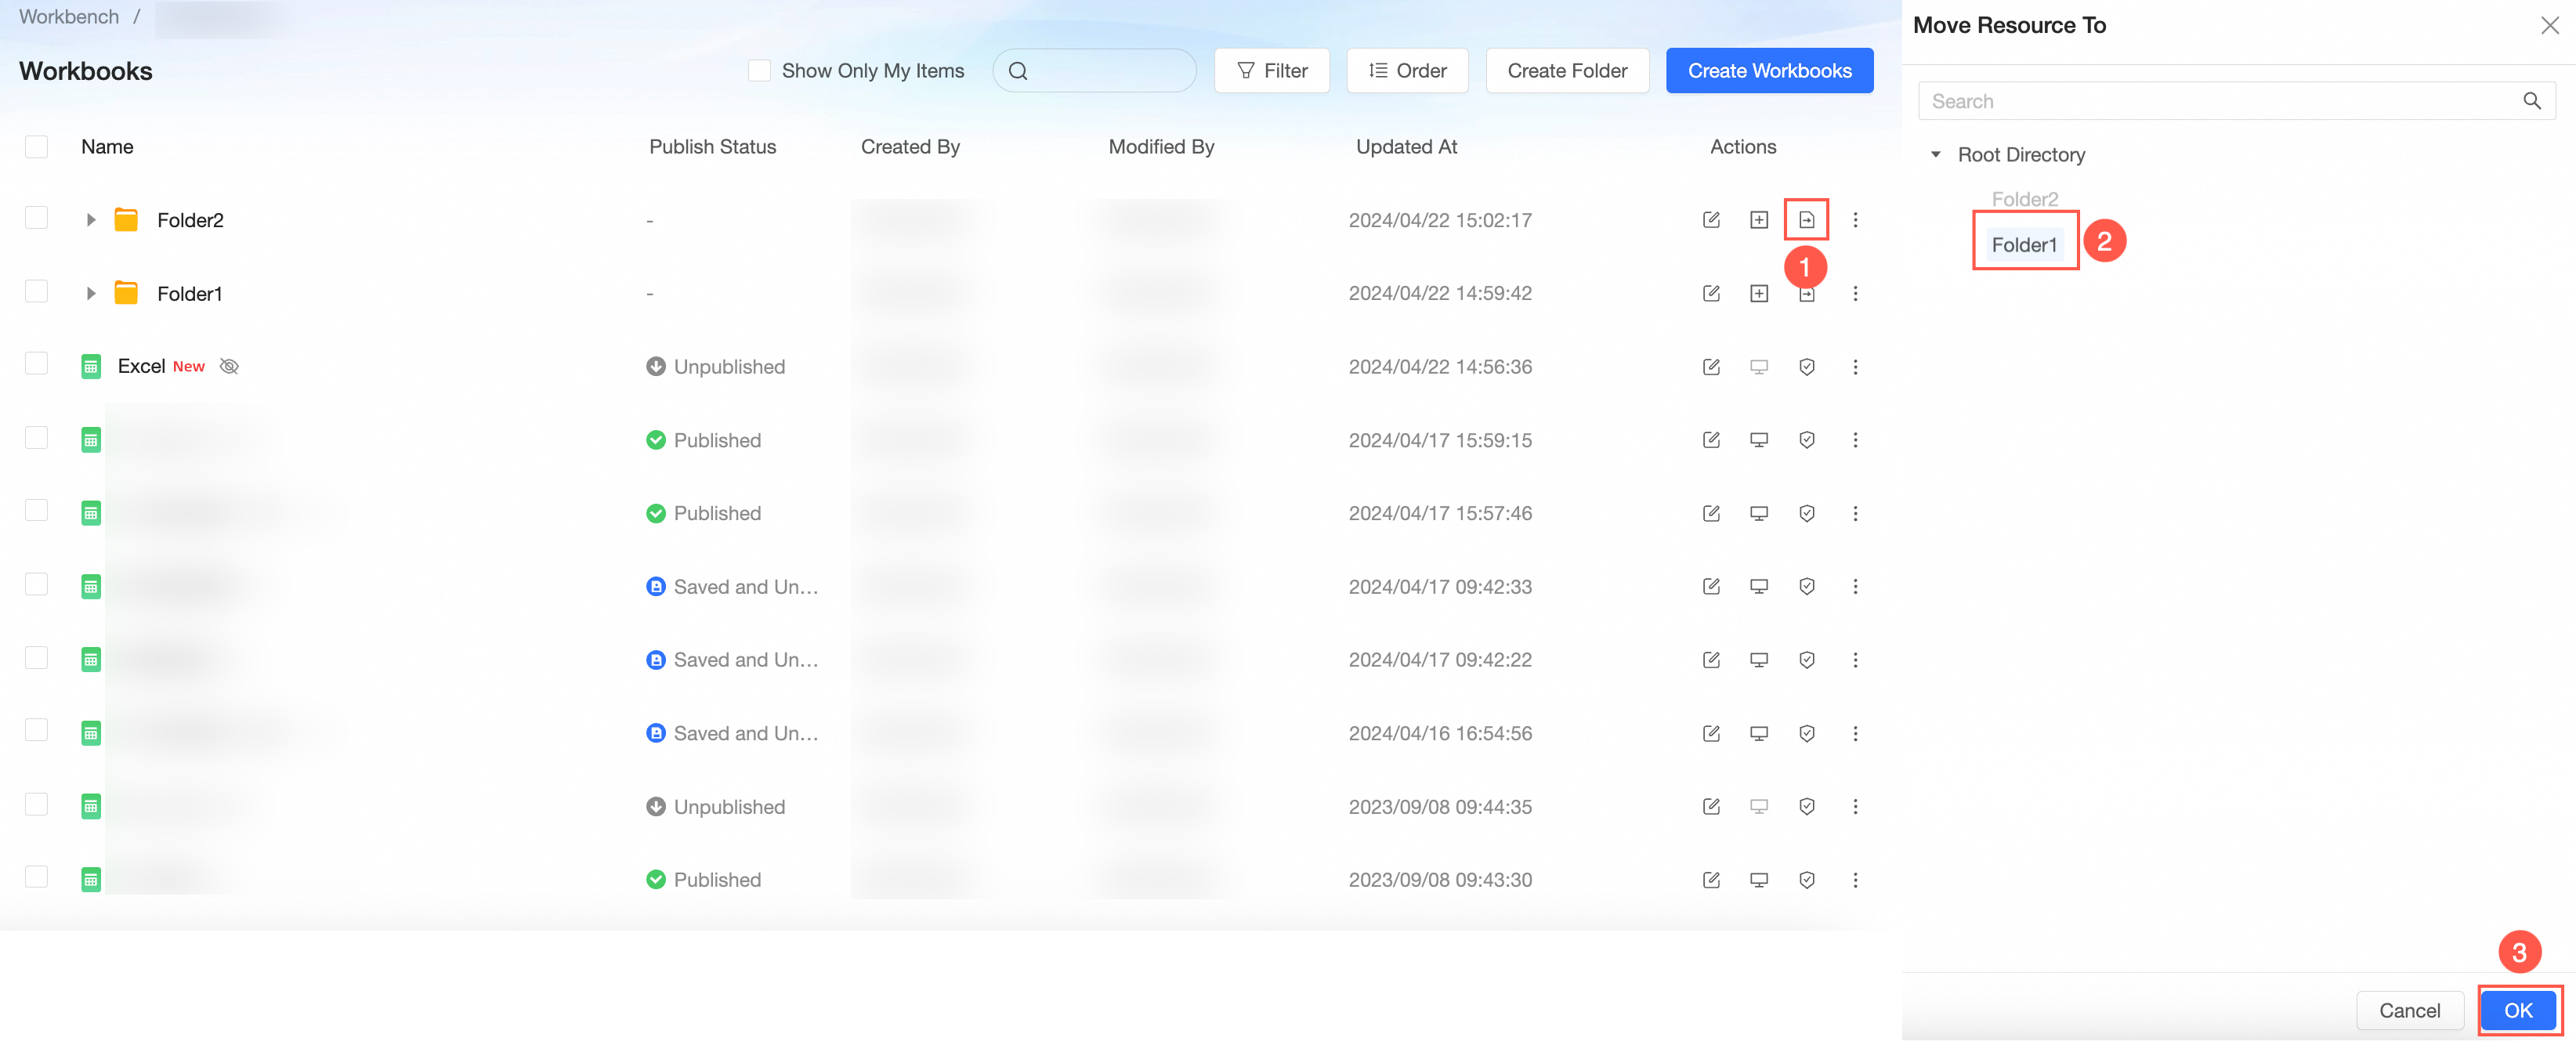
Move a folder
-
On the Workbooks page, follow the steps in the figure to move the folder.
The following figure shows an example result.
Delete a folder
Caution: Deleting a folder also deletes all workbooks within it. This action cannot be undone.
-
On the Workbooks page, right-click the folder and select Delete from the shortcut menu.
-
In the confirmation dialog box that appears, click OK.