
本文介绍如何使用基于Intel CPU的g8i实例,以DreamShaper8_LCM(基于Stable Diffusion v1-5微调后得到的模型)模型为例,结合系统级优化及IPEX技术加速文生图模型的推理速度,在Intel CPU云服务器上搭建高效的文生图服务。
背景信息
Stable Diffusion模型
Stable Diffusion模型是文本到图像的潜在扩散模型,它可以根据文本提示词生成对应的图像,目前已经可以应用于包括计算机视觉、数字艺术、视频游戏等多种领域和场景。为了更好的用户体验,我们期望能获得在几秒钟内生成高质量图像的能力。这种秒级生成图像的能力可用于许多场景,如2C的应用程序、营销和媒体领域的内容生成,或生成合成数据以扩充数据集。
阿里云第八代企业级实例g8i
阿里云第八代企业级通用计算实例g8i采用CIPU+飞天技术架构,搭载Intel最新一代至强可扩展处理器(Intel® Xeon® Emerald Rapids或者Intel® Xeon® Sapphire Rapids),性能进一步提升。同时,ECS g8i实例拥有AMX加持的AI能力增强,拥有AI增强和全面安全防护的两大特色优势。更多信息,请参见通用型实例规格族g8i。
购买该实例时,系统将随机分配上述两种处理器之一,不支持手动选择。
IPEX
Intel® Extension for PyTorch(IPEX)是由Intel开源并维护的一个PyTorch扩展库,使用IPEX可以充分利用英特尔CPU上的硬件加速功能,包括AVX-512、矢量神经网络指令(Vector Neural Network Instructions,AVX512 VNNI)以及先进矩阵扩展 (AMX),大幅度提升了使用PyTorch在Intel处理器上运行AI应用,尤其是深度学习应用的性能。Intel正不断为PyTorch贡献IPEX的优化性能,为PyTorch社区提供最新的Intel硬件和软件改进。更多信息,请参见IPEX。
阿里云不对第三方模型“Stable Diffusion”和“DreamShaper8_LCM”的合法性、安全性、准确性进行任何保证,阿里云不对由此引发的任何损害承担责任。
您应自觉遵守第三方模型的用户协议、使用规范和相关法律法规,并就使用第三方模型的合法性、合规性自行承担相关责任。
本文的示例服务仅用于教程实践、功能测试等场景,其结果数据仅为参考值,实际数据可能会因您的操作环境而发生变化。
部署并加速文生图服务
准备环境与模型
创建ECS实例
前往实例创建页。
按照界面提示完成参数配置,创建一台ECS实例。
需要注意的参数如下,其他参数的配置,请参见自定义购买实例。
实例:为了保证模型运行的稳定,建议实例规格至少选择ecs.g8i.4xlarge(16 vCPU)。
镜像:Alibaba Cloud Linux 3.2104 LTS 64位。
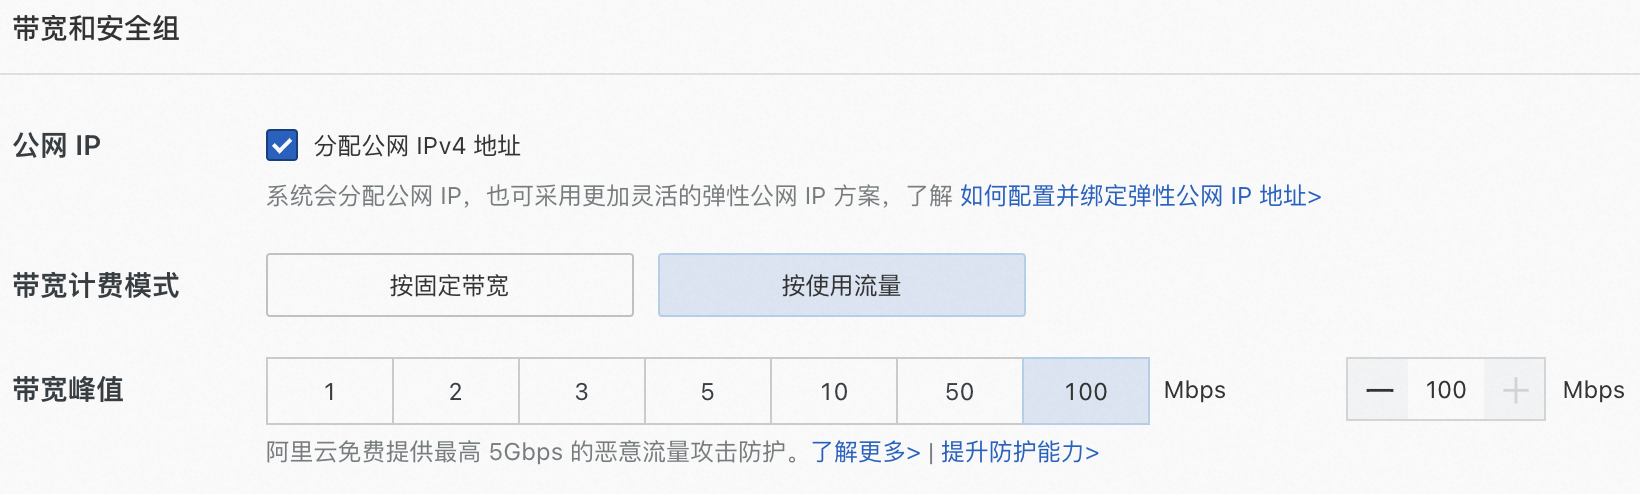
公网IP:选中分配公网IPv4地址,带宽计费模式选择按使用流量,带宽峰值设置为100 Mbps。以加快模型下载速度。
系统盘:模型数据下载、转换和运行过程中需要较大存储空间,为了保证模型顺利运行,建议系统盘设置为100 GiB。
添加安全组规则。
在ECS实例安全组的入方向添加安全组规则并放行22端口(用于访问SSH服务)。具体操作,请参见添加安全组规则。
下载并安装Anaconda。
运行如下命令,下载Anaconda安装脚本。
wget https://repo.anaconda.com/archive/Anaconda3-2023.09-0-Linux-x86_64.sh运行如下命令,安装Anaconda安装脚本。
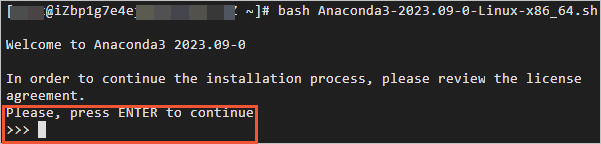
bash Anaconda3-2023.09-0-Linux-x86_64.sh安装过程中会出现确认安装协议、初始化conda到当前Shell中,请按以下操作执行。
出现Please,press ENTER to continue时,按一下Enter键。
多次按Enter键,出现Do you accept the license terms? [yes/no]时,输入yes。

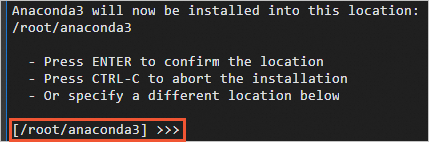
出现如下图所示时,按Enter将conda安装到当前目录,或输入您想要安装conda的目录。
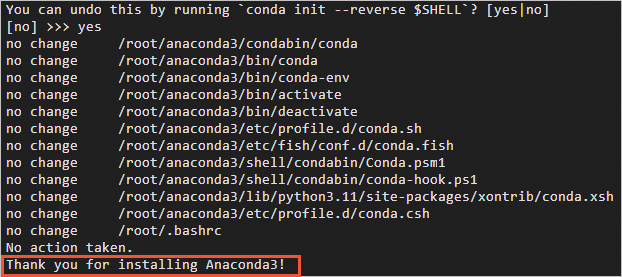
出现You can undo this by running 'conda init --reverse $SHELL'? [yes/no]时,输入yes。

出现Thank you for installing Anconda时,说明Anconda已安装完成。
执行如下命令,使Anaconda相关的环境变量生效。
source ~/.bashrc
创建一个包含Transformers、Diffusers、Accelerate、PyTorch以及IPEX库的虚拟环境。
conda create -n sd_inference python=3.9 -y conda activate sd_inference pip install pip --upgrade pip install transformers diffusers accelerate torch==2.1.1 intel_extension_for_pytorch==2.1.100使用huggingface-cli下载预训练模型Lykon/dreamshaper-8-lcm。
mkdir /home/hf_models
cd /home/hf_models/
pip install -U huggingface_hub
pip install -U hf-transfer
export HF_ENDPOINT=https://hf-mirror.com
export HF_HUB_ENABLE_HF_TRANSFER=1
huggingface-cli download --resume-download --local-dir-use-symlinks False Lykon/dreamshaper-8-lcm --local-dir dreamshaper-8-lcm
运行模型
创建ds8_lcm_pipe.py。
执行如下命令,创建并打开ds8_lcm_pipe.py。
vim ds8_lcm_pipe.py该脚本用于测试单张图像生成的平均时延,在脚本中输入以下两部分内容:
基准测试函数,用于统计单张图像生成的平均时延。
import time def elapsed_time(pipeline, prompt, height=512, width=512, guidance_scale=2, test_loops=3, num_inference_steps=10): # warmup images = pipeline(prompt, num_inference_steps=10, height=height, width=width, guidance_scale=guidance_scale).images start = time.time() for _ in range(test_loops): _ = pipeline(prompt, num_inference_steps=num_inference_steps, height=height, width=width, guidance_scale=guidance_scale) end = time.time() return (end - start) / test_loops用默认的float32数据类型构建一个StableDiffusionPipeline。
from diffusers import StableDiffusionPipeline, LCMScheduler
import torch
model_id = "/home/hf_models/dreamshaper-8-lcm"
pipe = StableDiffusionPipeline.from_pretrained(model_id)
pipe.scheduler = LCMScheduler.from_config(pipe.scheduler.config)
prompt = "portrait photo of muscular bearded guy in a worn mech suit, light bokeh, intricate, steel metal, elegant, sharp focus, soft lighting, vibrant colors "
generator = torch.manual_seed(0)
image = pipe(prompt, num_inference_steps=10, height=512, width=512, guidance_scale=2, generator=generator).images[0]
image.save("./fp32_image.png")
latency = elapsed_time(pipe, prompt, height=512, width=512, guidance_scale=2)
print("Using data type FP32, average latency for a test loop (10 steps) is ", latency, " s.")
ds8_lcm_pipe.py脚本的完整内容如下:
import time
from diffusers import StableDiffusionPipeline, LCMScheduler
import torch

# 定义基准测试函数
def elapsed_time(pipeline, prompt, height=512, width=512, guidance_scale=2, test_loops=3, num_inference_steps=10):
    # warmup
    images = pipeline(prompt, num_inference_steps=10, height=height, width=width, guidance_scale=guidance_scale).images
    start = time.time()
    for _ in range(test_loops):
        _ = pipeline(prompt, num_inference_steps=num_inference_steps, height=height, width=width, guidance_scale=guidance_scale)
    end = time.time()
    return (end - start) / test_loops

# 构建StableDiffusionPipeline并测试
model_id = "/home/hf_models/dreamshaper-8-lcm"
pipe = StableDiffusionPipeline.from_pretrained(model_id)
pipe.scheduler = LCMScheduler.from_config(pipe.scheduler.config)
prompt = "portrait photo of muscular bearded guy in a worn mech suit, light bokeh, intricate, steel metal, elegant, sharp focus, soft lighting, vibrant colors"
generator = torch.manual_seed(0)
image = pipe(prompt, num_inference_steps=10, height=512, width=512, guidance_scale=2, generator=generator).images[0]
image.save("./fp32_image.png")
latency = elapsed_time(pipe, prompt, height=512, width=512, guidance_scale=2)
print("Using data type FP32, average latency for a test loop (10 steps) is ", latency, " s.")
按
Esc键,输入:wq,按Enter键,退出并保存脚本。
使用jemalloc优化图片生成速度。
图像生成是一种内存密集型操作,通过安装高性能内存分配库,能够加速内存操作并使之能在CPU之间并行处理。jemalloc和tcmalloc是两个常用的内存优化库。此处使用jemalloc,jemalloc可以用于针对特定工作负载进行调优,如最大化CPU利用率。更多信息,请参见 jemalloc调优指南。
安装jemalloc并设置环境变量。
重要export CONDA_LOCATION后的/path_to_your_conda_environment_location请设置为实际的Anaconda安装路径。conda install jemalloc -y export CONDA_LOCATION=/path_to_your_conda_environment_location export LD_PRELOAD=$LD_PRELOAD:$CONDA_LOCATION/lib/libjemalloc.so export MALLOC_CONF="oversize_threshold:1,background_thread:true,metadata_thp:auto,dirty_decay_ms: 60000,muzzy_decay_ms:60000"安装intel-openmp并设置环境变量。
重要OMP_NUM_THREADS后的数字请修改为当前实例的物理CPU核数。
pip install intel-openmp
export LD_PRELOAD=$LD_PRELOAD:$CONDA_LOCATION/lib/libiomp5.so
export OMP_NUM_THREADS=16
安装numactl并运行ds8_lcm_pipe.py脚本。
yum install numactl -y numactl -C 0-15 python ds8_lcm_pipe.py执行结果如下,表示单张图片生成速度约为21 S。

加速图片生成速度
为了更好地发挥EMR CPU性能,可以将IPEX优化应用到pipeline的每个模块,并使用bfloat16数据类型。
执行如下命令,打开ds8_lcm_pipe.py脚本。
vim ds8_lcm_pipe.py对ds8_lcm_pipe.py进行如下修改。
使用IPEX优化pipeline的每个模块。
对于StableDiffusionPipeline,需要将IPEX优化应用到pipeline的每个模块,优化点包括将数据格式转换为channels-last格式、调用ipex.optimize函数并使用TorchScript mode等。Intel已将该优化pipeline提交pull request到diffusers库,作为一个custom_pipeline可以直接被客户调用。具体优化细节,请参见Stable Diffusion on IPEX。
在使用层面,需要做的代码修改非常简单:
在load pipe时配置custom_pipeline="stable_diffusion_ipex"。
对custom_pipeline调用prepare_for_ipex函数。
custom_pipe = StableDiffusionPipeline.from_pretrained(model_id, custom_pipeline="stable_diffusion_ipex")
#value of image height/width should be consistent with the pipeline inference
custom_pipe.prepare_for_ipex(prompt, dtype=torch.float32, height=512, width=512)
优化EMR CPU上的AMX加速器
为了利用EMR CPU上的AMX 加速器,可以借助Automatic Mixed Precision Package使用bfloat16数据类型。
custom_pipe = StableDiffusionPipeline.from_pretrained(model_id, custom_pipeline="stable_diffusion_ipex")
#value of image height/width should be consistent with the pipeline inference
custom_pipe.prepare_for_ipex(prompt, dtype=torch.bfloat16, height=512, width=512)
with torch.cpu.amp.autocast(enabled=True, dtype=torch.bfloat16):
    image = custom_pipe (prompt, num_inference_steps=10, height=512, width=512,  guidance_scale=2, generator=generator).images[0]
    image.save("./bf16_opt_image.png")
    latency = elapsed_time(custom_pipe, prompt, height=512, width=512, guidance_scale=2)
    print("Using data type BF16, average latency for a test loop (10 steps) w/ optimized pipeline is ", latency, " s.")
修改后的ds8_lcm_pipe.py脚本内容如下:
import time
import torch
from diffusers import StableDiffusionPipeline

def elapsed_time(pipeline, prompt, height=512, width=512, guidance_scale=2, test_loops=3, num_inference_steps=10):
    # warmup
    images = pipeline(prompt, num_inference_steps=10, height=height, width=width, guidance_scale=guidance_scale).images
    start = time.time()
    for _ in range(test_loops):
        _ = pipeline(prompt, num_inference_steps=num_inference_steps, height=height, width=width, guidance_scale=guidance_scale)
    end = time.time()
    return (end - start) / test_loops

model_id = "/home/hf_models/dreamshaper-8-lcm"
prompt = "portrait photo of muscular bearded guy in a worn mech suit, light bokeh, intricate, steel metal, elegant, sharp focus, soft lighting, vibrant colors"

custom_pipe = StableDiffusionPipeline.from_pretrained(model_id, custom_pipeline="stable_diffusion_ipex")
custom_pipe.prepare_for_ipex(prompt, dtype=torch.bfloat16, height=512, width=512)
generator = torch.manual_seed(0)

custom_pipe.to(torch.bfloat16)
with torch.cpu.amp.autocast(enabled=True, dtype=torch.bfloat16):
    image = custom_pipe(prompt, num_inference_steps=10, height=512, width=512, guidance_scale=2, generator=generator).images[0]
    image.save("./bf16_opt_image.png")

latency = elapsed_time(custom_pipe, prompt, height=512, width=512, guidance_scale=2)
print("Using data type BF16, average latency for a test loop (10 steps) w/ optimized pipeline is ", latency, " s.")
按
Esc键,输入:wq,按Enter键,退出并保存脚本。运行ds8_lcm_pipe.py脚本。
numactl -C 0-15 python ds8_lcm_pipe.py执行结果如下,表示单张图片生成速度约为7 S。
