运行和调试
更新时间:
复制为 MD 格式
部署应用到云端之前,您可以使用Fun,在本地测试应用或单步调试应用,包括验证应用的行为是否符合预期、调试错误内容并修复任何已知问题。
当使用Fun调试模式调用某个函数时,您可以连接调试器到对应函数,便可以单步执行代码、查看变量内容并修复问题。
启动和停止类Link IoT Edge环境
Fun提供了一个本地类Link IoT Edge环境来测试和调试您的应用,该环境与正式发布的Link IoT Edge版本类似,以便您测试完后可将应用直接发布到云。
- 启动类Link IoT Edge环境
在您已安装Node.js和Docker的本地机器上,执行如下命令。
fun edge start说明- 若本地存在之前已构建的类Link IoT Edge环境,该命令将直接启动该环境。
- 若首次使用该命令,执行命令后将在本地构建新的类Link IoT Edge环境,请按系统提示输入网关的设备证书信息。系统显示类似如下。
$ fun edge start
No local container found,try to create one...
linkedge_2019_01_21: Pulling from aliot-linkedge/linkedge-alpine
Status: Image is up to date for reg.docker.alibaba-inc.com/aliot-linkedge/linkedge-alpine:linkedge_2019_01_21

Please enter secret triples for setup:
? Product key <Gateway Product Key>
? Device name <Gateway Device Name>
? Device secret <Gateway Device Secret>
Applying secret triples...
Create container with name linkedge-debug.
Start container linkedge-debug.
- 停止本地类Link IoT Edge环境
在您已安装Node.js和Docker的本地机器上,执行如下命令。
fun edge stop
运行函数
您可以使用
fun edge invoke命令指定函数标识和事件文件夹,在本地类Link IoT Edge环境运行函数。
# Invoking funciton with event file
$ fun edge invoke helloworld/helloworld -e event.json

# Invoking function with event via stdin
$ echo '{"message": "Hello?" }' | fun edge invoke helloworld/helloworld

# For more options
$ fun edge invoke --help
说明 如果执行
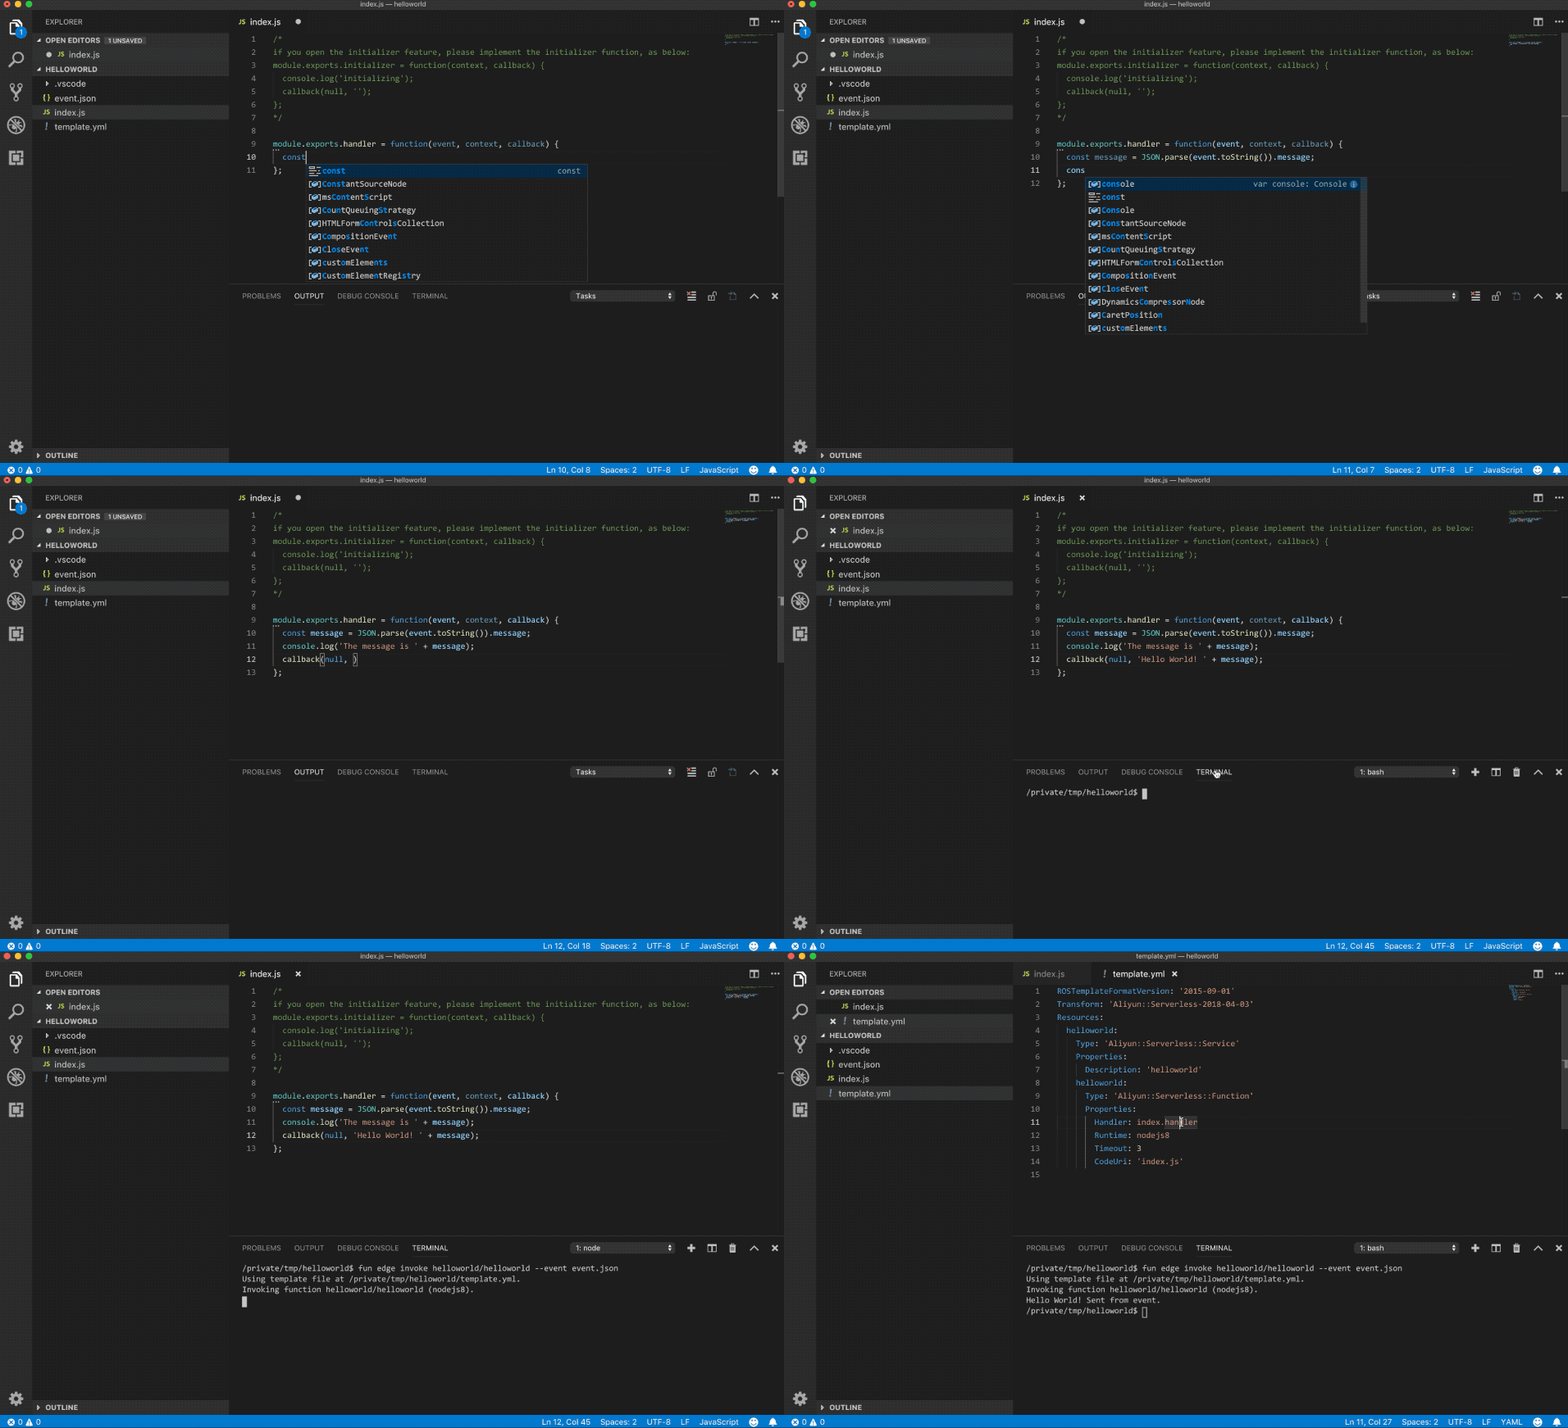
fun edge invoke命令时,未指定任何事件文件或没有通过管道符号“|”向命令提供事件参数,Fun将进入读取标准输入等待状态。您可以在命令行上直接输入事件内容、按Enter后按Ctrl+D来结束输入。下面以动画形式演示如何使用VS Code开发和运行函数:

调试函数
fun edge invoke命令也支持单步执行应用。您可以通过在命令行指定debug来启动调试模式。
此时函数将以调试模式启动,并等待调试器的连接。
fun edge invoke --debug helloworld/helloworld说明 如希望获取VS Code等调试器的调试配置信息,可以追加--output-debugger-configs选项。
$ fun edge invoke helloworld/helloworld --debug --output-debugger-configs --event event.json
Using template file at /private/tmp/helloworld/template.yml.
Invoking function helloworld/helloworld (nodejs8).

Debugging Configurations
## VS Code ##
{
    "version": "0.2.0",
    "configurations": [
        {
            "name": "Attach to Fun (Node.js 8)",
            "type": "node",
            "request": "attach",
            "address": "localhost",
            "port": 5700,
            "localRoot": "/private/tmp/helloworld",
            "remoteRoot": "/tmp/var/run/functions/helloworld/helloworld",
            "protocol": "inspector",
            "stopOnEntry": false
        }
    ]
}- Node.js
使用VS Code来调试Fun启动的Node.js函数时:
- 通过在VS Code界面打开命令面板,选择
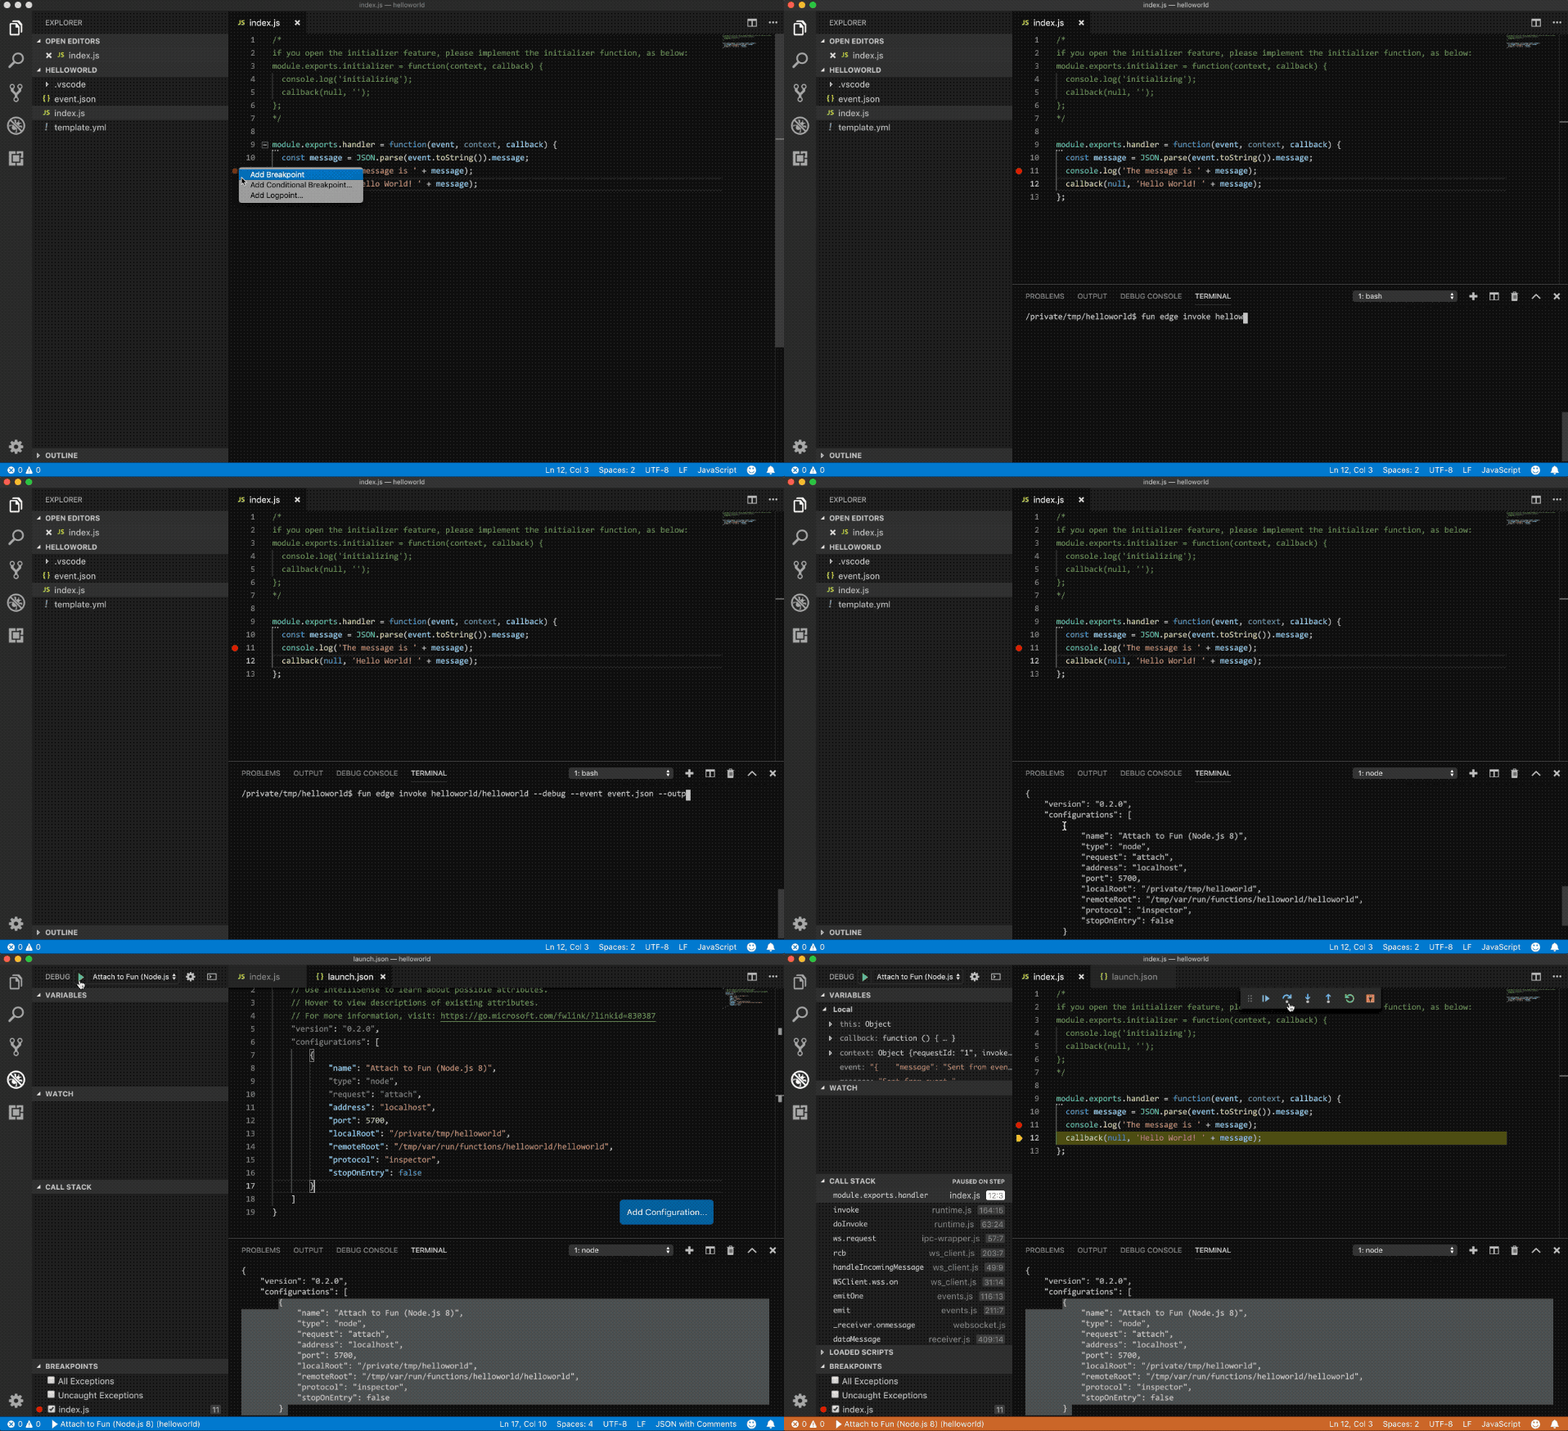
Shell Command: Install 'code' command in PATH来获取安装code实例的命令。例如当前在应用程序目录下时,则执行如下命令来打开一个VS Code实例:code .下面以动画形式演示如何使用VS Code来调试Node.js函数。
- 使用如下调试配置信息。
{ "version": "0.2.0", "configurations": [ { "name": "Attach to Fun (Node.js 8)", "type": "node", "request": "attach", "address": "localhost", "port": 5700, // app dir is the directory of the app code. "localRoot": "${workspaceRoot}/{app dir}", // service name and function name are the ones in template.yml respectively. "remoteRoot": "/tmp/var/run/functions/${service name}/${function name}", "protocol": "inspector", "stopOnEntry": false } ] }其中,部分字段说明如下所示。字段 说明 localRoot 设置为template.yml文件中CodeUri所指向的本地路径(若CodeUri指向一个文件,则为该文件所在的目录)。示例中${workspaceRoot}替换为实际的 .vscode所在目录。remoteRoot 设置为代码在类Link IoT Edge环境里的目录,您需要将示例中${service name}和${function name}替换为实际的内容。
可以通过调用
invoke命令时传入--output-debugger-configs参数获取自动生成的调试配置信息。 - 通过在VS Code界面打开命令面板,选择
- Python
使用VS Code来调试Fun启动的Python函数,您可以使用如下调试配置信息。
{
    "version": "0.2.0",
    "configurations": [
        {
            "name": "Attach to Fun (Python 3)",
            "type": "python",
            "request": "attach",
            "host": "localhost",
            "port": 5700,
            "pathMappings": [
                {
                      // app dir is the directory of the app code.
                      "localRoot": "${workspaceRoot}/{app dir}",
                      // service name and function name are the ones in template.yml respectively.
                    "remoteRoot": "/tmp/var/run/functions/{service name}/{function name}"
                }
            ]
        }
    ]
}
该文章对您有帮助吗?
